|
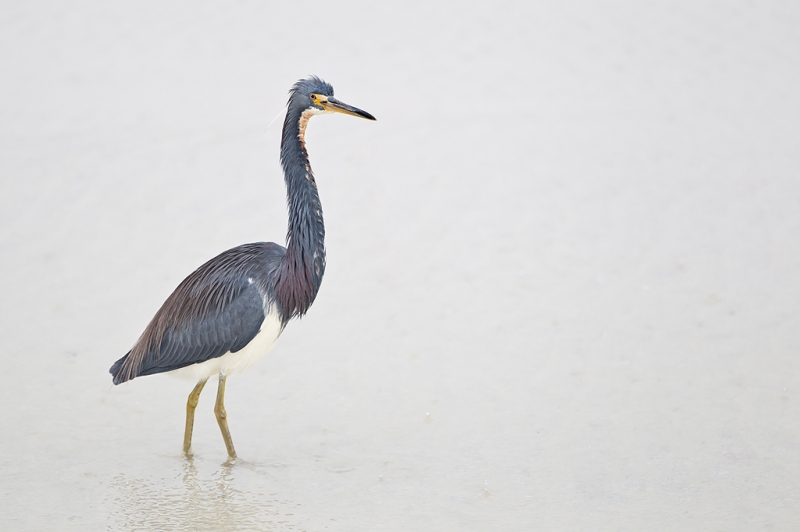
When photographing tall birds in horizontal format keep the bird well back in the frame. Here there is about four times more room in front of the bird than behind. Using the central sensor and placing the bird in the middle of the frame in situations like this is a criminal offense. You can choose a sensor off to one side of the frame, use One-Shot AF(S in Nikon) and recompose, or use central sensor AI Servo (C in Nikon)/Rear Focus and re-compose. Do not try to stuff a tall bird into a horizontal frame; be sure to leave a decent amount of room above and below the bird–usually a bit more above. Tricolored Heron, Little Estero Lagoon, Fort Myers Beach, FL Image created with Canon 70-200mm f/2.8L IS II lens, the 1.4X III TC (hand held at 255mm), and the Canon EOS-1D Mark IV. ISO 250. Evaluative metering at +2 stops: 1/300 sec. at f/4 in Tv mode. |
Bird Photography Composition Basics
Five simple rules are presented here. Learn them and your work will improve immeasurably. Think about them every time that you point your lens at a bird. Or a bear. Or at anything else. The principles outlined here hold true even when you are photographing your kids or your grandchildren. Break them when you dare, but only when you have a good reason for doing so. If you do not own these principles, bookmark this page and keep coming back until you do.
|
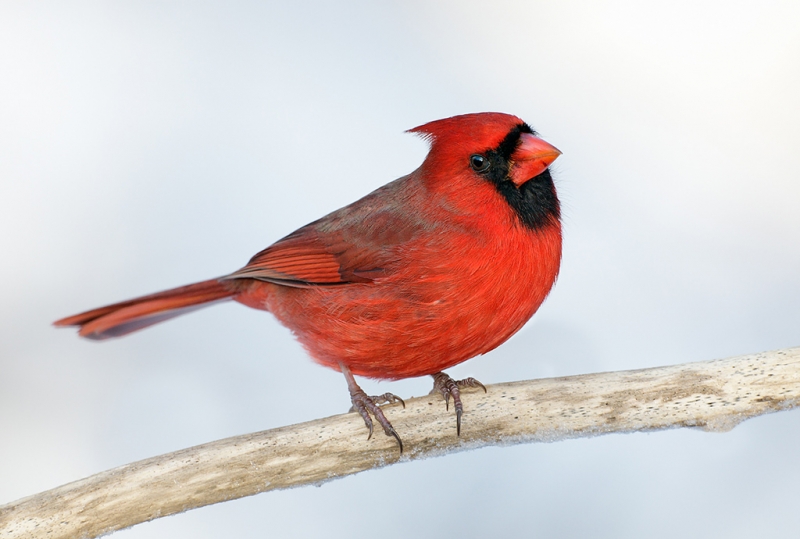
When photographing a large in the frame bird in horizontal format, leave three to five times as much space from the bird’s bill to the frame-edge than from the end of the tail to the opposite frame-edge. In sort, nobody gives a rat’s ass what’s going on behind the bird. In general, leave at least a bit more room above the bird than below. Northern Cardinal, Elizabeth A. Morton NWR, Noyack, NY. This image was created with the tripod-mounted Canon 800mm f/5.L IS lens and the Canon EOS-1D Mark IV. ISO 800. Evaluative metering +2 2/3 stops off the snow: 1/160 sec. at f/8 in Manual mode. |
Motivation
My motivation for writing this piece arose from the frustration of seeing so many folks on Bird Photographers.Net and during BIRDS AS ART Instructional Photo Tour critiquing sessions who simply do not understand the basics of image design. These principles are covered in detail in the original “The Art of Bird Photography.” Often when I suggest that folks purchase the book and study the basics of composition they say, “I have that book. It’s great.” That leaves me scratching my head…. Many folks think that buying the latest/greatest camera body and a $10,000 lens will transform them into a skilled bird photographer when what they really need to do is work harder by studying and practicing.
|
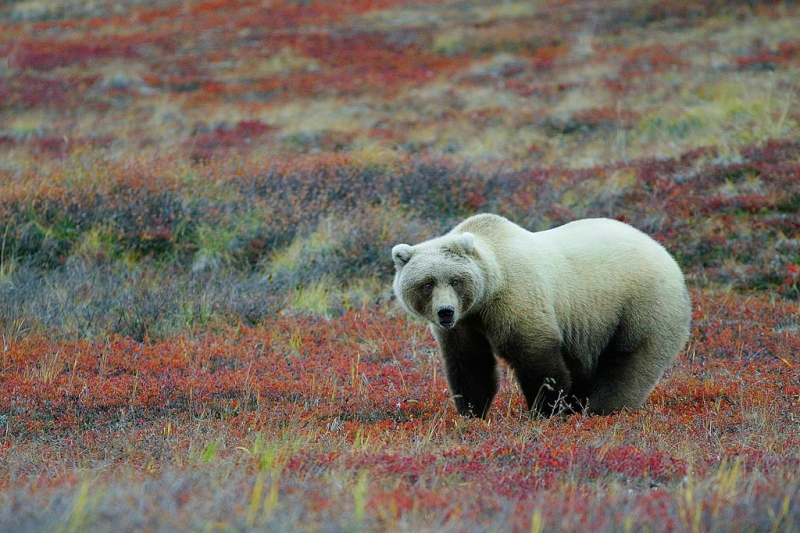
The rule of thirds has been guiding artists for centuries for good reason: it works. In nature photography it works especially well when your relatively small-in-the-frame subject is surrounded by beautiful habitat. Divide the frame in thirds horizontally and vertically and place the subject on or near one of the four intersecting points. Grizzly Bear, Denali National Park, AK. Image created with hand held Canon 300mm f/4L IS lens and the EOS-1D (this oldie now replaced by the Canon EOS-1D Mark IV). ISO 400. Evaluative metering -1/3 stop: 1/640 sec. at f/4 in Av mode. (Ah, I have learned a ton about digital exposure since I created this image in 2004….) |
Study!
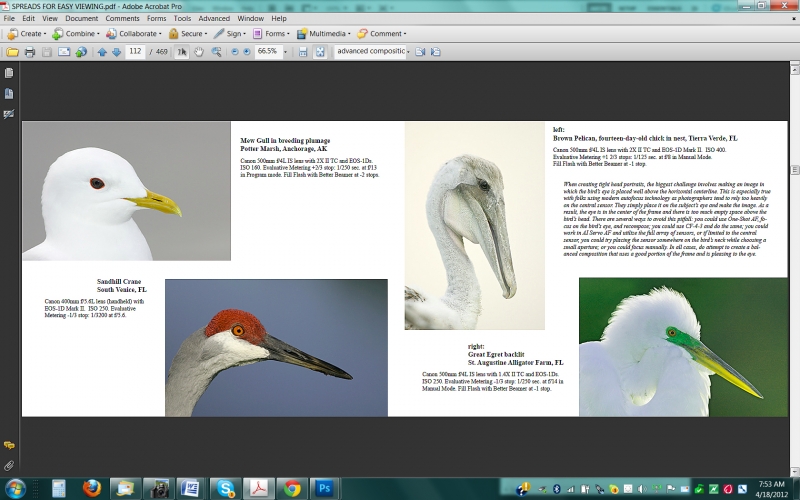
If you have already mastered the principles covered here then do consider purchasing “The Art of Bird Photography II,” copying it to the hard drive of your laptop, and studying Chapter II, Advanced Composition and Image Design (pages 163-254 including 97 images with our legendary educational captions). See the ABP II screen capture below.
|
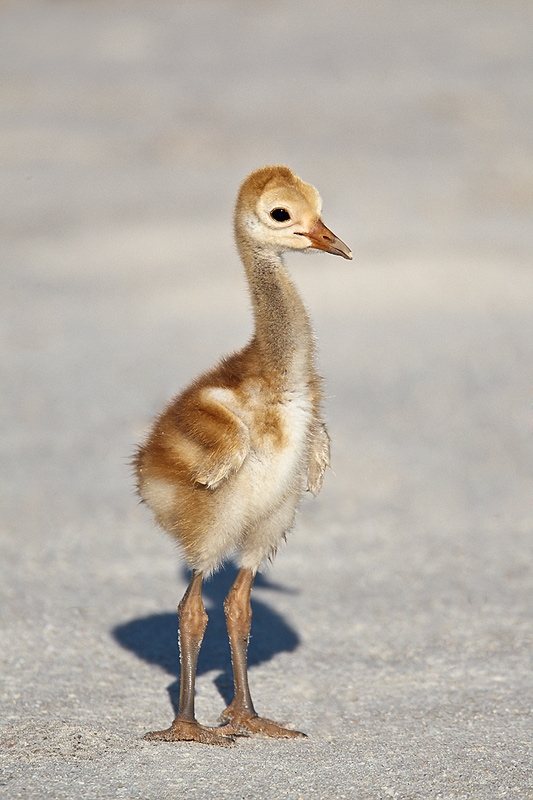
Tall, relatively large–in-the-frame birds (even baby ones) need to be in vertical frames. If they are looking at you they usually work best dead center. If they are looking to one side, you can place them a bit back in the frame as I did here. Be sure to leave well more room above their heads than below their feet. Note here that there is twice as much room above the bird than below. And be sure not to clip the virtual feet, feet that are hidden by tall grass or shallow water. Sandhill Crane chick, Indian Lake Estates, FL, with the tripod-mounted Canon 800mm f/5.L IS lens, the 1.4X III TC, and the Canon EOS-1D Mark IV. ISO 400. Evaluative metering at +1 stop: 1/1250 sec. at f/8 in Av mode. |
Staggering
The amount of information and instruction in the original ABP and the all-new continuation, ABP II is simply staggering. Oh how I wish that I had had these two books when I was struggling to learn bird photography in the ten years that followed August 1983. Today, you can save $10 by purchasing the two book bundle here.
|
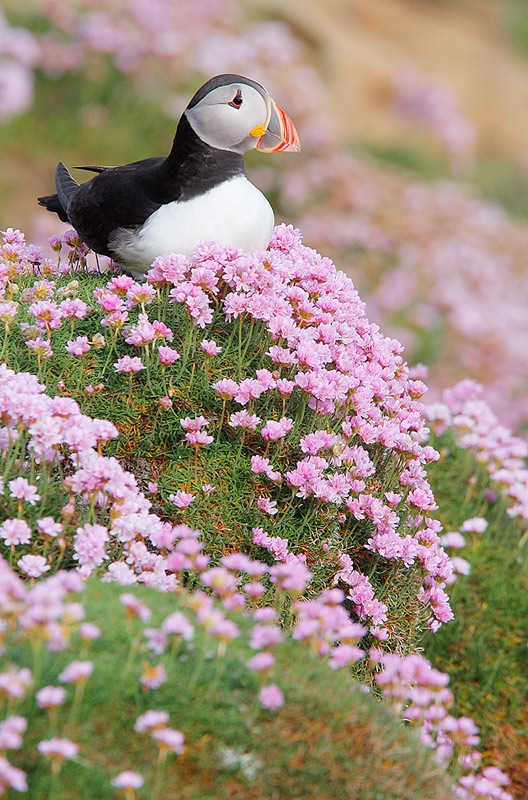
Small-in-the-frame subjects must be placed in the corners of vertical frames. This type of image works best when you wish to show off a beautiful setting. Atlantic Puffin, Saltee Island, Ireland with the hand held Canon 400mm f.4L IS DO lens and the EOS-40D (now replaced with the Canon EOS-7D. ISO 400. Evaluative metering at +1/3 stop: 1/500 sec. at f/0 in Av mode. |
Improve
By studying the material presented here, learning to use your camera’s AF system to it fullest capabilities, and looking at as many good and great photographs as possible, you too can begin producing images that feature pleasing, interesting, and dramatic compositions.
|
Pages 203/204 screen capture from ABP II’s Advanced Composition and Image Design Gallery. Most of the chapters in ABP II are followed by extensive galleries that review the material covered in the text. Click on the screen capture to see a larger version. |
Important Contest News
Only Five Days Left to Enter the Competition!
Only Five Days Left to Make Your Qualifying B&H Purchases!
Only Twelve Days Left to Upload Your Photos!
While you may upload images until 11:59pm eastern time on April 30, 2012, the very last day for registering for the contest and for making eligible B&H purchases will be Monday, April 23, 2012. This will give us time to process your registrations and verify your B&H purchases and will give you time to upload your images successfully. Good luck to all.
The BIRDS AS ART 1st International Bird Photography Competition has been going great guns. Additional folks are getting in on the fun each day. And many folks who had previously finished their entries have been taking advantage of the extension by uploading even stronger images. Thanks to those who responded to my Hand of Man pleas; it is now one of our strongest categories. While each of the following categories has some very strong images there is still room for improvement: Small in the Frame/Environmental, Pleasing Blurs, Youth, and especially Captive (photographs of captive, zoo, pet, or rehab birds).
Those of you who have been in the dark can learn more about the BIRDS AS ART 1st International Bird Photography Competition here or by visiting the main contest page here.
Save Your B&H Receipts
Do save your e-mail receipts for eligible B&H purchases made after Monday, April 23 as you will be able to use them for entry into the BIRDS AS ART 2nd International Bird Photography Competition; details will be announced in several months. Please remember, only B&H purchases made using the product-specific BAA B&H affiliate links in the Bulletins or on the blog or the more general link here qualify. See additional details by scrolling down to item 2 here. If in doubt, simply start your B&H searches by clicking here:
http://www.bhphotovideo.com/?BI=6633&KBID=7226
Earn Free Contest Entries and Support both the Bulletins and the Blog by making all your B & H purchases here.
More and more folks are earning multiple contest entries with their B & H purchases. See here for details on that. Eleven great categories, 34 winning and honored images, and prize pools valued in excess of $20,000. Click here to visit the competition home page.
Shopper’s Guide
Below is a list of the gear used to create the images in today’s post. Thanks a stack to all who have used the Shopper’s Guide links to purchase their gear as a thank you for all the free information that we bring you on the Blog and in the Bulletins. Before you purchase anything be sure to check out the advice in our Shopper’s Guide.
Canon 800mm f/5.6L IS lens. Right now this is my all time favorite super-telephoto lens.
Canon 70-200mm f/2.8L IS II lens. Man, I am loving this lens on my shoulder with the 2XIII teleconverter. I also use it a lot–depending on the situation–with the 1.4X III TC.
Canon EF 1.4X III TC. This new TC is designed to work best with the new Series II super-telephoto lenses.
Canon 300mm f/4L IS lens. This lightweight, close-focusing telephoto lens is still manufactured. With the 1.4X III TC it makes a great starter lens for beginning bird photographers, especially those with 1.6 crop factor bodies like the Canon EOS-7D.
Canon 400mm f.4L IS DO lens. A lightweight image stabilized telephoto lens that is easily hand held by most folks, great from any kind of boat, and super for flight photography. Works well with both Series III teleconverters.
Canon EOS-1D Mark IV professional digital camera body. The very best professional digital camera body that I have ever used.
And from the BAA On-line Store:
LensCoats. I have a LensCoat on each of my big lenses to protect them from nicks and thus increase their re-sales value. All my big lens LensCoat stuff is in Hardwood Snow pattern.
LegCoat Tripod Leg Covers. I have four tripods active and each has a Hardwood Snow LegCoat on it to help prevent further damage to my tender shoulders 🙂 And you will love them in mega-cold weather….
Gitzo GT3530LS Tripod. This one will last you a lifetime.
Mongoose M3.6 Tripod Head. Right now this is the best tripod head around for use with lenses that weigh less than 9 pounds. For heavier lenses, check out the Wimberley V2 head.
CR-80 Replacement Foot for Canon 800. When using the 800 on a Mongoose as I do, replacing the lens foot with this accessory lets the lens sit like a dog whether pointed up or down and prevents wind-blown spinning of your lens on breezy days by centering the lens directly over the tripod.
Double Bubble Level. You will find one in my camera’s hot shoe whenever I am not using flash.
The Lens Align Mark II. I use the Lens Align Mark II pretty much religiously to micro-adjust all of my gear an average of once a month and always before a major trip. Enjoy our free comprehensive tutorial here.
BreezeBrowser. I do not see how any digital photographer can exist without this program.



I think I need to post these rules on my wall near my computer, or at least on my desktop. Actually, maybe you could make a small instructional clipbook! 4×6 (3×5?), waterproof, has rules like this and other helpful reference information, like how to make good exposures, when to use certain features, etc! This would help me, and maybe help many!
“No one gives a rat’s ass what’s… behind the bird.” This blog entry is filled with great advice that I’m about to share with a beginner friend. Thanks for re-stating this guidance, and especially for making me literally laugh out loud upon reading your blunt explanation for leaving more room in front of the subject!
I like the composition as you have it. The angled flowers lead to the bird. Thanks again for your lessons. I have both APB’s They make great gifts.
Thank you Vincent!
All great tips – just by reading your books and going on one IPT, my photos have improved 1000%. You are absolutely right. I am amazed at people who spend a ton on equipment but don’t have a clue. There is always more to learn.
BTW yes, my signed copy of ABP is one of my most prized possessions! I still refer to it and always recommend it to people, but they have to get their own copy 🙂
I am thinking that I agree 🙂
Lr 4.1 RC definitely supports the 5D Mk III, Terry…
Sadly I did not buy the camera through B&H.It was not available when I wanted to order it.
I did however use the link to purchase the Canon 24-105 1:4 L IS lens last November so I hope you got the credit for that.
Hi Art,
Keep all the great stuff coming.
I hope to be able to do a tour with you next year.
I just received my 5D Mark III but do not have any up to date software to work on the Raw Images – Lightroom 4 is not updated yet – how are you managing that.
Also I want to set up the rear focus on this camera – how do you do that.
Thanks for the help
I updated ACR. The info is somewhere in a Bulletin or on the blog, likely in one of my first two mentions of the 5D III.
Did you get your 5D III with one of our B&H links?
All great lessons, thanks for sharing.
Great stuff Artie. The Puffin image is wonderful to see and so comical at the same time! This page is bookmarked alongside BBC, Google & Wiki.
Artie, I also started photographing birds in the early eighties and there just wasn’t any books out there to help you. When people ask me how to photograph birds, I tell them to purchase Arthur Morris’s books, it will put you years ahead of teaching yourself.
Thank you kindly sir!
Thanks, as always, Artie.
David
Thanks David.
It’s a tough call without knowing what was cropped out, but on the puffin I would have been tempted to add space at the top and to the right to get the puffin’s head at the third lines intersection – or go to a more horizontal framing and crop out some of the out-of-focus foreground and again perhaps add a little to the right. To me, the bird, the in-focus surroundings and the nicely blurred background are the best parts of this image and I want to see more of them, while the out-of-focus foreground doesn’t do much for me. Just my 2 cents!
I disagree on any crop but only 100%. I made lots of different compositions in what was a spectacular situation. Even f/32 and a tripod would not have gotten the foreground flowers sharp….
Good tips Artie. On the Puffin I would have cropped it at bottom just before it became out of focus.
See my response to Dave above. 🙂
“Nobody gives a rat’s ass whats going on behind the bird”? You’ve never been hit by pelican poop? Great tips. Love the baby crane and puffin most.
Well, Snow Goose poop….