|
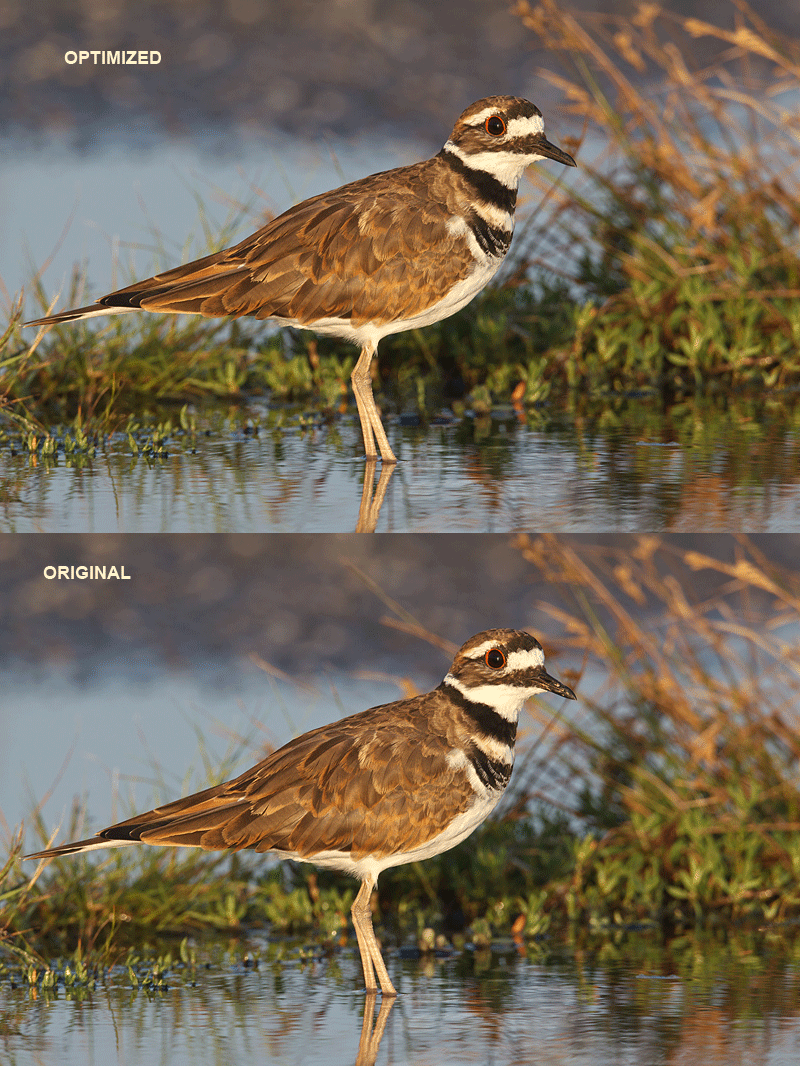
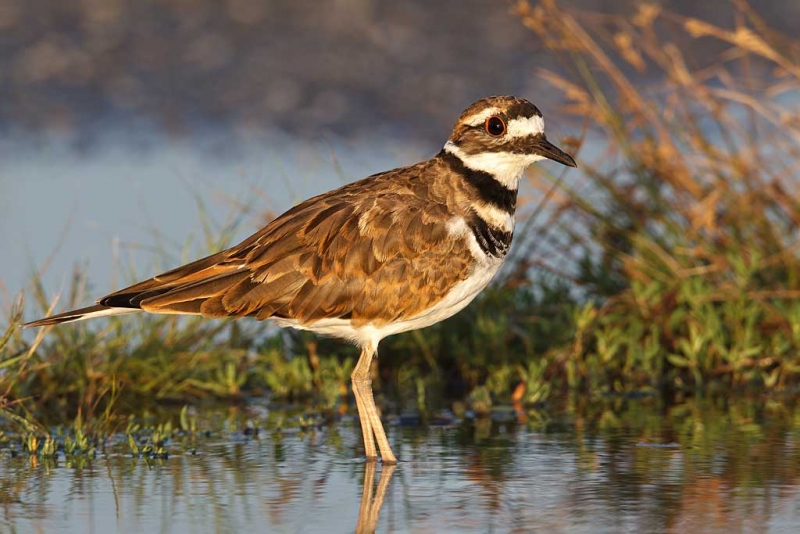
This adult Killdeer was photographed from my car with my rig resting on a folded up sweatshirt on the lowered driver’s side window; oh how I wish that I had brought my travel BLUBB to NY! With the Canon 800mm f/5.L IS lens, with the 1.4X III TC and the discontinued Canon EOS-1D Mark IV. ISO 400. Evaluative metering -1/3 stop: 1/250 sec. at f/11 in Manual mode. Central sensor (by necessity) AI Servo/Rear Focus AF on the closest bird’s face and recompose. Click here if you missed the Rear Focus Tutorial. Click on the image for a larger version. |
Living and Learning After the Thunderstorm
I had planned to head to the East Pond at Jamaica Bay Wildlife Refuge on Monday afternoon with my friend Tom Pfiefer, president of the Nature and Wildlife Photographers of Long Island group. The club has lots of highly skilled members and great speakers at most of their monthly meetings. Learn more about NWPLI here. But the weatherman intervened. And amazingly the predicted thunderstorms materialized so I stayed home and got some work done. Just before 6pm it got a bit brighter so I headed to a local state park that several folks had told me about. I found some shorebirds in a parking lot rain puddle and had a ton of fun. Better yet, I got to see my old friend Johann Schumacher. Johann goes back a lot further than Tom; we started photographing together at JBWR in the early ’80s.
I worked the small killdeer flock on and off for about 90 minutes before heading home. The image above, the last one that I created, was my favorite though I did get lots of other keepers.

|
Clean-up Along With a New Content Aware Fill Trick
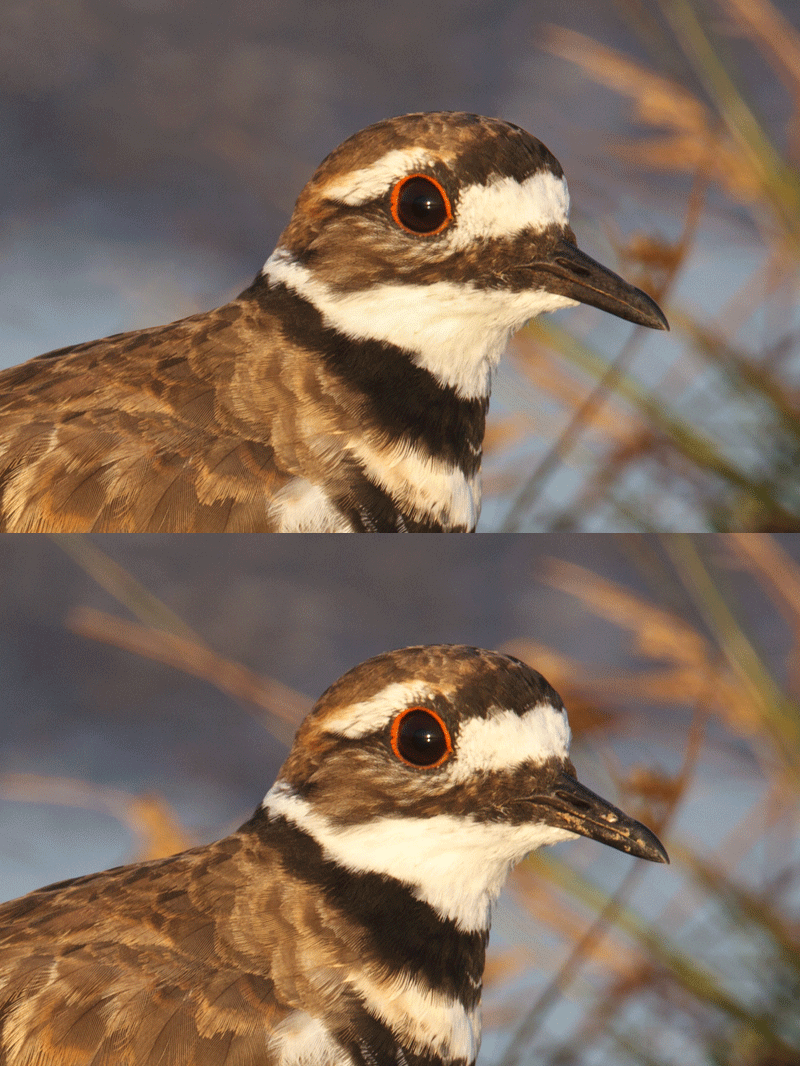
Bill and background clean-up–see the before and after animated GIF above–was as usual done with the Patch Tool, a few Quick Masks, Protect and Defend Cloning, and the Spot Healing Brush. But I have been trying Content Aware Fill recently with varying results–sometimes amazingly good and sometimes ludicrously bad. As with the Patch Tool, it is best to work large so that you can work small–if that makes any sense at all. Enlarge the image anywhere from 200% to 1000% depending on the size of the flaw and then work only on one single small flaw at a time. If there are several flaws in a small area and you try to repair them all at once you will usually be doomed to failure. Note: most of the background clean-up, as you can see in the animated GIF below, involved eliminated specular highlights. All of the above BTW is with CS-5.
All of the techniques above are of course covered in detail in our Digital Basics File that includes my complete digital workflow along with dozens of additional Photoshop tips and free updates.
With NIK Color Efex Pro: painted in 100% Detail Extractor to the whites of the face and neck with a Hide-All mask and an 80% layer of Tonal Contrast on the bird only after selecting the bird with the Quick Selection Tool. As regular readers know NIK’s Color Efex Pro 4 is now an integral part of my workflow. You can save 15% on all NIK products by clicking here and entering BAA in the Promo Code box at check-out. Then hit Apply to see your savings. You can download a trial copy that will work for 15 days and allow you to create full sized images. Click here for a cool NIK tutorial.
I have CS-6 on my laptop, where, BTW, I optimize all of my very best images. When I open it I am totally confused. Tim Grey has graciously provided me access to a collection of his CS-6 video tutorials. I will report back as soon as I have a chance to study them and get started with CS-6. In the meantime, you can check them out here. The first one that I will be checking out is “Photoshop CS6 Quick Start for Photographers.”
Anyway, back to my great new Content Aware Fill (CAF) trick. Previously, when using CAF I would first hit L for the Lasso Tool, and then use the CAF keyboard shortcut (Shift f5)–I hate to waste time with those drop-down menus. Then I would need to hit P for the Patch Tool (a custom made keyboard shortcut). Here is what I discovered. If I make a selection with the Patch Tool you can simply hit Shift f5 to activate CAF. This saves me lots of time as I do not have to repeatedly hit L and then P again when I want to try CAF while doing image clean-up. At times, CAF leaves small but telltale defects along the edges of the repair just as the Patch Tool does. Now I can simply do a quick Patch Tool repair to clean those up, again without having to toggle between L and P.
BTW again, all of our customized keyboard shortcuts and instructions on creating them are included in Digital Basics.

|
Avoiding Lumpy Bills
Working on small areas using the Patch Tool, small Quick Masks, the Spot Healing Brush, and Content Aware Fill will result in smooth repairs. If you use only the Clone Stamp Tool you will likely wind up with lots of lumpy looking repairs. Note the smooth appearance of the bill in the optimized tight crop in the animated GIF above.
New York City Weekend Nature Photography Seminar December 8-9, 2012
If you can learn this much in five minutes from a simple blog post think how much you will learn and how much your photography and image optimization skills will improve after you spend an entire weekend with Denise Ippolito and me…. See all the details and discount info here. If you live within a three hour drive of Staten Island and do not take advantage of this opportunity…. Nuf said. 🙂 It will be great.
Crazy B&H Canon Rebates
| [Not a valid template] |
Crazy B&H Canon Rebates
B&H is offering crazy-huge instant rebates of up to $300 on a variety of Canon lenses and Speedlites including many of my absolute favorite intermediate telephoto lenses like the 70-200mm f/2.8L IS, the 70-200mm f/4L IS, and the 100-400mm L IS. Click here or on the image above now for complete details; these offers expire on 1 September.
Purchases made using the links above will help us be able to continue providing free information on the blog and in the BAA Bulletins.
| [Not a valid template] |
B&H Sigma Lens Specials
I have, on many occasions, seen the incredible images made by Robert O’Toole with the Sigma 50-500mm f/4.5-6.3 DG OS HSM APO autofocus lens. It is lightweight, relatively inexpensive, sharp as a tack at f/8, and it features an almost ridiculous minimum focusing distance. The OS refers to the optical stabilizer in the lens. Best of all, B&H is now offering some very nice rebates on both the Canon and Nikon versions of this lens as well as on a wide variety of other Sigma lenses.
Click here to learn more about the Sigma 50-500mm f/4.5-6.3 DG OS HSM APO autofocus lens with Canon mount.
Click here to learn more about the Sigma 50-500mm f/4.5-6.3 DG OS HSM APO autofocus lens with Nikon mount.
Click here to learn more about the rebate offers for all Sigma Canon mount lenses.
And click here to learn more about the rebate offers for all Sigma Nikon mount lenses.
Purchases made using the links above will help us be able to continue providing free information on the blog and in the BAA Bulletins.


Tim did a couple of B&H Event Space overviews of CS-6 and Lightroom 4. Both were excellent. The links are below. Thanks for making us all aware of him Artie!
http://www.youtube.com/watch?v=Rk8Vjmo9YFA&list=UUHIRBiAd-PtmNxAcLnGfwog&index=10&feature=plcp
http://www.youtube.com/watch?v=c2z8ag0D2rY&feature=relmfu
Bill
You are most welcome Bill!
Nice cloning job on the Killdeer Artie. I could not tell before I saw the original.
Thanks Gary. I did not use the Clone Stamp much, just around the head.
Hi Artie,
Help educate me, please. Was that mud, crud, the ravages of time, or ??? on the beak?
Thanks,
Kathleen
Hi Kathleen, That would be a combination of mud and crud 🙂
Had to laugh at your comment that your favorite image after 90 minutes of shooting was your favorite. Isn’t it odd how often that happens? We had 90 minutes to photograph golden monkeys in Rwanda. For 89 minutes I got nothing at all, Zilch. The guide told us to pack up. Monkey came out in perfect light and gave me a beautiful shot and then approached for its portrait. I guess it felt sorry for me! As some say, “keep shooting!”
It happens that way often. Then once we get something nice we are more apt to pack up and leave…. With macro it often works just the opposite–the first one if often the winner.
BTW, I just sent you my 600mm B&H order number to see if you can expedite it, especially since you are now in NY. ;-0
Hey Artie,
I’m amazed by the upper bill in the closeup. The optimized image shows a line of dimples along the lower edge of the upper bill. In the original I can see one dimple next to the nare, and maybe one closer to the tip. Were you able to recover the others somehow from under the mud, or did you end up cloning the clear one? Either way it sure is seamless work. And an implicit lesson to me to spend more time collecting and studying closeups to learn that features like that even exist – I would have cleaned it to a smooth bill.
Do you think the saddle on the top of the upper bill is from wear?
Are the two highlights in the eye from two light sources or two internal reflections?
thanks for the lessons,
Alan
Thanks Alan. The perfect patterns were maintained by using a series of repeated Quick Mask layers. After I you are happy with the first layer just hit Control J, drag (V) the new layer, and continue as needed. I think that most birds of this species have that little depressed ridge on the bill. One highlight from the sun, one from the reflection of the sun in the puddle 🙂 I thought that I had evicted the 2nd one but see that I had only reduced it.
Denise and I are looking forward to seeing you and Pat on Midway and in Holland!