|
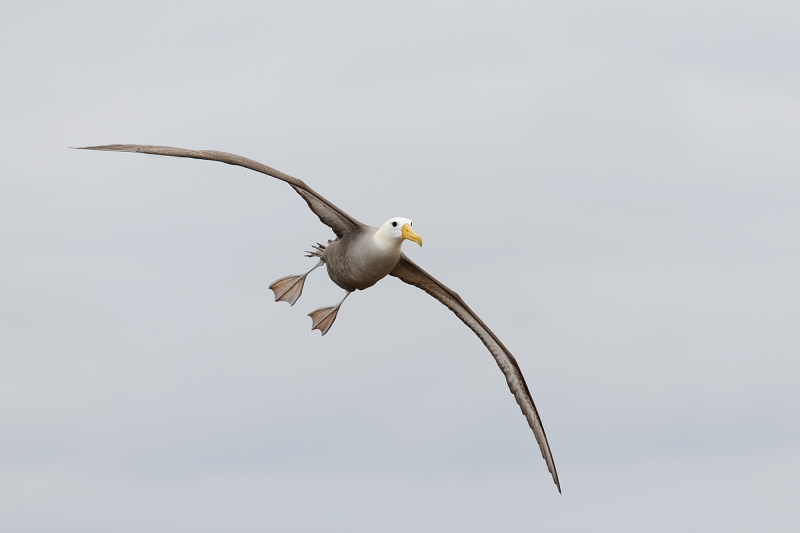
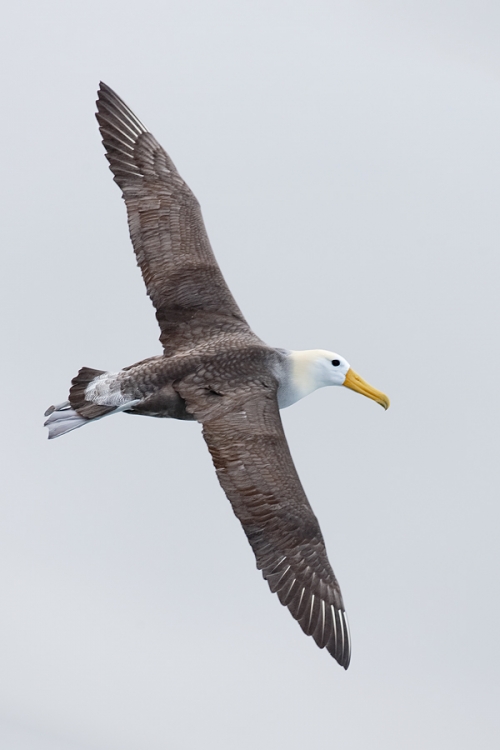
This image was created with the Canon EF 200-400mm f/4L IS USM Lens with Internal 1.4x Extender (hand held at 300mm) and the Canon EOS-1D X. ISO 800. Evaluative metering +2 stops off the light sky: 1/1600 sec. at f/4.5 in Manual mode. Central sensor/AI Servo-Surround/Rear Focus AF active at the moment of exposure. Click here if you missed the Rear Focus Tutorial. Click on the image to see a larger version. |
Flying High on Hood Island with the Canon 200-400mm f/4L IS USM with Internal Extender
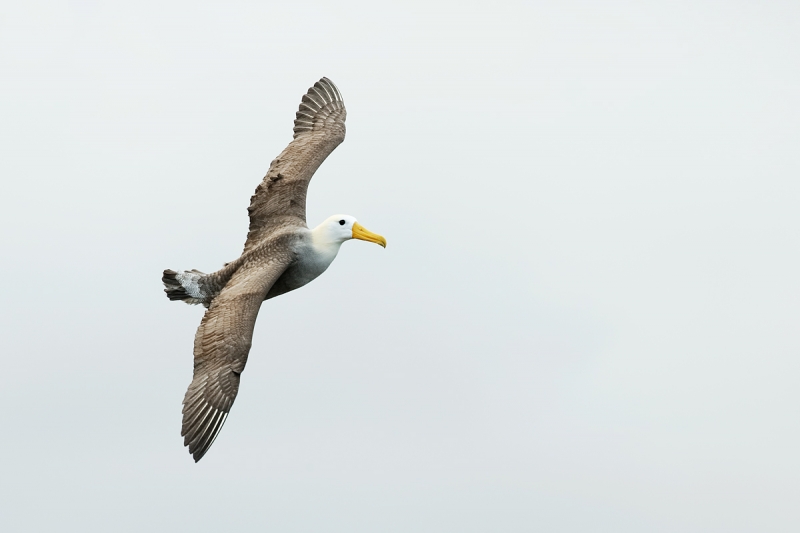
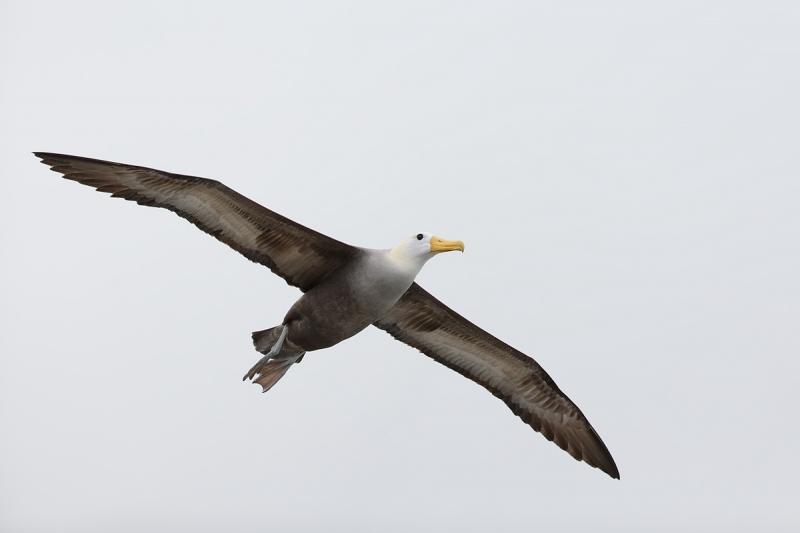
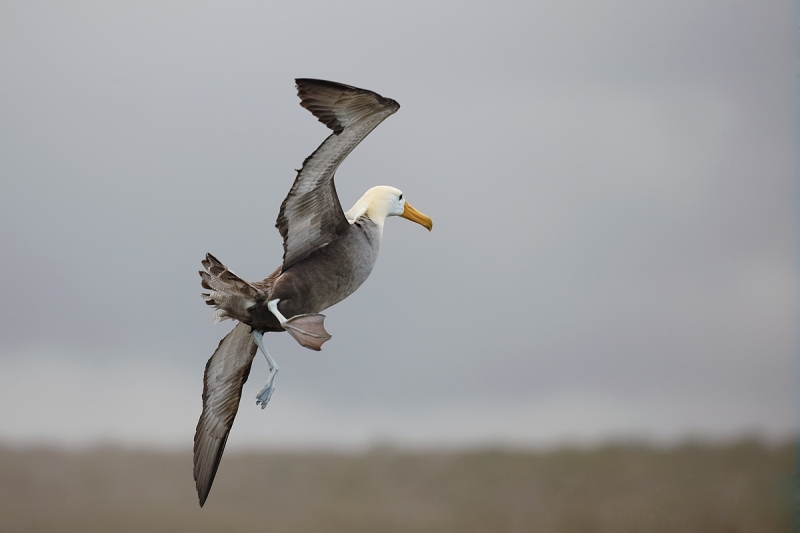
Hood Island is the home to virtually all of the world’s Waved Albatross. The landing at Punta Suarez is one of the highlights of any Galapagos Photo-Cruise as it is the only location on the planet where you can walk right up to these birds as they perform in their courtship dances and brood and feed their chicks. (Note: some 1 week or even 10 day trips may not include this spectacular but remote location.) The usually cloudy conditions in July offer tons of great flight photography for this and other species. The 200-400 without the TC engaged proved to be an ideal flight lens for these big birds. The zoom lens’s compact build and relatively small size as compared to even a 500II makes it easy to hand hold and being able to zoom out as the birds fly towards you is a huge advantage over all fixed focal length lenses.
|
This image was created with the Canon EF 200-400mm f/4L IS USM Lens with Internal 1.4x Extender (hand held at 350mm) and the Canon EOS-1D X. ISO 800. Evaluative metering +2 stops off the light sky: 1/1250 sec. at f/4.5 in Manual mode. Central sensor/AI Servo-Surround/Rear Focus AF active at the moment of exposure. Click here if you missed the Rear Focus Tutorial. Click on the image to see a larger version. |
|
This image was created with the Canon EF 200-400mm f/4L IS USM Lens with Internal 1.4x Extender (hand held at 247mm) and the Canon EOS-1D X. ISO 800. Evaluative metering +2 stops off the light sky: 1/1600 sec. at f/4.5 in Manual mode. Central sensor/AI Servo-Surround/Rear Focus AF active at the moment of exposure. Click here if you missed the Rear Focus Tutorial. Click on the image to see a larger version. |
|
This image was created with the Canon EF 200-400mm f/4L IS USM Lens with Internal 1.4x Extender (hand held at 371mm) and the Canon EOS-1D X. ISO 800. Evaluative metering +2 stops off the light sky: 1/2000 sec. at f/4.5 in Manual mode. Central sensor/AI Servo-Surround/Rear Focus AF active at the moment of exposure. Click here if you missed the Rear Focus Tutorial. Click on the image to see a larger version. |
|
This image was created with the Canon EF 200-400mm f/4L IS USM Lens with Internal 1.4x Extender (hand held at 376mm) and the Canon EOS-1D X. ISO 800. Evaluative metering +2 stops off the light sky: 1/1250 sec. at f/5 in Manual mode. Central sensor/AI Servo-Surround/Rear Focus AF active at the moment of exposure. Click here if you missed the Rear Focus Tutorial. Click on the image to see a larger version. Though I did create some vertical original flight shots this one was cropped from a horizontal. |
|
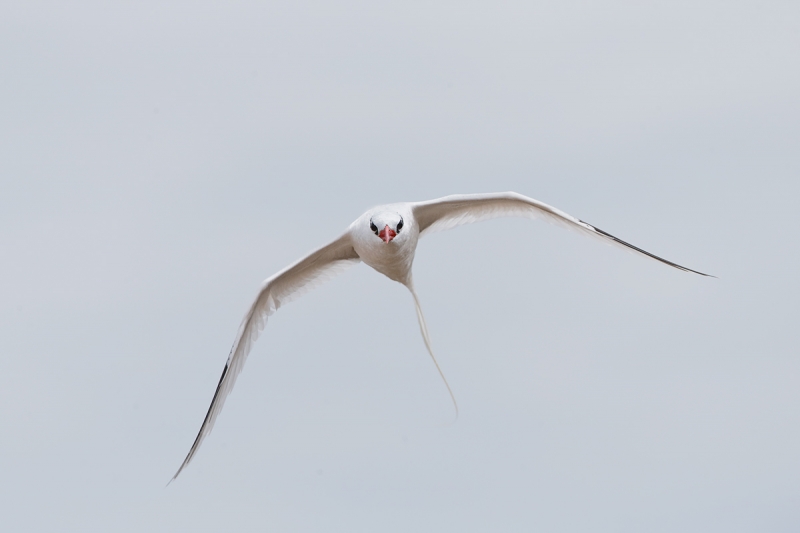
This image was created with the hand held Canon EF 200-400mm f/4L IS USM Lens with Internal 1.4x Extender (with the internal TC in place at 420mm) and the Canon EOS-1D X. ISO 800. Evaluative metering +1 2/3 stops off the light sky: 1/2000 sec. at f/7.1 in Manual mode. Central sensor/AI Servo-Surround/Rear Focus AF active at the moment of exposure. Click here if you missed the Rear Focus Tutorial. Click on the image to see a larger version. Red-billed Tropicbird I |
Red-billed Tropicbird Flight Photography
We also had some good chances with Red-billed Tropicbirds in flight on our Punta Suarez landing. Since they are far smaller than the Waved Albatrosses,
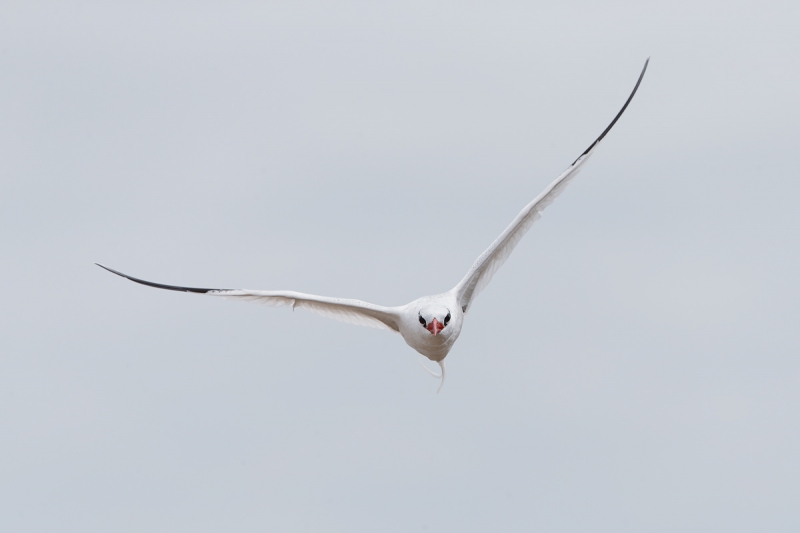
I flipped the lever down to engage the internal 1.4X TC to provide additional reach. Though they are faster, more erratic fliers than the albatrosses, the AF system performed beautifully while accurately focus-tracking the tropicbirds as they flew rapidly towards their cliff-side nests. Yhe 2-4 is proving to be my all-time favorite flight photography lens.
|
This image created just a moment after the image above with the Canon EF 200-400mm f/4L IS USM Lens with Internal 1.4x Extender with the internal TC in place (hand held at 420mm) and the Canon EOS-1D X. ISO 800. Evaluative metering +1 2/3 stops off the light sky: 1/2000 sec. at f/7.1 in Manual mode. Central sensor/AI Servo-Surround/Rear Focus AF active at the moment of exposure. Click here if you missed the Rear Focus Tutorial. Click on the image to see a larger version. Red-billed Tropicbird II |
Your Favorite?
Take a moment to leave a comment and let us know which of the 7 flight images above is your favorite. Please be sure to let us no why. If you’d like, let us know which you think is the weakest image in the group. And why.
Announcing the Mini-Flower Photography Seminar, Friday, September 13: 8:30am till 12:30pm, Canby Oregon
As part of the Swan Island Dahlia Farm Instructional Photo-Tour, September 11-15, 2013 (1 slot left; see here for details), denise and I will be presenting a 1/2-Day Mini-Flower Photography Seminar. Folks wishing to register for the mini seminar only may do so for only $49.
Denise will begin by presenting her “Bloomin’ Ideas” program, an overview of the in-the-field and post-processing techniques that she has used and developed over the past few years to create her signature look. Artie will follow with a Photoshop session that will be geared towards all levels. He’ll be sharing some of his favorite techniques and tips while working on images from the first two days of the IPT. Denise will conclude the morning seminar with a Photoshop demo; she will share her creative workflow using a variety of Photoshop filters and effects. The entire morning is designed to give you a peek into the minds of two very skilled and creative folks.
To register for the Mini-Flower Photography Seminar call Jim between Monday and Thursday or on Friday morning at 863-692-0906 with your credit card in hand.
|
All images courtesy of and copyright 2012: Denise Ippolito. Click for a larger version. |
Just one slot left!
A Creative Adventure/BIRDS AS ART Swan Island Dahlia Farm Instructional Photo-Tour, September 11-15, 2013: 5 FULL DAYS: $1649. Limit 16, Openings: 1.
Join Denise Ippolito and Arthur Morris at the Swan Island Dahlia Farm in Canby Oregon (just south of Portland) for a great learning and photography experience. Swan Island features more than 40 acres with over 350 varieties of dahlias in a plethora of colors, shapes and sizes, making it one of the largest growers in the United States.
Daily Photo Schedule
We will enjoy four morning (7:00am till 10:30am) and five afternoon (3:30pm till 6pm) photography sessions. While we will do most of our photography at the Swan Island Dahlia Farm, we will also visit the Portland Rose Garden and/or the Portland Japanese Garden on this IPT. The in-the-field instruction will include seeing the situation, the use of selective focus, creative use of depth of field, histogram and exposure guidance, designing creative images, choosing your background, isolating your subject, lens options, and the use of reflectors and diffusers. Our field sessions will include challenging photography assignments geared to make you think creatively. Both personalized and small group instruction will be provided. All times are tentative and subject to change based on the weather and on local conditions.
Seminar Morning: Friday, September 13: 8:30am till 12:30pm
Denise will begin by presenting her “Bloomin’ Ideas” program, an overview of the in-the-field and post-processing techniques that she has used and developed over the past few years to create her signature look. Artie will follow with a Photoshop session that will be geared towards all levels. He’ll be sharing some of his favorite techniques and tips while working on images from the first two days of the IPT. Denise will conclude the seminar portion of the IPT with a Photoshop demo; she will share her creative workflow using a variety of Photoshop filters and effects. The entire morning is designed to give you a peek into the minds of two very skilled and creative folks.
The group will have lunch together daily. All are invited to bring their laptops for image sharing. We hope that you can join us for an intense five days of learning and some of the best flower photography to be had in North America.
Deposit Info and Cancellation Policies:
A $449 non-refundable deposit is required to hold your slot for this IPT. Your balance is due 4 months before the date of the IPT and is also non-refundable. If the trip fills, we will be glad to apply a credit applicable to a future IPT for the full amount less a $100 processing fee. If we do not receive your check for the balance on or before the due date we will try to fill your spot from the waiting list. If your spot is filled, you will lose your deposit. If not, you can secure your spot by paying your balance.
Please print, complete, and sign the form that is linked to here and shoot it to us along with your deposit check (made out to “Arthur Morris.”) You can also leave your deposit with a credit card by calling the office at 863-692-0906. We will be short-handed in the office until January 21 so please leave a message and we will call you back. If you register by phone, please print, complete and sign the form as noted above and either mail it to us or e-mail the scan.
If you have any questions, please feel free to contact me via e-mail
Typos
On all blog posts, feel free to e-mail or leave a comment regarding any typos, wrong words, misspellings, omissions, or grammatical errors. Just be right. 🙂
Support the BAA Blog. Support the BAA Bulletins: Shop B&H here!
We want and need to keep providing you with the latest free information, photography and Photoshop lessons, and all manner of related information. Show your appreciation by making your purchases immediately after clicking on any of our B&H or Amazon Affiliate links in this blog post. Remember, B&H ain’t just photography!


Support the Blog


Amazon
Everyone buys something from Amazon, be it a big lens or deodorant. Support the blog by starting your search by starting your search by clicking on the logo-link below. No purchase is too small to be appreciated; they all add up. Why make it a habit? Because I make it a habit of bringing you new images and information on an almost daily basis.
And from the BAA On-line Store:
LensCoats. I have a LensCoat on each of my big lenses to protect them from nicks and thus increase their re-sales value. All my big lens LensCoat stuff is in Hardwood Snow pattern.
LegCoat Tripod Leg Covers. I have four tripods active and each has a Hardwood Snow LegCoat on it to help prevent further damage to my tender shoulders 🙂 And you will love them in mega-cold weather….
Gitzo GT3532 LS CF Tripod. This one replaces the GT3530LS Tripod and will last you a lifetime. Learn more about this great tripod here.
Mongoose M3.6 Tripod Head. Right now this is the best tripod head around for use with lenses that weigh less than 9 pounds. For heavier lenses, check out the Wimberley V2 head.
Double Bubble Level. You will find one in my camera’s hot shoe whenever I am not using flash.
The Lens Align Mark II. I use the Lens Align Mark II pretty much religiously to micro-adjust all of my gear an average of once a month and always before a major trip. Enjoy our free comprehensive tutorial here.
BreezeBrowser. I do not see how any digital photographer can exist without this program.
Delkin Flash Cards. I use and depend on Delkin compact Flash Cards and card readers most every day. Learn more about their great 700X and 1000X cards here or about my favorite Delkin card here.



All shots are spectacular. My favorite is the 5th as I like BIF shot from above.
I have not yet tested the 2-4 for BIF. So far I’ve used the 4/600 II because here birds are just shy most of the time and the 4/600 + 1.4x is often a better choice.
That said I will try the 2-4 for Black-headed Gulls in flight soon. Looking forward to it.
For static subjects, AF speed with the 2-4 and the 1DX was almost instantaneous.
Did you notice any change in AF speed when zooming during tracking a bird in flight?
Markus
Thanks Markus, Note sure what you meant by a change in AF speed when zooming but AF tracking was fine…. And accurate.
I thought that AF might get confused when you change the focal length while tracking a bird with AI Servo. Good to know that it works fine.
Markus
Hi Art, I like #5 for my favorite shot of the seven, but all are wonderful! I like the incredible detail on the top of the wings and tail, and a perfect profile shot of the head and bill. I’d say #4 is good as a somewhat humorously posed shot but since the bird is flying away from you, it doesn’t feel as interesting to me overall. About what distance range are you from these birds at the time of capture?
Thanks Dennis. Strangely enough, the Subject Distance in BreezeBrowser reads 655m for all of the flight images.And Subject Distance does not even show up in DPP. Go figure. I was probably 40-60 feet for most of them, maybe a bit more. I actually like the one of the bird turning away but I am not sure why.
Artie,
For me #2 is the strongest image. Definitely “Exposed to the right” as far as I can tell on my monitor. The top of the birds head almost looks to be on the verge of being blown out (highlights that is), but again could be my monitor or the fact that you have not touched this image in post processing yet. I expect this is a perfectly exposed image. The angle of the bird showing some pretty cool flight dynamics and the great detail in the tops of the wings really appeal to me. I also like the feathers being tufted up on the back side of the left wing showing how much lift is being generated in this turn…pretty cool stuff.
The last image is probably my least favorite just because of the straight “heads on” angle. I still wish I could have been there to take such an image though!
Thanks a ton for sharing!
Wayne
Not sure what you mean by “Exposed to the right” as far as I can tell on my monitor.” (#2)…. The WHITEs look fine on my laptop.
What I meant by saying “Exposed to the Right” is the use of the histogram and exposing the image as much as possible toward the white or “right” side of the graph.
Hope this clears up what I meant. ;>)
It does not. You cannot tell if an image was properly exposed to the right by looking at the optimized file…. I try to expose all of my images to the right. Then if need be, I darken them in Photoshop. Properly exposed RAW files for overall light toned scenes should look too light and washed out. But again, you cannot tell if an image was properly exposed to the right by looking at the optimized file; that is why I was confused :).
Gotcha… I understand why you questioned my comments and that makes perfect sense. If I cannot see the histogram of the image, I cannot know what it looks like… hence I cannot deduce how the image was exposed via the histogram.
What made me “think” it was exposed to the right as far as possible without too many totally white areas, was the top of the birds head. On my monitor, it looked to be exposed as bright as it could be without losing any detail in the birds head.
Thanks.
Rob, CK, and GK, thanks a stack. artie
ps: to Rob–not sure what a clear background has to do with higher ISOs and faster shutter speeds….
My God … how does one pick out of those SEVEN Images !!! Can I have one of each ???!!! You say the 2-4 is becoming your favorite Flight Lens … your Images show it … I see what was great now as GREATER . I have always had a ” thing ” for the Albatross … I think they are magical flyers . I used to test fly an aircraft we made by the same name . I choose Image 4 & 6 … 4 for the ” Flight Story ” it tells and the attentive head position … 6 ’cause it is a ” mystical shot ” … both for awesome aerodynamic Wing Position
Thank you sir for your more than kind words. artie
Hi Art: As a rodeo photographer I have always used the back button for focusing – the use of holding the shutting 1/2 way would not allow me to get the shot that was needed – a number of magazine shooters at the Calgary Stampede used the 1/2 way focusing way, until being convinced that the back focusing button is the only way to capture the fast action of rodeo photography. Because of the fast response to focusing, this is the only system that I have used for a long time.
I really enjoy your bird photography Art – keep giving everyone new techniques and ideas – much appreciated.
It’s image 5 for me all the way – the vertical with the beautiful back detail – and a lovely bright head and head angle. Love it!
I like 1 and 2. 1 for the gear down and overall symmetry of the image. 2 for the sharpness of both wingtips, head position, bird flying into the frame and shadow detail of the feathers. I see where you are bumping the ISO to prioritize the shutter for inflight. Thank you. I intend to try this if I have a similar clear background.