The Streak Continues: 295
After our one hour phone conference with Arash Hazeghi yesterday, I cleaned up a bunch of stuff that I had not quite understood; the way it works is that I ask the questions and Arash “‘splains” things. This morning I will spend another hour or two on stylistic issues and consistency and then send the MS Word file to Arash via Hightail. Otherwise most of yesterday was spent relaxing. And I enjoyed another nice 8 hours of sleep. This blog post, the 295th in a row, took me about 3 1/2 hours to prepare. It was published just before 7:45am from my home in Indian Lake Estates, FL.
As always, I would appreciate your using the BIRDS AS ART B&H affiliate links for all of your major gear, video, and electronic purchases, using our Amazon logo-link for all of your household purchases, and visiting the BAA Online Store for your tripod, tripod head, LensCoat, miscellaneous, accessories, and eGuide purchases as well. Please remember, web orders only. 🙂 Please remember also that all are invited to e-mail for gear advice.
Important Bosque Festival of the Cranes Event Registration Notice
Registration for all Festival of the Cranes workshops, seminars and programs is open. Please click here and read carefully to avoid missing out on several wonderful and inexpensive educational opportunities. Please do not tarry as we expect all of the BAA/A Creative Adventure sessions to sell out quickly, especially the early morning In-the-Field Workshops. You can click here to register.
There is still lots of room in the seminar and the free program. The Thursday In-the-Field Workshop (ITF-W) is sold out. Friday and Sunday are filling nicely. For some strange reason Saturday has only 4 folks signed up…. Both the seminar (below) and the ITF-Workshops represent a chance to learn a ton cheap.
Bosque del Apache Photography Two-Part Seminar
Bosque del Apache Photography Two-Part Seminar. Thursday, NOV 20, 2014. 2:00-4:30 pm at the refuge visitor center with Arthur Morris and Denise Ippolito: $50.00. Click here to register.
Part I: Bosque del Apache Photography Basics
Artie and Denise will cover the basics of lens selection, tripod and head selection, image design, getting the right exposure, autofocus options, and the relationship between light direction and wind direction, and will give an overview of the best photographic opportunities at the refuge. Artie and Denise have more than 26 years of experience photographing Bosque and count it high on their list of soul places.
Part II: Creative Photography at Bosque del Apache
Artie and Denise will teach you to think outside the box when photographing at the refuge (and elsewhere!). You will learn to create a variety of pleasingly blurred images by using slow shutter speeds, by photographing moving subjects, and by zooming or by panning with the lens during the exposure. They will teach you to take advantage of spectacular lighting and weather conditions. They will also cover post processing creative techniques.
|
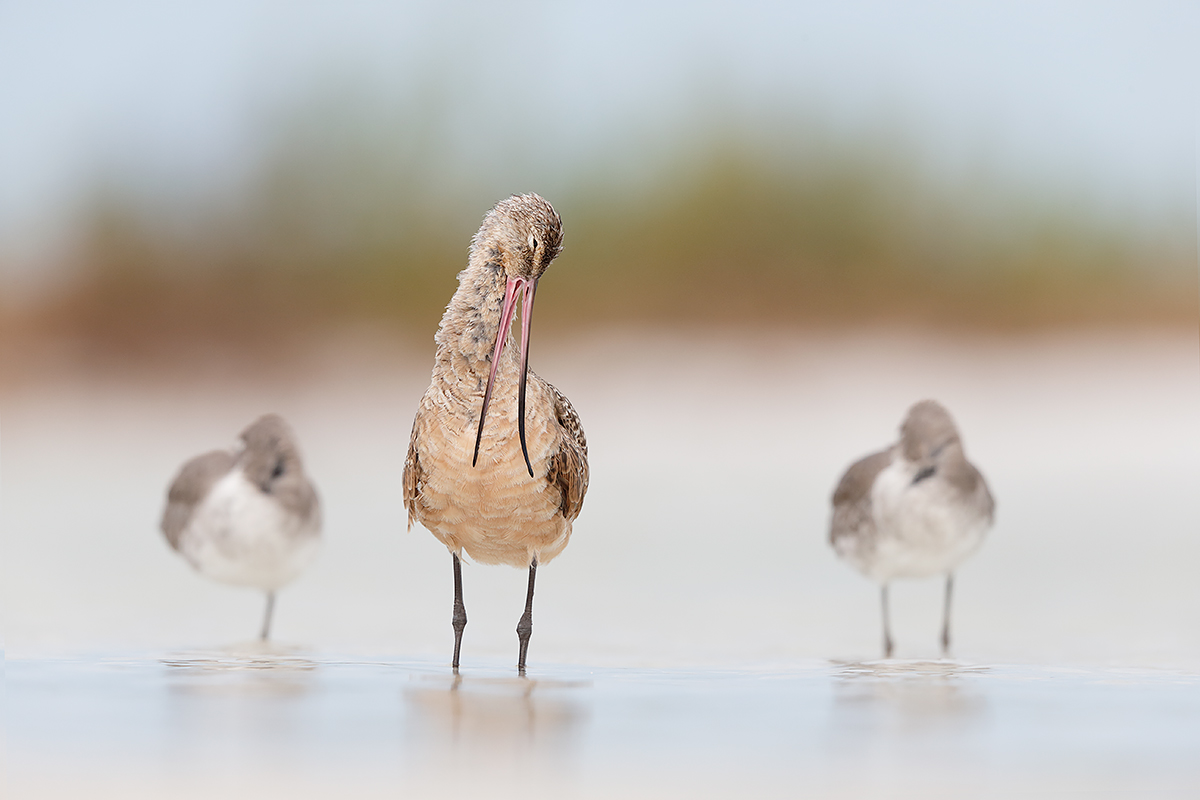
This image was created on the morning of September 16, 2012 at Fort DeSoto Park, Tierra Verde, FL, southwest of St. Petersburg, FL. I used the hand held Canon 500mm f/4L EF IS II lens, the Canon 1.4x EF tele-extender III, and the Canon EOS-1D X. ISO 800. Evaluative metering +2 2/3 stops off the light grey sky: 1/1600 sec. at f/6.3 in Manual mode. Central Sensor Surround/AI Servo Rear Focus AF on the godwit’s face and recompose. Click here to see the latest version of the Rear Focus Tutorial. Be sure to click on the image for a larger version. |
Difficult Questions Answered
In the “Difficult Questions” blog post of September 17, 2014 (you can see it here), I did ask some difficult questions as below. My answers with comments follow each question.
#1: Should I have tried to get higher by sitting up? By standing up? Why or why not?
Most folks who left comments liked the image and the background as presented. I did too. But I clearly remember trying to get up just high enough on my elbows to move the distant background to just above the top of the bird’s head with a nice border. Those efforts were not very successful. I did sit up but then I lost the background altogether while retaining some of the intimacy. Standing would totally eliminate all intimacy.
Many of the boys and girls were totally confused as to how getting higher would influence the placement of the background. See item next below, “The Effect of Getting Higher…”
#2: What do you think of the placement of the three birds in the frame? Would you have done anything differently as far as the image design is concerned?
Most folks like the image design and the placement of the birds in the frame and I agree 100%. With two birds on the left side of the frame and the godwit looking to our right the image is perfectly balanced with the gowdit placed just left of center. If you connect the the heads of the three birds there is a nice triangle going on. David Pugsley added: 2. I like the positioning of the birds. Had the godwit been centered between the two Willets the image would have bit’d been a bit too symmetrical.
#3: Why is it OK to use rear focus and recompose (which is effectively one-shot AF) when you are lying down but not OK to use rear focus and recompose (effectively one-shot AF) when you are sitting or standing? (In those cases you are much better off using AI Servo AF and keeping it active at the moment of exposure.) Why? What difference does it make if you are lying down as opposed to sitting or standing?
I have reviewed this principle so often that many folks nailed the answer. Richard Lethbridge wrote: You are much steadier lying down with both elbows firmly supported. Thus, there is no risk of throwing off the focus. David Policansky finished off the perfect answer when he wrote, Sitting or standing, you’re more likely to move a bit back and forth and so you want AI Servo AF to make sure the subject stays in focus.
|
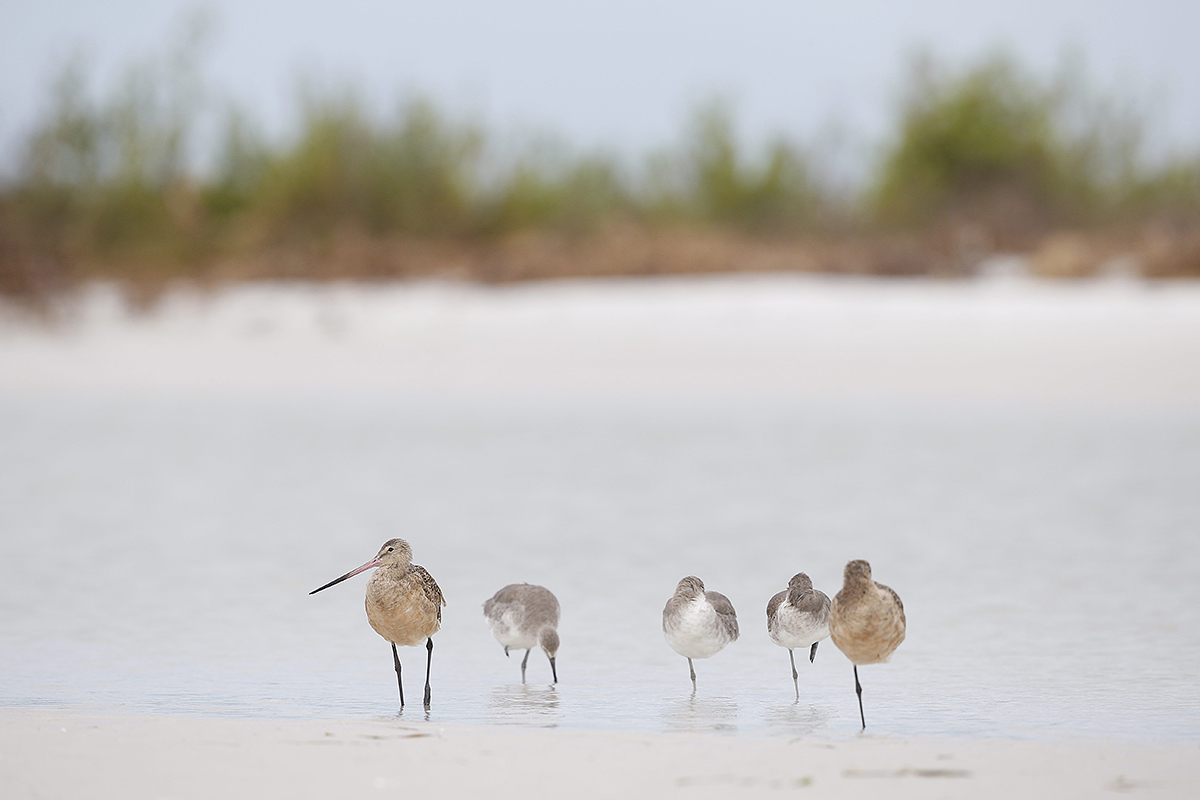
This image was also created on the morning of September 16, 2012 at Fort DeSoto Park, Tierra Verde, FL, southwest of St. Petersburg, FL. For this one I kneeled behind the Gitzo 3532 LS carbon fiber tripod, the Mongoose M3.6 head, the Canon 500mm f/4L EF IS II lens and the Canon EOS-1D X. ISO 800. Evaluative metering +2 2/3 stops off the light grey sky: 1/1250 sec. at f/6.3 in Manual mode. Central Sensor Surround/AI Servo Rear Focus AF on the left hand godwit’s face and recompose. Click here to see the latest version of the Rear Focus Tutorial. Be sure to click on the image for a larger version. This JPEG was created from the extracted JPEG. It represents the original RAW capture as it came out of camera. The optimized image below was created from the RAW file that was converted in DPP 4.0. |
The Effect of Getting Higher…
This image was created 12 minutes before the opening image, “on the way in,” that is, as I approached the birds. I had the lens on the tripod but standing at full height I had only a water background. To bring the vegetation on the shoreline into the frame I needed to get lower. So that is what I did; in effect I brought the birds and the shoreline closer to the same plane.
Note with the opening image that getting higher would effectively move the shoreline above the birds. For experienced photographers this concept is a no-brainer but many beginners have a problem understanding how the relationship of the subject with various other elements in an image will change as they get higher or lower or move left or right (or any combination of the two). The very best way to learn these concepts is to actually move yourself up or down or left or right. You do not even need a lens in your hand to see how the juxtapositions change as you shift your position.
If you are struggling in any way with designing pleasing images you are directed to the “Designing the Image” chapter (pages 103-113) in the original The Art of Bird Photography (now available in soft cover). The sections on Backgrounds (pages 108-9) and Perspective (110-110) will be especially helpful. In addition, the chapter on Advanced Image Design in The Art of Bird Photography II, the follow-up to the classic original, would also be most helpful–APB II: 916 pages, 900+ images on CD only.
What Bugged Me?
What bugged me about this image? The merge of the godwit on our right with the Willet next to it….
The Perspective Diagram |
The Perspective Diagram
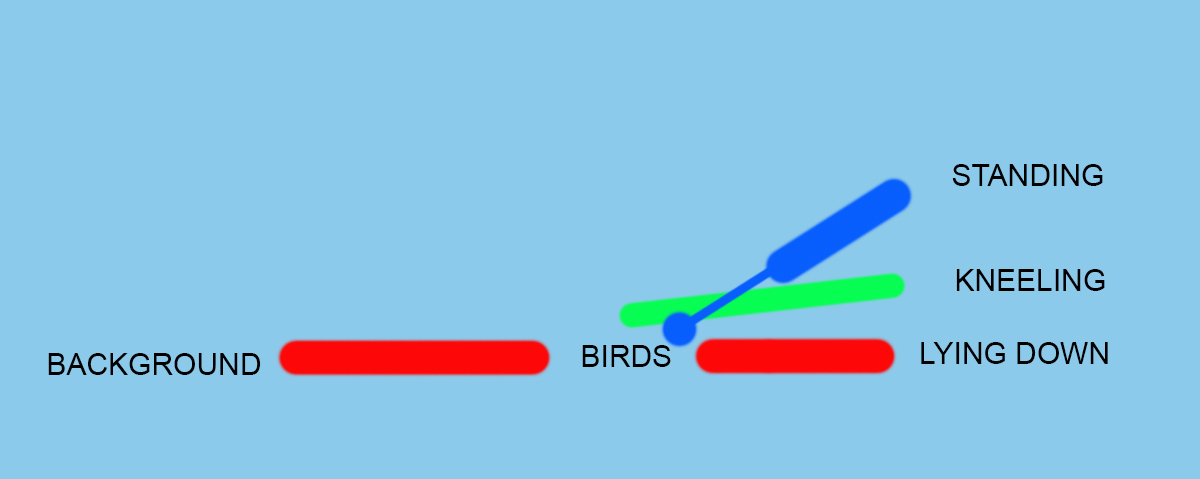
This is a schematic diagram of the situation that I encountered that morning. It is a common situation. If you study it carefully it will help you to better understand the perspective and juxtaposition issues that nature photographers must consider each and every time that they look through the viewfinder.
Consider the orange perspective line. When you are lying down, the birds and the relatively distant background will be on relatively the same plane. Imagine that if you got just a few inches higher, the background would move up just a bit relative to the birds….
Now consider the lime perspective line. You are kneeling. If you imagine extending this line it is easy to see that if you place the birds in the bottom of the frame the background will be well above the birds somewhere in the top of the frame.
Now consider the blue perspective line. When you are standing, you will be looking down on the birds; you will have only water in your background.
|
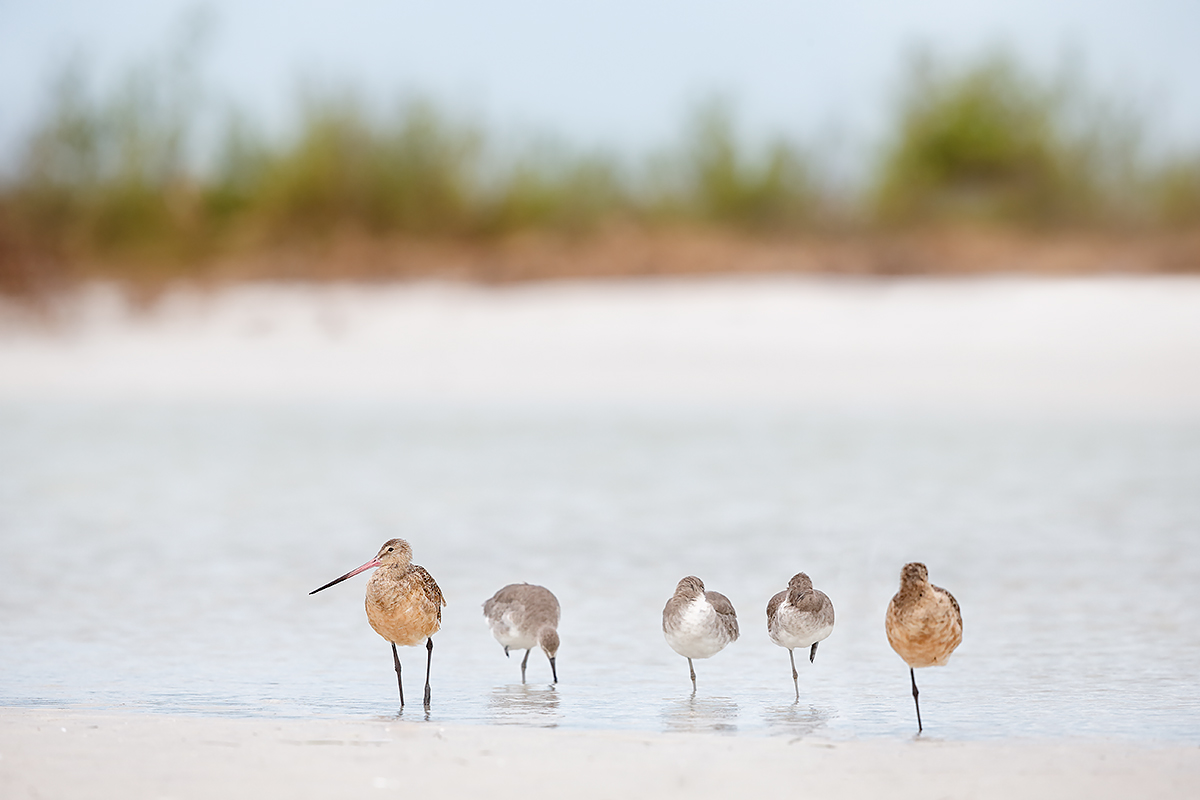
This is the optimized image that was created from the image above. |
The Image Optimization
First the image was converted in DPP 4.0 and then brought into Photoshop CS-6. Aside from the usual, I used two fairly large Quick Masks, one to move the godwit to our right and then a second one of water only to cover the original godwit. I made the second QM first, labeled that layer, moved it out of the way, went back to the Background copy, created the QM of the bird, moved that to the right, went back to the first Quick Mask, moved it into position, and then refined it as noted next. Both of the QMs were refined via the addition of a Regular Layer Mask. The QM that covered the original godwit needed to be warped. Next I needed to rebuild the missing edge of the Willet, the edge that had originally been hidden behind the godwit. For that I used several small QMs, some from the bird itself, one or two from the bird to its right.
Other Changes?
Please leave a comment and let us know what other changes you see when comparing the optimized image to the original.
Advanced Image Design Question
With the Marbled Godwit on our left looking to our left why didn’t I point the camera more to the left to move the whole group of birds back (to our right) in the frame?
The DPP RAW Conversion Guide
To learn why I use Canon’s Digital Photo Professional (DPP) to convert every image that I work on, click here. Coming very soon: The DPP 4.0 RAW Conversion Guide by Arash Hazeghi and Arthur Morris. I finished my first edit of Arash’s manuscript yesterday. The more that I use DPP 4.0 for my RAW conversions the more I learn about it and the more I learn about it the more I am impressed with it. Note: at present, DPP 4.0 will work only with 1D X and 5D III images.
Digital Basics
Everything that I did to optimize today’s image is covered in detail in my Digital Basics File–written in my easy-to-follow, easy-to-understand style. Are you tired of making your images look worse in Photoshop? Digital Basics File is an instructional PDF that is sent via e-mail. It includes my complete digital workflow, dozens of great Photoshop tips, details on using all of my killer image clean-up tools, the use of Contrast Masks, several different ways of expanding and filling in canvas, all of my time-saving Keyboard Shortcuts, Quick Masking, Layer Masking, and NIK Color Efex Pro basics, Digital Eye Doctor, Tim Grey Dodge and Burn, how to create time-saving actions, and tons more.
APTATS I & II
Learn the details of advanced Quick Masking techniques in APTATS I. Learn Advanced Layer Masking Techniques in APTATS I. Mention this blog post and apply a $5 discount to either with phone orders only. Buy both APTATS I and APTATS II and we will be glad to apply at $15 discount with phone orders only. Please call Jim or Jennifer at 863-692-0906 weekdays to order.
|
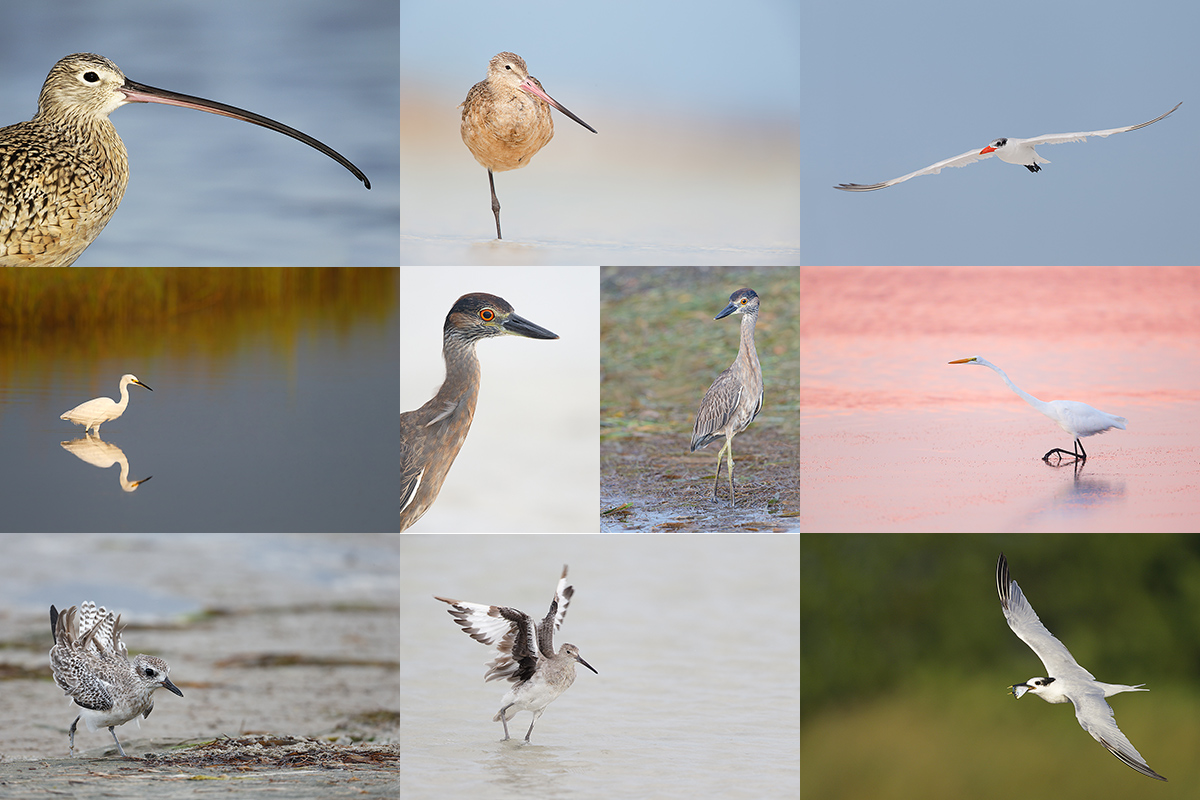
Fort DeSoto in fall is rich with tame birds. All of the images in this card were created at Fort DeSoto in either late September or early October. I hope that you can join me there this October. Click on the composite to enjoy a larger version. |
First-ever BIRDS AS ART In-the-Field/Meetup Workshop Session (ITF/MWS): $50
Join me on the afternoon of October 10, 2014 for 3-hours of photographic instruction at Fort DeSoto Park. Beginners are welcome. Lenses of 300mm or longer are recommended but even those with 70-200s should get to make some nice images. Teleconverters are always a plus.
You will learn the basics of digital exposure and image design, autofocus basics, and how to get close to free and wild birds. We should get to photograph a variety of wading birds, shorebirds, terns, and gulls. This inexpensive afternoon workshop is designed to give folks a taste of the level and the quality of instruction that is provided on BIRDS AS ART Instructional Photo-tours. I hope to meet you there.
To register please call Jim or Jennifer during weekday business hours with a credit card in hand to pay the nominal registration fee. Your registration fee is non-refundable. You will receive a short e-mail with instructions, gear advice, and meeting place at least two weeks before the event.
|
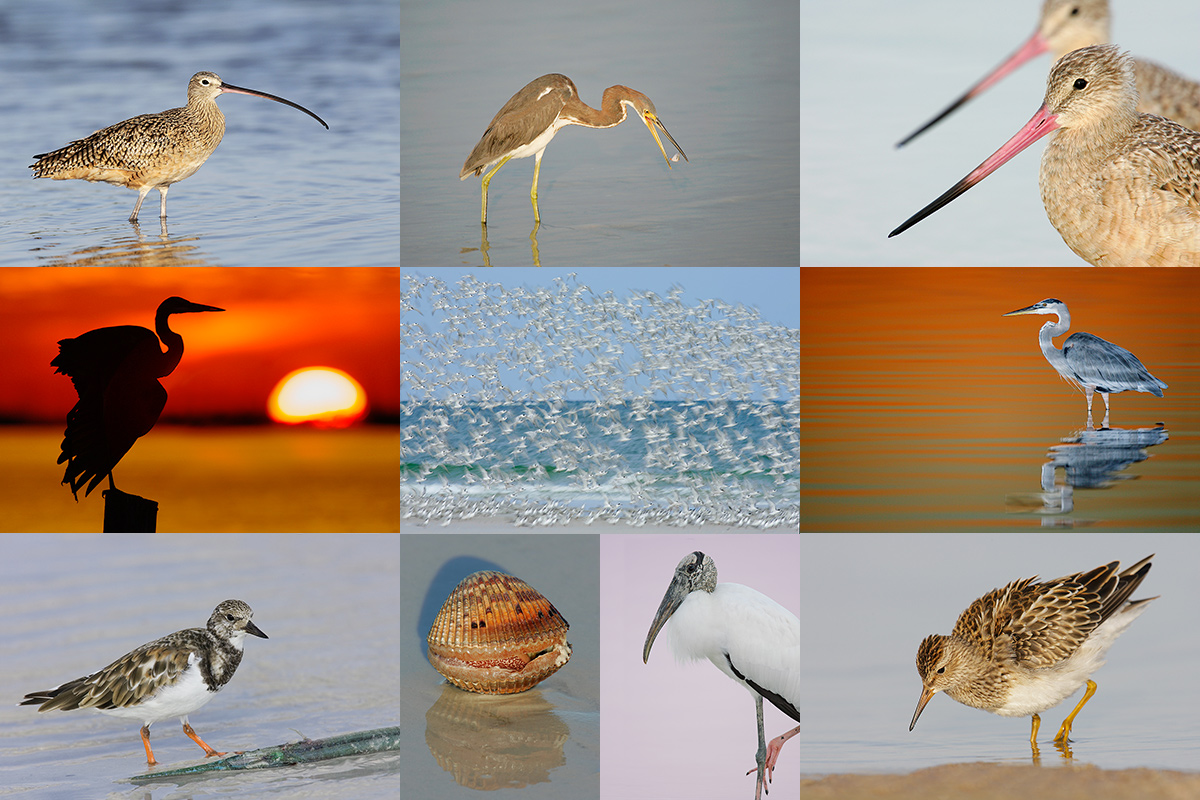
Obviously folks attending the IPT will be out in the field early and stay late to take advantage of sunrise and sunset colors. The good news is that the days are relatively short in October. Click on the composite to enjoy a larger version. |
Fort DeSoto Fall IPT/October 11-13, 2014. 3 FULL DAYs: $1099. Limit 8/Openings 5.
Fort DeSoto, located just south of St. Petersburg, FL, is a mecca for migrant shorebirds in fall. There they join hundreds of egrets, herons, night-herons, gulls, and terns who winter on the T-shaped peninsula that serves as their wintering grounds. With any luck, we should get to photograph two of Florida’s most desirable shorebird species: Marbled Godwit and the spectacular Long-billed Curlew. Black-bellied Plover and Willet are easy, American Oystercatcher likely. Great Egret, Snowy Egret, Great Blue Heron, and Tricolored Heron are easy as well and we will almost surely come up with a tame Yellow-crowned Night-Heron or two. We should get to do some Brown Pelican flight photography. And Royal, Sandwich, Forster’s, and Caspian Terns will likely provide us with some good flight opportunities as well. Though not guaranteed Roseate Spoonbill and Wood Stork would not be unexpected.
Folks who sign up for the IPT are welcome to join us on the ITF/MWS on Friday afternoon as my guest. See above for details on that.
On the IPT you will learn basics and fine points of digital exposure and to get the right exposure every time after making a single test exposure, how to approach free and wild birds without disturbing them, to understand and predict bird behavior, to identify many species of shorebirds, to spot the good situations, to choose the best perspective, to see and understand the light, to, and to design pleasing images by mastering your camera’s AF system. And you will learn learn how and why to work in Manual mode (even if you’re scared of it).
At lunch (included) we will review my images–folks learn a ton watching me edit–why keep this one and delete that one. If you opt to bring your laptop, we will take a look at five of your best images from the morning session. We will process a few of my images in Photoshop after converting them in DPP. That followed by Instructor Nap Time.
If you decide to register and are traveling to attend this IPT, please make your reservations at the Beachcomber Beach Resort, 6200 Gulf Blvd, St. Petersburg (St. Pete Beach), FL 33706 (727-367-1902) as soon as possible as rooms for the weekend days are scarce: ARR: 10 OCT/DEP 14 OCT. I stayed there on my last DeSoto visit and was quite happy with it. Lodging is tough in Florida at this season…. The best airport is Tampa (TPA). It is always best if IPT folks stay in the same hotel so if you are interested it would be a good idea to register now and make your hotel reservations as well. We can, however, coordinate easily with local folks who opt to stay at home either by cell phone or e-mail.
Because of the relatively late date, payment is full is due upon registration either by check or credit card. If the former, please e-mail us immediately so that we can save you a spot. If the latter, please call Jim or Jennifer during weekday business hours at 863-692-0906 with a credit card in hand to register . Your registration fee is non-refundable unless the IPT sells out with eight so please check your plans carefully before committing. You will receive a confirmation e-mail with detailed instructions, gear advice, and first morning meeting place about one month before this IPT.
|
BAA Site Guides are the next best thing to being on an IPT. |
Fort DeSoto Site Guide
Can’t make the IPT? Get yourself a copy of the Fort DeSoto Site Guide. Learn the best spots, where to be when in what season in what weather. Learn the best wind directions for the various locations. BAA Site Guides are the next best thing to being on an IPT. You can see all of them here.
Be sure to like and follow BAA on Facebook by clicking on the logo link upper right. Tanks a stack!
Support the BAA Blog. Support the BAA Bulletins: Shop B&H here!
We want and need to keep providing you with the latest free information, photography and Photoshop lessons, and all manner of related information. Show your appreciation by making your purchases immediately after clicking on any of our B&H or Amazon Affiliate links in this blog post. Remember, B&H ain’t just photography!
Amazon.com
Those who prefer to support BAA by shopping with Amazon may use this link:
Amazon Canada
Many kind folks from north of the border, ay, have e-mailed stating that they would love to help us out by using one of our affiliate links but that living in Canada and doing so presents numerous problems. Now, they can help us out by using our Amazon Canada affiliate link by starting their searches by clicking here. Many thanks to those who have written.
Typos
In all blog posts and Bulletins, feel free to e-mail or to leave a comment regarding any typos, wrong words, misspellings, omissions, or grammatical errors. Just be right. 🙂

