2nd Palouse IPT Added By Popular Demand is Filling Up Fast
Please scroll down for details.
The Streak Continues: 201
It is just before 7:45am here in Indian Lake Estates, FL as I finish up today’s blog post. This post took less than 2 hours to assemble. Enjoy it.
This post marks 201 consecutive days with a new blog post. With so many folks getting in the habit of using our B&H links and our Amazon logo-links why quit now? April, May and June have been fantastic as lots of folks are getting the message; using my affiliate links does not cost you a penny and helps support my efforts here. To show your appreciation, I do ask that you use our the B&H and Amazon affiliate links on the right side of the blog for all of your purchases. Please check the availability of all photographic accessories in the BIRDS AS ART Online Store, especially Gitzo tripods, Wimberley tripod heads, and the like. We sell only what I have used and tested, and know that you can depend on. We will not sell you junk. We know the tools that you need to make creating great images easy and fun. And we are always glad to answer your gear questions via e-mail.
You can find the following items in the store: Gitzo tripods, Mongoose M3.6 and Wimberley heads, plates, low feet, and accessories, flash brackets, , Delkin e-film Pro Compact Flash Cards, LensCoat products, and our unique line-up of educational materials including ABP I & II, Digital Basics, Site and Set-up e-Guides, Canon and Nikon Camera Users and AF e-Guides, and MP-4 Photoshop video tutorials among others.
I would of course appreciate your using our B&H affiliate links for all of your major gear, video, and electronic purchases. For the photographic stuff mentioned in the paragraph above we, meaning BAA, would of course greatly appreciate your business. Here is a huge thank you to the many who have been using our links on a regular basis and visiting the BAA Online store as well.
|
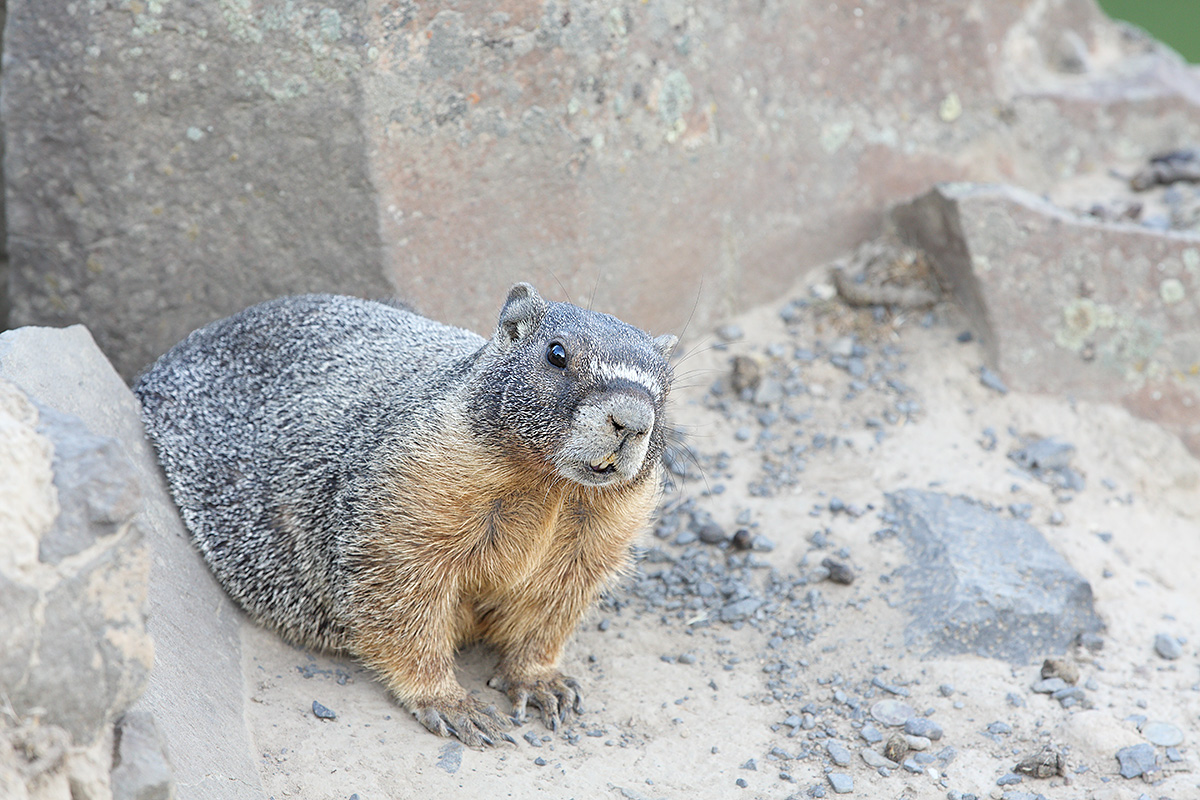
This image was created on our Palouse scouting trip with the Canon EF 70-200mm f/2.8L IS II USM lens, the Canon 1.4x EF Extender III (Teleconverter) (hand held 255mm), and the Canon EOS 5D Mark III Digital camera body ISO 400. Evaluative metering +1 stop: 1/2000 sec. at f/8. One sensor to the left of the central sensor/AI Servo Rear Focus/Surround AF on the Rock Chuck’s tip right cheek active at the moment of exposure. Click here if you missed the latest version of the Rear Focus Tutorial. Be sure to click on the image to enjoy a larger version. You can see more 70-200 II images here. |
Photographing Wildlife in the Palouse… You’ve Seen a Woodchuck?
When I first saw these creatures on the other side of the fence that keeps folks from the edge of the high cliffs around Palouse Falls I had no idea what they were. I asked another photographer what they were. His answer? “Rock Chuck.” While I have heard of Woodchucks I was a bit dubious. It looked like some type of large ground squirrel to me.
So while preparing this blog post I did a search for “large ground squirrel at Palouse Falls.” And up popped lots of links to Yellow-bellied Marmot, a large ground squirrel also known as a Rock Chuck. So it turns out that we were both right.
To create the image above with the hand held 70-200 with the 1.4X TC I supported my left forearm on the fence. This particular individual would hold a pose for several minutes before taking a step or two, and then pose again for a few minutes. They were quite used to people.
When the sun dropped below the canyon rim I noticed many Rock Chucks feeding on the grass but being on the people side of the fence they were not as tame as those on the other side of the fence. Next year I will have a longer lens just for them.
Today’s title is somewhat tongue in cheek; though we did see some Mule Deer in addition to the Rock Chucks nobody would confuse the Palouse with Yellowstone or Grand Teton National Parks. 🙂
|
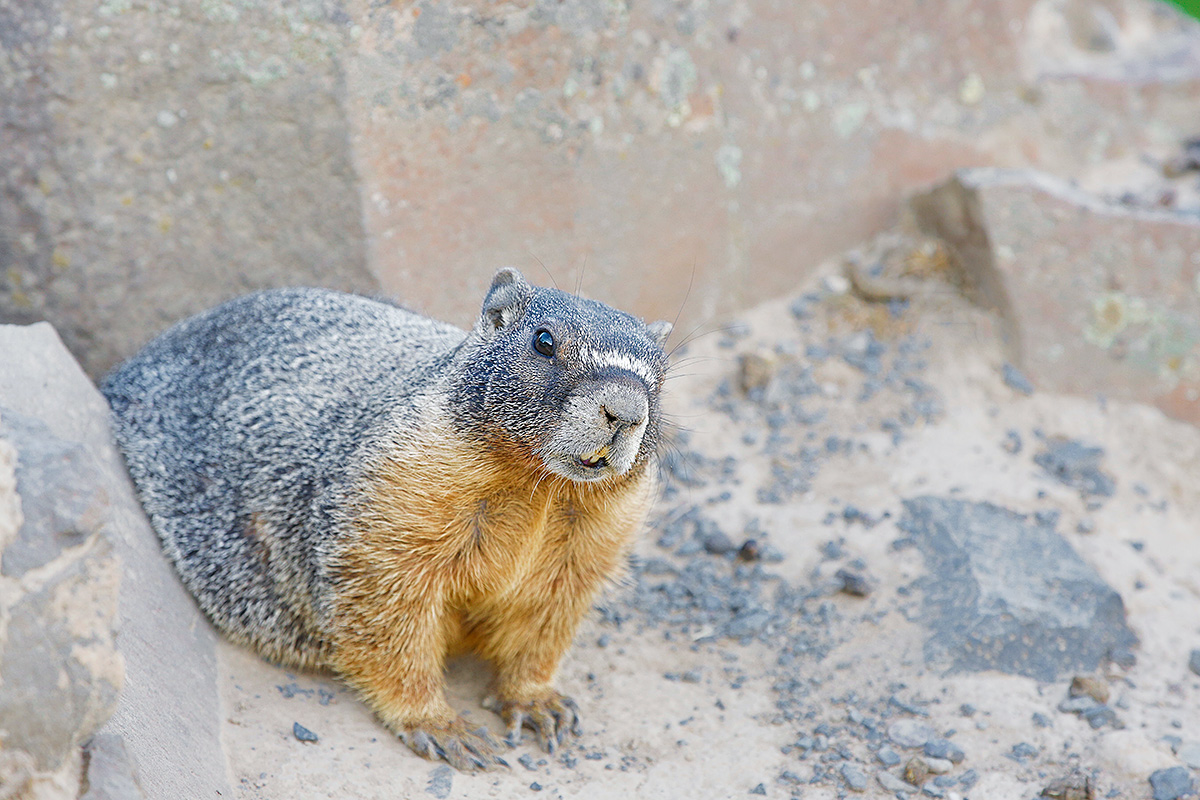
Gear was the same as above for this Art Vivid in-camera HDR image. Exposure was +1 1/3 stops +/- 2 stops around the base exposure of 1/1250 sec. at f/6.3 in Av Mode. AF was the same as well. |
Art Vivid for Wildlife?
Opportunities to use in-camera HDR for wildlife are exceedingly rare unless the subject is sleeping. But this cute little guy would pose and pose for minutes at a time, barely glancing around so I decided to give it a try. Hand holding for in-camera HDRs is generally not a good plan as any camera movement will ruin the final JPEG with mis-alignment issues. And the same goes for the animal breathing. But what the heck, once you are out there digital is free so I tried a few.
There are a two lessons here. First off, I should have zoomed out a bit for the Art Vivid capture to achieve the same framing as in the version that opened this post; in-camera HDRs are always cropped about 3% around the edge. Second, Art Vivid HDRs need a lot more light than either straight captures or Natural HDRs. I should have been at least at +2 stops of EC.
Once I got the Art Vivid JPEG into Photoshop I needed to lighten the whole image. I did that by pulling up the curve. Then I toned down the CYANs, the BLUEs, and the Yellows. I did that by reducing the saturation of each of those channels about 10-20%. When you compare the two images however you can easily see that the colors are still far richer in the Art Vivid HDR immediately above.
Image clean-up for both images was the same. I used a warped Quick Mask to cover a small white rock in the background that merged with the animal’s lower back. Then just a few swipes with the Patch Tool and the Spot Healing Brush, again to eliminate some small but distracting light-toned rocks from the BKGR. I applied my NIK 50-50 preset to the animal only in both images with after painting a Quick Mask and then sharpened the face only with a Contrast Mask (15/65/0). I painted in selective sharpening on the face using a Hide-All (Black or Inverse) Layer Mask after having applied the sharpening to the whole image (and then hiding it).
Digital Basics
Pretty much everything discussed above plus tons more is detailed in our Digital Basics File–written in my easy-to-follow, easy-to-understand style. I am not sure if the perspective control bit is covered in Digital Basics, but no matter: it is detailed above :).
Are you tired of making your images look worse in Photoshop? My Digital Basics File is an is an instructional PDF that is sent via e-mail. It includes my complete digital workflow, dozens of great Photoshop tips, the use of Contrast Masks, several different ways of expanding and filling in canvas (including the John Heado Technique), lots of color balancing tips, Tim Grey Dodge and Burn, all of my time-saving Keyboard Shortcuts, Quick Masking, Layer Masking, and NIK Color Efex Pro basics, my killer image clean-up techniques, Digital Eye Doctor, creating time-saving actions, and lots more.
APTATS I & II
Learn the details of advanced Quick Masking techniques in APTATS I. Learn Advanced Layer Masking Techniques in APTATS I. Mention this blog post and apply a $5 discount to either with phone orders only. Buy both APTATS I and APTATS II and we will be glad to apply at $15 discount with phone orders only.
DPP Raw Conversion Guide
The RAW file for the opening image was converted in DPP as are all of my RAW files. To learn why I use DPP rather than ACR for my conversions, click here and check out our DPP Raw Conversion Guide.
Which Do You Prefer?
Which do you prefer, the straight shot from the converted RAW file or the subdued version of the HDR Art Vivid JPEG? Be sure to let us know why.
Why I Like Art Vivid In-camera HDR
First off, in-camera HDRs are great for lazy folks like me who are in a hurry…. I simply do not have the time to bring the three frames in an HDR series into Photomatix and do the work needed to create traditional HDRs. Denise Ippolio is quick to point out that if your histogram has room to the left of the dark tones and room to the right of the light tones, there is no need to go HDR. While I fully understand that principle I often use Art Vivid simply to boost the colors rather than to increase the tonal range. I should try comparing a few images where I convert a RAW file, boost the colors with a Vibrance adjusmtent, and compare the result with the HDR Art Vivid JPEG, Speaking of JPEGs, another plus for in-camera HDRs is that there is no need to do a RAW conversion. Simply open your HDR JPEG in Photoshop and be sure to save it as a TIF.
5D Mark III User’s Guide
Purchase a 5D III using one of our product specific links or the logo link below, sent us your B&H receipt, and we will send you a free copy of our 5D Mark III User’s Guide.
|
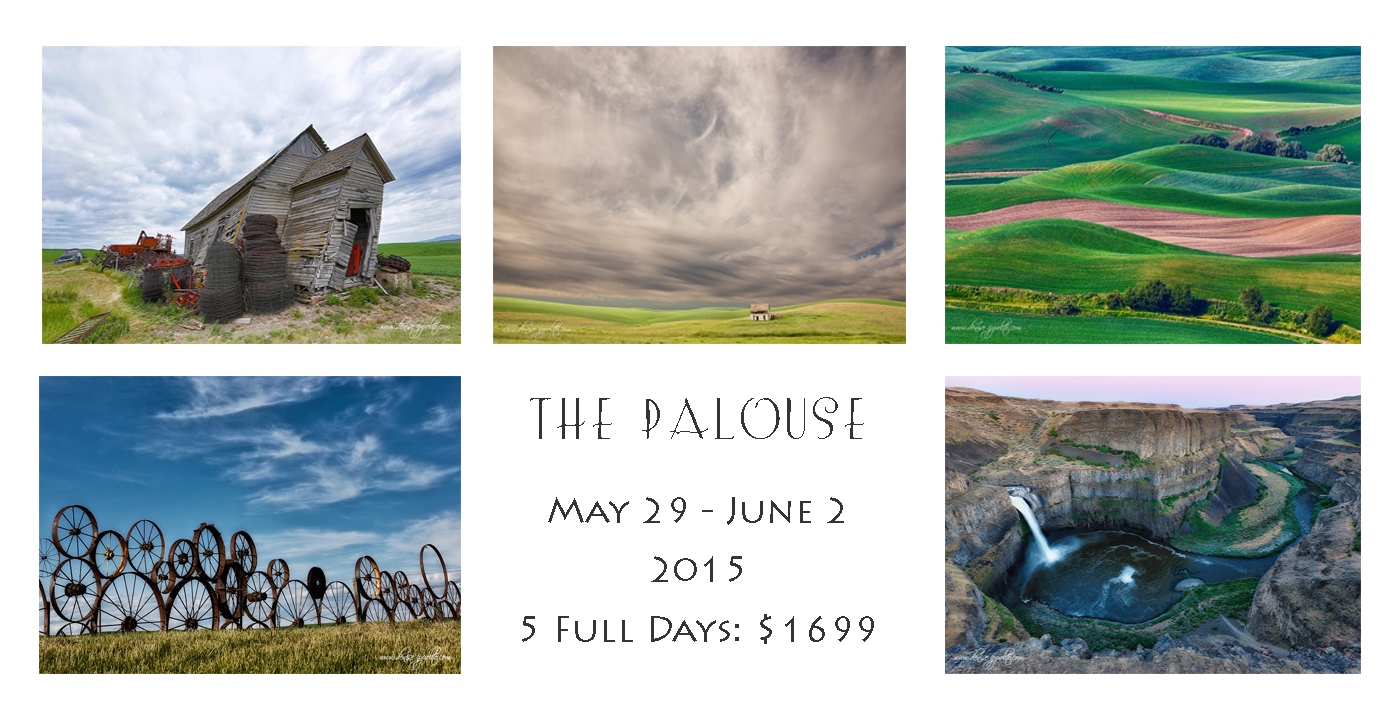
Hope that you can join us 🙂 Card and design by Arthur Morris/BIRDS AS ART |
The Palouse A Creative Adventure/BIRDS AS ART Instructional Photo-Tour (IPT)/Eastern Washington State. May 29-June 2, 2015/5 Full Days: $1699/Limit 12 photographers/Sold Out
As the trip above is now sold out, we have decided–in response to popular demand, to run a second trip after giving ourselves 2 days to recover from the first one. We have already sold six slots for the 2nd Palouse trip so please do not tarry if you wish to join us. There will not be a third trip. 🙂 See the details immediately below.
The Palouse A Creative Adventure/BIRDS AS ART Instructional Photo-Tour (IPT)/Eastern Washington State. June 5-9, 2015/5 Full Days: $1699/Limit 12 photographers/Openings 6; this trip is a go.
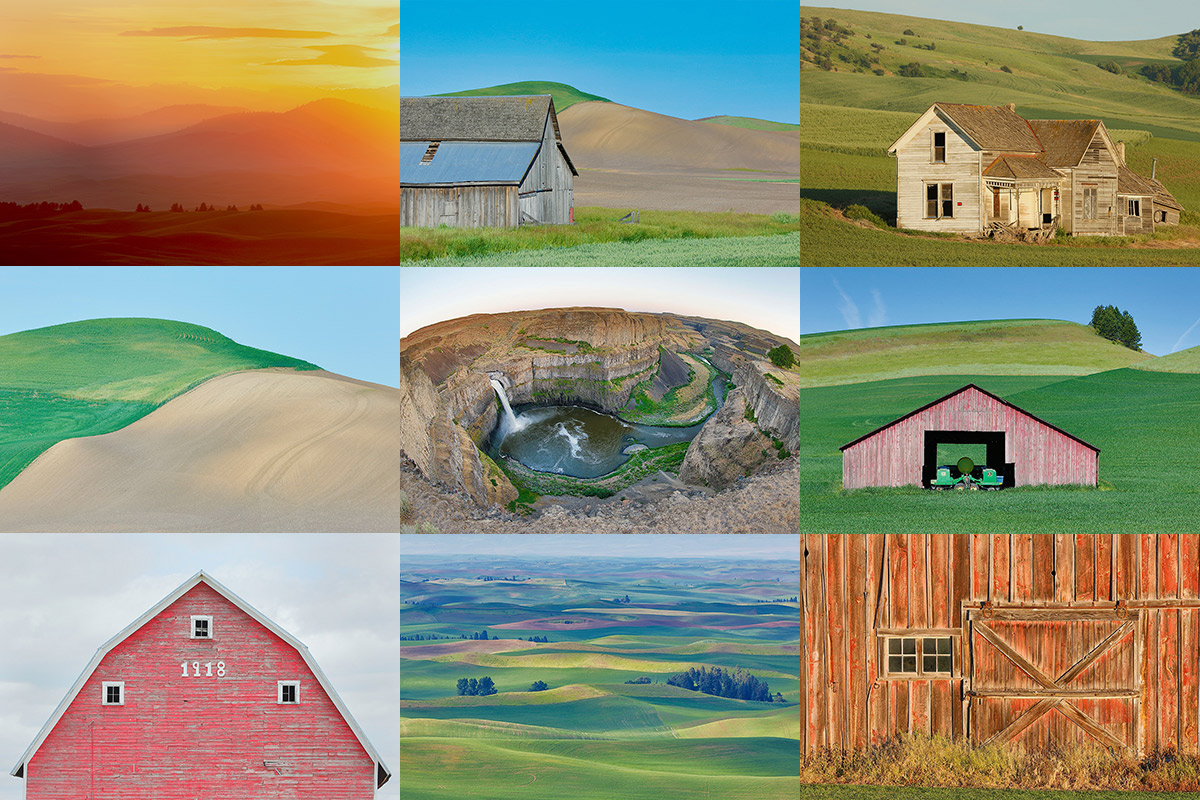
Rolling farmlands provide a magical patchwork of textures and colors, especially when viewed from the top of Steptoe Butte where we will likely enjoy spectacular sunrises and possibly a nice sunset or two. We will photograph grand landscapes and mini-scenics of the rolling hills and farm fields. We will take you to some really neat old abandoned barns and farmhouses in idyllic settings. There is no better way to improve your compositional and image design skills and to develop your creativity than to join us for this trip. Two great leaders: Denise Ippolito and Arthur Morris. Photoshop and image sharing sessions when we have the time and energy…. We get up early and stay out late and the days are long.
After 6 days of back-breaking scouting work in early June 2014 we found all of the iconic locations and, in addition, lots of spectacular new old barns and breath-taking landforms and views. We will teach you what makes one situation prime and another seemingly similar one a waste of your time.
What’s included: In-the-field instruction, guidance, lessons, and inspiration, our newfound but very extensive knowledge of the area, all lunches, motel lobby breakfasts, and Photoshop and image sharing sessions when possible.
You will learn and hone both basic and advanced compositional and image design skills. You will learn to get the right exposure every time. You will learn to develop your creative eye. You will learn the basics of HDR (high dynamic range) photography. You will learn a variety of in-camera creative techniques; Canon 5D Mark III bodies are a plus. And most importantly you will learn to see the situation and to create a variety of top-notch images. Do see both of our blogs for lots more on that in the coming weeks. You will learn how the quality and direction of light combine to determine the success of your images. And–please don’t gasp–we will be working quite a bit with sidelight when creating landscapes. Lastly, we will be touching on infrared photography.
A non-refundable $699 deposit is due now. The balance will be due on January 29, 2015. With the unpredictable nature of the photography business, I have not said this often lately, but it seems quite likely that this one will fill up very quickly. Please let me know via e-mail that you will be joining us. Then you can either call Jim or Jennifer at 863-692-0906 during business hours or send us a check; the latter is preferred.
Please send your deposit check made out to “Arthur Morris” to us at Arthur Morris/BIRDS AS ART, PO Box 7245, Indian Lake Estates, FL, 33855. If you have any questions, please feel free to contact me via e-mail. You can also contact denise via e-mail here
|
Card and design by Denise Ippolito. Scroll down here to see lots more of Denise’s Palouse images. Note that the dates on Denise’s card are for the sold out first Palouse IPT. The dates for the 2nd IPT are June 5-9, 2015. |
Support the BAA Blog. Support the BAA Bulletins: Shop B&H here!
We want and need to keep providing you with the latest free information, photography and Photoshop lessons, and all manner of related information. Show your appreciation by making your purchases immediately after clicking on any of our B&H or Amazon Affiliate links in this blog post. Remember, B&H ain’t just photography!
Amazon Canada
Many kind folks from north of the border, ay, have e-mailed stating that they would love to help us out by using one of our affiliate links but that living in Canada and doing so presents numerous problems. Now, they can help us out by using our Amazon Canada affiliate link by starting their searches by clicking here. Many thanks to those who have written.
Typos
In all blog posts and Bulletins, feel free to e-mail or to leave a comment regarding any typos, wrong words, misspellings, omissions, or grammatical errors. Just be right. 🙂


Better hope those Marmots are chucking wood. Too many trailheads out here have Marmots. That’s not bad, except at several trailheads the Marmots have decided that the rubber in parked car’s brakelines are just right for a snack. Nothing like coming back from a long hike to find that the brakes are non-functional. No kidding!
So, has it been decided if it is :
How much wood could a wood chuck, chuck OR is it How much wood would a wood chuck, chuck??? Does anyone know?
Whoops, one word on Woodchuck.
Most on-line sources show “would” but a few show “could.” Why Woodchuck and Rock Chuck??? arthur
Whatever it is, I hope Rock Chuck chucks wood, cause chucking
rocks is dangerous.
My head hurts 🙂
Doug
🙂
“How much wood would a woodchuck chuck if a woodchuck could chuck wood.”
your link to “Digital Basics File” opens a totally unrelated page. Can you fix that?
Also, I am receiving two emails for the daily BLOG. Can you fix that?
Thanks,
glenn
Good catch Glenn. Thanks. It is fixed. Shoot me an e-mail on the double subscription and I will have Jen see if she can help. Or, you can try un-subscribing once and see what happens 🙂 artie
Hmm, the second one looks oversharpened to me.
d.
He’s alive. Good to know :). Looks OK to me. Certainly not over-sharpened but I might have use a bit more Detail Extractor on the 2nd one…. You should join us at Nickerson!
Wow,
I read the comment about “losing the green” and I had to go back to look for it. I think the Marmot draws so much attention to the eye that the green goes unnoticed, unless of course you look for it. In my opinion it is not a distracting element and is just part of nature. Why make any part of nature disappear. We are always trying to mold nature to suit our eye, when in fact we should be molding our vision to suit nature. Not trying to disagree with Pat’s comment, but it seemed like a good of an opportunity to get us all to stop and think.
Love the shots Artie!
Wayne
Thanks. I just like that shade of green.
I like the art vivid photo. The orange/yellow on the cranial chest and teeth look better in the art vivid photo. The red on the background rock looks a little bit better in the art vivid photo too.
You know I love my Rock Chuck with the juicer set on high!
Go Spurs…oops I guess they aren’t playing tonight.
Congrats on the Spurs victory! At the nearby marina restaurant they actually serve Chocolate Rock Chuck shakes made with vanilla ice cream and peanut butter….
I THINK I’D LOSE THE GREEN IN THE UPPER RIGHT HAND CORNER — IT IS DISTRACTING.
I like it :). Different strokes…
Sooooo, how much wood could a rock chuck chuck, if a rock chuck could chuck wood? Or rock?
Doug