What’s Up?
I lay awake on Monday night for more than an hour having a tickle-cough fit. Then I finally figured out that breathing some steam would help. It did. Then I slept till 7:45. Finally went to my doctor in Lake Wales today. He thinks that I have had at least two respiratory bugs over the past 7 weeks. But my lungs are clear. As are my lung sounds. He started me on an albuterol nebulizer. Albuterol is a bronchodilator that relaxes muscles in the airways and increases air flow to the lungs. He also wants me breathing steam and drinking lots of decaffeinated tea. He thinks that I will be all better quite soon. I think that that is a good plan.


My Very Own 5DS R
Today I purchased my affiliate loaner Canon EOS 5DS R camera body from B&H. If what you have been learning here inspires you to purchase one please remember to use the logo-link above; it will not cost you a penny and helps me out tremendously. Many thanks, artie
|
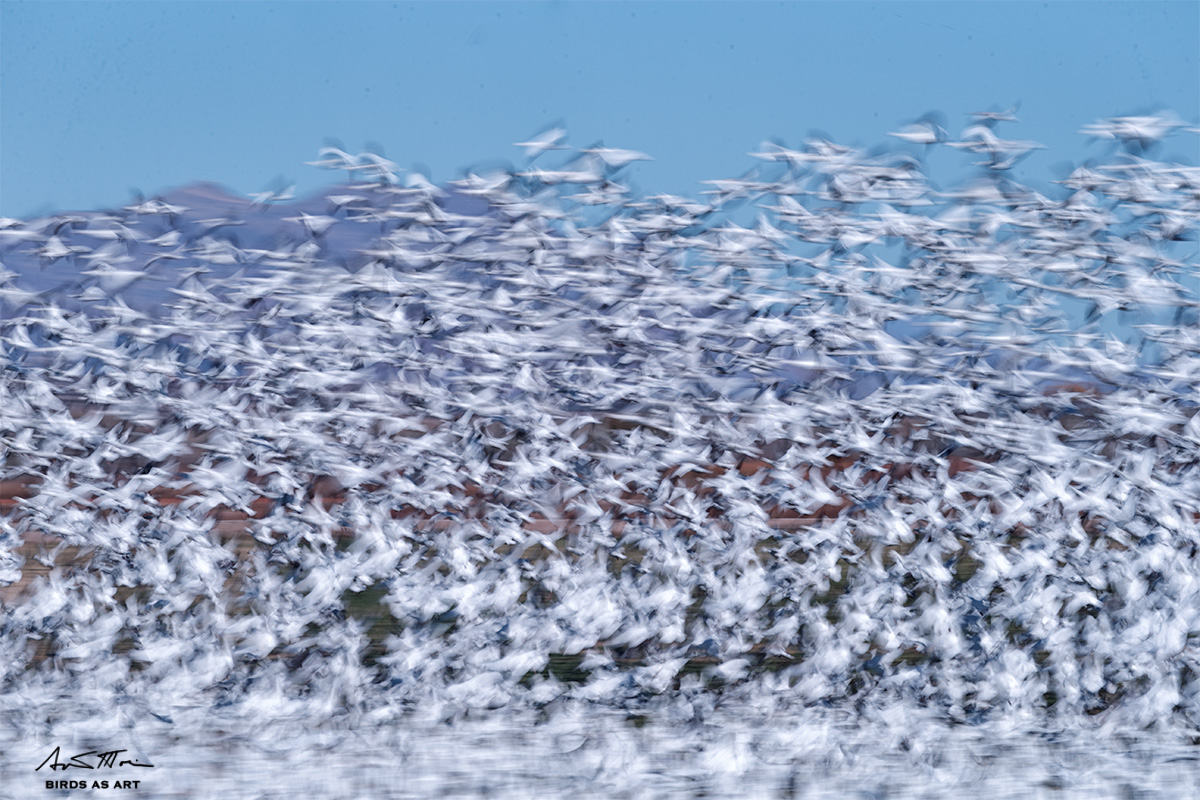
This image was created at Bosque del Apache NWR with the hand held Canon EF 100-400mm f/4.5-5.6L IS II USM lens (at 330mm) and the rugged Canon EOS-1D X. . ISO 50. Evaluative metering +1 stop: 1/13 sec. at f/6.3. Cloudy WB. Singh-Ray 3-stop Resin Mor-Slo Neutral Density Filter. Center AF point/AI Servo Expand/Rear Focus AF as framed was active at the moment of exposure (as is always best when hand holding). Click here to see the latest version of the Rear Focus Tutorial. Click on the image to see a larger version. Image #1: Snow Geese snowing… |
The Basic Premise
Using either the Singh-Ray 3-stop Resin Mor-Slo Neutral Density Filter or their 5-stop Glass ND allows me to get down to extremely slow shutter speeds even in bright sun without having to stop down to f/too many dust spots. I own both of these ND filters in the 77mm size that fits both my 100-400II (used to create all four of today’s images) or my old favorite blast off lens, the 70-200m f/2.8L IS (with either the 1.4X III or the 2X III TC). I use the 3-stop ND in cloudy bright conditions and the 5-stop in bright sun.
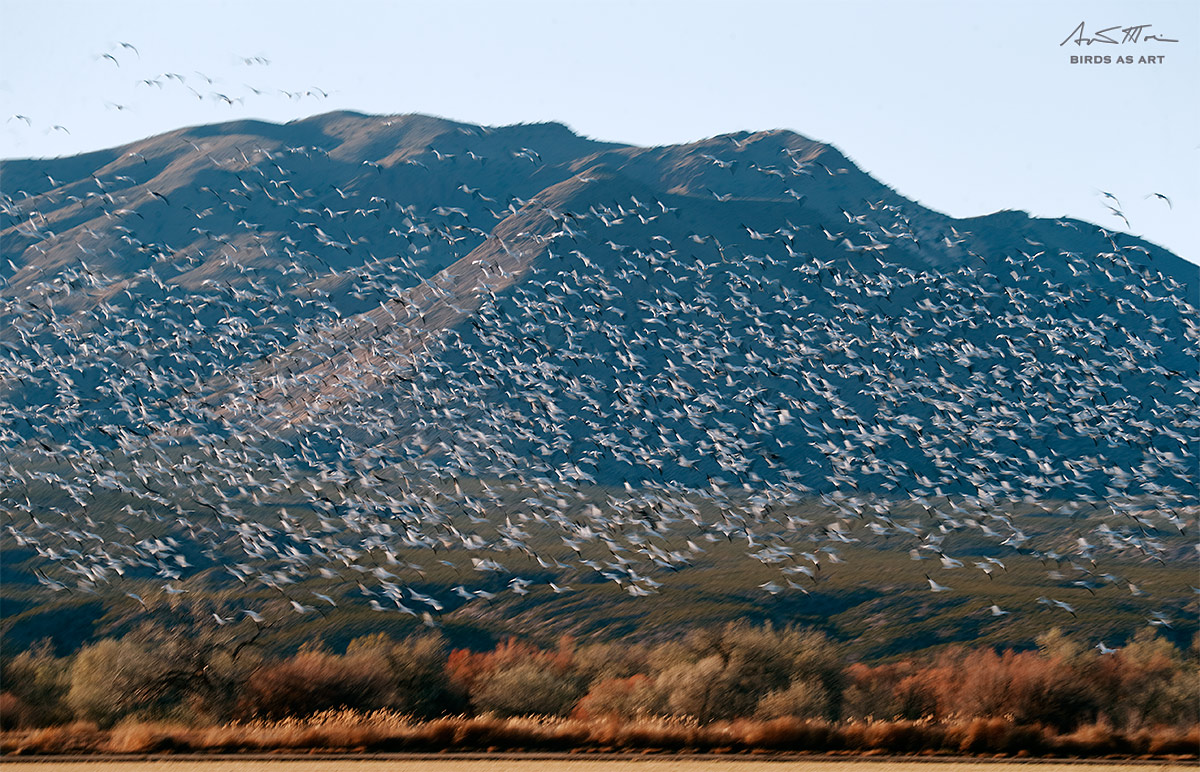
All four images here today were made in relatively bright sun yet they look as if they were created in a huge soft box. What gives? The blend blur effect: When you are working at extremely slow shutter speeds such as those between 1/8 and ½ or even one full second and panning as you shoot, the whites of the geese effectively blend with the middle tones of the background thus softening the otherwise harsh whites as you pan. And the background is softened as well. Bright sun is magically transformed into cloudy bright.
As we learned here the other day, you can prove to yourself that the blend blur effect exists as follows: With an ND filter in place and a very slow shutter speed set—hint: you need to be in Manual mode–play with your exposure settings and make a few test exposures until you have at least some blinkies on the white geese. Now take a second test exposure while panning: no more blinkies. You have just proven to yourself that the blend blur effect does indeed exist. In addition to creating wonderful pan-blurs you can tame the harsh light at any time of day, even high noon.
|
This image was created at Bosque del Apache NWR with the hand held Canon EF 100-400mm f/4.5-5.6L IS II USM lens (at 271mm) and the rugged Canon EOS-1D X. . ISO 50. Evaluative metering at zero; 1/15 sec. at f/9. Cloudy WB. Singh-Ray 3-stop Resin Mor-Slo Neutral Density Filter. Two AF points up from the center AF point/AI Servo Surround/Rear Focus AF as framed was active at the moment of exposure (as is always best when hand holding). Click here to see the latest version of the Rear Focus Tutorial. Click on the image to see a larger version. Image #2: Snow Geese against the Chupadera Mountains |

Singh-Ray Filters
Singh-Ray filters have been used by the world’s top photographers for many decades. As always, I will have my 77mm Singh-Ray Warming Polarizer in my vest in case of rainbows. And I now travel (as above) with various Singh-Ray ND filters so that I can create pleasing blurs even with clear skies and bright sun. See here for a great example.
No other filter manufacturer comes close to matching the quality of Singh-Ray’s optical glass that is comparable to that used by NASA. And they continue to pioneer the most innovative products on the market like their ColorCombo polarizer, Vari-ND variable and Mor-Slo 15-stop neutral density filters. When you use their filters, you’ll create better, more dramatic images and, unlike other filters, with absolutely no sacrifice in image quality. All Singh-Ray filters are handcrafted in the USA.
Best News: 10% Discount/Code at checkout: artie10
To shop for a Singh-Ray’s most popular solid ND filter, the 10-Stop Mor-Slo Glass Filter liter (for example), click on the logo link above, click on “Neutral and color Solid Neutral Density Filters (glass), then click on “Mor-Slo™ 5, 10, 15 and 20-Stop Solid Neutral Density Filters (glass),” choose the size and model, add to cart, and then checkout. At checkout, type artie10 into the “Have a coupon? Click here to enter your code” box, and a healthy 10% discount will be applied to your total. In addition to enjoying the world’s best filter at 10% off you will be supporting my efforts here on the blog.
The 10- and 15-stop Mor Slo filters are great for landscapes with water and moving clouds. With the 10-stop, 1/125th becomes 8 seconds and with the 15-stop, 4 minutes. I now own the 10-stop ND and will look for opportunities to use it. I am also testing their new Hi-Lux filters. More on that at some point.
|
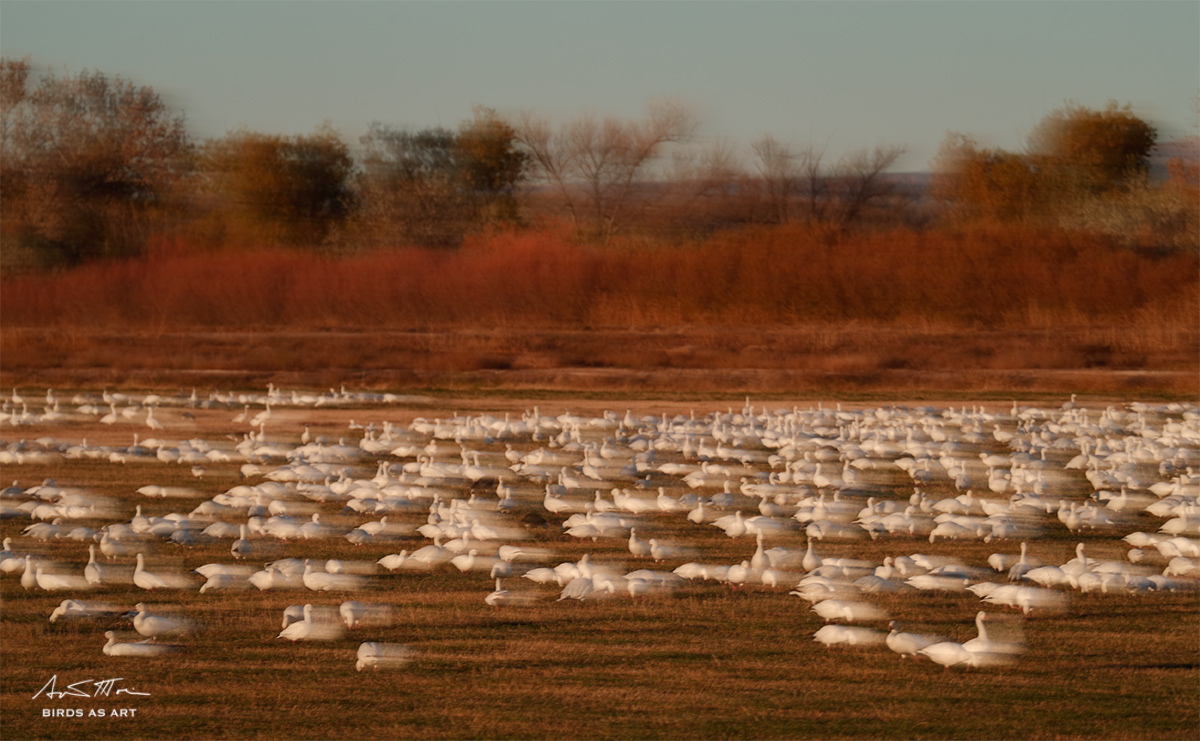
This image was created at Bosque del Apache NWR with the hand held Canon EF 100-400mm f/4.5-5.6L IS II USM lens (at 340mm) and the rugged Canon EOS-1D X. . ISO 50. Evaluative metering -1/3 stop: 1/15 sec. at f/6.3. Cloudy WB. Singh-Ray 3-stop Resin Mor-Slo Neutral Density Filter. Two AF points below the center AF point/AI Servo Expand/Rear Focus AF as framed was active at the moment of exposure (as is always best when hand holding). Click here to see the latest version of the Rear Focus Tutorial. Click on the image to see a larger version. Image #3: Snow Geese jiggle blur with a slight pan at the end |
The Technique
The jiggle blur was taught to me by Denise Ippolito. Simply jiggle the lens while making a relatively long exposure. She loves 1/6 second for her jiggle blurs. Here, working at 1/15 second, I had to jiggle a bit faster. Then toward the end I added a bit of pan to the right. I was working with one of Lou Newman’s daughter when there was not too much going on. We did pan blurs, vertical pan blurs, squiggle blurs, and even a few zoom blurs. She had fun and so did I. One of the amazing things about playing with blurs as we did is that while some of the images turn out to be extremely pleasing others made seemingly with the very same technique are insta-deletes. Go figure. As we stress in “A Guide to Pleasing Blurs” the number one rule of creating pleasing blurs to to make lots of images.
Summing Up
#1: Sharp images of goose blast-offs made in bright sun, on sun angle or not, simply do not work. All are invited to send me their very favorite bright sun/high shutter speed white geese blast-off via e-mail: a sharpened 1000 pixel wide JPEG is best.
#2: Having a 3-stop or 5-stop drop-in ND in place lets you get down to really slow shutter speeds in bright sun while avoiding the tiny apertures like f/22 and f/32 that maximize the effects of sensor dust. Remember: do not use even the 3-stop ND if doing so makes you use a higher ISO.
#3: Well done pleasing blurs win contests.
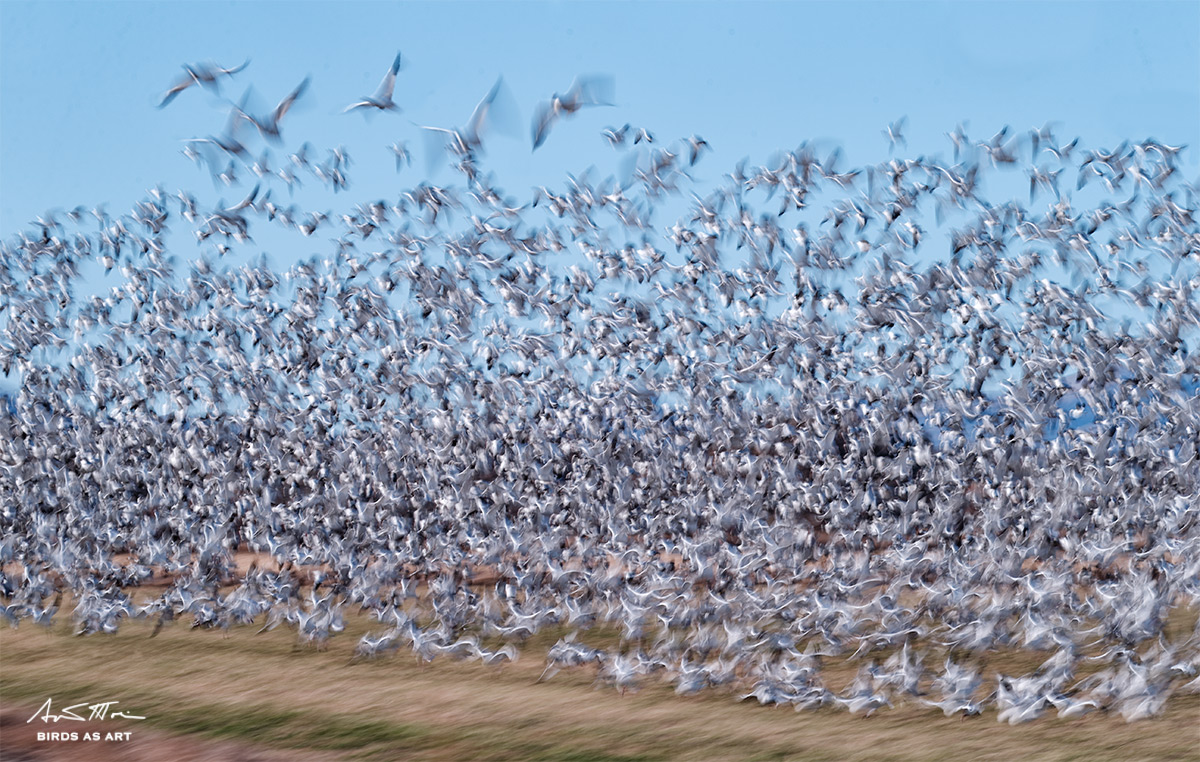
#4: I am always amazed by the variety of looks that you can come up with when working at very slow shutter speeds. To me it feels a lot like playing. You can vary your panning speed or even hold the lens still. Tip: if the latter you need to go to faster shutter speeds like 1/30 or 1/60 second lest the birds be rendered as long, unrecognizable streaks…. All are invited to join the fun.
#5: While the techniques above are great at Bosque, they can rock as well at any location where there are large groups of birds in the air at any one time.
|
This image was created at Bosque del Apache NWR with the hand held Canon EF 100-400mm f/4.5-5.6L IS II USM lens (at 200mm) and the rugged Canon EOS-1D X. . ISO 50. Evaluative metering +2/3 stop: 1/15 sec. at f/9. Cloudy WB. Singh-Ray 3-stop Resin Mor-Slo Neutral Density Filter. Two AF points up from the center AF point/AI Servo Surround/Rear Focus AF as framed was active at the moment of exposure (as is always best when hand holding). Click here to see the latest version of the Rear Focus Tutorial. Click on the image to see a larger version. Image #4: Snow Geese flock blast off coming at you |
Your Fave?
Which of today’s four features images do you like best? Do let us know why.
Xume Stuff!
I think that it was blog regular Mike Cristina who first mentioned the magnetic Xume filter holder system to me. IAC, I tried it and loved it. But I do not recommend the system for all lenses; see below on that….
First I screw one XUME 77mm Lens Adapter onto the front of my 100-400 II and another onto the front of my 70-200 f/2.8 L IS II.
Next I screw my Singh-Ray 77mm 3-Stop Resin Mor-Slo Neutral Density Filter, my Singh-Ray 77mm 5-Stop Glass Mor-Slo Neutral Density Filter, and my Singh-Ray 77mm LB Warming Circular Polarizer into their own individual XUME 77mm Filter Holders.
The lens adapters stay on the lenses. The ND filters and the polarizer stay screwed into their own filter holder. The filter/filter holder combos are stored in the lovely labeled leather pouches that come with each Singh-Ray filter purchase. They three of them fit perfectly into the small upper left zippered pocket of my Xtrahand vest. When I wish to mount a filter onto the front of one of my intermediate telephoto lenses I simply remove the lens hood, grab the filter that I need, and pop it securely into place in less than an instant. Ah, it’s the magnetic thing!
Be sure to replace the lens hood so that you do not accidentally dislodge the filter by whacking it against some shrubbery. To remove the filter simply remove the lens hood, pop the filter off instantly, place it back in its leather case, and stow it. With the Xume system there are no more tears. You do not have to screw and unscrew the filters onto the front of the lens. There are no more jammed threads. The Xume lens adapters and the filter holders are precision-machined to guarantee fast and secure filter attachment every time.
It is an elegant system but I can recommend it only for intermediate telephoto lenses: when used with short lenses and short zoom lenses it some serious vignetting will occur at the wide(r) focal lengths.
If you own only one lens and two filters I would recommend the XUME 77mm Lens Adapter and Filter Holder Starter Kit. It contains one lens adapter and two filter holders.
The next step up is the XUME 77mm Lens Adapter and Filter Holder Pro Kit. It offers two lens adapters and four filter holders. That one was perfect for me.
If you need Xume stuff for front element sizes other than 77mm please use this link; you will find two pages of good stuff!
Namibia
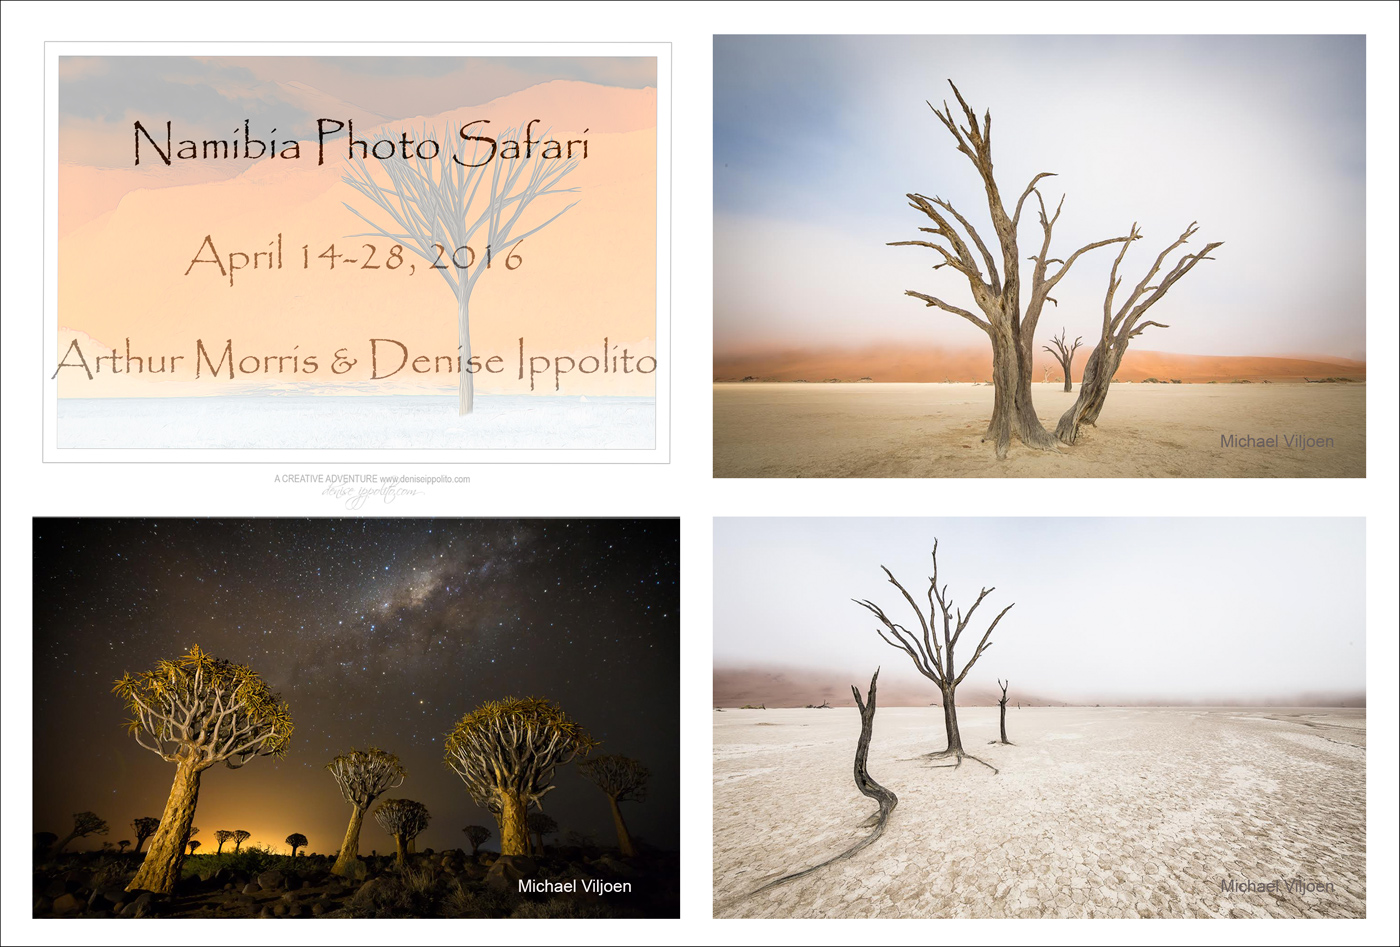
Photos of Namibian dunes, dead trees, birds, and wildlife often grace prestigious natural history calendars and are honored annually in pretty much all of the top flight nature photography contests including and especially the BBC Wildlife Photographer of the Year Competition and the Nature’s Best Windland Smith Rice International Awards Contest. Both denise and I have long dreamed of visiting. Our dream is coming true. With four folks signed up before the tour was even announced, this trip is a go. Most traveling from the US will likely want to be on one of the direct flights to Johannesburg, South Africa from New York’s JFK (on April 13, 2015 so as to arrive in Windhoek on the 14th). In addition, we would both be thrilled to meet some of our overseas followers on this trip.
In addition to enjoying several world class nature photography locations, you will learn more than you ever thought possible via in-the-field instruction from two of the best and informal image sharing and Photoshop sessions at the lodge. We hope that you can join us.
The 2016 Namibia BIRDS AS ART/A Creative Adventure Instructional Photo-Safari: April 14-28, 2016 on the ground: $8999. Limit: 10 photographers/openings: 4.
Our truly great itinerary is below. This workshop was planned with the help of two BBC-honored local photographers with an intimate knowledge of the area who will act as our guides for the entire trip. This IPT will be co-led by Denise Ippolito and yours truly. The dates and the price are set in stone: April 14-28, 2016. 15/days/14 nights: $8999 from Windhoek, Namibia (Hosea Kutako International Airport, airport code WDH). Please contact me via e-mail if you would like to register. Then please fill out, print, and sign the Registration and Release forms that are linked to here. Then mail it to us here: PO Box 7245, Indian Lake Estates FL 33855 along with your $3,000 non-refundable deposit check made out to “Arthur Morris.”
The second payment of $3,000 is due on November 15, 2015 and the final payment of $2,999 is due on February 1, 2015. As with the deposit, checks only.
Single supplements may be available for parts (or all) of the trip. They will be quite expensive. Best not to ask 🙂 Please inquire as to availability. If you or we are unable to line up a same sex roommate for you, you will be charged the single supplement on a pro-rated basis.
Travel Insurance
Please understand that we need the deposits for international trips as arrangements must be paid in full far in advance. If everybody decides to cancel then we are sort left holding a very short straw 🙂 Seriously interested folks are urged to consider getting trip insurance within two weeks of sending their deposit checks. There are lots of options for US residnets with Travel Services Insurance (TSI). You can explore them here.
The Namibia IPT Itinerary
Day 1: April 14, 2016. Fly into Windhoek (Hosea Kutako International Airport, airport code WDH. Spend the night at River Crossing Lodge. Note: folks traveling from the US and many other destinations will need to depart on redeye flights on April 13th. You need to be sure that you will be in Windhoek on April 14, 2015!
Day 2: Early departure to QuiverTree Forest Lodge on the outskirts of Keetmanshoop. Here we will be able to capture the beauty of the magnificent QuiverTree forest as well as have access to the Giant Playground area for some spectacular landscape photography. The sessions will include afternoon and evening shoots, the latter with stars, milky way, and star trails photography. Night photography instruction will be provided. In addition, we will let you know in advance what lenses and accessories you will need for the night photography.
Day 3: After breakfast we depart for the luxurious Sossusvlei Dune Lodge for 3 nights inside Namib Naukluft National Park. The distance to Sossusvlei is about 550km and the trip should take about 7 hours. Thanks to our experienced guides we will enjoy unparalleled after hours access to dead tree scenics at Dead Vlei. Arrangements have been made to to leave the lodge in the mornings an hour before sunrise to capture the best possible lighting conditions. We will be visiting Dead Vlei and Dune 45. There is a fairly strenuous up-and-down hike to some of the best photo locations that should take really fit folks about 15-20 minutes and as much as 45 minutes for the older fit folks or those with a bad knee. Denise is in the former category, Artie fits in both of the latter categories :). At Sossusvlei two desert systems come together: the beautiful red dunes of the Kalahari desert and the breathtakingly stark Namib desert. The desert experience is a surreal and life-changing one and even the best images do not reflect the amazing beauty of these unique deserts. Deadvlei, with its ancient trees in the now dried up lake, is a feast for photographers who are looking for something stark, different, and dramatic. Along with the spectacular landscapes we should get to photograph some wildlife as well with chances for oryx and springbok among others.
Day 6: From Sossusvlei we head off to Swakopmund to spend some three nights at the Swakopmund Beach Hotel. One morning will head into the dunes to target species such as the Desert Chameleon, Horned Adder, Sand-Diving Lizards, and Palmato Gecko—the world’s cutest gecko. We will spend time photographing the amazing bird life in and around the Walvisbay area. The Salt Mine and bay area is especially productive with a huge selection of waders and other waterfowl along with large numbers of flamingoes. We will enjoy one chartered boat trip to target pelicans in flight. Those and a selections of skua’s and cormorants will keep the most discerning bird photographers happy. Afternoons in the area will be spent driving along the beach to the huge seal colonies and photographing their playful interactions and antics. A tentative schedule is below:
Day 7: Morning (private tour) Desert Experience photographing Palmato Gecko / Sidewinders / Desert Chameleon etc, etc. Afternoon we either shoot Pelican point for seals or Walvisbay for flamingos and more.
Day 8: Morning bay cruise with chartered boat shooting pelicans flying in . We will likely spend the afternoon with the seals at Pelican point.
Day 9: After breakfast we depart for Etosha; arrive that afternoon at Halali and spend 3 nights there. Just when you thought it could not get any better we head further north to the wide-open plains of Etosha. Here the wildlife spectacle is arguably one of the best in Africa. Etosha is home to not only the Big Five, but also a variety of other species such as Cheetah, Honey Badger, Oryx, Springbok, Dik-Dik, Black-Faced Impala, Eland, Ostrich and more. Depending on our route this could take as long as four hours to get to the park entrance and another 2 hours drive to Halali. We will travel about 400km
Day 12:. We wrap-up at Halali and move down to Okaukuejo where we will spend three nights. Okaukuejo Camp is famous for its large floodlit waterhole, the hub of animal activity especially in the early morning and early evening hours. We will see and photograph many species including and especially the endangered Black Rhino. There will be game drives during the say. For the night water hole photography flash is optional but recommended.
Day 15: April 28, 2016. We make the 4-5 hour drive back to Windhoek in time for your international flights.
This price of this tour includes:
All Accommodations.
All breakfasts and dinners.
Logistics make formal lunches impossible. There will, however, be a variety of snacks including nuts and cheeses along with sodas and bottled drinking water in each vehicle.
Bottled water at the lodges and in the vehicles. Also included at the lodges are soft drinks and sodas and local wines and liquors (excluding premium and imported hard drinks).
All transportation from the time you arrive in Windhoek to the time you leave again.
All park entrance fees
One extra-late night in Deadvlei where we will use NWR vehicles for transport.
The chartered boat activities in Walvisbay.
The Private Desert Experience tour in Swakopmund.
The price of this tour does not include:
Your flights to and from Windhoek.
Visa costs: no visa is needed for folks from the US and most other countries.
Gratuities and items of a personal nature.
The Bosque Site Guide
If you can’t make or afford a Bosque IPT, or if the holidays preclude your joining one, be sure to get yourself a copy of my Bosque Site Guide. All BAA Site Guides are designed so that with a bit of study you can show up at a great place and know exactly where to be at what time on what wind and in what lighting conditions. And on what wind. With a Site Guide on your laptop you will feel like a 22-year veteran on your first visit. Site Guides are the next best thing to being on an IPT. If you plan on visiting Bosque it would be foolish to make the trip without having this guide in hand. Why spend money on gear and travel and then spend days stumbling around in the wrong spot? If you have visited previously, and are still unsure of where you should be at this time of day with that wind, this guide will prove invaluable to you as well. Even folks visiting Bosque for the tenth time will learn a ton as I share my secrets and hold nothing back….
In the next week or so, I will be working on a very short but valuable information-packed 2015 Bosque Current Conditions Guide; it will be send free to all who have previously purchased the Bosque Site Guide and will also be available as an inexpensive, separate, stand-alone purchase.


Please Remember to use our Affiliate Links 🙂
To show your appreciation for my continuing efforts here, we ask, as always, that you use our the B&H and Amazon affiliate links on the right side of the blog for all of your purchases. B&H is recommended for you major photography gear purchases, Amazon for your household, entertainment, and general purpose stuff. Please check the availability of all photographic accessories in the BIRDS AS ART Online Store, especially the Mongoose M3.6 tripod heads, Gitzo tripods, Wimberley heads and plates, LensCoats and accessories, and the like. We sell only what I have used, have tested, and can depend on. We will not sell you junk. We know what you need to make creating great images easy and fun. And we are always glad to answer your gear questions via e-mail. I just learned that my account was suspended during my absence; it should be up and running by Monday at the latest.
I would of course appreciate your using our B&H affiliate links for all of your major gear, video, and electronic purchases. For the photographic stuff mentioned in the paragraph above we, meaning BAA, would of course greatly appreciate your business. Here is a huge thank you to the many who have been using our links on a regular basis and visiting the BAA Online store as well.
Be sure to like and follow BAA on Facebook by clicking on the logo link upper right. Tanks a stack!
Typos
In all blog posts and Bulletins, feel free to e-mail or to leave a comment regarding any typos or errors. Just be right 🙂



Xume sounds like the solution I’ve been waiting for for years! I had pretty much given up on most filters because it was such a pita to mount & remove, and not drop or lose in the process. Just ordered (via your link, of course).
Many thanks. You will love em. a
Art, with all the camera bodies you have, it would be interesting to see a “grid” explaining when you use what body.
I wish that I knew and I wish that it were that simple 🙂
ps: I will give it some thought.
Hey Artie,
When does your San Diego exhibit start? Laurie and I are going to be at Borrego Springs for the month of January, and I of coarse will be with you for a few of those days in La Jolla. Considering its not far to San Diego from Borrego Springs, we would love to take a look as some of your printed work. Please advise and I am looking forward to seeing your and Denise in January. Otherwise, have a great Holiday Season.
More great images. Guess I need to get a couple of ND filters to mess around with. When we were at Bosque, I tried a couple of blurs with a polarizer filter and was not so please with the results. Still going thru my Bosque shots. The more I do it, the more I find that I had previously glossed over but only to find potential. A couple of my favorites will be given as Christmas presents to my kids
Frank.
Hi Frank and Laurie, Sounds like fun. Check out the springs for birds coming to water and LMK how you do.
I very much hope that you can make my program at the Nat on the morning of SAT JAN 16, 2016. The opening of the exhibit follows immediately after the program.
Thanks for liking the blurs; I do to 🙂 The polarizer can be OK if you know how to set “it to dark.” You should have asked me :). Barring that if you search for that topic in the little white box top right on each blog page you should find it….
Keep up on reviewing the images. I too sometimes find a really good one long after I thought that I was done….
later and much love and see you soon on the San Diego IPT.
a
What?
No Chicken Soup?
Feel better Artie.
Henry
Tis the season of URI and when I have that going on I love my steamy showers and sometimes twice a day.
Sounds like a good plan. a
Al – Albuterol can cause some people to become anxious or agitated. I have asthma and don’t have any of those albuterol side effects. Try using it before exercise – like walking and carrying your equipment. That is what I do and it does wonders.
Thanks Gloria. I intentionally did not read about the side effects 🙂 I am feeling fine. Right now I am in resting mode as far as physical activities. I cannot wait to get back in the pool. later and love, a