Image Questions
#1: Of the four featured images, which is your favorite. All are invited to leave a comment and let us know why they made their choice.
#2: Which basic compositional rule did I break when I created the second and the fourth images?
What’s Up?
Today is Friday 12 November 2021. I was out of bed well before 6am. It was pouring when I got up. Just for fun, I checked the Weather.com for ILE: cloudy with no chance of rain. You would at least think that they could look out the window … It is supposed to be cloudy this afternoon so I will be heading back to my new favorite trail at Circle B Bar Preserve. See more on this exciting location below. Wherever you are, and whatever you are doing, I hope that you too have a great day. This blog post took more than four hours to prepare.
Remember that you can find some great photo accessories (and necessities, like surf booties!) on Amazon by clicking on the Stuff tab on the orange/yellow menu bar above. On a related note, it would be extremely helpful if blog-folks who, like me, spend too much money on Amazon, would get in the habit of clicking on the Amazon logo link on the right side of each blog post when they shop online. As you might expect, doing so will not cost you a single penny, but would be appreciated tremendously by yours truly. And doing so works seamlessly with your Amazon Prime account.
Please remember that if an item — a Delkin flash card, or a tripod head — for example, that is available from B&H and/or Bedfords, is also available in the BAA Online Store, it would be great, and greatly appreciated, if you would opt to purchase from us. We will match any price. Please remember also to use my B&H affiliate links or to save 3% at Bedfords by using the BIRDSASART discount code at checkout for your major gear purchases. Doing either often earns you free guides and/or discounts. And always earns my great appreciation.
|
|
|
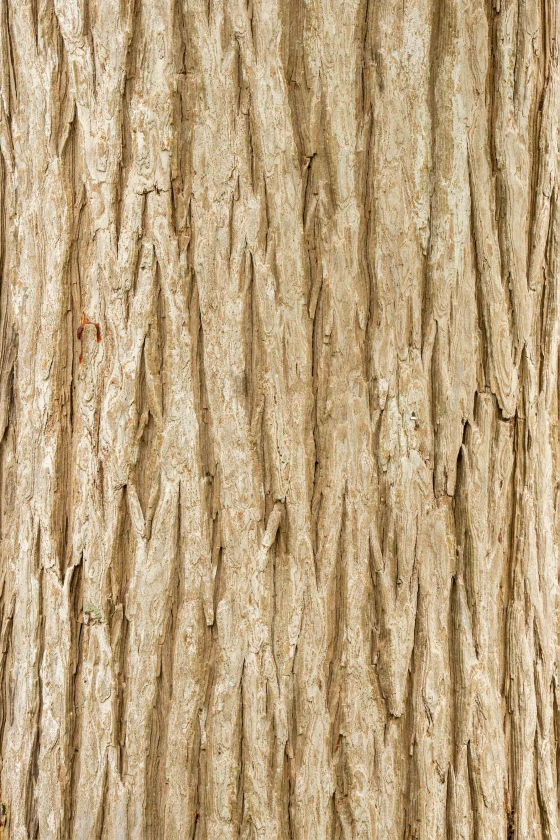
I created this image on 4 November at Circle B Bar Preserve in Lakeland, FL. While standing, I used the Levered-clamp Flexshooter Pro/Induro GIT 304L tripod-mounted Sony FE 200-600mm f/5.6-6.3 G OSS lens (at 600mm) and The One, the Sony Alpha 1 Mirrorless digital camera. ISO 800. Exposure determined via Zebras with ISO on the rear dial: 1/40 sec. at f/16 (stopped down 2 2/3 stops) in Manual mode. RawDigger showed that the brightness of the raw file was perfect. AWB at 2:55pm on a cloudy afternoon. Tracking: Spot (S) AF-C Bird/Eye Detection AF was active at the moment exposure and worked perfectly. Be sure to click on the image to enjoy the hi-res version. Image #1: Bark detail: Pond (or Bald) Cypress
|
Circle B Bar Preserve Revelation
As previously noted here, I spent last Thursday afternoon walking a previously un-visted-before-by-me trail at the Circle B Bar Preserve in Lakeland, FL. It was a beautiful walk through what seemed like a pristine marsh and an ancient cypress swamp. Best of all, there were lots of Anhingas, Common Gallinules, Ospreys, Great Blue Herons, along with a variety of other wading birds. If you own a copy of the BAA Middle of Florida Photographic Site Guide that I did with Joe Przybyla and would like information on this newly discovered trail, shoot me proof of purchase via e-mail with the word’s “Latest Info on Circle B Bar” in the Subject line.
Why Put the Sony 200-600 G Lens on a Tripod?
I take great delight in heading out to the beach with just the hand held Sony 200-600 G lens and an a1. Hand holding allows a tremendous amount of freedom and allows you to get into position and set up a shot much more easily than when working with the tripod-mounted 600mm f/4 GM lens. The 2-6 focuses much closer than the 600 f/4. On sunny days, the f/6.3 maximum aperture (at the longer focal lengths) is not a bother at all. And with good sharpness techniques, you can work with the 1.4X teleconverter as well.
But when working in low light conditions on cloudy days or in the woods, putting the 2-6 on a tripod is pretty much a necessity. The bark detail image above was created at 600mm with a shutter speed of 1/40 second. Most folks would be up the creek without the proverbial paddle with those settings. For me, a tripod was a necessity for Image #1 and for the three Anhinga images below as well.
200-600 owners have two options when they need to mount this very versatile zoom lens on a tripod. They can go with the Wimberley P-35 Lens Plate as I do, or with the Wimberley AP-620 Replacement Low Foot for Sony. Learn why and more in the next two items below.
|
|
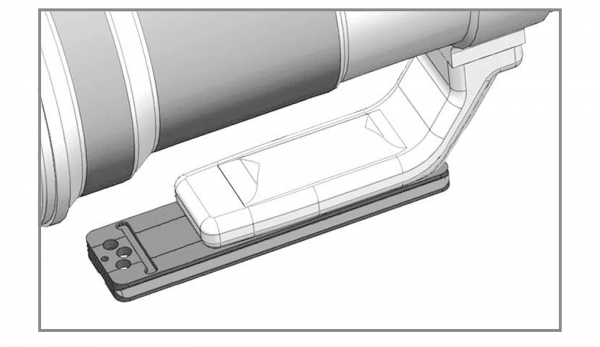
Figure 1: Wimberley P-35 Plate properly positioned and mounted on the Sony 200-600 G lens |
My Choice for the 200-600: the Wimberley P-35 Lens Plate
Because I hand hold this lens most of the time, I want to be able to remove the lens foot with the plate attached to save weight when I am working without a tripod. If there is a chance that I will be using the Panning Ground Pod, I will stick the foot/plate combo into a pocket, my vest, or my fanny pack so that I can grab it when needed.
Mounting the foot/plate combo onto the lens via the quick release mechanism is a snap. Many folks complain that this arrangement is unsafe, unstable, and insecure. I disagree, but only 100%. If you finger-tighten the double-ended lever properly, you are good to go and will never have a problem.
The P-35 lens plate is a 5.0” long, double dovetail, Arca-Swiss style quick- release plate. It is used to connect a camera lens, fitted with both a rotation collar and tripod mounting foot, to a compatible quick-release clamp. Wimberley plates are compatible with most Arca-Swiss style quick-release clamps, such as those made by Wimberley, Really Right Stuff, Kirk Enterprises, Markins, Arca-Swiss, Foba, Graf and others.
When the plate is mounted fully forward as shown in the diagram above, this two-screw lens plate matches up perfectly with the Sony 200-600. The needed bushing is included. The plate remains fully within the jaws of the clamp of the Levered-clamp Flexshooter Pro even when your rig is at maximum back-heaviedness (to coin a phrase). You are at maximum back-heaviedness when you are using an a1 body with the battery grip and the 2X TC. With all other combinations, you will need to move the plate back in the clamp to properly balance your rig. And there is plenty of room on the plate at the front even when you are using only the bare a1 on the 200-600.
You can order your P-35 plate here in the BIRDS AS ART Online Store.
|
|
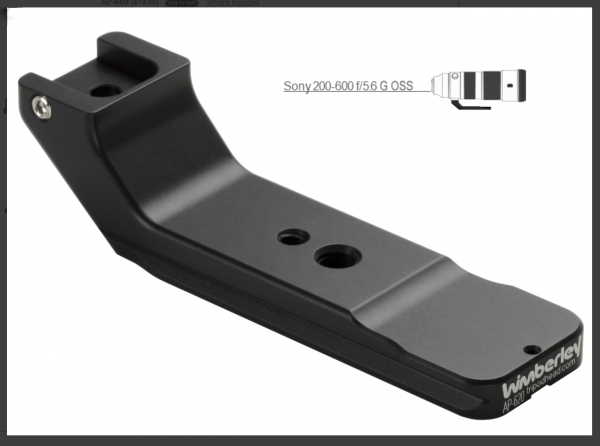
Figure 2: Wimberley AP-620 Replacement Low Foot for Sony |
Right for Some: the Wimberley AP-620 Replacement Low Foot for Sony
For folks who use their 200-600s on a tripod all or most of the time, the Wimberley AP-620 Replacement Low Foot for Sony is clearly the best choice. This low foot is very light at only 4.5 ounces and like all the Wimberley stuff, is elegantly designed. It is secured to the lens via a single 1/4-20 screw and thus, is no longer quick-release removable.
The AP-620 Replacement Foot fits the Sony 200-600 f/5.6 lens and serves three main purposes:
1. It is somewhat stiffer than the factory tripod mounting foot connected to a lens plate, thus reducing flex and vibration (or not …)
2. Functions as the Arca-Swiss style lens plate.
3. Creates the ideal geometry for using your lens on the Levered-clamp Flexshooter Pro and, as above, allows you to balance your rig optimally.
Note: Wimberley lens plates are compatible with Arca-Swiss style quick-release clamps such as those made by Wimberley, Kirk Enterprises, Really Right Stuff, Arca-Swiss, Markins, and others. I use the Wimberley P-20 Plate on my Sony 100-400, the Sony 70-200, and my Canon 180mm macro lens and recommend it for most intermediate and zoom telephoto lenses.
You can order your AP-620 Low Foot here in the BIRDS AS ART Online Store.
|
|
|
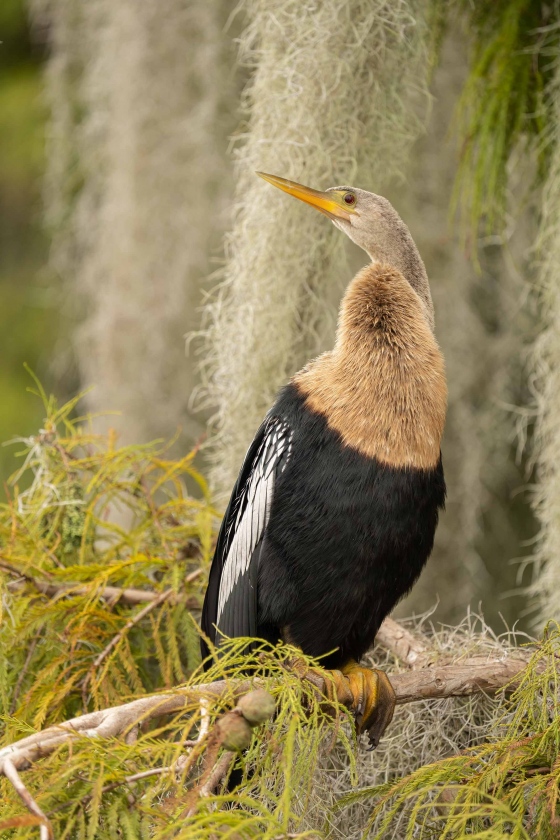
I created this image on 4 November at Circle B Bar Preserve in Lakeland, FL. While standing, I used the Levered-clamp Flexshooter Pro/Induro GIT 304L tripod-mounted Sony FE 200-600mm f/5.6-6.3 G OSS lens (at 467mm) and The One, the Sony Alpha 1 Mirrorless digital camera. ISO 1000. Exposure determined via Zebras with ISO on the rear dial: 1/320 sec. at f/6.3 (wide open) in Manual mode. RawDigger showed that the brightness of the raw file was perfect. AWB at 3:39pm on a cloudy afternoon. Tracking: upper center Zone AF-C Bird/Eye Detection AF was active at the moment exposure and worked perfectly. Be sure to click on the image to enjoy the hi-res version. Image #2: Anhinga, female in Pond (or Bald) Cypress
|
Anhingas and the Cypress Trees
On my new favorite Circle B Bar Reserve Trail, it seemed that there were Anhingas perched everywhere, often in the Bald or Pond Cypresses. Thanks to my friend John Bradford for this:
I am guessing that it is Pond Cypress, but don’t bet the bank on it. Many botanists consider Pond and Bald Cypress to only be varieties of the same species, Taxodium distichum, so it can be hard to tell one from the other.
Image #2 was made from one of two short boardwalks that protrude into the lake that lies just southeast of the trail.
|
|
|
I created this image on 4 November at Circle B Bar Preserve in Lakeland, FL. While standing, I used the Levered-clamp Flexshooter Pro/Induro GIT 304L tripod-mounted Sony FE 200-600mm f/5.6-6.3 G OSS lens (at 200mm) and The One, the Sony Alpha 1 Mirrorless digital camera. ISO 1000. Exposure determined via Zebras with ISO on the rear dial: 1/320 sec. at f/6.3 (wide open) in Manual mode. RawDigger showed that the brightness of the raw file was perfect. AWB at 3:40pm on a cloudy afternoon. Tracking: upper center Zone AF-C Bird/Eye Detection AF was active at the moment exposure and worked perfectly. Be sure to click on the image to enjoy the hi-res version. Image #3: Anhinga, female in Pond (or Bald) Cypress
|
Cypress Tree Bird-scape
Without moving the tripod, I simply zoomed out to create a lovely bird-scape. Tracking Zone AF-C Bird/Eye Detection AF performed remarkably with all three Anhinga image by finding and tracking the bird’s eye no matter how I varied the composition.
|
|
|
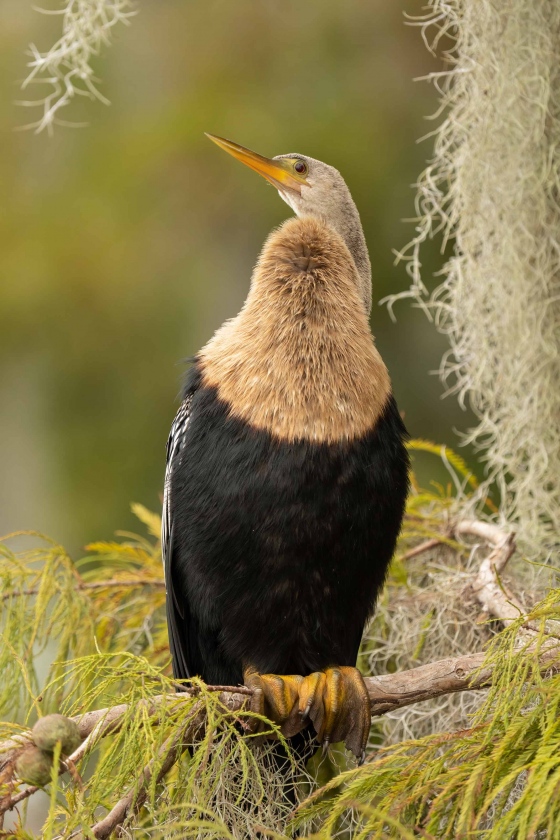
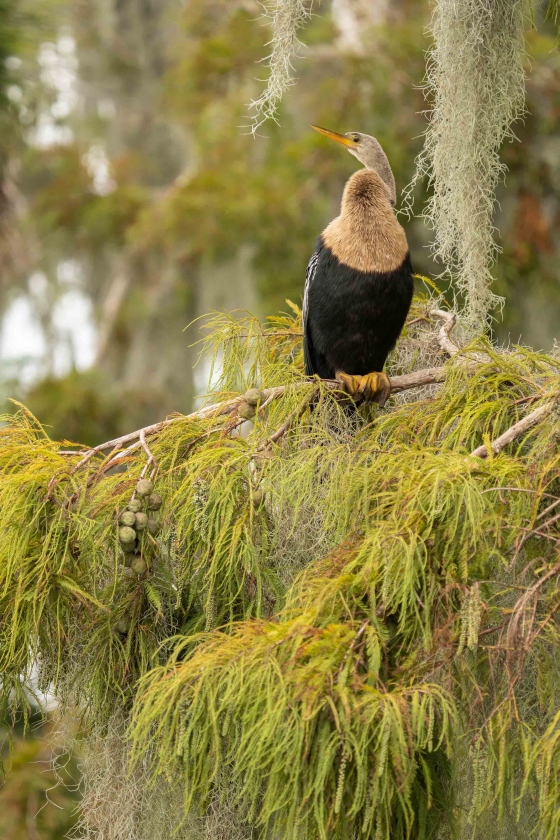
I created this image on 4 November at Circle B Bar Preserve in Lakeland, FL. While standing, I used the Levered-clamp Flexshooter Pro/Induro GIT 304L tripod-mounted Sony FE 200-600mm f/5.6-6.3 G OSS lens (at 200mm) and The One, the Sony Alpha 1 Mirrorless digital camera. ISO 800. Exposure determined via Zebras with ISO on the rear dial: 1/250 sec. at f/6.3 (wide open) in Manual mode. RawDigger showed that the brightness of the raw file was perfect. AWB at 3:47pm on a cloudy afternoon. Tracking: upper center Zone AF-C Bird/Eye Detection AF was active at the moment exposure and worked perfectly. Be sure to click on the image to enjoy the hi-res version. Image #4: Anhinga, female in Pond (or Bald) Cypress
|
The 200-600 on the Tripod!
Again, I need to stress the point that for most of us mortals, the Sony 200-600 needs to be on a tripod when you are photographing birds in low light. There are a few young, hero hand holders who can routinely make sharp images at relatively slow shutter speeds when standing and working at focal lengths in the 200-600 range, but I am not one of them.
|
|
The BAA Middle of Florida Photographic Site GuideYou can purchase your copy here in the BAA Online Store. |
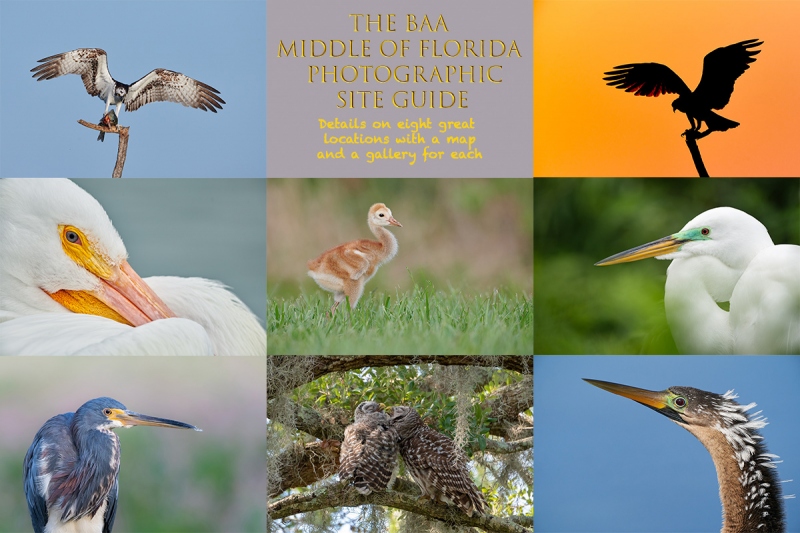
The BAA Middle of Florida Photographic Site Guide
126 pages, 87 photographs by Joe Przybyla and Arthur Morris.
The PDF for this e-Guide is an electronic download sent via e-mail.
Purchase your copy here in the BAA Online Store.
I had thought about doing a guide to some of the great but little-known photo hotspots around central Florida for about a decade, but those plans never came to fruition. I met Joe online in the Avian Forum at BirdPhotographer’s.Net about two years ago. Joe’s photography has improved tremendously over the past few years; he credits the BAA blog, my books and PDFs, and his participation on BPN. The one thing that I learned right from the get-go about Joe is that he is a hard and tenacious worker, always striving to improve his skills and to grow his knowledge base. As he knew of more than a few good spots in central Florida, I broached the idea of us doing a photographic site guide that covered many of the little-known photographic hotspots from Brandon to Lakeland to Joe Overstreet Road to Indian Lake Estates (my Florida home for the past 20 years or so). After more than many, many dozens of hours of effort, The BIRDS AS ART Middle of Florida Photographic Site Guide is now a reality. Thanks to Joe’s wife Dottie for her review of our writing. We all learned once again that writing is a process, a back and forth process. All thanks to the white pelicans of Lakeland. Here are the locations that are detailed in this e-Guide:
- Indian Lake Estates: Sandhills Cranes with chicks and colts, lots of vultures, and Ospreys up the kazoo!
- Gatorland, Kissimmee: Learn to make great images of wading birds in a cluttered rookery.
- The Brandon Rookery: Great for nesting Wood Storks, Great Egrets, and more.
- Circle Bar B Reserve, Lakeland: Here you will find a great variety of avian subjects in a great variety of habitats.
- Lake Morton, Lakeland: There are lots of silly tame birds here including and especially American White Pelican during the colder months.
- Lake Mirror, Lakeland: Tame Anhingas, Limpkins, and a zillion White Ibises at times.
- West Lake Parker, Lakeland: Here you will have a chance for two difficult birds, Snail Kite, and Purple Gallinule.
- Joe Overstreet Road, Kenansville: Crested Caracara, meadowlarks, Loggerhead Shrike, and much more on the fenceposts and barbed wire.
Each location includes a map, a detailed description of the best spots, best season, light and time of day instructions, the expected species, and an educational and inspirational gallery that is designed to open your eyes as to the possibilities.
You can purchase a copy here in the BAA Online Store.
Typos
In all blog posts, feel free to e-mail or to leave a comment regarding any typos or errors.



#2 because it fills the frame more, the others are good, but I prefer less busy.
Thanks for stopping by, Bryan.
with love, artie
Artie they are all great images, my favorite is #2. The bird is framed by the moss and
I prefer the head angle. Thanks for posting.
Hey Monte,
YAW. Thanks for leaving a comment. I am glad that I will be seeing you on either the San Diego or on one of the Stick Marsh IPTs.
with love, artie
Artie
I will take a crack at your compositional question. The anhinga is looking to our left. If I were to crop the shot, I would place the anhinga a little bit more to the right and lower in the frame to give more open space where the bird is looking.
As always, I enjoy your blog, and learn from your challenging questions, and your thorough explanations.
Hey Vince, Thanks for leaving a comment. In #2 and #4, I am fine with either image design, either centered or slightly to our left (looking right).
And thanks for your very kind final comment. That is the plan.
with love, artie
The normal BAA rule for verticals is to put the eye on the center line. In #2 and especially #4, you didn’t. In #4, I think the weight of the Spanish Moss on the left and the anchoring branch in the lower left corner might have been factors in putting the bird further right for balance.
Thanks, Cliff. I was aware of both placements that you mention and am usually fine with either.
with love, artie
In image #2, the bird is dead-center in the frame, so you broke the Rule of Thirds. In image #4, the bird is off-center and I find it a more pleasing composition. I don’t know what you did “wrong” here.
The rule of thirds rarely applies to verticals. That leaves you stumped 🙂
with love, artie
My preference is #2 — the focus is on the bird with just enough habitat to show us where the bird lives.
No. 3 for me. I like the way the bird is framed with the hanging moss and you can see some of the bird’s environment.
Hi, Artie. I’ve been yelling at the National Weather Service to look out the window for decades. I don’t understand why they so often don’t. I think # 3 is my favorite.
I like image # 2 best because the bird is better separated from the Background than in image # 4. However, I would remove a part of the background Spanish moss that is closest to the bird.
Image # 1: F 16 (wide open) can’t be correct.
Thanks, Dietmar. I actually like that extra moss on our left to frame the bird. II will fix the typo now.
with love, artie
#2 for me. I like the background better.
Image #4 is my favourite. Even though the background is a little busy I like it, it shows the habitat well, and I also like that there is more white showing on the wing.