|
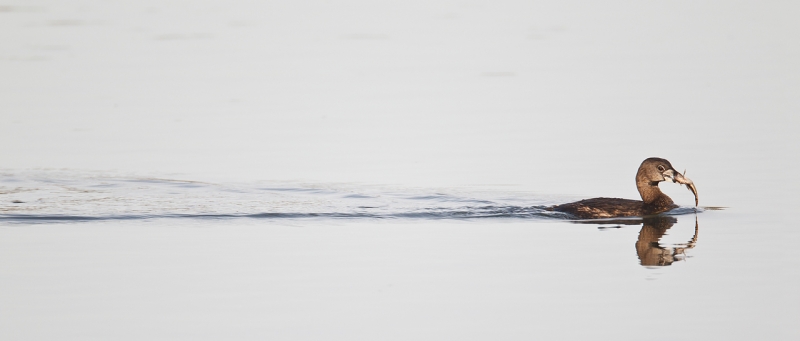
This Pied-billed Grebe with a small fish was photographed with the tripod-mounted Canon 800mm f/5.L IS lens, the 1.4X III TC, and the Canon EOS-1D Mark IV. ISO 400. Evaluative metering at +2 stops: 1/400 sec. at f/8 in Manual mode. Central sensor (by necessity) AI Servo/Rear Focus AF active at the moment of exposure. Click here if you missed the Rear Focus Tutorial. Click on the image for a larger version. |
The Wake Shot
When this small-in-the-frame pied-billed swam by parallel to our position on the Morro Bay IPT I called out to the group, “Focus on the wake and put the bird in the far right side of the frame.” Until after the fact when I had time to show them the resulting image on the LCD on the back of the camera pretty much nobody understood exactly what I was talking about. Thus, “The Wake Shot” blog post. And lots of lessons.
Wake shot opportunities are few and far between. You need still water and a bird swimming parallel to your position. The fish here was a big extra.
|
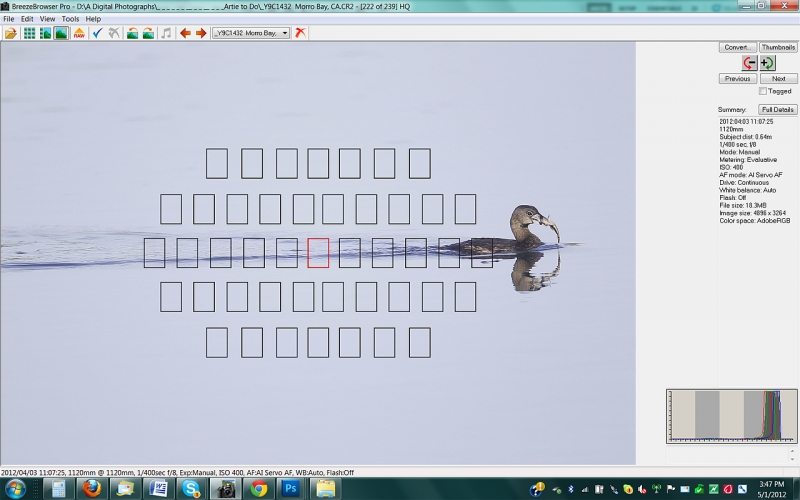
This is the BreezeBrowser main view page screen capture for the RAW image. To be able to see the active sensor click on “Show Focus Points” in the “View” drop-down menu or hit Shift+Control+F. That’s one shortcut that I do not use as one I click on Show Focus Points is sticks. Coming soon: How to Run Breezebrowser on a Mac. Note as usual 🙂 the perfect histogram with the data well to the right as is proper for an overall light-toned image. In The Art of Bird Photography II (ABP II: 916 pages on CD only) I teach you to get the right exposure using digital capture every time. And best of all, it is simple. |
The BreezeBrowser main view page screen capture above shows exactly where I placed the central sensor in order to create the composition that I wanted. If you think about it there was not better place in the frame to put the bird in the original capture. The central sensor is the only sensor available when using the 800/1.4X III/Mark IV combination.
|
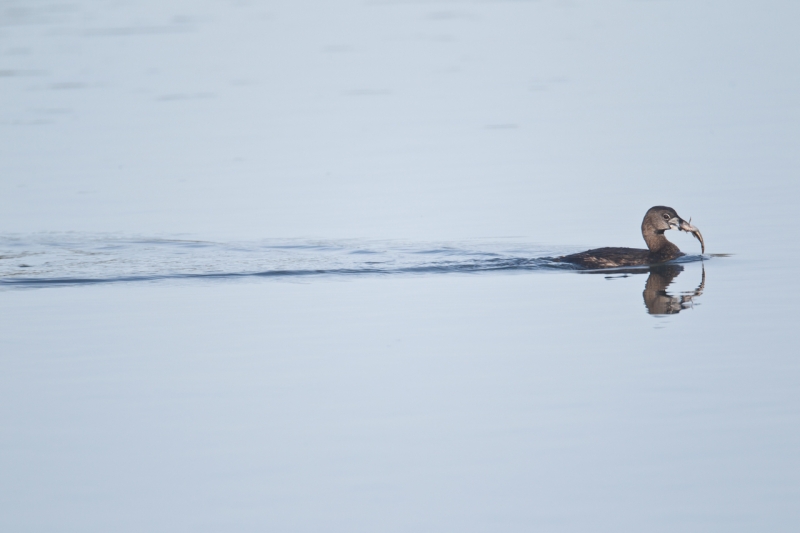
This JPEG represents the original RAW capture for the featured image that opens this blog post. All the extra space above and below made the pano crop an obvious one. With some detail in the water in the upper left I opted to go with 2/3 above, 1/3 below. |
The large BLUE cast was removed with an Average Blur Color Balance adjustment. The image was leveled (my Bubble Level was in my pocket!) by drawing a line with the Ruler Tool from the back of the head to the reflection of the back of the head and hitting my “Image/Rotate/Arbitrary” keyboard shortcut: Control + ? and then hitting OK. Both of these killer techniques are detailed in Digital Basics that includes my complete Digital Workflow and dozens of other great Photoshop tips. Digital Basics actually includes several techniques for eliminating color casts and several techniques for leveling an image. Choices are good and with color casts one method often works well where others fail. Digital Basics also teaches you how to create your very own keyboard shortcuts and includes a list of all of them that I use.
|
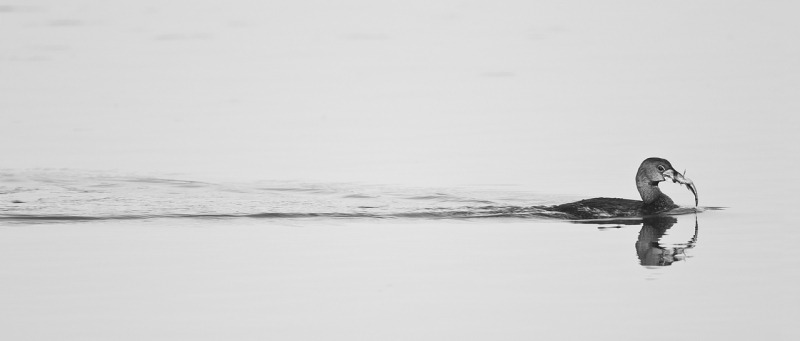
This B&W version was created with NIK Silver Efex Pro using the Neutral pre-set (for the first time ever). Once you load the image in Silver Efex Pro it is easy to click on the various pre-sets to determine which looks best with a given iamge. My usual favorites are High Structure, High Contrast Red Filter, and Wet Rocks. |
NIK 15% Discount
As regular readers here know, NIK Color Efex Pro has drastically changed my digital workflow. Remember that you can save 15% on all NIK products by clicking here and entering BAA in the Promo Code box at check-out. Then hit Apply to see your savings. You can download a trial copy that will work for 15 days and allow you to create full sized images.
Shopper’s Guide.
Support both the Bulletins and the Blog by making all your B & H purchases here.
Below is a list of the gear used to create the images in this blog post. Thanks a stack to all who have used the Shopper’s Guide links to purchase their gear as a thank you for all the free information that we bring you on the Blog and in the Bulletins. Before you purchase anything be sure to check out the advice in our Shopper’s Guide.
Canon 800mm f/5.6L IS lens. Right now this is my all time favorite super-telephoto lens.
Canon EF 1.4X III TC. This new TC is designed to work best with the new Series II super-telephoto lenses.
Canon EOS-1D Mark IV professional digital camera body. The very best professional digital camera body that I have ever used.
And from the BAA On-line Store:
LensCoats. I have a LensCoat on each of my big lenses to protect them from nicks and thus increase their re-sales value. All my big lens LensCoat stuff is in Hardwood Snow pattern.
LegCoat Tripod Leg Covers. I have four tripods active and each has a Hardwood Snow LegCoat on it to help prevent further damage to my tender shoulders 🙂 And you will love them in mega-cold weather….
Gitzo GT3530LS Tripod. This one will last you a lifetime.
Mongoose M3.6 Tripod Head. Right now this is the best tripod head around for use with lenses that weigh less than 9 pounds. For heavier lenses, check out the Wimberley V2 head.
CR-80 Replacement Foot for Canon 800. When using the 800 on a Mongoose as I do, replacing the lens foot with this accessory lets the lens sit like a dog whether pointed up or down and prevents wind-blown spinning of your lens on breezy days by centering the lens directly over the tripod.
Double Bubble Level. You will find one in my camera’s hot shoe whenever I am not using flash.
The Lens Align Mark II. I use the Lens Align Mark II pretty much religiously to micro-adjust all of my gear an average of once a month and always before a major trip. Enjoy our free comprehensive tutorial here.
BreezeBrowser. I do not see how any digital photographer can exist without this program.


Another great lesson! I too would not thought of focusing on the wake. Thanks Arthur for your time and input.
The B&W one is my favorite – simplicity speaks for itself. I wouldn’t have thought to focus on the wake. Good info. Thanks!
Excellent post Guru Artie 🙂 I have learned so much from you. Can’t wait to find out more about breezebrowser for Mac.
Thank you.
This one made me smile a little. I have a baby wood duck that was going left to right. I focused on the wake and placed the duckling near the right edge (not right on the edge, still left a little room).
Every single critique I get is ‘he’s swimming out of the frame…place him more on the left…more space on the right…less space on the left’. You know how it goes. Sometimes I wonder if people REALLY look at what’s going on in an image. Doug
As a side note, I’d like to see a bit more blue in the water. Not as in the original shot, but let’s say mid-way between the original shot and the final photo.
I understand the composition. But, why focus on the wake, and not the bird’s eye?
Jay, You actually need to read what I write. 🙂 As it clearly states above, “The central sensor is the only sensor available when using the 800/1.4X III/Mark IV combination.” If I put the central sensor on the bird’s eye the bird would be in the middle of the frame and you would have only half the wake in the image.
Placing the only available sensor on the wake was the only way to create the image that I saw in my mind. And was the main point in this blog post. 🙂
I was probably not clear in my question. My thought was, should you get the focus on the eye, and then recompose the shot with the focus locked in to get the wake with the grebe located to the right of the viewfinder.
I did understand what you meant. That might have a chance of succeeding but would be hit or miss. If the bird were swimming slightly towards or away from you it would fail miserably. Focusing on the center of the wake with a bit of d-o-f as I did and as I recommend is much cleaner, simpler, and more effective. That’s why I wrote the post :).
Very nice indeed Artie. I am puzzled though when you indicate central sensor by necessity, surely you could have used any sensor and recomposed???
Surely not. When working with a swimming or otherwise moving subject you must be in AI Servo mode; recomposing is not an option in AI Servo with AF “active at the moment of exposure.”
Let me know if that makes sense :). artie
Hi, Artie, and thanks as usual. I have had a few opportunities like yours and I still haven’t decided in general how much wake to include. The good news is that you can make more than one version from each capture. The fish was a nice extra indeed.
David
In general the more wake the better provided that you give the bird just a bit of room in the front of the frame as I did here. Distance to the subject and your effective focal length will determine the length of the wake in the original capture.
Beautifully captured. Nice lessons too!
Many thanks Lady D.