Exposure Simplified Simplified
Folks consistently make far too big a deal about getting the right exposure with digital capture. My belief is that if the light is constant for ten seconds or longer that anyone with a third grade education should be able to create an image with a perfect exposure every time. How? Add or subtract light as needed so that you have at least some data in the right-most histogram box while avoiding significant blinkies. It’s that simple. Here we will take a look at three simple examples that cover a lot of ground.
Before we take a look at the images consider the following:
1-When the sun it out at full strength, the meters on our cameras are pretty smart.
2-Whenever the sun is at less than full strength–sunrise, sunset, low light, cloudy, or in the shade for example– the meters on our cameras are pretty dumb and will need lots of help from you.
3-I use Evaluative metering 100% of the time.
| [Not a valid template] |
|
This Coastal Brown (Grizzly) Bear image was created at Hallo Bay, Katmai National Park, AK with the tripod-mounted Canon 500mm f/4L EF IS II USM Lens, the Canon 1.4x EF Extender III (Teleconverter), and the Canon EOS 5D Mark III Digital Camera (Body Only). ISO 400. Evaluative metering at zero as framed: 1/640 sec. at f/5.6. Note that once I had confirmed the correct exposure in the opening image I simply stuck with it as the bear approached us. Left of center sensor/AI Servo Surround Rear Focus AF active at the moment of exposure. Click here if you missed the Rear Focus Tutorial. Click on the image for a larger version. This is a BreezeBrowser Main View screen capture. |
When the sun is out, your camera’s meter is pretty smart. I had been photographing this young bear long before he walked right up to us and had already checked the histogram. Here, though I was working in Manual mode, I noted that my manual settings perfectly matched those suggested by the camera; the indicator was on the zero mark. No + or – compensation was needed with this framing to give me a perfect histogram with lots of data well into the right-most box of the histogram. And there were no significant blinkies. When the sun is out and the scene averages to a middle tone as this one does, you can simply use the settings suggested by your camera’s metering system without adding or subtracting light.
For more photos and the complete story of this wonderful little bear, check out “The Adventures of Little Mr. Huffer” here.
|
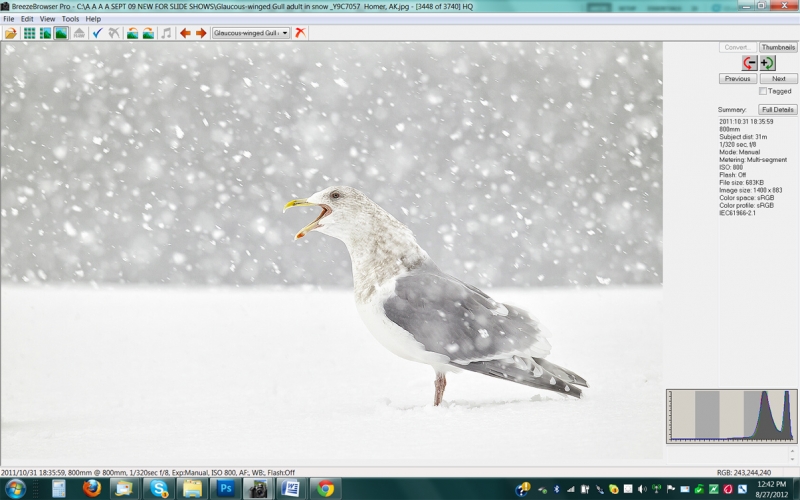
This image of an adult Glaucous-winged Gull in snow, near Homer, AK with the Canon EF 800mm f/5.6L IS USM Autofocus Lens and the unfortunately discontinued EOS-1D Mark IV. ISO 800. Evaluative metering + 2 1/3 stops: 1/320 sec. at f/8 in Manual mode. |
When the sun is at less than full strength, as in the near white-out here, the meters on our cameras are pretty dumb and need lots of help from us. The closer the scene averages to white in such conditions, the more light you will need to add to get a good exposure. With this image I added 2 1/3 stops of light to move the histogram well to the right while always checking to make sure that I had avoided significant blinkies. The exposure here was actually three stops more than the meter reading off the snow alone.
|
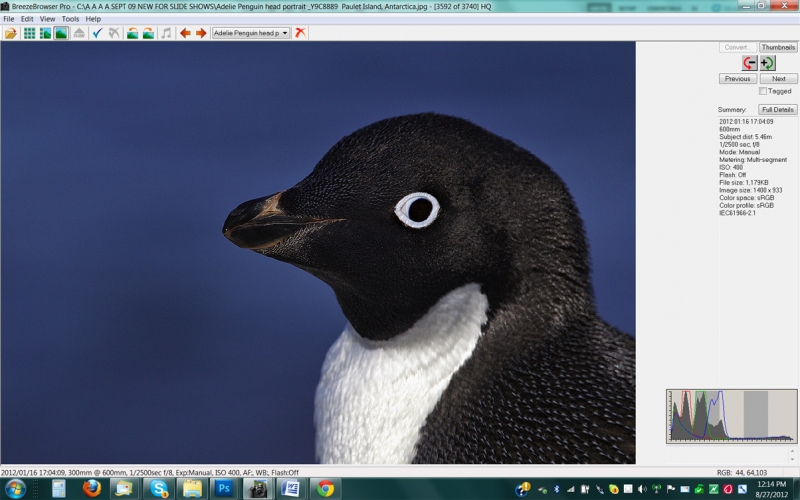
This image of an Adlie Penguin was created at Paulet Island, Antarctica with the Canon EF 300mm f/2.8L IS II USM Telephoto Lens, the Canon 2x EF Extender III (Teleconverter) and the unfortunately discontinued EOS-1D Mark IV. ISO 400. Evaluative metering -1 stop: 1/2500 sec. at f/8 in Manual mode. |
As far back as the film days I taught folks, “White against blue with the sun out, subtract 1/3 stop of light.” With the dark blue water and the bird’s head dominating the frame here, my first exposure was made at -2/3 stop but I had more than a few blinkies on the whites of the upper breast so I took away another 1/3 stop of light and wound up with a perfect exposure at -1 full stop. Understand that though most of the data here, represented by the darker tones, is well left of center on the histogram, the strip of data that extends well into the right-most histogram box represents the white of the upper breast–another perfect exposure.
Those who would like to master exposure theory so that they can get it right when they have less than ten seconds are directed to the chapter on exposure in the original “The Art of Bird Photography.” Those who would like to read the whole story will want to consult “Exposure Simplified” in “The Art of Bird Photography II” (ABP II: 916 pages on CD only). And those who would like to do both can save $10 by purchasing the two book bundle.
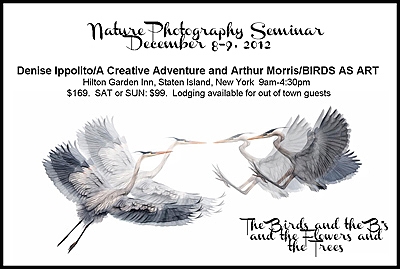
NYC Weekend Nature Photography Seminar
Presented by Denise Ippolito/A Creative Adventure and Arthur Morris/BIRDS AS ART
Hilton Garden Inn, Staten Island, New York. December 8-9, 2012 from 9am-4:30pm.
Weekend: $169. SAT or SUN: $99. Lodging available for out of town guests.
Saturday: Image Capture Sunday: Image Evaluation and Processing
Hilton Garden Inn, Staten Island, New York. December 8-9, 2012 from 9am-4:30pm.
Weekend: $169. SAT or SUN: $99. Lodging available for out of town guests.
Saturday: Image Capture Sunday: Image Evaluation and Processing
Click here for complete details including the Saturday and Sunday schedules, club and group discount info, and registration incentives and for more info on the In-the-Field Seminar Follow-up Workshop.
Artie, the grizzled veteran, is widely noted as one of the premier bird photographers, tour leaders, and educators on the planet. Denise, who specializes in flowers, is the mega-creative up-and-comer, a popular lecturer, a skilled field instructor, and an amazing Photoshop wizard who will share her tips and tricks with you. Both artie and denise are full time professional nature photographers.
BIRDS AS ART Instructional Photo-Tours
Click here for complete IPT information including the current schedule and links to general IPT info, deposit and cancellation policies. and the required registration and release forms.
Shop B&H


