|
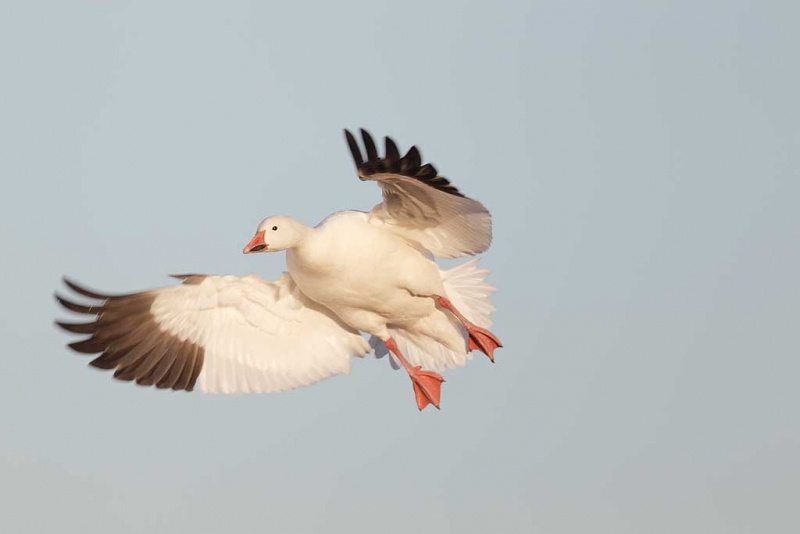
This image of an adult Snow Goose braking to land was created on last year’s Bosque del Apache BAA Instructional Photo-tour with the Canon EF 800mm f/5.6L IS USM Autofocus lens and the unfortunately discontinued EOS-1D Mark IV. ISO 400. Evaluative metering +2/3 stop off the low blue sky: 1/1250 sec. at f/6.3. Central Sensor/AI Servo Rear Focus active at the moment of exposure. Click here if you missed the Rear Focus Tutorial. Click on the image to enjoy a larger version. |
The Same Old Lessons…
Pan faster for better flight images. Easy to say. Easy to teach. Not so easy to do especially as the calendar pages keep flipping…. The problem with the image above is that by not panning fast enough to keep the sensor on the bird’s eye, face, or neck, the subject is much too far forward in the frame. You want the bird flying into the frame not flying out of it. See below for the 3-second solution.
The key to getting great flight images at Bosque is to understand the wind and know where to be when. With this being my 18th consecutive year at the refuge during the Thanksgiving holiday season, I understand the wind and know where to be when pretty much better than anyone alive. Do consider joining us on this year’s Bosque IPT.
BOSQUE del APACHE 2012 IPT: “The Complete Bosque Experience.” NOV 21-27, 2012. 7-FULL DAYS: $3399. Introductory Slide program: 6:30 pm on 11/20. Limit: 12/Openings 4.
Non-refundable deposit: $500/Balance by check due immediately
Tens of thousand of Snow Geese, 10,000 Sandhill Cranes, ducks including point-blank American Wigeon and Wood Duck, amazing sunrises, sunsets, and blast-offs. Live, eat, and breathe photography with one of (if not the) world’s premier photographic educators at one of his very favorite locations on the planet. Top-notch Photoshop instruction. This will make 18 consecutive Novembers at Bosque for me. Nobody knows the place better than I do. Join us to learn to think like a pro, to recognize situations and to anticipate them based on the weather, especially the light and the wind direction. Every time we make a move we will let you know why. When you head home applying what you learned will prove to be invaluable. The cast of co-leaders includes Denise Ippolito, Jim Heupel, and Mike Hannisian.
|
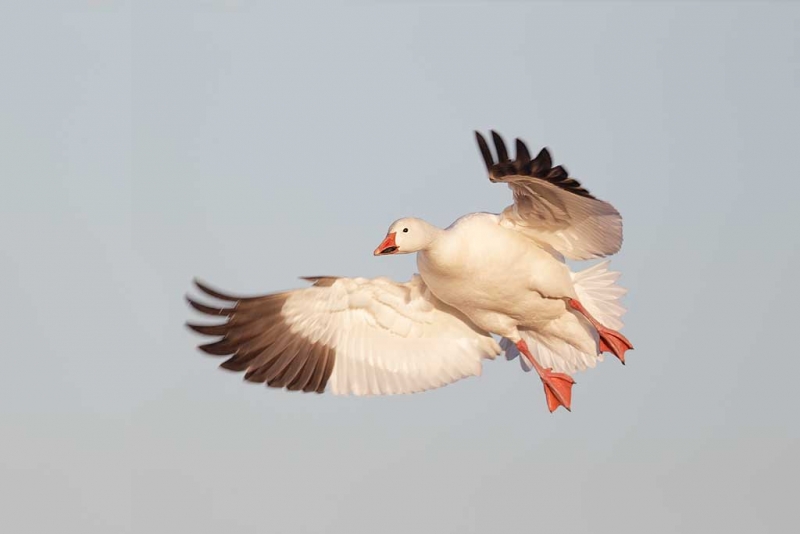
Moving the bird back in the frame took about one minute in Photoshop…. You can see what others had to say about this image and learn the basics of 1/3-stop understanding of ISO, aperture, and shutter speed by clicking here. |
The Fix
Using the”Composition Correction: Increase Lead Room Without Cropping” technique from Robert O’Toole’s APATATS II I easily moved the bird back in the frame. How? Control A. Control J. V for the Move Tool. Move the bird back in the frame. Use a Quick Mask of the blue sky to cover the portion of the wing revealed by the move. Add a Layer Mask to the Background Copy and blend the edges after hitting B, D, X. (See Layer Masking for Dummies in Digital Basics.)
You can learn advanced Layer Masking techniques in APTATS II. Using one of the super-fast techniques below would have cut the time in Photoshop by more than half as I would not have needed to paint the Layer Mask.
APTATS II
Here are the tutorials that are included in APTATS II:
· Composition Correction: Increase Lead Room Without Cropping/Basic
· Composition Correction: Increase Lead Room Without Cropping/Intermediate
· Composition Correction: Increase Space Near a Frame Edge/Advanced
· Super-Fast Element Removal: Basic
· Super-Fast Element Removal Plus Composition Improvement
· Gradient Background Blur
· Mask Blending for Mega-Depth-of-Field
· Selective Highlight Detail Enhancement
· Selective Noise Reduction and Sharpening
· Selective Sharpening with Finely Detailed Edges
· Average Blur Color Balance Trick
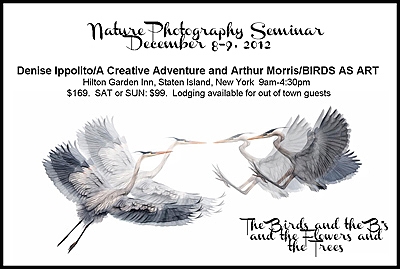
NYC Weekend Nature Photography Seminar
Presented by Denise Ippolito/A Creative Adventure and Arthur Morris/BIRDS AS ART
Hilton Garden Inn, Staten Island, New York. December 8-9, 2012 from 9am-4:30pm.
Weekend: $169. SAT or SUN: $99. Lodging available for out of town guests.
Saturday: Image Capture Sunday: Image Evaluation and Processing
Hilton Garden Inn, Staten Island, New York. December 8-9, 2012 from 9am-4:30pm.
Weekend: $169. SAT or SUN: $99. Lodging available for out of town guests.
Saturday: Image Capture Sunday: Image Evaluation and Processing
Click here for complete details including the Saturday and Sunday schedules, club and group discount info, and registration incentives and for more info on the In-the-Field Seminar Follow-up Workshop.
Artie, the grizzled veteran, is widely noted as one of the premier bird photographers, tour leaders, and educators on the planet. Denise, who specializes in flowers, is the mega-creative up-and-comer, a popular lecturer, a skilled field instructor, and an amazing Photoshop wizard who will share her tips and tricks with you. Both artie and denise are full time professional nature photographers.
BIRDS AS ART Instructional Photo-Tours
Click here for complete IPT information including the current schedule and links to general IPT info, deposit and cancellation policies. and the required registration and release forms.
Shop B&H


Please explain the reason for+2/3 stop off the sky. Wouldn’t that over expose the image? Thanks, newbie
Michael. In early morning light with a blue sky and I bright white subject I start with +2/3 off the sky about 40 degrees up from the horizon and then check the histogram to make sure that I have data in the fifth box. I would recommend that you get a copy of both ABP to learn exposure theory and a copy of ABP II to learn the basics of digital exposure and histograms.
When shooting BIF on a sunny day with the bird in flight, e.g. not landing, the underside is shadowed and darker than the top side. Using fill flash with 8-10 fps doesn’t seem to be possible. How to get around this or does one just have to wait for an overcast day?
I greatly prefer cloudy bright to full sun for flight. You can try manual flash at full power with a Better Beamer while keeping your shutter speed at either 1/500 sec. or 1/1000 sec. in High Speed Synch….. Flash output is of course greatly reduced.
Assuming the bird is on the background layer (and/or the layer with the bird on it is selected) save yourself another couple of seconds by skipping the ctrl-A and ctrl_C keystrokes. They’re unnecessary because ctrl-J duplicates the whole current layer.
Best
Martin
Old habits die hard…