New Concept IPT Last Minute & Pro-rated Info
Due to a last minute cancellation there is now a single opening on this IPT. If you are local and wish to save a ton of money call us right now and apply a $500 last minute discount: 863-692-0906.
It looks as if folks are liking the idea of more time for image review and image sharing during the day, more in-the-field-instruction with a smaller group, no time in the classroom, and a bit more time to rest and sleep…. Learn more by clicking here and scrolling down to the first item. If you would like to explore the possibility of joining us for part of this IPT or a morning on the Hooptie Deux please e-mail me asap or call me on Tuesday on my personal line at 863-692-2806 for a pro-rated quote. Right now Sunday morning is looking to be superb.
Fort DeSoto/Hooptie Deux/Roseate Spoonbill Short Notice IPT: March 6-10, 2013. 5-DAY: $2399 (Includes 3 mornings on the Hooptie Deux). Limit: 6/Openings: 2.
Join me as part of a small group for five great days of bird photography and learning. We will spend three mornings with the breeding plumage spoonbills on James Shadle’s customized pontoon boat, the Hooptie Deux. This alone would cost you $1050 so this works out to the cheapest IPT ever: 5 full days for only $1349. We will spend two of our mornings and four of our afternoons at Fort DeSoto photographing all manner of wading birds, gulls, terns, and almost surely some Great Horned Owl chicks. Our last afternoon will be spent at an active Wood Stork rookery with lots of flight photography opportunities.
|
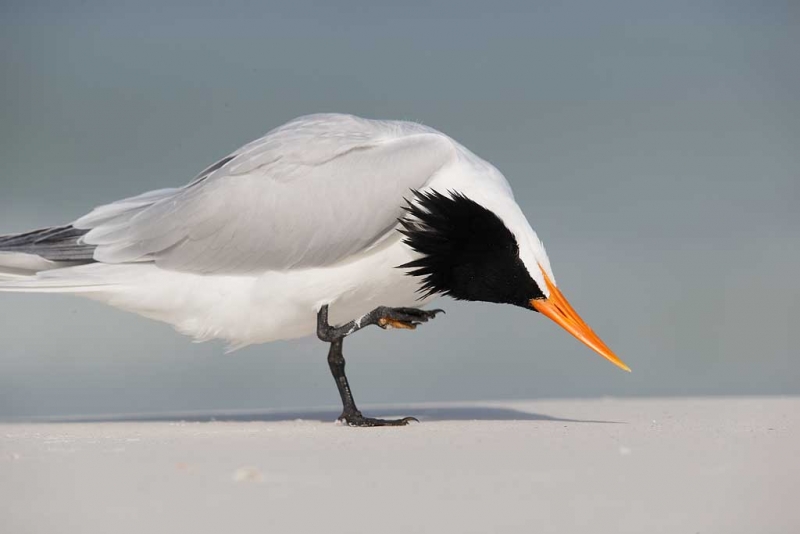
This is the front end of a scratching Royal Tern. It was created with the tripod-mounted Canon EF 600mm f/4L IS II USM lens, the Canon 2x EF Extender III (Teleconverter), and the Canon EOS-1D X Digital SLR camera. ISO 400: 1/1600 sec. at f/8 in Manual Mode confirmed via histogram check. Central sensor (by necessity) Expand/AI Servo/Rear Focus AF on the base of the bill where it meets the head and recompose. Click here if you missed the Rear Focus Tutorial. Click on the image to see a larger version. You cannot beat the 600II/2XIII TC combo for reach (with phase detection AF). |
Par for the Course
I am always looking to make the best possible image in the field but I never shy away from making a good image even better while optimizing an image. That process begins with the RAW conversion in Canon Digital Photo Professional (DPP) usually followed by from two to thirty minutes in Photoshop and NIK Color Efex Pro. Here I share with you several recent examples.
After a group of participants on the Monday In-the-Field Desoto Workshop finished photographing a group of gorgeous Royal Terns, more than one of them asked me, “How did you fit that bird in the frame with the 2X and the 600?” “I didn’t,” I said, showing them the image below on the rear LCD of my 1D X.
|
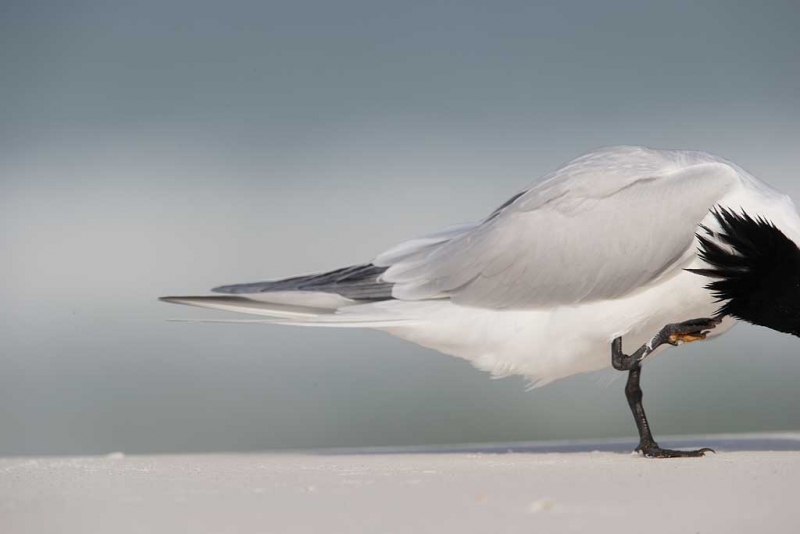
This is the rear end of the same scratching Royal Tern photographed just a few seconds after the last of a series of the front end of the bird was created. Of course I used the tripod-mounted Canon EF 600mm f/4L IS II USM lens, the Canon 2x EF Extender III (Teleconverter), and the Canon EOS-1D X Digital SLR camera. ISO 400: 1/1600 sec. at f/8 in Manual Mode confirmed via histogram check. |
Learn to Think Digitally in the Field
I realized from the get-go that the image of the front end of the bird would not cut it so as soon as I had what I thought was an image with a nice view of the top of the bird’s head and crest I pointed the camera to the left and made two frames of the back end of the mule. It is mandatory that you do not re-focus when creating stitched panoramas so I did not touch the back button that I use to rear focus. It is also mandatory for obvious reasons that you use the exact same exposure. Working in Manual mode is of course best but an option if you are in an automatic mode is to press the start button to lock the exposure. The image that I chose for the pano is above.
By learning to think digitally in the field you can make some great images in situations the seem hopeless.
|
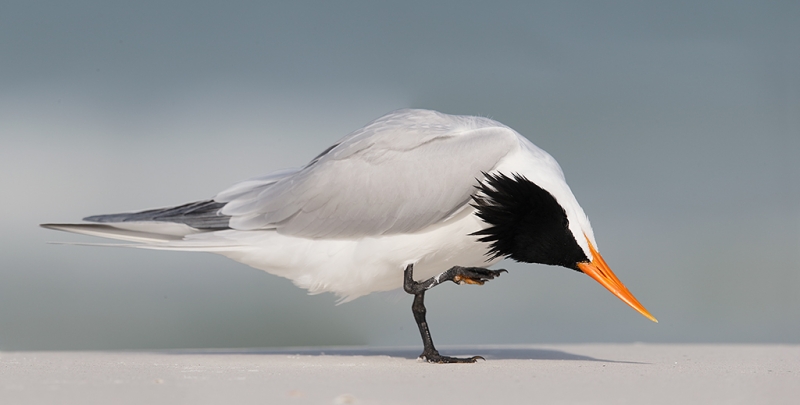
This stitched pano of a scratching Royal Tern was created from two images made on last Monday’s In-the-Field Workshop at Fort DeSoto with the tripod-mounted Canon EF 600mm f/4L IS II USM lens, the Canon 2x EF Extender III (Teleconverter), and the Canon EOS-1D X Digital SLR camera. ISO 400: 1/1600 sec. at f/8 in Manual Mode confirmed via histogram check. Central sensor (by necessity) Expand/AI Servo/Rear Focus AF on the base of the bill where it meets the head and recompose. Click here if you missed the Rear Focus Tutorial. Click on the image to see a larger version. You cannot beat the 600II/2XIII TC combo for reach (with phase detection AF). |
Creating the Stitched Pano
After converting both chosen images in DPP I want to Photoshop, hit File/Automate/Photomerge, clicked on Reposition in Layout, selected the two images, hit OK, and answered a few e-mails. Perfecto. Then I merged the two layers, copied the file name and number of the front end image (_09U2714 Fort Desoto Park, Pinellas County, FL.TIF), and saved the image. The minimal processing took less than two minutes after the pano was assembled.
|
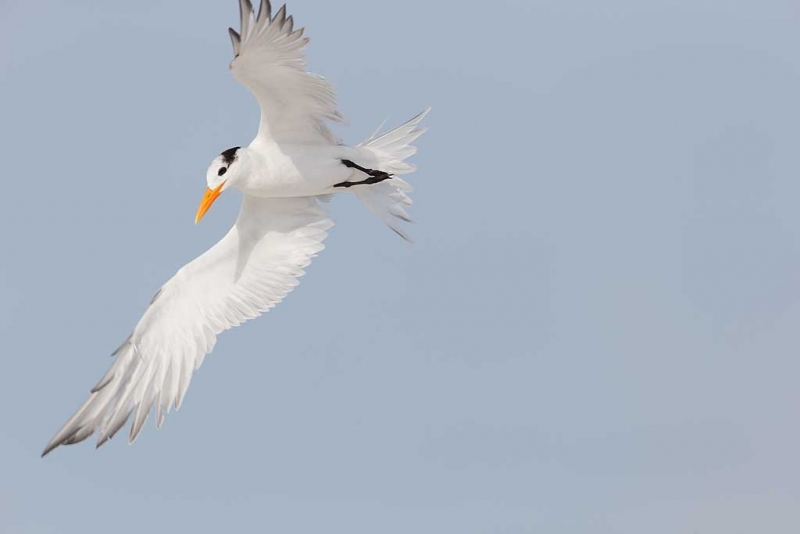
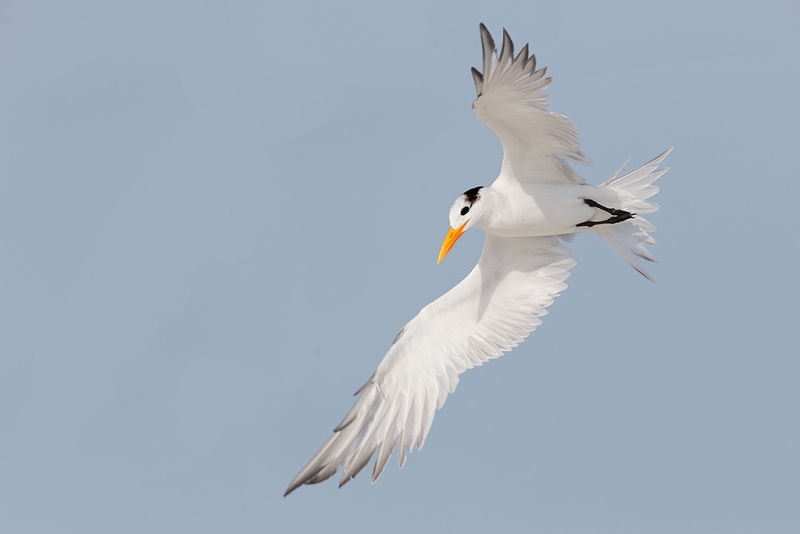
This is the original frame for the flaring in flight Royal Tern. It was created with the hand held Canon EF 600mm f/4L IS II USM lens and the Canon EOS-1D X Digital SLR camera. ISO 400. Evaluative metering +2/3 stop as framed: 1/2500 sec. at f/5.6 in Manual mode was really pushing the histogram to the right. My excuse? The light was changing every few seconds. The DPP conversion allowed me to bring the WHITEs into Photoshop at about 235. Central sensor Surround/AI Servo/Rear Focus AF active at the moment of exposure. Click here if you missed the Rear Focus Tutorial. Click on the image to see a larger version. I am able to hand hold the 600II for flight and action only for short periods of time. Here, it had been on the tripod but I grabbed it when several terns began landing into the wind. As I remember it, this one was taking flight when it turned making framing difficult at best. That is my excuse for cutting off the wing tip 🙂 |
Clipped Wing…
It is always a bummer when you clip the primaries on a nice flight pose as I did here. Moving the bird back in the frame using techniques from APTATS II was relatively quick and easy with the sky being of consistent tonality. Adding the two wing tips using techniques detailed in APTATS I and in Digital Basics took about 30 more minutes. I plan on doing an MP4 Photoshop Tutorial on the optimization of this image in about a week.
|
This flaring in flight Royal Tern was photographed on the In-the-Field Workshop at Fort DeSoto earlier this week with the hand held Canon EF 600mm f/4L IS II USM lens and the Canon EOS-1D X Digital SLR camera. ISO 400. Evaluative metering +2/3 stop as framed: 1/2500 sec. at f/5.6 in Manual mode was really pushing the histogram to the right. My excuse? The light was changing every few seconds. The DPP conversion allowed me to bring the WHITEs into Photoshop at about 235. Central sensor Surround/AI Servo/Rear Focus AF active at the moment of exposure. Click here if you missed the Rear Focus Tutorial. Click on the image to see a larger version. I am able to hand hold the 600II for flight and action only for short periods of time. Here, it had been on the tripod but I grabbed it when several terns began landing into the wind. As I remember it, this one was taking flight when it turned making framing difficult at best. |
Snowy Egret Exposure Quiz
|
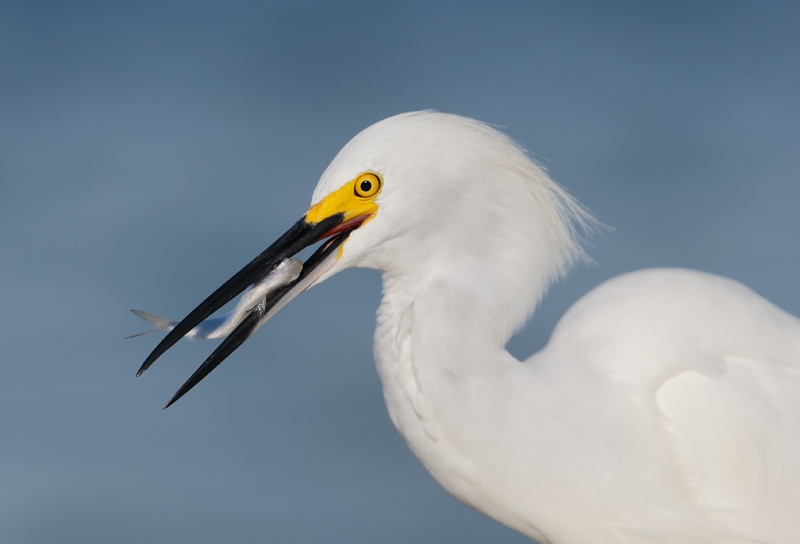
This Snowy Egret was also photographed on the recently concluded SW FLA BIRDS AS ART Instructional Photo-Tour with the hand held Canon EF 300mm f/2.8L IS II USM lens with the Canon 1.4x EF Extender III (Teleconverter) and the Canon EOS-1D X Digital SLR camera body. ISO 400. 1/2000 sec. at f/? in Manual mode. Central sensor/AI Servo Surround/Rear Focus AF active at the moment of exposure. Click here if you missed the Rear Focus Tutorial. Click on the image to see a larger version. If you own a 1D X be sure to check out the info on our EOS-1D X Autofocus Guide below. |
Another Exposure Quiz Answer
This Snowy Egret was photographed in the same light as the Great Blue Heron that opened the March 1st blog post here. The GBH image was created at 1/2000 sec. at f/7.1 in Manual mode. The question was, “With the same ISO and shutter speed what aperture would you have set? And why?
Several folks reasoned that since the GBH had a white neck that the right exposure for the Snowy Egret would be the same, 1/2000 sec. at f/7.1. Julian Mode was very close to the right answer and his reasoning was good as was Merv Lowe. Elinor Osborne’s reasoning was convoluted at best.
Here is my take: yes, the GBH has a white neck but the whites are not as bright as the whites on a Snowy Egret. I stopped down to f/8 and the resulting histogram was perfect: lots of data well into the fifth (rightmost) histogram box with no significant blinkies.
Seriously Huge B&H Savings on Nikon and Canon Gear
Nikon
For the first time in many years NIKON is going to be deeply discounting many legacy pro lenses individually for the next 2 weeks only with discounts up to $350. There are also many amazing deals on NIKON Buy together and Save packages as well. Click here to save.
Nikon DSLRS Bundles with Lenses & Flash: Save up to $750. Click here to save. Make sure to add each item to your shopping cart to see the absolute lowest price.
Canon Lenses & Speedlites: Save Up to $300
Click here to save. Make sure to add each item to your shopping cart to see the absolute lowest price.
Canon Buy Together & Save: Save Up to $400
Click here to save.
EOS-1D X AF Guide
You can learn exactly how I set up and use this camera’s great new AF system in our EOS-1D X AF Guide. And you can learn about our other camera User’s Guides here.
Typos
On all blog posts, feel free to e-mail or leave a comment regarding any typos, wrong words, misspellings, omissions, or grammatical errors. Just be right. 🙂
Support the BAA Blog. Support the BAA Bulletins: Shop B&H here!
We want and need to keep providing you with the latest free information, photography and Photoshop lessons, and all manner of related information. Show your appreciation by making your purchases immediately after clicking on any of our B&H or Amazon Affiliate links in this blog post. Remember, B&H ain’t just photography!
Support the BAA Blog. Support the BAA Bulletins: Shop Amazon here!
Shop Amazon
And from the BAA On-line Store:
LensCoats. I have a LensCoat on each of my big lenses to protect them from nicks and thus increase their re-sales value. All my big lens LensCoat stuff is in Hardwood Snow pattern.
LegCoat Tripod Leg Covers. I have four tripods active and each has a Hardwood Snow LegCoat on it to help prevent further damage to my tender shoulders 🙂 And you will love them in mega-cold weather....
Gizo GT3532 LS CF Tripod. This one replaces the GT3530LS Tripod and will last you a lifetime. Learn more about this great tripod here.
Mongoose M3.6 Tripod Head. Right now this is the best tripod head around for use with lenses that weigh less than 9 pounds. For heavier lenses, check out the Wimberley V2 head.
Double Bubble Level. You will find one in my camera's hot shoe whenever I am not using flash.
The Lens Align Mark II. I use the Lens Align Mark II pretty much religiously to micro-adjust all of my gear an average of once a month and always before a major trip. Enjoy our free comprehensive tutorial here.
BreezeBrowser. I do not see how any digital photographer can exist without this program.
Delkin Flash Cards. I use and depend on Delkin compact Flash Cards and card readers most every day. Learn more about their great 700X and 1000X cards here or about my favorite Delkin card here.



I am most intrigued at the idea of stitching birds. I do some pano stuff with landscapes but have been a bit shy when working with birds since they are always moving about. For the same reason I have never tried doing HDR with wildlife. The idea that one might be able to pull this off fascinates me. Please talk a bit more on your thinking and when you decide to give it a shot. I must try some of this. 🙂
Not sure what more I can share; please let me know if there is something specific that I can help you with that has not already been covered. FYI: I have posted several 5D Mark III in-camera HDRs in the past few months….
I was shooting Snowy Egrets in a feeding frenzy at Mrazek Pond last week; they are indeed brighter than all the other birds, except maybe the Great White Egret. Thanks for the information!
Hey Chris, Though common names can be confusing there is no bird in NA known as the Great White Egret. We have Great Egret that is as white as a snowy, and we have Great White Heron, the white morph of Great Blue Heron that is a shade lighter.
Doh, I was off by a third of a stop! Well, thanks for the answer. Any chance you could post the histograms of the GBH and Egret? Just for educational purposes? I’d love to see exactly how the exposure settings affect the histogram in that right-most box…I think we could all learn a lot from that.
BTW, when you expose…do you aim for zero “blinkies” period, or are very small amounts of blinkies ok? I’ve read some of your comments on that in the past, and it sounded like you aim to avoid blinkies entirely…but the current comment here seemed to indicate a small amount were ok.