This Blog Post and College Football…
I started working on this blog post at 4:00am. After I take my 59 degree Fahrenheit ice baths before dinner each night I usually get to bed early so I get up earlier than most folks. I will post this at about 9:30am. Yesterday afternoon I was thrilled with Auburn’s amazing victory over Missouri in the SEC championship game. Auburn needed a victory by underdog Michigan State over Ohio State in last night’s Big Ten championship game to get to the national championship game. I taped that game on TiVo and watched it this morning while working on this blog post. I was rooting for Michigan State as I had fallen in love with Auburn’s amazing running attack the day before. Congrats to Michigan State for its gritty, come-from-behind victory and to Auburn for its upcoming trip to the national championship game against the surely to be favored Florida State Seminoles. I will be rooting for Auburn.
All in all I probably spent about four hours on this blog post. Each post is presented for your enjoyment, to teach you a few new things about nature photography, and hopefully, to inspire you. Everyone buys something from Amazon. Please get in the habit of doing all of your Amazon shopping (holiday and otherwise) by starting with our Amazon affiliate link immediately below or with one of our B&H affiliate links in and at the end of this blog post. Your purchases will not cost you a penny more and using our links is a great way to thank me for my work here and for my work on the BIRDS AS ART Bulletins. 🙂
Thanks for considering this request. No purchase is too small to be appreciated!
|
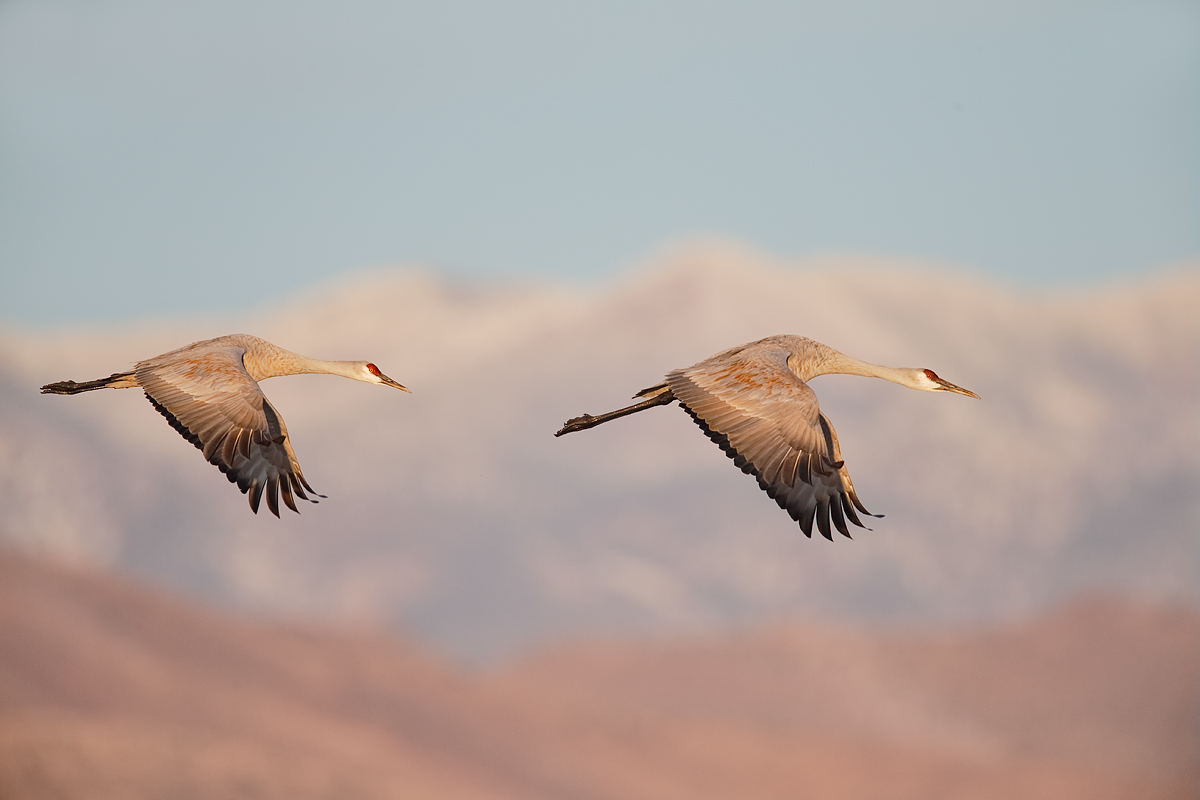
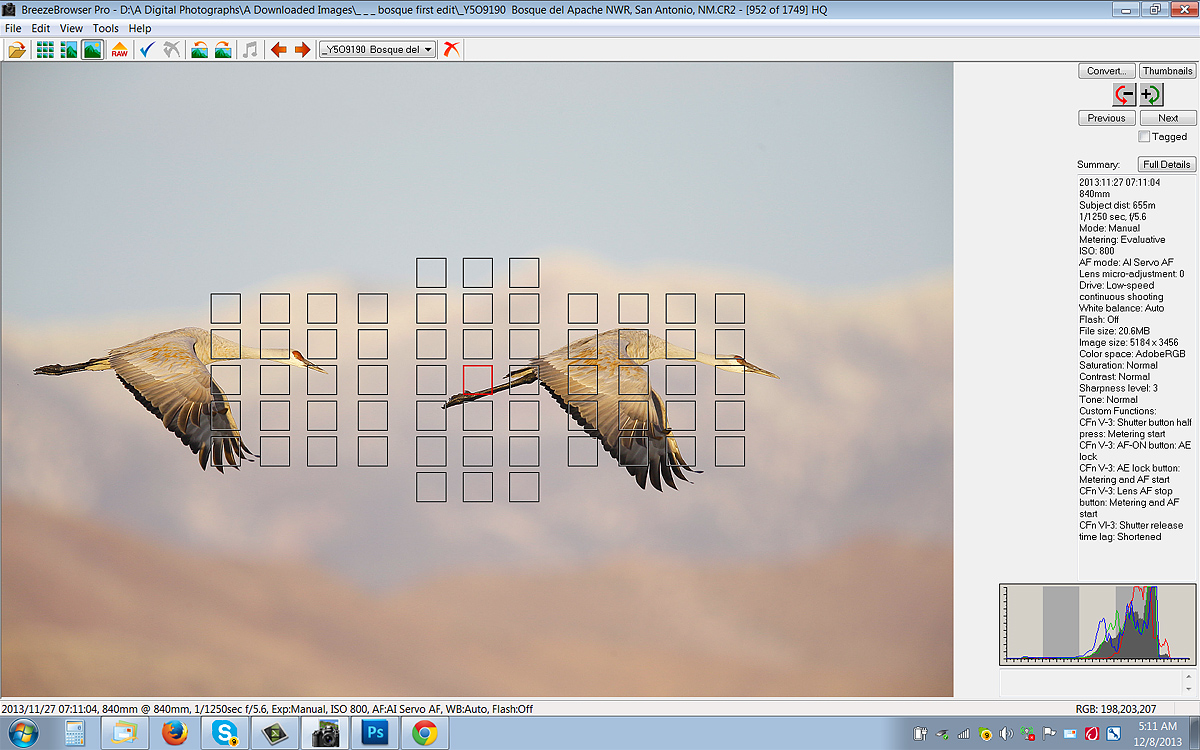
This Sandhill Crane flight image was created with the Gitzo 3532 LS carbon fiber tripod, the Mongoose M3.6 head, the Canon EF 600mm f/4L IS II USM lens, the Canon 1.4x EF Extender III (Teleconverter), and the Canon EOS-1D X. ISO 800. Evaluative metering +1 1/3 stops off the sky in early morning light at 7:11am: 1/1250 sec. at f/5.6 in Manual mode. Color temperature: AWB. Central sensor/AI Servo/Surround Rear Focus AF on the leg of the front bird active at the moment of exposure. See the BreezeBrowser screen capture below. Click here to see the latest version of the Rear Focus Tutorial. Click on the image to see a larger version. |
Multi-Subject Flight Photography Tips
Photographing Parallel-Flying Pairs
When photographing two birds flying parallel to the plane of your position, that is, from side to side, the best strategy is to place the active AF sensor on the trailing feet of the front bird. As you can see, that plan worked perfectly here and resulted in a balanced composition with the birds nicely back in the frame. If I had had the central sensor on the front bird I would have cut off a good part of the trailing bird.
As always for flight photography, once you have acquired focus with the bird or birds in the zone, that is, either flying parallel to your position or angling at least slightly towards you with a good light angle and decent subject size in the frame, it is always best to fire off several frames in rapid fire succession. The 1D X especially gives you a better chance to come up with a pair or perfect wing positions as I did here. This is the best of a 3-frame sequence; I kept all of them but this one is sheer perfection.
|
This is the BreezeBrowser Main View screen capture. |
BreezeBrowser Main View Screen Capture
Above is the BreezeBrowser Main View screen capture for the opening image. Note that the illuminated red square shows that the center focusing sensor was active at the moment of exposure. In Breezebrowser you need to check “Show Focus Points” under View to activate this feature. To see the focus points in DPP check “AF Point” under View or hit Alt L. Hit Alt M to see Highlight Alert. To learn how and why I use DPP (Canon Digital Photo Professional) to convert my RAW files, see the info on our DPP RAW Conversion Guide here.
Regular readers know that I use and depend on BreezeBrowser every day of the year. It allows me to sort my keepers and deletes the rejects faster than any other Windows browsing program. We use it on the main computer in the home office to catalog our images file-drawer style. And the companion program, Downloader Pro allows me to download my images quickly and conveniently. It automatically adds my IPTC data and the shooting location. I have it set up to create a folder named by the Month/date/year. The Breezebrowser/Downloader Pro combo saves me many hours each week. To learn earn more or to purchase this great PC only program, click here. As far as the BreezeBrowser/Downloader Pro Combo goes, if you are using a Windows platform and are not using these two great programs you are at best, wasting your valuable time. My understanding is that Photo Mechanic is best for Mac-users.
1D X AF Guide
To learn everything that I know about the great 1D X AF system check out our 1D X AF Guide here.
|
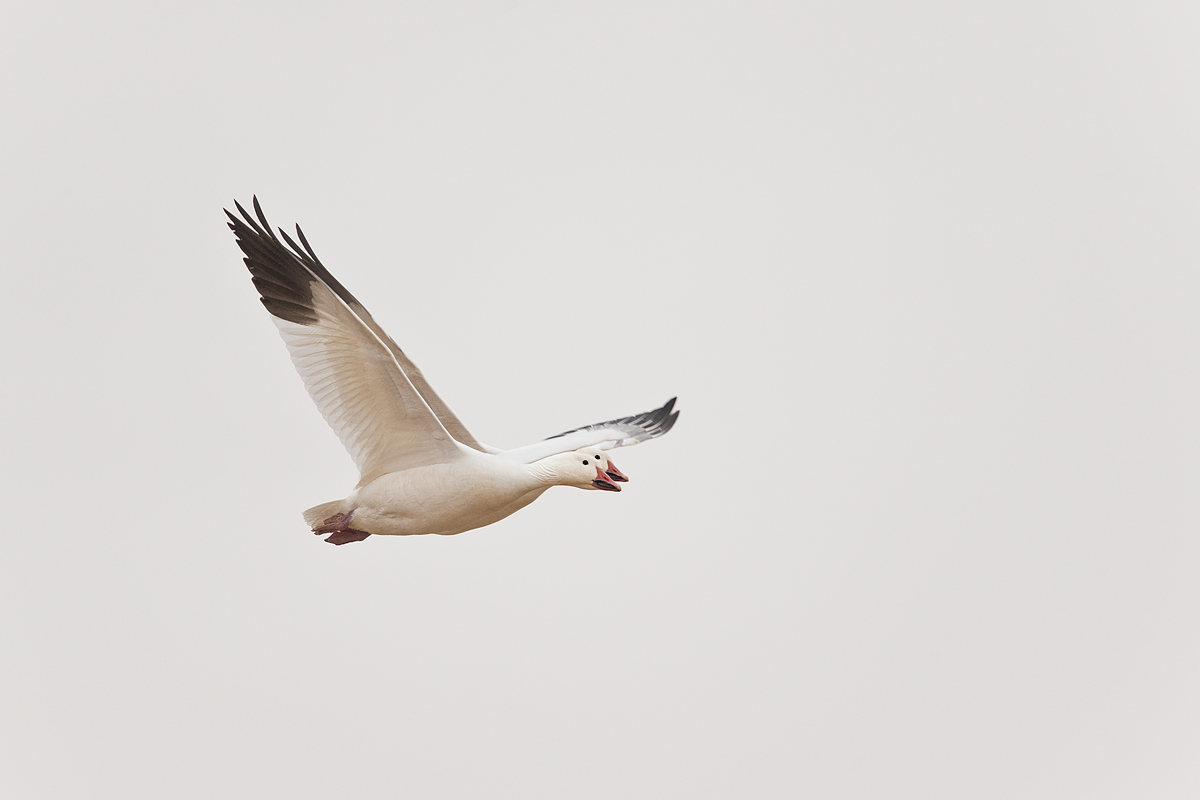
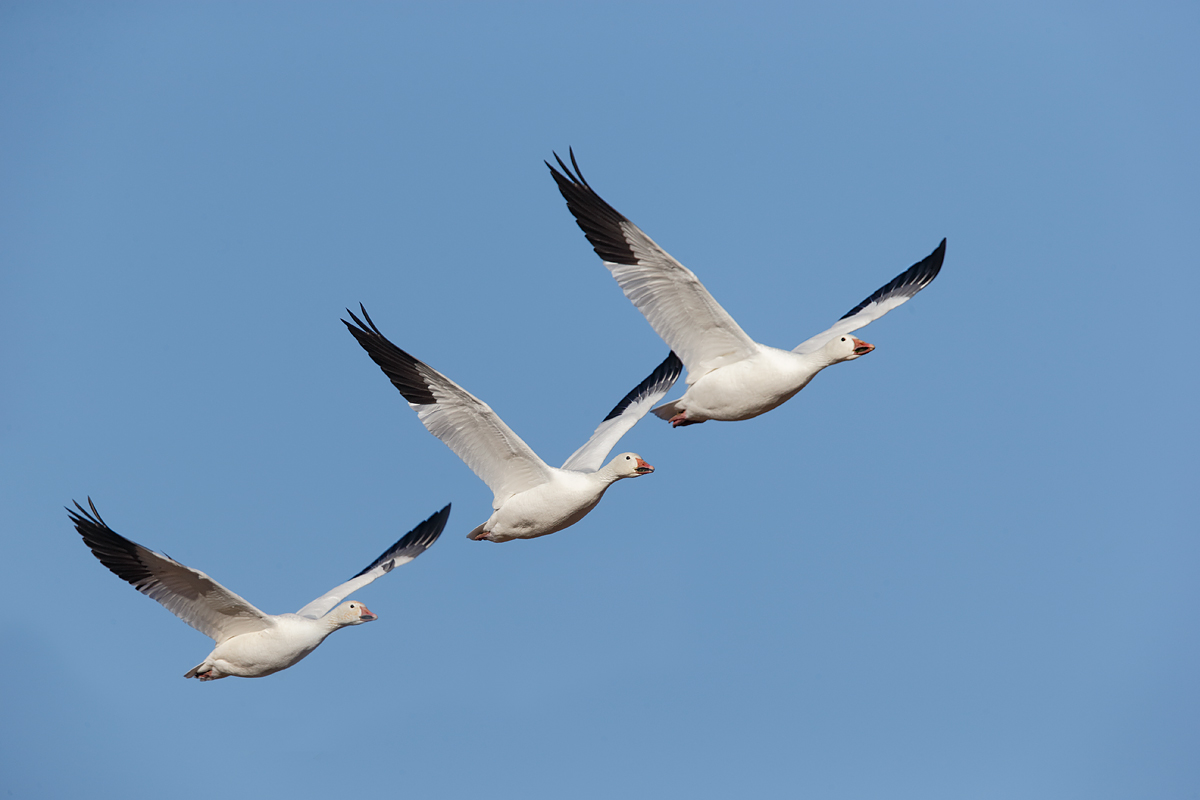
This image was created with the Gitzo 3532 LS carbon fiber tripod, the Mongoose M3.6 head, the Canon EF 600mm f/4L IS II USM lens, the Canon 1.4x EF Extender III (Teleconverter), and the Canon EOS-1D X. ISO 3200. Evaluative metering +2 1/3 stops off the white sky: 1/1000 sec. at f/5.6 in Manual mode. Color temperature: AWB :7000. Central sensor/AI Servo/Surround Rear Focus AF as framed active at the moment of exposure. See the BreezeBrowser screen capture below. Click here to see the latest version of the Rear Focus Tutorial. Click on the image to see a larger version. |
Beating the Dead Horse
If I’ve said it once, I’ve said it a thousand times: “As always for flight photography, once you have acquired focus with the bird or birds in the zone, that is, either flying parallel to your position or angling at least slightly towards you with a good light angle and decent subject size in the frame, it is always best to push the shutter button, hold it down, and fire off several frames in succession.”
Note that that does not mean that you acquire focus while the bird is a mile away, mash down on the shutter button,, and keep making images until the bird is well past your position flying away from you. Proper technique is to make 3 or 4 images when the bird is in the zone as described above. I swear that I have seen folks make 100 images as a bird flies by, no doubt in an effort to impress someone….
With the image above, I created a three frame sequence and got lucky in capturing a neat juxtaposition of the two geese, in part due to the fast frame-rate of the 1D X. Pushing the shutter button when the birds are tiny in the frame, well off light angle, or flying away from you is simply a waste of time and pixels. On the other hand, if the birds are in the zone, push the button whether or not you like the way the birds are arranged in the frame. You cannot react fast enough when you see a pleasing image in the viewfinder. Sometimes you can anticipate a good image, but usually that is not possible.
For the last time, when the birds are in the zone, push the button and create 3- or 4-frame sequences.
|
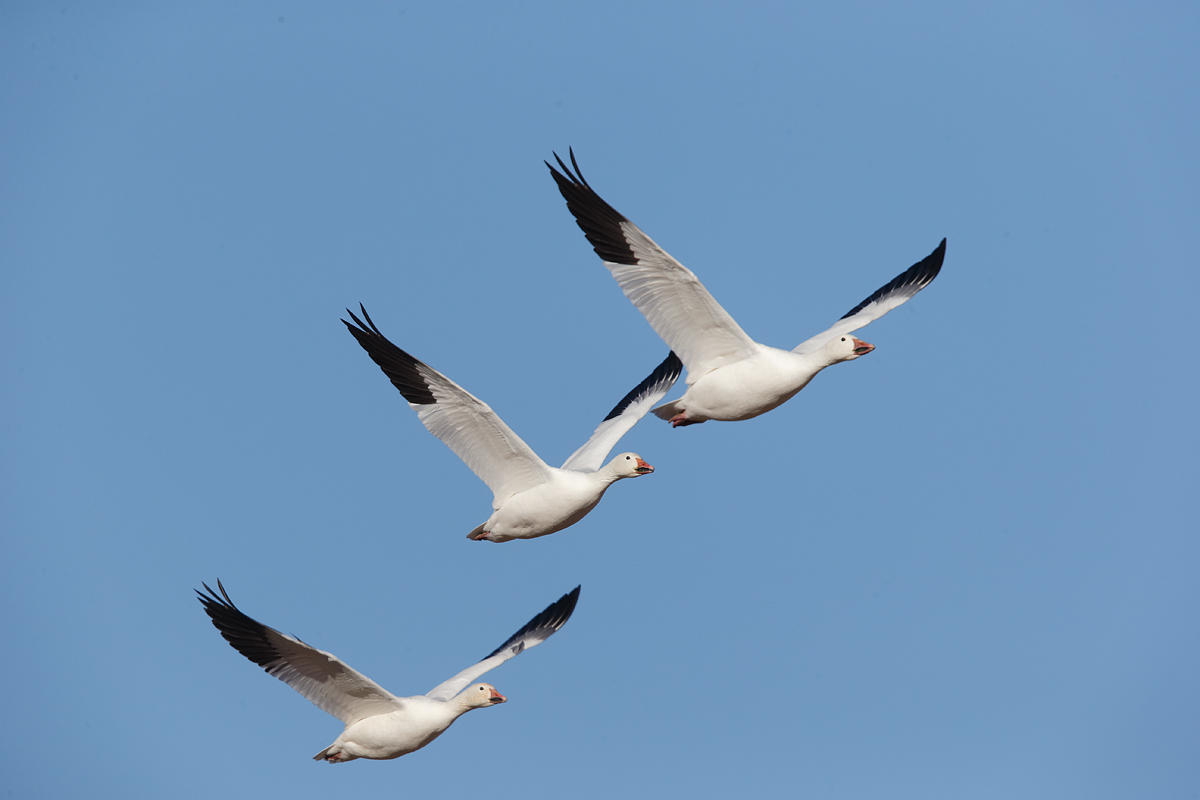
This image was created from the image below with the Gitzo 3532 LS carbon fiber tripod, the Mongoose M3.6 head, the Canon EF 600mm f/4L IS II USM lens, the Canon 2x EF Extender III (Teleconverter), and the Canon EOS-1D X. ISO 400: 1/1600 sec. at f/8 in Manual mode. Central sensor (by necessity) Expand/AI Servo Rear Focus AF on the far wing of the middle bird active at the moment of exposure. But it is likely that one of the Surround AF points took over and just caught that bird’s head. Click here if you missed the latest version of the Rear Focus Tutorial. Click on the image to see a larger version. |
A Primer on Exposing Correctly for Bright Whites in Full Sun and a Note On Sunny F/22 White Exposures
First off, as you might have suspected the original capture here (see below) was created as part of a rapid fire burst–this one a 4-frame sequence. I will say no more. 🙂
Most film folks are familiar with the Sunny f/16 guideline–1 over the film speed will give a good exposure for a middle-toned subject at f/16. That from John Shaw’s classic The Nature Photographer’s Complete Guide to Professional Field Techniques. (I lost my signed copy years ago when moving to Florida….) Most folks, however, never turned the page after reading about Sunny f/16. If I recall correctly, what follows is Sunny f/22 for Whites. This premise states simply that if you know the correct exposure for a middle-toned subject (f/16) then you need to shoot one stop darker for white subjects (f/22). This simple principle is not understood by most nature photographers, heck, by most photographers. The point is hammered home in the Exposure chapter in the original The Art of Bird Photography. Few folks now that ABP was inspired by John’s Amphoto book.
Important Note
After totally screwing up the math when I first posted this, I decided to re-write it correctly. That re-write begins below.
OK, so now let’s do the math and see how it applies to digital. At ISO 400 1/film speed is 1/400 sec. John states that the correct exposure for bright whites in full sun with film is 1/400 at f/22. That extrapolates to 1/800 sec. at f/16 and then again to 1/1600 sec. at f/11. For the Snow Goose trio image I was actually 1 stop lighter than the Sunny f/22 for Whites guideline–1/1600 at f/8 is one stop lighter than 1/1600 sec. at f/11 as suggested by Sunny f/22 for bright whites.
Why? Obviously digital is better able to hold the detail in the highlights than film at a given exposure level.
Here’s the rub, I thought that I had been at 1/1600 at f/9 but I must have inadvertently hit the thumb wheel. Why do I like 1/1600 sec. at f/9 (1/2000 sec. at f/8) for bright whites in full sun? I like to bring my Whites into Photoshop without any RGB values above 235 or so. For the Snow Goose trio image above I needed to do some extra work to restore detail in the brightest WHITEs: I applied an 18% layer of Linear Burn to the WHITEs that I had selected using Select/Color range and followed that with NIK Detail Extractor at about 25% painted in using a Hide-All Layer Mask.
The bottom line is that my baseline exposure for bright whites in full sun with digital at ISO 400 is 1/2000 sec. at f/8 or 1/1600 sec. at f/9. If, in extremely bright sun I run into a few blinkies on the the subject I will go 1/3 stop darker to 1/2500 sec. at f/8 or 1/2000 sec. at f/9 (for flight photography). These bright whites in sun value hold pretty well across all camera bodies and systems though you may have to tweak things 1/3 stop either way after you check the histogram and most importantly, for blinkies.
Kudos to those who e-mailed and left comments noting my math error. What’s my excuse? It’s been a long, long time that I have thought in terms of Sunny 16 in any form. With digital the rule is to get some data in the rightmost box of the histogram and let ’em fly.
The fact is that very few folks know or understand that WHITEs need one full stop less light then middle-tones to be exposed correctly. And BLACKs need 2/3 to a stop more light than middle-tones to be properly exposed. Note that in nearly all cases we need to expose for the highlights and avoid significant blinkies on the subject.
How do I know that most folks do not understand these concepts? I ask the question all the time at seminars, in-the-field workshops, on IPTs, on BPN, and whenever I see someone using an incident meter. The failure rate is 99.9%…..
I am sorry for my careless error. I hope that I got it right this time. 🙂
The Art of Bird Photography II
You can learn a ton about getting the right exposure with digital every time whether the sun is out or it is cloudy in the “Exposure Simplified” of ABP II (916 pages, 900+ images on CD only). If you have no clue as to what I am talking about with regards to exposure or if you would like a complete bird photography education here then you will surely want to order the 2-book combo.
Digital Basics
All of the above is of course described in detail in our in Digital Basics File, an instructional PDF that is sent via e-mail. It includes my complete digital workflow, dozens of great Photoshop tips, several different ways to expand canvas, all of my time-saving Keyboard Shortcuts, Quick Masking, Layer Masking, and NIK Color Efex Pro basics, image clean-up techniques, Digital Eye Doctor, and tons more.
|
This is the original Snow Goose Trio capture. |
As above, the original capture shown here was the best of a 4-frame sequence. It featured three very nice wings-up positions. The problem was that the third bird in the formation was too low. I used a series of Quick Masks as learned in APTATS I and techniques that I learned while editing APATATS II for readability to seamlessly move the bird up in the frame.
Your Favorite?
Take a moment and leave a comment letting us know which of the images above is your favorite. And be sure to let us know why you made your choice.
Last Year’s Grand Prize winning image by Lou Coetzer
|
BIRDS AS ART 2nd International Bird Photography Competition
Time is Running Out! The December 31, 2013 closing deadline is fast approaching.
Learn more and enter the BIRDS AS ART 2nd International Bird Photography Competition here. Twenty-five great prizes including the $1000 Grand Prize and intense competition. Bring your best.
Support the BAA Blog. Support the BAA Bulletins: Shop B&H here!
We want and need to keep providing you with the latest free information, photography and Photoshop lessons, and all manner of related information. Show your appreciation by making your purchases immediately after clicking on any of our B&H or Amazon Affiliate links in this blog post. Remember, B&H ain’t just photography!


Amazon
Everyone buys something from Amazon, be it a big lens or deodorant. Support the blog by starting your search by clicking on the logo-link below. No purchase is too small to be appreciated; they all add up. Why make it a habit? Because I make it a habit of bringing you new images and information on an almost daily basis.
Typos
In all blog posts and Bulletins feel free to e-mail
IPT Info
Many of our great trips are filling up. You will learn more about how to make great images on a BAA IPT than anywhere else on the planet. Click here for the schedule and additional info.



All the images are great Artie, specially the Geese trio.
I’m nourishing a small wish for a while. Few tips from the Guru (you) on how to best utilize prosumer setup like a 1.6 crop body + EF 400mm f/5.6L USM.
If you find time; that would be great.
Thanks in advance.
Hand hold. Expose to the right. Pre-focus manually. Make sure that the lens is on far focus limit range…. Practice!
Thank you boss, will follow.
The second image of the Snow Geese side by side is so unusual and so good!! The others are also excellent.
Thanks for your kind words and for leaving a comment. artie
Thank you for including the time of day in your data. Although I don’t understand every thing it’s another clue.
YAW. All of the exposure answers are in ABP and ABP II. The time will be a big clue in answering the image question in the next blog post….
Artie, I airways learn something from your blogs, but this one is a real gem. Lots of VERY useful information here, already copied and pasted into a Word document I refer to from time to time. Rest assured I’m not the only one who appreciates these tips from you. I, for one, read them over and over again. Having been at Bosque with you, I can visualize exactly what you are saying here; I feel like I’m there shooting the cranes and snow geese, but with greater understanding.
Thanks. John! (John is a multiple IPT-veteran.)
To be an Auburn fan you need to know…War D–n Eagle!!!
Thanks Dick. Dr. Curtain is a multiple-IPT veteran 🙂
Lots of math details, but it is faster to check the histogram for me! Love the 2nd image of the 2 geese nearly side by side! How perfect! And always, much appreciation for all the work you put into the blogs. They are indeed educational and inspirational!
Thanks Nancy. Nancy is an Out-of-the-Box Moderator at BirdPhotographers.Net and an IPT veteran.
Really like the image of the two snow geese best – perfectly aligned…and sharp. Glad you have become an Auburn fan. WDE!!!
Hey Dick, YAW and me too! What is WDE???
Thanks. Send more photo tips.
YAW. Just visit the blog regularly. 🙂
Arthur
“After I take my 59 degree Fahrenheit ice baths before dinner each night…..”
Will you please explain why 59 degrees for a bath?
Ice Bath even….
Brrrrr.
Is this phrase a euphemism?
Thank you.
Jim Amato
Hi Jim,
No euphemism. I get into a tub filled with tap water and a good amount of ice. For 40 minutes. The last 15 minutes I am lying back with three frozen jugs of water on my chest. Am I nut? No. The main health benefit for me is far better sleep with far fewer pit-stops… After and ice bath I usually get up only once each night, and that after a nice 4-5 hour solid sleep. Without ice baths you do not want to know…. It also does wonders for my bad right shoulder.
Scroll down here for info on Cold Thermogenesis:
http://jackkruse.com/easy-start-guide/
Jacj Kruse is a neurosurgeon with a world wide following.
Here is the list of benefits:
Lower body fat
Increase hormone levels
Reproductive fitness!
Fertility
Reverse diabetes
Cut food cravings
Kill fat permanently
Strengthen adrenal function
Fix thyroid disorder
Super immune function
Deep sleep
Pain management
Sense of well being and better attitude
Cut visceral fat first
Promote cessation of eating disorders
More interesting stuff from the guy here: http://jackkruse.com/cold-thermogenesis-6-the-ancient-pathway/
1/400 @ F22 becomes to my calculation 1/800 @ F16 and the 1/1600 @ F11- with finally 1/3200 @ F8.
I do not see how 1/400 @ F22 Becomes 1/800 @ F11
For “sunny 16” – 1/400 @ F16 would become 1/1600 @ F8 – with F9 being one stop darker-
This would appear to be a regular use of the “sunny 16 rule” -not John Shaw’s Sunny white rule.
Have I garbled something in my Translation from F22-F8?
Good job Eugene. I did screw up. Please see the re-write that begins above at Important Note.
Thanks, Artie. Great advice as always. I was photographing eagles fishing recently, and I do keep the shutter button down for more than 4 shots, because they keep doing such interesting things after they catch the fish, but not more than 15 or 20. Many people there were firing off 100 or so at a time. I love all four of your images but my favorite is the second one, the double geese, so close and perfectly synchronized. Second-favorite is the third image of the three geese. I like the spacing in that one better than the spacing in the fourth image.
For John Shaw’s bright white sunny f22 rule at ISO 400 I get —
f22 1/400
f16 1/800
f12 1/1250
f11 1/1600 JS 1/800
f9 1/2500 AM 1/1600
f8 1/3200 JS 1/1600 AM 1/2000
I just made this little chart to see how all the numbers fit from the explanation above. Is my math wrong or am I just not understanding some basic thing here?
Hi Eleanor. Good job. And thanks. Though I do not fully understand your notes I did screw up. Please see the re-write that begins above at Important Note.
I think you have a typo. It should be 1/400 at f22, not f12.
Thanks Leonard. Good catch. It has been fixed. artie