The Streak Continues
Today was a relaxing final one in Kyoto. We strolled the Nishiki Market before lunch–heck, we wound up skipping lunch–absorbing a final dose of Japanese culture. I am finishing up this post–it took about 6 hours in all with the image processing–at about 6:00pm Japan time on Saturday, March 2, 2014. That is 4:00am on the same day in Florida and in New York. Tomorrow Denise and I take the high speed train to Tokyo Station, the Narita Express to the Airport, and a shuttle bus to the hotel where we overnight for our Tuesday flights to our respective homes.
This post marks 93 straight days with a new blog post, a record by far that should be extended for at least another day or so, or not. Or more…. To show your appreciation for my efforts here, we ask that use our B&H and Amazon affiliate links for all of your B&H and Amazon purchases. Please check the availability of all photographic accessories in the BIRDS AS ART Online Store. We sell only what I use and depend on. We will not sell you junk. We know what you need to make creating great images easy and fun. And we are always glad to answer your gear questions via e-mail.
You can find the following items in the store: Gitzo tripods, Mongoose M3.6 and Wimberley heads, plates, low feet, and accessories, flash brackets, , Delkin e-film Pro Compact Flash Cards, LensCoat products, and our unique line-up of educational materials including ABP I & II, Digital Basics, Site and Set-up e-Guides, Canon and Nikon Camera Users and AF e-Guides, and MP-4 Photoshop video tutorials among others.
We would of course appreciate you using our B&H and Amazon affiliate links for all of your B&H and Amazon major gear, video, electronic, household, and personal purchases. For the photographic stuff mentioned in the paragraph above we would of course greatly appreciate your business. Here is a huge thank you to the many who have been using our links on a regular basis and visiting the BAA Online store as well.
Thanks a Huge Stack!
Thanks a stack to all who visit the blog regularly. February was a record month for the BAA B&H affiliate program. And dozens of folks are getting in the habit of using Amazon for both the minor household and entertainment purchases as well as for major purchases. Their kindness is greatly appreciated and it is great to see that the streak is paying dividends. Love you all. artie
The BIRDS AS ART 2nd International Bird Photography Competition
Thanks a stack to the many who entered. We have a ton of great images to get through. Judging should begin on or about March 10th. The process will be a lengthy one; we appreciate your patience.
|
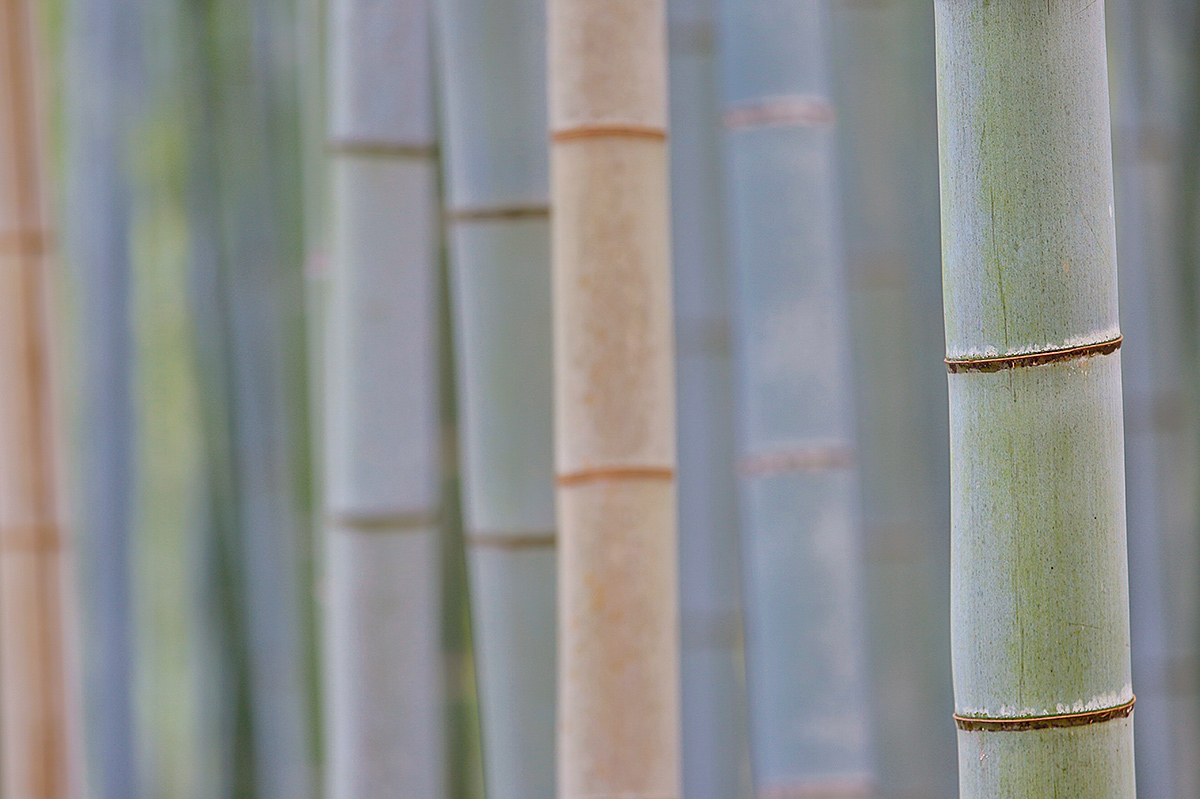
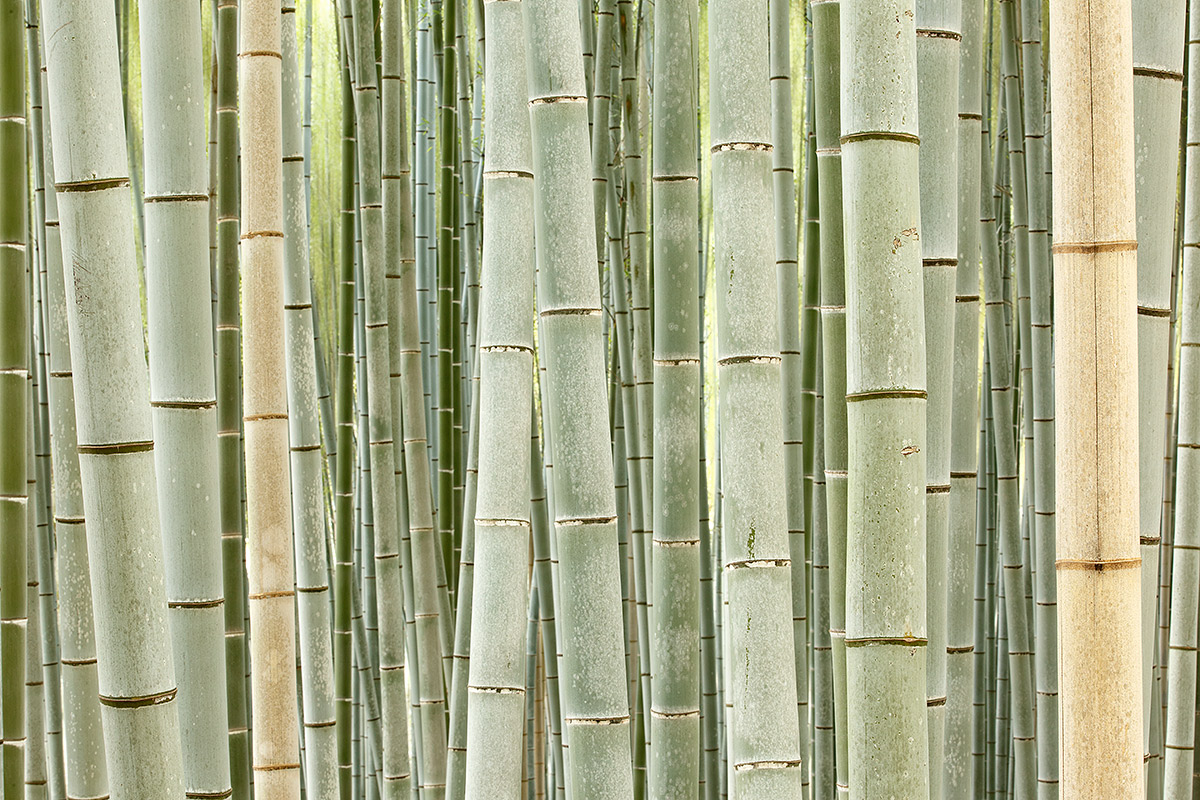
This image was created in Kyoto, Japan with the Gitzo 3532 LS carbon fiber tripod, the Mongoose M3.6 head, the Canon EF 70-200mm f/2.8L IS II USM lens (at 88mm), and the Canon EOS 5D Mark III DSLR. ISO 400. Evaluative metering +2/3 stop as framed: 5 sec. at f/22 in Av mode. Color temperature: 10,000K. Central Sensor/AI Servo-Surround/Rear Focus AF on the closest bamboo on the right and re-compose. Click here to see the latest version of the Rear Focus Tutorial. Click on the image to see a larger version. Image #1: Horizontal Density |
Bamboo-zled
Denise and I and several of those who continued on to Kyoto with us spent our first three mornings at one of two bamboo forests. We were led to the traditional bamboo forest by Paul McKenzie who had photographed there before. We found the smaller tract of bamboo on the hillside above the Fushimi Inari Taisha Shrine on our own. The first two mornings Denise photographed exclusively with her trusty Canon EF 24-105mm f/4L IS USM .ens. I went with the tripod-mounted Canon EF 70-200mm f/2.8L IS II USM lens and the hand held Canon EF 24-70mm f/2.8L II USM lens. We used the same gear to photograph at the shrine; if you missed my images from there you can click on Tunnel Visions. On the last morning Denise brought along the old Canon 15mm fish eye now replaced by the Canon EF 8-15mm f/4L Fisheye USM lens. You can see some of Denise’s tunnel and bamboo images in her killer “Japan–Odds and Ends” blog post here.
I spent the better part of the first morning creating similar images at small apertures. I hated the leaf detail that showed through in the areas where the were no bamboo trunks. I used a variation of a technique taught to me by the aforementioned Denise ippolito: I ran a relatively large (vertical) Motion Blur on its own layer, added a Hide-All Mask, painted away the leaf detail, and lowered the opacity of the layer to about 75% to achieve the desired result that you see above. Thanks Lady D.
Digital Basics
Learn everything that I know about using Photoshop in Digital Basics, an instructional PDF that is sent via e-mail. It includes my complete digital workflow, dozens of great Photoshop tips, the use of Contrast Masks, several different ways of expanding canvas, all of my time-saving Keyboard Shortcuts, Quick Masking, Layer Masking, and NIK Color Efex Pro basics, my killer image clean-up techniques, Digital Eye Doctor, and lots more.
Learn the details of advanced Quick Masking techniques in APTATS I. Mention this blog post and apply a $5 discount with phone orders only. Learn advanced Layer Masking Techniques in APTATS II. Mention this blog post and apply a $5 discount with phone orders only. by the pair, APTATS I and APTATS II and we will be glad to apply at $15 discount with phone orders only.
The DPP RAW Conversion Guide
After seeing the accurate colors that I get from my DPP RAW conversions, Japan in Winter co-leader Paul McKenzie is switching to DPP conversions and Denise Ippolito is considering doing the same. Now that is amazing…. To learn why I use Canon’s Digital Photo Professional (DPP) to convert every image that I work on, click here.
|
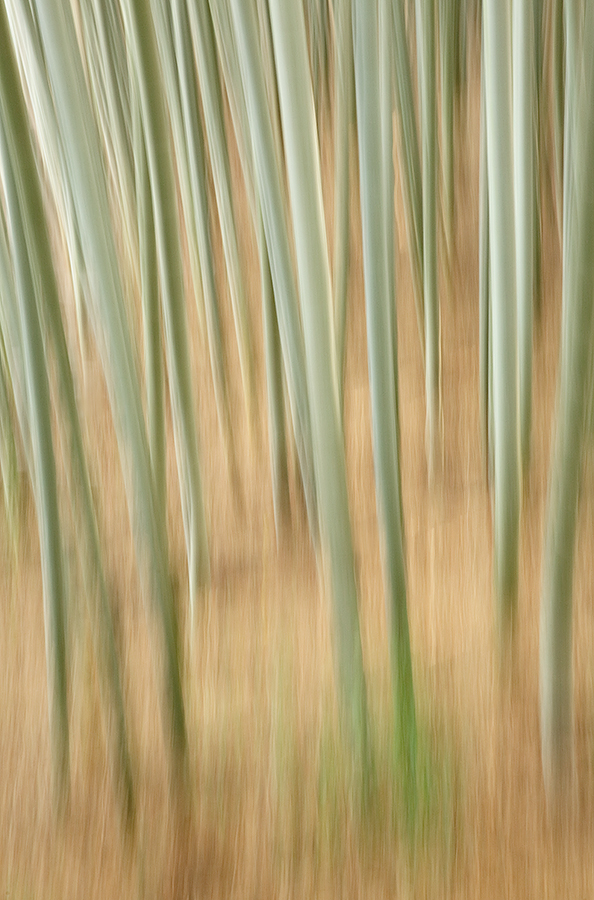
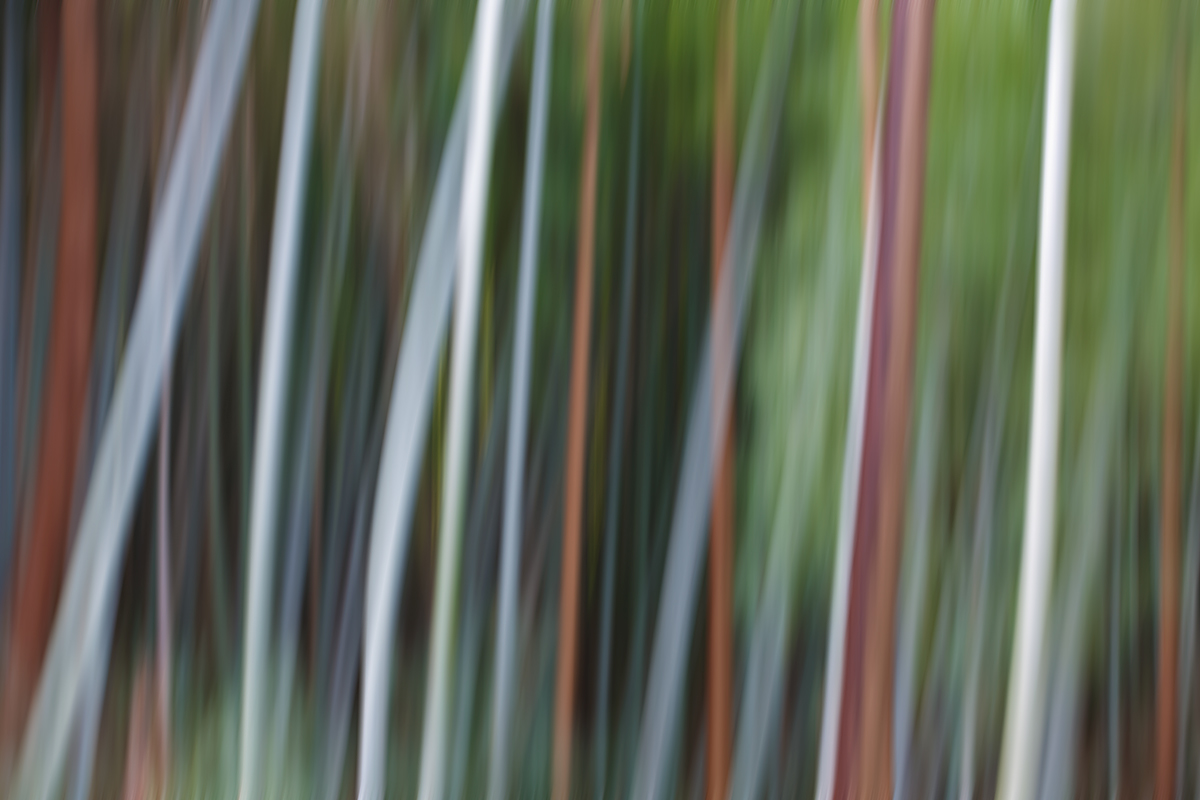
This image was created in Kyoto, Japan with the Gitzo 3532 LS carbon fiber tripod, the Mongoose M3.6 head, the Canon EF 70-200mm f/2.8L IS II USM lens (at 95mm), and the Canon EOS 5D Mark III DSLR. ISO 50. Evaluative metering at zero: 1/2 sec. at f/6.3 in Tv mode. Color temperature: AWB. Central Sensor/AI Servo-Surround/Rear Focus AF on the closest bamboo trunk and re-compose. Click here to see the latest version of the Rear Focus Tutorial. Click on the image to see a larger version. Image #2: Angled Vertical Pan Blur |
Vertical Pan Blurs
With such strong and beautiful patterns and a variety of colors creating some vertical pan blurs was a great option. We urge folks to create dozens of similar blurs once they see a decent motfi; in most cases, one or two will leap off the monitor and scream, “This is the one!” Please understand that creating pleasing blurs is not luck. Almost all need to be carefully planned and executed and be accurately focused. Learn to create your own pleasing blurs of all types in A Guide to Pleasing Blurs by Denise Ippolito and yours truly.
I added just a small bit of angled vertical motion blur to this image to enhance it.
|
|
This Art Vivid In-Camera HDR image was created in Kyoto, Japan with the Gitzo 3532 LS carbon fiber tripod, the Mongoose M3.6 head, the Canon EF 70-200mm f/2.8L IS II USM lens, the Canon Extender EF 1.4X III (at 245mm), and the Canon EOS 5D Mark III DSLR. ISO 400. Evaluative metering +1 1/3 stop yielded a base exposure of 1 sec. at f/4 in Av mode (+/- 2 stops). Color temperature: AWB, Central Sensor/AI Servo-Surround/Rear Focus AF on the closest bamboo stalk on the right and re-compose. Click here to see the latest version of the Rear Focus Tutorial. Click on the image to see a larger version. Image #3: Wide Aperture Bamboo Grouping |
Wide Apertures the Answer…
After spending the better part of two mornings working at f/22 or so, I finally went to f/4 to blur the background bamboos rather than attempt to make everything sharp. That experiment was a great success and led to the creation of the images above and below.
Long, Slow, Exposures, Small Apertures, and Image Sharpness
To guarantee sharp images with the extremely slow shutter speeds used to create the images here I used a technique that I developed on the Holland Tulip trip last spring: 2-second self-timer with Live View for Mirror Lock. I was aware that I might need to turn off IS but with relatively short focal lengths (as compared to 600 and 840mm) that step was not necessary. It is a great technique that produces sharp images as long as you focus accurately and do not accidentally whack your tripod during the exposure. 🙂
|
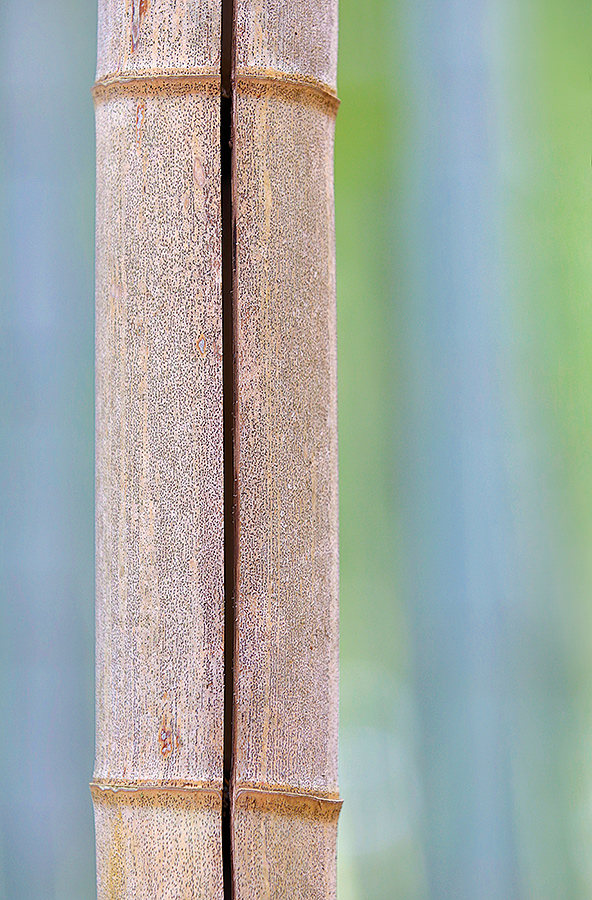
|
This Art Vivid In-Camera HDR image was created in Kyoto, Japan with the Gitzo 3532 LS carbon fiber tripod, the Mongoose M3.6 head, the Canon EF 70-200mm f/2.8L IS II USM lens, the Canon Extender EF 1.4X III (at 160mm), and the Canon EOS 5D Mark III DSLR. ISO 400. Evaluative metering +1 stop yielded a base exposure of 1/10 sec. at f/4.5 in Av mode (+/- 2 stops). Color temperature: AWB. Central Sensor/AI Servo-Surround/Rear Focus AF on the crack in the main bamboo stalk and re-compose. Click here to see the latest version of the Rear Focus Tutorial. Click on the image to see a larger version. Image #4: Wide Aperture/Single Cracked Bamboo |
Art Vivid In-Camera HD Tricks
1-You need to frame a bit wider than what you see in the viewfinder as the resulting 61-mb jpegs are cropped about 3-4%.
2-You need to use a lot more plus EC (exposure compensation) when creating Art Vivid HDR images than when creating Natural HDR images.
3-My latest, greatest Art Vivid tip: when working in low light, shade, and heavy cloud resist the urge to work at any White Balance other than AWB. By working in AWB the images will be less YELLOW and less funky than when working at the higher Kelvin temperatues.
Learn how to set your 5D III up for both in-camera HDRs and in-camera Multiple Exposures in my EOS-5D Mark III User’s Guide. Learn everything that I know about this great camera including coverage of its all-new AF system and all the Menu Items and Custom Functions that I use. You will not only learn what to set but will learn why I made my choices as they pertain to nature and wildlife photography.
|
|
This vertical pan blur was created the hand held Canon EF 24-70mm f/2.8L II USM lens (at 61mm) and the Canon EOS 5D Mark III DSLR. ISO 800 (should have been a much lower ISO). Evaluative metering +1/3 stop as originally framed: 1/2 sec. at f/14 in Tv mode. Color temperature: 10,000K. Central Sensor/AI Servo-Surround/Rear Focus AF on the middle of the bamboo in the middle, recompose, and then pan from down to up during the exposure. Click here to see the latest version of the Rear Focus Tutorial. Click on the image to see a larger version. Image #5: Skewed Vertical Pan Blur |
The Influence of Perspective Choice
While creating the image above I was standing on a relatively high shelf of land that left me about 15 feet above my subjects, a pleasing stand of bamboo. Having to point my wide angle lens down before zooming up during the slow exposure left the trees on each side of the frame pleasingly skewed outwards. Compare the results here with Image #2 where I was pretty much even with my subjects throughout the range of my panning motion.
|
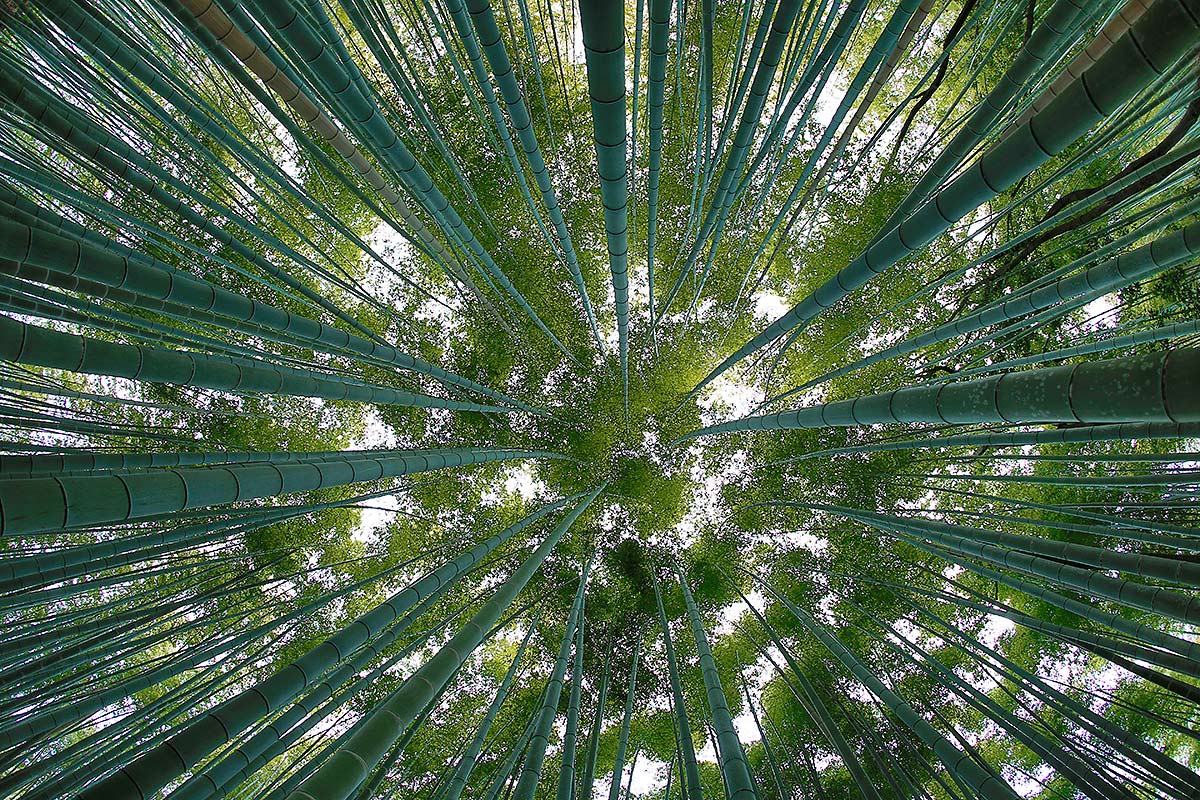
This in-camera Art VIvid HDR image was created in Kyoto, Japan with the Gitzo 3532 LS carbon fiber tripod, the Mongoose M3.6 head, and my Giottos MH 1302-655 Ballhead with a Wimberley P-5 plate attached to the bottom of my Canon EOS 5D Mark III DSLR. (I keep the Giotto’s tiny ballhead in my vest; it takes less than two minutes to mount the plate on the camera body, spin off the Mongoose M3.6, and replace it with the tiny head.) The lens was the old Canon 15mm fish eye now replaced by the Canon EF 8-15mm f/4L Fisheye USM lens. ISO 400. Evaluative metering +2/3 stop yielded a base exposure of 1/40 sec. at f/5.6 in Av mode (+/- 2 stops). Color temperature: AWB. I focused one-third of the way up one of the bamboo trunks via contrast off the sensor using Live Mode AF in Live View (with Rear Focus/AI Servo AF). Image #6: Fish Eye Straight Up |
The Fish Eye Lens on a Tripod
I had never worked with the fish eye lens on a tripod before while pointing the lens straight up at the sky so I had a bit of finagling to do. I mounted the tiny ballhead, put the P-5 camera body plate on my 5D III, shortened the two two rear legs of the tripod and lengthened the forward-pointing leg a bit, I pulled the stem of the ballhead into the slot for vertical, got down on the ground flat on my back, positioned the tripod directly above me, and adjusted the tripod legs with the leg tabs pulled out so that the round tripod base or platform was relatively square to the world, that is, roughly parallel to the ground. Then I went to work creating images. I am not sure why but the image above was my favorite fish eye shot by a wide margin.
Your Favorite?
Please take a moment and let us know which of the six images above you like the best. Be sure to let us know why you made your choice.
|
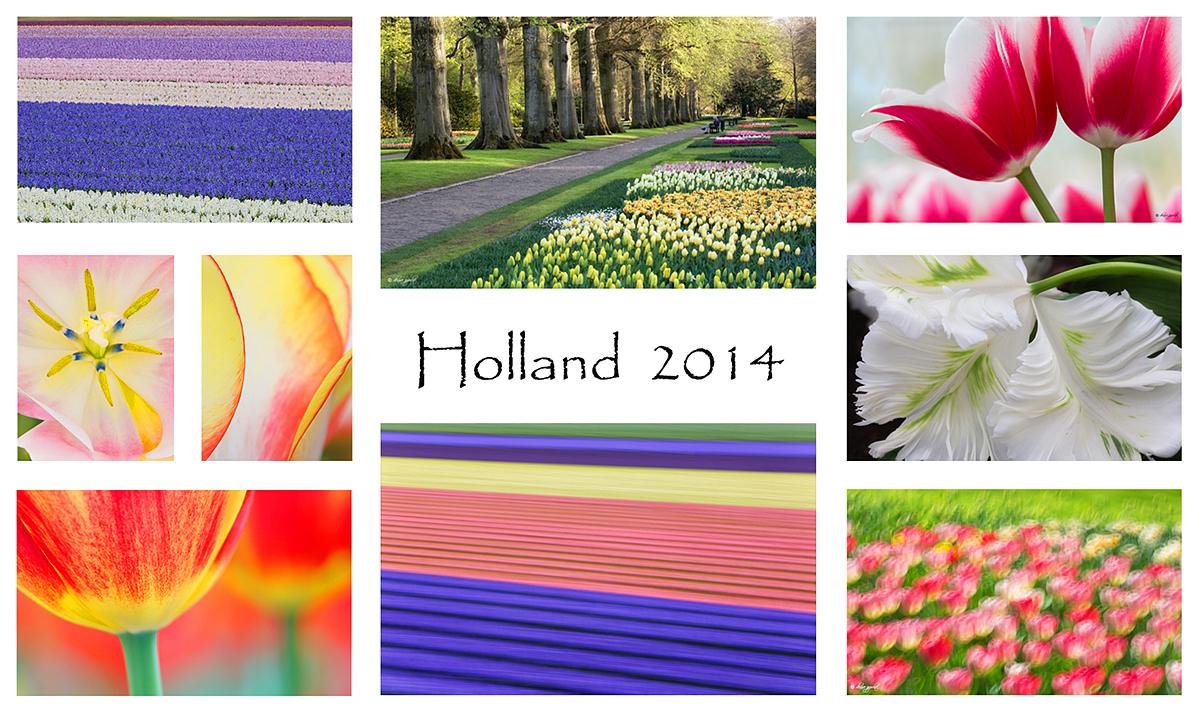
Images copyright 2012: Denise Ippolito & Arthur Morris. Card design by Denise Ippolito. Click on the image to enjoy a spectacular larger version. |
Holland 2014 7 1/2-Day/8-Night: A Creative Adventure/BIRDS AS ART/Tulips & A Touch of Holland IPT. April 17-April 24, 2014: $4995 Limit: 12/Openings: 5
We still have room for 5 more flower photographers on this great trip.
Join Denise Ippolito, Flower Queen and the author of “Bloomin’ Ideas,” and Arthur Morris, Canon Explorer of Light Emeritus and one of the planet’s premier photographic educators for a great trip to Holland in mid-April 2014. Day 1 of the IPT will be April 17, 2014. We will have a short afternoon get-together and then our first photographic session at the justly-famed Keukenhof. Most days we will return to the hotel for lunch, image sharing and a break. On Day 8, April 24, we will enjoy both morning and afternoon photography sessions.
The primary subjects will be tulips and orchids at Keukenhof and the spectacularly amazing tulip, hyacinth, and daffodil bulb fields around Lisse. In addition we will spend one full day in Amsterdam. There will be optional visits the Van Gogh Museum in the morning and the Anne Frank House in the afternoon; there will be plenty of time for street photography as well. And some great food. On another day we will have a wonderful early dinner at Kinderdijk and then head out with our gear to photograph the windmills and possibly some birds for those who bring their longs lenses. We will spend an afternoon in the lovely Dutch town of Edam where we will do some street photography and enjoy a superb dinner. All lodging, ground transportation, entry fees, and meals (from dinner on Day 1 through dinner on Day 7) are included. For those who will be bringing a big lens we will likely have an optional bird photography afternoon or two.
Click here for additional info or to register.
|
|
Join me for the 2014 Tanzania Summer Safari! |
2014 Tanzania Summer Safari, 14-day African Adventure/leave the US on August 9. Fly home on August 24: $12,999.
Co-leaders Todd Gustafson & Arthur Morris. The limit is 12. Three photographers/van; you get your own row of seats. Our trip is a bit more expensive than the average safari for good reason. It is the best. We have the best driver guides with a total of decades of experience. They have been trained over the years by Todd and by me to drive with photography in mind. We have the best and most knowledgeable leaders. We stay in the best lodges and camps. We hope that you will join us for what will be Todd’s 35th African safari, and my 8th.
If you are seriously interested please e-mail me; I will be glad to send you the illustrated PDF with the complete itinerary and deposit info.
What else makes this expedition unique?
•Pre-trip consultation and camera equipment advice
•Award-winning photographers as your guides
•A seamless itinerary visiting the right locations at the best time of year
•Hands-on photography instruction in the field
•Specially designed three roof-hatch photo safari vehicles
•Proprietary materials for preparation, including free copy of “A Photographer’s Guide to Photographing in East Africa.”
•Post-safari image critiques
All-inclusive (double-occupancy) except for your flights to and from Kilamajaro Airport, bar drinks, soda & water (except at the Intimate Tented Camp where everything is free for our entire stay), tips for drivers and camp staff, personal items, and trip insurance.
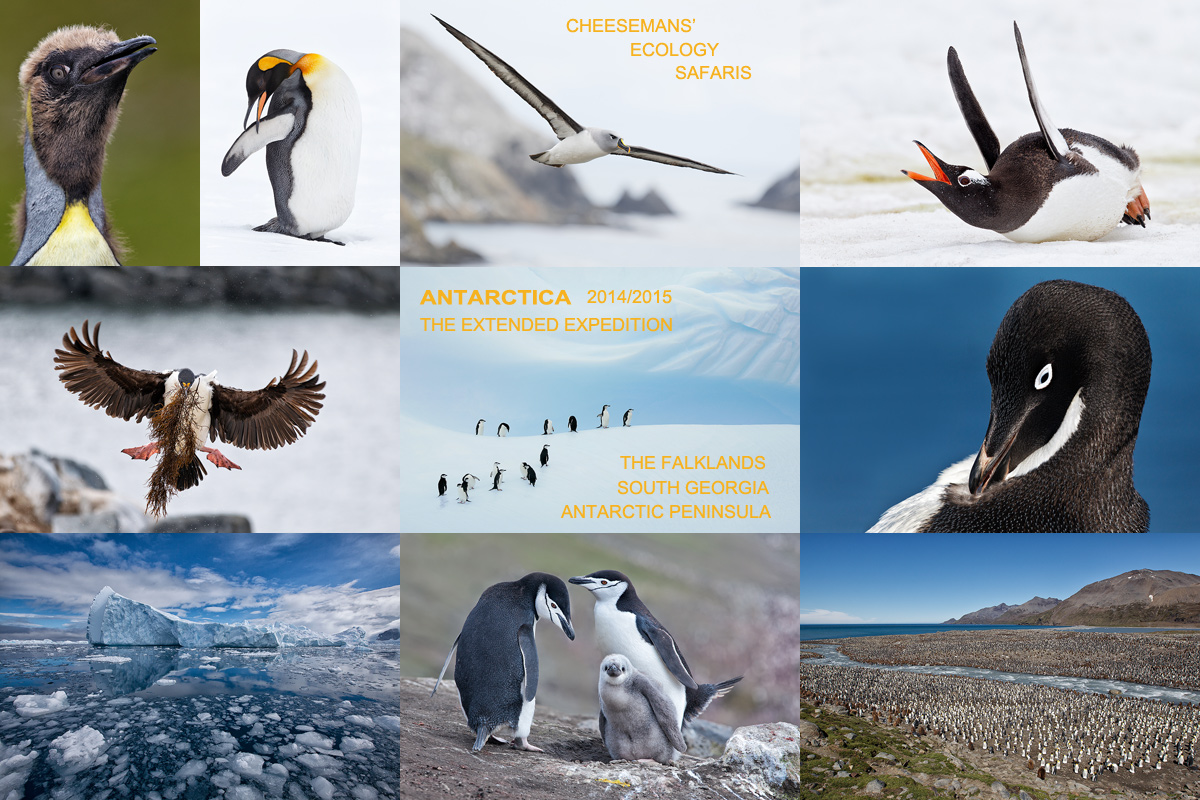
|
|
Breathe deeply, bite the bullet, and live life to its fullest; we all get only one ride on the merry-go-round… Join me on this great trip. Click on the image to enjoy a larger version. |
The Southern Ocean…
If you would like to explore the possibility of joining me on the Cheesemans’ Ecology Safaris Antarctica/The Extended Expedition Voyage< trip: Antarctic Peninsula, South Georgia and Falkland Islands: December 13, 2014 to January 10, 2015, click here for additional information and then shoot me an e-mail.
The DPP RAW Conversion Guide
To learn why I use Canon’s Digital Photo Professional (DPP) to convert every image that I work on, click here.
Support the BAA Blog. Support the BAA Bulletins: Shop B&H here!
We want and need to keep providing you with the latest free information, photography and Photoshop lessons, and all manner of related information. Show your appreciation by making your purchases immediately after clicking on any of our B&H or Amazon Affiliate links in this blog post. Remember, B&H ain’t just photography!


Amazon
Everyone buys something from Amazon, be it a big lens or deodorant. Support the blog by starting your search by clicking on the logo-link below. No purchase is too small to be appreciated; they all add up. Why make it a habit? Because I make it a habit of bringing you new images and information on an almost daily basis.
Typos
In all blog posts and Bulletins, feel free to e-mail or to leave a comment regarding any typos, wrong words, misspellings, omissions, or grammatical errors. Just be right. 🙂
IPT Info
Many of our great trips are filling up. See especially info on the South Florida, Holland, and Nickerson Beach IPTs. Two great leaders on most trips ensure that you will receive individual attention, have all of your questions answered, and learn a ton including how to think like a pro, see the situation, and get the right exposure every time. In addition you will have fun, and make lots of great images. Click here for IPT details and general information.



Hi, Artie. Wonderful images. I hope it’s OK for me to say I think I can see Denise’s influence. I know I’d consider that a huge compliment if anyone said that about any of my photos, or if someone saw your influence, so it’s meant as a huge compliment to both of you. My favorites are numbers 1, 4, and the last one. I’ve taken photos like the last one in an Australian rainforest but yours is so much better. I love the sharpness, detail, color, and composition in all of them. Safe travels, Your timing is perfect; east-coast snowstorm tonight and Monday but should be long gone by the time you get home.
First and last images are nothing short of genius……this is what I did prior to Avian work…
Thanks Henry. What’s work???
My Favorite: Image#6: Fisheye Straight Up. A close second: Image#5: Skewed Vertical Pan Blur
Awesome blurs of the bamboo! #3 & #5 really catch my eye. Love the soft pastels of #3 and the addition of the unblurred bamboo on the right. Being able to clearly see the horizontal lines in the bamboo adds much interest to the composition. In #5 I really like the unique perspective of looking down & the bamboo rising gracefully upwards. Also lovely soft colors. I have thoroughly enjoyed your trip via the computer.
Thank you Artie for taking us to Japan with you via your posts. Always such great inspiration seeing your incredible photos and knowing that posting them with all the photo information takes up a great deal of your time. THANK YOU for being who you are and sharing all this with us!
Love the last photograph using the wide angle lens looking up!
I do have one question using an ISO of 400 on most of the photos. Is this because the bamboo trees had movement to them?
I understand you being as busy as you are if this question goes unanswered.
Thanks again. Safe travels,
Tony
Thanks Tony. ISO 400 is my standard ISO. I try to remember to set lower ISOs when creating pleasing blurs but sometimes I forget…. The only time wind was a small problem was with the fish eye stuff as the leaves on the tops of the tress were moving a bit, but with them being relatively small and far away I did not run into any problems.
For fisheye photos straight up, like at a cathedral, I just lay the 5DMKIII on the ground and use the 10 sec timer and get out of the way. Auto focus and f22 seem to do the trick.
Thanks Jack but there are way too many variables there for me with that approach….
I like the first image but the last is great. Did you have any problems keeping people out of the image?
Having just seen Denise’s almost identical image I feel yours is stronger possibly due to it being darker and more contrasty? I wonder what I would have thought had I seen hers first.
What do others think?
Our small group comprised the whole crowd so no, no problems at all with people. Denise often goes for the softer, lighter look. She sure made some great images and she often inspires me.
Hi Arthur, too hard to pick a favorite here, they are all fantastic. The green tones are beautiful. Save travels home.