The Streak Continues: 210
It is now just before 8:45am at my home in Indian Lake Estates–I slept really well last night. I am getting really excited about the UK Puffin IPT. I fly to Newark on Tuesday afternoon where I will meet Denise and one of our 7 clients for the red eye flight to Edinburgh, Scotland, arriving in the UK at 7:55am on Wednesday morning. Amazingly this post took about 2 1/2 hours to prepare. Enjoy and learn.
This post marks 210 consecutive days with a new blog post. With so many folks getting in the habit of using our B&H links and our Amazon logo-links why quit now? April, May and June have been fantastic as lots of folks are getting the message; using my affiliate links does not cost you a penny and helps support my efforts here. To show your appreciation, I do ask that you use our the B&H and Amazon affiliate links on the right side of the blog for all of your purchases. Please check the availability of all photographic accessories in the BIRDS AS ART Online Store, especially Gitzo tripods, Wimberley tripod heads, and the like. We sell only what I have used and tested, and know that you can depend on. We will not sell you junk. We know the tools that you need to make creating great images easy and fun. And we are always glad to answer your gear questions via e-mail.
You can find the following items in the store: Gitzo tripods, Mongoose M3.6 and Wimberley heads, plates, low feet, and accessories, flash brackets, , Delkin e-film Pro Compact Flash Cards, LensCoat products, and our unique line-up of educational materials including ABP I & II, Digital Basics, Site and Set-up e-Guides, Canon and Nikon Camera Users and AF e-Guides, and MP-4 Photoshop video tutorials among others.
I would of course appreciate your using our B&H affiliate links for all of your major gear, video, and electronic purchases. For the photographic stuff mentioned in the paragraph above we, meaning BAA, would of course greatly appreciate your business. Here is a huge thank you to the many who have been using our links on a regular basis and visiting the BAA Online store as well.
|
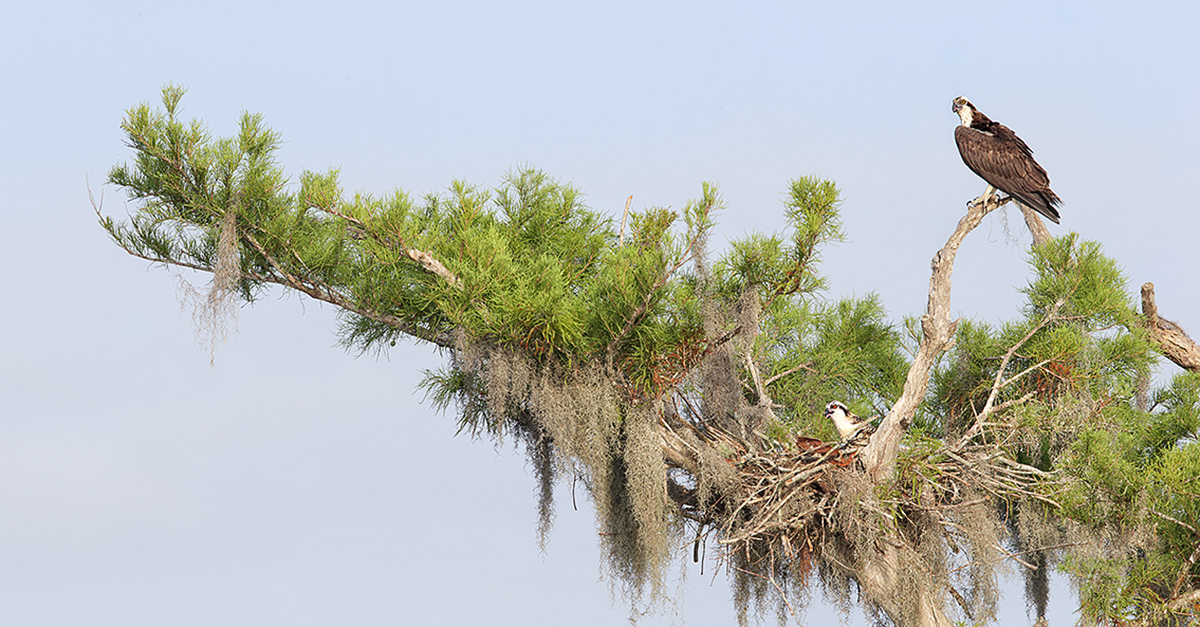
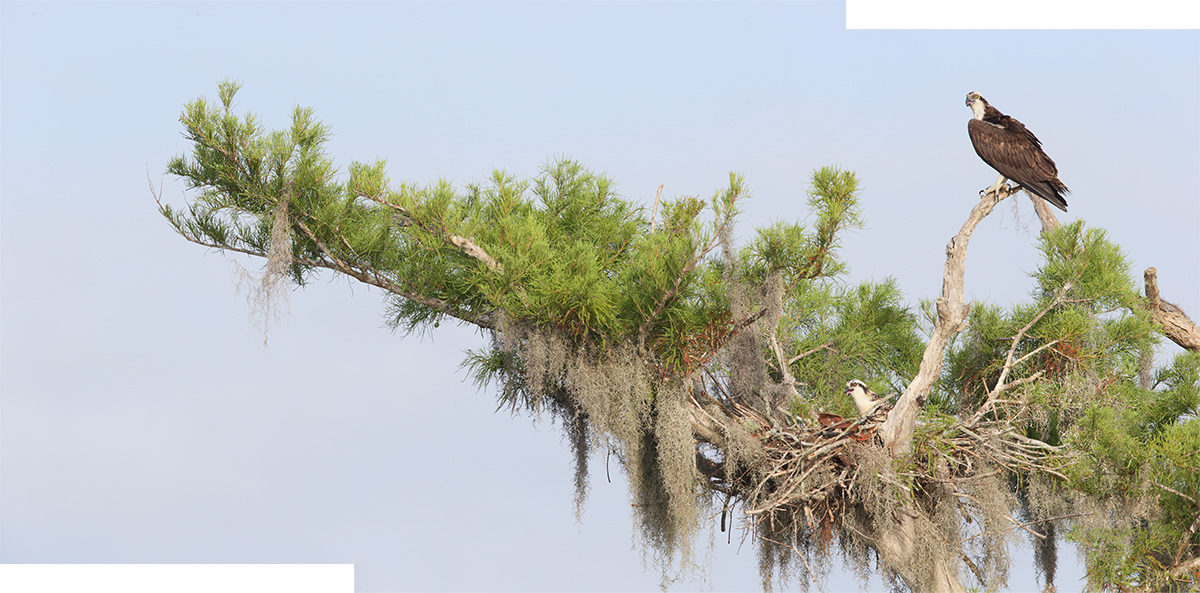
This stitched pano was created from the two original frames below that were made from a pontoon boat on a cloudy bright morning at a local lake with the hand held Canon EF 600mm f/4L IS II USM lens, the Canon Extender EF 1.4X III, and the Canon EOS-1D X. ISO 400. Evaluative metering +2 stops off the light blue sky: 1/800 sec. at f/9 in Manual Av mode. AWB. |
The Situation
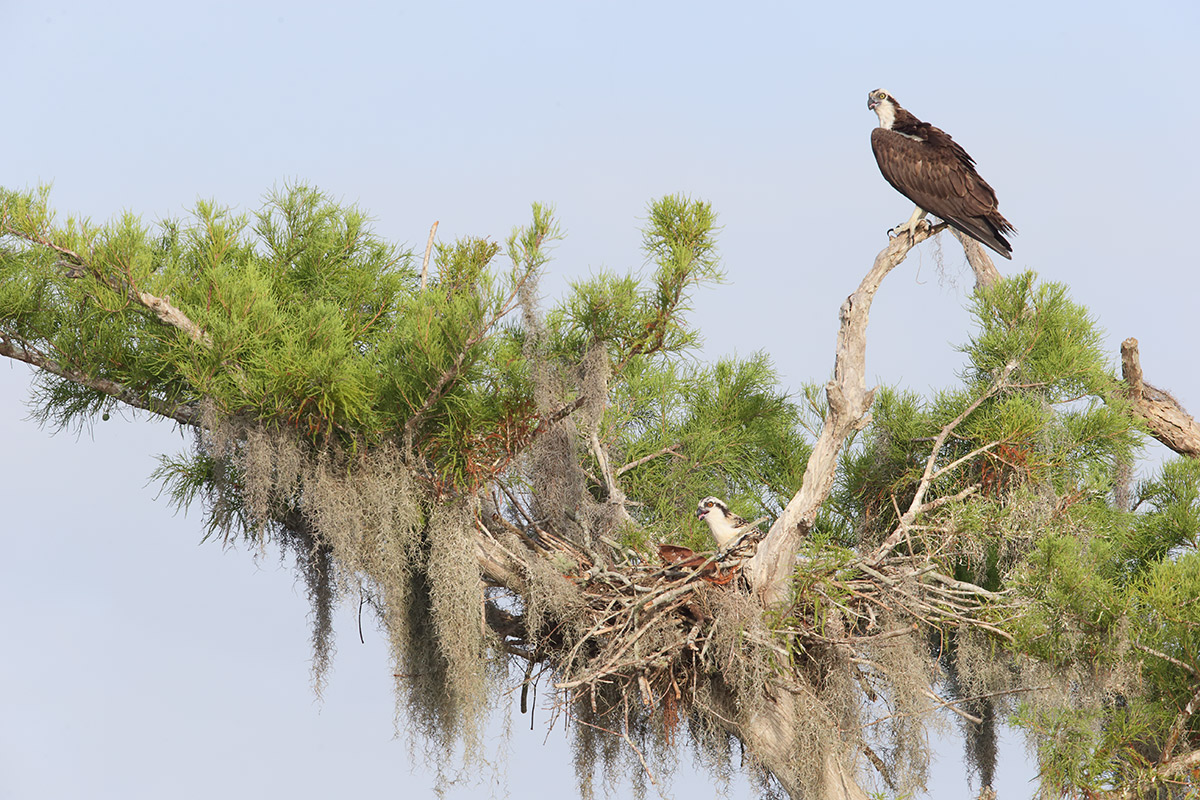
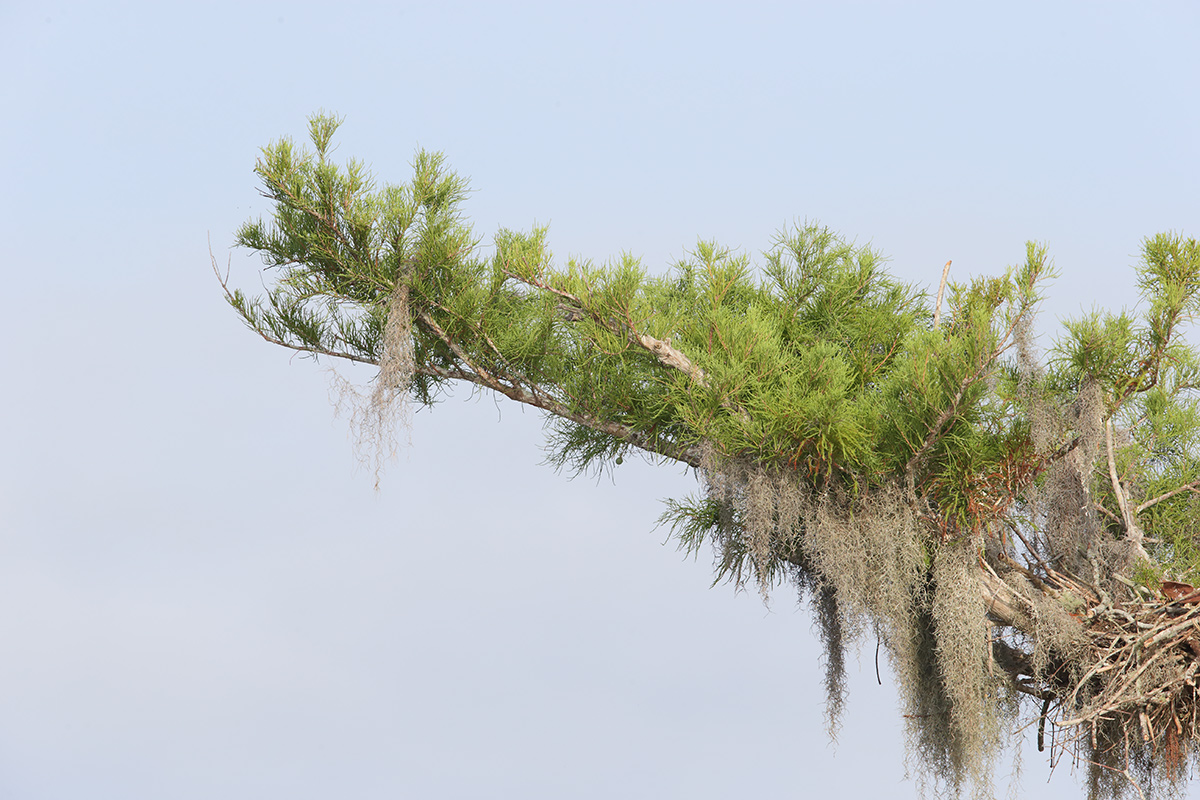
I had been checking out this nest from a great distance for a while as there was not a whole lot going on. But the chick was asleep. When I noticed that the large young Osprey had not only woken up but was posed exactly the same as the adult and had paralleled it as well I created what I call “Osprey right-hand image” below. Since it was the sweep of the pine bough that had caught my eye I decided right then and there to create a second image, “Osprey left-hand image” below, that I could use to complete the stitched pano.
Learn to create a stitched pano in Photoshop by scrolling down.
|
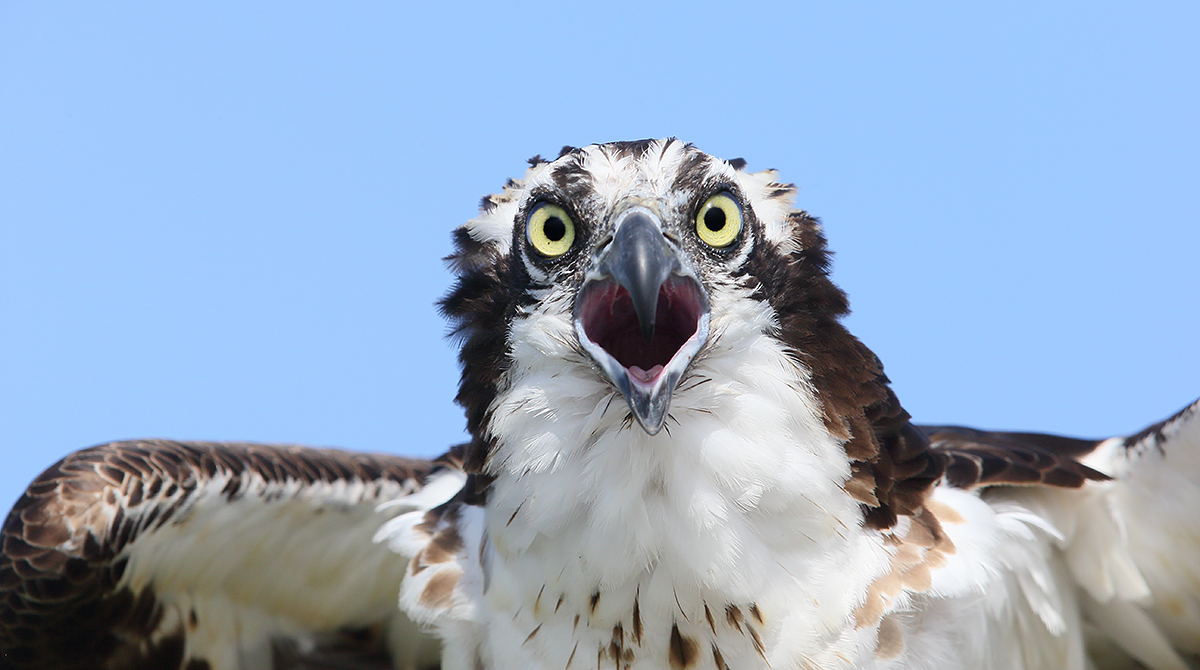
This image was created at 9:17am on the same morning in sunnier conditions with the Gitzo 3532 LS carbon fiber tripod, the Mongoose M3.6 head, the Canon EF 600mm f/4L IS II USM lens, the Canon Extender EF 2X III, and the Canon EOS-1D X. ISO 400. Evaluative metering -1/3 stop as framed (I was worried about burning the WHITEs: 1/1000 sec. at f/11 in Manual Av mode turned out to be about a 1 stop under exposure. AWB. Central Sensor (by necessity)/AI Servo-Expand/Rear Focus AF just to the right of the bird’s upper mandible was active at the moment of exposure. When you add the 2X TC to an f/4 lens with the 1DX or the 5D III hit the MFn button once to toggle to AF Expand and enjoy 4 extra AF sensors. Learn everything there is to know about the 1D X and 5D III AF systems including how to manage the various AF Area Selection Modes, when to use which one, and several ways to move the AF sensor around in the 1D X AF Guide and the 5D Mark III User’s Guide. Click here to see the latest version of the Rear Focus Tutorial. Click on the image to see a larger version. . |
From One Extreme to Another With the Canon 600mm f/4L IS II. And the 2X III TC
We decided to go head-hunting so I put the big lens on the tripod and added the 2X III TC. I pulled the tripod legs in tight to get a bit higher even though this meant that the rig would a bit less stable but at 1/1000 sec. I was not worried much. I created this image as the boat drifted slowly toward the perch tree.
The optimized image above is a small crop from the top resulting in somewhat of a panoramic look.
As much as the two images above show how versatile a given lens can be, it shows what is possible when a photographer learns to see and to think creatively….
Your Favorite?
Which of today’s 2 images do you like best, the wide pano or the tight head shot? Please leave a comment and let us know why.
Osprey right-hand imageGear as noted above. Four sensors to the right of the Central Sensor/AI Servo-Surround/Rear Focus AF fell halfway down the adult’s perch branch and was active at the moment of exposure. Learn to manage the various AF Area Selection Modes, when to use which one, and several ways to move the AF sensor around in the 1D X AF Guide and the 5D Mark III User’s Guide. Click here to see the latest version of the Rear Focus Tutorial. Click on the image to see a larger version. . |
Osprey Right-hand Image Question
1-Why did I opt to focus halfway down the adult’s perch branch?
Osprey left-hand imageCentral Sensor/AI Servo-Surround/Rear Focus AF as framed was active at the moment of exposure. Learn to manage the various AF Area Selection Modes, when to use which one, and several ways to move the AF sensor around in the 1D X AF Guide and the 5D Mark III User’s Guide. Click here to see the latest version of the Rear Focus Tutorial. Click on the image to see a larger version. . |
Osprey Left-hand Image Questions
2-Why did I opt to focus halfway down the adult’s perch branch?
3-After comparing the right-hand and left-hand images, why is it mandatory to be in Manual Mode when creating a stitched pano?
4-When creating stitched panos the standard operating procedure is to set the focus for the first image and leave it. Why did I choose to keep AF active and to re-focus for the left-hand image?
|
The image after running File/Automate/Photomerge… in Photoshop CS-6. |
Stitched Pano Tutorial
Adapted from the Digital Basics File/Stitched Panoramas Using Photoshop’s Photo Merge
The stitching feature in CS6 is phenomenal.
Here are the very basics for creating the source images for a stitched panoramic image: Make sure that your tripod is level. Set both exposure and focus manually. Frame loosely so that you have room to crop. Tighten all the tripod controls but the panning control. Note: You may wish to tighten and then loosen this control for each image when you are using slow shutter speeds. Start from left (for example). Make one image, and then pan to the right, overlapping by about 25-20 percent. Continue until you have reached the last image in your envisioned panoramic image. If do this while hand holding, frame even more loosely.
Assuming that you are using RAW capture, convert each image. In Photoshop, click on File/Automate/Photomerge. When the Photomerge dialogue box opens, browse to the folder that contains the images that you want to stitch together and highlight those files. Select Reposition Only in the Layout box—I find that this is best for most natural history panoramas made with long or intermediate telephotos lenses. Make sure that the Blend images together box is checked. Then click OK and take a short break; depending on the number of images and the speed of your computer the panoramic image will open at some point. The files may be huge, again depending on how many images you are stitching. Before you begin to optimize the image it is best to hit Control E (Merge Layers). When using previous versions of Photoshop this step often eliminates what look like cracks where the images have been stitched together. You will almost always need to crop, sometimes considerably–that is why we advise that you frame loosely. I find this technique easy to use and with CS-6 the stitching is usually seamless.
With the two-frame stitched Osprey at the nest pano here note that I needed to use the Clone Stamp Tool to fill in the two rectangular strips of missing sky.
DPP V4.0
Canon recently released a new version of DPP, V4.0. It can be downloaded here. You will need to enter your 1D X or 5D Mark III serial number to start the download. I downloaded 4.0 to my old computer and opened it yesterday. While early reports are that it is significantly better in many areas than any previous versions, I was totally baffled by the interface. It bears no resemblance to any current version of DPP. If I can figure it out, and I am sure that I will at some point, there will be an all-new DPP V4.0 eGuide that will require a separate purchase. V4.0 works only with 1D X, 5D III, 6D, and 1Dc (whatever that is) images. Folks with older bodies (both pro-sumer and professional) will need to continue using previous versions of DPP. I recently updated to V3.11 and have been very happy with it and was glad to note the addition of a Color Temperature slider.
Digital Basics
Everything that I did to optimize today’s image is detailed in the Digital Basics File–written in my easy-to-follow, easy-to-understand style. Are you tired of making your images look worse in Photoshop? Digital Basics File is an instructional PDF that is sent via e-mail. It includes my complete digital workflow, dozens of great Photoshop tips, the use of Contrast Masks, several different ways of expanding and filling in canvas, all of my time-saving Keyboard Shortcuts, Quick Masking, Layer Masking, and NIK Color Efex Pro basics, my killer image clean-up techniques, Digital Eye Doctor, creating time-saving actions, and lots more.
APTATS I & II
Learn the details of advanced Quick Masking techniques in APTATS I. Learn Advanced Layer Masking Techniques in APTATS I. Mention this blog post and apply a $5 discount to either with phone orders only. Buy both APTATS I and APTATS II and we will be glad to apply at $15 discount with phone orders only. Please call Jim or Jennifer weekdays at 863-221-2372 to take advantage of this special offer.
Nickerson Baby Beach-nesting Birds IPT: 3-Full Days/July 15-17, 2014: $1199. Introductory meet and greet: 8pm, Monday, July 14, 2014. Co-leaders Arthur Morris and Denise Ippolito
Late Registration Discount: Call Jim weekdays at 863-692-0906 for details or call artie this SAT or SUN (6/28 or 29) only at 863-692-0806. Or contact us via e-mail.
With a small group pretty much guaranteed, do consider joining us on Long Island, NY this coming July to photograph Black Skimmers–it’s looking like a great year for skimmer nesting, Common Terns with chicks, American Oystercatcher families, and possibly some just-hatched Black Skimmer chicks. The opportunities will include chances to photograph a variety of breeding behaviors including courtship feeding, display flight and combat, and copulations. Car-pooling is recommended; if we opt to return to the beach before 5pm on cloudy days for example) there is a $30/vehicle parking fee that is not included so it is best to share that expense. Parking in the morning is free.
Because of the late date, your non-refundable payment in full is due when you register.
Please print, complete, and sign the form that is linked to here and shoot it to us along with your deposit check (made out to “Arthur Morris.”) Though we prefer a check, you can also leave your deposit with a credit card by calling the office at 863-692-0906. If you register by phone, please print, complete and sign the form as noted above and either mail it to us or e-mail the scan.
If you have any questions, please feel free to contact me via e-mail
Be sure to like and follow BAA on Facebook by clicking on the logo link upper right. Tanks a stack!
Support the BAA Blog. Support the BAA Bulletins: Shop B&H here!
We want and need to keep providing you with the latest free information, photography and Photoshop lessons, and all manner of related information. Show your appreciation by making your purchases immediately after clicking on any of our B&H or Amazon Affiliate links in this blog post. Remember, B&H ain’t just photography!
Amazon Canada
Many kind folks from north of the border, ay, have e-mailed stating that they would love to help us out by using one of our affiliate links but that living in Canada and doing so presents numerous problems. Now, they can help us out by using our Amazon Canada affiliate link by starting their searches by clicking here. Many thanks to those who have written.
Typos
In all blog posts and Bulletins, feel free to e-mail or to leave a comment regarding any typos, wrong words, misspellings, omissions, or grammatical errors. Just be right. 🙂



I really really like that stitched picture. Bravo.
I guess (a wild guess!) that your colour temperature is about 4800K. I would set it to about 5200K to make it warmer.
I would set the white balance and not keep it at AWB.
How would you set the White Balace? What would you change it to? Why?
In your opinion, would the 500mm II lens with a 2x III on it be as sharp as the 800mm?
That is not a fair question. Images made with a prime lens alone will always be a bit sharper than images made with teleconverters with lenses of similar focal lengths; that is the nature of the beast. Images made by skilled folks with the 500II or the 600 II and a 2X III TC will rival those made by the 800mm and the 1.4X III TC for sharpness. But the over-riding factor is always the skill of the individual photographer as most lenses and TC combos are far sharper than most photographers….
IAC, picking out the slightly sharped images from a group would be a difficult chore for most folks even at 100%… Lastly, there are some top pros who say that they would never us any 2X TC and others who say that they would never use any TC….