What’s Up?
My flights home were a piece of cake. Jim picked me up at MCO just after 2:00pm on a very rainy Monday afternoon. I almost slept on the plane a few times…. And as I type, I am falling asleep again in the car. After a stop at Publix we arrived at home just before 4:00pm. Laundry tomorrow and then packing for the next big trip. On Friday.
This blog post took about two hours to prepare and was published from my home sweet home in Indian Lake Estates, FL at 3:30am.
To show your appreciation for my efforts here, we ask, as always, that you use our the B&H and Amazon affiliate links on the right side of the blog for all of your purchases. B&H Is recommended for you major photography gear purchases, Amazon for your household, entertainment, and general purpose stuff. Please check the availability of all photographic accessories in the BIRDS AS ART Online Store, especially Gitzo tripods, Wimberley tripod heads, and the like. We sell only what I have used, have tested, and can depend on. We will not sell you junk. We know what you need to make creating great images easy and fun. And we are always glad to answer your gear questions via e-mail.
I would of course appreciate your using our B&H affiliate links for all of your major gear, video, and electronic purchases. For the photographic stuff mentioned in the paragraph above we, meaning BAA, would of course greatly appreciate your business. Here is a huge thank you to the many who have been using our links on a regular basis and visiting the BAA Online store as well.
|
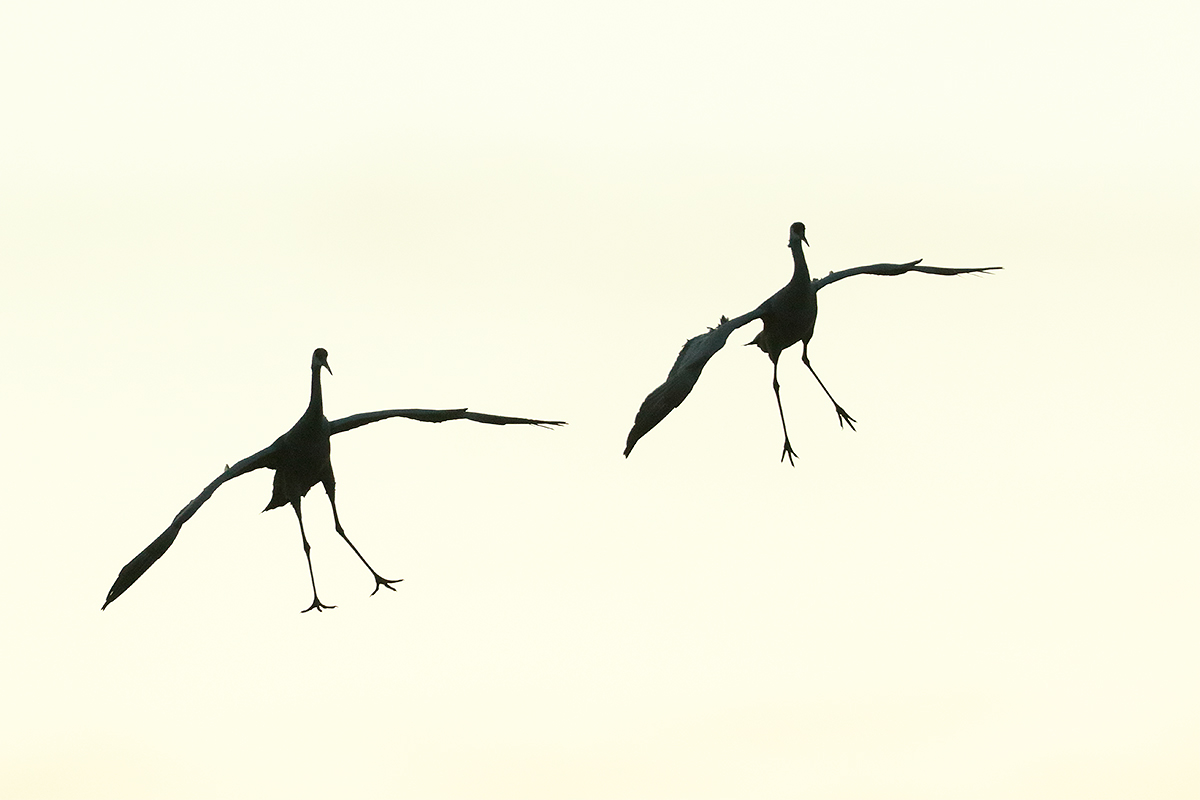
This image was created at 5:05pm on Sunday, DEC 7, the second and last evening of this year’s Canon Destination Workshop. I used the Gitzo 3532 LS carbon fiber tripod), the Mongoose M3.6 head, Canon EF 600mm f/4L IS II USM lens, the Canon Extender EF 1.4X III, and the Canon EOS 7D Mark II. ISO 1600. Evaluative metering +1 2/3 stops as framed: 1/800 at f/5.6 in Av Mode. Color temperature: 8000K. 65-Point Automatic Selection/AI Servo Rear Focus AF as framed activated an array of 3 AF points that caught the left wing of the crane on our right and were active at the moment of exposure. Click here if you missed the Rear Focus Tutorial. Click on the image to see a larger version. Sandhill Crane pair landing SILH against pale sky |
65-Point Automatic Selection AF Area Selection Mode
I love to use 65-Point Automatic Selection AF Area Selection mode when photographing the cranes in silhouette. It allows me to place small in the frame birds well out of the center of the frame and it allows me to frame incoming pairs without clipping the wingtips of one or the other. If the contrast gets too low I will usually go to Surround.
I had the group in the perfect location but the color did not materialize until it was way too dark to shoot despite the thin clouds that had graced the western horizon in late afternoon. You never want to get into the business of predicting sunrise or sunset colors….
|
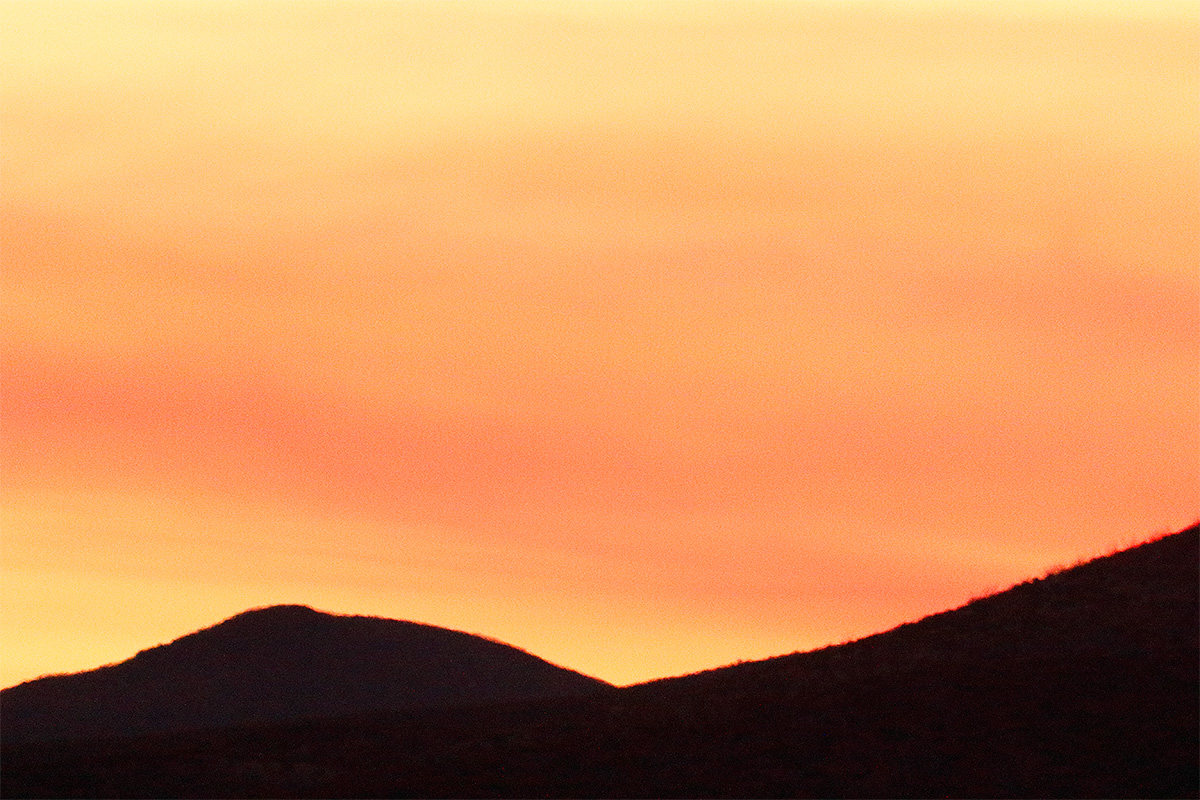
This image was created at 5:35pm on Sunday, DEC 7, the second and last evening of the Canon Destination Workshop. I used the Gitzo 3532 LS carbon fiber tripod), the Mongoose M3.6 head, Canon EF 600mm f/4L IS II USM lens, the Canon Extender EF 1.4X III, and the Canon EOS 7D Mark II. ISO 6400. Evaluative metering +1 2/3 stops as framed: 1/250 at f/5.6 in Av Mode. Color temperature: 8000K. Central sensor/AI Servo surround Rear Focus AF as framed was (amazingly) active at the moment of exposure. Click here if you missed the Rear Focus Tutorial. Click on the image to see a larger version. Richly colored sky well after sunset |
Half-way Decent
We did get just a bit of sky color well after sunset. As I often do I created a few images with the distant ridge and the color. I am not sure why I had not thought of combining two such images before.
|
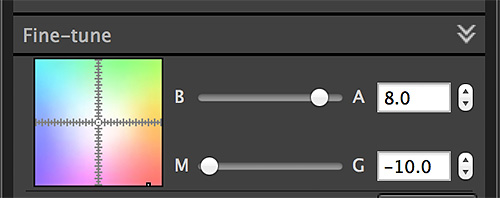
The Color Fine-tune box |
The Color Fine-tune box
I juiced up the colors of the sky image a bit during the RAW conversion in DPP 4 using the Color Fine-tune box on the Perform basic image adjustment tab. Though we only touch upon the use of the Color Fine-tune box in the DPP 4 Guide I used it a lot recently with sunrise and sunset images from Bosque. How do I use it? Experiment by dragging the center point around. Next I worked on the color in Photoshop with both Vibrance and Selective Color adjustments.
|
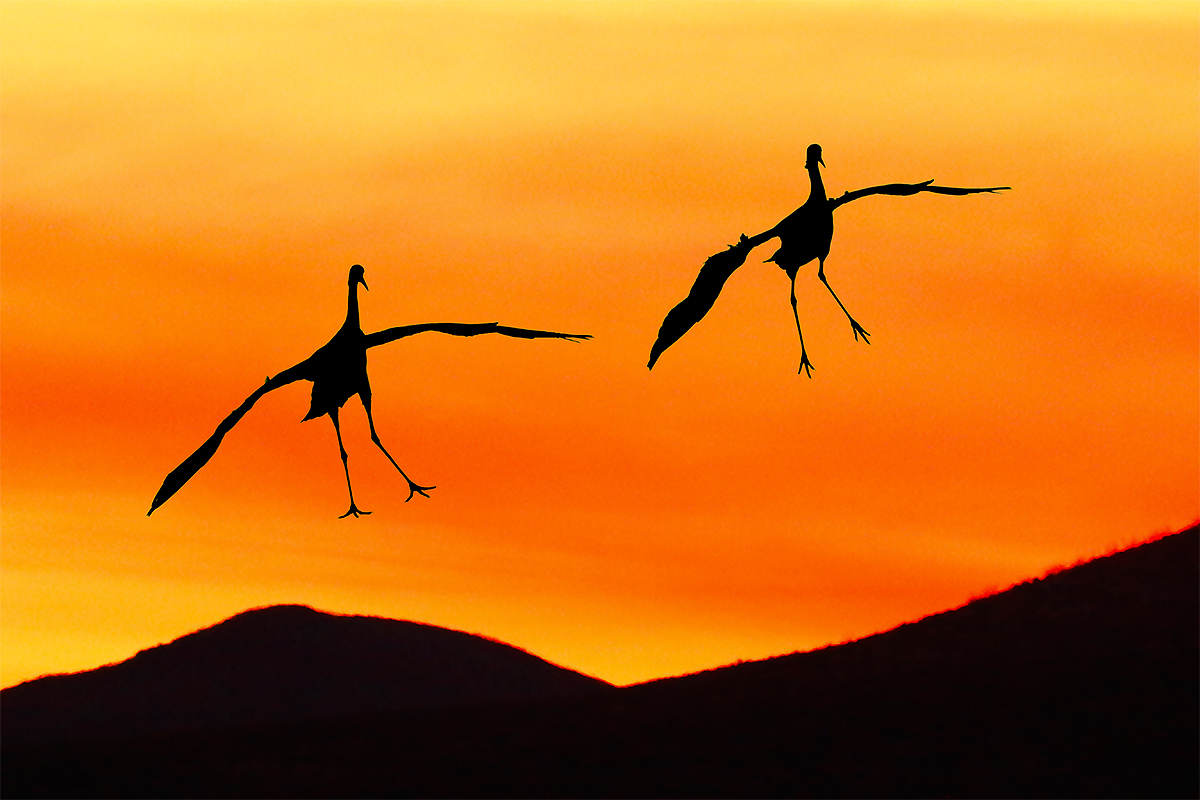
This image was created from the two images above using a blend mode in Adobe Photoshop Creative Cloud (1-Year Subscription). Which one? |
The Blending
I knew that there was probably a one-step technique to blend the two images together using one of the Blend Modes in PS. But I had no idea which one would retain the rich colors of the BKGR image and the deep BLACKs of the SILH. I experimented and finally hit the case ace for four of a kind.
If you know or think that you know which Blend Mode I used please do leave a comment. Note: the sky was the bottom layers, the crane pair was the top layer.
Just for the record books…
The file name for the optimized image, “Sandhill Cranes landing–blend of two images _Y8A7665 Bosque del Apache NWR, San Antonio, NM.tif” lets editors know what they are dealing with. My intent is always to avoid deception and to let folks know how an image was created.
Digital Basics
Everything that I did to optimize today’s image is covered in detail in my Digital Basics File–written in my easy-to-follow, easy-to-understand style. Are you tired of making your images look worse in Photoshop? Digital Basics File is an instructional PDF that is sent via e-mail. It includes my complete digital workflow, dozens of great Photoshop tips (including the Surface Blur settings that I used to smooth out the noise in the ISO 6400 image as taught to me by Denise Ippolito), details on using all of my image clean-up tools, the use of Contrast Masks, several different ways of expanding and filling in canvas, all of my time-saving Keyboard Shortcuts, Quick Masking, Layer Masking, working with color and contrast, and NIK Color Efex Pro basics, Contrast Masks, Digital Eye Doctor techniques, using Gaussian Blurs, Tim Grey Dodge and Burn, a variety of ways to make selections, how to create time-saving actions, and tons more.
|
DPP 4 is completely new and different from the various versions of DPP 3. It handles files only from the following cameras: EOS-1D X, EOS 5D Mark III, EOS-6D, and the EOS-7D Mark II. |
Great 7D II/DPP v4.01.0 News
An updated version of Canon Digital Photo Professional that supports RAW files from the EOS-7D Mark II was released more than a month ago and is available for download the Canon USA website. To download DPP v4.1 first click here and then click on Drivers and Software and follow the prompts.
|
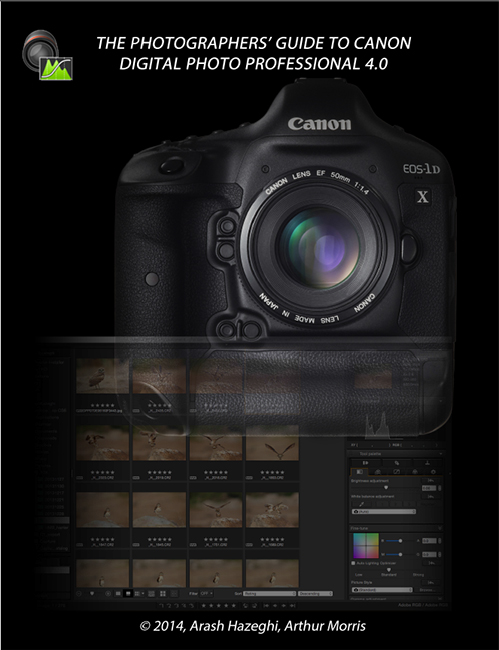
The Photographers’ Guide to Canon Digital Photo Professional 4.0 by Arash Hazeghi and Arthur Morris is now available. Click here to order. |
The DPP 4 eGuide (PDF)
The Photographers’ Guide to Canon Digital Photo Professional 4.0 by Arash Hazeghi and Arthur Morris: $40.
Artie first went to DPP because he was not happy with the colors he was getting with 1D X and 5D III images from ACR (Adobe Camera Raw). Though less than intuitive, he found it fast and easy to use once he mastered the basics. He collaborated with Arash Hazeghi on the first DPP RAW Conversion Guide. Do understand that the DPP RAW Conversion Guide details the use of various iterations of DPP 3. He calls those the DPP 3.whatever versions. The latest version is DPP 3.14.41.0.
Some time ago Canon released DPP 4.0, completely and utterly new and different from DPP 3. When it was introduced DPP 4 worked only EOS-1D X, EOS-5D Mark III, and EOS-6D images but support for the EOS-7D Mark II was added to the latest version when that camera began shipping.
When I first opened DPP 4 I felt as if I were in the cockpit of a Boeing 747 and was being asked to fly it. There were so many tabs and buttons and controls that I simply closed the program. I immediately called Arash and asked him if he wanted to work together on a DPP 4 guide. After 100s of hours of work the guide was ready to teach you to conveniently and easily use DPP 4 to create the finest possible image files from your 1D X, 5D III, 6D, and 7D II image files. Basically, Arash sent me a sophisticated outline that I re-crafted into a clear, concise, easily understood, and easy to follow how-to guide written in the BAA style. Arash created all of the charts, diagrams, and graphics.
His charts with recommendations for both Chrominance and Luminance Noise Reduction values for each of the 4 covered cameras at various ISO settings are alone worth the price of the book. He spent many dozens of hours experimenting with high ISO RAW files and shares his findings with you in the DPP 4 Guide. Folks will surely want to create some sort of easily accessible quick reference on their laptops and home computers.
DPP offers a host of great features some but not all of which are reminiscent of ACR. These include the following: Multi-image display, the extremely valuable Before/after Comparison layout, Highlight/shadow warnings, White Balance, and the eight RAW Conversion tabs that include sliders for Brightness, Highlights, Shadows, Contrast, Hue-Saturation, Color Tone, Sharpness, Noise Reduction, HSL (Hue/Saturation/Luminance), Lens Corrections, and Digital Lens Optimizer among others. We teach you how to best utilize each of those and many more. We share our slightly different DPP workflows and dozens of tips that will simply make your life easier. Arash uses DPP4′s rating system for choosing his keepers while artie continues to rely on BreezeBrowser Pro for that. DPP offers a variety of sorting filters. We explain all of the options. In addition, we teach you how to set your preferences and how to arrange your workspace for the greatest efficiency.
Both authors firmly believe that the manufacturer’s conversion algorithms will always out-perform 2nd party software when it comes to preserving image quality, fine detail, and accurate color rendition.
The authors wish to thank Chuck Westfall and Rudy Winston of Canon USA for their help; they are always available to answer our nit-picking questions. Sincere thanks also to Ken Kovak, Bob Schwartz, Dane Johnson, and John Stuhlmuller for their thoughtful and substantive reviews of late drafts of the DPP 4 manuscript.
You can order your copy of the DPP 4 Guide for $40 through the BAA Online Store by clicking here, by calling Jim or Jen in the office at 863-692-0906 with credit card in hand, by sending us a check made out to “Arthur Morris” or a money order for $40 to BIRDS AS ART, PO Box 7245, Indian Lake Estates, FL 33855, or by by sending a Paypal for $40 to e-mail. IN the latter two instances be sure to note DPP 4 Guide so we know what you are ordering :).
Note: the Sharpness and Noise Reduction Charts will be updated to include the recommended values for the 7D Mark II. I have been sending RAW files to Arash for several days. Now Arash has a lot more work to do. For those who have purchased the DPP 4 Guide, the update will of course be free but please be patient.
Those using older Canon camera bodies like the 1D Mark IV, the 7D, the 50D, the 40D, the various Rebels (not highly recommended for serious nature photography), are directed to the original DPP RAW Conversion Guide click here. DPP 3 (the latest version is DPP v3.14.41.0) does a fine job of converting images from the older camera bodies. I used it for several years.
DPP 4 eGuide 7D II Update
If you have purchased the DPP 4 eGuide and have purchased a 7D II, please request the free update by shooting Jim an e-mail with the words DPP 4 7D II Update cut and pasted into the Subject Line. You must include some sort of proof of purchase; a cut and paste of page 2 of the current guide will suffice. If you send your request without including proof of purchase your updated eGuide will not be sent 🙂
Be sure to like and follow BAA on Facebook by clicking on the logo link upper right. Tanks a stack!
Support the BAA Blog. Support the BAA Bulletins: Shop B&H here!
We want and need to keep providing you with the latest free information, photography and Photoshop lessons, and all manner of related information. Show your appreciation by making your purchases immediately after clicking on any of our B&H or Amazon Affiliate links in this blog post. Remember, B&H ain’t just photography!
Amazon.com
Those who prefer to support BAA by shopping with Amazon may use this link:
Amazon Canada
Many kind folks from north of the border, eh, have e-mailed stating that they would love to help us out by using one of our affiliate links but that living in Canada and doing so presents numerous problems. Now, they can help us out by using our Amazon Canada affiliate link by starting their searches by clicking here. Many thanks to those who have written.
Typos
In all blog posts and Bulletins, feel free to e-mail or to leave a comment regarding any typos or errors. Just be right :).







Overlay:)
I guess multiply
Any of the Darken set of Blend Modes with the exception of Color Burn will work but Multiply or Linear Burn produce the dark blacks better.
My guess???
Linear Burn
I will withhold judgement for now other than to say that you are in the neighborhood. artie
ps: where do you live?
Near the confluence of the Mississippi and Missouri Rivers–Missouri side
If you want some of the grey tones– Darken or Darker Color
To go to silhouettes then Multiply or Linear Burn which I think makes a simple and dramatic image
Color Burn will cause the birds to pick up the lower layers orange tones
So will Overlay btw 😉