What’s Up?
This blog was adapted from one originally published here on September 8, 2013. As I did with many others, I finished this post in the lobby of the Albatross Hotel on Sunday, December 14, 2014.
Along with the rest of my shipmates I boarded the Ortelius on the afternoon of 15 DEC. We get back to dock on the the morning of 9 JAN. There is no wifi on the ship. That means that I will effectively and absolutely be without internet at least from 14 DEC through 9 JAN. At present I am further behind with answering e-mails than at any time since I have began answering folks’ photography-related questions about 25 years ago.
Please therefore refrain from e-mailing me at the usual samandmayasgrandpa e-mail address until I get back home on 13 JAN. You can reach my right-hand man Jim Litzenburg by e-mail here or reach Jennifer here as usual.
Important Blog Notice
I have been preparing a few new blog posts today to be published during my absence with the help of either Jim or the invaluable Peter Kes, the BAA webmaster. In addition, my plan is to resurrect a collection of older but important educational blog posts (like today’s) and have them re-published during my absence. Please enjoy. Please consider signing up for an IPT. And please continue to do a great job of using my B&H and other affiliate links while I am gone.
To show your appreciation for my efforts here, we ask, as always, that you use our the B&H and Amazon affiliate links on the right side of the blog for all of your purchases. B&H Is recommended for you major photography gear purchases, Amazon for your household, entertainment, and general purpose stuff. Please check the availability of all photographic accessories in the BIRDS AS ART Online Store, especially Gitzo tripods, Wimberley tripod heads, and the like. We sell only what I have used, have tested, and can depend on. We will not sell you junk. We know what you need to make creating great images easy and fun. And we are always glad to answer your gear questions via e-mail.
I would of course appreciate your using our B&H affiliate links for all of your major gear, video, and electronic purchases. For the photographic stuff mentioned in the paragraph above we, meaning BAA, would of course greatly appreciate your business. Here is a huge thank you to the many who have been using our links on a regular basis and visiting the BAA Online store as well.
|
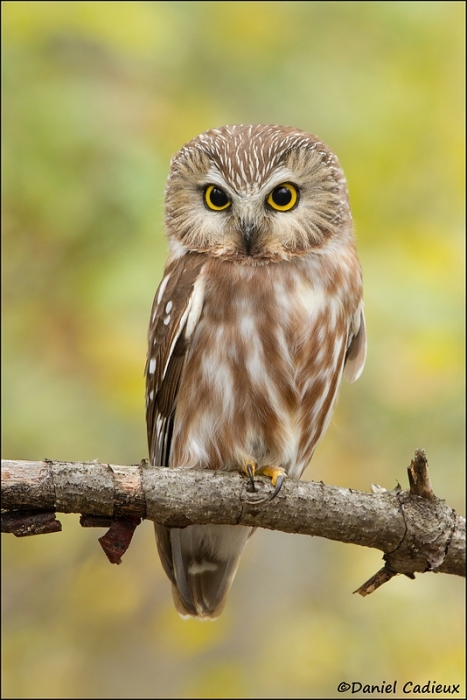
Saw Whet Owl. Image copyright 2012: Dan Cadieux. This image was created with the following gear hand held: |
Let’s not forget….
Let’s not forget that good photographers make good images with whatever gear they have in their hands. At a time when everyone is lusting for the latest greatest super-telephoto lens and the state of the art $8K camera body the body of work that Dan Cadieux, our top BirdPhotographer’s.Net Avian Moderator, put together while working “only” with the much-maligned EOS-7D Mark and the equally maligned Canon 100-400 IS L lens is beyond impressive. As we were saying, good photographers make good images, and great photographers make great images.
How Dan Cadieux Masters the Canon EOS-7D
Dan Cadieux, a Canadian federal government employee, lives with his wife Chantal in Ottawa Canada. He is the proud father of two boys and an avid bird/nature photographer in his free time. He is a skilled, hard-working moderator in the Avian Forum at Bird Photographers.Net. As of 8:02 am on September 18, 2012 he has started 1112 threads and posted 12,310 comments. Most of the threads include one of his great images posted for critiquing. In most of the comments he is critiquing the work of others telling what he likes, what he does not like, and offering suggestions for improvement. He is an invaluable member of the BPN staff. You can learn more about Dan here.
All of the images in yesterday’s blog post, Answers in 48 Hours…, and all of the images here were created by Daniel with the Canon EOS 7D SLR digital camera and the Canon 100-400mm f/4.5-5.6L IS USM autofocus lens. As Dan does not own a tripod all of the images were created hand held.
|
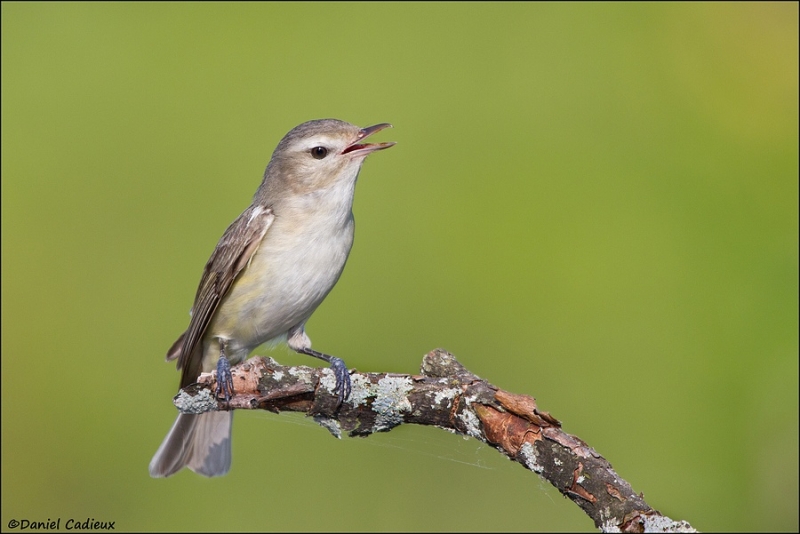
Warbling Vireo singing. Image copyright 2012: Dan Cadieux. This image was created with the following gear hand held: |
The Much-Maligned Duo
Both the Canon 100-400mm f/4.5-5.6L IS USM autofocus lens (“not sharp at 400mm, slow-to focus, poorly constructed,”) and the EOS 7D (“sub-par quality sensor, too noisy at the higher ISOs”) have been much-maligned by the so-called internet experts and others. With the images here, Dan Cadieux puts those myths to rest once and for all.
Below, in a guest blog post written especially for you at my request, Dan lets you know exactly how he captures and processes the great images that he so kindly shares with you here. Be sure to visit Dan’s website here and his BPN gallery here. Like me I am positive that you will be impressed by the artistic beauty and the technical perfection of Dan’s images. Enjoy. I am pretty sure that Dan will be glad to answer any questions that you have. To do so, please leave a comment below.
|
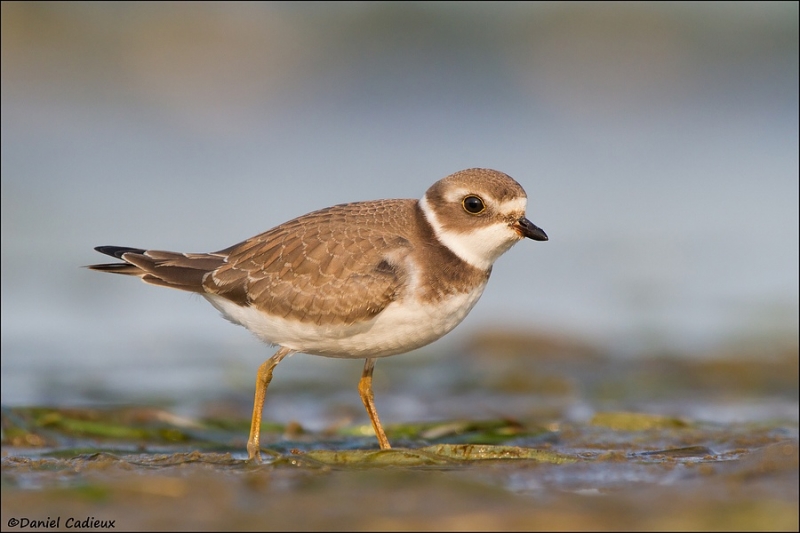
Semipalmated Plover, juvenile plumage. Image copyright 2012: Dan Cadieux. This image was created with the following gear hand held: |
Canon 7D processing 101
by Daniel Cadieux
Ever since Canon’s introduction of the EOS 7D in 2009 there has been quite the fuss over its image quality (IQ), or more precisely, noise level performance at the higher ISOs. We’ve all seen, heard, or read statements about how bad and unusable its files are with anything created at ISO 400 or higher. Is the 7D really that bad?
Many folks have contacted me about the “clean” results I’ve been able to achieve with this much-maligned camera. In this tutorial I will share my workflow and hopefully demonstrate that the answer to the above question is a resounding “No!” This tutorial is not meant to be scientific; it does not include tests, charts, graphs, comparisons, or pixel-peeping samples. There is a market and a demand for that type of information but providing it is not my intent here. It is not meant to compare the 7D to its much more expensive cousins such as the cameras in the 1D or the 5D series. It is simply a short tutorial written for hobbyists, especially those on a budget, or for those still on the fence about purchasing a 7D. It will show that the Canon EOS-7D is indeed worth a second look and that it is more than capable of creating terrific, high quality images in real-world situations.
|
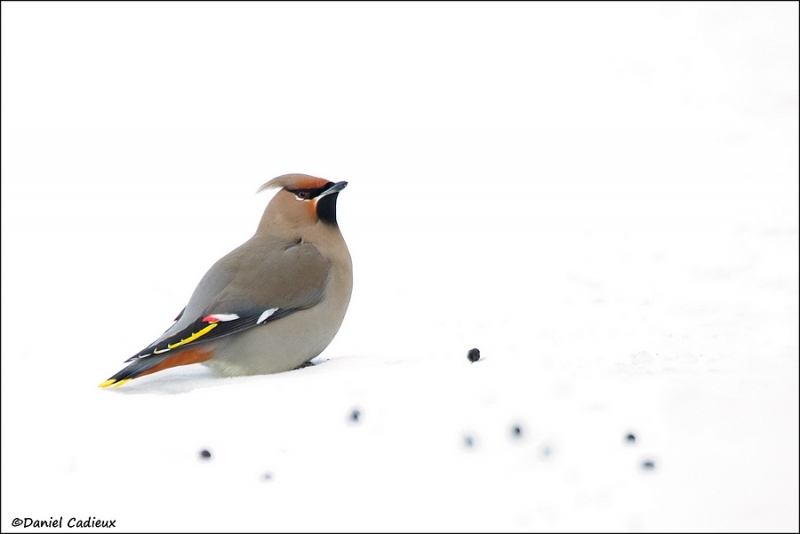
Bohemian Waxwing on snow. Image copyright 2012: Dan Cadieux. This image was created with the following gear hand held: |
I work at ISO 800 more than half the time. Many folks find that 7D image quality is unacceptable at ISO 800; here I share my workflow which shows how I create quality images with my 7D/100-400 set up.
The in-camera part of my workflow is short and sweet; it assumes that the user is proficient at exposing images properly. Here are two important points: The first is the importance of micro-adjusting each of your lenses. The 7D is capable of producing images with incredible detail, but it will not do that if your rig is front- or back-focusing with a given lens. (Note: the best way of micro-adjusting each of your lenses to your camera boy is with the Lens Align Mark II.) The second is that you must learn to “expose to the right”(ETTR); this means simply that you need to expose your images so that the histogram shows data well into the right-most box (the fifth box). If an image has bright whites in it it is fine to have a very few blinkies on the whites as blinkies are just over-exposure warnings. This will yield the best results after post-processing especially with images that have blacks or dark tones. At the very least do not underexpose your images. This is basically true for every DSLR anyhow, but the 7D can struggle a bit more with noise in deep shadows when you need to add back light in post processing. Other than those there is nothing out of the ordinary to do in-camera.
My post-processing workflow is more detailed, but it is rather simple and easy to emulate. (Warning: I never use layers and rarely use masks thus they are not mentioned; you may of course use them if they are part of your normal workflow).
|
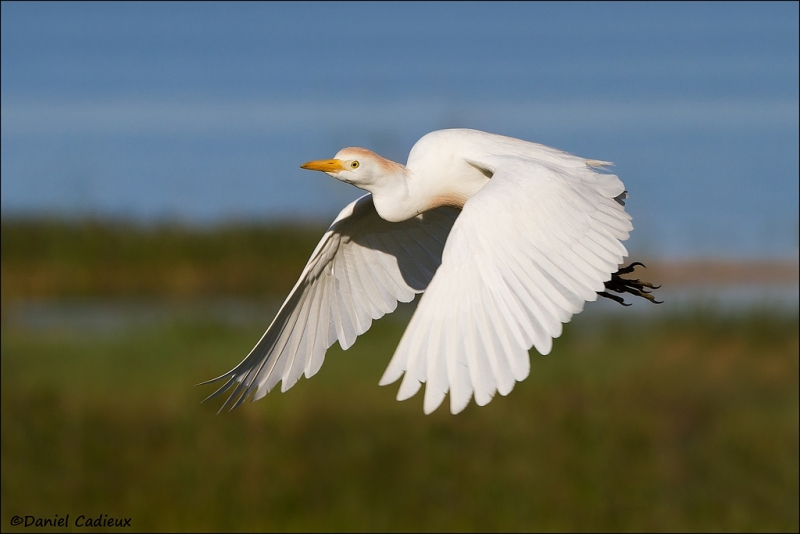
Cattle Egret in flight. Image copyright 2012: Dan Cadieux. This image was created with the following gear hand held: |
I use Lightroom 3 (LR3) for processing my RAW files; ACR is basically the same and other RAW converters work similarly. I start off with all the LR3 settings intact and from the menu options at right in the “Develop Module” I start from the top and work my way down. The first two sliders, White Balance and Tint, are most often left untouched. I work almost exclusively in Auto White Balance.
The next group of sliders is the most important. First I “correct” the exposure, which, if I have used the ETTR method correctly, means that I need to lower the value here. It can be as small as 0.10 stop, or as much as a full stop or more. The Recovery and Fill Light sliders are great if there is still a bit of clipping at either end of the histogram. Recovery can be used fairly aggressively and still look natural. Not so with Fill-Light, but it can be combined with a reduction in the Blacks (which is defaulted at +5) to produce a less problematic result. I may boost Contrast from +25, the default, to as much as +50 or so for photos made with mostly midtones or those created in very flat light. The next two sliders, Clarity and Vibrance, are usually boosted anywhere from +8 to +12. Although noise reduction (NR) is good in LR3 I do not find localized adjustments as user-friendly as in Photoshop (PS) where I do my NR.
|
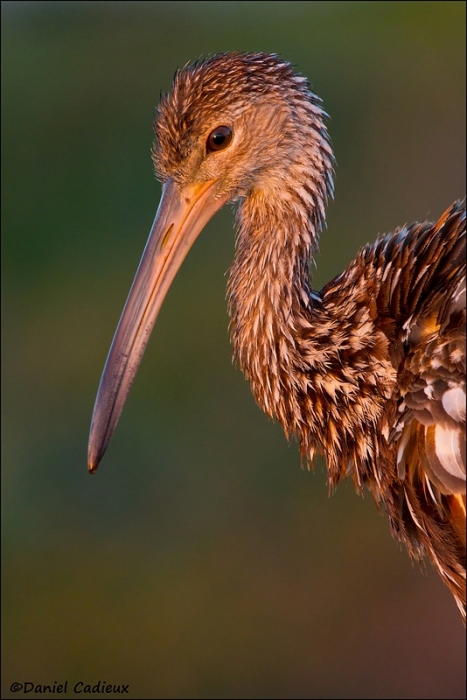
Limpkin just before sunset. Image copyright 2012: Dan Cadieux. This image was created with the following gear hand held: |
That’s basically it for LR3. Next I convert the file to a 16 bit tiff and open it in Photoshop. Note: I am currently using CS2. Even though I do a good job in LR3 in prepping the files, I feel that PS can take things up another notch. The first thing that I do is double check the exposure in Levels. Sometimes a small tweak is needed, most times not. Next I make whatever localized adjustments are needed with the Dodge and Burn tool. I use the Dodge Tool to open up areas with harsh shadows especially under a bird’s belly, chin, or undertail coverts, or to lighten too dark areas in the background or the foreground. Conversely I use the Burn Tool to tame overly light areas in the frame. I touch up the eye on 90% of my bird images by lightening the iris and/or darkening the pupil. My default settings for both of these tools are a soft brush (0% hardness) with the range set to midtones and the exposure at 8%. The same goes for the Sponge Tool which is my favorite “color enhancer” or “reducer.” I use it to enhance the iris color which may have become a bit washed-out after I’ve lightened it. I may also use it to enhance colors such as the yellow lores of a Savannah Sparrow or the green sheen on the head of a drake Mallard. These are the tools that I use the most in PS; many of the compliments that I get about my post processing skills are a result of the use of these tools.
|
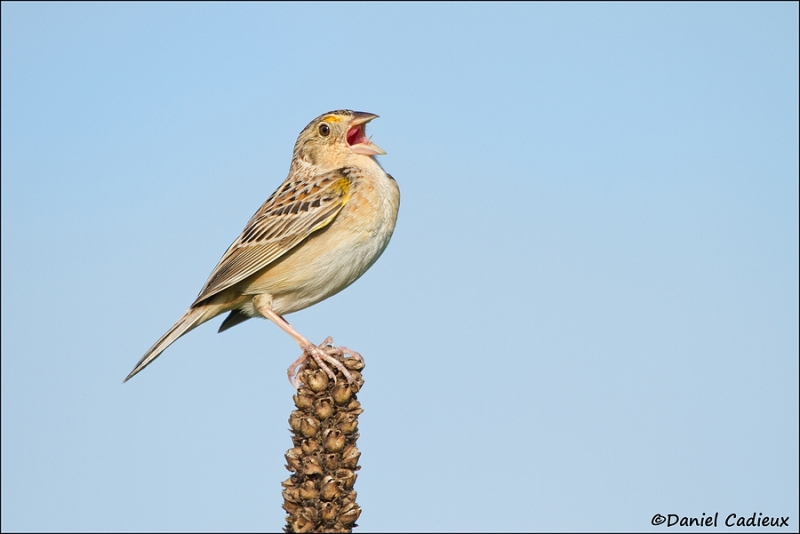
Grasshopper Sparrow singing. Image copyright 2012: Dan Cadieux. This image was created with the following gear hand held: |
I do other types of touch-ups including cloning, patching, spot healing, and cropping to format needed, but nothing unusual or groundbreaking and all stuff that is covered in detail in Artie’s Digital Basics File. I save a final version of the file, a finished version without NR or sharpening applied. This is my “master file.” I go back to it in order to prep images for web or for print. Then I open the file and apply the finishing touches (NR and sharpening via Unsharp Mask–USM) but only after after the image is sized for use. This, in my opinion, is an area of high confusion as many folks over-complicate things. Here is the simple way that I do things. With most files I apply NR to the whole image using the Noise Ninja plug-in for PS; any such software will do a nice job. Then I use the History Brush at 100% opacity and “paint” away the NR on the subject, the perch, and any other areas of high detail that are in focus or are covered by the depth-of-field. I do not use NR on any image created at ISO 400 or below unless I messed up the exposure and need to recover (lighten) it aggressively in post
|
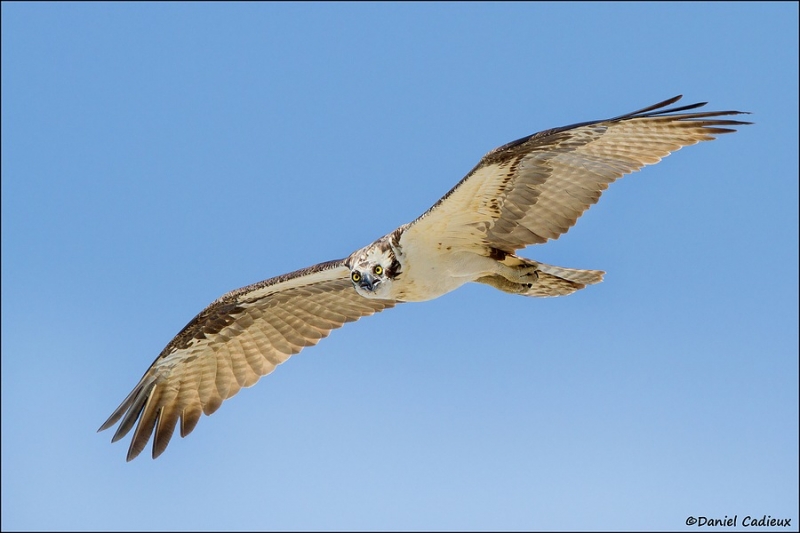
Osprey in flight. Image copyright 2012: Dan Cadieux. This image was created with the following gear hand held: |
The last step is to apply USM. For images that have had NR applied, I sharpen the whole image. Yes, the whole image. With images that have had no NR applied, I only sharpen the subject, the perch, and whatever else is in focus.
For every image file I set the Radius to 1.3 and the Threshold to 0; the Amount varies between 120 and 170. That’s it! Really! Keep in mind that the results look bad if the image is viewed at anything larger than the intended size and they will look downright awful if viewed at 100% or more. This is normal. The results, however, are awesome when the images are viewed at the intended size for display or print.
I hope that after trying my recommendations you conclude that the 7D really is a great camera that offers amazing image quality with noise characteristics that are easily handled with one round of NR applied to the images created at the higher ISOs. It is no different than any of the other crop-factor cameras out there. Opinions will surely vary, but for me, this is the perfect camera for a hobbyist on a budget and even for the pro who needs a great crop-factor camera with lots of pixels. If you have been sitting on the fence about the purchase of a 7D I recommend that you go right ahead and try one, you might be quite surprised at the results. Ignore the mixed reviews as I did. And I haven’t looked back since!
|
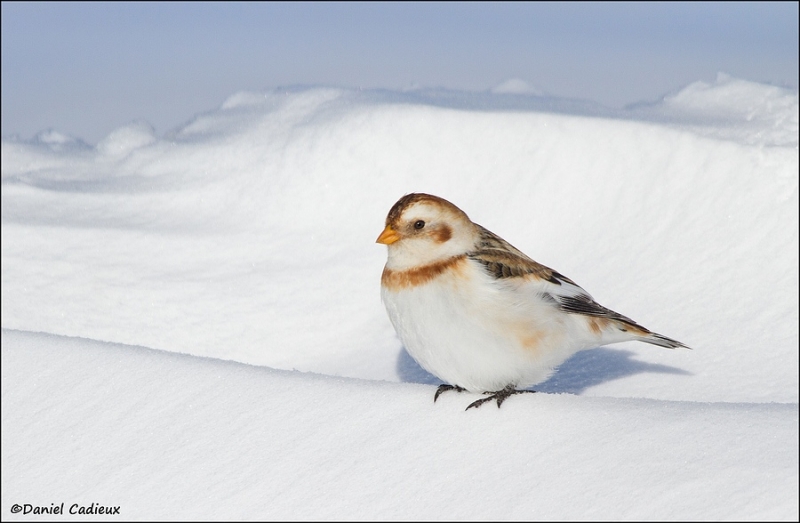
Snow Bunting female on snow. Image copyright 2012: Dan Cadieux. This image was created with the following gear hand held: |
Thanks Dan!
Thanks Dan for sharing your amazingly beautiful images and your 7D workflow with us here. Your love of birds and your high levels of skill as a bird photographer are quite evident in your images. This article and your work should serve as an inspiration for the legions of folks out there who cannot afford to purchase a Canon 1D X and a 600mm f/4L IS II lens. And as an inspiration to those who can!
Reflections, and An Invitation
Those of you who missed the celebration gallery from way back when might enjoy it by clicking here and then clicking on the gallery link to view it.
Be sure to like and follow BAA on Facebook by clicking on the logo link upper right. Tanks a stack!
Support the BAA Blog. Support the BAA Bulletins: Shop B&H here!
We want and need to keep providing you with the latest free information, photography and Photoshop lessons, and all manner of related information. Show your appreciation by making your purchases immediately after clicking on any of our B&H or Amazon Affiliate links in this blog post. Remember, B&H ain’t just photography!


Amazon.com
Those who prefer to support BAA by shopping with Amazon may use this link:
Amazon Canada
Many kind folks from north of the border, eh, have e-mailed stating that they would love to help us out by using one of our affiliate links but that living in Canada and doing so presents numerous problems. Now, they can help us out by using our Amazon Canada affiliate link by starting their searches by clicking here. Many thanks to those who have written.
Typos
In all blog posts and Bulletins, feel free to e-mail or to leave a comment regarding any typos or errors. Just be right :).



Thanks for posting Daniel Cadieux’s workflow. The 7D has been my primary camera since it was introduced and it has produced many fine bird images. My workflow is similar to Daniel’s with certain exceptions. I learned several new steps from the post. I now look forward to making images with my 7DII, but will always have the 7D as backup. Great camera!
Incredible images!!!!!
Artie,
Being relatively new to your blog and BPN, I stumbled on the original post quite by accident and found it both enlightening and encouraging. As you said, Daniel did some amazing work with the 100-400 and the 7D. I say ‘did’ because he has now moved up to the 500 f/4 II.
There is another member of BPN, Ovidiu Cavasdan, who had posted some very nice pictures taken with, originally the 40D, and now the 7D and the 300 f4L.
As you said: “Let’s not forget that good photographers make good images with whatever gear they have in their hands.” Something that, while aspiring to become, am well short of the mark right now.
I hope that, from time to time, you continue to point out examples of work done with something less than the top-of-the-line equipment and possibly share their techniques as you did with Daniel.
Thanks on all counts. When I find them, I will share. artie
Artie, Wait to you get home and get to play with the new 100-400mm II. It blows the old one out of the water. It is razor sharp at F5.6 at 400mm. SUPER lens, and focus’s really fast…