What’s Up?
At dinner on Saturday evening with Dr. Cliff Oliver and his Annie and Patrick and Robin, Cliff explained that general anesthesia is about the most stressful thing that our body will ever experience; that our body shuts down because it thinks that we are dying; that the effects of being under last for months. When asked, he stated that I should continue to rest and not go to La Jolla on Sunday morning. So I brought only the 100-400 II, the flash, and the 1.4X III teleconverter. I did not climb over any fences nor did I climb down any cliffs. And I stayed only two hours.
Though I had a great time I did notice that simply keeping the lens steady while making a series of images seemed to require more effort than usual. Patrick and I enjoyed some great light and with love in the air, had a ton of fun photographing the Western Gulls. Images to follow. When we got back to Patrick’s place, I took a wonderful 1 1/2 hour nap. And then got lots of work done.
The Streak
Today’s blog post marks 143 days in a row with a new educational blog post. Assuming that I will be making the trip to Namibia on April 11, this streak will come to an end soon. As always–and folks have been doing a really great job recently–please remember to use our B&H links for your major gear purchases. For best results use one of our many product-specific links; after clicking on one of those you can continue shopping with all subsequent purchases invisibly tracked to BAA. Your doing so is always greatly appreciated. Please remember: web orders only. Please remember that if you are shopping for items that we carry in the BAA Online Store (as noted in red at the close of this post below) we would appreciate your business.
Missed Question
In the 30-second exposure blog post here, not a single person took a stab at the question below. As it is an important lesson, I am repeating it here. Remember that the more interactive the blog is, the more everyone learns.
Technique Question
Why is it unnecessary to use Live View, Mirror Lock-up, or the 2-second timer when doing 15- or 30-second exposures?
|
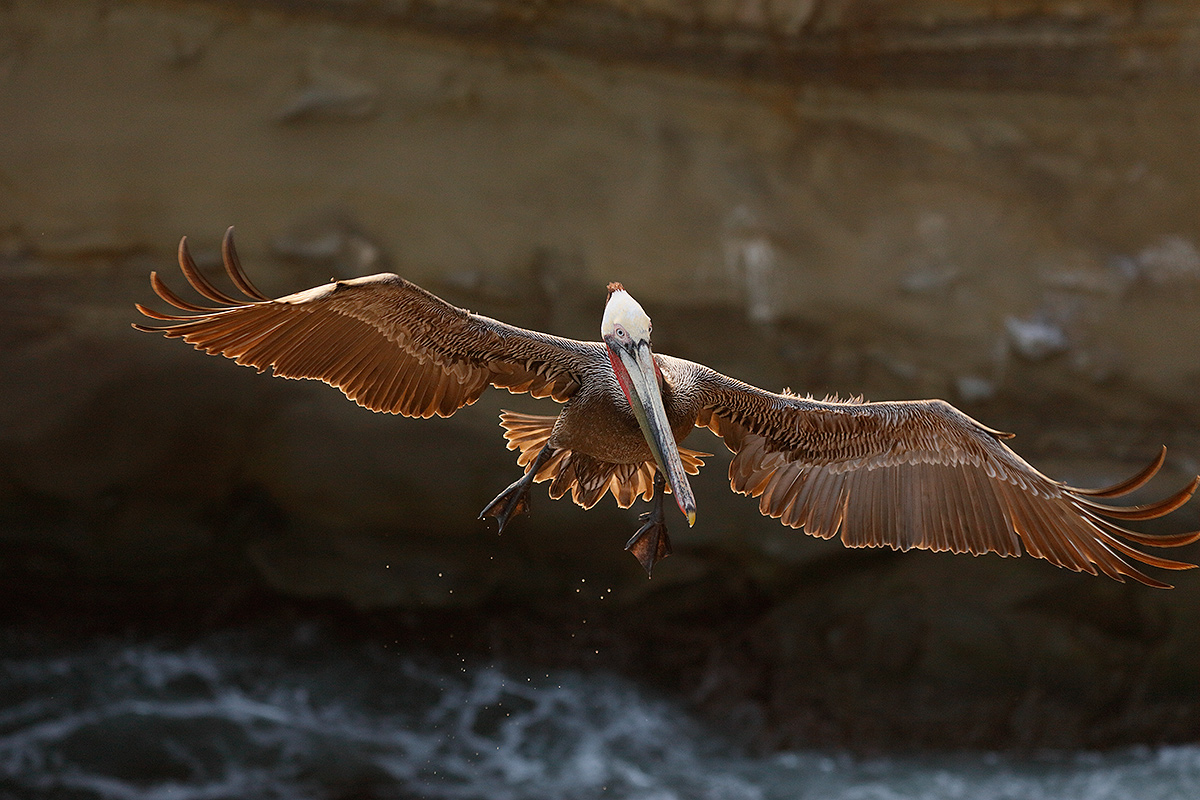
This image was created at La Jolla, CA with the hand held Canon EF 100-400mm f/4.5-5.6L IS II USM lens (at 158mm) and the amazing mega mega-pixel Canon EOS 5DS R. ISO 1600. Evaluative metering probably about -2/3 stop: 1/1250 sec. at f/5.6. AWB. Center AF point (Manual selection)/AI Servo Shutter button AF as originally framed was active at the moment of exposure (as is always best when hand holding). The selected AF point was on the bird’s breast just to our left of the bottom of the red on the bill pouch. Click on the image to see a larger version. Backlit Brown Pelican with one clipped primary tip |
So Whaddya Do With This Image? Cry?
Gorgeous backlight coming through the perfectly positioned wings. Sharp. A gorgeous bird. The perfect head turn. But I mis-framed the image and clipped a single primary. If I had simply been able to keep the sensor on the bird’s face I would’a been famous. What to do? Add canvas and the missing wingtip. Learn how I did it below.
100-400 II Versatility
Though I did not zoom out quite quickly enough when creating today’s image, I would have been dead in the water with a fixed focal length intermediate telephoto lens like the 300 II or the 400 DO II. Zooming out to 158mm gave me a chance. If only I hadn’t been so greedy 🙂
Just So You Know
This is still another image that was created on the “lousy” morning of March 22. You will get to see a few more good ones from that morning as the “What do you do when nothing’s happening? Get into the creative zone!” series continues.
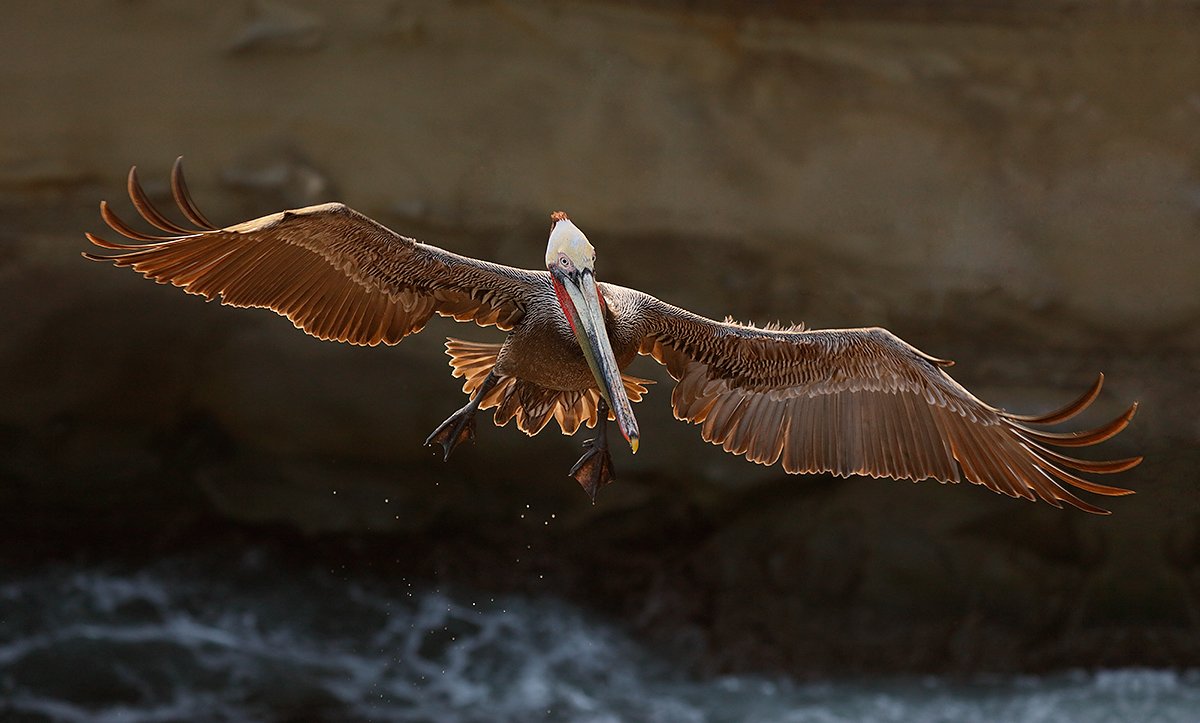
Added canvas and wingtip repair |
Added Canvas and Wingtip Repair
The wingtip repair here was the easy part. I added canvas here by grabbing one of the love handles on the Crop Tool and pulling it out. Filling in the canvas was the trick part. As none of the regular APTATS II techniques would have worked because of the unevenness of the background, I used the Rectangular Marquee Tool to grab a portion of the right side of the frame from top to bottom, placed that on its own layer, and flopped it. Then I cleaned up the primary feathers that I did not need with all of my favorite friends: the Clone Stamp Tool, the Patch Tool, and the Spot Healing Brush. Then I repaired the missing wing tip using techniques from APTATS I and II and used the same batch of tools to clean up most of the whitewash on the wall of the cliff.
Resources
My complete digital workflow along with dozens of great Photoshop tips can be found in our Digital Basics File. Advanced Quick Masking is covered in APTATS I, and Advanced Layer Masking in APTATS II. You can save some money by purchasing both together by clicking here.
|
The New Guide and NeatImage
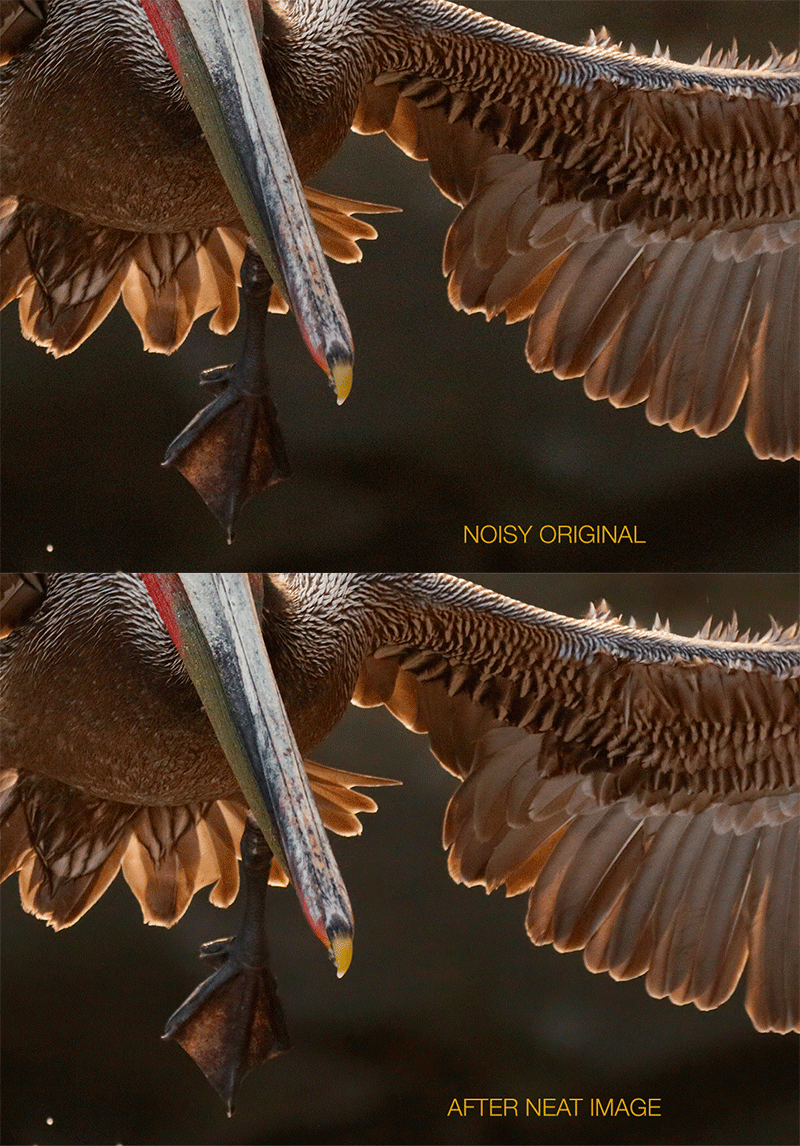
The going has been slow while working on Arash’s new Post Processing Guide but we are ironing out all the kinks via e-mail and phone and making good progress. The guide will teach you–as you can see in the Animated GIF above, to apply a small amount of NR to the bird (to maintain fine feather detail)and apply greater amounts of NR to noisy backgrounds to smooth them out. The key to the success of these methods is NeatImage. As above, the main thrust of the book deals with Arash’s high level noise reduction techniques using NeatImage. Arash recommends and uses only the NeatImage plug-in for advanced noise reduction. Both artie and Arash recommend only the Proversion as the Homeversion does not work on 16-bit images. Folks who are good with Layer Masking may wish to get a copy of NeatImage and get a head start on using this great program. If not, the new guide will make it simple for you.
With this image the strong NR on the BKGR helped to clean up the artifacting mess in the area to our right of the bird’s left wing where the repairs were done. Learn more on the effectiveness of NeatImage in the blog post here.
Please also that the 5DS R BKGR noise at ISO 1600 (while properly underexposing for the bird’s white head) is not bad at all. More on that in tomorrow’s blog post.
IPT Updates
Learn to improve your bird and nature photography with the best instructor on the planet; join a BIRDS AS ART Instructional Photo-Tour. Learn more and see the schedule here.
immediately below) has lots of room.
|
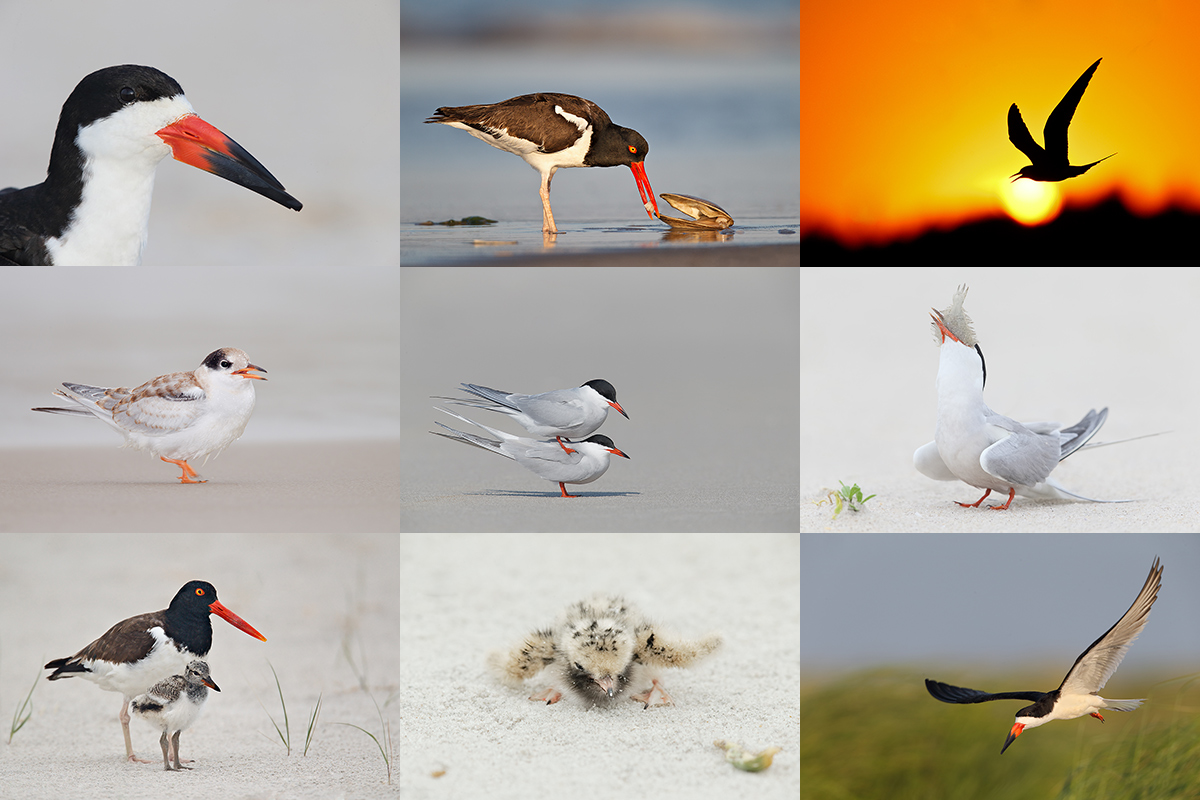
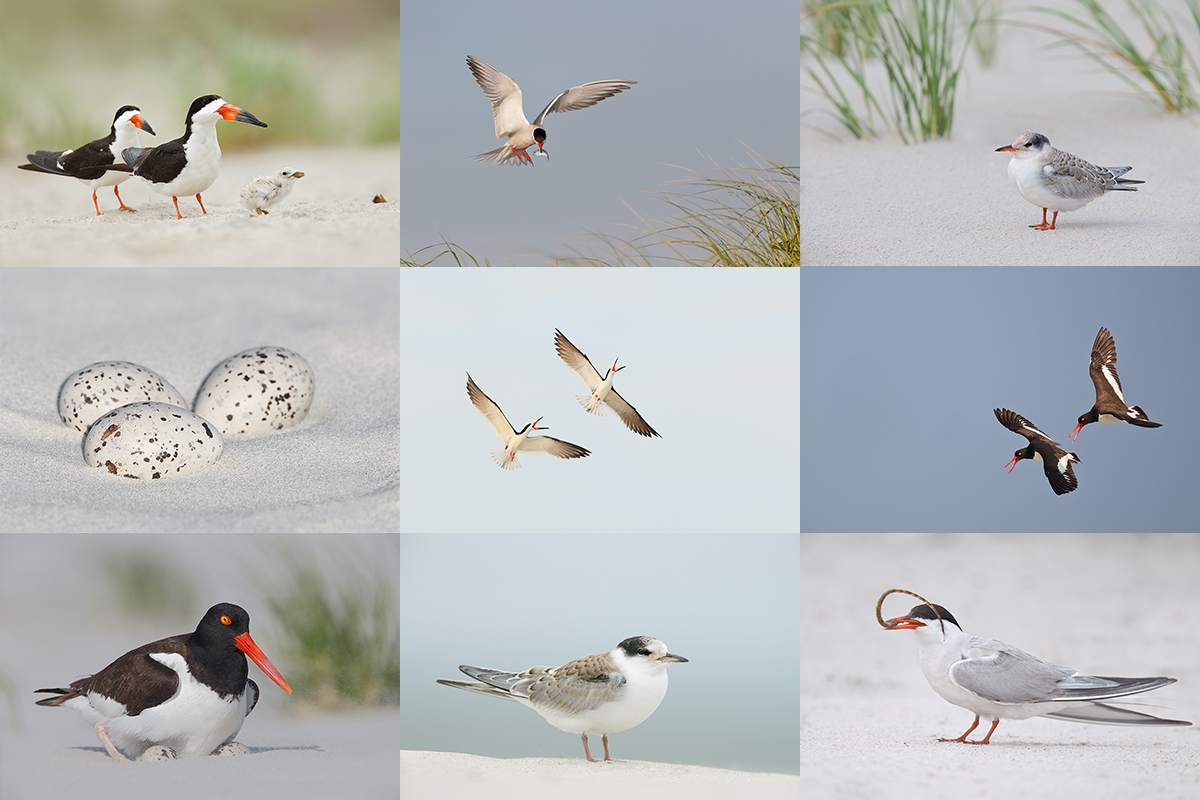
From upper left clockwise to center: Black Skimmer head portrait, American Oystercatcher dining on surf clam flesh, Common Tern at sunset, Common Tern adult swallowing flatfish, Black Skimmer in flight, newborn Common Tern chick, American Oystercatcher with chick, fresh juvenile Common Tern (with fill flash), and Common Terns copulating. |
Nickerson Beach Terns/Skimmers/Oystercatchers Instructional Photo-Tour (IPT): July 18-22, 2016. 4 1/2 DAYS: $1899
Meet and greet at 3pm on the afternoon of Monday, July 18. Limit 10/Openings: 8.
The primary subject species of this IPT will be the nesting Common Terns. The trip is timed so that we will get to photograph tiny chicks as well as fledglings. There will be lots of flight photography including adults flying with baitfish. Creating great images of the chicks being fed is a huge challenge. In addition to the terns we will get to photograph lots of Black Skimmers courting, setting up their nesting territories, and in flight (both singles and large pre-dawn flocks blasting off). Midair battles are guaranteed on sunny afternoons. And with luck, we might even see a few tiny chicks toward the end of the trip. We will also get to photograph the life cycle of American Oystercatcher. This will likely include nests with eggs and tiny chicks, young being fed, and possibly a few fledglings.
Nesting Piping Plover is also possibly. There will be lots of gulls to photograph; most years I am able to find a few Lesser Black-backed Gulls of varying ages in addition to the Herring, Ring-billed, and Great Black-backed Gulls. You will learn to identify and age the various gull species. There will likely be some Willets feeding along the surf and with luck we might get to photograph a handsome juvenile or two. In addition to the locally breeding shorebirds, we will likely get to see some southbound migrant arctic-and sub-arctic breeding shorebird species such as Sanderling, Semipalmated Plover, and maybe even Red Knot.
|
From upper left clockwise to center: Black Skimmers with tiny chick, Common Tern landing with baitfish for young, fledged Common Tern chick in dunes, American Oystercatchers/display flight, adult Common Tern with pipefish for chick, Common Tern fledgling in soft light, American Oystercatcher on nest with eggs, American Oystercatcher 3-egg clutch, battling Black Skimmers. |
The IPT Logistics
The tour will begin with a meet and greet on the afternoon of Monday, July 18, 2016. That will be followed by our first shooting session at the beach. From Tuesday through and including all of Friday we will have two photography sessions daily. Our morning sessions will start very early so that we are on the beach well before sunrise. We usually photograph for about four hours. Then we will enjoy a group brunch. We will always have a midday break that will include a nap for me. That followed by our daily afternoon classroom sessions that will include image review, workflow and Photoshop, and a review/critique of five of your trip images. Folks are always invited to bring their laptops to brunch for image sharing. I always have mine with me but heck, I am a big show-off. Afternoon in-the-field sessions generally run from 5pm through sunset.
Breakfasts are grab what you can. Four brunches are included. Dinners (if at all) will be on your own as we will often get back to the hotel at about 9pm. There is a fridge in every room and a supermarket within walking distance of the hotel so nobody should starve. You will learn a ton during the nine shooting sessions, the four in-classroom sessions, and even at lunch. Early morning and late afternoon parking is free. If we want to head back to the beach early we will need to arrange tight carpools and share the $30/vehicle parking fee. Non-photographer spouses, friends, or companions are welcome for $100/day, $450 for the whole IPT.
Save a space by calling Jim or Jen at the office at 863-692-0906 and arranging to leave your deposit of $599–credit cards are accepted for deposits only. Your balance will be due on April 18, 2016. I hope that you can join me for what will be an exciting and educational IPT.
Please Remember to use our Affiliate Links 🙂
To show your appreciation for my continuing efforts here, we ask, as always, that you get in the habit of using my B&H affiliate links on the right side of the blog for all of your photo and electronics purchases. Please check the availability of all photographic accessories in the BIRDS AS ART Online Store, especially the Mongoose M3.6 tripod heads, Gitzo tripods, Wimberley heads and plates, LensCoats and accessories, and the like. We sell only what I have used, have tested, and can depend on. We will not sell you junk. We know what you need to make creating great images easy and fun. And we are always glad to answer your gear questions via e-mail. I just learned that my account was suspended during my absence; it should be up and running by Monday at the latest.
I would of course appreciate your using our B&H affiliate links for all of your major gear, video, and electronic purchases. For the photographic stuff mentioned in the paragraph above we, meaning BAA, would of course greatly appreciate your business. Here is a huge thank you to the many who have been using our links on a regular basis and visiting the BAA Online store as well.
Be sure to like and follow BAA on Facebook by clicking on the logo link upper right. Tanks a stack!
Typos
In all blog posts and Bulletins, feel free to e-mail or to leave a comment regarding any typos or errors. Just be right 🙂



Hi a,
I have a slightly different take, though of course the answers given are good, i.e. shutter or mirror vibration decays well short of a long exposure.
But this doesn’t consider what you have to do to deal with a rubbish tripod (short of chucking it and getting a not-rubbish one). Here it’s not so much to avoid vibration, which will be pretty much a given throughout the whole exposure, but to avoid rearranging the whole setup which is so easy to do with the slightest touch of the shutter button. Live-view, or some other remote press, helps keep the camera pointed where you think it’s pointed. I say ‘helps’ because it’s just one of many things that will conspire to move the camera during the shot.
Neil
Hi Neil, If I am understanding you correctly, owning a crummy tripod is a choice 🙂 I use Induro; far better than Gitzo and costs more than 1/3 less. artie
I would have cried too! Great save for a Fantastic Image!!
To answer the question: Using a tripod and the exposure time makes it unnecessary?? You didn’t say anything about using a handheld shutter release button.
My preference: I like using live view to get accurate focus. I use a canon 60D and it seems to be soft on AF focus through the viewfinder. I did a test and when I manually focused with Live view the focus was sharper then using AF through the viewfinder or AF with Live view. Maybe it’s me or maybe it’s the camera model. Hoping to upgrade one of these days just to see if it’s me or the camera. I’m betting it’s the camera!
Can’t what to get the Book & CD… Excited!! 🙂 Jackie
Thanks for your purchase. Don’t forget to study; then you can join us on an IPT. a
ps: I will be doing some new stuff on micro adjusting soon; that might very well be your problem. Focusing manually in Live View for bird just does not cut it unless you only do sleeping birds…
Hi a, very much looking forward to your session on micro adjusting. As far as I know the 60D dropped this, though it’s present in the 50D and 70D. Perhaps after testing a 60D would need to go for in-shop calibration?
Thanks. I am slightly confused: do the 50D, 60D, and 70F offer micro-adjusting? a
As far a I know for the xxD line, only the 50D and 70D have micro adjusting, the 60D doesn’t. All the xD’s have it.
Thanks Neil! Right now my repair place is Geek Squ_ _ _. I’m not sure if they have the ability to do it correctly. I have sent it in on 3 repairs and it always comes back with the remark “Working Perfectly”. I’m not sure it’s worth spending the $$ to have Canon go over it or just save up for a better body?? What is the price for calibration (roughly)??
A, I’ve never tried live view with birds, I have a hard enough time getting them in the viewfinder 🙂 I use live view for flowers & mushrooms etc. That’s why I like the 60D it has the flip out screen.
Learning much!!!
I’m with Rob and Richard. The time it takes for the vibrations in the “system” (camera, lens, support structure) to decay to a state of equilibrium is a small fraction of the total exposure time that the effect is diminished and the unsharpness induced by that motion is just not significant when compared to the “whole” of the 30 seconds. Motions induced by winds, etc. which continue over the whole exposure time would cause visible reductions in sharpness. As far as the effect from the shutter button, it would be just one more in the series of vibrations happening at the time of release. Without getting into harmonics, etc., the time to decay is likely to depend on the original causes of the motion (size of impact / shock) and the material (s) of the structure (wood, aluminum, carbon, various metals).
I admit this pretty much follows what was said before.
Best wishes for a complete and speedy recovery.
Well covered and thanks for the good wishes. I continue to do well. a
Why is it unnecessary to use Live View, Mirror Lock-up, or the 2-second timer when doing 15- or 30-second exposures? — Because at that slow a shutter speed any camera movement from the shutter will not show up? Anyway, I would be using a cable release at 1/30th or below (except when w/o one, then I’d try very hard to steady and hope for the best).
You need to prevent the shake introduced by the mirror slap (live view and mirror lock up) and touching the camera (reason for 2 second timer)
When? Not at 30 seconds… a
Artie,
I’ve never done this type of exposure, never used a tripod, etc, so this is a total guess:
specifically, in the photo cited, you were using the 10-stop ND filter. I am guessing that shake from pressing the shutter release would be unnoticeable.
However, to your point about a one second exposure, I would say then it’s important to use a remote shutter release or to use the timer. Or, if you’re doing a long exposure without the ND filter, then use remote shutter release or the timer.
I second Rob’s question as well.
Bingo. Rob’s question or Rob’s answer? a
Hi Artie,
When Rob said “what’s the shortest exposure at which the principal is safe to apply”.
If you use live view your mirror is already locked up,
However If I’m doing 15 or 30 seconds I’d be using a remote shutter release?
Yes on mirror lock-up with Live View but the question is why NOT Live View with a 30-sec. exposure??? a
Hi Doug,
While what you say is of course true, it is not the right answer…
a
ps: to further promote learning, would your answer above be the same if you were creating a 1-second moving water blur?
Well, when I create waterfall shots, I actually never use mirror lockup. I do use the timer. Live View, I really don’t use that too much, so I can’t speak from experience on that one. About the only time I’ve used the mirror lockup is when I do a moon shot..and thats if I remember 🙂
I’m not the best to answer this question, but I figured what the heck 🙂
Doug
On the technical question, I’ll second the answer that the interval during which mirror-slap vibration would occur must be a small enough fraction of the total exposure not to matter. If so, I wonder what’s the shortest exposure at which this principle is safe to apply.
Rob, what about gear shake from pressing the shutter button? a
Would think that on that long an exposure, any vibration initially would be such a small percentage of the exposure time that it wouldn’t matter. Any recorded data from that short vibration would be covered up by data from the remaining exposure. Never really thought of this before, just used live view/delay as it seemed like the right thing to do….
I’ll take a shot at the 30 second…
Basically cause you’re photographing something that is and isn’t moving.
In other words, you don’t have to worry about camera shake as far as the cliffs go, cause they’re stationary. The ocean, you don’t have to worry about camera shake cause you do want blurred, so it isn’t an issue.
Doug