What’s Up?
I had my best night’s sleep since the surgery with 1 1/2 to 2 hours between pit stops; with the laser surgery it takes from 2 weeks to 2 months to see real improvement. I did lots to get ready for the Namibia trip including ordering some needed diabetic supplies and getting the right electrical outlet adapter (Type M) thanks to good friend Bill Lloyd who will be on the trip.
The Streak
The Streak
Today’s blog post marks 152 days in a row with a new educational blog post. Assuming that I will be making the trip to Namibia on April 11, this streak will come to an end soon. As always–and folks have been doing a really great job recently–please remember to use our B&H links for your major gear purchases. For best results use one of our many product-specific links; after clicking on one of those you can continue shopping with all subsequent purchases invisibly tracked to BAA. Your doing so is always greatly appreciated. Please remember: web orders only. Please remember that if you are shopping for items that we carry in the BAA Online Store (as noted in red at the close of this post below) we would appreciate your business.
|
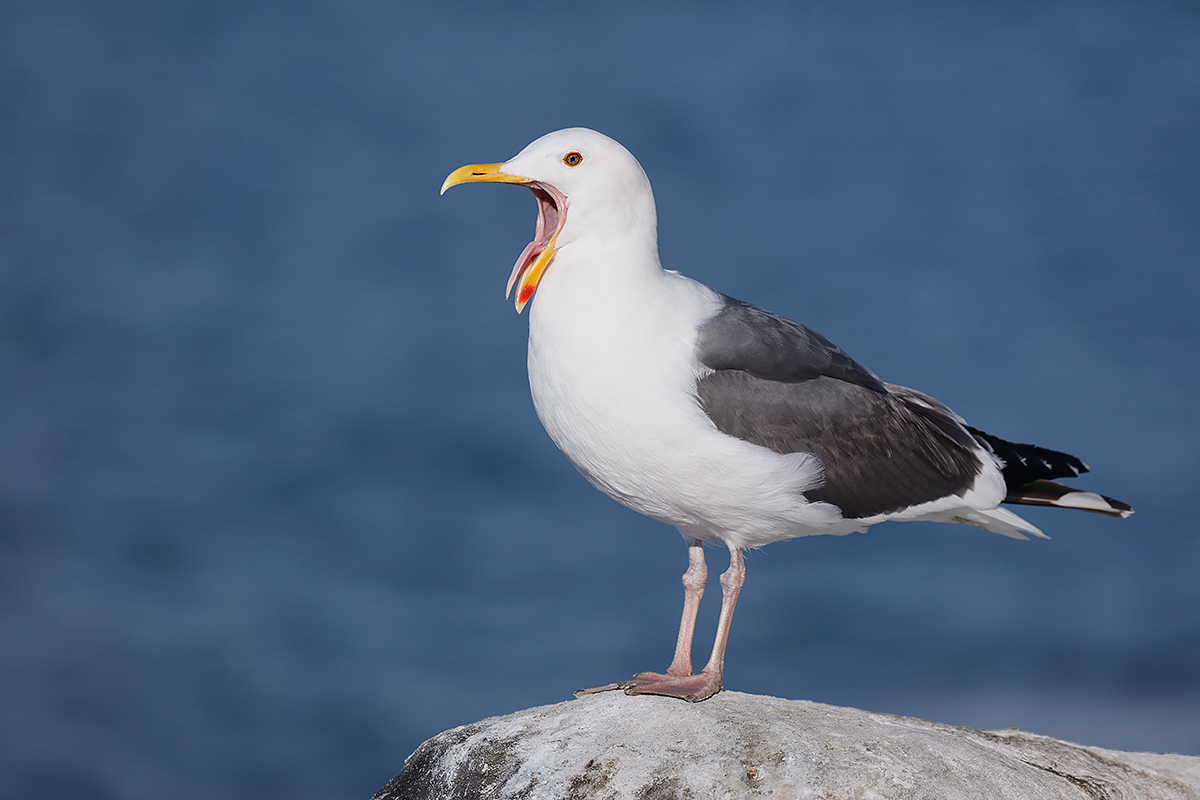
This image was created at La Jolla, CA on the afternoon of Saturday, April with the hand held Canon EF 100-400mm f/4.5-5.6L IS II USM lens (at 312mm) and the mega mega-pixel Canon EOS 5DS R. ISO 400. sunny ISO 400 bright white exposure of 1/2500 sec. at f/7.1 (the equivalent of 1/2000 sec. at f/8.) Daylight WB. I selected one AF point that was two up from the center AF point/AI Servo Expand/Rear Focus AF on the gull’s neck was active at the moment of exposure as is always best when hand holding. Click here to see the latest version of the Rear Focus Tutorial. Click on the image to see the spectacular larger version. adult Western Gull calling |
Serendipitously On Sun Angle
Patrick Sparkman and I had made our way down to the low cliffs on a clear afternoon. We were working mostly on Brant’s Cormorants when I noticed this gull land behind us on a pretty nice rock. (Yes, good photographers have eyes in the back of their heads…) To get into position, I moved slowly to avoid pissing off a female Sea Lion. I worked my way to sun angle, selected the AF point that would work for the image design that I wanted, and did an exposure check. Then I got a bit lower by bending and squatting a bit to move the already distant background even farther effectively from the bird.
Just as I got into the perfect position the gull called. I made two images and backed away thinking “It’s just not gonna get any better than that.” In a Birder’s World article entitled “Go For the Gulls” I wrote, “When you point your lens at a gull they will usually do something pretty neat.” This gull made my life too easy!
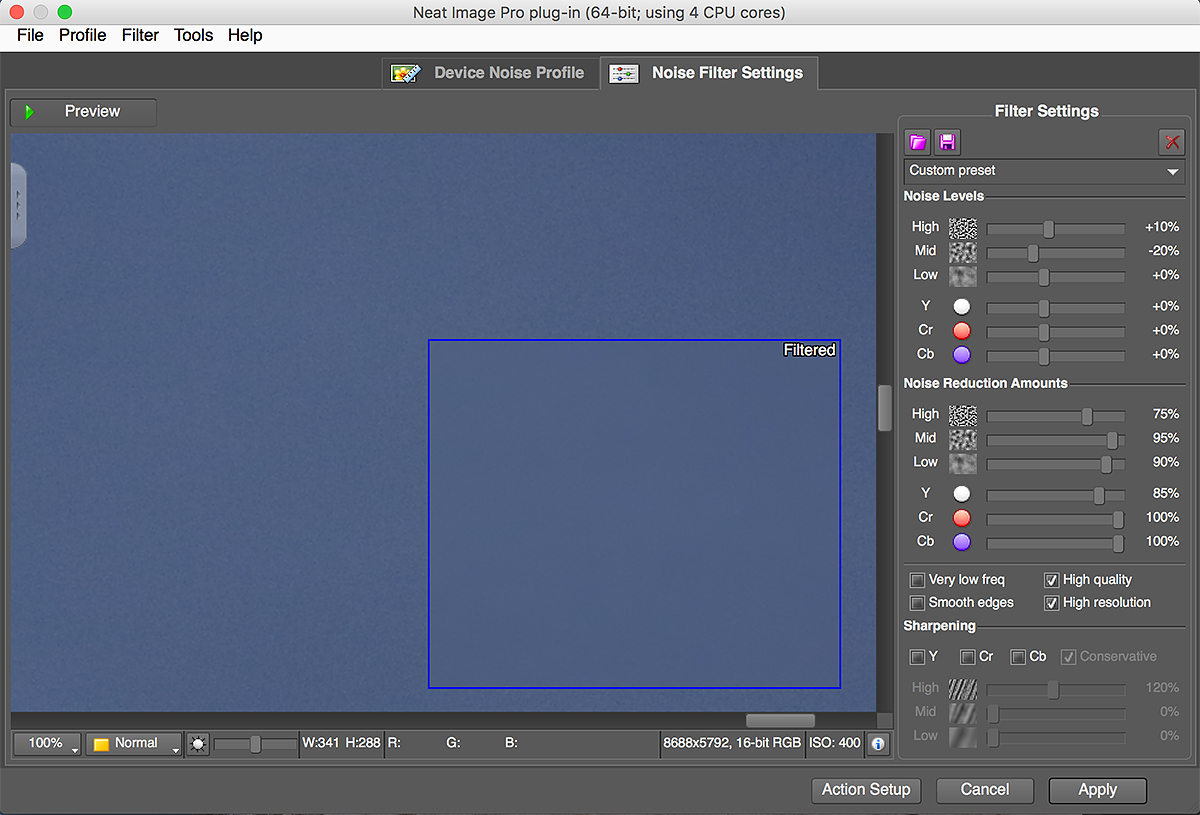
NeatImage background NR screen capture |
NeatImage Background NR Screen Capture
The NeatImage background Noise Reduction screen capture above gives you a sneak preview of our great new post-processing guide. Written by Arash Hazeghi and edited for readability and clarity by yours truly, this e-book will teach you to apply professional noise reduction and sharpening to your images. First, a mild NR is done on the bird, and then a stronger round or two of NR is applied to the background. Arash’s ingenious technique allows you to do this quickly and easily in most cases. You will learn to make an accurate selection of the subject to put this all in motion. Notice the smooth as a baby’s tush background in the screen capture of today’s featured image above.
The area in the blue square has been filtered by NeatImage Noise Reduction. The area outside of the blue box is unfiltered, exactly as it appears on the converted TIFF. While I will assume that everyone will be impressed by the virtually complete absence of noise in the original file, I need to point out that the mid- to dark-toned water is actually one stop to 1 1/3 stops under-exposed. Why? WHITES need one stop less light to be properly exposed than mid-tones in a given lighting condition; thus the mid-to dark middle toned water is one to 1 1/3 stops under it should be, and therefore, more noisy. I am rather amazed that all of the internet experts including some very good photographers and good friends are all proclaiming that high ISO noise with the 5DS R is a problem. But heck, that’s why they are internet experts: they rarely if ever use the gear that they complain about.
The New Guide and NeatImage
The work on on Arash’s new Post Processing Guide is finished and we will be announcing its publication here very soon. The guide will sell for $48. As above, the guide will teach you–as you can see in today’s featured image, to apply a small but effective amount of NR to the bird (while maintaining fine feather detail) and to apply greater amounts of NR to noisy backgrounds to smooth them out. The key to the success of these methods is a combination of Arash’s cleverly developed and innovative techniques and the great NeatImage plug-in. Arash recommends and uses only the NeatImage plug-in for advanced noise reduction. Both artie and Arash recommend only the Proversion as the Homeversion does not work on 16-bit images. Folks who are good with Layer Masking may wish to get a copy of NeatImage and get a head start on using this great program. If not, the new guide will make it simple for you. Learn more on the effectiveness of NeatImage in the blog post here.
|
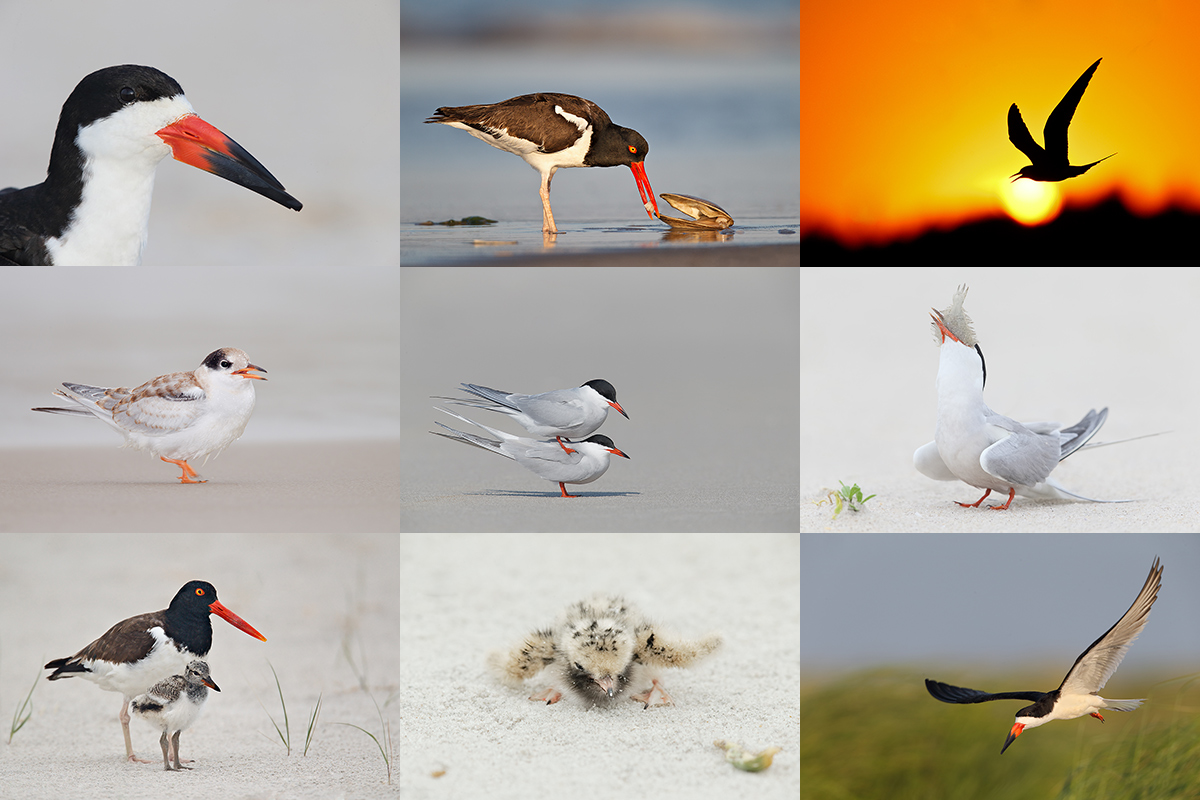
From upper left clockwise to center: Black Skimmer head portrait, American Oystercatcher dining on surf clam flesh, Common Tern at sunset, Common Tern adult swallowing flatfish, Black Skimmer in flight, newborn Common Tern chick, American Oystercatcher with chick, fresh juvenile Common Tern (with fill flash), and Common Terns copulating. |
Nickerson Beach Terns/Skimmers/Oystercatchers Instructional Photo-Tour (IPT): July 18-22, 2016. 4 1/2 DAYS: $1899
Meet and greet at 3pm on the afternoon of Monday, July 18. Limit 10.
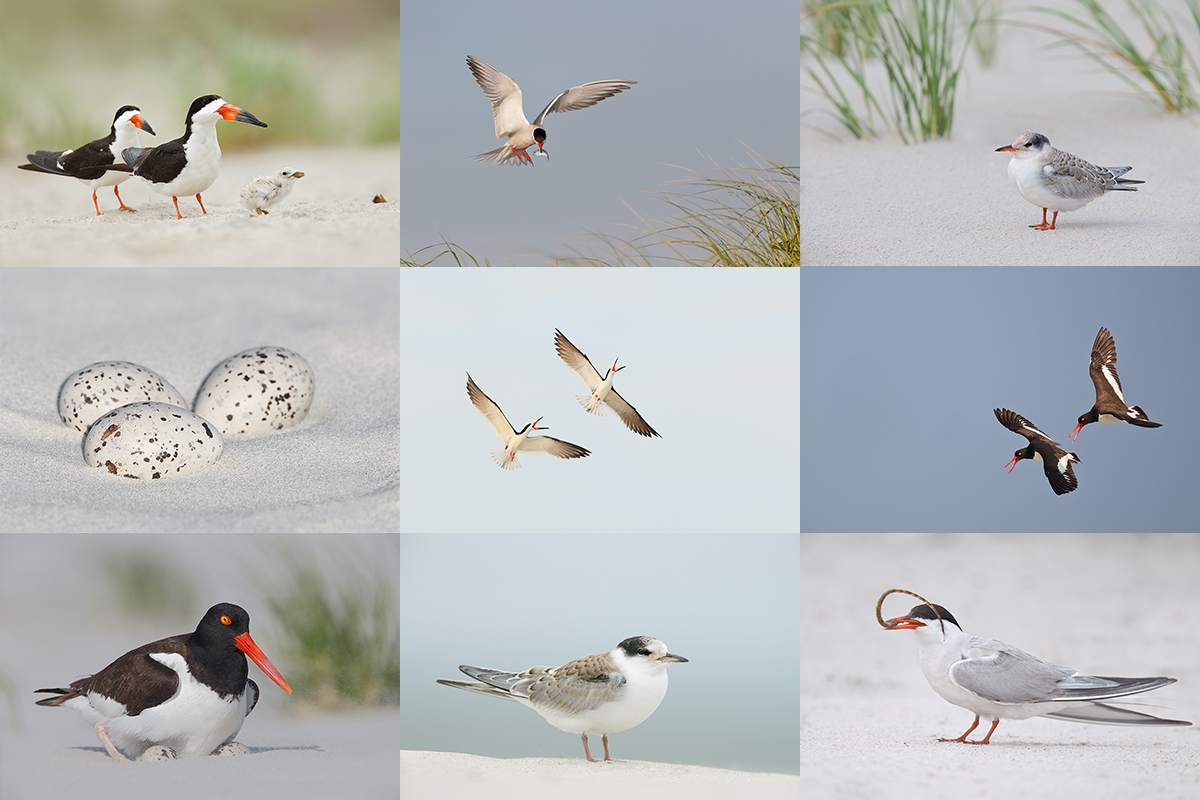
The primary subject species of this IPT will be the nesting Common Terns. The trip is timed so that we will get to photograph tiny chicks as well as fledglings. There will be lots of flight photography including adults flying with baitfish. Creating great images of the chicks being fed is a huge challenge. In addition to the terns we will get to photograph lots of Black Skimmers courting, setting up their nesting territories, and in flight (both singles and large pre-dawn flocks blasting off). Midair battles are guaranteed on sunny afternoons. And with luck, we might even see a few tiny chicks toward the end of the trip. We will also get to photograph the life cycle of American Oystercatcher. This will likely include nests with eggs and tiny chicks, young being fed, and possibly a few fledglings.
Nesting Piping Plover is also possibly. There will be lots of gulls to photograph; most years I am able to find a few Lesser Black-backed Gulls of varying ages in addition to the Herring, Ring-billed, and Great Black-backed Gulls. You will learn to identify and age the various gull species. There will likely be some Willets feeding along the surf and with luck we might get to photograph a handsome juvenile or two. In addition to the locally breeding shorebirds, we will likely get to see some southbound migrant arctic-and sub-arctic breeding shorebird species such as Sanderling, Semipalmated Plover, and maybe even Red Knot.
|
From upper left clockwise to center: Black Skimmers with tiny chick, Common Tern landing with baitfish for young, fledged Common Tern chick in dunes, American Oystercatchers/display flight, adult Common Tern with pipefish for chick, Common Tern fledgling in soft light, American Oystercatcher on nest with eggs, American Oystercatcher 3-egg clutch, battling Black Skimmers. |
The IPT Logistics
The tour will begin with a meet and greet on the afternoon of Monday, July 18, 2016. That will be followed by our first shooting session at the beach. From Tuesday through and including all of Friday we will have two photography sessions daily. Our morning sessions will start very early so that we are on the beach well before sunrise. We usually photograph for about four hours. Then we will enjoy a group brunch. We will always have a midday break that will include a nap for me. That followed by our daily afternoon classroom sessions that will include image review, workflow and Photoshop, and a review/critique of five of your trip images. Folks are always invited to bring their laptops to brunch for image sharing. I always have mine with me but heck, I am a big show-off. Afternoon in-the-field sessions generally run from 5pm through sunset.
Breakfasts are grab what you can. Four brunches are included. Dinners (if at all) will be on your own as we will often get back to the hotel at about 9pm. There is a fridge in every room and a supermarket within walking distance of the hotel so nobody should starve. You will learn a ton during the nine shooting sessions, the four in-classroom sessions, and even at lunch. Early morning and late afternoon parking is free. If we want to head back to the beach early we will need to arrange tight carpools and share the $30/vehicle parking fee. Non-photographer spouses, friends, or companions are welcome for $100/day, $450 for the whole IPT.
Save a space by calling Jim or Jen at the office at 863-692-0906 and arranging to leave your deposit of $599–credit cards are accepted for deposits only. Your balance will be due on April 18, 2016. I hope that you can join me for what will be an exciting and educational IPT.
Please Remember to use our Affiliate Links 🙂
To show your appreciation for my continuing efforts here, we ask, as always, that you get in the habit of using my B&H affiliate links on the right side of the blog for all of your photo and electronics purchases. Please check the availability of all photographic accessories in the BIRDS AS ART Online Store, especially the Mongoose M3.6 tripod heads, Gitzo tripods, Wimberley heads and plates, LensCoats and accessories, and the like. We sell only what I have used, have tested, and can depend on. We will not sell you junk. We know what you need to make creating great images easy and fun. And we are always glad to answer your gear questions via e-mail. I just learned that my account was suspended during my absence; it should be up and running by Monday at the latest.
I would of course appreciate your using our B&H affiliate links for all of your major gear, video, and electronic purchases. For the photographic stuff mentioned in the paragraph above we, meaning BAA, would of course greatly appreciate your business. Here is a huge thank you to the many who have been using our links on a regular basis and visiting the BAA Online store as well.
Be sure to like and follow BAA on Facebook by clicking on the logo link upper right. Tanks a stack!
Typos
In all blog posts and Bulletins, feel free to e-mail or to leave a comment regarding any typos or errors. Just be right 🙂


I have to admit I had to look that one up: Serendipitous(ly) is an adjective that describes accidentally being in the right place at the right time, like bumping into a good friend in some unusual location, or finding a hundred dollar bill on the ground.
I need more of that!
Hope you’re doing well Artie??
Heck, I used serendipitous yesterday; you need to read every word every day! Today it was serendipitous that the gull called for me right one cue. Getting on sun angle as not serendipitous–it is what I always do :0 a
I think garbage is a little harsh for DeNoise, but Arash’s images look a lot better than mine so I can’t argue. I should point out the latest version of DeNoise comes with presets for every Canon body at all common ISOs. They work quite well as a starting point for the 7DII. No need to do your own calibration.
Thanks Mike. artie
ps: I am working on an example for you now.
pps: Using Denoise, which might or might not be improved–heck, you thought that it was pretty good before–do you know how to apply separate amounts of NR to the subject and to the BKGR?
ps: both Arash and I call things as we see them. Some who do not know us well judge both of us as too harsh at times… Others appreciate our honesty.
a
Thanks so much for taking the time to put together examples to show how/why noise reduction with NI is superior! I have been looking forward to those since the NI guide was touted. I have remained skeptical that NI is superior to the many other options, especially since it hasn’t been updated in 2 years (could be wrong, but that was latest release I saw). Most internet reviews only focus on pre-set profiles and aren’t terribly useful. I am curious as to “how to apply separate amounts of NR to the subject and to the BKGR” is a big deal or confusing regardless of any NR software one chooses. “Selective NR” should be as “Selective sharpening” or applying anything else to the subject. Or at least it has been with every NR plugin I have used (NI, Noise Ninja, DeNoise, Noiseware, etc.). Thanks again in advance.
Thanks. There will be one on subject only NR likely tomorrow. The guide will be released very soon 🙂
a
For Doug and Mike,
I asked Arash about Topaz Denoise. Here is his response:
“It cannot calibrate the noise levels. I tried it. It was garbage.”
Best
Arash Hazeghi Ph.D.
To which I would add:
In the guide, we teach folks to calibrate noise levels for each image or series of images. As an option, also covered in the guide, we teach you to create a Noise Profile for each ISO with a given camera by photographing a NeatImage calibration target… a
Artie,
I have used Neat Image Pro Version for years. When Arash put out his first ebook on using NI for noise reduction, I purchased a copy. I found it to be very helpful, but as you said, NI can be a little more sophisticated than just moving a slider. I’m really looking forward to the new, updated edition of the ebook and will get it as soon as it’s available.
Hi John, Actually, a lot more. Should be announced very soon. Many thanks for your faith in us.
later and love, artie
Hi, Artie. I quote you often about pointing your camera at a gull, and I often point mine at a gull. And I chastise–gently–friends who say “It’s only a gull.” Terrific image.
I have purchased and loved many of your books. However, I am still not convinced about the noise reduction guide. Any noise reduction program can smooth a blue sky. The real challenge is an area with a lot of detail, like feather detail. Can the noise be removed without smoothing out the detail? I have always thought Topaz DeNoise was the champion at that, but maybe I don’t know how to use Neatimage to best effect. I would love to see samples of what your techniques do on the bird. Removing noise but leaving feather detail is what will convince me. I look forward to being convinced!
Coming soon to a theater near you. NI does a great job, in conjunction with Arash’s techniques, of getting rid of the noise on the subject without destroying fine detail. The process is a bit on the complex side; that is why the re-write took so long. We will be posting some examples as you requested.
a
I think you forgot a period in your image details….unless you really did shoot a F71, which I would’ve expected more of the ocean in focus 🙂
As far as NeatImage, do you think the same principles you and Arash talk about can be applied to other noise reduction programs? I use Topaz DeNoise, so that’s why I’m curious.
Doug