What’s Up
Sunday was a hazy lazy day. I did a bit of mopping up on my 2015 taxes, worked on a few Soduko puzzles, and watched some golf and NBA playoff basketball. And again I enjoyed a great sunny day swim. Oh, and started and finished this blog post.
I took a rare Sunday evening ice bath end enjoyed my best night’s sleep since the surgery.
IPT Similarities
The Fort DeSoto and the Nickerson Beach IPTs have a lot in common. Lots of birds, lots of sand, and lots of learning. The big difference is that there are lots more flight opportunities at Nickerson: hovering terns, birds landing at the nest, and with luck and the right morning winds, skimmers skimming. And we will surely get to photograph American Oystercatchers. With a bit of luck, they will be feeding chicks of various ages. Scroll down here for complete Nickerson details.
The Streak
Today’s blog post marks an insane 199 days in a row with a new educational blog post. And I still have dozens of new topics to cover; there should be no end in sight until my big South America trip next fall. As always-–and folks have been doing a really great job recently–-please remember to use our B&H links for your major gear purchases. For best results use one of our many product-specific links; after clicking on one of those you can continue shopping with all subsequent purchases invisibly tracked to BAA. Your doing so is always greatly appreciated. Please remember: web orders only. Please remember that if you are shopping for items that we carry in the BAA Online Store (as noted in red at the close of this post below) we would appreciate your business.
|
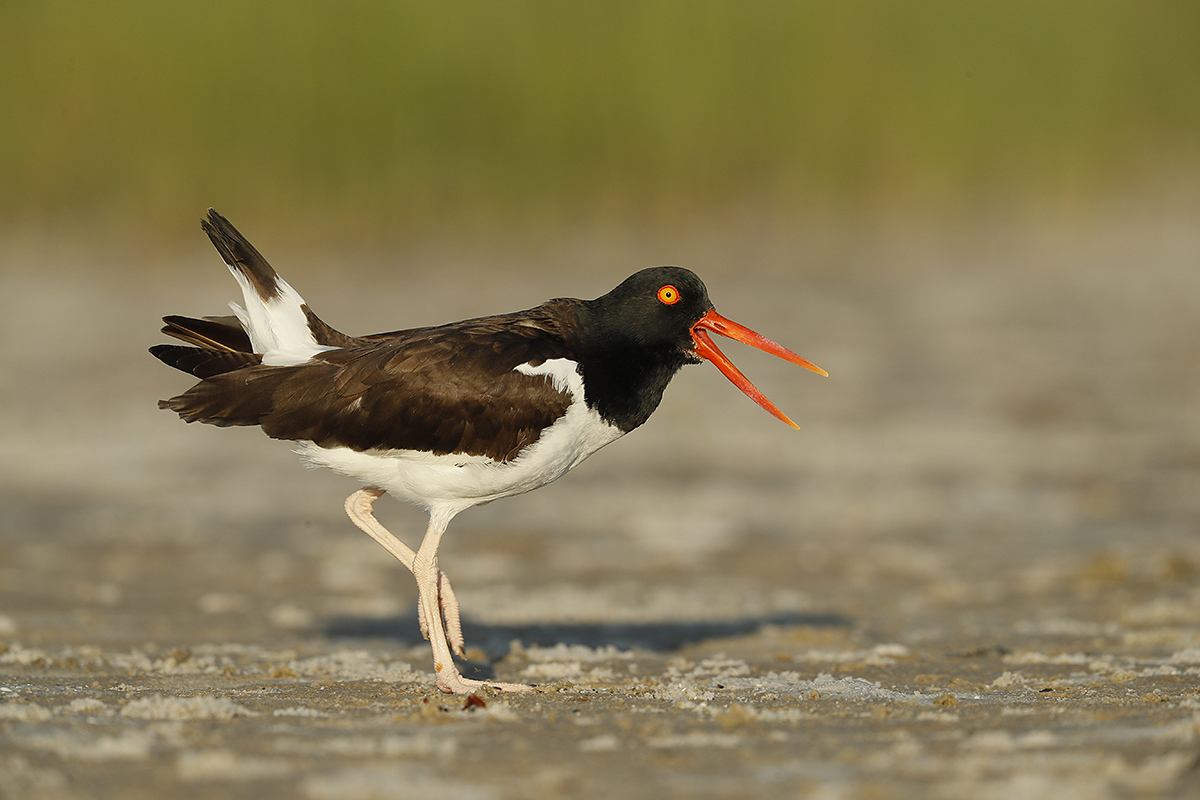
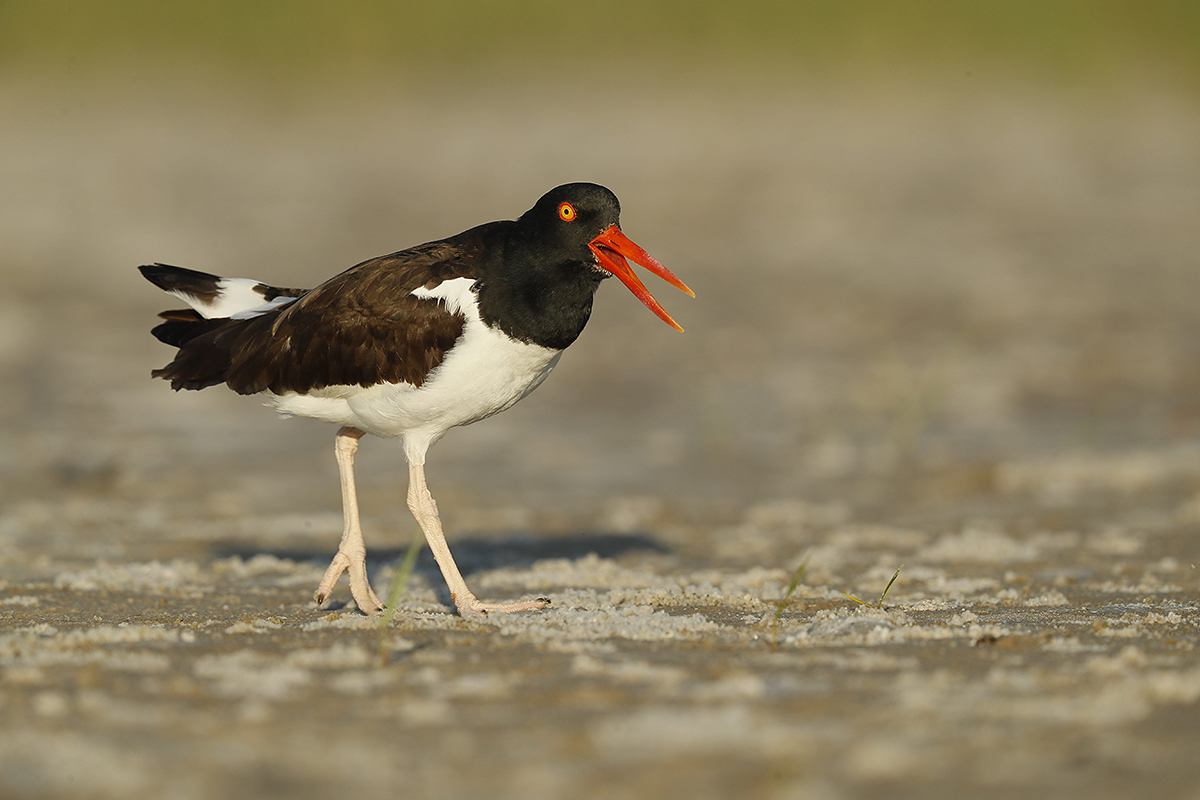
All of the images in today’s blog post were created on the last morning of my Fort DeSoto busman’s holiday with the Induro GIT 304L/Mongoose M3.6-mounted Canon EF 600mm f/4L IS II USM lens, the Canon Extender EF 1.4X III, and the Canon EOS-1D X Mark II with a 64GB Card and Reader ISO 400. Evaluative metering at about +1/3 stop: 1/1250 sec. at f/7.1. I selected on AF point above the center AF point/AI Servo Surround/Rear Focus AF as framed. AF was of course active at the moment of exposure as the bird was striding forward while calling. Click here to see the latest version of the Rear Focus Tutorial. Click on the image to see a larger version. AF Micro-adjustment via LensAlign/Focus Tune: +4. Tutorial coming soon. Group I: Image #1: |
The Situation and the Set-Up
I was sitting in about six inches of saltwater at my favorite early morning spot. I had lowered my Induro tripod and taken the time to level the bubble on the tripod platform (by shoving first this leg and then that leg into the wet sand) and then leveling the camera body; this ensured that no matter where I pointed the lens the image would be pretty darned close to perfectly level. I taught this lesson several times on the IPT. It works great whenever you will be working from the same spot for more than a few minutes. Sometimes you need to lengthen or shorten a leg to get the bubble centered in the circle. This technique also works well when you are standing for flight photography, and equally well when your tripod is on a solid surface such as a dirt road or a parking lot.
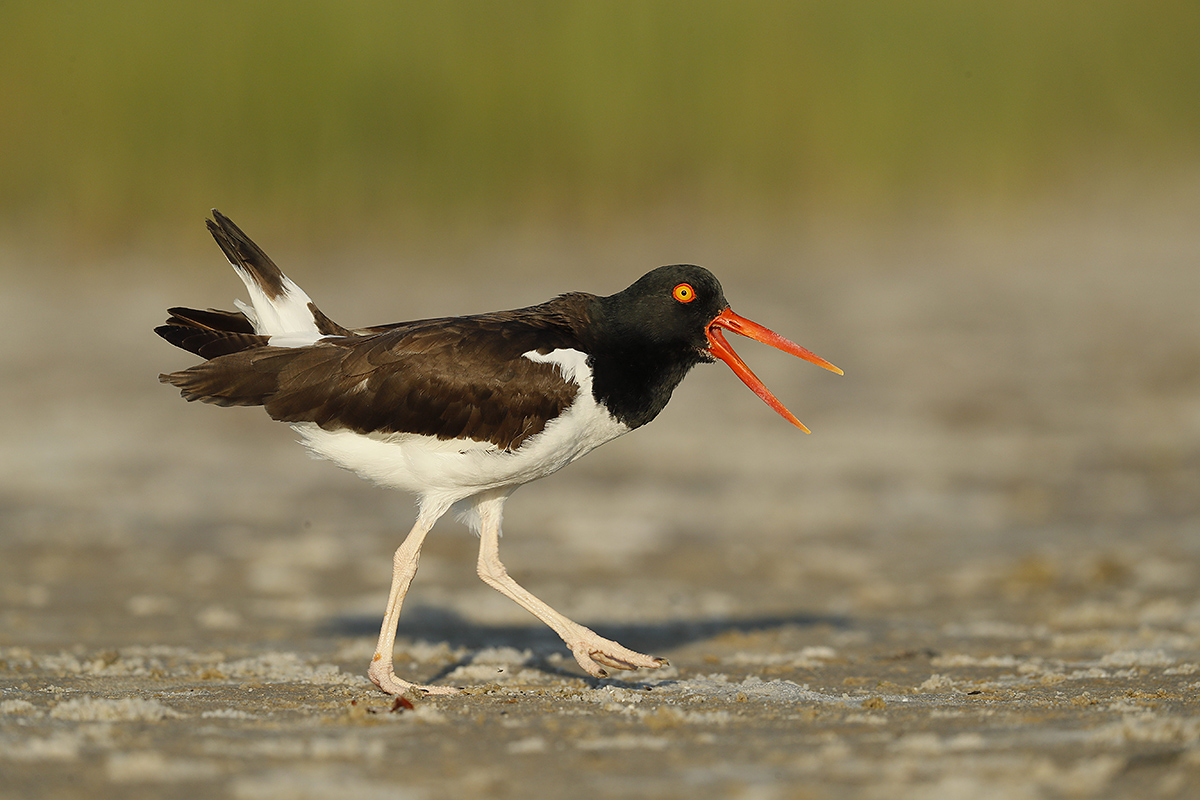
Group I: Image #2: |
Displaying Oystercatcher Lands Right in my Wheelhouse
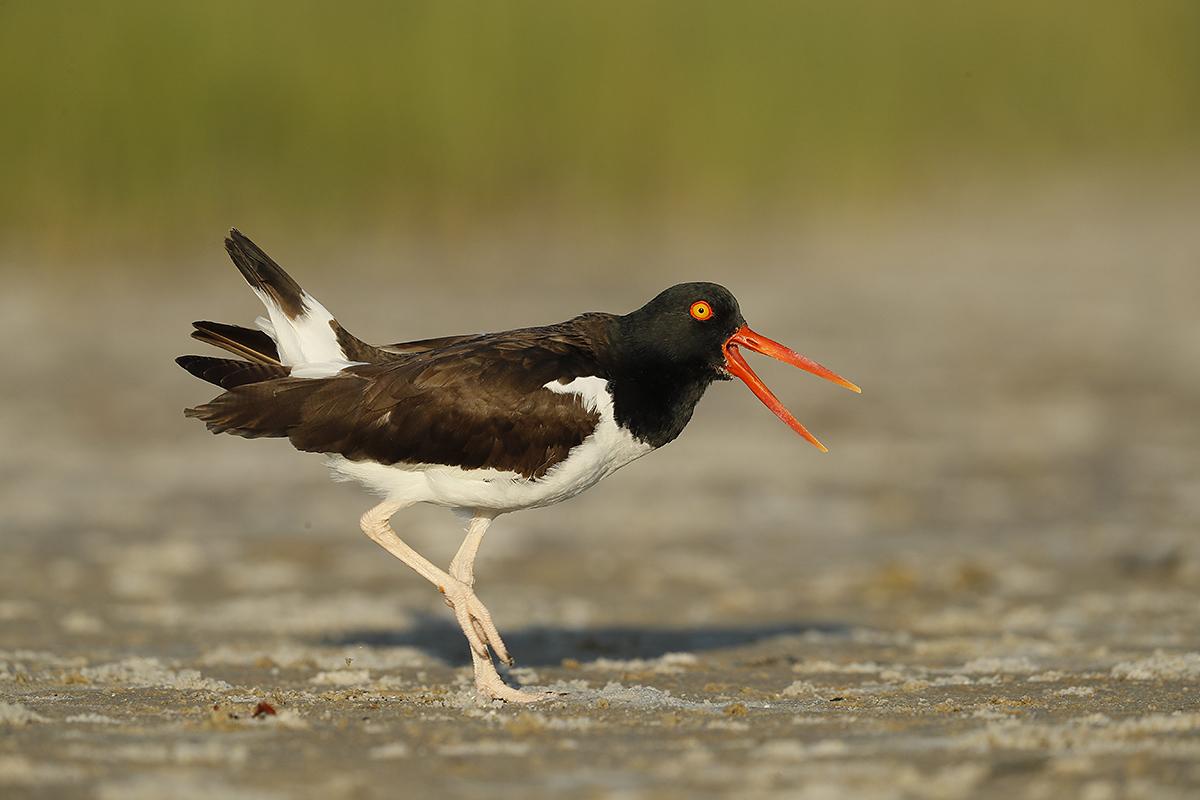
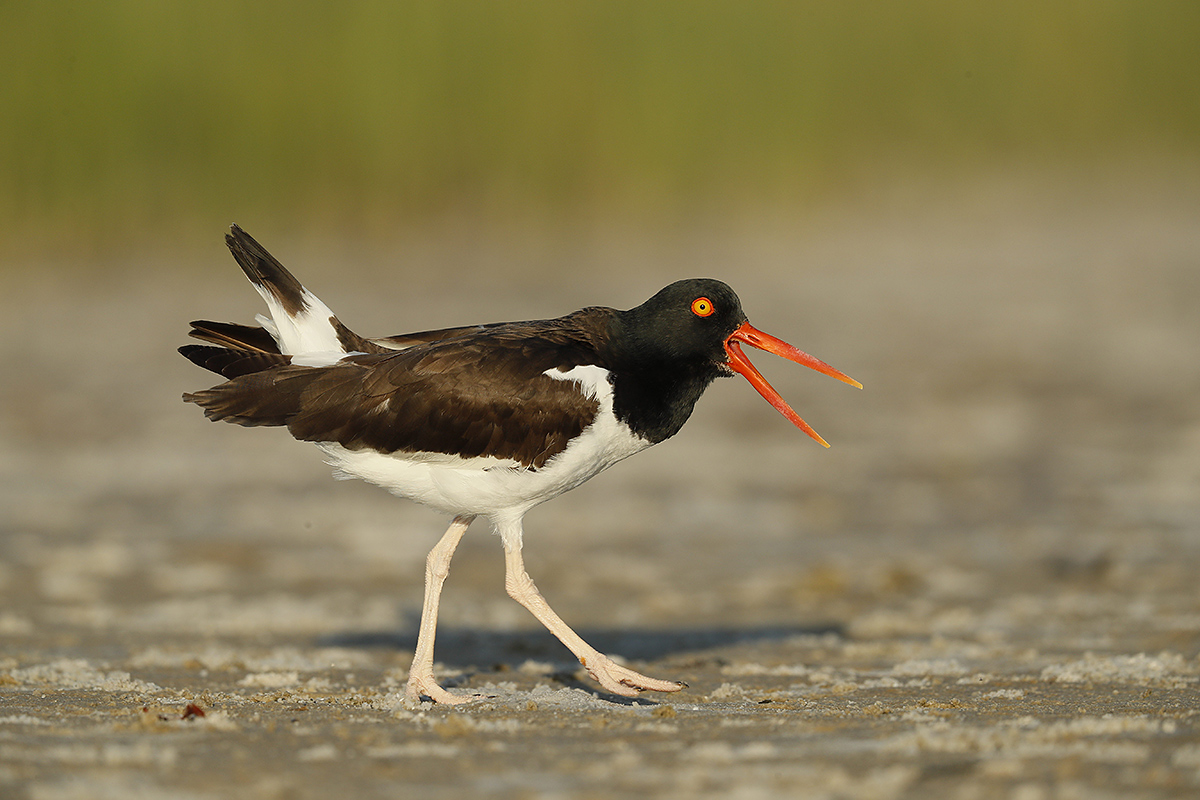
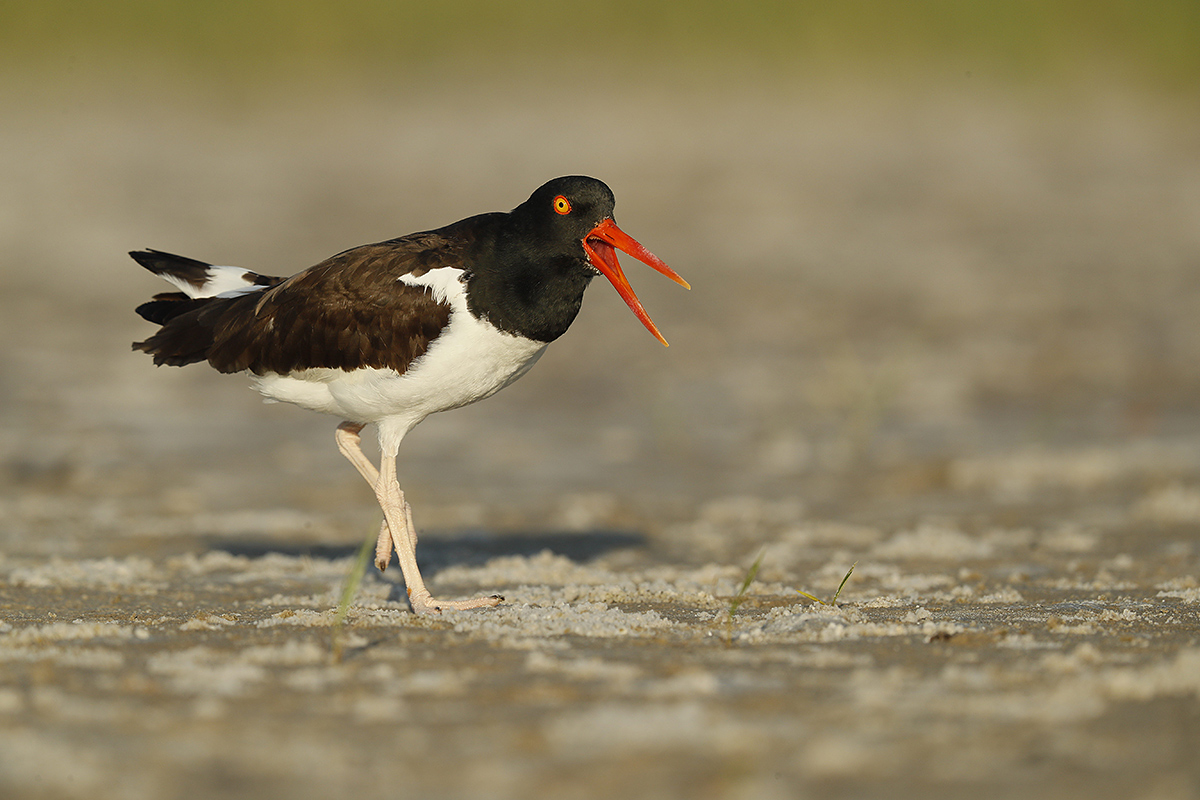
While I was photographing some feeding breeding plumage Dunlins this oystercatcher flew in and landed–right down my sun angle–right in front of me and began displaying. As I swung the lens to get on the bird I clicked the index finger wheel one click clockwise for the next faster shutter speed (to avoid burning the oystercatcher’s brighter whites) and moved the AF point up one row. Then I fired off about 20 frames. The extracted JPEGs from the best six are presented here today in two groups. In Group I, the bird is parallel to the back of the camera. In Group II, the bird is angling toward me.
Group I: Image #3: |
You Get to Edit the Two Groups, i.e., pick the keepers
Your Chinese Food Menu Task
Please select the best image from Group I, and the best image from Group II. Feel free to comment on one or more images from each group, and please let us know why you made your choices. For me, the choice with Group II is crystal clear. With Group I, not so clear… I will be interested to see what y’all have to say.
Please note that you are viewing full frame extracted JPEGs cropped to 1200 pixels wide and sharpened with Unsharp Mask at 110/.3/0.
The Hardest Question
Which is the single strongest image? Why?
Group I: Image #4: |
AF Comments
With the first four images, the selected AF point fell just forward of the white slash at the bird’s shoulder. With lots of contrast there, the 1DX II AF acquired instantly and tracked the subject perfectly. Once the bird turned to angle toward me, I kept the same AF point and Area Selection mode and the system again worked perfectly; with the last two images, those in Group II, the selected AF point was not even on the bird; it was in front of the bird well below the bill. But one or more of the upper left Surround assist points was on the bird’s neck and the system got every image sharp.
Group II: Image #5: |
My Perspective on My Perspective
I could not have (without lying down in the water) chosen a better perspective. I was very happy that the bird’s head did not merge with the base of the background grasses. Lying flat down in 4-6 inches of water would have provided a wondrous perspective, but it is not a lot of fun> It can put a lot of stress on the muscles in your lower back and shoulders and, as I learned last year, put’s your gear at risk of saltwater damage.
As age 70 draws closer, sitting is fine for me 🙂
Group II: Image #6: |
Head Angle Comments
In Image #1-4, the bird was kind enough to turn his head a perfect two degrees toward me. And the head angles in frames 5&6 are just fine as well.
|
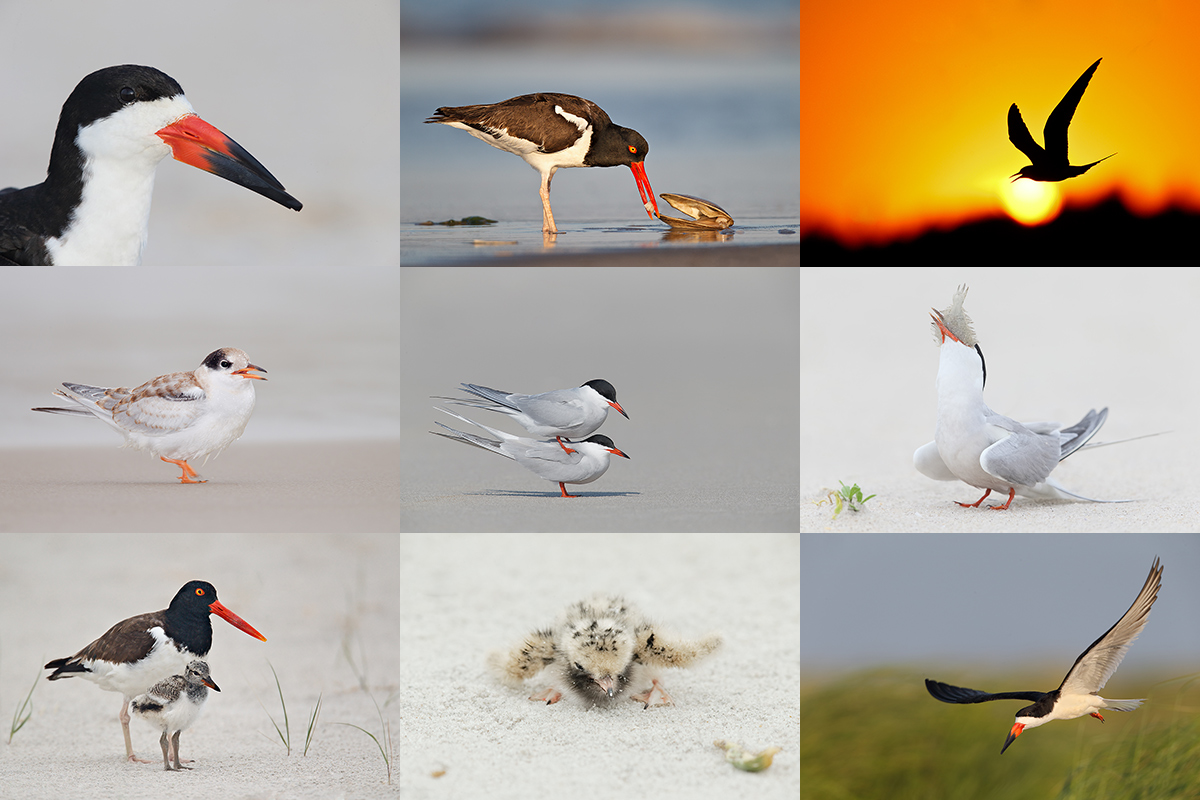
From upper left clockwise to center: Black Skimmer head portrait, American Oystercatcher dining on surf clam flesh, Common Tern at sunset, Common Tern adult swallowing flatfish, Black Skimmer in flight, newborn Common Tern chick, American Oystercatcher with chick, fresh juvenile Common Tern (with fill flash), and Common Terns copulating. |
Nickerson Beach Terns/Skimmers/Oystercatchers Instructional Photo-Tour (IPT): July 18-22, 2016. 4 1/2 DAYS: $1899. Limit 10/Openings 8.
Meet and greet at 3pm on the afternoon of Monday, July 18. Limit 10.
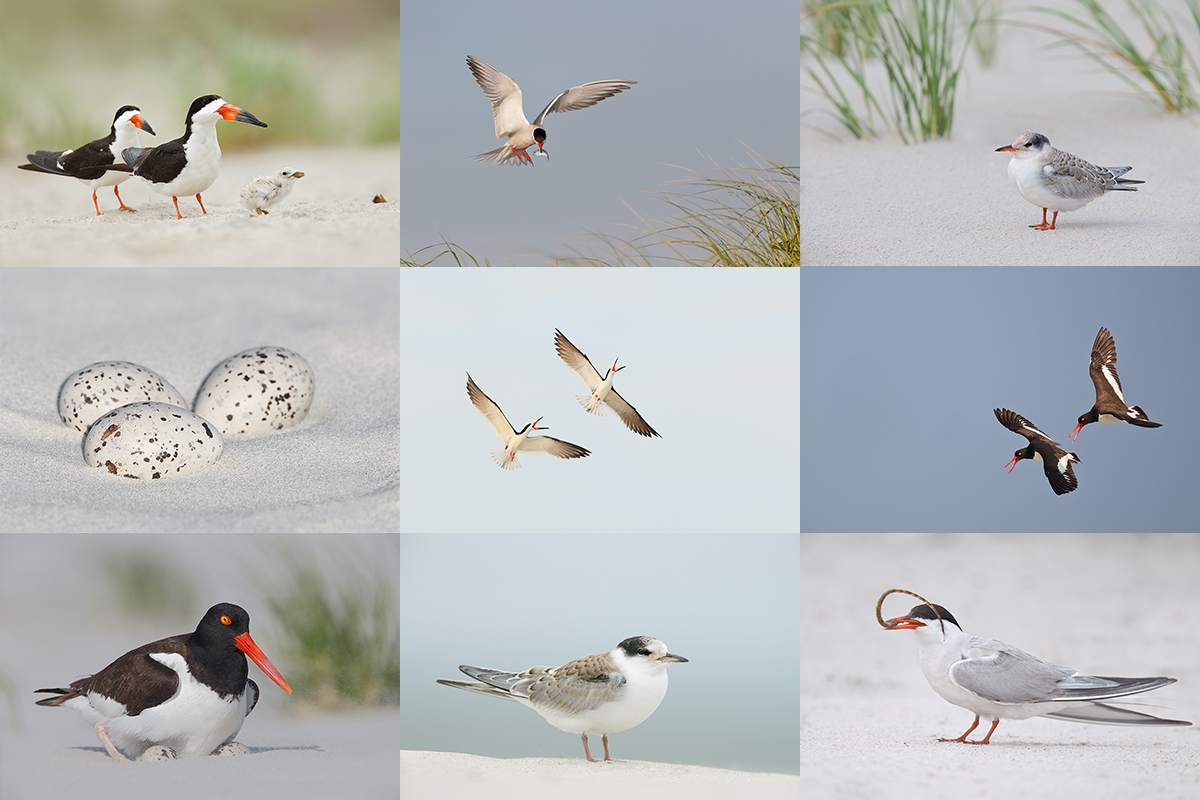
The primary subject species of this IPT will be the nesting Common Terns. The trip is timed so that we will get to photograph tiny chicks as well as fledglings. There will be lots of flight photography including adults flying with baitfish. Creating great images of the chicks being fed is a huge challenge. In addition to the terns we will get to photograph lots of Black Skimmers courting, setting up their nesting territories, and in flight (both singles and large pre-dawn flocks blasting off). Midair battles are guaranteed on sunny afternoons. And with luck, we might even see a few tiny chicks toward the end of the trip. We will also get to photograph the life cycle of American Oystercatcher. This will likely include nests with eggs and tiny chicks, young being fed, and possibly a few fledglings.
Nesting Piping Plover is also possibly. There will be lots of gulls to photograph; most years I am able to find a few Lesser Black-backed Gulls of varying ages in addition to the Herring, Ring-billed, and Great Black-backed Gulls. You will learn to identify and age the various gull species. There will likely be some Willets feeding along the surf and with luck we might get to photograph a handsome juvenile or two. In addition to the locally breeding shorebirds, we will likely get to see some southbound migrant arctic-and sub-arctic breeding shorebird species such as Sanderling, Semipalmated Plover, and maybe even Red Knot.
|
From upper left clockwise to center: Black Skimmers with tiny chick, Common Tern landing with baitfish for young, fledged Common Tern chick in dunes, American Oystercatchers/display flight, adult Common Tern with pipefish for chick, Common Tern fledgling in soft light, American Oystercatcher on nest with eggs, American Oystercatcher 3-egg clutch, battling Black Skimmers. |
The IPT Logistics
The tour will begin with a meet and greet on the afternoon of Monday, July 18, 2016. That will be followed by our first shooting session at the beach. From Tuesday through and including all of Friday we will have two photography sessions daily. Our morning sessions will start very early so that we are on the beach well before sunrise. We usually photograph for about four hours. Then we will enjoy a group brunch. We will always have a midday break that will include a nap for me. That followed by our daily afternoon classroom sessions that will include image review, workflow and Photoshop, and a review/critique of five of your trip images. Folks are always invited to bring their laptops to brunch for image sharing. I always have mine with me but heck, I am a big show-off. Afternoon in-the-field sessions generally run from 5pm through sunset.
Breakfasts are grab what you can. Four brunches are included. Dinners (if at all) will be on your own as we will often get back to the hotel at about 9pm. There is a fridge in every room and a supermarket within walking distance of the hotel so nobody should starve. You will learn a ton during the nine shooting sessions, the four in-classroom sessions, and even at lunch. Early morning and late afternoon parking is free. If we want to head back to the beach early we will need to arrange tight carpools and share the $30/vehicle parking fee. Non-photographer spouses, friends, or companions are welcome for $100/day, $450 for the whole IPT.
Save a space by calling Jim or Jen at the office at 863-692-0906 and arranging to leave your deposit of $599–credit cards are accepted for deposits only. Your balance will be due on April 18, 2016. I hope that you can join me for what will be an exciting and educational IPT.
Please Remember to use our Affiliate Links 🙂
To show your appreciation for my continuing efforts here, we ask, as always, that you get in the habit of using my B&H affiliate links on the right side of the blog for all of your photo and electronics purchases. Please check the availability of all photographic accessories in the BIRDS AS ART Online Store, especially the Mongoose M3.6 tripod heads, Induro tripods and ballheads, Wimberley heads and plates, LensCoats and accessories, and the like. We sell only what I have used, have tested, and can depend on. We will not sell you junk. We know what you need to make creating great images easy and fun. And we are always glad to answer your gear questions via e-mail.
I would of course appreciate your using our B&H affiliate links for all of your major gear, video, and electronic purchases. For the photographic stuff mentioned in the paragraph above we, meaning BAA, would of course greatly appreciate your business. Here is a huge thank you to the many who have been using our links on a regular basis and visiting the BAA Online store as well.
Be sure to like and follow BAA on Facebook by clicking on the logo link upper right. Tanks a stack!
Typos
In all blog posts and Bulletins, feel free to e-mail or to leave a comment regarding any typos or errors. Just be right 🙂



For me it’s Group I #3 and #4.
I like:
the whole bird parallel to film plane
#3 the raised foot showing action. In Grp I #1 and 2 a dead leaf (or?) obscures part of the foot.
#4 the raised foot walking.
the tail up showing display. It’s lower in Grp II so not as clear what is going on.
I prefer the tail position of 1, it’s more dramatic and shows the action we’re interested in. The feet position of 2 is better to my taste though. I think 6 is a great action shot and despite the first 4 having a better background it’s my overall favourite.
For Group I, I prefer the separation of the legs in #2 & #4, but would pick #4 due to the debris in next to the foot in #2. For Group II, #5 is my pick also because the legs are better separated, and I would attempt to remove the grass in post. Overall I think I like #5 best.
Out of group 1, I find image 1 to be the weakest – side profile and rear leg mostly hidden. Image two has lots going for it, but personally I don’t like waders doing the “goose” step, where the step forwards is finishing. However, when it’s the rear leg, as in image two, it does have the benefit of “swinging” the bird slightly towards the camera, improving the otherwise predominantly side-profile. Image three has my preferred leg position. The foot is being raised, at the start of the stride. Yes, there’s some overlap (wanted the frame before – see image 5). Image 3 (and 4) also don’t have the beach debris in front of the toes. In image 3 the two wing tips and tail are all isolated. When a bird is “doing something” I find I weigh the pros and cons of this – sometimes you want nice clean lines, wing tips together. But for a shot such as this I prefer the separation. Image 4, similar to image 2, but even later in the stride, and it’s the front leg that’s raised, swinging the bird (ever so slightly) away (and weaker than image 2 as a consequence). Turning to group 2, the angle of approach is less desirable – it’s turned too much. And then we have to weigh up leg position and bill. Image 5 the bird is finishing it’s call (or just starting) and so it’s not at its widest – but I like the stretched toes, even though it’s the rear let. And then image 6 wide bill in mid-call, but the leg too hidden. Both have the blade of grass to contend with too. Sadly, I find something I’d like to improve in all shots, but my overall favourite is image 3 (just pipping image 2). One final comment – for stepping birds I prefer the rear leg to be mid the stride (image two), the closer leg to be beginning the stride (image 3, but slightly earlier).
Martin
My preferences: Group 1, Image 2. I prefer it over Group 1, Image 1 and 3 because I like the legs separated and not overlapping. I also feel the bird is better balanced with the rear leg striding rather than the front leg as in Image 4. Group 2, Image 5. Same reason. Prefer legs separated instead of overlapping. Overall, I’d select Group 2, Image 5 as my favorite.
In Group #1, it is between image #2 and #4. Why? The bird is mid-stride, I can see both legs and I can see some feather detail on the upper leg. My favorite in group #1 is image #4, because I can see the right foot very clearly including the bird’s toenails.
I prefer the Group #2 images with the bird angling toward you.
In Group #2, I prefer image #5, again, because I can see both legs; one leg is active, so the bird isn’t just standing there, it appears to be moving toward you. I like that there is a bit of grass, although I would probably remove the blade of grass that is touching the bird’s legs. These Group #2 images don’t have the tail and rump feather details of Group #1, but that’s ok with me.
Out of all the images I prefer image #5.
Of the first group number three appears the most dynamic, and in the second group I like the wider gape of No 6 and the greater threat that it conveys. With the grass removed I’d choose no 6 overall just because it appears to be threatening me – very personal!
First, congratulations on getting and making the most of the opportunity! For me, the main differences are the leg positions, so that rules out images 1 and 3 in group 1. My choice for group 1 and overall is image 4. Hard choice between if and image 2, but perhaps the closer leg being in motion in image 4 carries the day. Also a little pebble slightly obscures a foot in image 2. In group II, I prefer image 6 despite the legs because the display seems more vigorous (mouth wider open). The blade of grass detracts slightly but overall everything about image 4 wins for me.
Maybe I’m different, but I like the raised foot in images 1 and 3. Image 2 is also very strong, and the dark pebble is not distracting from the image as in 1 and 3 (I would take a guess that you will remove it in editing). If I were to choose, probably 3, because the raised foot is in front of the leg, rather than behind the leg as in image 1.
In group II, image 5 is the stronger image, though the grass between the legs is a bit distracting.
As for strongest overall, I’m torn between images 3 and 5. I like the angle of the bird in image five, but image 3 seems cleaner/stronger overall to me.
Group I – I pick #4 as the legs are free of each other, the OC has gotten past a small piece of debris that pqrtially blocks the foot in #1, and if given the choice I prefer that the leading foot is the one closest to the camera which is the case in #4.
Group II – #5 is my pick. As in my pick for Group I, image #5 has the legs free of each other.
So, I agree with Doug’s picks on both counts. Overall, I like Image #4 the best. I like seeing the full side of the bird, the open bill appeals to me more in this shot. Also, the raised tail feathers in #4 adds additionla interest for me.
You did well to capture the OC under the vegetation line from your sitting position. It’s just not as easy as it used to be to get down on my belly either.
I would choose image four and five. For me, it all comes down to the legs and feet. In image four, I really like how the forward door is just above the sand, and the feet are not obstructed by sand or the dark piece of debris. I like image five as the legs are not crossed as they are in image six. What a beautiful bird the American Oustercatcher is!
Good stuff Doug. What is your pick of the litter, the single best image? a
#4 by a whisker, simply cause the beak is a little more wide open vs # which
he seems to be just opening or closing his beak.
Doug
For group I…its a tossup for me between #2 and #4. I guess I’d pick #4 simply cause of the debris slightly blocking the right foot in #2. I didn’t pick #1 cause of the raised left leg being blocked by the right. #3 is basically the opposite, which I like a little better than #1. But overall, #4.
For Group II, I’d pick #5 and remove that OOF blade that’s kind of intersecting the right leg. I didn’t pick #6 because of the same reason as #1…the raised leg behind the right.
Doug