What’s Up?
I started this blog post on the way back to the IPT hotel after an amazing sunset on Steptoe Butte, a sunset that seemingly materialized out of thin air.
What’s Up II
I finished this blog post on Tuesday afternoon. Today, on our last IPT morning, we had an amazing session at a restored gas station. During our image review session each participant shared 10 of their favorite images from the trip. Both leaders were blown away. The skill and creativity shown by all was quite amazing.
The Streak
Today’s blog post marks a totally ridiculous 213 days in a row with a new educational (and fun) blog post. And I still have dozens of new topics to cover; there should be no end in sight until my big South America trip next fall. As always-–and folks have been doing a really great job recently–-please remember to use our B&H links for your major gear purchases. For best results use one of our many product-specific links; after clicking on one of those you can continue shopping with all subsequent purchases invisibly tracked to BAA. Your doing so is always greatly appreciated. Please remember: web orders only. Please remember that if you are shopping for items that we carry in the BAA Online Store (as noted in red at the close of this post below) we would appreciate your business.
|
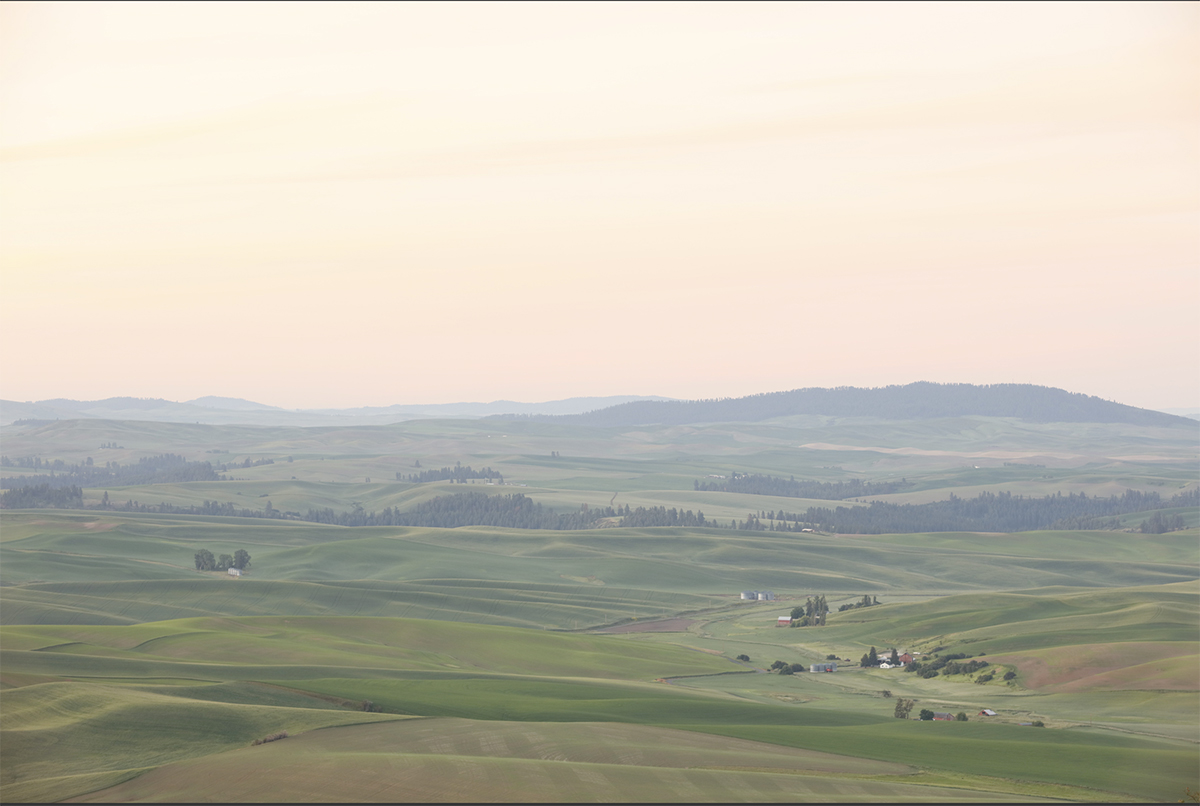
This image was created on the morning of Day 3 on the first Palouse IPT with the Induro GIT 304L/Mongoose M3.6-mounted Canon EF 70-200mm f/2.8L IS II USM lens (at 110mm) and the mega mega-pixel Canon EOS 5DS R. ISO 400. Evaluative metering +2 stops: 1/8 sec. at f/8. WB = K8000. Center AF point/AI Servo Expand/Rear Focus AF one-fourth of the way into the frame and re-compose. Click here to see the latest version of the Rear Focus Tutorial. Click on the image to see a larger version. Image #1: The RAW file for today’s featured image |
Exposing to the Right
Many in this group and many in most groups express utter consternation when told that images made in low light should look washed out and boring on the back of the camera to maximize file size and reduce noise. We spent lots of time on this workshop showing them how to process their properly exposed image files. Before you scroll down, consider this question: what would you do with this perfectly exposed but very boring RAW file?
|
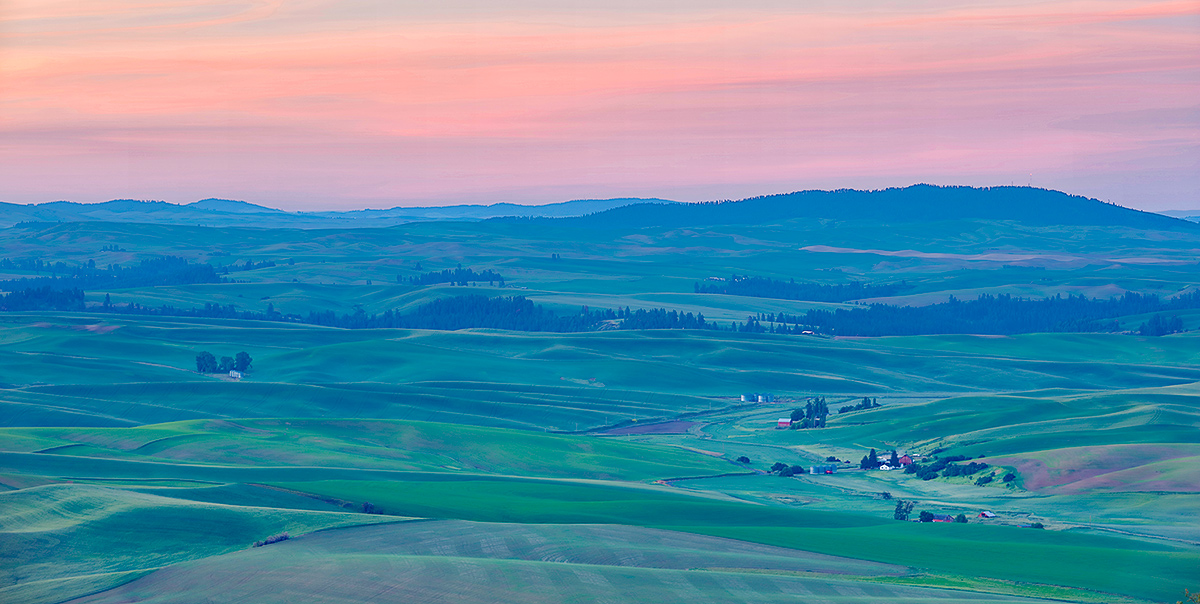
This image was created on the morning of Day 3 on the first Palouse IPT with the Induro GIT 304L/Mongoose M3.6-mounted Canon EF 70-200mm f/2.8L IS II USM lens (at 110mm) and the mega mega-pixel Canon EOS 5DS R. ISO 400. Evaluative metering +2 stops: 1/8 sec. at f/8. WB = K8000. Center AF point/AI Servo Expand/Rear Focus AF one-fourth of the way into the frame and re-compose. Click here to see the latest version of the Rear Focus Tutorial. Click on the image to see a larger version. Image #2: Rolling farmlands with pink skies |
The Image Processing
The image Processing for today’s RAW file was relatively straightforward. The RAW conversion was done in DPP 4 where in addition to my standard settings I upped the saturation and adjusted the color towards pink and magenta by pulling the dot down in the Fine Tune color box. In Photoshop a simple Levels adjustment on a layer and some color work, mostly with the Vibrance slider, did the trick. Then the pano crop. Though the results are dramatic the post-processing was simple. All–as usual–as detailed in Digital Basics.
Please Remember to use our Affiliate Links and to Visit the New BAA Online Store 🙂
To show your appreciation for my continuing efforts here, we ask, as always, that you get in the habit of using my B&H affiliate links on the right side of the blog for all of your photo and electronics purchases. Please check the availability of all photographic accessories in the New BIRDS AS ART Online Store, especially the Mongoose M3.6 tripod head, Wimberley lens plates, Delkin flash cards and accessories, and LensCoat stuff.
As always, we sell only what I have used, have tested, and can depend on. We will not sell you junk. We know what you need to make creating great images easy and fun. And we are always glad to answer your gear questions via e-mail.
I would of course appreciate your using our B&H affiliate links for all of your major gear, video, and electronic purchases. For the photographic stuff mentioned in the paragraph above we, and for everything else in the new store, we, meaning BAA, would of course greatly appreciate your business. Here is a huge thank you to the many who have been using our links on a regular basis and those who will be visiting the New BIRDS AS ART Online Store as well.
Be sure to like and follow BAA on Facebook by clicking on the logo link upper right. Tanks a stack!
Typos
In all blog posts and Bulletins, feel free to e-mail or to leave a comment regarding any typos or errors. Just be right 🙂


I like photo #1 in general. I don’t like #2 too saturated for my taste. the green looks fake to me.
so, what to do with the photo?
take some of the pink sky from #2 and add to #1, to see how it looks.
The dehire filter that Nick is mentioning sounds promising. Dehaze + some pink sky.
Otherwise….delete?
I love it 🙂 a
you love the photo or my suggestions?
Like Nick below, I love the optimized version 🙂 a
Great dramatic look Artie. Have you tried the Adobe Raw dehaze filter? It works great on this image.
Thanks. Have not. I need to update ACR to support 5DS R and 1D X images. For nearly all of my images, I do my RAW conversions in DPP 4. a
I also do all my RAW conversions in DPP4 as per yours and Arash’s guide. You can use the dehaze filter once the file is converted. In Photoshop go to Filter – Camera Raw Filter, this will open the Camera Raw interface, then click on Effects (fx), the dehaze effect is the top slider.
Thanks Nick. I will give it a look-see. a