What’s Up?
Welcome to jet-lag city/IPT/travel exhaustion; on Thursday I took nice swim along with two 2 1/2 hour naps–one in the morning and another in the late afternoon. For the rest of the day I pretty much sat on the couch like a zombie watching OJ in America and UFC stuff on TIVO. I was in bed by 10:30pm and up and at ’em at 2:30am (7:30am in the UK).
This blog post took nearly 3 hours to prepare.
So you wanna be a professional photographer/educational blogger/tour leader? Heck, it is still a great life and I would not change it for anything.
BAA Bulletin #481
Three great new gannet flight images including a killer 5DS R Vertical
BAA Bulletin #481 is online and can be accessed here.
- Don’t Faint!
- Your Very Last Chance to join the Nickerson Beach IPT
- The Gannet Boat Slaughter
- The 5DS R versus the 1DX Mark II for hand held flight photography…
- A Big 5DS R Advantage
- Sitting Down on the Job
- The 2017 UK Puffins and Gannets IPT
- Used Photo Gear Sales Hot!
- The Blog is the Bomb!
- My latest e-book birds as art: The Avian Photography of Arthur Morris/The Top 100
- Your Help Needed and Appreciated/Affiliate Stuff
DPP 4 RAW Conversion Guide Kudos
Vie e-mail from Steven Swart
I live in sunny South Africa where the crime rate is high and the value of our currency is low. I normally take my pictures around the Cape Town wetlands and in our national parks. I use the Canon EOS 7D Mark II and the Canon EF 400mm f/5.6L USM lens. Last night, after I downloaded DPP 4 and followed the instructions in your and Arash’s e-book, I was astounded by the differences. When I used Camera Raw my captures were not sharp and the colors were very bland. After I did my first conversion I was totally stunned! The detail and quality were superb, and the colors accurate! I really did not expect this at all. This guide is worth every penny. It’s as if I made a massive upgrade by buying a new lens or a new camera. Best of all, I am sure that I will get better with practice.
Thank you so much. Steven
Learn more about the DPP 4 RAW Conversion Guide below.
The Streak
Today’s blog post marks a totally insane, absurd, completely ridiculous, unfathomable, silly, incomprehensible, makes-no-sense, 242 days in a row with a new educational blog post. And I still have dozens of new topics to cover; there should be no end in sight until my big South America trip next fall. As always-–and folks have been doing a really great job recently–-please remember to use our B&H links for your major gear purchases. For best results use one of our many product-specific links; after clicking on one of those you can continue shopping with all subsequent purchases invisibly tracked to BAA. Your doing so is always greatly appreciated. Please remember: web orders only. AND Please remember also that if you are shopping for items that we carry in the new BAA Online Store (as noted in red at the close of this post below) we would appreciate your business.
|
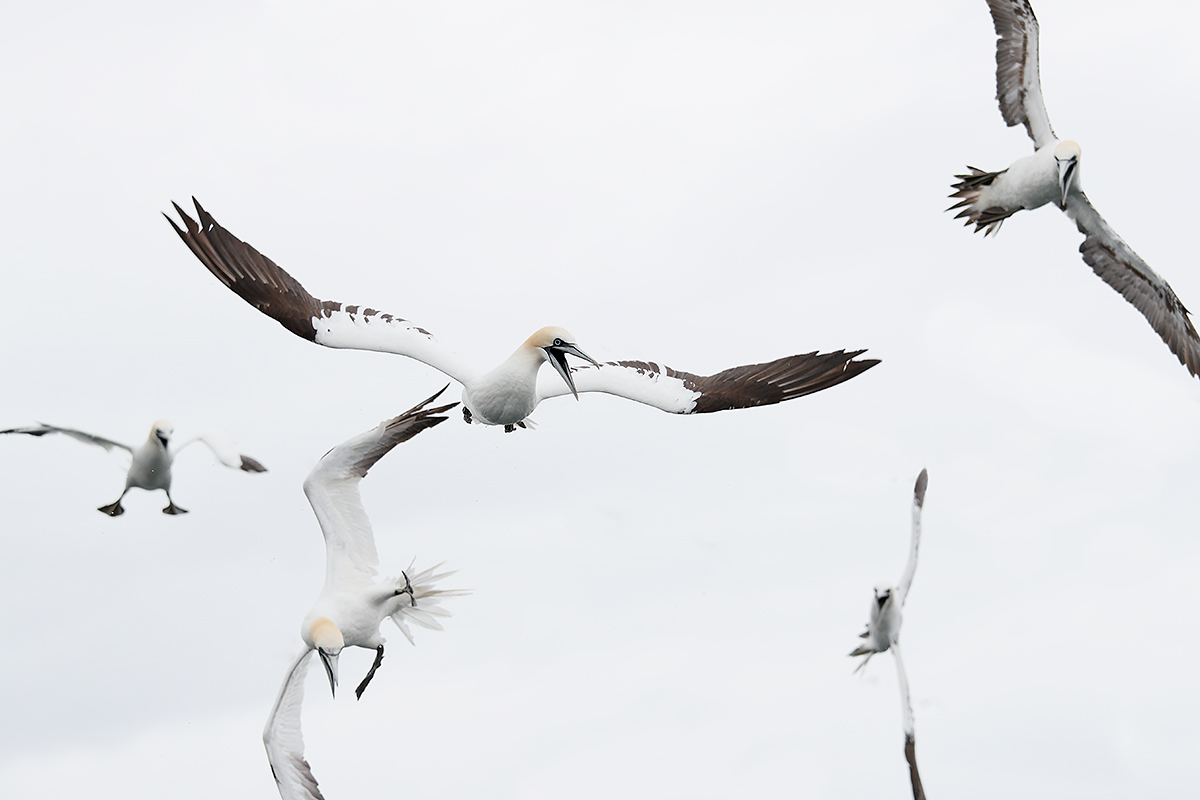
This image was created on the Monday July 4 afternoon gannet boat add-on with the hand held Canon EF 70-200mm f/4L IS USM lens (at 116mm) with the rugged pro Canon EOS-1D X Mark II with 64GB Card and Reader. ISO 800. Evaluative metering +2 1/3 stops off the sky: 1/1600 sec. at f/4. AWB. Center AF point(manual selection)/AI Servo/Shutter Button AF as originally framed was active at the moment of exposure (as is always best when hand holding). The selected AF point was on the edge of the wing between the open bill of the primary subject. Click on the image to see a larger version. Image #1: Northern Gannets diving (optimized version) |
In-gannet-sanity Isolation Problems
As noted previously the action on the gannet boat was non-stop and the weather was superb: rain on the way out, then cloudy, then heavy rain on the way back. What the image in the Gannet Fireworks: One afternoon, five photographers, more than 12,000 images in just two hours… here did not show, was that isolating a single bird was a problem. There were literally hundreds of gannets circling the boat diving for the fish tossed by the mate. Four boxes worth.
Scroll down to the see the original image capture and learn about the image optimization.
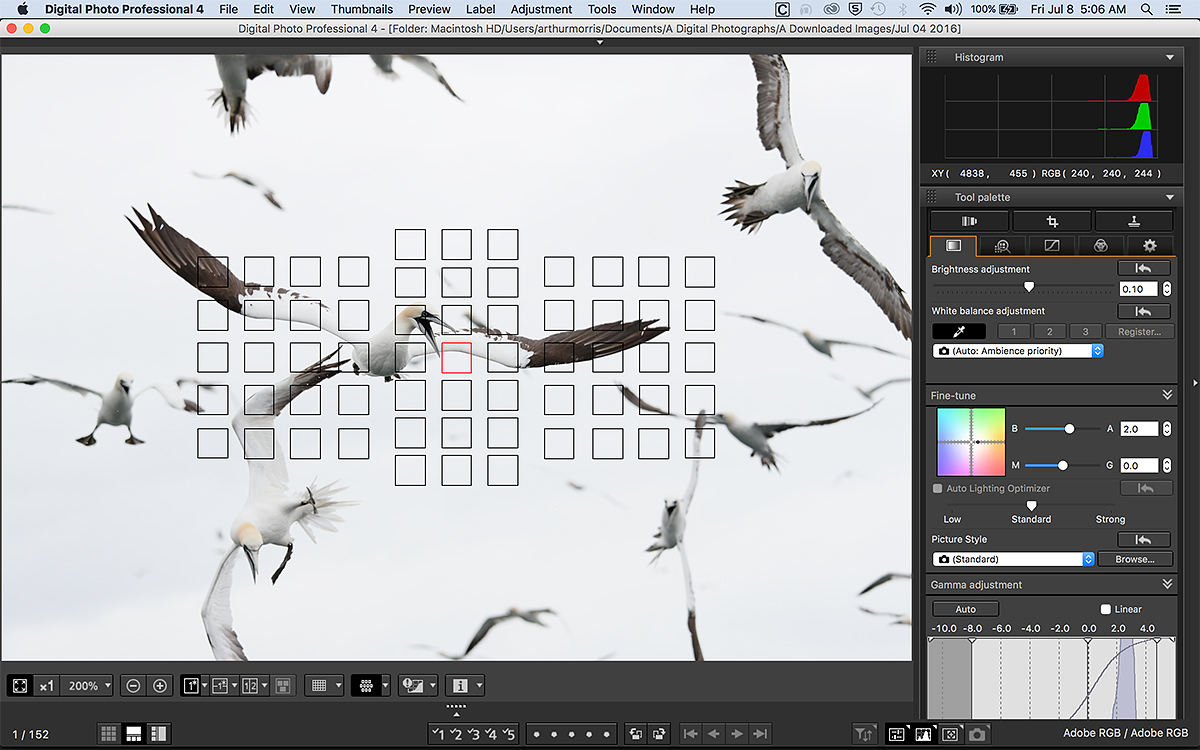
Image #2: the original via a DPP 4 screen capture |
The DPP 4 Screen Capture
In the DPP 4 screen capture above you can see the active focusing point as described in the caption for Image #1. You can see what a proper histogram looks like on a cloudy day. And you can see that I pulled the dot in the Fine Tune box to the right (toward the warmer colors) to eliminate some of the BLUE tones that are always present on cloudy days. I used the noise reduction values for the 1D XII from the most recent update of the RAW Conversion Guide by Arash Hazeghi and yours truly. Now that Arash has updated the Luminance and Chrominance noise reduction tables to include both the 5DS R and the 1DX II I have been creating and saving the recipes for each of these cameras at the various ISOs. By creating a recipe for each camera at each ISO I cut my time in DPP 4 by at least 50%. I have been promising a tutorial on how to create and save these recipes for some time now and promise to get it done when I am on Long Island after the Nickerson Beach IPT. With all the WHITEs and so little BLACK in this image, NeatImage NR was not needed.
The Image Optimization
A close look at the original image will reveal that I eliminated at least 11 birds or parts of birds–one gull and the rest gannets–to bring some order to the chaos. I do realize that some folks would consider this criminal and that others might feel that the more cluttered original would have been a better choice to make my point. Some might even prefer an optimized version of the original capture. But I am the artist here and the original was far to cluttered and chaotic for my tastes.
Since this is a photo illustration I toyed with the idea of moving the main gannet up a bit… But after doing just that, I went back in the History palette and left it where it started.
After the RAW conversion in DPP 4 I brought the image into Photoshop and used lots of Quick Masks refined by Regular Layer Masks to cover many of the birds. I also employed the Clone Stamp Tool as well as Divide and Conquer and protective cloning on a layer techniques for the clean-up. I selected, feathered and saved the head of the main subject and ran my 25/25 NIK CEP Detail Extractor/Tonal Contrast recipe on that layer. Then I merged that layer, duplicated a new layer (Cntrl + J), loaded the selection of the head, and applied a Contrast Mask. Then, on the same layer, I made a Curves adjustment (Cntrl + M) by pinning the whites and pulling up the darker tones of the fill and open mouth).
Would You Move the Main Subject Up a Bit?
Do you think that I should have moved the main subject gannet up in the frame a bit? Why or why not? If yes, how?
Digital Basics
Everything detailed above is covered in detail in my Digital Basics File–written in my easy-to-follow, easy-to-understand style. Are you tired of making your images look worse in Photoshop? The Digital Basics File is an instructional PDF that is sent via e-mail. It includes my complete digital workflow, dozens of great Photoshop tips, details on using all of my image clean-up tools, the use of Contrast Masks, several different ways of expanding and filling in canvas, all of my time-saving Keyboard Shortcuts, Quick Masking, Layer Masking, and NIK Color Efex Pro basics, the use of Contrast Masks, Digital Eye Doctor techniques, using Gaussian Blurs, Tim Grey Dodge and Burn technique, a variety of ways to make selections and expand canvas, how to create time-saving actions, and tons more.
|
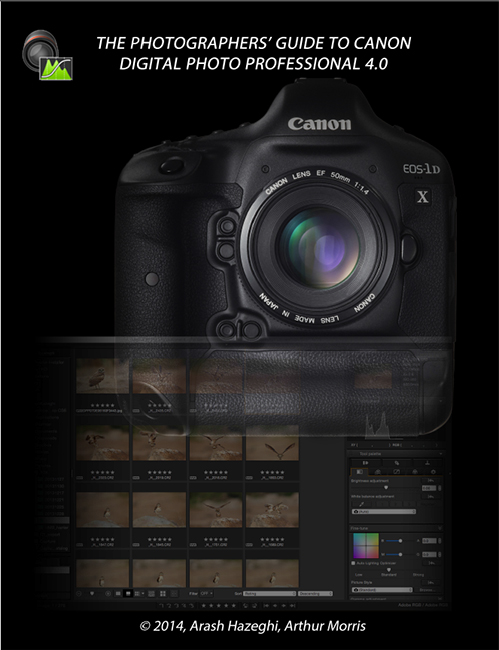
You can order your copy of “The Photographers’ Guide to Canon Digital Photo Professional 4.0” (aka the DPP 4 Raw Conversion eGuide) by Arash Hazeghi and Arthur Morris by clicking here. |
The DPP 4 RAW Conversion Guide Updated
Thanks to lots of hard work by Arash Hazeghi, the DPP 4 RAW Conversion Guide has been updated. There were quite a few changes in the basic set-up and in the preferences in the latest version, 4.4.30.2 and Arash covered those in fine fashion. Most importantly, the Chrominance and Luminance NR value tables have been updated to include the 5DS (R) and the 1D X Mark II.
If you already own the DPP 4 RAW Conversion Guide, please click here to send Jim an email and be sure to cut and paste page 1 of the current guide or your receipt into the body of the e-mail to serve as proof of purchase. Your update will be sent from Hightail, so please watch for that.
Learn how and why I and many other discerning photographers choose and use only DPP 4 to convert their Canon RAW files in the DPP 4 RAW Conversion Guide by Arash Hazeghi and yours truly. The latest version supports all of the newer Canon camera bodies and several older models including the EOS-7D and the EOS-1D Mark IV. The DPP IV Guide is the ideal companion to the 7D Mark II User’s Guide, a runaway best seller.
Folks who love the DPP 4 Guide will surely want to get themselves a copy of The Professional Photographers’ Guide to Post Processing. (See same immediately below).
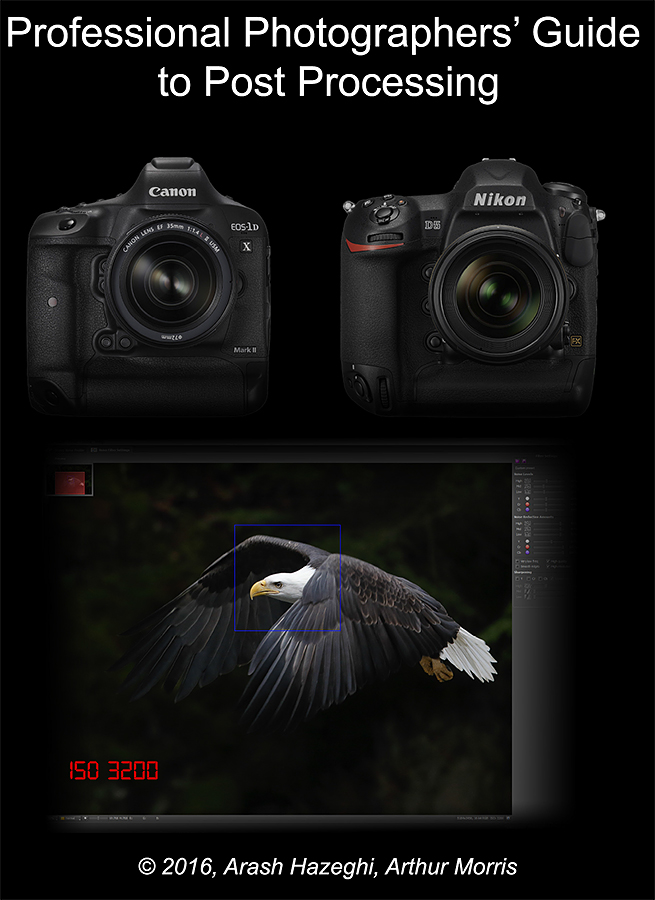
The Professional Photographers’ Guide to Post-Processing by Arash Hazaghi with Arthur MorrisYou can order your copy here. If you are ever at all concerned with noise in your optimized images this new e-guide will astound you. |
The Professional Photographers’ Guide to Post-Processing: $48.
Your e-book (11mb) will be delivered either by e-mail or by Hightail (for download).
Arash’s Take on the guide…
In recent years, advances in CMOS image sensor technology have enabled DSLR cameras to capture detailed, high-quality images at very high ISO settings; this has taken low-light and action photography to a whole new level. To make the most out of your camera’s high ISO performance, proper post-processing, including advanced noise reduction and efficient sharpening, is essential. The first step in effective post-processing is executing an optimal RAW conversion that produces a TIFF file that is clean, free of artifacts, and detailed, without too much sharpening or strong noise reduction. For Canon users, we recommend converting your RAW images in Canon Digital Photo Professional 4 (DPP 4). We cover exactly how to do that in the DPP 4 RAW Conversion Guide. This new supplemental guide deals with the post-RAW conversion processing of your TIFF files for final presentation.
In order to use this guide, you need Adobe Photoshop (CS4 or later) as well as the Neat Image noise reduction plugin for Photoshop. This plugin can be downloaded here. We recommend the pro version. You will need an up-to-date PC or Mac computer to process your files. A modern quad-core processor (Intel i7 or Xeon) with at least 16GB of RAM and a fast SSD drive for running Photoshop is recommended. It is best to do your image processing on a high quality IPS LCD panel capable of displaying Adobe RGB color gamut. We recommend calibrating your screen using a hardware color calibration solution such as Spyder or Xrite. The consumer LCD screens used in many laptops and low-end desktops suffer from poor contrast ratios and a limited color gamut. Images processed on inferior screens may appear noisy, too dark, too bright, or unsharp. And they will often show a color cast when viewed on a high quality monitor that has been properly calibrated.
Artie’s Take on the guide…
This guide is for serious photographers who wish to maximize the quality of their optimized, noise reduced files and who want to learn to sharpen their images after they are sized for a final usage. The emphasis is on sharpening for electronic presentation. The guide includes the brilliant techniques that Arash developed for applying just the right amount of NR to the subject (while retaining all the fine detail) and then applying a lot more NR to the background where it is almost always needed. His efforts were refined by Arthur Morris to ensure that the guide is clear, concise, easy-to-read, and easy to-easy-to-follow; artie’s great strength is his how-to writing. He has used Arash’s brilliant NR and sharpening techniques on his 15 inch Macbook Pro with Retina Display with great success.
You can order your copy here.
Important Note
The entire guide is based on the remarkable Pro Version of NeatImage. Only the Pro Version supports 16-bit files. This Photoshop Plug-in requires a separate $79.95 purchase. Why NeatImage when there are so many other Noise Reduction programs available?
When someone asked about Topaz Denoise on the blog I got in touch with Arash. here was his response:
I asked Arash about Topaz Denoise. Here is his response:
It cannot calibrate the noise levels. I tried it. It was garbage.
Best
Arash Hazeghi Ph.D.
To which I added:
In the guide, we teach folks to calibrate noise levels for an image or series of images. As an option, also covered in the guide, we teach you to create a Noise Profile for each ISO with a given camera by photographing a NeatImage calibration target.
Arash continued the next day; this published here for the first time:
Here is a more elaborate answer. A preset is a “one size fit all” solution; it is not the same as a calibration. If you look carefully through your images you will find that the ISO value used and the amount of visible noise in the image aren’t always correlated. An image at ISO 400 can look noisier than an image taken at ISO 3200. Many factors other than the ISO determine the amount of visible noise in an image. Two images taken at the same ISO may require significantly different amounts of NR. Furthermore, different areas of the same image often require different amounts of noise reduction.
The presets are made by looking at the noise characteristics of a flat neutral or 18% grey target with no detail. They don’t include shadows, highlights, grain size, or the possibility of the effects of post-capture exposure boosts. (In other words, images made at a given ISO that are lightened during or after conversion will always exhibit more noise than properly exposed images.) The presets are often made using in-camera JPEGs that have been already noise-reduced, sharpened, and compressed thus smearing (destroying) the fine feather detail. Sometimes they are made from ACR RAW conversions that are vastly inferior as compared to properly executed DPP 4 RAW conversions.
A calibrated noise profile is created for each image in its present form independent of the ISO value, the exposure levels, or the RAW convertor. It makes no assumptions. NeatImage NR calibrations can be compared to purchasing a hand-crafted, custom-tailored suit versus buying a suit off the rack at WalMart. In engineering terms, NeatImage calculates the noise spectrum for each image and then with proper adjustment attenuates only the frequencies that don’t overlap with the detail. Other NR tools like Topaz, Nik etc. apply constant attenuation regardless of what the spectrum looks like. Try the guide and see for yourself.
You can learn more about NeatImage or purchase a copy here.
Be sure to like and follow BAA on Facebook by clicking on the logo link upper right. Tanks a stack!
Typos
In all blog posts and Bulletins, feel free to e-mail or to leave a comment regarding any typos or errors. Just be right 🙂


Kudos Mr. Arthur!! You have inspired me to work hard at creating pleasing images. Your blog is my newspaper. It’s the first thing I read after watching the weather. I love your work and I love the way you teach. It makes me think! When I’m looking through the viewfinder and dialing in the (hopefully) correct settings, I’m thinking, before it was more or less point and shoot, but now I’m actually considering all aspects of the image I want to create.
Thank you for spending the hours you do to help the ones that love photography.
Thanks for your kind words 🙂
a
Artie, I love this piece of art. The lower left Gannet with vertical wings creates a line from the baseline up that flows into the main sublect’s wings, one of which activates the top left corner and the other wing leads my eye to the top right Gannet. Glad you reduced the clutter to allow that energetic line to work. Less is more.
Thanks for your kind words. If you like that lower left gannet be sure to see the vertical image diving in BAA Bulletin #481!
artie
Hi Artie,
I like the Gannet where it is. I don’t know how to move it anyway.
With a Quick Mask…
Your screen shot is very instructive.
Good. That is the plan.
I am intrigued by just how far to the right the histogram shows each channel.
In the images you publish here on the blog I have rarely seen more than one bird in the frame at a time. So you have shown remarkable restraint by leaving so many birds in. The image does have a nice feel of the Gannet insanity context though.
The clipped wings on the odd bird must have given you pause for thought.
Not at all. To my eye, the extra birds frame the main subject nicely.
You would normally get rid of these too.
Here the extra birds make the image by telling the story…
New adjective for the streak ‘Unbelievable if you didn’t know me’ right after Makes no sense and before the day count.
I am confused by the above 🙁
When you are having Fun it doesn’t feel like work now does it?
You are correct sir. I have been working 14 hours a day since I retired from teaching in 1992 and not one minute has felt like work 🙂
PS: booked the pre-trip extension Falklands earlier this week for South Georgia in October.
Amazing. That was sold out forever. Did they add an extra trip? You may not know but I am also doing a Falklands pre-trip with just myself and 3 others. Please shoot me an e-mail and let me know when you are getting into SCL.
later and love, a
“a great life and I would not change it for anything”.
Arthur, There is no better gratification then being able to help someone learn something new and seeing the smile on their faces…..
Stay healthy and continue passing on this knowledge to others. Hopefully they will, in turn, take this new learned skill and pass it on to others.
Sorry, Misspelled your name…. Can’t blame it on spell check, can I?
Fixed with pleasure. Thanks for your kind words.
artie
Well said Tom.
Ditto.
And, thank you for your generosity and sharing.
oh yeah, and humor! ; )