What’s Up?
We brought the Mets some needed good luck. And the threatening weather held. The Mets beat the Rockies 6-4 on Neil Walker’s three run bomb in the bottom of the seventh inning to the delight of three generations of Morrises.
The Streak
Today’s blog post marks a totally insane, absurd, completely ridiculous, unfathomable, silly, incomprehensible, what’s wrong with this guy?, makes-no-sense, 263 days in a row with a new educational blog post. And I still have dozens of new topics to cover; there should be no end in sight until my big South America trip next fall. As always-–and folks have been doing a really great job recently–-please remember to use our B&H links for your major gear purchases. For best results use one of our many product-specific links; after clicking on one of those you can continue shopping with all subsequent purchases invisibly tracked to BAA. Your doing so is always greatly appreciated. Please remember: web orders only. AND Please remember also that if you are shopping for items that we carry in the new BAA Online Store (as noted in red at the close of this post below) we would appreciate your business.
|
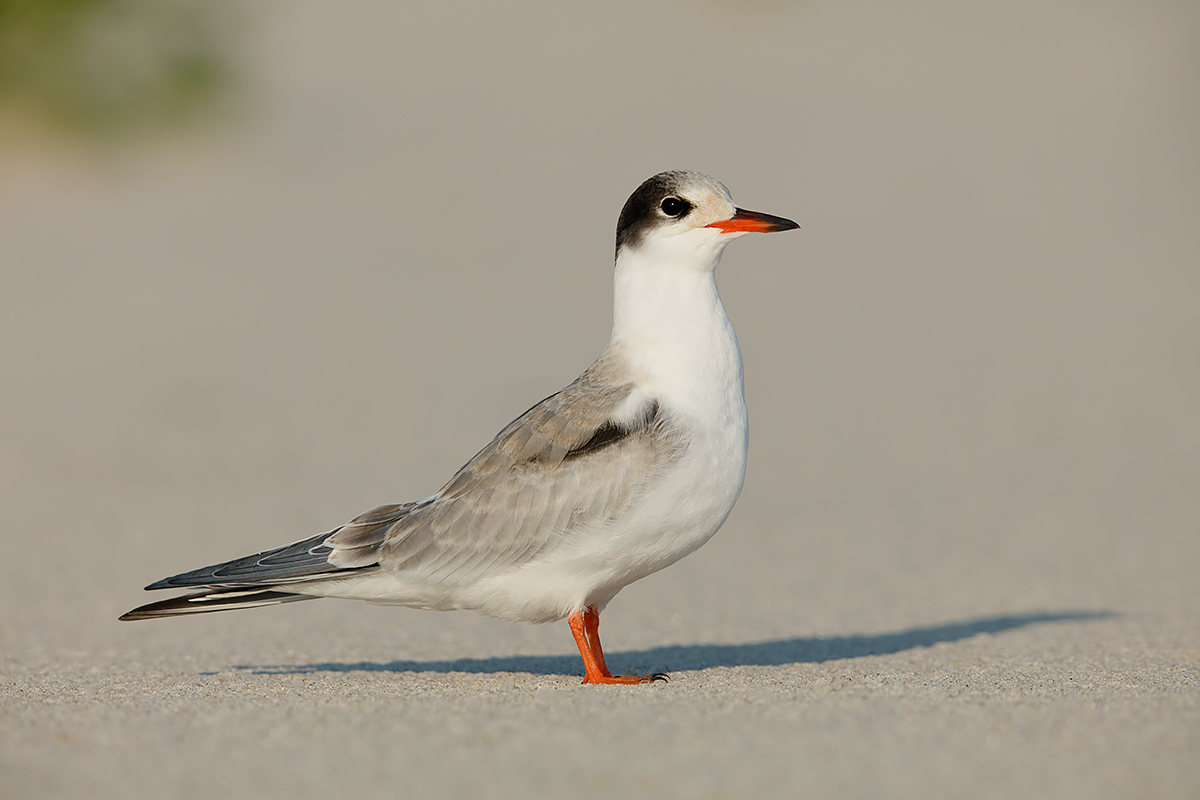
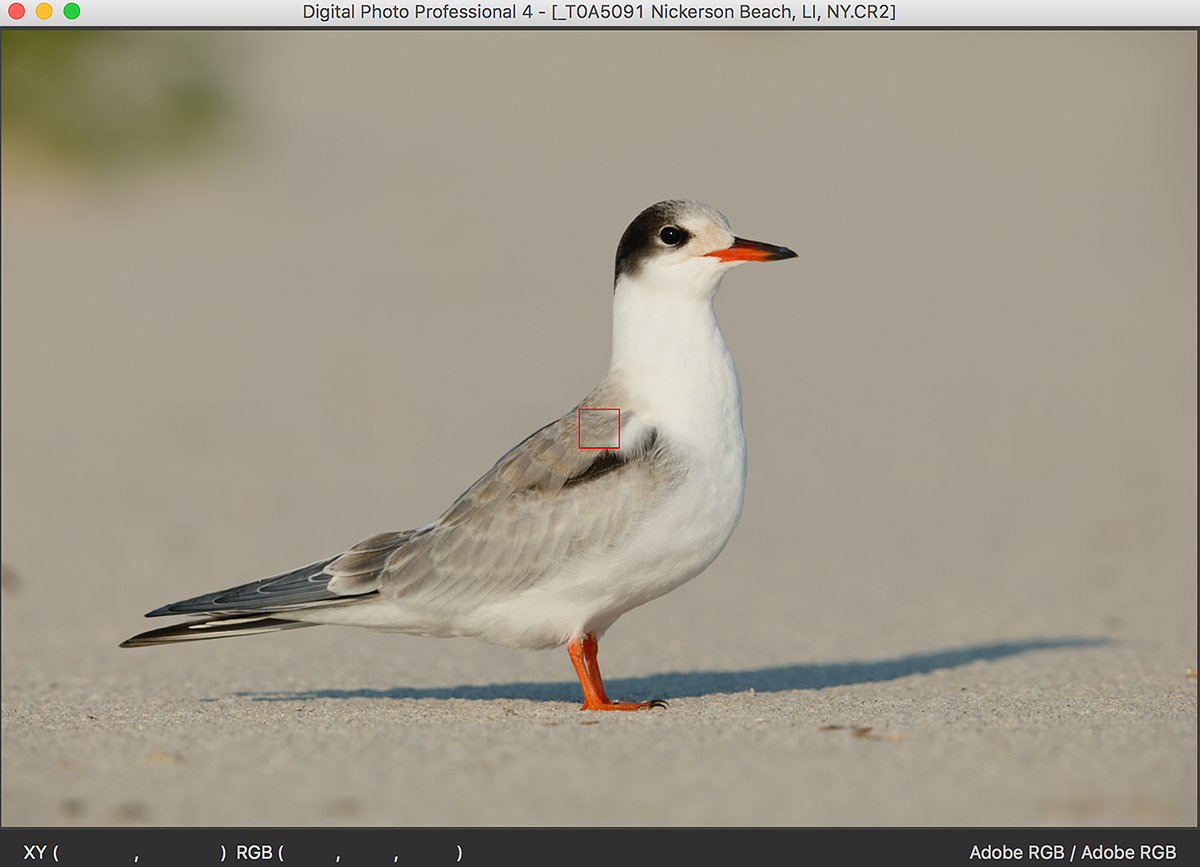
This image was created on the afternoon of the private day (FRI pm and SAT am) that I spent with multiple IPT veteran Jake Levin. I used the Induro GIT 304L/Mongoose M3.6-mounted Canon EF 600mm f/4L IS II USM lens, the Canon Extender EF 2X III, and the mega mega-pixel Canon EOS 5DS R. ISO 400. Evaluative metering +1/3 stop: 1/1000 sec. at f/10. Daylight WB. Center AF point (by necessity)/AI Servo Expand/Rear Focus AF as framed was active at the moment of exposure. The active AF point fell on the side of the bird’s upper back just above the dark mark on the folded wing. Click here to see the latest version of the Rear Focus Tutorial. Click on the image to see a larger version. LensAlign/FocusTune micro-adjustment: -5. Common Tern fledgling posing perfectly in late afternoon light |
Today’s Featured Image
What makes today’s featured image so special? Is it the sweet late afternoon light. The soft, splendid, de-focused background that came with getting down on the ground? The beautiful young Common Tern? The alert posture? (Perhaps the bird thought that it heard mom coming with a fish…) The fact that the shadow adds so nicely to the image design? Or the out of focus beach vegetation in the ULC? Or all of the above?
Yeah, the above is a set of rhetorical questions…
DPP 4 Screen Capture showing active AF point |
The Active AF Point
I placed the AF point on a spot that I thought would approximate the plane of the bird’s eye. I think that i did quite well. See more below.
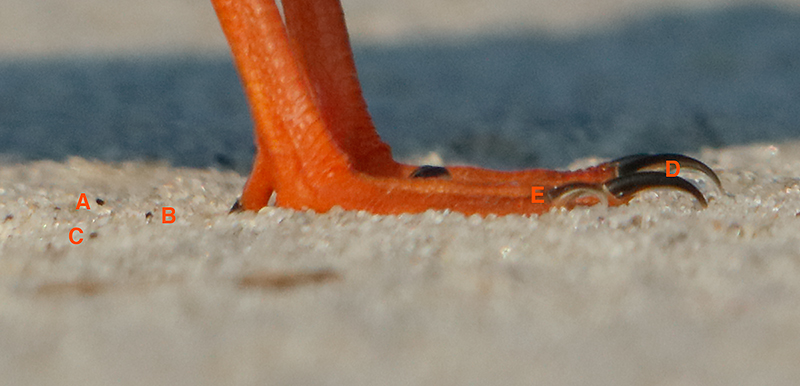
Tight crop of feet, toes, and sand grains… |
Understanding Depth of Field and Plane of Sharp Focus Issues
The black grain of sand to the right of A is in very sharp focus.
The black grain of sand to the left of B is not quite in sharp focus.
The dark grain of sand to the left of C is completely out of focus.
The two long toes, the one on the right foot (nearest us) and the one on the left foot (farthest from us), are both pretty well focused. If push came to shove, I’d say that the near long toe is a bit sharper than the far long toe. This makes sense as A, the sharpest grain of sand, looks to be on the same plane as the near long toe, the one below the letter D.
Thus, with the slight head turn toward us, the bird’s razor sharp eye must be pretty much on the same plane as the long toe of the near foot.
At f/10 at 1200mm with a full frame camera body and estimating the distance at 25 feet, my favorite online depth of field calculator, DOF Master.Com, states that depth of field in front of and behind the plane of focus would be more than .4 inches with a total depth of field of more than .8 inches. A quick glance at the tight crop of the feet, toes, and sand grains shows that that is at least a 50% over-estimate…
The fact is that at 1200mm with the subject 20-30 feet from the back of the camera, depth of field is measured in small fractions of an inch. Thus, if your gear or the bird moves even a fraction of an inch you will not produce an image that is sharp on the eye. That is the great challenge of working with extremely long focal lengths.
Ramifications
Yes, creating razor sharp on the eye images at 1200mm is a big challenge. It is almost always better to have AF active at the moment of exposure (even when you are limited to the center AF point) than it is to use rear focus (or One Shot AF) and re-compose (even when you are on a tripod). Why? It the bird shifts position even slightly, you are toast as far as sharpness is concerned. There is of course a big advantage with the 1DX Mark II in these situations as you would have all AF points available.
On a related matter, try to get the active AF point on an area with at least some pattern and contrast. Placing the active AF point on a featureless white breast might work on occasion but much better to give the AF system a fair chance. And that goes double in low light situations…
A Question
Are you better off working at the same distance with the 600 II and the 1.4X III TC, enjoying more d-o-f, producing sharper images with more fine feather detail, and then cropping than you are with the 600 II/2X III TC combo?
My answer? I honestly don’t know. What do you think? Does anyone know the theoretically correct answer?
|
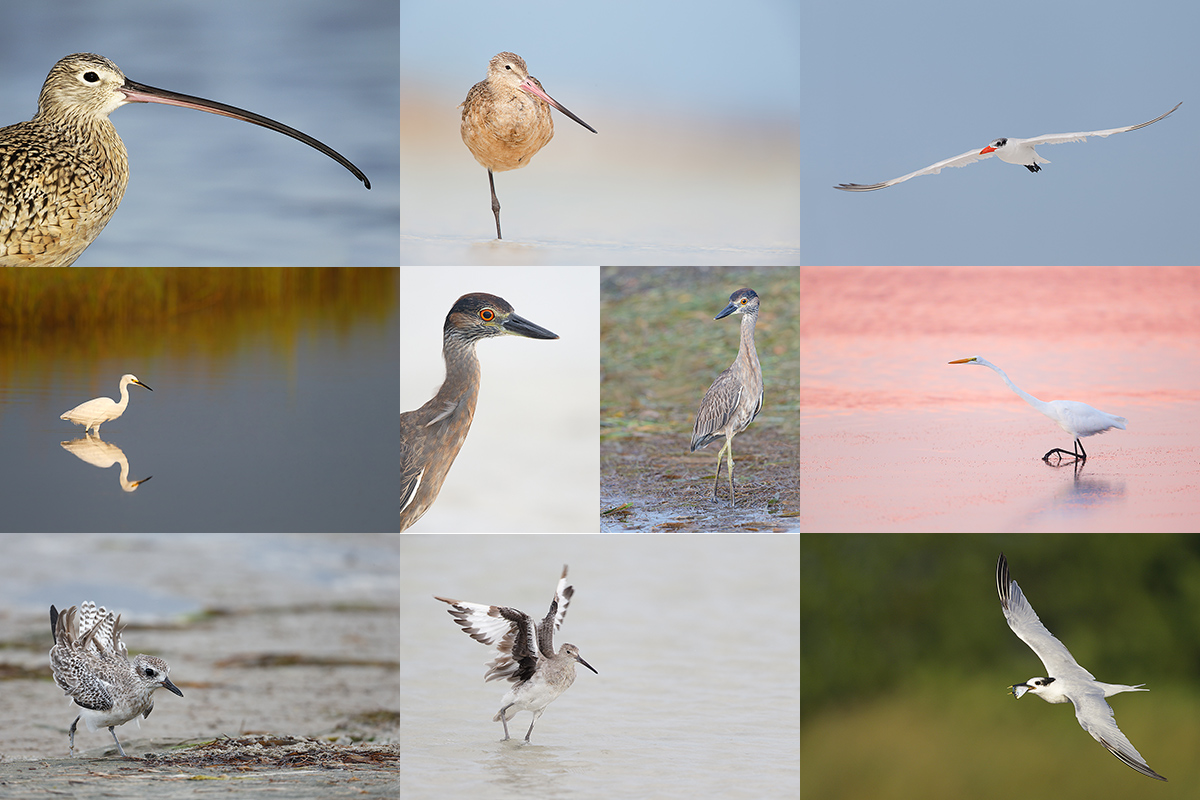
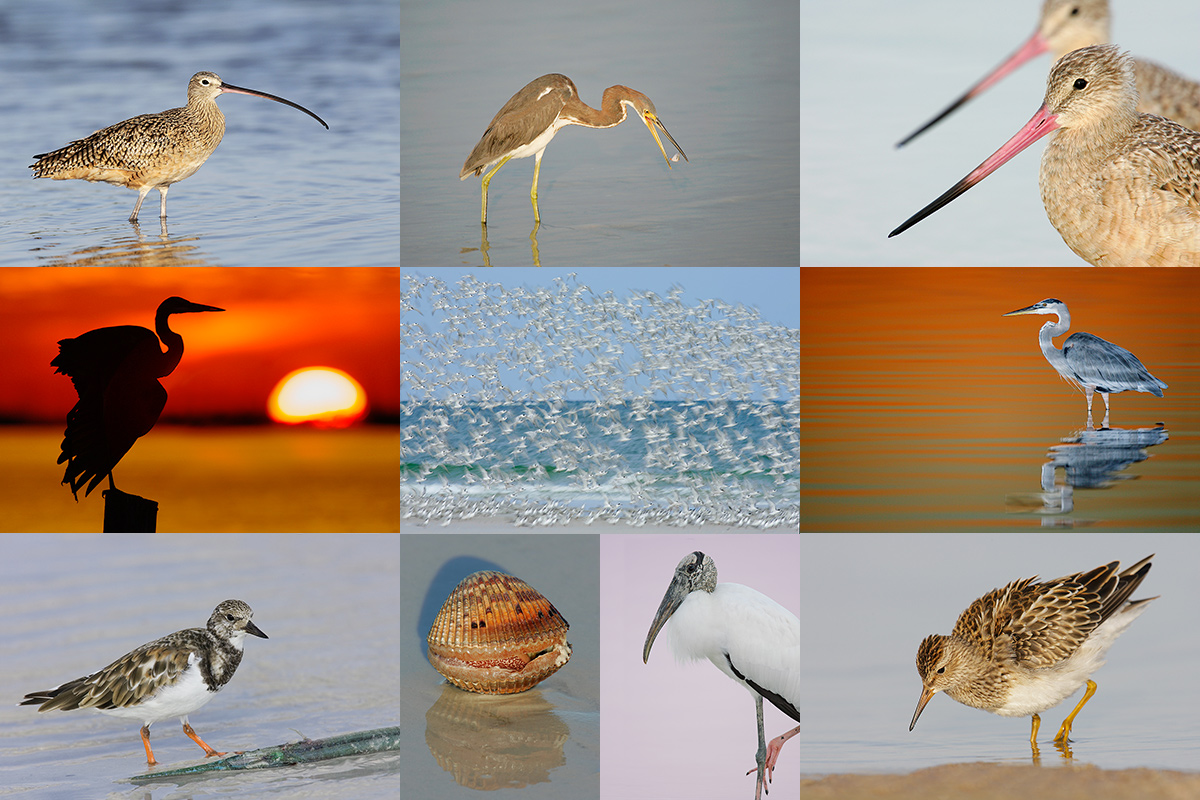
Fort DeSoto in fall is rife with tame birds. All of the images in this card were created at Fort DeSoto in either late September or early October. I hope that you can join me there this fall one way or another. Click on the composite to enjoy a larger version. |
BIRDS AS ART Fort DeSoto In-the-Field Meet-up Workshop (ITFW): $99
Join me on the morning of October 2, 2016 for 3-hours of photographic instruction at Fort DeSoto Park. Beginners are welcome. Lenses of 300mm or longer are recommended but even those with 70-200s should get to make some nice images. Teleconverters are always a plus.
You will learn the basics of digital exposure and image design, autofocus basics, and how to get close to free and wild birds. We should get to photograph a variety of wading birds, shorebirds, terns, and gulls. This inexpensive morning workshop is designed to give folks a taste of the level and the quality of instruction that is provided on BIRDS AS ART Instructional Photo-tours. I hope to meet you there.
To register please call Jim or Jennifer during weekday business hours with a credit card in hand to pay the nominal registration fee. Your registration fee is non-refundable. You will receive a short e-mail with instructions, gear advice, and meeting place one week before the event.
|
Folks attending the IPT will be in the field early and stay out late to take advantage of sunrise and sunset colors. The good news is that the days are relatively short in early fall. Click on the composite to enjoy a larger version. |
Fort DeSoto Short Notice Fall IPT/September 28 (meet & greet and afternoon session) through the full day on October 1, 2016. 3 1/2 DAYs: $1549. Limit 10. Sunday morning ITFW free to IPT registrants.
Fort DeSoto, located just south of St. Petersburg, FL, is a mecca for migrant shorebirds in fall. There they join dozens of egrets, herons, night-herons, gulls, and terns who winter on the T-shaped peninsula that serves as their wintering grounds. With any luck, we should get to photograph two of Florida’s most desirable shorebird species: Marbled Godwit and the spectacular Long-billed Curlew. Black-bellied Plover and Willet are easy, American Oystercatcher likely. Great Egret, Snowy Egret, Great Blue Heron, and Tricolored Heron are easy as well and we will almost surely come up with a tame Yellow-crowned Night-Heron or two. We should get to do some Brown Pelican flight photography. And Royal, Sandwich, Forster’s, and Caspian Terns will likely provide us with some good flight opportunities as well. Though not guaranteed, Roseate Spoonbill and Wood Stork would not be unexpected.
Folks who sign up for the IPT are welcome to join me as my guest on the ITFW on the Sunday morning following the workshop. See above for details on that.
On this and all other IPTs you will learn basics and fine points of digital exposure and to get the right exposure every time after making a single test exposure, how to approach free and wild birds without disturbing them, to understand and predict bird behavior, to identify and age many species of shorebirds, to spot the good situations, to choose the best perspective, to see and understand the light, to, and to design pleasing images by mastering your camera’s AF system. And you will learn learn how and why to work in Manual mode (even if you’re scared of it).
At brunch (included) we will review my images–folks learn a ton watching me edit–why keep this one and delete that one. If you opt to bring your laptop, we can take a look at a few of your images from the morning session. We will process a few of my images in Photoshop after converting them in DPP. That followed by Instructor Nap Time.
As I already have one signed up for this workshop, it is a go. Hotel info will be e-mailed when you register. The best airport is Tampa (TPA). It is always best if IPT folks stay in the same hotel so if you are interested it would be a good idea to register now and make your hotel reservations as soon as you hear from us. We can, however, coordinate with local folks who opt to stay at home.
Because of the relatively late date, payment is full is due upon registration either by check or credit card. If the former, please e-mail us immediately so that we can save you a spot. If the latter, please call Jim or Jennifer during weekday business hours at 863-692-0906 with a credit card in hand to register. Your registration fee is non-refundable unless the IPT sells out with eight so please check your plans carefully before committing. You will receive a confirmation e-mail with detailed instructions and gear & clothing advice a fairly soon.
|
BAA Site Guides are the next best thing to being on an IPT. |
The Fort DeSoto Site Guide
Can’t make the IPT or the ITFW? Get yourself a copy of the Fort DeSoto Site Guide. Learn the best spots, where to be when in what season in what weather. Learn the best wind directions for the various locations. BAA Site Guides are the next best thing to being on an IPT. You can see all of them here.
Please Remember to use my Affiliate Links and to Visit the New BAA Online Store 🙂
To show your appreciation for my continuing efforts here, we ask, as always, that you get in the habit of using my B&H affiliate links on the right side of the blog for all of your photo and electronics purchases. Please check the availability of all photographic accessories in the New BIRDS AS ART Online Store, especially the Mongoose M3.6 tripod head, Wimberley lens plates, Delkin flash cards and accessories, and LensCoat stuff.
As always, we sell only what I have used, have tested, and can depend on. We will not sell you junk. We know what you need to make creating great images easy and fun. And we are always glad to answer your gear questions via e-mail.
I would of course appreciate your using our B&H affiliate links for all of your major gear, video, and electronic purchases. For the photographic stuff mentioned in the paragraph above we, and for everything else in the new store, we, meaning BAA, would of course greatly appreciate your business. Here is a huge thank you to the many who have been using our links on a regular basis and those who will be visiting the New BIRDS AS ART Online Store as well.
Be sure to like and follow BAA on Facebook by clicking on the logo link upper right. Tanks a stack!
Typos
In all blog posts and Bulletins, feel free to e-mail or to leave a comment regarding any typos or errors. Just be right 🙂



Depth of field is a matter of magnification not lens length. If the subject remains the same size and the camera is moved closer of further depending on the lens length and the f-stop remains the same the depth of field will remain the same. As in this case quite shallow. As stated above what changes is the angle of view. Cropping an image after the fact to get the same magnification will not do the same thing, the depth of field will appear as the magnification at which it was shot. Thank you Artie for a great post.
YAW. That’s what I said 🙂 How is that baby of yours that I photographed a zillion years ago?
artie
He turns 24 next week. He is coming for a visit next week. He lives in Colorado Springs and we are in Tucson now. If that was a zillion year ago we must be getting old. I still have a copy of that image.
Yes, we are getting old 🙂
a
I believe that you are usually better off maximizing the size of the image at capture and minimizing cropping for the best final image. The fewer pixels you have to throw away the better. At least it works that way with a 5Dmk3. Of course, with your 5DSR, it is kind of a moot point. 🙂
Hi Artie,
I’m going to venture an amature opinion here.
For me personally, i would be inclined to go with the 600 + 1.4 TC to get a little more depth of field and therefore a higher likelihood of having more of the bird in focus, and have the increased sharpness, and then cropping (not resizing) to have the bird the same relative size within the frame. Since i rarely print bigger than 5×7, i don’t think i’d be able to tell the difference between the two versions of the photo when printed at that resolution. I think differences would only be visually evident when zooming in or printing at a much larger size.
It would be a fun experiment to try.
As usual, thanks for your posts… part of my daily reading 🙂
Tony
Many folks are so inclined. For 5X7s, your plan should work just fine.
a
Hi, Artie. Wonderful image and lessons. If I might quibble, that bird is a fledgling, rather than a chick. In any case, I agree with Ludi Lochner that you’re better off with the longer lens/TC combo in terms of ultimate feather detail and sharpness, because cropping takes a toll on those features. I think dof ends up the same but I’m not sure. The other lesson in today’s blog post is depth of field and the bird’s body angle with respect to the focal plane. I photographed a common tern fledgling here on Nantucket begging the other day. When it was angled toward the camera, the image was much more dramatic but more of the bird was out of focus than when it was parallel to the sensor. That was a trade-off I was happy with and I much prefer the image of the bird angled toward the camera.
It is a fledgling so I changed it. The d-o-f- will NOT be the same.
Good on all the rest.
artie
Ludi, thank you for your amazing and informative comments.
Except for the one wrong one 🙂
Artie – the way you inserted your responses into Ludi’s comments makes it easy to follow his thoughts and yours.
Glad for that 🙂 And brilliant I’d say.
This chain of commentary should have it’s own tab on the blog. Really thought provoking as Artie pointed out.
I may make a blog post out of it…
Back to the featured image above: i like the image because there is a softness to it; i like the blurred green in the upper left as well as the small bits of beach debris in the foreground – gives the image a sense of place. The image is razor sharp – my first thought was “wow, you can even see the bird’s toenails!”
Many tanks!
In terms of the plane of sharpness info, under ‘Ramifications’ where you are pointing out “It is almost always better to have AF active at the moment of exposure (even when you are limited to the center AF point) than it is to use rear focus (or One Shot AF) and re-compose (even when you are on a tripod).” You make it crystal clear why.
That is good.
Something I may not be clear on: is there a situation when Rear Button focus is better or is it as simple as “use it if you like it”? In your 7D Mark II camera guide, you indicate that you use shutter button AF in pure flight.
Most folks like to go with one or the other as to their personal preference. I am one of the very few who switches routinely from rear focus for most birds on the ground or on perches to shutter button for flight…
I am guessing it’s because you’re using longer lenses and only the center AF point is active?
I will often go to rear focus when using the 2X TC. But at times when re-composing you get hurt when the bird shifts position even slightly…
To simplify, is it correct that you advise Rear Button Focus because, as you wrote:, “…many folks become compositional slaves to the central sensor, especially when working in AI Servo AF (as opposed to using One-Shot AF and re-composing).”?
In general, yes.
Moving the focus sensor around was a huge lesson for me on the Nickerson IPT. Thanks Artie!
You are most welcome. Thanks again for joining us.
a
Artie,
There is no such thing as a free lunch in optics!
Agree. Folks should understand that adding a 1.4X TC robs you of about 14% of the sharpness of the prime lens alone. Add a 2X TC and that doubles to approximately 28% of lost sharpness…
Generally speaking, if you were to shoot on a 600 mm plus 2X extender and on a 600mm plus 1.4 extender and enlarge the latter image so that the subject size is identical in both images, the depth of field would appear to be the same.
I am not sure that that is correct… My understanding is that if you use the 2X at f/10, say, and then move closer with the 1.4X also at f/10 so that the size of the subject in the frame is the same, that then the d-o-f would be the same. But that is not what you are saying. If I am correct then I am pretty sure that you are wrong. Either way it is not a big deal.
In retrospect I am positive that you are wrong on the d-o-f being the same. Why? In part, because the d-o-f cannot be changed by a crop. And more importantly, I just ran the d-o-f numbers for today’s image, first at 1200mm and then at 800mm. As I expected, the total depth of field at 1200mm jumped from .07 feet to .16 feet when I switched the focal length to 800mm. (840mm is not an option.)
My question, however, was not concerning d-o-f but the sharpness of the two images.
The only difference between the two would be the angle of view, that is the width of the background. In the case of the image taken using the 2X extender, the background would appear to be cropped relative to the image taken on 1.4X extender.
I agree and understand that the angles of view would be different.
An image that has been enlarged to, say, 3 X 4 inches will appear to be sharp whereas the same image enlarged to 16 X 20 inches and viewed from the same distance as the 3 X 4 inch image will appear less sharp – you have to stand back to view the 16 X 20 inch image so that the angle of view, measured against the subject, for both images remains the same. In the latter case the depth of field, practically speaking, would appear to be the same.
In the paragraph above you have lost me 🙂
To place this in a practical context, you cannot seek to gain a depth of field advantage by choosing a lens of a particular focal length, the camera and subject size in the final “picture” remaining the same. Given the same camera and the same image size in the frame, that is the size on the sensor or in the final picture, the apparent depth of field will be the same, practically speaking, whatever the focal length of the lens.
Again, I am pretty sure that I disagree.
One advantage you that you gain from a choice of focal length is how much or how little of the background you wish to include behind the subject – the longer the focal length, the further you must stand back from your subject in order to maintain the size of the image within the frame and the less of the background will be included if the size of the subject in the frame remains the same. This can be useful in flower photography where you can choose a longer focal length to exclude a distraction along the outer edges of the image!
And in bird photography as well. In addition, adding a TC and moving back can help you decrease the angles of inclination or declination to the subject. That’s why folks often think that I was sitting when working at 1200mm when I was actually sitting or even standing.
So, generally speaking, you get a sharper image by shooting with a longer focal length lens than you get by shooting with a shorter focal length and enlarging the images so that the subject is the same size in both images, assuming there is no camera movement.
Or lens shake or subject movement. If you are correct it explains why I stick with the 2X TC so much. As with today’s featured image 🙂
To put it in practical terms, if you were to photograph a stationary bird using a 24 mm wide angle lens and then photograph the same bird from the same position as the first shot but using, this time, an 800mm lens, cropping the first image down to the same size as the second image would result in the first image, practically speaking, not being as “sharp” (or as contrasty?) as the second image.
I am thinking that you are putting it too mildly, that the image quality from the 24mm photo cropped so that the bird is the same size in the frame as with the 800mm image, would be horrific at best.
This default may stem from issues in designing/manufacturing lenses for the market – the tolerances used for the 24 mm are fine and will stand up to an image taken on an 800mm lens to the same tolerances, both images being enlarged by the same amount, for instance to 6″ X 8 “, but will show up if the image taken on the 24 mm is cropped so that when enlarged to to 6 X 8 inches, the subject is the same size for both the 24 mm and the 800mm lenses.
That would be one huge crop.
The lesson to be learnt is to use the longest suitable focal length lens available but to bear in mind that there is a tendency to use too long a focal length lens leading to less freedom when it comes to cropping to a desirable final image on the computer!
In general I choose to work with long focal lengths than most. Doing that helps me produce the tight, clean, graphic images that I love but hurts me when trying to photograph action, behavior, flight, and interactions…
Best regards and many, many thanks for all your good work!
You are most welcome. And thanks for sharing your thought-provoking comments.
artie
Ludi Lochner
United Kingdom