What’s Up?
I woke 11 minutes before the 4:30am alarm on my cell phone went off. I had some gluten free oatmeal and headed to Jamaica Bay WR at 5:08am. With stormy looking skies, I stopped at the McDonald’s on Cross Bay Blvd for a large decaf. I travel with my own heavy cream. I checked e-mails and then headed to the East Pond.
Conditions were horrific, the water levels much too high for anything due to the recent rains. I saw four Least and one Semipalmated Sandpiper before decided not to make the trek to the Raunt through the mud and the muck and the probably knee high or deeper water in some spots.
I debated as to whether I should head to Nickerson Beach, check things out at Jones Beach, or head to my Mom’s to get some work done. I chose B and was glad that I did as I quickly located a single, quite photographable Least Tern nest with two eggs and a very cooperative adult. An image will follow soon.
I have a second session with Dr. Dan this afternoon. That followed with a visit to Dr. Steven Puopolo, the hand surgeon who saved my post-surgery-infected trigger finger–left middle–several years ago via successful debridement surgery. My latest of too many trigger fingers–left ring–has been acting up a lot recently so I am gonna get a shot. If you hear loud screaming at about 3pm on eastern Long Island you will know that its me.
The Streak
Today’s blog post marks a totally insane, absurd, completely ridiculous, unfathomable, silly, incomprehensible, what’s wrong with this guy?, makes-no-sense, 265 days in a row with a new educational blog post. And I still have dozens of new topics to cover; there should be no end in sight until my big South America trip next fall. As always-–and folks have been doing a really great job recently–-please remember to use our B&H links for your major gear purchases. For best results use one of our many product-specific links; after clicking on one of those you can continue shopping with all subsequent purchases invisibly tracked to BAA. Your doing so is always greatly appreciated. Please remember: web orders only. AND Please remember also that if you are shopping for items that we carry in the new BAA Online Store (as noted in red at the close of this post below) we would appreciate your business.
|
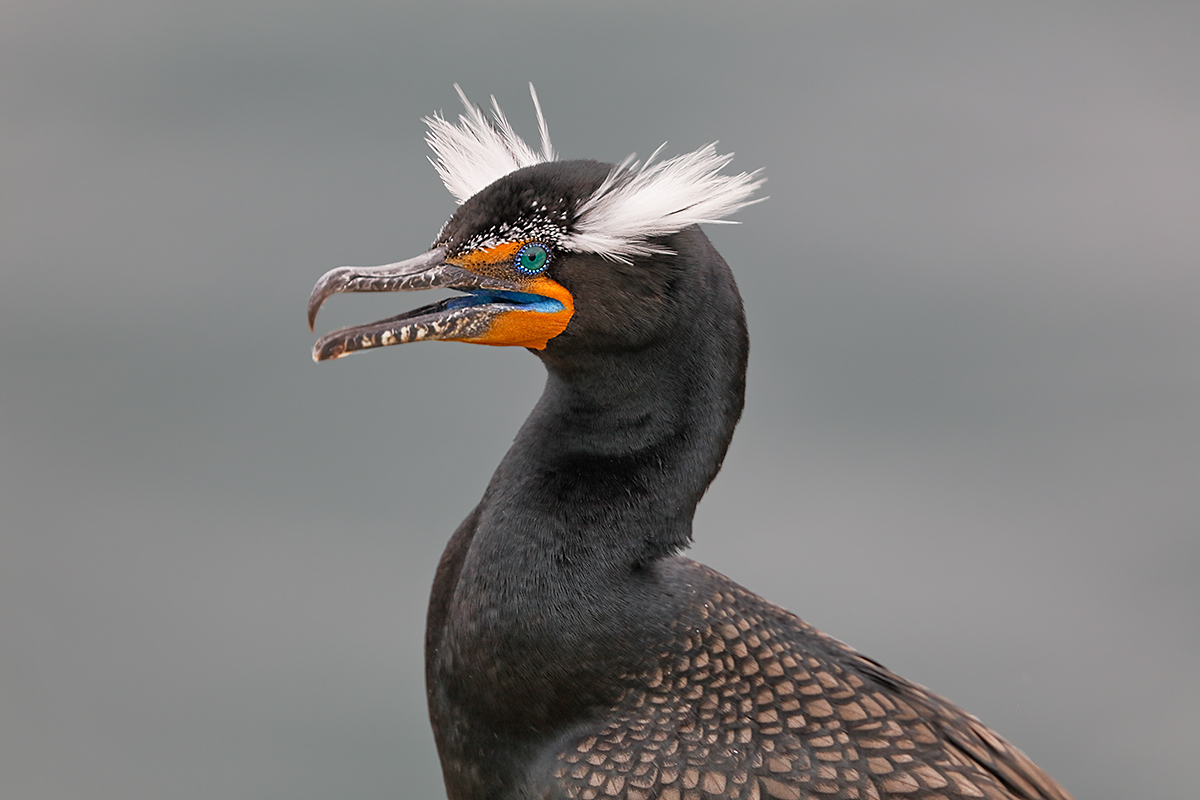
This image was created in San Diego last February with the Induro GIT 304L/Mongoose M3.6-mounted Canon EF 400mm f/4 DO IS II USM lens, the Canon Extender EF 2X III, and the mega mega-pixel Canon EOS 5DS R. ISO 800. Evaluative metering +2/3 stops as framed: 1/125 sec. at f/8. AWB. Center AF point (by necessity)/AI Servo Expand/Rear Focus AF as framed was active at the moment of exposure; the selected AF point fell on the side of the bird’s neck just rear of the base of its bill. Click here to see the latest version of the Rear Focus Tutorial. Click on the image to see a larger version. Double-crested Cormorant with white crests raised |
The Question
In the How Sharp is Sharp Enough??? blog post here, I asked, referring to the image above, Can you judge critical sharpness from this JPEG? I would love to hear your thoughts? As presented, it looks pretty good to me.
The Consensus
Every single person who commented felt that the eye was sharp and that the fine feather detail was at least adequate. Some commented that the bill tip was a bit soft and I agree, in part because of a lack of d-o-f and in part because of lens shake… See the truth about the actual sharpness of this image in The First Revelation below.
Damn the Iceplant!
I saw the killer bird and climbed the relatively low fence as fast as possible in hopes of photographing it before it quit displaying. I got the angle that I wanted and put the tripod down. The two rear legs were firmly seated on solid dirt, but the front leg, the one pointed at the subject, came down on a bed of ice plant. As Ice Plant is a succulent, its leaves are soft and fleshy. Not wanting to risk coming up empty, I aimed, focused, and fired off a few frames knowing that the resulting images would like be a bit soft at only 1/125 sec. This one was the sharpest of the lot. A shutter speed of 1/125 second would have been more than fast enough to create a sharp image if I had had the time to firmly seat the front leg of the tripod. But as it turned out, it was a good thing that I opted to get something. Why? The moment I tried to firm up the forward-facing leg of the tripod, the bird quit displaying…
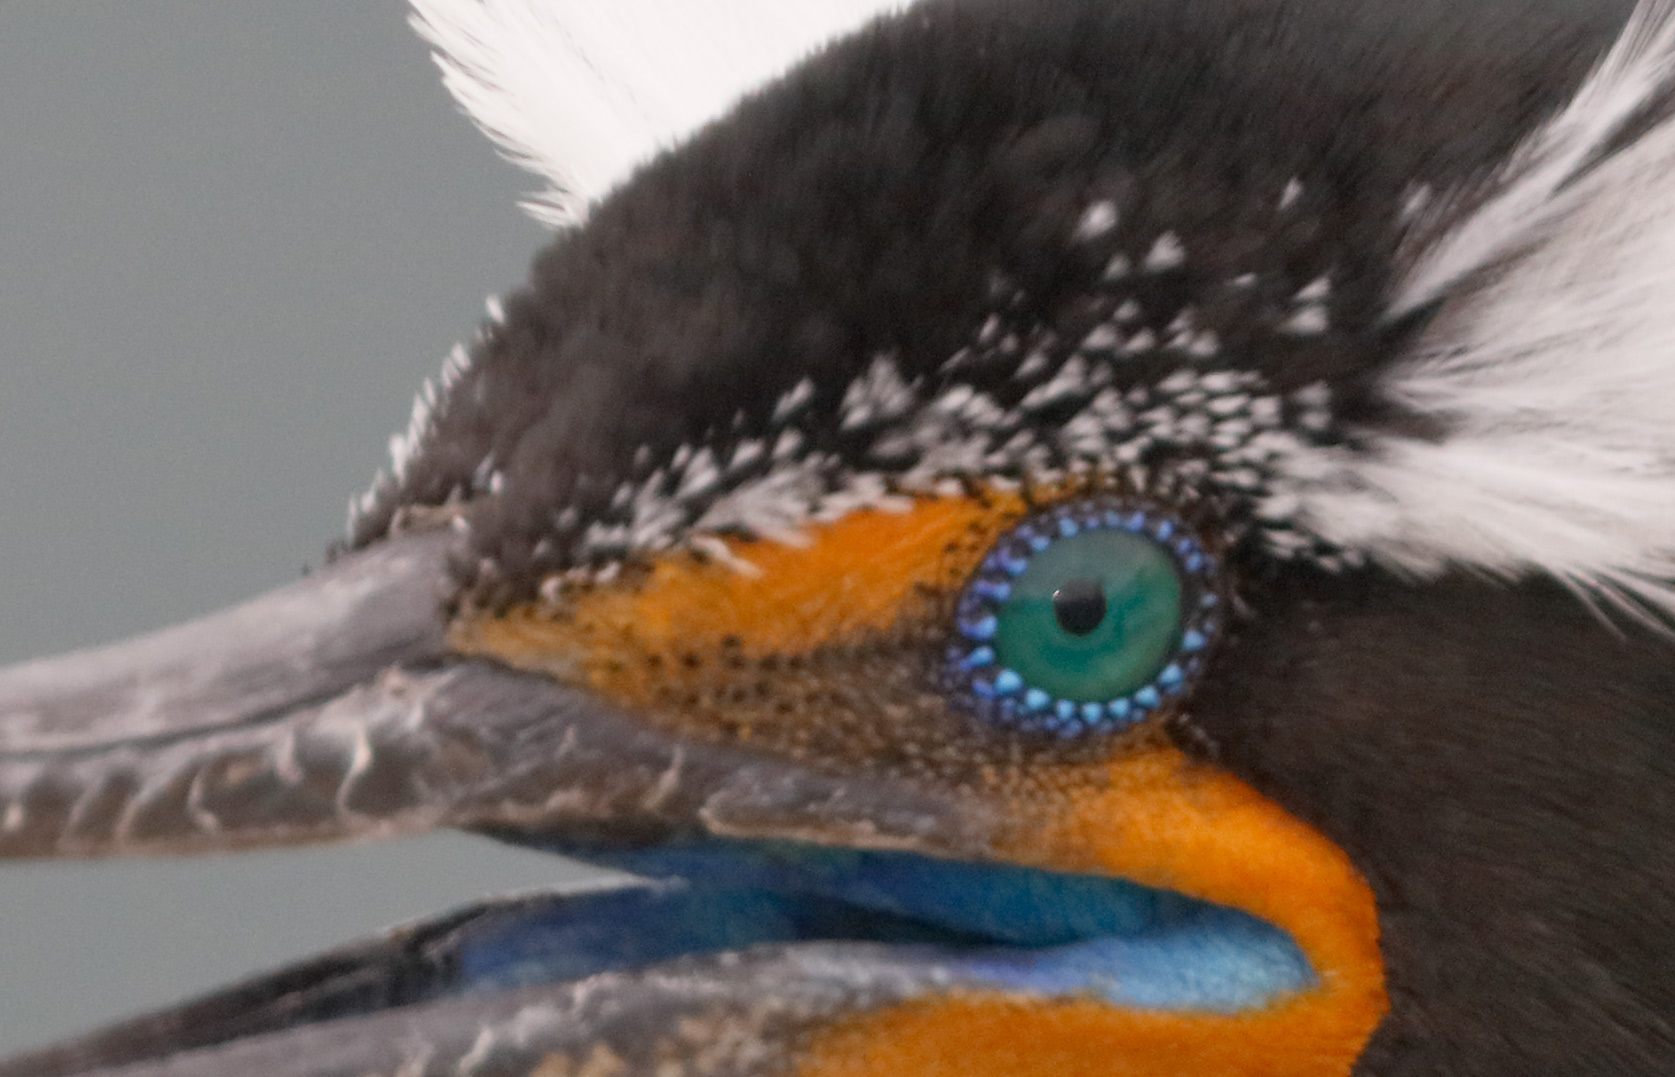
A 100% crop of the unsharpened, converted TIFF |
The First Revelation
#1: As you can see by the 100% crop the image was not close to being critically sharp. If it had been, each of the little blue jewels around the eye would look sharply etched. Heck, it was not even what I would call sharp.
In the comments to the original post IPT veteran Doug West asked, “Do you judge the sharpness from what you see in your RAW file, or what it could possibly look like after some post-processing?”
I responded, What you might be missing is that there are degrees of sharpness ranging from “totally out of focus” to “a bit soft” to “almost sharp” to “sharp” to “amazingly sharp…” Depending on the content and impact of an image, I might optimize an image from any of those groups but the first one (but only rarely from the “a bit soft” category).
Looking at the 100% crop of the RAW file, I would judge the sharpness of the image in question as somewhere between “a bit soft” and “almost sharp.”
The Second Revelation and How It Can Help You…
The second revelation is that many images that are less than critically sharp can be sharpened during post processing so that they are great for web and other electronic presentation and more than fine for making small and even medium-sized (or larger) prints. Heck, in the BirdPhotographer’s.Net post here, I even fooled fine feather detail fanatic Arash Hazheghi!
How do I do this routinely?
#1: Eye Doctor work.
#2: By applying a contrast mask to the bird’s head.
Learn the details of the above in my Digital Basics File, the best $25 you will ever spend on photography. Learn how make your images better in Photoshop rather than ruining them! It includes dozens of great Photoshop tips.
#3: I sharpen my JPEGs using Unsharp Mask at from 110-150/0.3/0. This sharpening is applied to the whole image not just to the subject.
|
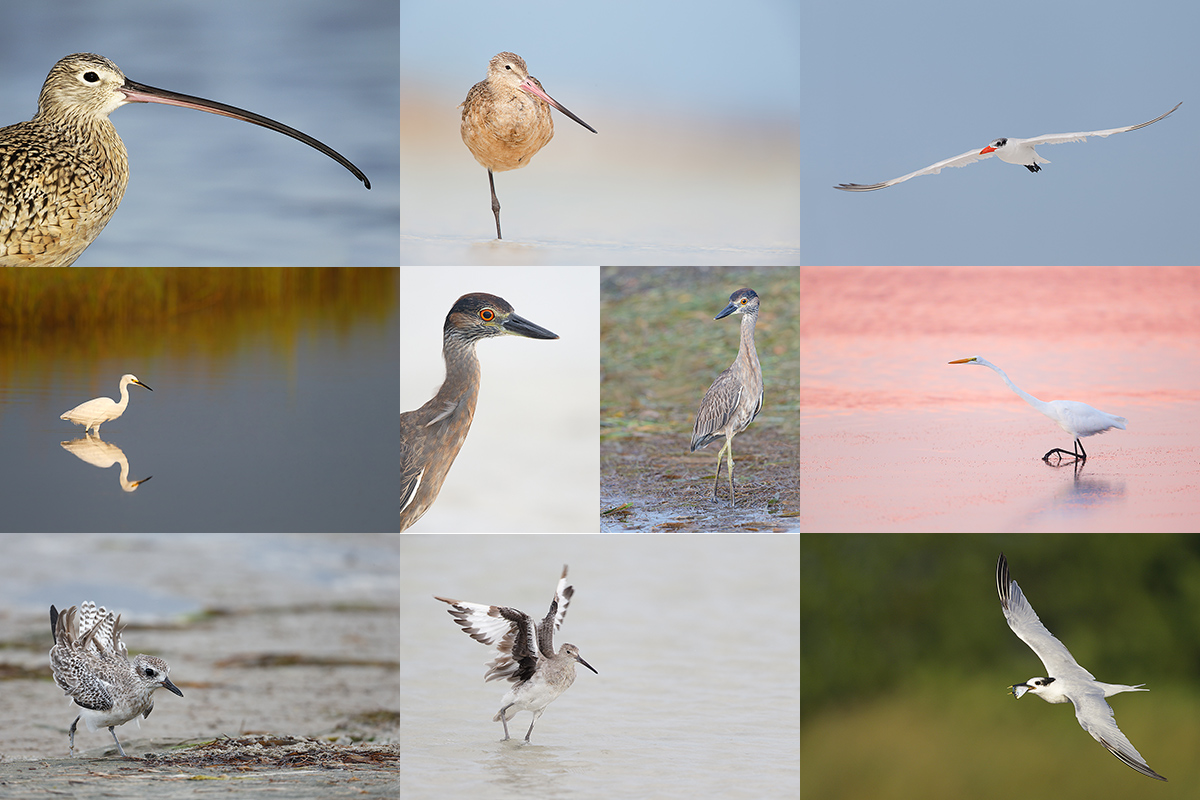
Fort DeSoto in fall is rife with tame birds. All of the images in this card were created at Fort DeSoto in either late September or early October. I hope that you can join me there this fall one way or another. Click on the composite to enjoy a larger version. |
BIRDS AS ART Fort DeSoto In-the-Field Meet-up Workshop (ITFW): $99
Join me on the morning of October 2, 2016 for 3-hours of photographic instruction at Fort DeSoto Park. Beginners are welcome. Lenses of 300mm or longer are recommended but even those with 70-200s should get to make some nice images. Teleconverters are always a plus.
You will learn the basics of digital exposure and image design, autofocus basics, and how to get close to free and wild birds. We should get to photograph a variety of wading birds, shorebirds, terns, and gulls. This inexpensive morning workshop is designed to give folks a taste of the level and the quality of instruction that is provided on BIRDS AS ART Instructional Photo-tours. I hope to meet you there.
To register please call Jim or Jennifer during weekday business hours with a credit card in hand to pay the nominal registration fee. Your registration fee is non-refundable. You will receive a short e-mail with instructions, gear advice, and meeting place one week before the event.
|
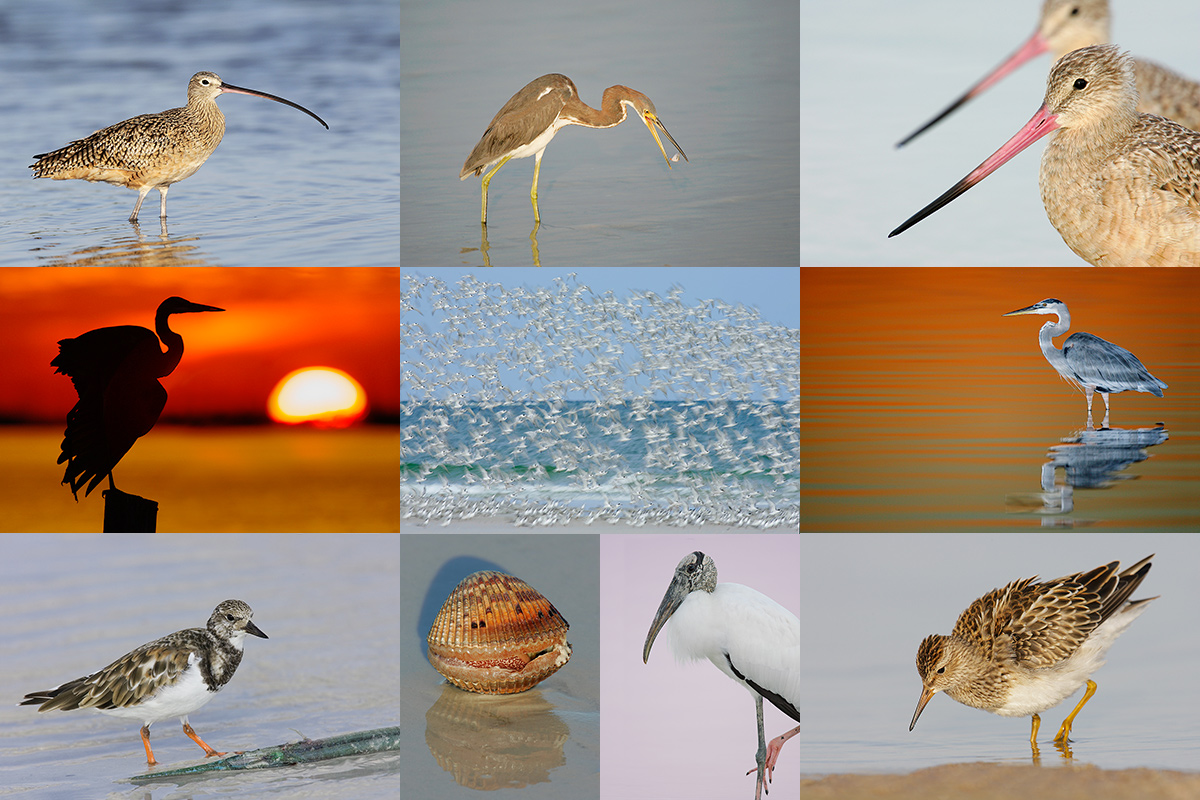
Folks attending the IPT will be in the field early and stay out late to take advantage of sunrise and sunset colors. The good news is that the days are relatively short in early fall. Click on the composite to enjoy a larger version. |
Fort DeSoto Short Notice Fall IPT/September 28 (meet & greet and afternoon session) through the full day on October 1, 2016. 3 1/2 DAYs: $1549. Limit 10. Sunday morning ITFW free to IPT registrants.
Fort DeSoto, located just south of St. Petersburg, FL, is a mecca for migrant shorebirds in fall. There they join dozens of egrets, herons, night-herons, gulls, and terns who winter on the T-shaped peninsula that serves as their wintering grounds. With any luck, we should get to photograph two of Florida’s most desirable shorebird species: Marbled Godwit and the spectacular Long-billed Curlew. Black-bellied Plover and Willet are easy, American Oystercatcher likely. Great Egret, Snowy Egret, Great Blue Heron, and Tricolored Heron are easy as well and we will almost surely come up with a tame Yellow-crowned Night-Heron or two. We should get to do some Brown Pelican flight photography. And Royal, Sandwich, Forster’s, and Caspian Terns will likely provide us with some good flight opportunities as well. Though not guaranteed, Roseate Spoonbill and Wood Stork would not be unexpected.
Folks who sign up for the IPT are welcome to join me as my guest on the ITFW on the Sunday morning following the workshop. See above for details on that.
On this and all other IPTs you will learn basics and fine points of digital exposure and to get the right exposure every time after making a single test exposure, how to approach free and wild birds without disturbing them, to understand and predict bird behavior, to identify and age many species of shorebirds, to spot the good situations, to choose the best perspective, to see and understand the light, to, and to design pleasing images by mastering your camera’s AF system. And you will learn learn how and why to work in Manual mode (even if you’re scared of it).
At brunch (included) we will review my images–folks learn a ton watching me edit–why keep this one and delete that one. If you opt to bring your laptop, we can take a look at a few of your images from the morning session. We will process a few of my images in Photoshop after converting them in DPP. That followed by Instructor Nap Time.
As I already have one signed up for this workshop, it is a go. Hotel info will be e-mailed when you register. The best airport is Tampa (TPA). It is always best if IPT folks stay in the same hotel so if you are interested it would be a good idea to register now and make your hotel reservations as soon as you hear from us. We can, however, coordinate with local folks who opt to stay at home.
Because of the relatively late date, payment is full is due upon registration either by check or credit card. If the former, please e-mail us immediately so that we can save you a spot. If the latter, please call Jim or Jennifer during weekday business hours at 863-692-0906 with a credit card in hand to register. Your registration fee is non-refundable unless the IPT sells out with eight so please check your plans carefully before committing. You will receive a confirmation e-mail with detailed instructions and gear & clothing advice a fairly soon.
|
BAA Site Guides are the next best thing to being on an IPT. |
The Fort DeSoto Site Guide
Can’t make the IPT or the ITFW? Get yourself a copy of the Fort DeSoto Site Guide. Learn the best spots, where to be when in what season in what weather. Learn the best wind directions for the various locations. BAA Site Guides are the next best thing to being on an IPT. You can see all of them here.
Please Remember to use my Affiliate Links and to Visit the New BAA Online Store 🙂
To show your appreciation for my continuing efforts here, we ask, as always, that you get in the habit of using my B&H affiliate links on the right side of the blog for all of your photo and electronics purchases. Please check the availability of all photographic accessories in the New BIRDS AS ART Online Store, especially the Mongoose M3.6 tripod head, Wimberley lens plates, Delkin flash cards and accessories, and LensCoat stuff.
As always, we sell only what I have used, have tested, and can depend on. We will not sell you junk. We know what you need to make creating great images easy and fun. And we are always glad to answer your gear questions via e-mail.
I would of course appreciate your using our B&H affiliate links for all of your major gear, video, and electronic purchases. For the photographic stuff mentioned in the paragraph above we, and for everything else in the new store, we, meaning BAA, would of course greatly appreciate your business. Here is a huge thank you to the many who have been using our links on a regular basis and those who will be visiting the New BIRDS AS ART Online Store as well.
Be sure to like and follow BAA on Facebook by clicking on the logo link upper right. Tanks a stack!
Typos
In all blog posts and Bulletins, feel free to e-mail or to leave a comment regarding any typos or errors. Just be right 🙂


Thanks, Artie. I did say that I probably couldn’t judge whether it was sharp enough for a big print, and I’m glad I said that! But I confess that I’m surprised that it didn’t look a little better at 100%. It does look pretty good to me on the screen.
Also interesting that you applied that much sharpening. I went and tried it on one of my images (that wasn’t sharp enough) and it actually does more good than bad! Not enough to make up for its not having been sharp enough to start with, but a considerable improvement. So thanks for that, too.
Hi Artie,
Beautiful pic and to me it does look sharp. Is it possible to see a 100% crop of the sharpened tiff to see the difference the post processing made?
Thanks!
Thank you Art! I have rejected so many of my photos for being soft to almost sharp. Maybe I need to reevaluate them.
J 🙂
I think there is “sharp” and there is “not sharp”. To me, amazingly sharp and critically sharp are the same. “Totally out of focus and a bit soft and almost sharp” are not sharp in any degree. Looking at the entire image, I would judge the photo to be “sharp” to my eye. Seeing it enlarged to 100% demonstrates that it is not sharp. I believe “sharp” is defined by the viewer. Some may view one of my images and declare it sharp while I may be of a different opinion. I think this image is beautiful. If I couldn’t blow this up to a 40 x 60 and retain it’s sharpness, I’d print it as an 11 x 14 (or some other appropriate size) and call it “sharp”.
Sharpening the image as a whole leaves you open to run into several kinds of trouble
– it is prone to exaggerate any noise in low contrast areas and shadows
At times…
– when high contrast edges occur at the edge to low contrast background you often end up with a halo around the sharp foreground area and the background.
At times…
Your example image shows exactly such an unnatural dark halo in the white feathers behind the head where they meet the out of focus background. The quick fix would be to either
– mask the out of focus background
– create a second layer before the sharpening and repair the affected areas from that
or (the easiest solution)
Neither of those is quick. In addition I know all of that and have been teaching it for years, most recently in the post-processing guide that I did with Arash Hazeghi. For large prints, that is exactly what I do. But for JPEGs I simply do not have the time.
– use PS CC’s Smart Sharpening instead of USM: https://www.youtube.com/watch?v=YOeZD8ZKCjQ
So what would you recommend for Smart Sharpen for a 1200 pixel wide JPEG?
artie