What’s Up?
On Sunday morning, I continued working on blog posts to be published during my more than nine-week trip to South America. In the afternoon I began working on my DPI-SIG program that will be presented next Saturday morning in Naples, FL. I enjoyed my usual easy 3/4 miles swim. The pool temp is down 2 degrees to 84 after a week of nearly constant rain. That plus some core exercises and stretching. Just 3 spaces left on the Japan in Winter IPT; scroll down for details.
Please remember that the blog is intended to be interactive; the higher the number of folks who participate, the more everyone learns, including you. And me.
The Tale of the Scale
When I left home in mid-July, I weighed in at 182, my fighting weight. After eating eight jars of various healthy and very delicious nut butters on my 5-week Long Island trip, I weighed 188 3/4 on that first morning after getting back home. Yikes! Last Sunday morning, aided by my pre-colonoscopy fast, I tipped the scales at 184 3/4. This week I lost another pound; down to 183 3/4 on Sunday morning, September 4. 175 would be lovely… Nice and slow is best, and as I get older, it ain’t as easy as it use to be.
Gear Questions and Advice
Too many folks attending IPTs and dozens of the folks whom I see in the field, and on BPN, are–out of ignorance–using the wrong gear, especially when it comes to tripods and more especially, tripod heads… Please know that I am always glad to answer your gear questions via e-mail.
The Streak
Today’s blog post marks a totally insane, irrational, illogical, preposterous, absurd, completely ridiculous, unfathomable, silly, incomprehensible, what’s wrong with this guy?, makes-no-sense, 298 days in a row with a new educational blog post. There should be no end in sight until my big South America trip next fall. Or not… As always-–and folks have been doing a really great job recently–-please remember to use our B&H links for your major gear purchases. For best results use one of our many product-specific links; after clicking on one of those you can continue shopping with all subsequent purchases invisibly tracked to BAA. Your doing so is always greatly appreciated. Please remember: web orders only. And please remember also that if you are shopping for items that we carry in the new BAA Online Store (as noted in red at the close of this post below) we would appreciate your business.
|
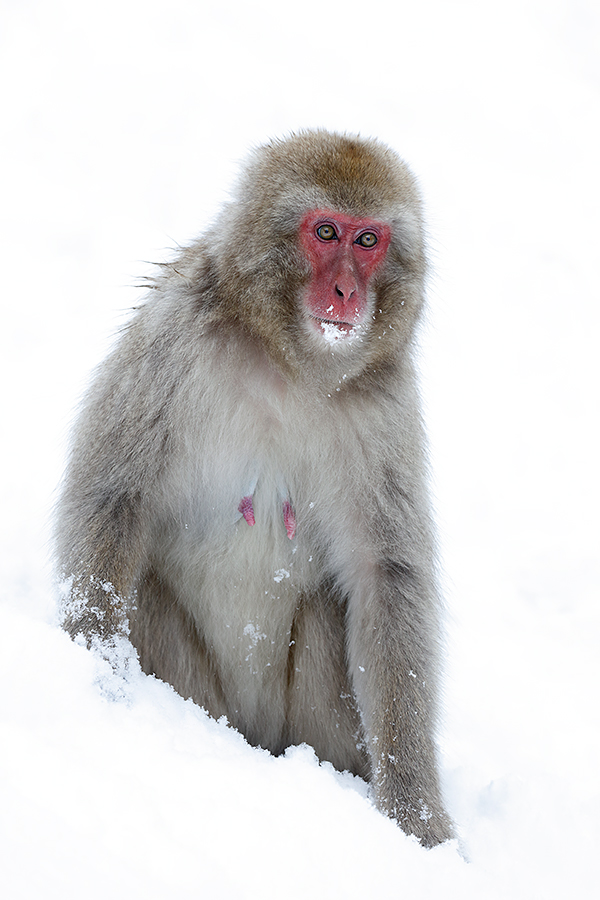
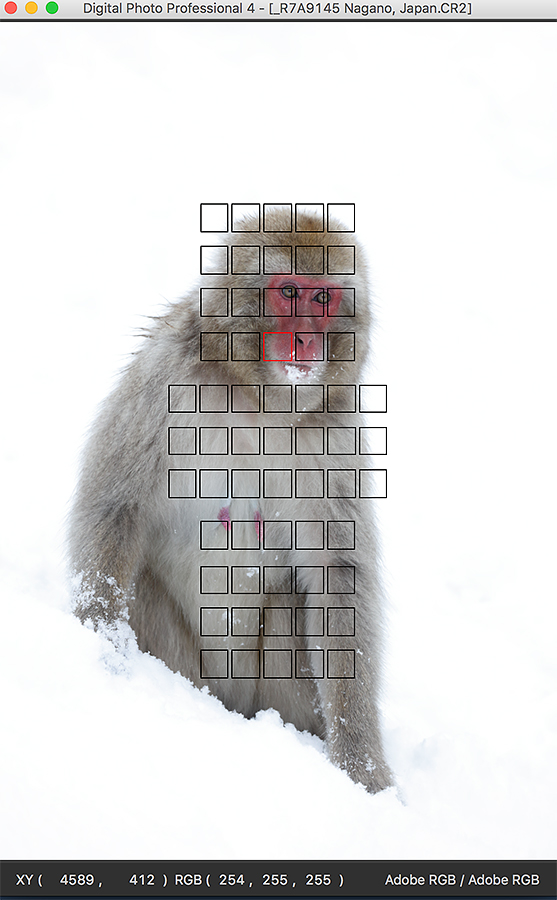
This image was created on the 2016 Japan in Winter IPT with the hand held Canon EF 100-400mm f/4.5-5.6L IS II USM lens (at 248mm) and the mega mega-pixel Canon EOS 5DS R DSLR.. ISO 640. Evaluative metering +3 1/3 stops off the snow: 1/320 sec. at f/7.1. AWB. Two AF points up from the center AF point/AI Servo Surround/Rear Focus AF as originally framed was active at the moment of exposure (as is always best when hand holding). The selected AF point was on the edge of the monkey’s snout just to our left of its right nostril. (See more with the DPP4 screen capture below). Click here to see the latest version of the Rear Focus Tutorial. Click on the image to see a larger version. Snow Monkey mom in snow |
Snow at the Snow Monkey Park
Fresh snow on the ground at the Snow Monkey Park–as in today’s featured image–is great. Snowing is excellent as well, as long as the flakes are not so large, thick, and heavy that AF has a problem; in that case, you can simply turn the AF switch to M and focus manually. The absolute best would be a snow and ice storm with colder than usual temperatures; snow encrusted Snow Monkey faces have BBC potential. Just ask my friend Jasper Doest of The Netherlands. And ice-encrusted Snow Monkey faces would be even better…
Photo Mechanic Screen CaptureScroll down to learn tons more about why I use Photo Mechanic to edit my day take folders (pick my keepers). |
Toasted Snow: Better Than OK!
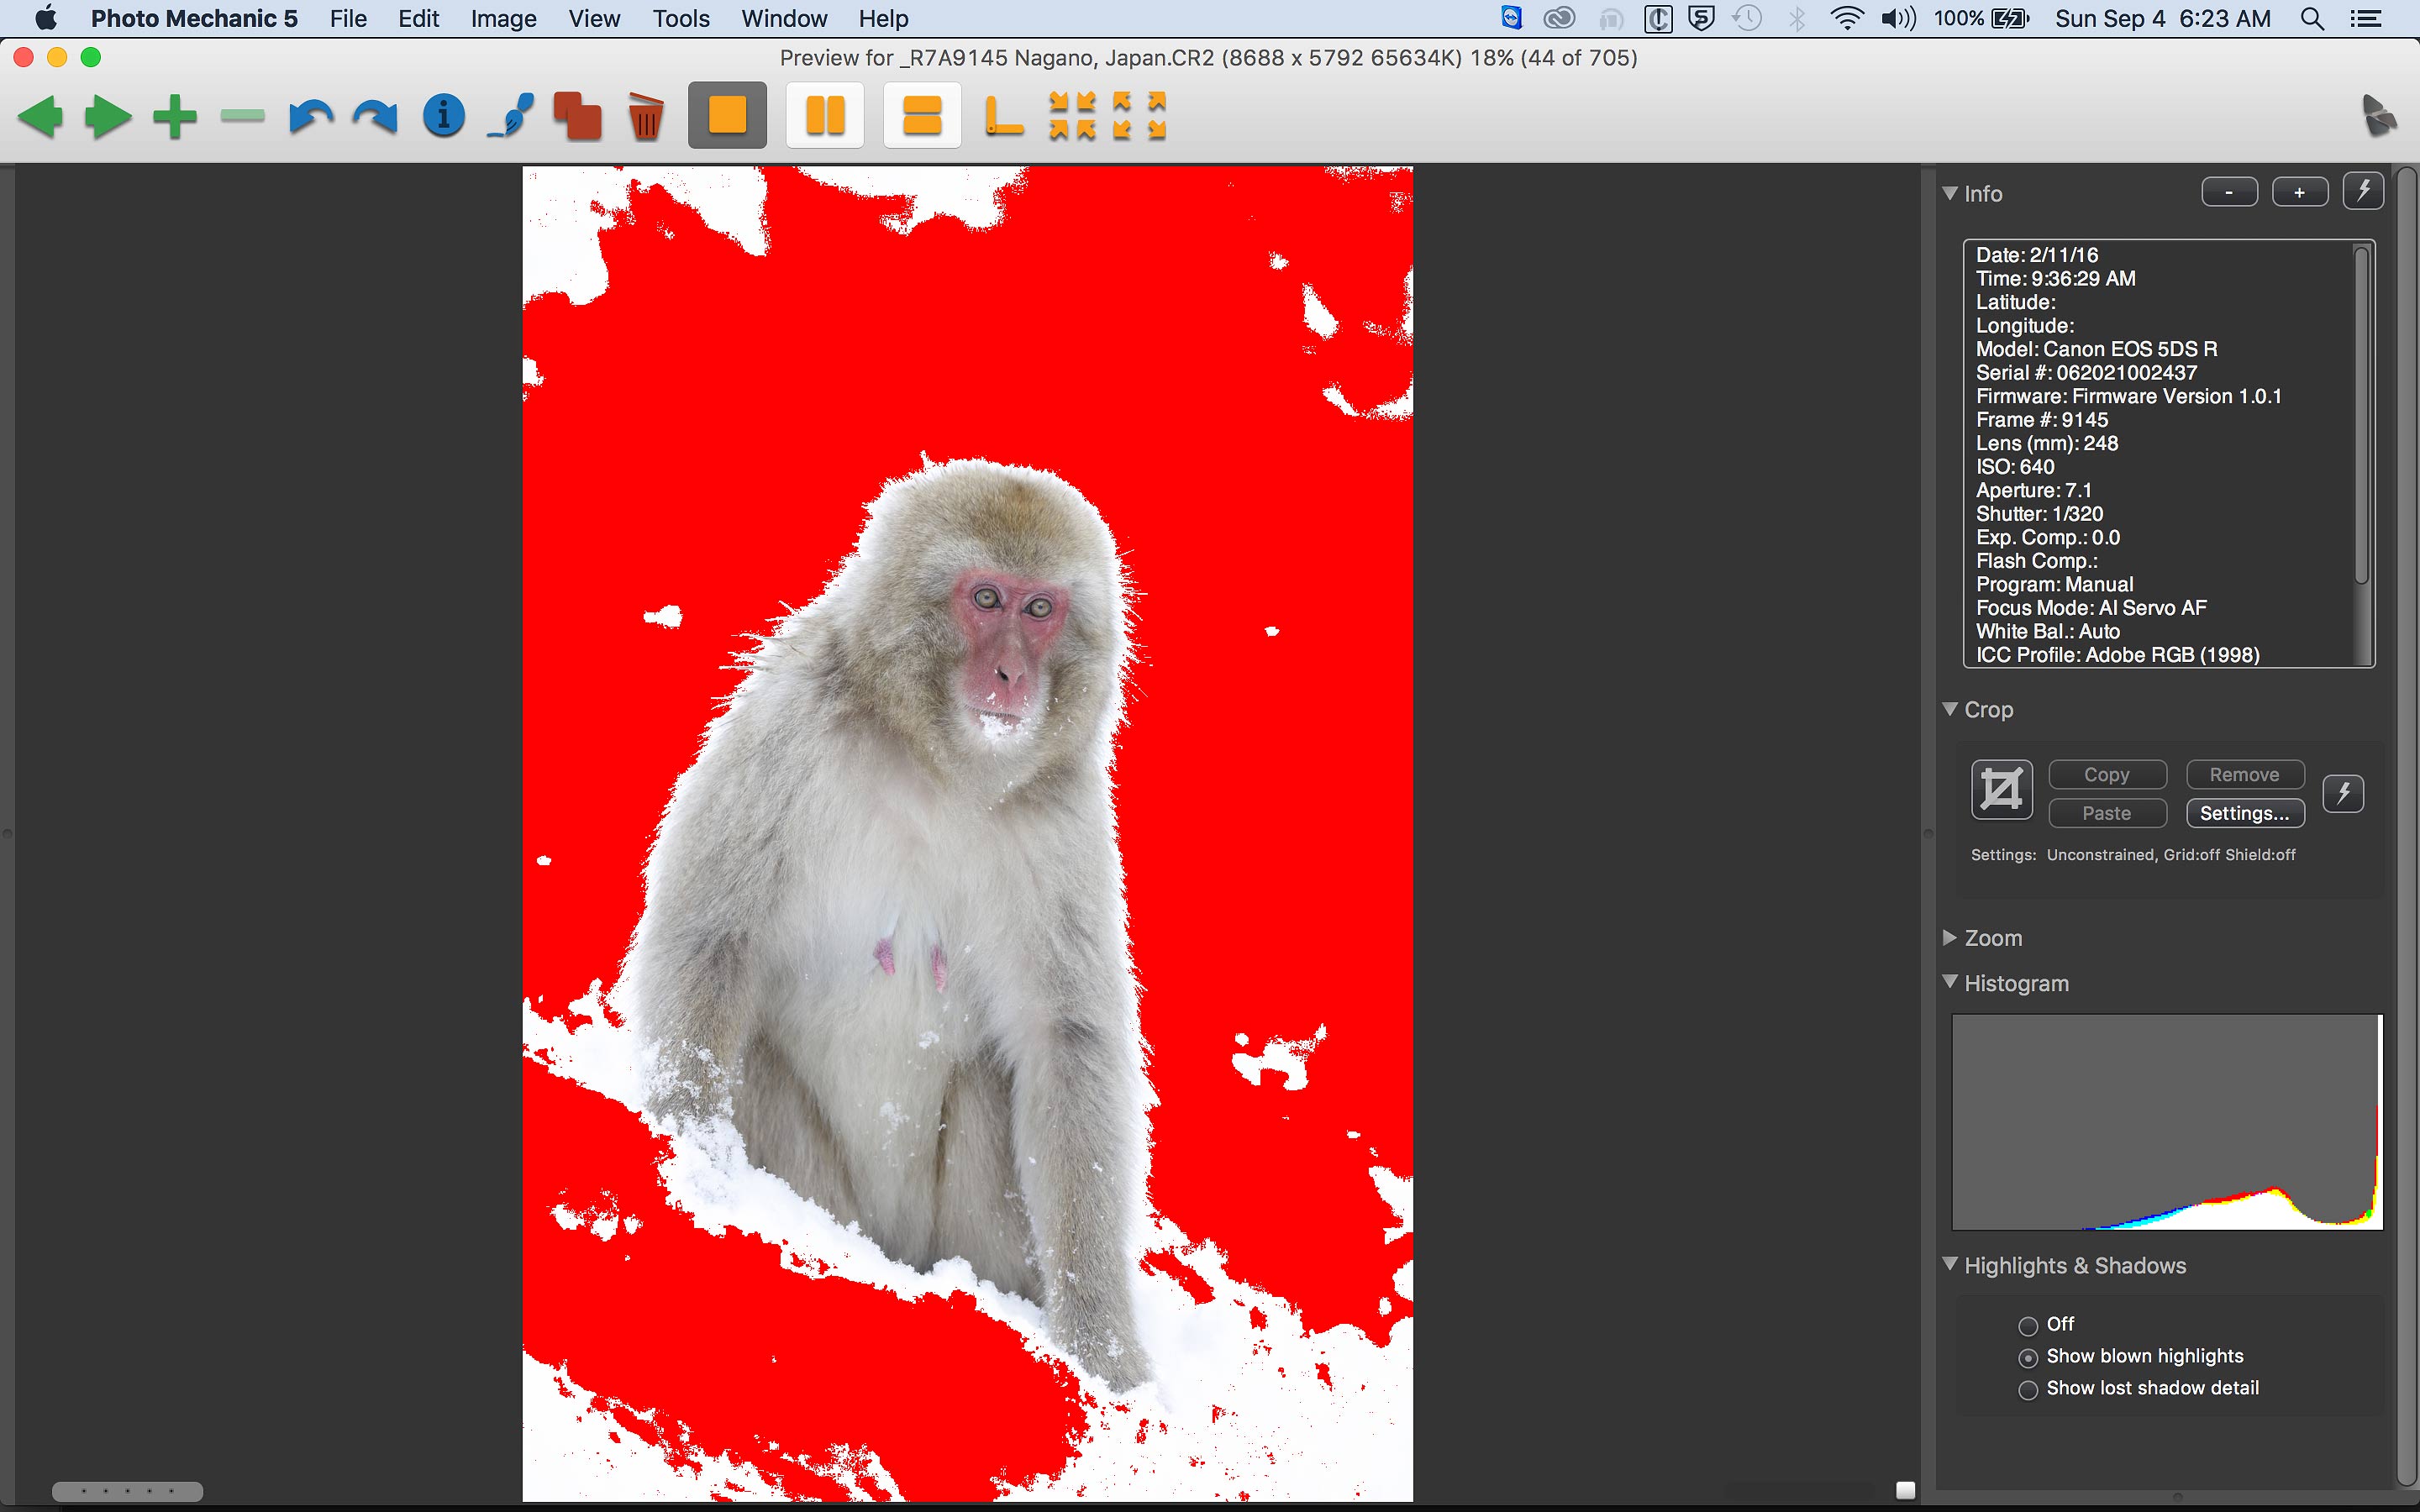
In the Photo Mechanic screen capture above, the red represents over-exposed areas. Of snow. In this case, it represented a perfect exposure as it allowed me to bring out all of the details in the Snow Monkey fur and skin; note all the room from the left histogram axis to the start of the data. Understand that on cloudy days, in low light, or when working in the shade you will never be getting much detail if any at all in properly exposed WHITEs. The main monkey onsen at the Snow Monkey Park never gets sun on it as it is nestled in a sort of bowl in the hillside. For me, this is a big plus.
If I had a nickel for every time someone on an IPT said, “But the image looks washed out on the back of the camera” I’d be a rich man (with lots of perfectly exposed images). With today’s featured image, a simple Levels Adjustment brought the image to life by enriching the monkey’s color tones.
DPP4 Screen CaptureLearn why I convert all of my Canon RAW files in the DPP 4 RAW Conversion Guide here. |
AF Issues and Two Questions
Note the position and placement of the selected AF point (illuminated in red). I was using Surround. Remember that with Surround only the selected AF point is ever displayed. I wish that the active AF points were displayed. Best would be to have the selected AF point displayed in one color and the active AF point or points displayed in a different color…
Questions 1 a, 1b, & 1c: As noted in the image caption, the selected AF point was on the edge of the monkey’s snout just to our left of its right nostril. Should I have selected a different AF point? If yes, which one? And why?
Question 2: I believe that Surround was not the best choice here. What AF Area Selection mode would have been better?
Exposure Note
Note the RGB values for the brightest WHITEs: 254, 255, 255. These indicate the near complete over-exposure of the snow. But as we have learned above, the exposure for the subject and for the image as well, is perfect.
100% crop of the eyes |
100% Crop of the Eyes
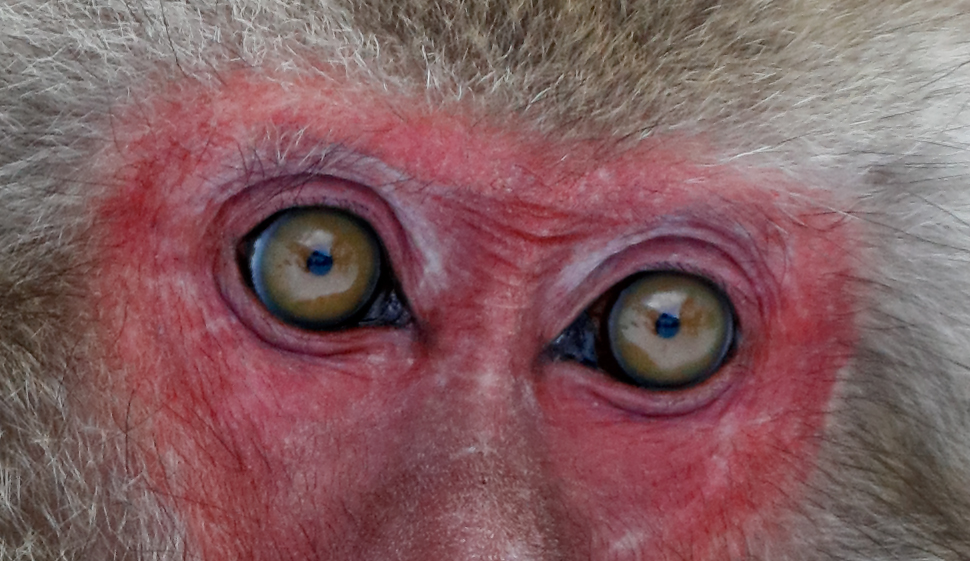
Please leave a comment and let me know what you think of the image quality, sharpness, and FFD (fine fur detail). Remember that the blog is intended to be interactive; the more folks that participate the more everyone learns, including me. And you.
|
You can purchase a copy of Photo Mechanic in the BIRDS AS ART Online Store here. See important details below. |
Photo Mechanic: save a few bucks with a BAA phone order
I use Photo Mechanic every day for ingesting (downloading) my images, picking my keepers, and sorting and arranging image files. It is fast and easy to use with great phone support: +1 503.547.2888 Mon-Fri, 9:00am-5:00pm [PST/PDT]. Purchase Photo Mechanic from BIRDS AS ART and your license code will be sent to you via e-mail within 1-7 business days (usually within 1-3 business days). Your copy of Photo Mechanic will be delivered to you via electronic download from the manufacturer’s website.
Photo Mechanic is a standalone image browser and workflow accelerator that lets you view your digital photos with convenience and speed. Photo Mechanic’s super fast browsing and its ability to quickly Ingest, Edit, and Export your photos, takes the hard work out of your workflow. Its powerful batch processing, full support of IPTC and Exif metadata, and innovative use of image variables and code replacements, make Photo Mechanic an indispensable tool for digital photographers.
Photo Mechanic works on both PCs and Macs. Folks using a PC need to read the fine print to decide between Photo Mechanic and BreezeBrowser.
Editing (Picking Your Keepers) in Photo Mechanic
I set the default so that the images are arranged by Capture Time when I open a folder.
To view your images in Photo Mechanic simply select the first image in the folder and then hit the spacebar. After that, hit the right arrow key to advance to the next slide. I hit letter T to tag my keepers. You can hit T again if you change your mind. I go to Preferences > Preview and then–under Automatically advance to the next photo when:– I uncheck the tag is changed box. That way when I tag a keeper it does not automatically advance to the next frame.
When I am done editing the folder I set Filter view by to Untagged. Then I hit Command A (select all) and Command delete to delete all the rejected images. Done deal. I will be sharing more of my digital workflow here with you in the not-to-distant future.
Photo Mechanic Magnified Viewing and Tips
While viewing your image you can zoom in to 100% by hitting “Z.” An even better trick when you want to enlarge from a specific spot (like the bird’s eye) rather than from the center is to place the cursor on the specific area that you want to view at 100% and then hit Command + Left click. To get back to the full screen view simply hit “Z.” (Not Escape!)
Best News
Folks who subscribe to the blog can call Jim or Jennifer at 863-692-0906 weekdays before 2pm to receive a small thank you discount. Or, if they wish to purchase Photo Mechanic in the BIRDS AS ART Online Store here, they can e-mail Jim for a discount code.
|
PM’s auto Ingest rocks! |
Photo Mechanic’s Auto Ingest
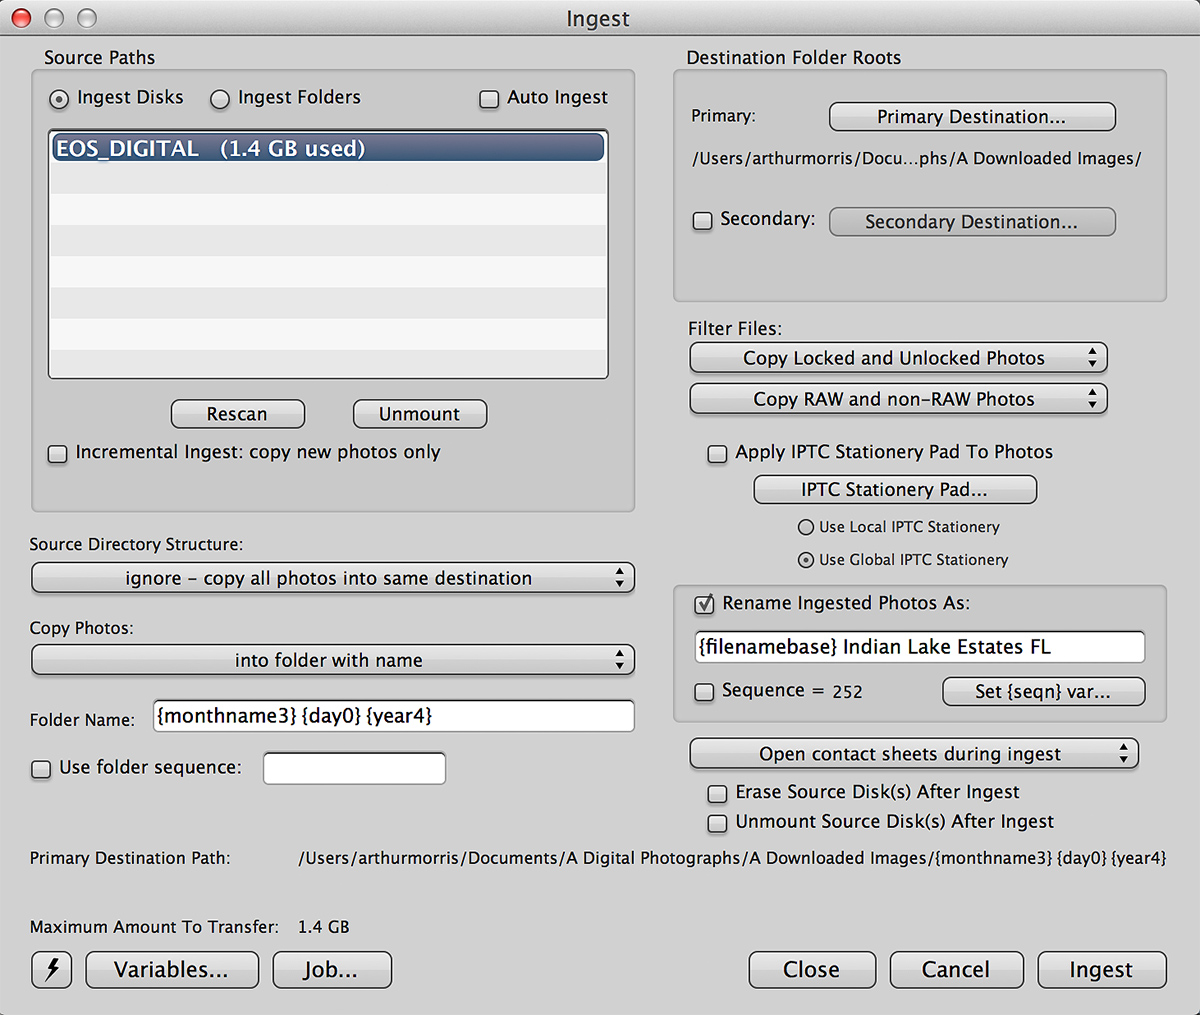
Stick the card in your Delkin Dual Slot Card Reader, set up your Ingest screen exactly as above, and your images will be placed in a dated folder with the location that you type in appearing after the image’s file name/number. Just as I do most every day.
Questions
Please leave a comment if you are already using Photo Mechanic or if you have any questions. I will do my best to help.
|
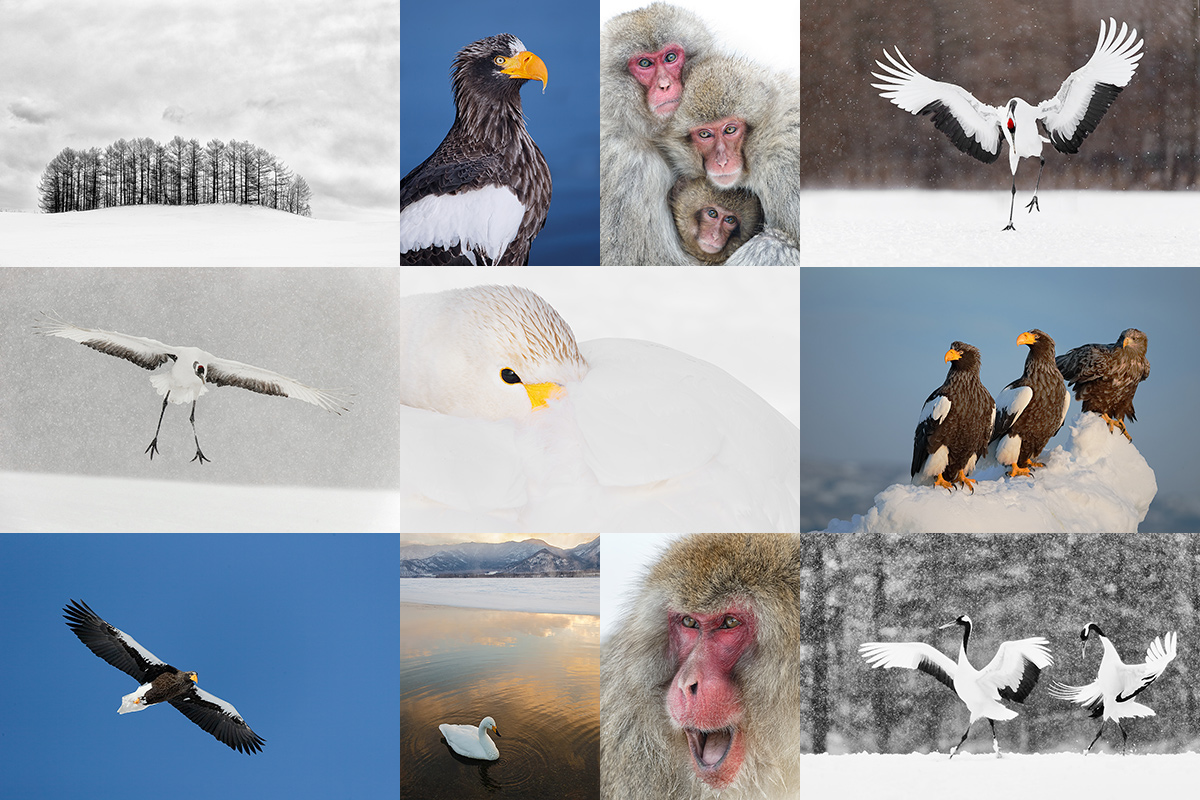
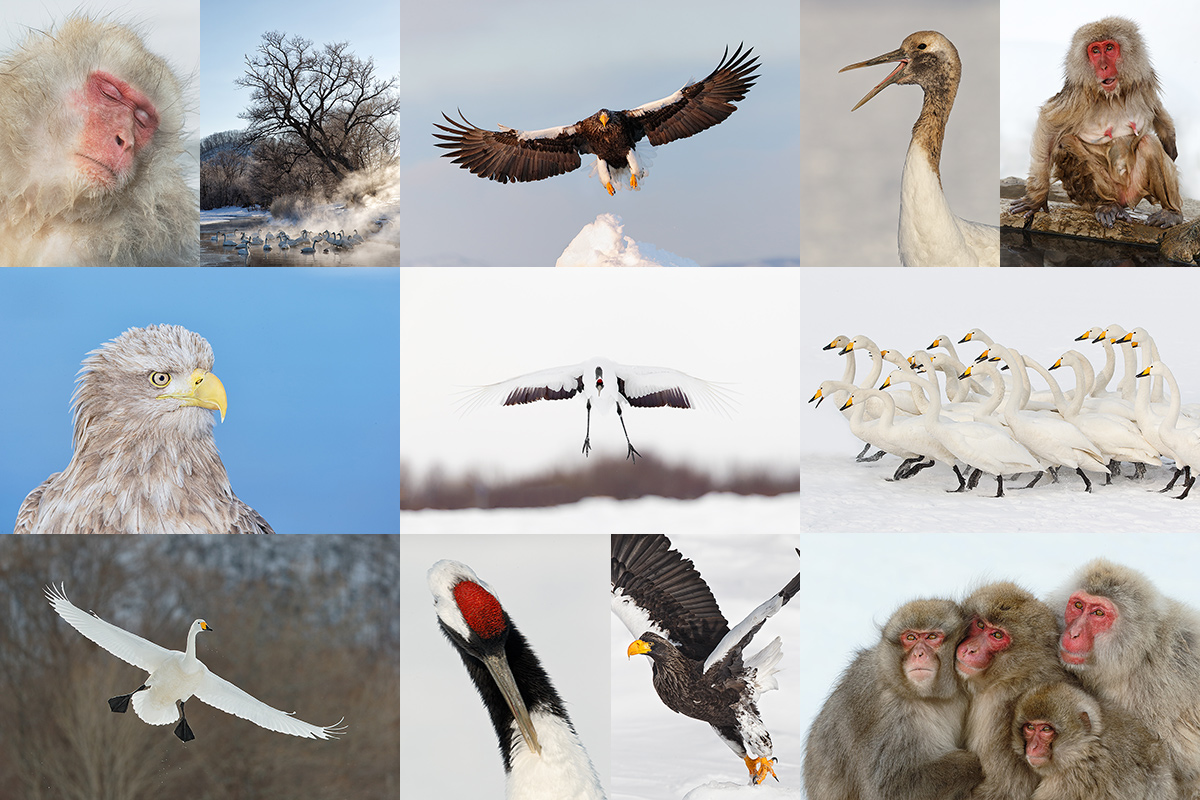
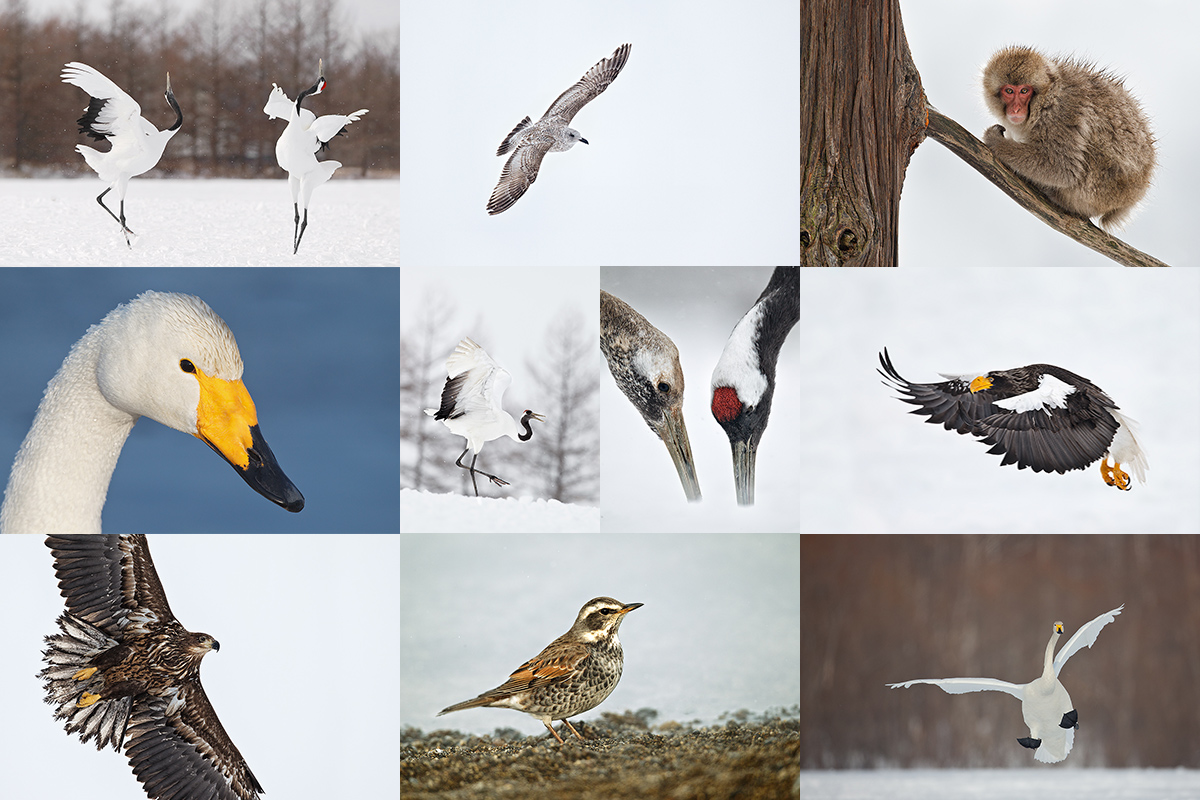
Consider joining me in Japan in February, 2017, for the world’s best Japan in Winter workshop. Click on the card to enjoy the spectacular larger version. |
Japan In Winter IPT. February 9-24, 2017: $11,499 (was $13,999)/double occupancy. Limit 8/Openings: 3.
Price Reduced $2,500 on 3-8-16!
All lodging including the Tokyo hotel on 9 FEB, all breakfasts & dinners, ground transport and transfers including bus to the monkey park hotel, and all entrance fees and in-country flights are included. Not included: international flights, all lunches–most are on the run, and alcoholic beverages.
Please e-mail for couple and IPT repeat customer discount information.
This trip is one day longer than the great 2014 trip to allow for more flexibility, more time with the cranes, and most importantly, more time for landscape photography. Hokkaido is gorgeous. You will enjoy tons of pre-trip planning and gear advice, in-the-field instruction and guidance, at-the-lodge Photoshop and image review sessions in addition to short introductory slide programs for each of the amazing locations. Skilled photographer Paul McKenzie handles the logistics and we enjoy the services of Japan’s best wildlife photography guide whom I affectionately call “Hokkaido Bear.” His network of local contacts and his knowledge of the weather, the area, and the birds is unparalleled and enables him to have us in the best location every day.
|
Amazing subjects. Beautiful settings. Nonstop action and unlimited opportunities. Join me. |
The Logistics
Arrive Tokyo: 9 FEB 2017 the latest. 8 FEB is safer and gives you a day to get acclimated to the time change. Your hotel room for the night of the 9th is covered.
Bus Travel to Monkey Park Hotel: 10 FEB: A 1/2 DAY of monkey photography is likely depending on our travel time… This traditional hotel is first class all the way. Our stay includes three ten course Japanese dinners; these sumptuous meals will astound you and delight your taste buds. There are many traditional hot springs mineral baths (onsens) on site in this 150 year old hotel.
Full Day snow monkeys: FEB 11.
Full Day snow monkeys: FEB 12.
13 FEB: Full travel day to Hokkaido/arrive at our lodge in the late afternoon. The lodge is wonderful. All the rooms at the lodge have beds. Bring your warm pajamas. A local onsen (hot springs bath and tubs) is available for $5 each day before dinner–when you are cold, it is the best thing since sliced bread. The home-cooked Japanese styles meals at the lodge are to die for. What’s the best news? Only a small stand of woods separates us from the very best crane sanctuary. During one big snowstorm we were the only photo group to be able to get to Tsurui Ito; we had the whole place to ourselves in perfect conditions for crane photography!
FEB 14-23: Red-crowned Crane, raptors in flight, Whooper Swans, and scenic photography. Ural Owl possible. An overnight trip to Rausu for Steller’s Sea Eagle and White-tailed Eagle photography on the tourists boats is 100% dependent on the weather, road, and sea ice conditions. Only our trip offers complete flexibility in this area. It has saved us on more than once occasion. The cost of 2 eagle-boat trips is included. If the group would like to do more than two boat trips and we all agree, there will be an additional charge for the extra trip or trips. No matter the sea ice conditions, we will do two eagle boat trips (as long as we can make the drive to Rausu; it snows a lot up there). We have never been shut out.In 2016 there was no sea ice but our guide arranged for two amazingly productive boat trips.
Lodging notes: bring your long johns for sleeping in the lodge. At the Snow Monkey Park, and in Rausu, the hotel the rooms are Japanese-style. You sleep on comfortable mats on the floor. Wi-fi is available every day of the trip.
FEB 24. Fly back to Tokyo for transfer to your airport if you are flying home that night, or, to your hotel if you are overnighting. If you need to overnight, the cost of that room is on you.
|
Life is short. Hop on the merry-go-round. |
To Sign Up
To save your spot, please send your $5,000 non-refundable deposit check made out to “Birds as Art” to Arthur Morris/BIRDS AS ART, PO Box 7245, Indian Lake Estates, FL 33855. I do hope that you can join me for this trip of a lifetime. Do e-mail with any questions or give me a buzz at 863-692-0906.
Purchasing travel insurance within 2 weeks of our cashing your deposit check is strongly recommended. On two fairly recent Galapagos cruises a total of 5 folks were forced to cancel less than one week prior to the trip. My family and I use Travel Insurance Services and strongly recommend that you do the same.
Please Remember to use my Affiliate Links and to Visit the New BAA Online Store 🙂
To show your appreciation for my continuing efforts here, we ask, as always, that you get in the habit of using my B&H affiliate links on the right side of the blog for all of your photo and electronics purchases. Please check the availability of all photographic accessories in the New BIRDS AS ART Online Store, especially the Mongoose M3.6 tripod head, Wimberley lens plates, Delkin flash cards and accessories, and LensCoat stuff.
As always, we sell only what I have used, have tested, and can depend on. We will not sell you junk. We know what you need to make creating great images easy and fun. And we are always glad to answer your gear questions via e-mail.
I would of course appreciate your using our B&H affiliate links for all of your major gear, video, and electronic purchases. For the photographic stuff mentioned in the paragraph above we, and for everything else in the new store, we, meaning BAA, would of course greatly appreciate your business. Here is a huge thank you to the many who have been using our links on a regular basis and those who will be visiting the New BIRDS AS ART Online Store as well.
Be sure to like and follow BAA on Facebook by clicking on the logo link upper right. Tanks a stack!
Typos
In all blog posts and Bulletins, feel free to e-mail or to leave a comment regarding any typos or errors. Just be right 🙂




I think the auto focus point and the surround setting is fine for this image. The fur detail is very good, but the eyes appear a little soft and could be sharpened in PS. The focus on the side of the nose would allow enough of the nose and the remainder of the face to be in acceptable focus with the 7.1 aperture assuming the distance from where you were to the monkey was not close.
What is the highest ISO you would consider using that would produce a quality photo? I Do not use anything above 800 with my 5D SR.I would like to think I could go a lot higher.I would appreciate your thoughts. Thanks John Koeniger
If I know that I need a sharp image I will raise the ISO to whatever I need, 6400, 10,000, etc. Then I can at least worry about the noise after I have the shot 🙂
I have an old image of a gator eating a baby Brown Pelican made with the EOS 1D Mark III at ISO 6400. It made the final rounds of judging in the BBC contest several times so it ain’t junk…
a
ps: I try not to go above 800 with any camera body. Right now, if I really need a silly high ISO I would hope that I had the 1DX Mark II in my hands…
Art, so happy you are using Photomechanic. I have used this great tool since 2002 when I bought my first digital camera, a Nikon D100.
Where have you been? I have been using it for more than two years, ever since I switched to Mac.
a
Art, I have been a Photomechanic “user” since 2002. Wow, 14 years ago. I could not imagine not have this arrow in my photography quiver.
Hi Artie. For this subject I would probably chosen single point, one af point above the one shown in the image. Why, pretty stationary subject, well posed. Seems like the eyes are a little better plane of focus compared to the snout, which is a little forward of the eyes. The full image (1st) seems sharp, but the 100% view of the eyes seems a little soft. Could have it been better with the AF single point on the eyes? I am curious also, considering the snow is blown out and you really don’t care about detail in that area of the image, would closing that lens down one stop have helped. I assume you were hand holding, so with the slower shutter speed (1/160) perhaps could have been a little slow to get a sharp image. As I said, the full image looks great and I would not complain.
Have a great day,
Frank
Hi Artie…
What are the benefits of PhotoMechanic over say Lightroom? I have the ‘pay monthly’ Adobe CC Photoshop/Lightroom bundle, so I am not likely to turn to another program, but just interested!
Photo Mechanic has lots of features that work well for me including the ease of fast editing (picking my keepers) and the various sorting options. I too pay for LR but have never opened it. If you do a search for Lightroom on the little white box on the top right of each blog post you should easily find the Why I Hate Lightroom posts… Not the exact title but that is the gist of it.
am
Mmmmm. Re your April 21st 2015 Blog Post, I have read through most of it & it would seem that there are more ‘fors’ than ‘against’ Lightroom, especially the latest versions! I thought the subject would be of great interest, so thanks for the link info. Maggi
Certainly not from me 🙂 But then, as always, you need to ask yourself, “What the heck does he know?”
a