Stuff
It was 8:12am on Saturday morning as I put the finishing touches on this blog post. I am toying with the idea of heading over to Fort DeSoto this afternoon to look for the mystery heron/egret. I would stay over on Saturday night. I will need to swim early today and start driving at about lunch time …
I am still looking for a few more folks for San Diego #2. If you are considering this trip and might be interested in adding on a free day of instruction before the IPT begins please shoot me an e-mail.
The Streak
Today makes eighty days in a row with a new educational blog post! This blog post took less than an hour to prepare. With all of my upcoming free time (or not …), the plan right now is to break the current record streak of (I think) four hundred eighty something … Good health and good internet connections willing.
|
|
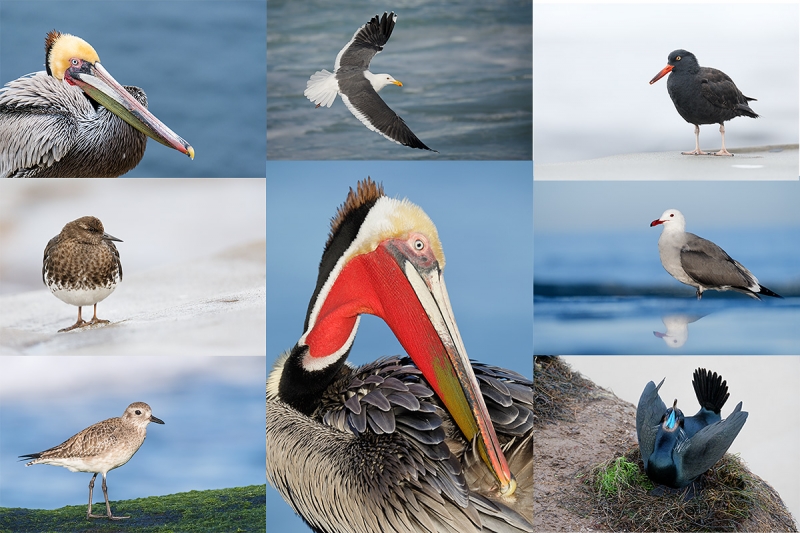
2017 in San Diego was a very good year …. |
2018 San Diego 3 1/2-DAY BIRDS AS ART IPT #2: Sunday, JAN 28 thru and including a morning session on Wednesday, JAN 31, 2018: 3 1/2 days: $1699. Limit: 8: Openings: 7
Meet and Greet at 6:30pm on the evening before the IPT begins; Saturday, Jan 27, 2018.
Please remember: I go with one.
Click here for details.
Booking.Com
Booking.Com came through for me twice again recently with both the DeSoto Fall IPT and next July’s UK Puffins, Gannets, and Bempton Pre-trip room reservations. And all the rates were great. If you’d like to give Booking.Com a shot, click here and you will earn a $25 reward. Thanks to the many who have already tried and used this great service.


Gear Questions and Advice
Too many folks attending BAA IPTs and dozens of folks whom I see in the field, and on BPN, are–out of ignorance–using the wrong gear especially when it comes to tripods and more especially, tripod heads… Please know that I am always glad to answer your gear questions via e-mail.
|
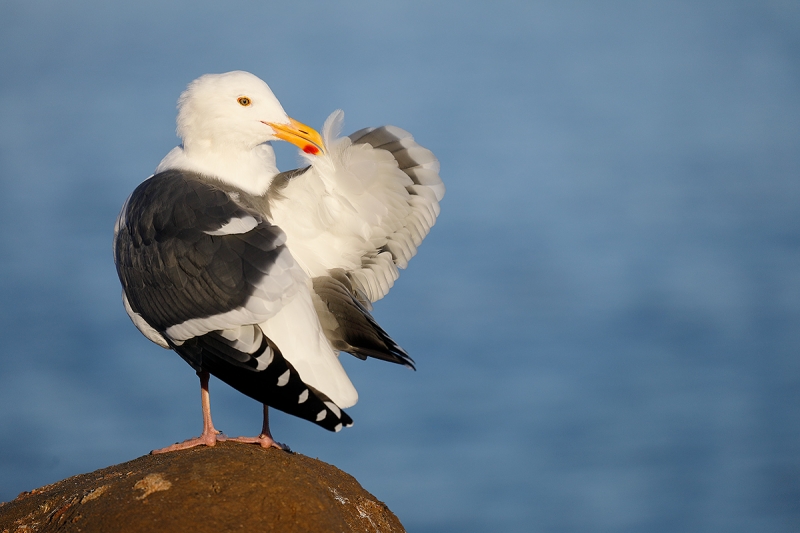
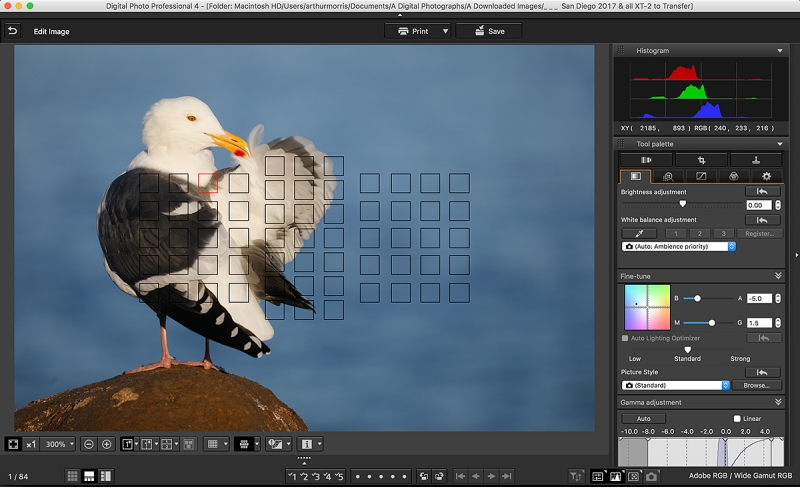
This image was created on the 2017 San Diego IPT with the hand held Canon EF 100-400mm f/4.5-5.6L IS II USM lens (at 360mm) and my favorite bird photography camera, the Canon EOS 5D Mark IV. ISO 400. Evaluative metering probably at zero as famed: 1/2000 sec. at f/6.3 in Manual mode. AWB. One AF point that was two and one-half rows up from and three columns to the right of the center AF point/AI Servo/Manual selection/Shutter Button AF as framed was active at the moment of exposure. See the DPP 4 screen capture below to see the exact placement of the single (selected) AF point. FocusTune/LensAlign Micro Adjustment: 0. Western Gull, adult breeding plumage preening |
Helpful Bird Photography Principles …
- 1- When photographing a bird from behind the best head angle will generally be very close to a perfect 90 degrees with the bird’s head square or close to square to the imaging sensor.
- 2- When photographing a bird from behind be sure to focus on or very near the head.
- 3- When working in horizontal format be sure to select your AF point carefully so as to keep the bird out of the center of the frame (unless you can verbalize a very good reason for putting the subject dead center …)
- 4- Learn to work competently in Manual mode so that the amount of black or white in the frame at a given moment will not affect the exposure. That involves making an exposure check image, checking or blinkies, and evaluating the histogram to make sure that you have exposed well to the right (with at least some data halfway into the rightmost histogram box).
- 5- Even when photographing a bird from behind there is no need to use additional depth of field as long as the distance to the subject provides you will enough depth of field to cover the subject (as with today’s featured image).
- 6- Working with backgrounds that are separated from the subject and relatively distant while using wide apertures will yield pleasingly out of focus canvases for your avian images.
From Chapter Seven, Designing the Image (page 108), of the original The Art of Bird Photography (Amphoto, NY: 1998)
If the subject is positioned against an uncluttered background or if there is a cluttered background well behind the subject, telephoto lenses — with their narrow angles of view — and the shallow depth of field that comes with the use of wide apertures, will produce lovely soft, out-of-focus backgrounds. I’ll take still blue water or well lit green foliage every time.
Shooting wide open (at your lens’ widest aperture heightens this effect; with subject size constant, it is the aperture rather than the length of the lens that determines the depth of field. Large apertures such as f/2.8, f/4, and f/5.6, minimize depth of field and reduce background detail. Conversely, small apertures, such as f/16 and f/22, maximize depth of field and increase background detail.
Note: I changed a single word in the second paragraph above to improve the clarity of the writing.
More 100-400 II Versatility
The hand held Canon EF 100-400mm f/4.5-5.6L IS II USM lens is deadly on the cliffs of La Jolla with or without the Canon Extender EF 1.4X III. Its focal length range, its relatively light weight, and its amazing close focus (down to less than one meter) make it my most valuable lens when visiting San Diego. In addition, it is quite an excellent flight lens and being able to zoom out on close-flying pelicans and gulls can save the day.
The DPP 4 Screen Capture for today’s featured image |
Understanding the Color of Light/Part I
Note the RGB values for the brightest WHITEs: R=240, G = 233, B = 216. Not the high value for RED and the low value for B despite the fact that I moved the Color fine tune dot toward BLUE. Note also that this image was created at 7:39am. On clear mornings not long after sunrise the light is rich in REDs and YELLOWs; much of the BLUE is filtered out as the light travels obliquely a long way through the earth’s atmosphere. The result is what we call “early” or “sweet” light (as opposed to the colder light later on in the day when the sun is much more directly overhead. As a guideline folks often state that the really “sweet” light occurs on clear days when your shadow is three time longer than your height. I am generally fine with twice my height. Note that the lower the sun in the sky the more comfortable I am working a bit off sun angle.
As I like the look of the rich, warm light in this image I was not at all concerned with having the WHITEs completely neutral, say 235, 235, 235. I could have worked toward that end if I wanted to either during the RAW conversion in DPP 4 or during the image optimization in Photoshop. But I am a firm believer in “if it ain’t broke, don’t fix it.”
The Lesson
There is no need to work towards having perfectly neutral WHITEs or a perfectly neutral White Balance if you are happy with the colors in an image.
High-Level AF Point Selection Question
Why did I abandon my usual AF Expand for this particular situation and go with Manual selection (i.e., with a single AF point)?
If In Doubt …
If in doubt about using the BAA B&H affiliate link correctly, you can always start your search by clicking here. Please note that the tracking is invisible. Web orders only. Please, however, remember to shoot me your receipt via e-mail.


Please Remember to use my Affiliate Links and to Visit the New BAA Online Store 🙂
To show your appreciation for my continuing efforts here, we ask, as always, that you get in the habit of using my B&H affiliate links on the right side of the blog for all of your photo and electronics purchases. Please check the availability of all photographic accessories in the New BIRDS AS ART Online Store, especially the Mongoose M3.6 tripod head, Wimberley lens plates, Delkin flash cards and accessories, and LensCoat stuff.
As always, we sell only what I have used, have tested, and can depend on. We will not sell you junk. We know what you need to make creating great images easy and fun. And please remember that I am always glad to answer your gear questions via e-mail.
I would of course appreciate your using our B&H affiliate links for all of your major gear, video, and electronic purchases. For the photographic stuff mentioned in the paragraph above, and for everything else in the new store, we, meaning BAA, would of course greatly appreciate your business. Here is a huge thank you to the many who have been using our links on a regular basis and those who will be visiting the New BIRDS AS ART Online Store as well.
Amazon.com
Those who prefer to support BAA by shopping with Amazon may use the logo link above.
Amazon Canada
Many kind folks from north of the border, eh, have e-mailed stating that they would love to help us out by using one of our affiliate links but that living in Canada and doing so presents numerous problems. Now, they can help us out by using our Amazon Canada affiliate link by starting their searches by clicking here.
Be sure to like and follow BAA on Facebook by clicking on the logo link upper right. Tanks a stack.
Typos
In all blog posts and Bulletins, feel free to e-mail or to leave a comment regarding any typos or errors. Just be right :).


This is a good example of how beautiful a common bird as a Gull can be. So if you here people say, oh, that’s just a Gull why photograph it? Take a look at this image, the answer lies there.
Hi Artie.
Thanks for the discussion on color balance. I have been struggling with that a bit, thinking I should be making efforts to get the numbers (RGB) closer together by using either options in DPP4 to adjust the colors. But it’s a relief that an aesthetical evalualation is just as valid as trying to get to “neutral”.
Let me ask you a question. If your 5DIV had a bigger selection of AF points and you could have moved your center point in AF Expand to where you have your single point, would you have used AF Expand. Also, could this be an example of why one might be use BBF and recompose?
Be good and Later,
Frank
Hi, Artie. I love this image. I agree completely with Warren Robb about why you used a single AF point. I even go to spot AF fairly often; it is even more precise.
Artie, In the first paragraph under “Understanding the Color …” the second sentence should start with Note not Not. Your good thinking is faster than your typing!
Because of the narrow depth of field due to the wide aperture, it was important to position the focus as close as possible to the mid point of the bird’s features depth wise in order for them all to be in focus. AF Expand would likely have picked a point either too far or too close.
Hi Artie, I think the colours are beautiful in this image. I love the shape that the feathers (the ones that are being preened) made. My first thought as to why you used single point was that you didn’t want the assist points pulling the focus on to the (closer) wing feathers, possibly throwing the eye out of focus, in hindsight it would not have made a difference (if this was the reason) because in the image both the wing feathers and the eye look sharp (to me). Then it struck me that one of the assist points might have caught the background water? But I am not sure.
Jake