Stuff
On Monday, before, during, and after our travels, I worked extensively on finishing up the LensAlign/Micro-adjusting e-Guide. I still have a few things to clear up on Tuesday with Michael Tapes and hope to have the guide published by tomorrow, or by Thursday at the latest. No swimming and no exercising till Tuesday.
The LensAlign/FocusTune Micro-adjusting e-Guide will be published and announced tomorrow accompanied by an interesting back-story piece on the development of the hardware, LensAlign, and the software, FoucsTune, by the brilliant Michael Tapes, inventor of both. To purchase the LensAlign Mark II/FocusTune package, click please click here.
I am still looking for a few more folks for San Diego #2. If you are considering this trip and might be interested in adding on a free day of instruction before the IPT begins please shoot me an e-mail.
Great Response
After downloading the RAW file, lots of folks have been sending me JPEgs of their version of Monday’s featured image. If you would like to take a crack at it, see the blog post here. I will publish my version on Friday.
The Streak
Today makes eighty-three days in a row with a new educational blog post! This blog post took more than two hours to prepare. With all of my upcoming free time (or not …), the plan right now is to break the current record streak of (I think) four hundred eighty something … Good health and good internet connections willing.
|
|
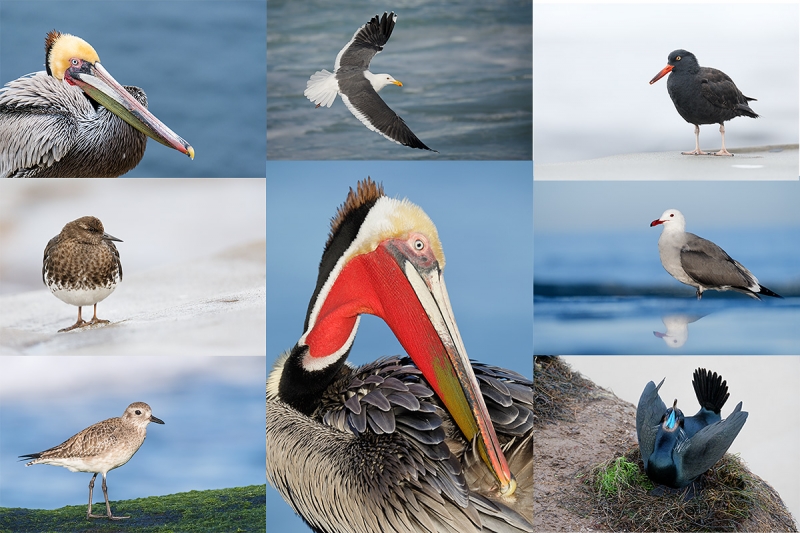
2017 in San Diego was a very good year …. |
2018 San Diego 3 1/2-DAY BIRDS AS ART IPT #2: Sunday, JAN 28 thru and including a morning session on Wednesday, JAN 31, 2018: 3 1/2 days: $1699. Limit: 8: Openings: 7
Meet and Greet at 6:30pm on the evening before the IPT begins; Saturday, Jan 27, 2018.
Please remember: I go with one.
Click here for details.
Booking.Com
Booking.Com came through for me twice again recently with both the DeSoto Fall IPT and next July’s UK Puffins, Gannets, and Bempton Pre-trip room reservations. And all the rates were great. If you’d like to give Booking.Com a shot, click here and you will earn a $25 reward. Thanks to the many who have already tried and used this great service.


Gear Questions and Advice
Too many folks attending BAA IPTs and dozens of folks whom I see in the field, and on BPN, are–out of ignorance–using the wrong gear especially when it comes to tripods and more especially, tripod heads… Please know that I am always glad to answer your gear questions via e-mail.
|
|
|
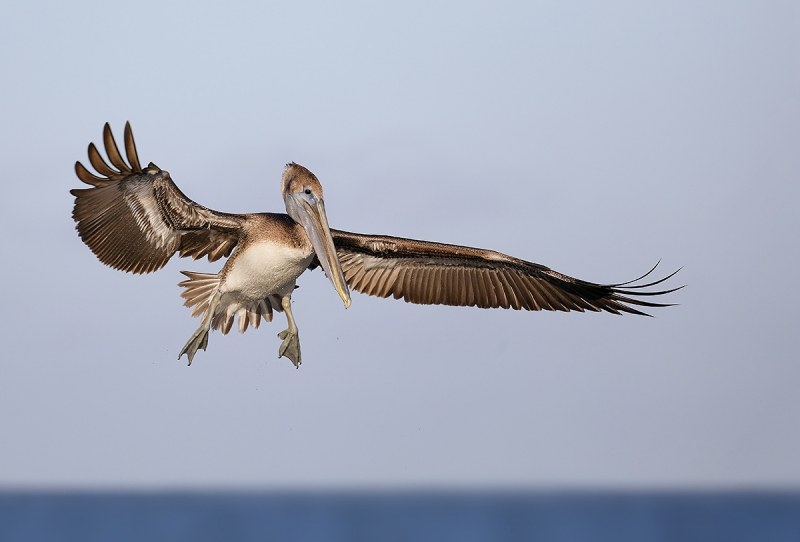
This image was created on the early morning of Sunday, October 15 with the hand held Canon EF 100-400mm f/4.5-5.6L IS II USM lens (at 371mm) and my favorite pelicans in flight photography camera, the Canon EOS 5D Mark IV. ISO 400. Evaluative metering +1 stop off the sky in early morning light: 1/2500 sec. at f/6.3. (Should have been +1 2/3 stops off the sky). AWB. Center AF point/AI Servo/Expand/Shutter Button AF was active at the moment of exposure. As originally framed, the selected AF point fell on the bird’s face just behind and below the eye (as seen in the DPP 4 screen capture below). Please click on the image to enlarge it. FocusTune/LensAlign Micro Adjustment: -4 (extrapolated). Brown Pelican, landing juvenile |
Brown Pelican landing juvenile
Thanks to a suggestion from DeSoto Fall IPT participant Jim Miller, the group tried a new spot in the park, a spot that I had only rarely (if ever …) been to. It turned out to be fantastic. On my visit last weekend I photographed there on Saturday afternoon and Sunday morning in an effort to learn more about the location. I was successful. On clear mornings with any winds with an easterly component the landing pelican photography will likely turn out to be spectacularly consistent.
Canon EOS 5D Mark IV Cropped Image Quality
Note how well image quality held up to a relatively large crop. AF performs better when you work wider; doing that allows you to aggressively crop a sharp image to your taste. Please understand that I am not advising you to crop away 90% of the pixels in a given image 🙂 With a sharp RAW file you can easily get away with cropping away 30 to 40% of the pixels.
More 100-400 II Versatility
On both Saturday afternoon and Sunday morning past I never took the 500 f/4L IS II out of my Sequoia. What fun it was to walk around with a lightweight lens that is great for flight photography; being able to zoom out on close-flying pelicans and gulls can be a huge plus; with today’s image, I might have zoomed in a bit more … But by zooming out a bit I was able to keep the selected AF point on the bird’s head. Once the sun came over the dunes I added the 1.4X III TC for additional reach while photographing birds on the beach. While I do have some sharp flight images with the 100-400 II/1.4X III combo, my preference is to do flight with the lens alone; AF is faster and more accurate. We have seen this week that the 1-4 can be used at the wide end to create scenic-type images (without having to run back to the car for a shorter lens). It’s focal length range (with or without the Canon Extender EF 1.4X III) is fantastic. And its amazing close focus (down to less than one meter) make this the most versatile lens you will ever own. Lastly, as we saw the other day, you can add a few extension tubes and use the 1-4II to photograph very small flowers.
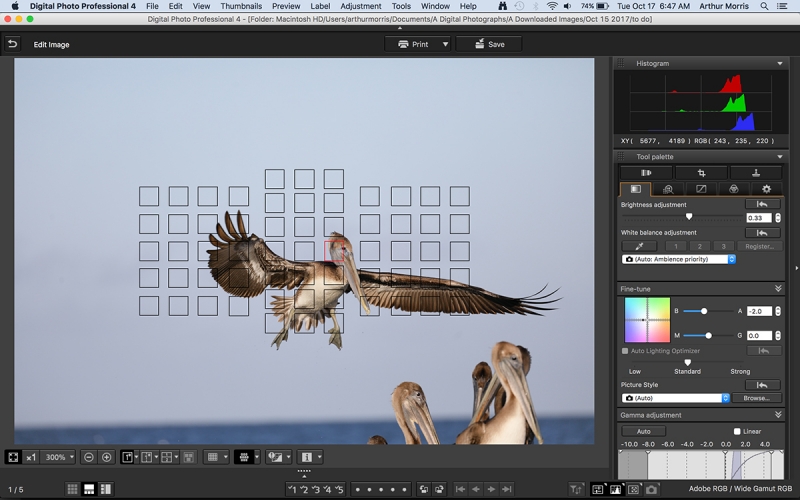
The DPP 4 Screen Capture for today’s featured image |
The DPP 4 Screen Capture for Today’s Featured Image
Note the illuminated red square that shows the placement of the activated AF point at the moment of exposure. See that I added 1/3 stop of light by moving the Brightness slider to +.33. And that I moved the Color fine tune dot a bit towards blue to counteract the rich, red, early morning light just a bit. Note that the BLUE channel dominates the histogram because of the blue sky and the blue water.With the cursor on the brightest WHITEs we do see the early morning light: R = 243, G = 235, B = 220. Again, there is no need to neutralize the WHITEs or to strive for a neutral white balance when working in early morning light …
The Image Optimization
- 1-Convert the RAW file in DPP 4.
- 2-Bring the image into Photoshop.
- 3-Level the image using the Ruler Tool (R) and Image > Rotate > Arbitrary (my keyboard shortcut Command + /).
- 4-Starting in the lower right corner crop the image (C) hard from the left and above using the 2X3 preset flopped to 3X2.
- 5-Select the skinny triangles using the Magic Wand Tool (M).
- 6-Use the minus Lasso Tool (L) to deselect areas of the bird that got picked up ….
- 7-Expand the selection 6 pixels using Select > Modify > Expand.
- 8-Fill in the Canvas with John Haedo Content Aware Fill (Shift + Delete).
- 9-Eliminate the pelicans below the subject using the Patch Tool (my keyboard shortcut P). It is amazing how easy that was and how amazing the Patch Tool is.
- 10-Add some canvas above and in front of the bird and then filling in the new canvas with John Haedo Content Aware Fill (Shift + Delete).
- 11-Lighten the shadowed area of the right underwing primaries using Tim Grey Dodge and Burn; be sure to compare the optimized image with the original …
- 12-Put the whole thing on a new layer and run cheap and dirty NeatImage noise reduction at 80% on the whole image. This completely eliminated the noise in the dark blue water without affecting the sharpness of the subject. To learn everything that there is to know about noise reduction using NeatImage (and lots more!) see the Professional Post Processing Guide by clicking here
- 13-Select the head and bill with the Quick Selection Tool (W), place it on its own layer, and quasi-sharpen it with a Contrast Mask (15/65/0).
- 14-Flatten the image and then duplicate it.
- 15-Apply a 65-pixel Gaussian Blur to the whole thing.
- 16-Add a Regular Layer Mask and erase the blur from the sky and the bird leaving it in place only on the blue water of the Gulf. Be sure to use a large, soft brush for the erasing.
- 17-Name and save the TIFF file.
- 18-Create a 1200 pixel wide JPEG, sharpen it with Unsharp Mask at 90/.3/0.
- 19-Save the JPEG and close the image.
Note: it took longer to type the section above than it did to optimize the image in Photoshop … The latter took less than eight minutes.
|
|
|
The BIRDS AS ART Current Workflow e-Guide (Digital Basics II) will teach you an efficient Mac/Photo Mechanic/Photoshop workflow that will make it easy for you to make your images better in Photoshop (rather than worse). That true whether you convert your images in DPP 4 or ACR. See the blog post here to learn lots more and to read a free excerpt. You can order your copy from the BAA Online Store here, by sending a Paypal for $40 here, or by calling Jim or Jennifer weekdays at 863-692-0906 with your credit card in hand. |
The BIRDS AS ART Current Workflow e-Guide (Digital Basics II)
Everything mentioned above is covered in detail in the BIRDS AS ART Current Workflow e-Guide (Digital Basics II), an instructional PDF that is sent via e-mail. Learn more and check out the free excerpt in the blog post here. The new e-Guide reflects my Macbook Pro/Photo Mechanic/DPP 4/Photoshop workflow. Do note that you will find the RGB Curves Adjustment Color Balancing tutorial only in the new e-guide. Note: folks working on a PC and/or those who do not want to miss anything Photoshop may wish to purchase the original Digital Basics along with DB II while saving $15 by clicking here to buy the DB Bundle.
The two most recent and many of the older MP4 Photoshop Tutorial videos releases go hand and hand with the information in DB II):
Folks who learn well by following along rather than by reading can check out the complete collection of MP 4 Photoshop Tutorial Videos by clicking here.
You can learn how and why I and other discerning Canon shooters convert nearly all of their Canon digital RAW files in DPP 4 using Canon Digital Photo Professional in the DPP 4 RAW conversion Guide here. And you can learn advanced Quick Masking and advanced Layer Masking techniques in APTATS I & II. You can save $15 by purchasing the pair. Folks can learn sophisticated sharpening and (NeatImage) Noise Reduction techniques in the The Professional Post Processing Guide by Arash Hazeghi and yours truly.
If In Doubt …
If in doubt about using the BAA B&H affiliate link correctly, you can always start your search by clicking here. Please note that the tracking is invisible. Web orders only. Please, however, remember to shoot me your receipt via e-mail.


Please Remember to use my Affiliate Links and to Visit the New BAA Online Store 🙂
To show your appreciation for my continuing efforts here, we ask, as always, that you get in the habit of using my B&H affiliate links on the right side of the blog for all of your photo and electronics purchases. Please check the availability of all photographic accessories in the New BIRDS AS ART Online Store, especially the Mongoose M3.6 tripod head, Wimberley lens plates, Delkin flash cards and accessories, and LensCoat stuff.
As always, we sell only what I have used, have tested, and can depend on. We will not sell you junk. We know what you need to make creating great images easy and fun. And please remember that I am always glad to answer your gear questions via e-mail.
I would of course appreciate your using our B&H affiliate links for all of your major gear, video, and electronic purchases. For the photographic stuff mentioned in the paragraph above, and for everything else in the new store, we, meaning BAA, would of course greatly appreciate your business. Here is a huge thank you to the many who have been using our links on a regular basis and those who will be visiting the New BIRDS AS ART Online Store as well.
Amazon.com
Those who prefer to support BAA by shopping with Amazon may use the logo link above.
Amazon Canada
Many kind folks from north of the border, eh, have e-mailed stating that they would love to help us out by using one of our affiliate links but that living in Canada and doing so presents numerous problems. Now, they can help us out by using our Amazon Canada affiliate link by starting their searches by clicking here.
Be sure to like and follow BAA on Facebook by clicking on the logo link upper right. Tanks a stack.
Typos
In all blog posts and Bulletins, feel free to e-mail or to leave a comment regarding any typos or errors. Just be right :).


Nice image with some very nice processing. Step 19 says JPEB Instead of JPEG.
Thanks John, and fixed.
with love, artie