Stuff
Sunday morning at Gilbert was definitively not as productive as Saturday which had been poor at best. Again we met up with physiotherapist Amy Novotny and friend Bryan Holliday. They added lots of water to my favorite pond and thus, there were no birds there at all.
The Streak
Today makes two hundred seventeen days in a row with a new educational blog post! This one took about 40 minutes to prepare. With all of my upcoming free time (or not…), the plan right now is to break the current record streak of 480 … Good health and good internet connections and my continuing insanity willing.
Exposure Math Answer
In the Sun or Shade? And Another Exposure Math Quiz blog post here, I asked that folks calculate the difference in the exposure for Image #1 and Image #2.
Image #1 was created at ISO 400. 1/1000 sec. at f/7.1.
Image #2 was created at ISO 800. 1/160 sec. at f/6.3.
From ISO 400 yo ISO 800 is one stop.
From 1 1/1000 sec. down to 1/160 sec. goes like this: 1/160 … 1/320 …1/640 is two full stops. From 1/640 sec. to 1/1000 sec is another 2/3 stop. So 2 2/3stops in all. From f/7.1 to f/6.3 is 1/3 stop. All in the same direction. So in total the difference in exposure was exactly four full stops: 1 + 2 2/3 + 1/3 = 4.
Keith Swindell was the first to answer correctly when he wrote at 9:44am on March 3: Looks to be 4 stops to me (ISO: 1 stop, Tv: 2 1/3 stops, Av: 2/3 stop).
And like me, he preferred the second image, the one in the shade:
I prefer the shot in the shade, birds from directly head-on look awkward to me.
While I do like both images, I absolutely love the watercolor look of the second image, the one made in the shade. That in part because of the greatly reduced contrast.
The Used Gear Page
Action on the Used Gear Page recently has been fantastic. You can see all current listings on the Used Photo Gear page here.
Booking.Com
Several folks on the Spoonbill IPTs used the Booking.Com link below and got great rates and saved a handsome $25.00 in the process. If you too would like to give Booking.Com a shot, click here and to earn a $25 reward on your first booking. Thanks to the many who have already tried and used this great service.
Gear Questions and Advice
Too many folks attending BAA IPTs and dozens of folks whom I see in the field, and on BPN, are–out of ignorance–using the wrong gear especially when it comes to tripods and more especially, tripod heads… Please know that I am always glad to answer your gear questions via e-mail. Those questions might deal with systems, camera bodies, accessories, and/or lens choices and decisions.
|
|
|
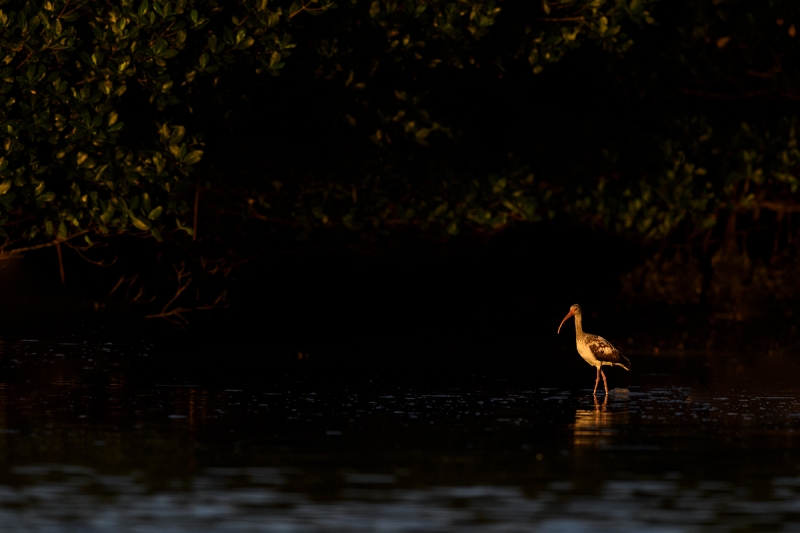
This image was created at Alafia Banks on the morning of February 25, 2018 with the Induro GIT 304L/Mongoose M3.6-mounted Nikon AF-S NIKKOR 600mm f/4E FL ED VR lens, the Nikon AF-S Teleconverter TC-14E III, and the Nikon D850. ISO 800. Matrix metering -2 stops: 1/2500 sec. at f/7.1. AUTO0 WB at 7:16am. Nikon Focus peaking AF Fine-tune: +5. (Please see and carefully read Nikon Focus Fine-tune Guide item below). Click on the image to see a larger version. Image #1: White Ibis, immature in red mangroves. |
No More Rear Button Focus
I no longer use rear button focus. I tried to figure out how to set that up with my Nikon gear but could not. Instead, I programed the AF-ON button to lock AF; you need to press and hold the button down. It works like a charm when you are on a tripod and it is even better when the bird is standing stock still as in Image #1 or is sleeping as in Image #2.
|
|
|
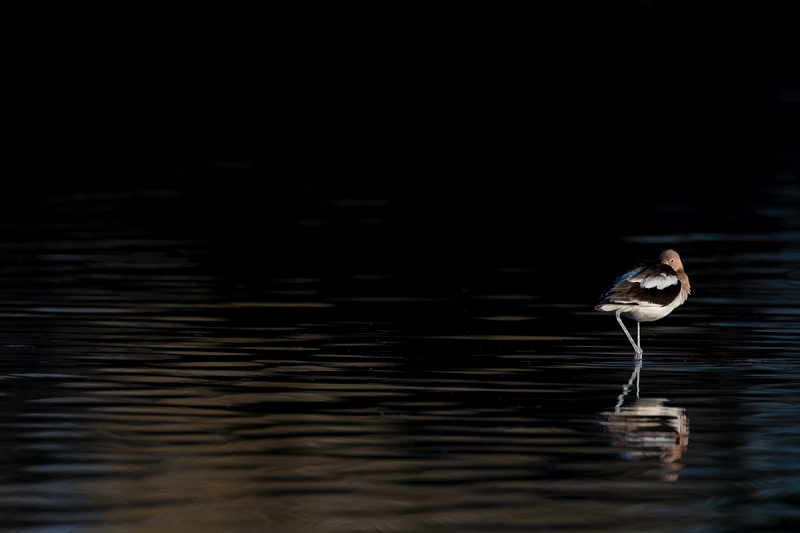
This image was created at the Gilbert Water Ranch Riparian Preserve on the morning of March 3, 2018 with the Induro GIT 304L/Mongoose M3.6-mounted Nikon AF-S NIKKOR 600mm f/4E FL ED VR lens, the Nikon AF-S Teleconverter TC-14E III, and the Nikon D850. ISO 400. Matrix metering -2 stops: 1/2500 sec. at f/7.1. AUTO0 WB at 7:35am. Center d-9 shutter Button AF. Focused on the bird, locked focus by holding the he AF-ON button, and recomposed. Nikon Focus peaking AF Fine-tune: +5. (Please see and carefully read Nikon Focus Fine-tune Guide item below). Click on the image to see a larger version. Image #2: American Avocet, sidelit in black water |
Multiple Choice Image Preference Question
Which image is the strongest”
- a-Image #1. Please let us know why you made your choice.
- b-Image #2. Please let us know why you made your choice.
- c-I like them both. Please let us know why.
- d-I do not like either image. Please let us know why.
Light Angle Notes …
Note that in Image #1 my shadow was pretty much pointed right at the bird. I was working on sun angle as I almost always do. With Image #2 I was about 45 degrees off sun angle; the subject was very strongly sidelit. But as the subject was angled about 45 degrees away from me the half of the bird that we see was pretty much directly lit. It is very rarely that I work with side light.
Please Note
I have been getting lots of e-mails below on qualifying for a free Nikon D850/D5 Focus Fine-tune Guide (should I ever actually get started on and finish it). “I once met you in San Diego; do I qualify for a free guide? I bought your micro-adjusting guide; do I get a free copy of the Nikon D850/D5 Focus Fine-tune Guide? Please read the item below before e-mailing as it clearly states the qualifications for getting the guide for free 🙂
The Nikon D850/D5 Focus Fine-tune Guide
I hope to be working on a Nikon D850/D5 Focus Fine-tune Guide while I am in Phoenix. There is lots of mis-information out there on Nikon Automatic AF Fine-tune. Working with Patrick Sparkman, we perfected a method of using the Focus Peaking feature available only on the D850 to quickly and accurately micro-adjust all of your lenses and TC-Es with your D-850. Both Nikon Automatic AF Fine-tune and D850 Focus Peaking AF Fine-tune require a LensAlign Mark II kit. If you know for sure whether the very popular Nikon D500 DSLR Camera (Body Only) (or any other of the newer Nikon dSLRs) offer Automatic AF Fine-tune.
Folks who purchase a Nikon D850, a Nikon D5 DSLR Camera (Body Only, Dual XQD Slots), or any Nikon gear totaling more than $2,000 will receive the new guide free. I hope to have it finished in three weeks but don’t hold me to it 🙂
Registering for an IPT
To register for any of the IPTs below call Jim or Jen in the office at 863-692-0906 from Monday morning through Friday lunch with your credit card in hand to leave your $500 non-refundable deposit. Balances may not be paid by credit card so you will be asked to send a check for your balance along with the signed paperwork that you will find here.
|
|
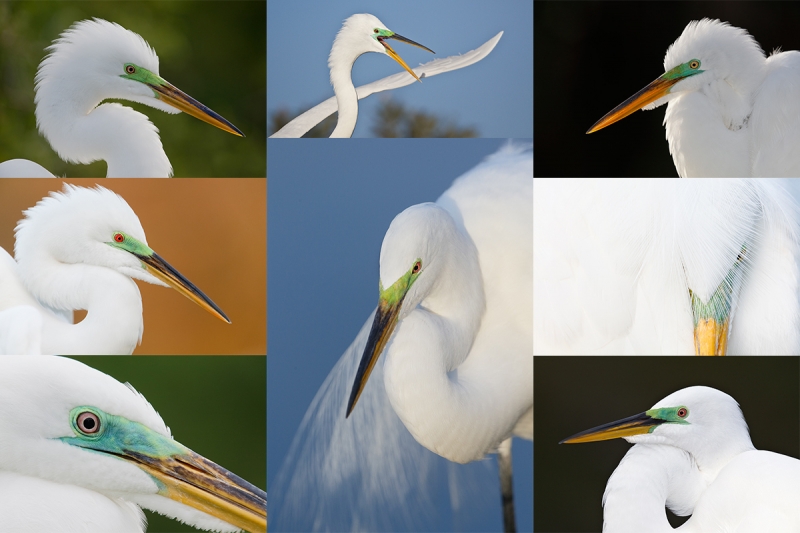
Great Egrets in breeding plumage are quite beautiful |
Gatorland IPT #1. Sunrise: 7:25am, Sunset: 7:40pm
3 1/2 DAYs: THURS 22 March through and including the morning of SUN 25 MAR. $1599. Limit 5 photographers.
(2 1/2 DAY option) FRI 23 March through and including the morning of SUN 25 MAR. $1199.
Must purchase Gatorland Photographers Pass. Click here for details. All early entry. Late stays Friday and Saturday. Thursday late-stay is under discussion. Gatorland IPT #1 is best for killer breeding plumage Great Egrets. With chicks. Also Wood Stork and Cattle Egret. Surprisingly, there are already more than a few Snowy Egrets and Tricolored Herons in breeding plumage! Learn to get the right exposure, flight photography techniques, my secret Gatorland spots, how to see the best situations (nobody is better at that than me), and how to make great images in extremely cluttered situations.
|
|
Tame birds in breeding plumage are great fun. |
Gatorland IPT #2. Sunrise: 6:48am. Sunset: 7:58pm.
3 1/2 DAYs: THURS 26 APR through and including the morning of SUN 29 APR. $1599. Limit 5 photographers.
(2 1/2 DAY option) FRI 27 APR through and including the morning of SUN 29 APR. $1199.
Must purchase Gatorland Photographers Pass. Click here for details. All early entry. Late stays Friday and Saturday. Thursday late-stay is under discussion. Gatorland IPT #2 should have lots of chicks, and lots of birds in breeding plumage. We will get to photograph Great Egret, Snowy Egret, Tricolored Heron, and Wood Stork. The Cattle Egrets in full breeding plumage will be present in good numbers. Learn my Gatorland strategy, to get the right exposure, flight photography techniques, my secret Gatorland spots, how to see the best situations (nobody is better at that than me), and how to make great images in extremely cluttered situations.
|
|
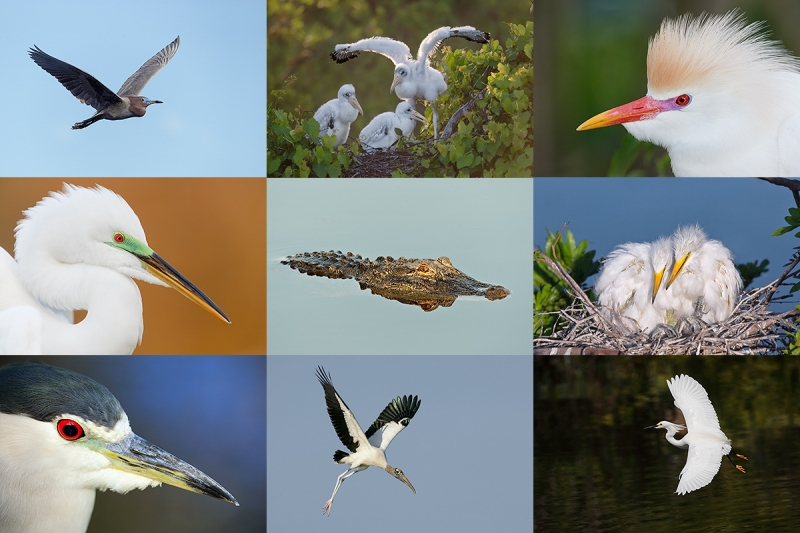
Large Tricolored Heron chicks (lower left) are to die for! |
Gatorland #3. Sunrise: 6:33am. Sunset: 8:10pm.
3 1/2 DAYs: THURS 17 MAY through and including the morning of SUN 20 MAY. $1599. Limit 5 photographers.
(2 1/2 DAY option) FRI 18 MAY through and including the morning of SUN 20 MAY. $1199.
Must purchase Gatorland Photographers Pass. Click here for details. All early entry. Late stays Friday and Saturday. Thursday late-stay is under discussion. Gatorland IPT #3 is best for medium sized chicks of the following species: Cattle Egret, Snowy Egret, and Tricolored Heron. Head portraits of handsome fledged Great Egrets are pretty much guaranteed. Learn to get the right exposure, flight photography techniques, my secret Gatorland spots, how to see the best situations (nobody is better at that than me), and how to make great images in extremely cluttered situations.
Help Support the Blog
Please help support my (stupendous) efforts here on the blog by remembering to click on the logo link above each time that you shop Amazon. That would be greatly appreciated. There is no problem using your Prime account; just click on the link and log into your Prime account. With love, artie
If In Doubt …
If in doubt about using the BAA B&H affiliate link correctly, you can always start your search by clicking here. Please note that the tracking is invisible. Web orders only. Please, however, remember to shoot me your receipt via e-mail.


Please Remember to use my Affiliate Links and to Visit the New BAA Online Store 🙂
To show your appreciation for my continuing efforts here, we ask, as always, that you get in the habit of using my B&H affiliate links on the right side of the blog for all of your photo and electronics purchases. Please check the availability of all photographic accessories in the New BIRDS AS ART Online Store, especially the Mongoose M3.6 tripod head, Wimberley lens plates, Delkin flash cards and accessories, and LensCoat stuff.
As always, we sell only what I have used, have tested, and can depend on. We will not sell you junk. We know what you need to make creating great images easy and fun. And please remember that I am always glad to answer your gear questions via e-mail.
I would of course appreciate your using our B&H affiliate links for all of your major gear, video, and electronic purchases. For the photographic stuff mentioned in the paragraph above, and for everything else in the new store, we, meaning BAA, would of course greatly appreciate your business. Here is a huge thank you to the many who have been using our links on a regular basis and those who will be visiting the New BIRDS AS ART Online Store as well.
Be sure to like and follow BAA on Facebook by clicking on the logo link upper right. Tanks a stack.
Typos
In all blog posts and Bulletins, feel free to e-mail or to leave a comment regarding any typos or errors. Just be right :).



Hey Arthur, I’m going with c. The sweet light makes the ibis really pop against all that dark background. Small in the frame is another reason. The light makes the avocet pop against all the dark water and i like the side lighting. The ripples in the water are nice as well.
Hi Artie,
b. I much prefer image #2 because of the position of the bird and the lovely lighting on the bird. For me, the avocet really stands out from the background whereas I am drawn away from the ibis from the distracting foliage in the image.
Jake
Artie: I prefer image 2. I love avocets and the pose and lighting on this one are great. I wojld prefer to have the bird larger in the frame.
d) and here’s why. I find the pose and light more interesting in the first image but the muddy background trees are distracting. Perhaps a tighter crop would work better? The second image has a less cluttered background but I feel the subject is a bit too far to the right especially with the bird looking in that direction and the light/pose are not as engaging. Sorry, but that’s my opinion.
Well, it’s nice to know that I am not wrong ***all*** of the time. 😉
I prefer the tones of the second image, the first has a bit too much contrast for my taste, but I like the bird in the first image better, with the beak hidden it is tough to tell what the second image is about. I also agree with Elinor and Tim that the second would be a better image with the bird on the left rather than the right where it appears to be headed out of the frame.
Except that I did mess up on the math, twice, (40 years of photography for nothing!) but two wrongs made a right! However, I think this means that I am disqualified. 🙁
Keith Swindell: Like you, I understood the concepts but messed up the math, not once but twice. Embarrassing….:(
Hi Artie
I prefer image 1 because the ibis is beautifully lit and looks like he is walking into the frame. For image 2 something inside tells me the avocet should be on the left of the frame, I don’t know why! We get pied avocets here across the pond. When exposing for black and white birds do you let some of the white ‘blow out ‘ if you required to stop the overall image becoming too dark? Thanks
#2 for me because the water has a beautiful color and all the same. In #1 the water is dark with no texture farther back but has light areas closer in, neither of which have a beautiful color to me. Since the avocet’s eye seems to be pointing between straight out and right, if it were possible, I would like it better placed on the left side. If it were facing directly left then I would like it where it is, on the right side. Now the more I look, the harder it is to choose. I like just the suggestion of mangroves behind the Ibis. And I’m liking the water there better now.
Back button focus – did you set custom setting a8? http://onlinemanual.nikonimglib.com/d850/en/18_menu_guide_05_a08.html