What’s Up?
Saturday was dark and rainy. I took it pretty easy all day watching college football and then the amazing game six of the ALCS. Congrats to the Houston Astros and their walk-off mightly mite, Jose Altuve. (I was rooting for the Yankees …) I did get into the pool late in the day. It is 6:51am on Sunday October 20 and I am heading down to the lake in a few minutes.
Need System or Upgrade Advice?
These are certainly exciting and volatile times in bird and nature photography: Canon, Nikon, SONY? Upgrade or switch systems? Yikes! If you are thinking about switching or upgrading and have questions, feel free to call me on my cell at 863-221-2372 for a free ten-minute consultation. The only thing that I ask in return is that you make a firm commitment to use my B&H affiliate links or to buy from Bedford using the BIRDSASART discount code at checkout if you decide to go forward. Remember that Steve Elkins at Bedford can save you a few additional bucks on lens/camera/accessories packages. See the blog for his contact details. Either way, it will not cost you one penny more.
Be sure to leave a message if I do not pick up and I will get back to you. And please follow that up with an e-mail or a text stating your name and a good time for me to call you back. I spend lots of time each day walking, swimming, and watching football and baseball 🙂 And napping.
|
|
|
i-Phone 8+ image in Portrait Mode by Jim Litzenberg Setting the Tripod Up in the Vehicle/Best by far with the FlexShooter Pro |
The Setting up a Tripod in your Vehicle MP4 Video
$10 here in the BAA Online Store or free with your purchase of the life-changing FlexShooter Pro Head.
This seven-minute video will teach you exactly how to set up a tripod in most vehicles. You can do this with pretty much any tripod that does not have a center post. It is just one of the many reasons that I do not like or use a tripod with a center post. As I did for more than two decades, you can use this strategy with any ballhead or with a Wimberley V2 head or a Mongoose M3.6 action head, but the FlexShooter Pro has several huge advantages. First and foremost you are able to level the large silver ball. This enables you to pan with moving subjects and shoot action and even flight from the driver’s seat of your vehicle all while the camera remains 100% square to the world, aka “level.” The second big advantage is the FlexShooter Pro has a lower profile than either of the other two heads mentioned so that you can be low enough to work subjects on the ground that are relatively close to your car.
You can order your copy of this MP4 video here in BAA Online Store. It is free with the purchase of a FlexShooter Pro head. Those who have previously purchased the FlexShooter Pro from us can e-mail to request their free copy.
IPT Updates
- The Return to Bosque Reduced Rate Scouting IPT. NOV 26-28, 2019 — 3 FULL DAYS: $1199.00. Limit: 8/Openings: 6. Extra Day Options: Join me for one to three extra In-the-Field Days at the end of the IPT as follows: FRI 29 NOV, SAT 30 NOV, and SUN 1 DEC for only $300.00/day.
- The 2020 San Diego 4 1/2-DAY BIRDS AS ART Instructional Photo-Tour (IPT) WED JAN 8, 2020 thru and including the morning session on SUN JAN 12: 4 1/2 days: $2099.(Limit: 8/Openings: 5)
BIRDS AS ART
BIRDS AS ART is registered in the U.S. Patent and Trademark Office.
FlexShooter Pro News
All FlexShooter Pro BigFeet are now in stock in the BAA Online Store. You can click on the chart above or here for more information.
Coming Soon
The FlexShooter Mini
The Mini has experienced further unavoidable production delays.
Several months ago I had a FlexShooter Mini to test on both the UK Puffins and Gannets IPT and the Galapagos Photo-Cruise of a Lifetime. It is a smaller, lighter (one pound!) version of the amazing FlexShooter Pro. I used it often with both the Nikon 500 PF and the SONY 100-400 GM with great success and in a pinch, I was able to make sharper images with the Nikon 600 and the TC-E14. All with the Mini mounted on the lighter Induro GIT 204. I suggested to developer/manufacturer Csaba Karai that the Mini needed a bit more spring tension. As there was a problem getting the balls for the new Minis anodized properly, delivery will be delayed several weeks. 🙁 When we do receive our first shipment, the Minis will have my suggested changes.
The FlexShooter Mini with the lighter Induro GIT 204 is dead-solid-perfect for those whose intermediate telephoto or telephoto zoom is their workhorse lens for bird and nature photography. It will sell for $579 plus shipping. Folks who wish to be assured of getting one from our first shipment can order theirs by phone by calling Jim at 863-692-0906 asap. Your card will not be charged until your Mini is shipped. We already have five orders to ship from our first shipment.
FlexShooter Pro Update
We currently have only two FlexShooter Pro heads in stock here. All BigFeet are in stock in the BAA Online Store here. Click here to access the pretty-much-complete FlexShooter Pro story with videos.
Money Saving Reminder
If you need a hot photo item that is out of stock at B&H, would enjoy free overnight shipping, and would like a $50 discount on your first purchase over $1000.00, click here to order and enter the coupon code BIRDSASART at checkout. If you are looking to strike a deal on Canon or Nikon gear (including the big telephotos) or on a multiple item order, contact Steve Elkins via e-mail or on his cell at (479) 381-2592 (Eastern time) and be sure to mention your BIRDSASART coupon code and use it for your online order. Steve has been great at getting folks the hot items that are out of stock at B&H. Those include the SONY a7r IV, the SONY 200-600, the SONY 600mm f/4 GM, and the Nikon 500mm PF. Steve is eager to please.


Gear Questions and Advice
Too many folks attending BAA IPTs and dozens of photographers whom I see in the field and on BPN, are–out of ignorance–using the wrong gear especially when it comes to tripods and more especially, tripod heads… Please know that I am always glad to answer your gear questions via e-mail. Those questions might deal with systems, camera bodies, accessories, and/or lens choices and decisions.
|
|
|
i-Phone8+ image Image #1: Turkey Vultures at impromptu feeder |
The Situation: An Impromptu Vulture Feeder
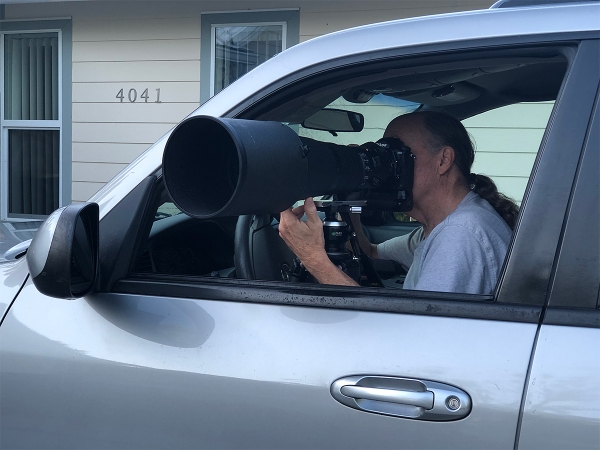
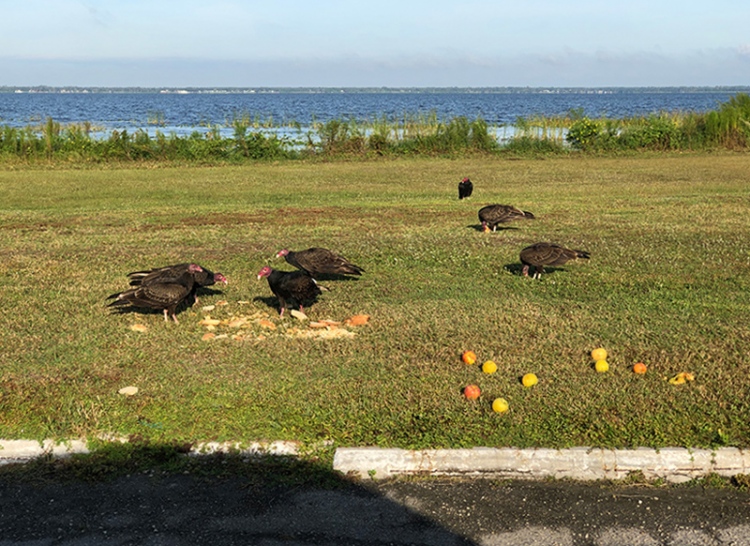
As I mentioned in the last blog post, someone dumped a load of bread, pretzels, and apples on the grass at the parking circle near the pier very early on Thursday morning. When I arrived for my walk, there were lots of Boat-tailed Grackles. But when I finished there were several Turkey Vultures dining on the stale bread and fresh apples. Go figure. I set up my Induro GIT 304 in the car topped by the FlexShooter Pro and went to work at 1200mm with the a7r IV. I did drive very, very slowly as I got into position. On Friday morning, there were lots of Black Vultures partaking of the remaining apples. Who knew?
Note by the position of the shadow of my Sequoia that I am pretty much on sun angle for the four vultures on the left. Of those four, the bird in the front right had the brightest head and is the subject of this photo. I worked the scene for about 40 minutes. And I did make some similar images of the younger birds with the duller heads. As it is pretty much impossible to level the tripod platform when setting up in a vehicle, being able to level the silver ball of the FlexShooter Pro is a huge plus. In the right situation, it is that feature that allows me to shoot flight from the driver’s seat … The word is spreading as we are still selling one or two Pro heads each week.
|
|
|
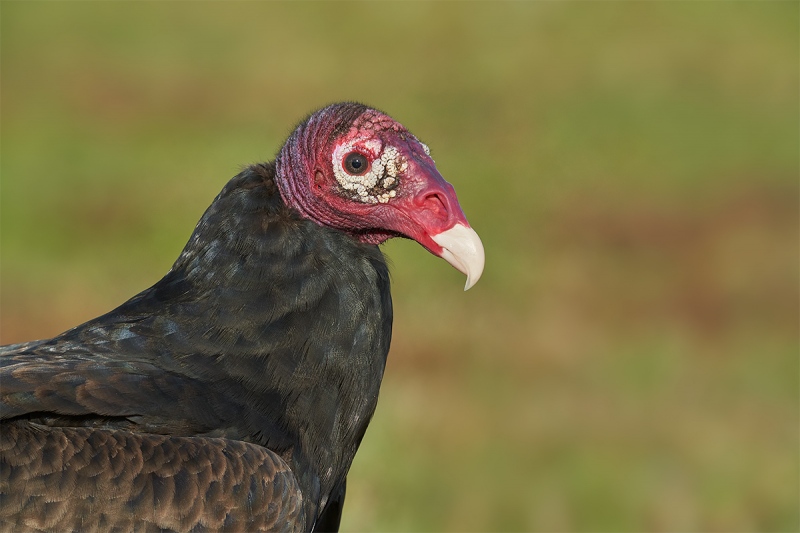
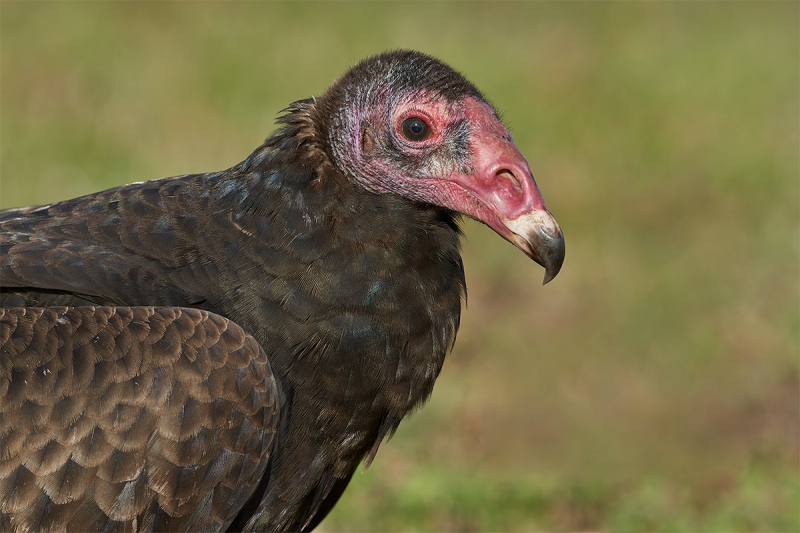
This image was created on October 17, 2019 at Indian Lake Estates, FL. Working from the driver’s seat of my SUV, I used the Induro GIT 304/FlexShooter Pro-mounted Sony FE 600mm f/4 GM OSS lens, the Sony FE 2.0x teleconverter, and the 61-MP monster, the Sony Alpha a7R IV Mirrorless Digital Camera Body. ISO 800. Exposure determined by Zebras with ISO on the rear dial: 1/400 sec. at f/13 in Manual mode was about +1/3 stop on the analog scale. AWB at 8:50am in sunny morning. Flexible Spot (S) Continuous/tracking AF was active at the moment of exposure. I selected an AF point to cover the bird’s eye. With large in the frame subjects like this, Animal Eye Tracking works very well even though it is not supposed to work on birds. But heck, an eye is an eye. Image #2: Turkey Vulture, adult head and shoulders portrait |
Back in the 1200mm Saddle
It is absolutely wonderful to be able to work confidently at 1200mm with the 600 GM, the FE 2X teleconverter, and the a7r IV. Doing so with Nikon was nearly impossible. With Canon, I did well at 1200mm but the SONY rig blows it away with fast, accurate AF over 93% of the frame. With SONY, in low light, low contrast situations AF with the very outer AF point occasionally chatters and searches. In most situations, initial focus acquisition is quite fast and AF holds focus perfectly.
As the birds were on a slight rise, there was a decent amount of background separation so working at f/13 — stopped down 1 1/3 clicks from wide-open (f/8), did not bring up any unwanted background detail. Clean, tight, and graphic has long been my preferred style so the switch to SONY has enabled me to get back to my roots.
|
|
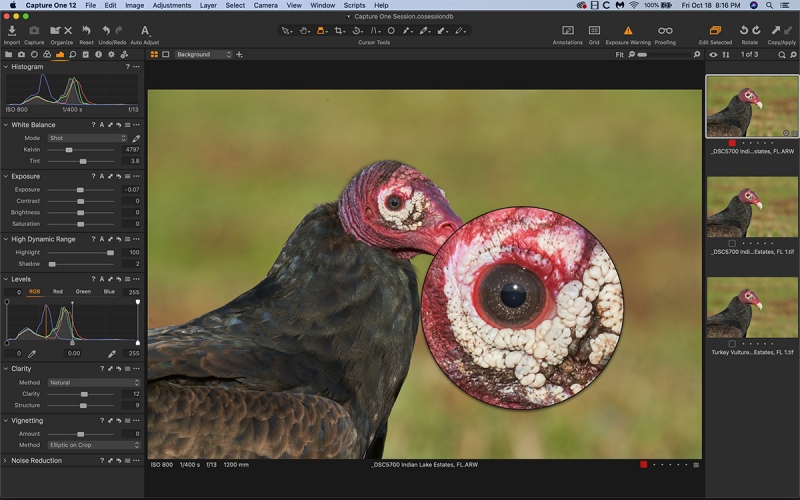
Image #2A: Capture One screen capture |
A7r IV Sharpness and Resolution
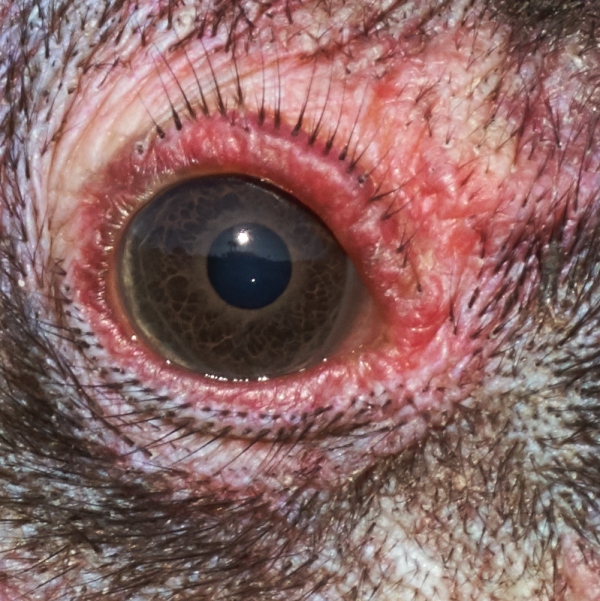
Capture One large Loupe at 100% magnification. Check out the incredible sharpness and the iris detail at 1200mm. The 61MP files of the a7r IV are velvety smooth yet finely detailed and offer color that fits the color-space in my mind.
|
|
|
This image was also created on October 17, 2019 at Indian Lake Estates, FL. Again, working from the driver’s seat of my SUV, I used the Induro GIT 304/FlexShooter Pro-mounted Sony FE 600mm f/4 GM OSS lens, the Sony FE 2.0x teleconverter, and the 61-MP monster, the Sony Alpha a7R IV Mirrorless Digital Camera Body. ISO 400. Exposure determined by Zebras with ISO on the rear dial: 1/400 sec. at f/13 in Manual mode was about +2/3 on the analog scale. AWB at 9:02am in sunny morning. Flexible Spot (S) Continuous/tracking AF was active at the moment of exposure. I selected an AF point to cover the bird’s eye. With large-in-the-frame subjects like this, Animal Eye Tracking works very well even though it is not supposed to work on birds. But heck, an eye is an eye. Image #3: Turkey Vulture, sub-adult head and shoulders portrait |
Sub-adult Turkey Vulture
I call the bird in Image #3 a “sub-adult” because it has a dark bill tip but has lots of red on its face. Juveniles have gray heads and the bill tip is completely black. I am not sure if this bird is a hatch-year bird or a 1 1/2 year-old bird.
Exposure Question
ISO 400 with 1/400 sec. at f/13 is half the exposure resulting from ISO 800 with 1/400 sec. at f/13. How could this possibly be correct given the fact that the lighting conditions were identical?
|
|
Image #3A: A Photoshop unsharpened 100% screen capture |
Your Call?
How would you judge the sharpness and fine detail in this unsharpened 100% crop? Do check out the detail in the iris and those eyelashes.
|
|
The Capture One Pro-12 Simplified Video
|
The Capture One Pro-12 Simplified Video
$15.00 via electronic download
As below, Capture One did a great job of converting the RAW (NEF) files for today’s featured images.
When I first heard about doing RAW conversions in Capture One Pro 12 I purchased the somewhat pricey program and tried to figure it out on my own. I was totally lost. So I did some reading online and was still very confused. Then I consulted Arash Hazeghi’s comprehensive The Nikon Photographers’ Guide to Phase One Capture One Pro e-Guide and while Arash does a great job of covering the fine points, I still had some difficulty getting started. I thought Who needs Sessions and who wants to have to Import images? So I consulted Patrick Sparkman, the BAA technical advisor. Patrick had been using C-1 Pro 12 for a while. We spent a good deal of time on FaceTime simplifying things. That video is a direct result of those conversations.
You can purchase your copy in the BAA Online Store here.
If you are new to Capture One Pro-12, please click here to order. Understand that C-1 Pro 12 is expensive for good reason … Are your photos worth it?
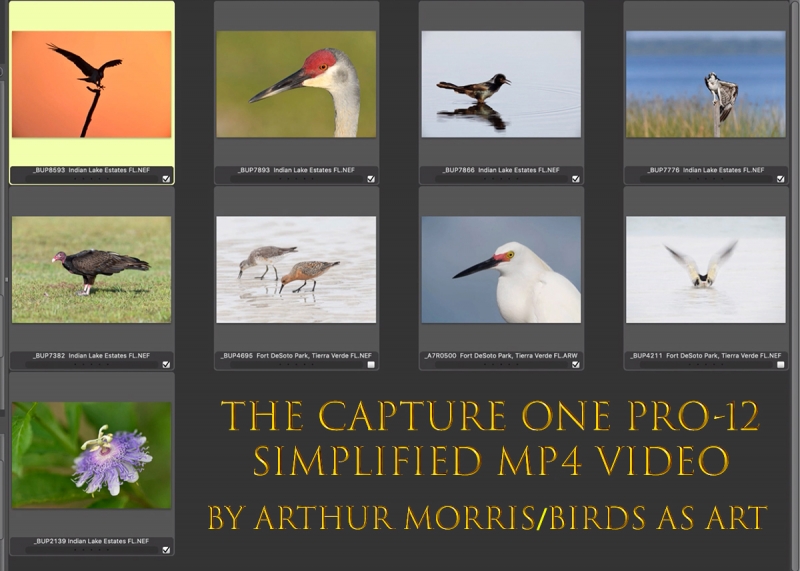
Here are some of the things you will learn in this 33+ minute video as we convert nine different RAW files (eight Nikon and one SONY) from soup to nuts, from Photo Mechanic through the RAW conversion in Capture One to Photoshop:
- 1-How to quickly and easily find your images while working in a simple file folder format.
- 2-How to customize your Exposure and Details tabs to streamline your workflow.
- 3-How to set the White and Black points using Levels.
- 4-How to adjust set the values for the relevant sliders including Exposure, White Balance, High Dynamic Range (the Highlight and Shadow sliders), and Clarity and Structure.
- 5-How to work at 100 or 200% and fine-tune your settings for Noise Reduction and Sharpness.
- 6-How to work with the Color Editor
If you are trying to get a handle on how to use this great RAW conversion engine for your Nikon and SONY images, this video is just what you have been looking for. It is meant to serve as an adjunct to Arash’s comprehensive The Nikon Photographers’ Guide to Phase One Capture One Pro e-Guide. For Canon shooters, Arash and I both recommend using DPP 4.
|
|
The BAA Middle of Florida Photographic Site GuideYou can purchase your copy here in the BAA Online Store. |
The BAA Middle of Florida Photographic Site Guide
126 pages, 87 photographs by Joe Przybyla and Arthur Morris.
The PDF for this e-Guide is an electronic download sent via e-mail.
Purchase your copy here in the BAA Online Store.
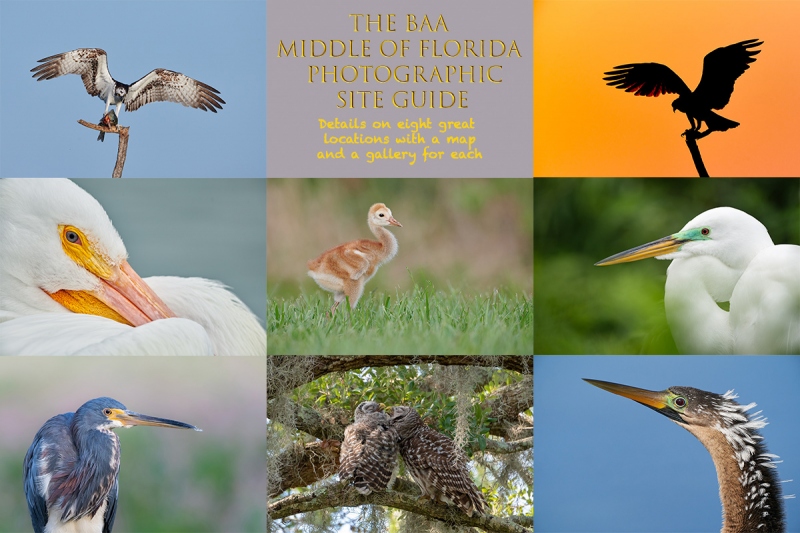
I had thought about doing a guide to some of the great but little-known photo hotspots around central Florida for about a decade, but those plans never came to fruition. I met Joe online in the Avian Forum at BirdPhotographer’s.Net about two years ago. Joe’s photography has improved tremendously over the past few years; he credits the BAA blog, my books and PDFs, and his participation on BPN. The one thing that I learned right from the get-go about Joe is that he is a hard and tenacious worker, always striving to improve his skills and to grow his knowledge base. As he knew of more than a few good spots in central Florida, I broached the idea of us doing a photographic site guide that covered many of the little-known photographic hotspots from Brandon to Lakeland to Joe Overstreet Road to Indian Lake Estates (my Florida home for the past 20 years or so). After more than many, many dozens of hours of effort, The BIRDS AS ART Middle of Florida Photographic Site Guide is now a reality. Thanks to Joe’s wife Dottie for her review of our writing. We all learned once again that writing is a process, a back and forth process. All thanks to the white pelicans of Lakeland. Here are the locations that are detailed in this e-Guide:
- Indian Lake Estates: Sandhills Cranes with chicks and colts, lots of vultures, and Ospreys up the kazoo!
- Gatorland, Kissimmee: Learn to make great images of wading birds in a cluttered rookery.
- The Brandon Rookery: Great for nesting Wood Storks, Great Egrets, and more.
- Circle Bar B Reserve, Lakeland: Here you will find a great variety of avian subjects in a great variety of habitats.
- Lake Morton, Lakeland: There are lots of silly tame birds here including and especially American White Pelican during the colder months.
- Lake Mirror, Lakeland: Tame Anhingas, Limpkins, and a zillion White Ibises at times.
- West Lake Parker, Lakeland: Here you will have a chance for two difficult birds, Snail Kite, and Purple Gallinule.
- Joe Overstreet Road, Kenansville: Crested Caracara, meadowlarks, Loggerhead Shrike, and much more on the fenceposts and barbed wire.
Each location includes a map, a detailed description of the best spots, best season, light and time of day instructions, the expected species, and an educational and inspirational gallery that is designed to open your eyes as to the possibilities.
You can purchase a copy here in the BAA Online Store.
If In Doubt …
If you are in doubt about using the BAA B&H affiliate link correctly, you can always start your search by clicking here. Please note that the tracking is invisible. Web orders only. Please, however, remember to shoot me your receipt via e-mail.


Please Remember to use my Affiliate Links and to Visit the BAA Online Store 🙂
To show your appreciation for my continuing efforts here, we ask, as always, that you get in the habit of using my B&H affiliate links on the right side of the blog or Bedfords, for all of your photo and electronics purchases. Please check the availability of all photographic accessories in the New BIRDS AS ART Online Store, especially the Mongoose M3.6 tripod head, Wimberley lens plates, Delkin flash cards and accessories, and LensCoat stuff.
As always, we sell only what I have used, have tested, and can depend on. We will not sell you junk. We know what you need to make creating great images easy and fun. And please remember that I am always glad to answer your gear questions via e-mail.
I would, of course, appreciate your using our B&H affiliate links or Bedfords for all of your major gear, video, and electronic purchases. For the photographic stuff mentioned in the paragraph above, and for everything else in the new store, we, meaning BAA, would of course greatly appreciate your business. Here is a huge thank you to the many who have been using our links on a regular basis and those who will be visiting the New BIRDS AS ART Online Store as well.
Be sure to like and follow BAA on Facebook by clicking on the logo link upper right.
Typos
In all blog posts and Bulletins, feel free to e-mail or to leave a comment regarding any typos or errors. Just be right :).





I am a little north of Atlanta. I grew up in Northeast Florida (jacksonville beach area) and go back there to visit family a couple of times a year, but always watching weather there or hearing about it on the phone….
Thanks. Did you ever photograph the nesting terns and gulls on the beaches?
with love, artie
Hey Arite, I’m impressed, it appear Sony gear is working well for you. Thank you for sharing and your blog.
Rodgers had one of his best games ever. I was born in Wisconsin and have been a life long Packers fan. My Dad had a tryout with the Packers in the mid-1950’s but the pay was so low then he took a different tack and became a tool and die designer for Cutler-Hammer. The Lombardi days were incredible but that goes way way back
I think it was his best game ever 🙁 So I guess that you are saying that you can I go way back too 🙂
with love, artie
Greetings Artie!
I’m stumped by your exposure quiz. If you are in manual mode and the lighting doesn’t change, the exposure of the subject should not change come what may…I think that’s what you taught me! Ah, but the subject is not the same so I’m guessing there is a difference in the darkness of the two subjects.
Guess #2 is you merely compensated for the difference in ISO with the exposure slider in Post, but I don’t think you’d quiz us on that!
Hi Ed,
Thanks for making me realize that I totally screwed up here … I was going for the fact that for Image #1 to be properly exposed it would have required less light than Image #2. Why? Because we need to expose properly for the ivory-white bill tip — WHITEs need less light to be properly exposed than middle tones. So far, so good. But since the ISO for Image #1 was double the ISO for Image #2, I gave more light to the exposure. The only explanation for this apparent screw-up is that the sun was partially covered by a light cloud when I made Image #1 (though it does not look that way …)
My bad.
with love, artie
Glad to see you back in the 1200mm realm …. it seems to be perhaps your most enjoyable technique. I could tell you were missing it during your brief Nikon era. The image detail with a great lens, a 61 mp sensor and great technique is astounding. I am always impressed by the detail in the iris of the bird’s eyes in your images. Kudos once again.
(PS: Go Packers!)
Thanks, Joel. How did Aaron Rodgers do yesterday? 🙂
with love, a
ps: I have not liked the Packers since Lombardi left!
Sharpness is incredible!
Also, you mentioned that you could shoot f13 and not bring any background into focus because of the distance, which I understand. My question is to confirm “Why” you went to f13 rather than shoot wide open at f8 and be able to drop the iso or increase the shutter speed.
I assume the main reason was to increase the depth of field and get the whole bird, including the close wing, into focus. I also guess you are that comfortable with the iso performance of the a7RIV that you were not worried about noise.
Is that about right?
Enjoy Sunday football. Better weather today than yesterday!
Hi Waren, Good on you for commenting and asking questions — the best way to learn.
I agree on the amazing sharpness. It was not the distance to the subject that softened the BKGR. The bird was on a slight rise, a little hill if you would. That effectively moved the background farther away than if the bird had been sitting on level ground and I was shooting down on it from the car. Then the grass close to the bird would have become distractingly sharp …
I went to f/13 for a bit of extra sharpness. As I was pretty close to the bird, maybe 20 feet or so, the depth of field is measured only in small fractions of a single inch … An online d-o-f calculator shows that the total d-o-f at 1200mm with a full-frame camera at f/13 at 20 feet is 5/100 foot or on 6/10 of one inch. Not nearly enough to sharpen the wing feathers. The neck feathers are pretty close to being on the same plane as the face. All of the SONY bodies do great with noise. Giants lost but I had two great swims.
Where do you live?
with love, artie