What’s Up?
Thursday was a relatively nice day with only a few sprinkles here and there. I photographed some wildflowers in the morning. I almost finished e-mail #21 (Memory Cards and More …) for the SONY Alpha a1 Info and Updates group.I will complete and distribute that this morning. The group has been growing pretty much daily as the world’s best camera for bird photography becomes more and more available. Better yet, no more EVF blackout!
The forecast for this morning, Friday 9 July 2021, is for partly cloudy with almost no wind, pretty much ideal for flower photography. I found another Alligatorlily last night and will try again … Wherever you are, and whatever you are doing, I hope that you too have a great day.
This blog post took about 90 minutes to prepare and makes 194 consecutive days with a new one. Please remember that if an item — a Delkin flash card, or a tripod head — for example, that is available from B&H and/or Bedfords and is also available in the BAA Online Store, it would be great, and greatly appreciated if you would opt to purchase from us. We will match any price. Please remember also to use my B&H affiliate links or to save 3% at Bedfords by using the BIRDSASART discount code at checkout. Doing either often earns you free guides and/or discounts. And doing so always earns my great appreciation.
Please Remember
With income from IPTs now close to zero, please, if you enjoy and learn from the blog, remember to use one of my two affiliate programs when purchasing new gear. Doing so just might make it possible for me to avoid having to try to get a job as a Walmart greeter and will not cost you a single penny more. And if you use Bedfords and remember to enter the BIRDSASART code at checkout, you will save 3% on every order and enjoy free second-day air shipping. In these crazy times — I am out at least forty to sixty thousand dollars so far due to COVID 19 (with lots more to come) — remembering to use my B&H link or to shop at Bedfords will help me out a ton and be greatly appreciated. Overseas folks who cannot order from the US because of import fees, duties, and taxes, are invited to help out by clicking here to leave a blog thank you gift if they see fit.
New and Better Bedfords Discount Policy!
You can now save 3% on all of your Bedfords photo gear purchases by entering the BIRDSASART coupon code at checkout. Your discount will be applied to your pre-tax total. In addition, by using the code you will get 2nd day air shipping via Fed Ex.
Grab a Nikon AF-S Teleconverter TC-14E III and save $14.99. Purchase a Canon EOS R5 and your discount will be $116.97. Purchase a Sony FE 600mm f/4 GM OSS lens and save a remarkable $389.94! Your Bedford’s purchase no longer needs to be greater than $1,000.00 for you to receive a discount. The more you spend, the more you save.
Money Saving Reminder
Many have learned that if you need a hot photo item that is out of stock at B&H and would enjoy free second-day air shipping, your best bet is to click here, place an order with Bedfords, and enter the coupon code BIRDSASART at checkout. If an item is out of stock, contact Steve Elkins via e-mail or on his cell phone at (479) 381-2592 (Central time). Be sure to mention the BIRDSASART coupon code and use it for your online order to save 3% and enjoy free 2nd-day air shipping. Steve has been great at getting folks the hot items that are out of stock at B&H and everywhere else. The wait lists at the big stores can be a year or longer for the hard to get items. Steve will surely get you your gear long before that. For the past year, he has been helping BAA Blog folks get their hands on items like the SONY a9 ii, the SONY 200-600 G OSS lens, the Canon EOS R5, the Canon RF 100-500mm lens, and the Nikon 500mm PF. Steve is personable, helpful, and eager to please.


Gear Questions and Advice
Too many folks attending BAA IPTs (remember those?) and dozens of photographers whom I see in the field and on BPN, are–out of ignorance–using the wrong gear especially when it comes to tripods and more especially, tripod heads… Please know that I am always glad to answer your gear questions via e-mail
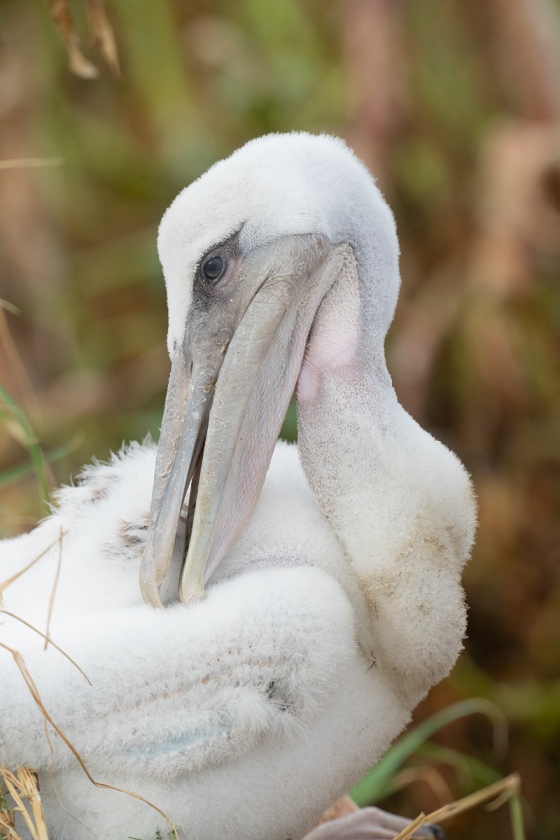
Image #1: The original for the Large Brown Pelican chick preening in nest image. |
The Original
This is the original for the Large Brown Pelican chick preening in nest image that was featured in the The JAX Colony is Not Just Royal Terns and Laughing Gulls blog post here.
Blog regular, David Policansky (AKA Dr. Fish), commented in part:
I too was instantly struck by the piece of dead grass in image 1. I’ve never seen you do that, Artie, but it’s the kind of thing I do all the time. And it doesn’t bother me at all. David
Arthur Morris/BIRDS AS ART replied;
I decided that I should leave one section of grass so that it would not look too perfect 🙂. with love, artie
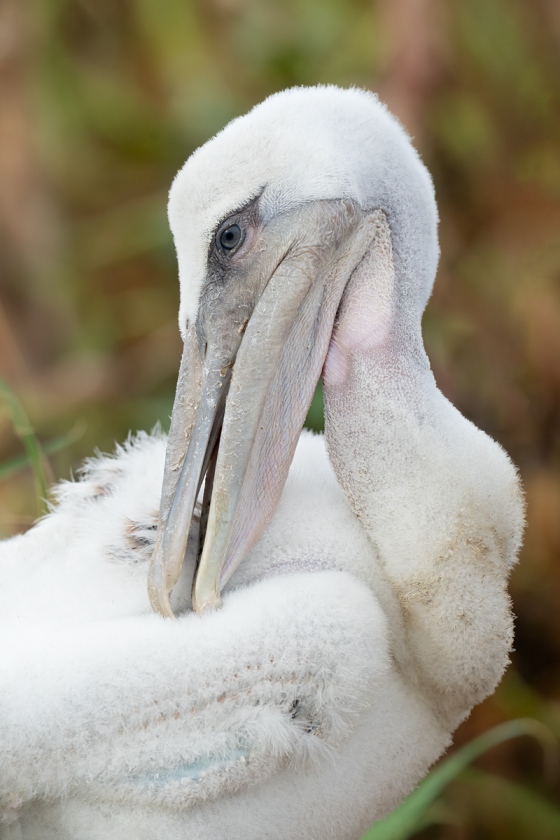
I do understand that some folks would prefer Image #1 (above) to Image #1A (below) as it is more natural.
|
|
|
This image was created on 1 July 2021 on a beach near Jacksonville, FL. Standing at full height, I used the Induro GIT 304L/ Levered-Clamp FlexShooter Pro-mounted-Sony FE 600mm f/4 GM OSS lens, the Sony FE 2.0x Teleconverter, and The One, the Sony Alpha 1 Mirrorless Digital Camera (Body Only). ISO 1250. The exposure was determined by Zebras with ISO on the rear wheel: 1/500 sec. at f/9 (stopped down (1/3-stop) in Manual mode. RawDigger showed this exposure to be 1/3 stop too dark. AWB at 8:26am on a cloudy morning. Wide/AF-C was active at the moment of exposure and performed perfectly. Click on the image to enjoy a larger version. Image #1A: Cleaned up in response to popular demand |
In Response to Popular Demand
Anyhoo, I decided to create a perfectly clean version, Image #1A, immediately above. Such clean-ups are best done using the Divide and Conquer technique that was detailed in last version of Digital Basics but was inadvertently omitted from Digital Basics II. Though I use the Clone Stamp for the Divide, I would never use it to do the whole repair.
Since I just discovered that Divide and Conquer is not included in DB II, I decide to share the technique here, adapted from the last update to the original Digital Basics.
Divide and Conquer
Let’s say that you have a long branch in the background that needs to be removed. Best would be to use a Quick Mask, but in many instances there is simply not enough matching background with which to cover the distracting branch. The Patch Tool is greatly preferred to the Clone Stamp as the Patch Tool blends texture while the Clone Stamp copies texture-less color. It is often impossible to patch a long branch in one fell swoop, and if you try the Patch Tool on small sections of the branch, you will encounter terrible smudging. What to do? Divide and Conquer. By cutting the offending branch into two or more pieces, you can create manageable sections. Loggers cut a big tree trunk into sections that can be much more easily handled than the entire trunk. To cut up your distracting branch, use the Clone Stamp at 20% opacity. Note: if the tonality on one side of the branch is of a slightly different tonality or color than the other, be sure to work from both sides. Once you have cut the branch into manageable sections, you can use the Patch Tool to eliminate the remaining sections.
|
|
The BIRDS AS ART Current Workflow e-Guide (Digital Basics II).You can order your copy from the BAA Online Store here, by sending a PayPal for $40 here, or by calling Jim or Jennifer weekdays at 863-692-0906 with your credit card in hand. Be sure to specify Digital Basics II. |
The BIRDS AS ART Current Workflow e-Guide (Digital Basics II)
The Photoshop Tools used with all of my clean-up techniques along with dozens of other great Photoshop tips and techniques — along with all of my personalized Keyboard Shortcuts, are covered in detail in the BIRDS AS ART Current Workflow e-Guide (Digital Basics II), an instructional PDF that is sent via e-mail. Learn more and check out the free excerpt in the blog post here. While the new e-Guide reflects my MacBook Pro/Photo Mechanic/DPP 4/Photoshop workflow, folks using a PC and/or BreezeBrowser will also benefit greatly by studying the material on DB II. Note: folks working on a PC and/or those who do not want to miss anything Photoshop may wish to purchase the original Digital Basics along with DB II while saving $15 by clicking here to buy the DB Bundle.
Folks who learn well by following along rather than by reading can check out the complete collection of MP 4 Photoshop Tutorial Videos by clicking here. Note: all of the videos are now priced at an amazingly low $5.00 each.
You can learn how and why I converted all of my Canon digital RAW files in DPP 4 in the DPP 4 RAW Conversion Guide here. More recently, I became proficient at converting my Nikon RAW (NEF) files in Adobe Camera Raw. About two years ago I began converting my Nikon and Sony RAW files in Capture One Pro 12 and continue to do so today.
You can learn advanced Quick Masking and advanced Layer Masking techniques in APTATS I & II. You can save $15 by purchasing the pair.
|
|
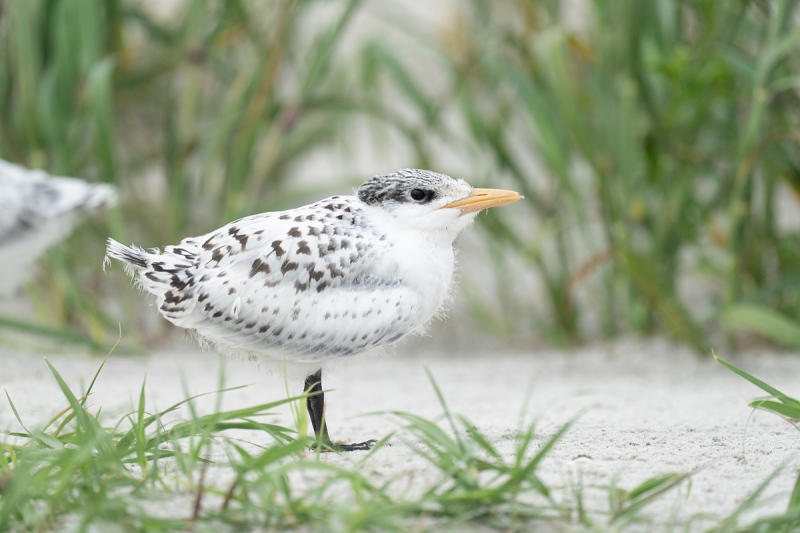
Image #2: The original for the Least Tern chick standing near a beach vegetation/new growth image |
One Bird Butt Too Many
I was a bit concerned that removing the rear end of the extraneous tern on the left frame-edge would require lots of time and effort, but I decided to try a single technique that might remove the extra bird butt in ten seconds. I was amazed when it worked perfectly. How did I do it? What technique or techniques would you have used?
Folks who leave a comment will receive the answer via e-mail detailing how I did the repair in one fell swoop.
|
|
|
This image was created on 1 July 2021 on a beach near Jacksonville, Florida. While seated on dry sand and using the knee-pod technique, I used the hand held Sony FE 600mm f/4 GM OSS lens with the Sony FE 1.4x Teleconverter and The One, the Sony Alpha 1 Mirrorless digital camera. ISO 1250. Exposure determined via Zebras with ISO on the rear dial: 1/1250 sec. at f/5.6 (wide open) in Manual mode. AWB at 8:48am on a cloudy morning. Tracking: Expand Spot was active at the moment of exposure and performed perfectly. Image #2A: Royal Tern chick in beach grasses |
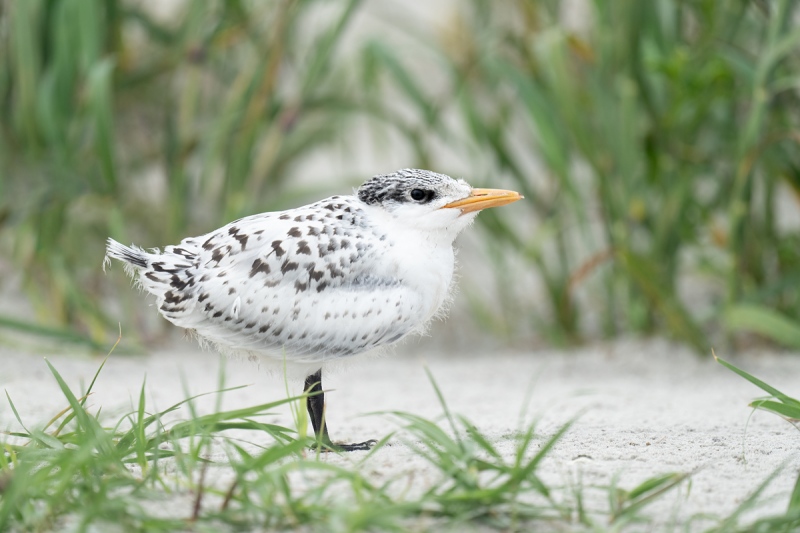
The Optimized Version
This is the optimized version of the Royal Tern chick in beach grasses image that originally appeared in the Add Green Whenever Possible … blog post here. I was stunned when the Photoshop Tool that I chose worked so effectively.
Typos
With all blog posts, feel free to e-mail or to leave a comment regarding any typos or errors.




Art: I’d do the same as a couple of other people: Select/Edit/Content Aware/Fill.
Hi Artie. Maybe the object removal tool?
oops…followed by content aware fill.
I’d use the lasso tool to select the butt and then content aware fill.
Close, and that would work, but there is a slightly better way.
with love, artie
I am enjoying your daily emails so much — thank you.
I would draw an irregular shape around the offending butt and use content aware fill.
Hi Elle, Thanks for your kind words. What would you use to make your selection?
with love, artie
I’d probably try the content aware tool first, making a rough selection around the butt. Then go from there, depending on the results.
Hi, Artie. All lovely images. I think you did bill cleanup on the least tern chick. We’re getting the remnants of Elsa here on Nantucket; south 37 mph gusting to 47 mph a few minutes ago, but very little rain. The wind is strong enough to lift the wet sand from the beach and blow it around so no photography for me for a while.
I liked all four photos and HAHA I thought the butt remove was the grass remove from image 1!!
Hiya! I do like the second much better. I wonder, though, besides editing the grass, did you enhance her eye? It looks brighter in the second shot. Thank you for sharing (also the “one butt too many” – made me giggle). Cheers!
Thanks and welcome, Pamela. I do lots of eye doctor work on many images but I do not think that I did anything to the eye during the clean-up …
with love, artie
You certainly did a great job.
I would have tried the content aware fill that Michael Hogan also suggested.
As first suggested by Cliff Beittel 🙂
with love, artie
Artie: Looking forward to learning how you removed the offending butt, as I’m still a novice with Photoshop. Thank you
This one is so, so simple …
with love, artie
Artie,
For the butt removal, I’d probably try the method described by Cliff Beittel – Select/Edit/Content Aware Fill, but I’m not sure if it would work but always worth a try. Otherwise have a good look round and see if you could use Quickmask method to copy over another piece of the grass
Michael
Used Spot healing brush tool in PhotoShop?
No Ma’am. That would not work.
with love, artie
Very nice chick images! Beautiful clean up job, can’t wait to hear how you did that in one fell swoop!
You will, via e-mail tomorrow.
with love, artie
I’ve been dividing and conquering for a long time too, a trick learned by necessity when Photoshop couldn’t handle the intersection of things that stayed with things to be deleted. I often divide using the clone tool, then conquer with spot healing or fill.
For the pelican chick, I’d leave the grasses at the bottom corners both as anchoring/framing and evidence of the nest, and remove just the grasses forming the triangle left of the bill tip.
For the butt removal, I’d circle the butt then try edit>fill>content aware. That’s usually my first choice for any repair. When it works, it’s amazing, and even when it doesn’t, it’s quick to try.
All good suggestions and ideas, Cliff.
with love, artie
I’d just select the butt and try Content Aware Fill.
How would you select the butt-end?
with love, a
You also did cleanup on the beak. Is the beak technique explained in Digital Basics II?
Beak clean-up on which photo? IAC, all of the tools used for all of my clean-up work are covered in detail in DBB II.
with love, artie
I would first try a copy & paste method, then flip, rotate, resize the layer to suit applying Hue & saturation if required. Then I’d use the patch and clone tools to tidy up the edges and blend it in. You use a far simpler and quicker method I suspect?
Yes, far simpler. Especially because there is no good source …
with love, artie
Good morning Artie! Great chick shots! To remove the chick tush I’d first try the Patch tool in Photoshop.
Good morning, Gloria. That is not what I used …
with love, artie