Your Fave?
Which of today’s five re-featured images do you feel is the strongest? Please leave a comment letting us know why you made your choice.
What’s Up?
My investigation as to what it going on at Stick Marsh with regards to the permitting of the Structure S-96 Rehabilitation project continues. Yesterday I learned that there is no USFWS permit in place. As far as I know, the only permits issued were by the Florida Department of Environmental Protection. I will try to find out today if a USFWS permit is/was required to stage a huge construction project within 50 yards of a wading bird rookery where dozens of pairs of spoonbills nest each year. Considering that Roseate Spoonbill is protected both by the U.S. Migratory Bird Treaty Act and as a State-designated Threatened species by Florida’s Endangered and Threatened Species Rule, I continue to be baffled.
I did get down to the lake twice yesterday for some photography, first early on a foggy morning, and then again late in the day for a sunset that fizzled. I have been doing my slow, 50 length swims every day. Last week the pool had been down to 80° in the mornings. With the continuing gorgeous weather, I have been enjoying balmy water temps of 86 to 88°.
Today is Thursday 9 December 2021. Wherever you are, and whatever you are doing, I hope that you too have a great day. This blog post took about two hours to prepare and makes 30 consecutive days with a new one.
Please remember that you can find some great photo accessories (and necessities, like surf booties!) on Amazon by clicking on the Stuff tab on the orange/yellow menu bar above. On a related note, it would be extremely helpful if blog-folks who, like me, spend too much money on Amazon, would get in the habit of clicking on the Amazon logo link on the right side of each blog post when they shop online. As you might expect, doing so will not cost you a single penny, but would be appreciated tremendously by yours truly. And doing so works seamlessly with your Amazon Prime account.
Please remember that if an item — a Delkin flash card, or a tripod head — for example, that is available from B&H and/or Bedfords, is also available in the BAA Online Store, it would be great, and greatly appreciated, if you would opt to purchase from us. We will match any price. Please remember also to use my B&H affiliate links or to save 3% at Bedfords by using the BIRDSASART discount code at checkout for your major gear purchases. Doing either often earns you free guides and/or discounts. And always earns my great appreciation.
Brand New and As-Good-As-Ever Bedfords BAA Discount Policy
Folks who have fallen in love with Bedfords can now use the BIRDSASART coupon code at checkout to enjoy a post-purchase, 3% off-statement credit (excluding taxes and shipping charges) on orders paid with a credit card. The 3% credit will be refunded to the card you used for your purchase. Be sure, also, to check the box for free shipping to enjoy free Second Day Air Fed-Ex. This offer does not apply to purchases of Classes, Gift Cards, or to any prior purchases.
Money Saving Reminder
Many have learned that if you need a hot photo item that is out of stock at B&H and would like to enjoy getting 3% back on your credit card along with free 2nd Day Air Fed-Ex Air shipping, your best bet is to click here, place an order with Bedfords, and enter the coupon code BIRDSASART at checkout. If an item is out of stock, contact Steve Elkins via e-mail or on his cell phone at (479) 381-2592 (Central time). Be sure to mention the BIRDSASART coupon code and check the box for Free Shipping. That will automatically upgrade to free 2nd Day Air Fed-Ex. Steve has been great at getting folks the hot items that are out of stock at B&H and everywhere else. The wait lists at the big stores can be a year or longer for the hard to get items. Steve will surely get you your gear long before that. For the past year, he has been helping BAA Blog folks get their hands on items like the SONY a 1, the SONY 200-600 G OSS lens, the Canon EOS R5, the Canon RF 100-500mm lens, and the Nikon 500mm PF. Steve is personable, helpful, and eager-to-please.
Important Note
As an Amazon Associate, I earn a small percentage when you purchase from Amazon after using any of the Amazon links on the blog (including the logo-link immediately above). My link works with Amazon Prime and using it will not cost you a single cent. Huge thanks, BTW 🙂
Please Remember Also
Please, if you enjoy and learn from the blog, remember to use one of my two affiliate programs when purchasing new gear. Doing so just might make it possible for me to avoid having to try to get a job as a Walmart greeter and will not cost you a single penny more. And if you use Bedfords and remember to enter the BIRDSASART code at checkout, you will (still!) save 3% on every order and enjoy free second-day air shipping. In these crazy times — I lost about fifty thousand dollars in income due to COVID 19 — remembering to use my B&H link or to shop at Bedfords will help me out a ton and be greatly appreciated. Overseas folks who cannot order from the US because of import fees, duties, and taxes, are invited to help out by clicking here to leave a blog thank you gift if they see fit.


Gear Questions and Advice
Too many folks attending BAA IPTs and dozens of photographers whom I see in the field and on BPN, are–out of ignorance–using the wrong gear, especially when it comes to tripods and more especially, tripod heads… Please know that I am always glad to answer your gear questions via e-mail. If you are desperate, you can try me on my cell at 863-221-2372. Please leave a message and shoot me a text if I do not pick up.
|
|
|
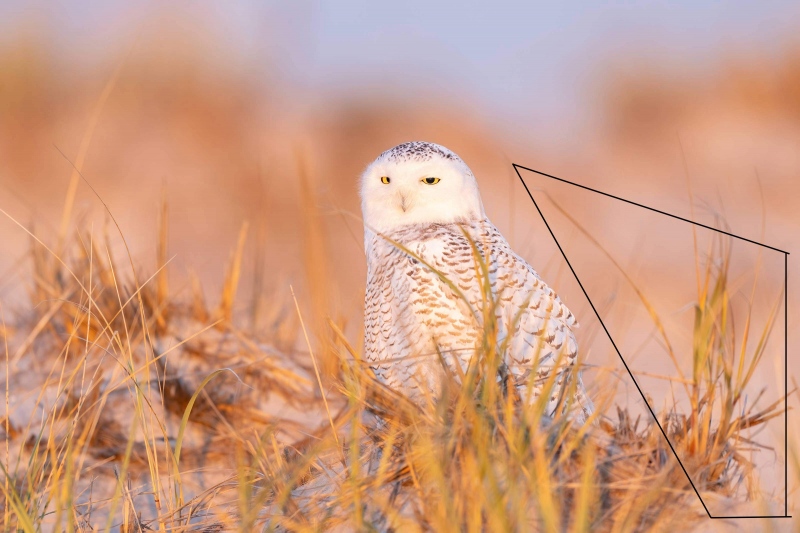
This image was created on 30 November 2021 at Westhampton Beach, Long Island, NY. Standing, I used the (no longer available) Induro GIT304L Grand Series 3 Stealth Carbon Fiber Tripod / Levered-Clamp FlexShooter Pro-mounted-supported Sony FE 600mm f/4 GM OSS lens and The One, the Sony Alpha 1 Mirrorless Digital Camera.. ISO 800. The exposure was determined by Zebras with ISO on the rear wheel: 1/320 sec. at f/4 (wide open) in Manual mode. AWB at 7:05am on cold, clear morning . Tracking: Spot S with Bird-Eye/Face Detection performed perfectly by tracking and nailing the bird’s left eye. Click on the image to enjoy the high-res version. Image #1: Snowy Owl on dune in early morning light |
Image Design Question Answered
In the 2nd Best Snowy Owl Image From My Northeast Trip? blog post here, I wrote:
If you think you know why I placed the owl a lot closer to the center of the frame than I usually do, please leave a comment.
IPT veteran David Pugsley
The vertical grasses to the right add balance to the scene. Also, had you framed to crop them out you’d be left with the large, diagonal grass that, now floating, would need to be cloned out.
Ted Willcox
Showing the grass on the right side balances the image better than cropping it out. Beautiful image!
Kudos to both for their correct responses. Since a picture is worth a thousand words, I created the image above to show what I was thinking: I did not want to mess with the grasses inside the quadrilateral, so I carefully placed the owl more in the center of the frame than usual.
The Lesson: rather than simply following a series of rules or preconceived notions when designing an image, you should consider all of the background (and other) elements before you press the shutter button.
Cliff Beittel
Thanks to friend, skilled bird photographer, and decades ago multiple IPT veteran Cliff Beittel who chipped in with this:
Can’t say why you centered the owl, but it looks perfect. In a long ago book, Tim Fitzharris had a photo of an American Bittern showing all sorts of layers of composition: near foreground, middle foreground, in-plane vegetation, near background, distant background, sky, corner anchors, etc., etc. This photo has all of that, and it all frames the bird wonderfully. Love the way the dune rises to our left, the way the owl’s head doesn’t merge with the sky, how the weight of the out-of-focus grasses in front of the bird balance the dune on the left. Sweet.
I wrote back:
Thanks a stack, Cliff. The key was to be able to get halfway up the dune without flushing the bird. From below, the owl was completely blocked; there was no shot from below ….
with love, artie
|
|
|
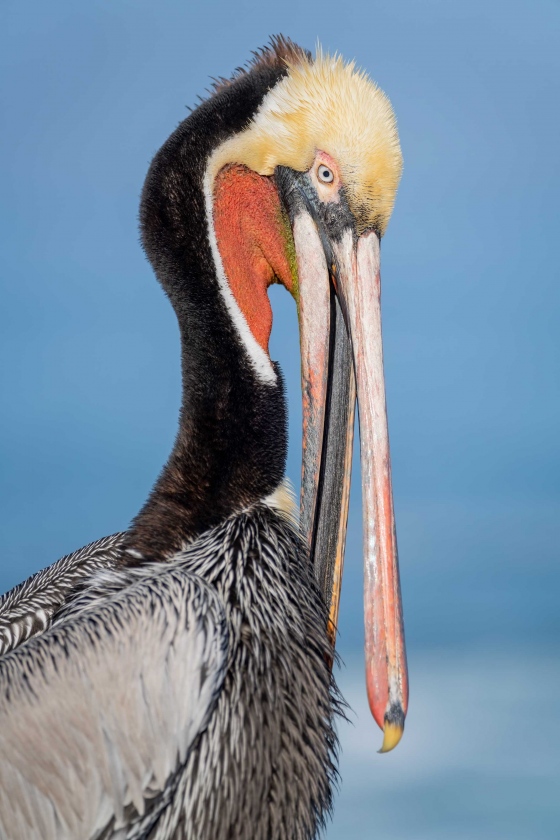
This image was created on 25 January 2020 at La Jolla, CA. Standing, I used the handheld Sony FE 70-200mm f/2.8 GM OSS lens (now replaced by the Sony FE 70-200mm f/2.8 GM OSS II lens with the Sony FE 1.4x Teleconverter (at 225mm), and the Sony a7R IV (now replaced, for me, by The One, the Sony Alpha 1 Mirrorless Digital Camera.( ISO 400. The exposure was determined by Zebras with ISO on the rear wheel: 1/3200 sec. at f/4 (wide open) in Manual mode. AWB at 10:42am on a then-sunny morning. Upper Center Zone AF/C produced a razor sharp on the eye image. Click on the image to enjoy the high-res version. Image #2: Brown Pelican – adult breeding plumage Pacific-race, scissors preening |
Depth-of-Field or Not Answer
In yesterday’s Pelican Scissors Preening Photo Tips and Lots More! blog post herehttps://www.birdsasart-blog.com/2021/12/08/pelican-scissors-preening-photo-tips-and-lots-more/, I wrote:
Both images were created at the wide open apertures. Note that in Image #1 the entire bird was sharp at f/2.8. Image #2, however, also created at the wide open aperture, could have used some additional depth-of-Field as the distal portion of the bill and the feathers on the pelican’s body could have been rendered sharper with the use of a smaller aperture, perhaps f/8.
Why the difference?
Though only a single reader responded, he nailed the answer:
Steve
I think the depth of field was shallower in the second image because you were closer to the subject.
The Lesson: depth-of-field increases as the distance to the subject increases. Ad the converse is true as well: depth-of-field decreases as the distance to the subject decreases.
|
|
|
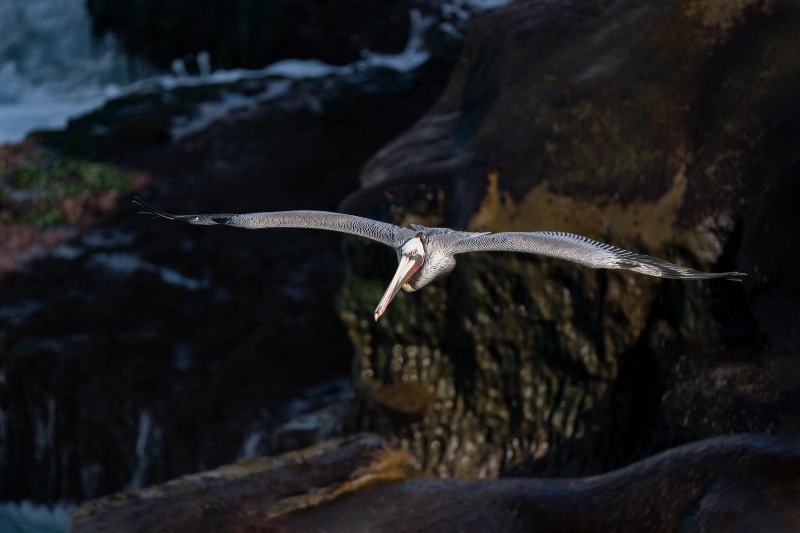
This image was created on 9 January 2020 at La Jolla, CA. Standing, I used the (no longer available) Induro GIT304L Grand Series 3 Stealth Carbon Fiber Tripod / Levered-Clamp FlexShooter Pro-mounted-supported Sony FE 600mm f/4 GM OSS lens and the Sony a9 II (now replaced by The One, the Sony Alpha 1 Mirrorless Digital Camera.. ISO 400. The exposure was determined by Zebras with ISO on the rear wheel: 1/5000 sec. at f/4 (wide open) in Manual mode. AWB at 2:41pm on clear afternoon. Center Zone AF/C produced a razor sharp on the eye image. Click on the image to enjoy the high-res version. Image #3: Brown Pelican – dorsal flight view against cliffs |
Why Manual Mode?
In the recent Seeing New Situations. Why Manual Mode? More On Saving the WHITEs. An ACR Raw Conversion. And an Innovative New Photoshop Technique blog post here, I wrote:
If I had been photographing incoming birds in the sky while working in an automatic mode like shutter or aperture priority, what would have happened to the pelican in this image? Why? Once you get to the right answer, you will understand why Manual mode is best for 99% of bird photography situations.
IPT veteran and friend David Policansky (AKA Dr. Fish)
Hi, Artie. If you’d been using an automatic mode, the pelican would have been totally blown out (overexposed). Whenever I am photographing birds flying in front of varied backgrounds I use manual mode. The theory is simple: I want the bird — not necessarily the background, to be correctly exposed.
He answered correctly, but did not explain why: influenced by the predominate dark rock background, the in-camera meter would have opened up (increased the exposure).
|
|
|
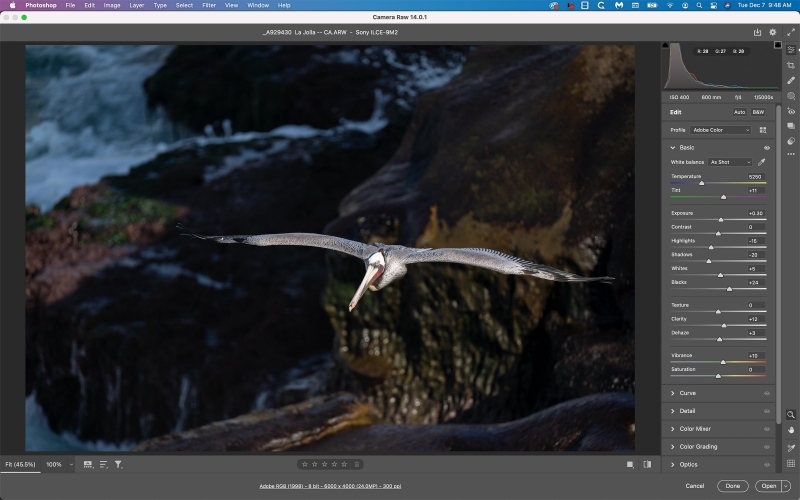
Click on the image to better read the fine print. Image #3A: Adobe Camera Raw slider settings for the Brown Pelican – dorsal flight view against cliffs image |
Raw Conversion Questions
In the same blog post, I wrote:
1- With most images, we move the BLACK slider to the left. Why did I move the BLACK point to +24 with this image?
2- With most images, we move the Shadow slider to the right to open up the shadows. After moving the BLACK point for this image to +24, why did I move the shadow slider to the left, to -20?
Friend and active BPN Avian Forum participant Paul Burdett
1. You moved the black point to the right to +24, as opposed to moving it the left, so as not to cause the darkest areas of the rocks to lose detail. with RawDigger showing the image as 1/3 stop under, they were probably too dark to start with. This may have also helped the bright areas of the bird.
2. You moved the shadow slider to the left, to -20, to increase the contrast between the dark background and the lighter tones of the bird’s wings.
Signed, sealed, delivered, and right on the money. Well done, Paul. Checkout Paul’s very fine Golden-headed Cisticola image here on BPN.
|
|
|
This image was created on 1 December 2021 at Westhampton Beach on Long Island. While standing at full height, I used the no-longer available GIT304L Grand Series 3 Stealth Carbon Fiber Tripod/Levered-Clamp FlexShooter Pro-mounted-Sony FE 600mm f/4 GM OSS lens, the Sony FE 2.0x Teleconverter, and The One, the Sony Alpha 1 Mirrorless Digital Camera (Body Only). ISO 500. The exposure was determined by Zebras with ISO on the rear wheel: 1/1000 sec. at f/8 (wide open) in Manual mode. AWB at 9:07am on a sunny morning. Tracking: Spot S AF-C with Bird-Eye/Face Detection performed perfectly. Be sure to click on the image to enjoy a larger higher-res version. Image #4: A new optimized version of the Snowy Owl on clean sand beach image with the shell as it was in the raw file |
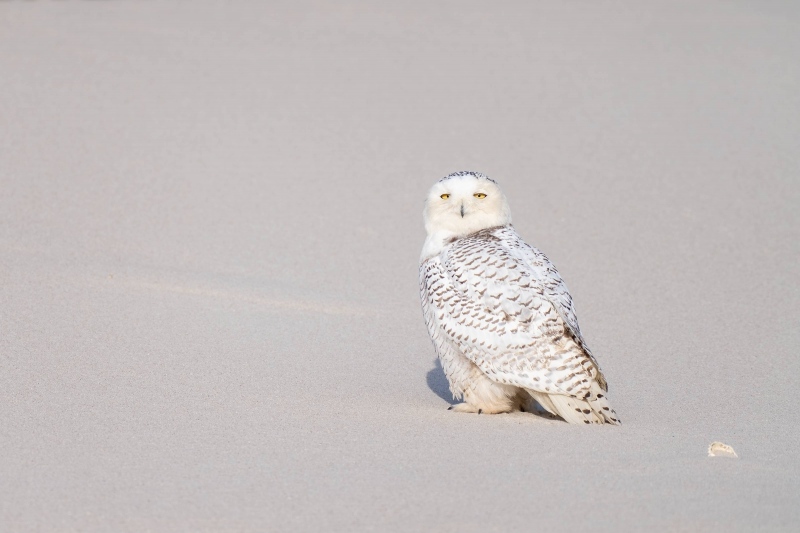
For Adam
At the Unanimity. And Learning About Snowy Owls … blog post here, blog regular Adam Rubinstein left this comment:
I would like to have seen a cropped, color-corrected version with the shell in place. In some respects, the shell provides a bit of interest and one might look at the image longer or in more detail to discern whether it was prey, a pellet, etc. Alternatively, it might just be a distraction worth cloning out. Snowy Owl’s are remarkable creatures and a delight to behold.
I created the version above for Adam.
|
|
|
This image was created on 1 December 2021 at Westhampton Beach on Long Island. While standing at full height, I used the no-longer available GIT304L Grand Series 3 Stealth Carbon Fiber Tripod/Levered-Clamp FlexShooter Pro-mounted-Sony FE 600mm f/4 GM OSS lens, the Sony FE 2.0x Teleconverter, and The One, the Sony Alpha 1 Mirrorless Digital Camera (Body Only). ISO 500. The exposure was determined by Zebras with ISO on the rear wheel: 1/1000 sec. at f/8 (wide open) in Manual mode. AWB at 9:07am on a sunny morning. Tracking: Spot S AF-C with Bird-Eye/Face Detection performed perfectly. Be sure to click on e the image to enjoy a larger higher-res version. Image #4A: A new optimized version of the Snowy Owl on clean sand beach image with the shell moved to a spot in front of the bird |
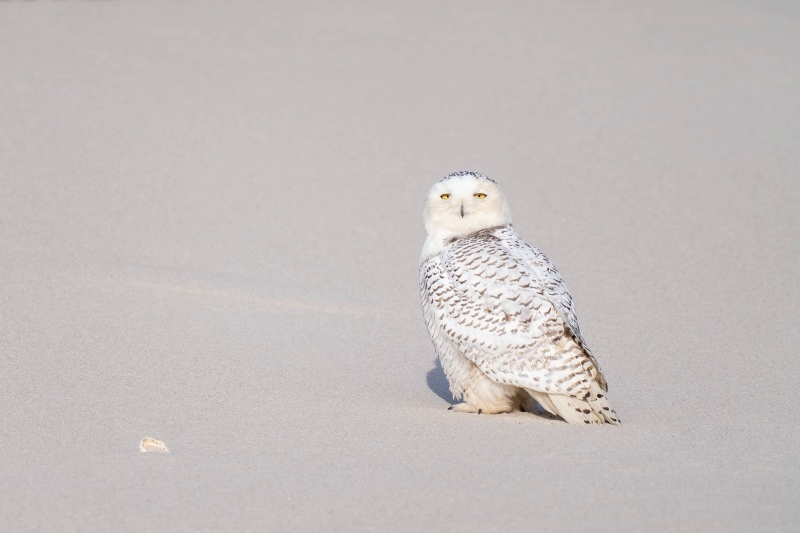
For Jordan
At the same blog post, Jordan Cait wrote
The shell is a distraction and pulls my eye behind the owl. I would remove it. But if the shell had to be present, it would be better placed in the direction the owl is facing instead of behind it.
This version is for Jordan. It was easy to move the shell using the Patch Tool first set on Destination and then putting it back to Source.
My Explanation
Note that because the shell was several inches in front of the plane of the owl, it was rendered unsharp due a lack of depth of field (as expected at f/8, wide open at 1200mm). Had the shell — it looks like a scallop, been on the exact same plane as the owl, it would have been rendered sharp. In that case I would have either left it or moved it in front of the bird as in Image #4A.
|
|
|
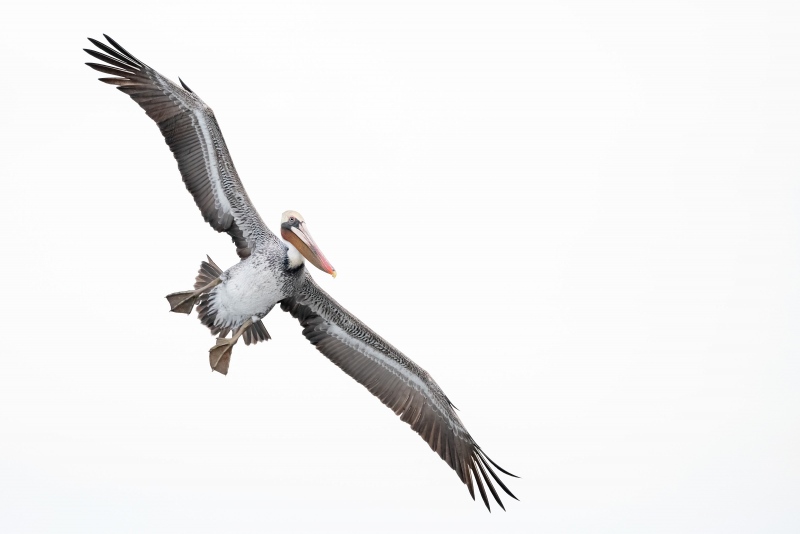
This image was created on 20 January 2019 at La Jolla, CA. I used the hand held Nikon AF-S NIKKOR 200-500mm f/5.6E ED VR lens (at 500mm) and the mega mega-pixel Nikon D850 DSLR.. ISO 3200: 1/1000 sec. at f/6.3 in Manual mode. AWB at 9:41am on a rare cloudy morning. Center Group/Shutter Button AF. Click on the image to enjoy a hi-res version. Image #5: Pacific race Brown Pelican sub-adult in flight |
My Preference
In the Variety is the Spice of Flight in San Diego! blog post herehttps://www.birdsasart-blog.com/2021/12/03/variety-is-the-spice-of-flight-in-san-diego/, I asked, After clicking on all three of today’s featured images to view the hi-res versions, you are invited to leave a comment letting us know which of the three is your favorite, and why you made your choice.
While I liked all three of the flight images, and all who commented agreed that Image #1, the incoming Ring-necked Duck drake in flight, was their favorite, mine was the Pacific race Brown Pelican sub-adult in flight image above. I love white sky flight. I love the variety of pelican plumages that we get to study in San Diego in January. And I love the young birds with the red and olive bill pouches of the breeding plumage adult birds.
San Diego, California: A Bird Photographer’s Paradise!
I’ve been visiting San Diego, California for more than 50 years, and photographing there for almost four decades. It truly is one of my favorite bird photography locations on the planet. The Pacific race Brown Pelicans with their fire-engine red and olive green bill pouches, are indeed the stars of the show, but there are lots of other great birds there that are relatively easy to photograph. Check out this five minute video to see the potential.
Be sure to subscribe to my YouTube channel by clicking here.
|
|
|
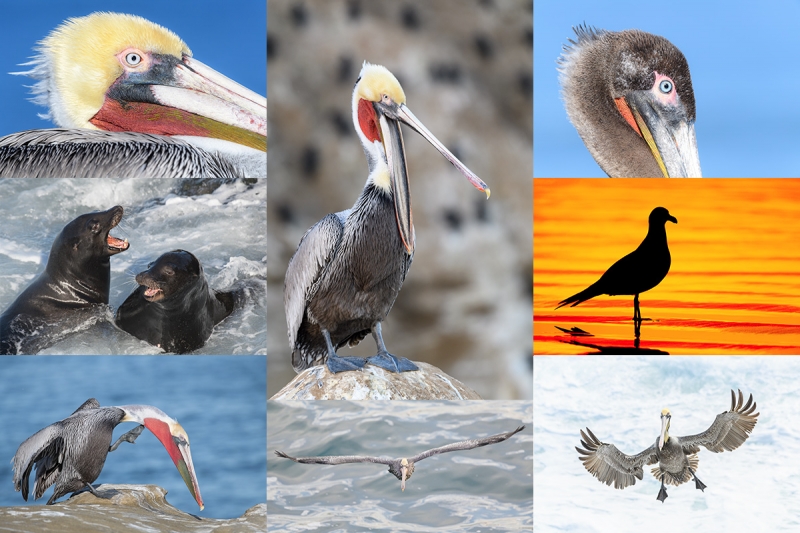
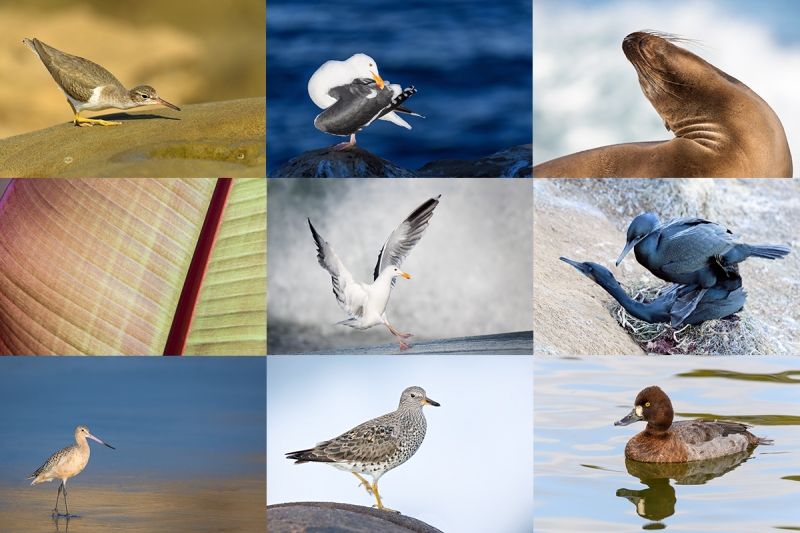
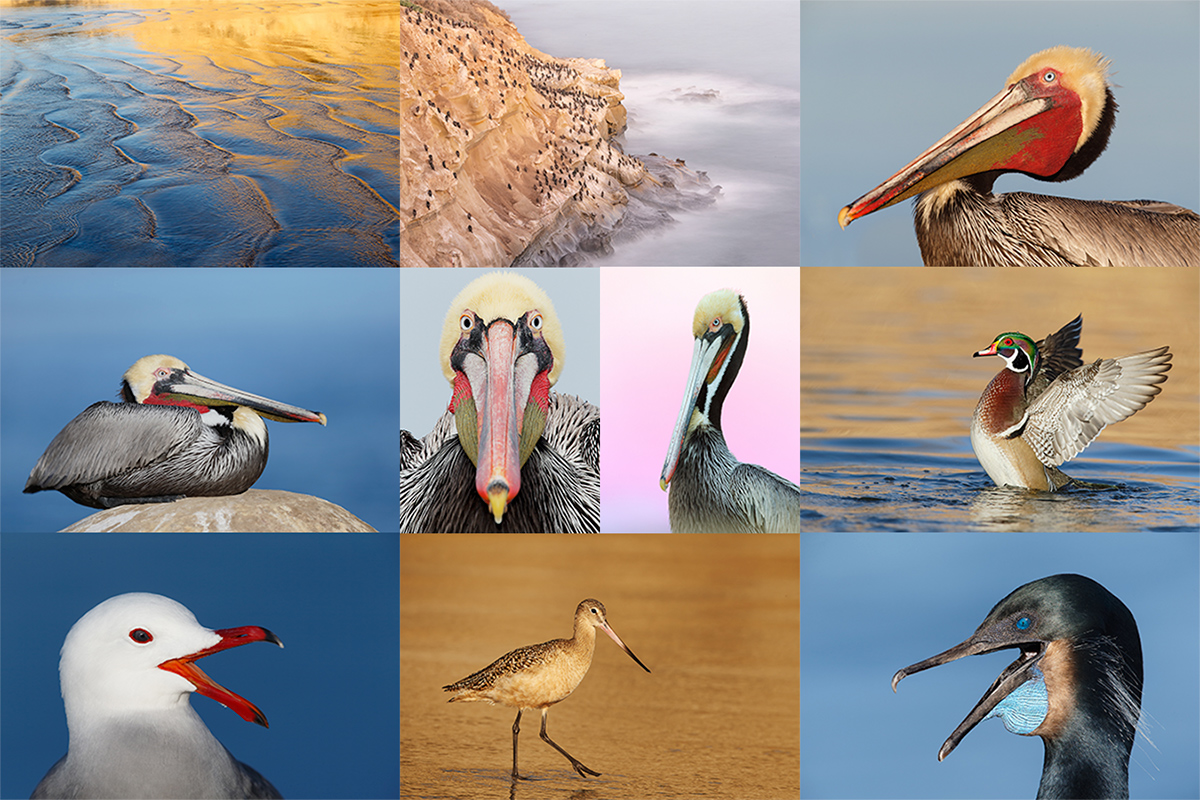
San Diego offers a wealth of very attractive natural history subjects, including and especially the Pacific race of California Brown Pelican. With annual visits spanning more than four decades, I have lots of photographic experience there … Click on the composite to enjoy a larger version. |
The 2022 San Diego Brown Pelicans (and more!) IPT. Monday 17 January thru the morning session on Friday 21 January 2022. Four full and one-half day: $2999.00. Deposit: $899.00. Limit: 8 photographers/Openings: 6
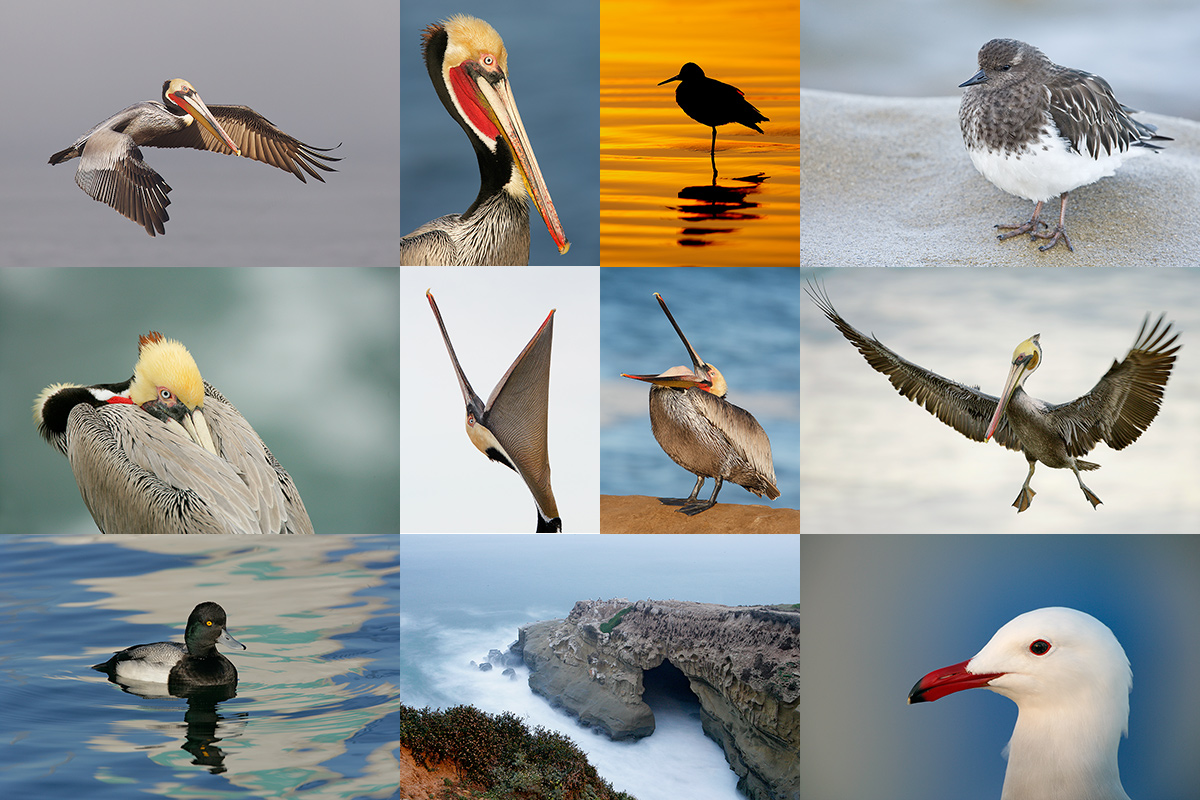
Join me in San Diego to photograph the spectacular breeding plumage Brown Pelicans with their fire-engine red and olive green bill pouches; Brandt’s (nesting with eggs and possibly chicks) and Double-crested Cormorants; breeding plumage Wood and Ring-necked Duck; other duck species possible including Lesser Scaup, Redhead, Northern Shoveler and Surf Scoter; a variety of gulls including Western, California, and the gorgeous Heermann’s, all in full breeding plumage; shorebirds including Marbled Godwit, Willet, Sanderling and Black-bellied Plover; many others are possible including Least, Western, and Spotted Sandpiper, Whimbrel, Black and Ruddy Turnstone, Semipalmated Plover, and Surfbird; Harbor Seals (depending on the current regulations) and California Sea Lions. And as you can see by studying the IPT cards, there are some nice bird-scape and landscape opportunities as well. Not to mention a ton of excellent flight photography opportunities and instruction.
Please note: where permitted and on occasion, ducks and gulls may be attracted (or re-located) with offerings of grains or healthy bread.
Learning Exposure, Whether You Like It Or Not
Whether you like it or not, we will be beating the subject of exposure like a dead horse. In every new situation, you will hear my thoughts on the exposure situation along with my thoughts on both Nikon and Canon histograms and SONY Zebras. Whether you like it or not, you will learn to work in manual mode and to get the right exposure every time as long as a bird gives you ten seconds with the light constant. (Or two seconds with SONY zebras…) And you will learn what to do when the light is changing constantly. What you learn about exposure is one of the great takeaways on every IPT.
|
|
|
Though the pelicans will be the stars of the show on this IPT, there will be many other handsome and captivating subjects in wonderful settings. Click on the composite to enjoy a larger version. |
It Ain’t Just Pelicans
With gorgeous subjects just sitting there waiting to have their pictures taken, photographing the pelicans on the cliffs is about as easy as nature photography gets. With the winds from the east almost every morning there is usually some excellent flight photography as well, often with 70-200mm lenses! And the pelicans are almost always doing something interesting: preening, scratching, bill pouch cleaning, or squabbling. And then there are those crazy head throws that are thought to be a form of intra-flock communication. You will be guided as to how to make the best of all of those opportunities. And depending on the weather and local conditions and tides, there are a variety of other fabulous photo chances available in and around San Diego.
|
Did I mention that there are lots of great birds and natural history subjects in San Diego in winter? Click on the composite to enjoy a larger version. |
The San Diego Details
This IPT will include five three hour morning photo sessions, four one and one-half afternoon photo sessions, four working brunches that will include image review and Photoshop sessions. On rare cloudy day occasions, we may — at my discretion, stay out in the morning for a long session and skip that afternoon. To ensure early starts, breakfasts will be your responsibility. And so that we can get some sleep, dinners will be on your own as well. In the extremely unlikely event that Goldfish Point is closed due to local ordinance (or whimsy) — that has never happened in the past fifty years, I will of course do my very best to maximize our photographic opportunities.
An $899 deposit is required to hold your slot for this IPT. You can send a check (made out to “BIRDS AS ART”) to us here: BIRDS AS ART, PO Box 7245, Indian Lake Estates, FL, 3385, or call Jim or Jennifer at the office with a credit card at 863-692-0906. Your balance, payable only by check, is due right after you sign up.
Travel Insurance
Travel insurance for both big international trips and US-based IPTs is highly recommended as we never know what life has in store for us. I strongly recommend that you purchase quality travel insurance. Travel Insurance Services offers a variety of plans and options. Included with the Elite Option or available as an upgrade to the Basic & Plus Options you can also purchase Cancel for Any Reason Coverage that expands the list of reasons for your canceling to include things such as sudden work or family obligation and even a simple change of mind. My family and I use and depend on the great policies offered by TIS whenever we travel. You can learn more here: Travel Insurance Services. Do note that many plans require that you purchase your travel insurance within 14 days of our cashing your deposit check or running your credit card. Whenever purchasing travel insurance, be sure to read the fine print carefully even when dealing with reputable firms like TSI.
|
Variety is surely the spice of life in San Diego. Click on the composite to enjoy a larger version. |
Getting Up Early and Staying Out Late
On all BIRDS AS ART IPTS including and especially the San Diego IPT, we get into the field early to take advantage of unique and often spectacular lighting conditions and we stay out late to maximize the chances of killer light and glorious sunset silhouette situations. We often arrive at the cliffs a full hour before anyone else shows up to check out the landscape and seascape opportunities.
Typos
With all blog posts, feel free to e-mail or to leave a comment regarding any typos or errors.




Artie: Thanks so much for the kind words and link to my image. I’ve definitely learned so much from being a forum member. Cheers.
Image 4 is okay but a little too bright. Images 2,3 and 5 are good colors and not too bright. Image 1 is okay but just a little bright.