Change Your Life
Consider changing your life and becoming a much better bird photographer by joining me on a BIRDS AS ART Instructional Photo-Tour (IPT). DeSoto, San Diego, Homer, and the yet-to-be announced July 2024 Galapagos Photo-Cruise of a Lifetime all offer the opportunity for you to improve your skills both in the field and at the computer and to make some astounding images as well. Click here and see which IPT might be best for you.
I was glad to learn yesterday that newbie Nancy Fischer took advantage of the late registration discount offer and will be joining DeSoto #1 and that many multiple IPT veteran Jim Dolgin will be joining the second DeSoto IPT for two days.
What’s Up?
Tuesday began with a 3-mile walk/rope flow walk with a photography break after 2 miles when the sun came out for 20 minutes. I worked the Vulture Trees. I had two very good images lined up and each time the bird flew just before I pressed the shutter button. You gotta love it. As my shoulder is getting stronger with two hanging from the chinning bar sessions I am gradually increasing the length of my daily swims. Yesterday I did 40 lengths in the morning and 40 more in the afternoon. The 80-lengths totaled nine-tenths of a mile.
Today is Wednesday 21 September 2022. I will be heading down to the lake early. Wherever you are, and whatever you are doing, I hope that you too have a great day. This blog post about an hour to prepare and makes one hundred eighty days in a row with a new one.
Please remember to use the B&H and Amazon links that are found on most blog pages and to use the BIRDSASART discount code at checkout when purchasing your new gear from Bedfords to get 3% back on your credit card and enjoy free second-day air FedEx. Please, also, consider joining a BAA IPT. You will be amazed at how much you will learn!
Huge Thanks to Muhammad Arif
Muhammad texted me yesterday at 12:15pm asking if I was sick or had died. Why? I finished yesterday’s blog post at 6:15am and forgot to hit Publish. Thanks to Moe, the current streak is still alive. That’s what friends are for!
|
|
|
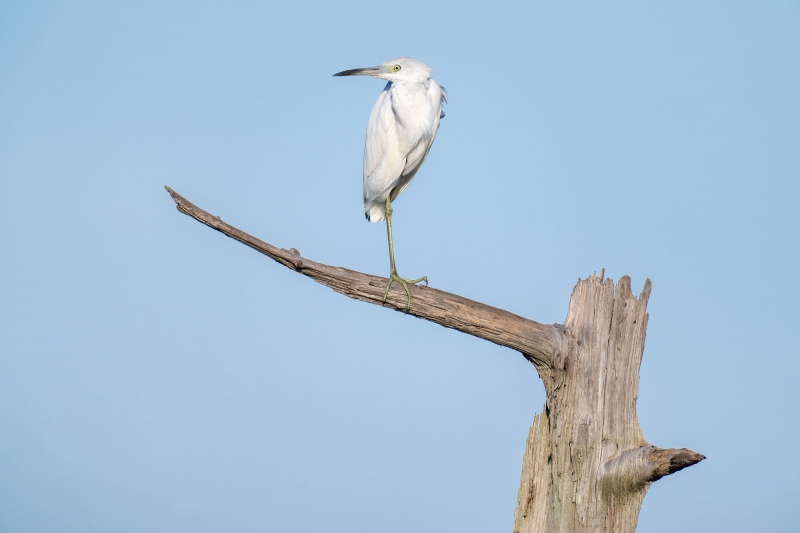
This image was created on 16 September 2022 down by the lake near my home at ILE. Working from the front seat of my vehicle, I used the BLUBB-supported Sony FE 600mm f/4 GM OSS lens, the Sony FE 2.0x Teleconverter (at 1200mm) and The One, the Sony Alpha 1 Mirrorless Digital Camera). The exposure was determined via Zebra technology with ISO on the thumb dial. ISO 800. 1/1250 sec. at f/8 (wide open) in Manual mode. When evaluated in RawDigger, the raw file brightness was determined to be 1/6 stop from perfect. AWB at 8:33:16am on a partly cloudy morning. Tracking: Spot S/AF-C with Bird-Eye/Face Detection performed perfectly. Click on the image to enjoy the high-res version. Be sure to click on the image to enjoy a high-res version. Image #1: Little Blue Heron juvenile on The Perch — blue sky version |
Dealing with a Washed Out Sky
With the raw file properly exposed well to the right, the sky in the original was a pale, washed out shade of blue. To render the sky bluer, I worked the BLUE sliders in the Color Mixer tab of Adobe Camera Raw during the raw conversion: I moved the BLUE saturation to the right to increase it, and moved the LUMINANCE slider to the left (just a bit) to reduce it. Capture One offers similar HSL color controls. I am still planning on creating a Getting the BLUES Right video.
Sony Telephoto BLUBB DMF Reminder
If you are using a Sony Telephoto lens on a a href=”https://birdsasart-shop.com/blubb-big-lens-ultimate-bean-bag/” rel=”noopener noreferrer” target=”_blank”>BLUBB, it is important that you remember to turn the DMF switch to OFF so that the focus does not change inadvertently while you are shooting (as might occur whenever you move the lens even slightly to fine tune the image design). At present, I believe that only Sony offers a Direct Manual Focus switch on some telephoto lenses. When I started doing this I thought that it would be challenging to remember to turn the switch OFF when working from the car with the BLUBB, but that has not been the case. If I forget to move the switch to ON when I go back to the tripod, I will be reminded as soon as I try to pre-focus manually and the focus does not change.
|
|
|
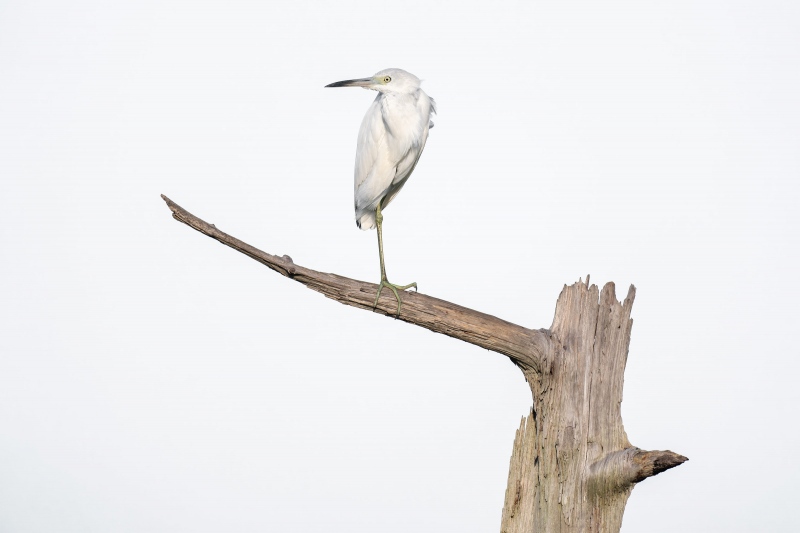
This image, from the same raw file as above, was created on 16 September 2022 down by the lake near my home at ILE. Working from the front seat of my vehicle, I used the BLUBB-supported Sony FE 600mm f/4 GM OSS lens, the Sony FE 2.0x Teleconverter (at 1200mm) and The One, the Sony Alpha 1 Mirrorless Digital Camera). The exposure was determined via Zebra technology with ISO on the thumb dial. ISO 800. 1/1250 sec. at f/8 (wide open) in Manual mode. When evaluated in RawDigger, the raw file brightness was determined to be 1/6 stop from perfect. AWB at 8:33:16am on a partly cloudy morning. Tracking: Spot S/AF-C with Bird-Eye/Face Detection performed perfectly. Click on the image to enjoy the high-res version. Be sure to click on the image to enjoy a high-res version. Image #2: Little Blue Heron juvenile — white sky version |
Creating a White Sky Version
To render the sky white, I again worked the BLUE sliders in the Color Mixer tab of Adobe Camera Raw during the raw conversion: I moved the BLUE saturation to the left to decrease it, and moved the the LUMINANCE slider all the way to the right. Capture One offers similar HSL color controls. I am still planning on creating a Getting the BLUES Right video.
Your Call?
All are invited to leave a comment letting us know why they prefer the blue sky version or why they prefer the white sky version. My choice may surprise you.
Typos
With all blog posts, feel free to e-mail or to leave a comment regarding any typos or errors.


I prefer the blue-sky version, but I’m not crazy about the detailless background in any case. It looks rather artificial.
I assume that the bird is processed the same in both images. The different backgrounds produce what is called a simultaneous contrast effect. Against the whiter background, the bird appears to be a bit gray. But against the blue background, it appears more white. This is a product of visual system processing – same color/tone looking different against different background. So, to my eye, the bird looks a bit dingy in the second image and I would prefer the first. The white of the juvi Little Blue is one of it’s striking features.
But I do understand what you were going for with the high key impression in the second image.
Yes, the bird should be very close to the same (though I did not protect it). I understand the concept. If you enter a room with a very light green or magenta tint, you will quickly perceive it as pure white. I think that is related to what you mention above.
with love, artie
Deepen the blue.
White sky for me.
How about a third option, sky replacement? Of the two, I find the white sky image preferable and more compelling.
I think it is interesting just how many opinions there are on this topic. Just goes to show you, never worry what you think others will like. Make it the way YOU like it!
BTW, I like the blue version….
White, looks better to my eye
don’t know why
White sky version. Striking image. Blue one is run of the mill, been seen a million times before, IMO
I much prefer the blue sky.
Both photos are nice but I think #1 is the best light and best colors and a little better then #2.
I like the egret against the white sky. The white on white seems more dramatic than the more common white on blue. I wonder if you could saturate the eye, bill and leg more on the egret on white to make it pop out more.
I’d like to see more saturation too
While the blue sky is more natural it is also more common. The white sky version is a nice high key image and you really focus your attention on the bird and perch. #1 is good and is the usual version but #2 is a vision of what would really enhance the bird and perch. I vote for #2.
Blue appears more natural…….white appears somewhat washed-out.
Blue. The white version looks artificial like a selection cut from the background.
White sky version for me. I’ve got to remember to work with Color Mixer more. Thanks for the reminder