On Improving Your Bird Photography
Consider joining me on a BIRDS AS ART Instructional Photo-Tour (IPT). The DeSoto, San Diego, Homer, and the yet-to-be announced July 2023 Jacksonville IPTs, and July 2024 Galapagos Photo-Cruise of a Lifetime, all offer the opportunity for you to dramatically improve your skills both in the field and at the computer and to make some astounding images as well. Click here and see which IPT might be best for you.
What’s Up?
I walked early on Sunday morning and found the cooperative snake that is today’s featured subject. The water level in the lake is so high that many overflow ponds have been created in the North Field. At one of those yesterday I counted 10 Greater Yellowlegs (unusual for ILE), sixty Black-bellied Whistling Ducks (including one juvenile), and an assortment of herons and egrets. Then I headed home for a day of TIVO-ed NFL games.
As many folks who shoot Sony are still using some of the older camera bodies like the a7R III, the a7R IV, the a9, and the a9 II, I resurrected the info on The Sony Camera User’s e-Guide (and Videos) for those folks who for whatever reason are not using an a1. If you own one of the aforementioned bodies and do not have the guide, it would behoove you to scroll down, check it out, and get a copy.
Note: Everyone who is in the SONY Alpha a1 Set-up and Info Group can receive a free copy of the The Sony Camera User’s e-Guide by request.
Today is Monday 3 October 2022. Wherever you are, and whatever you are doing, I hope that you too have a great day. This blog post took more almost three hours to prepare makes one hundred ninety-two days in a row with a new one.
Please remember to use the B&H and Amazon links that are found on most blog pages and to use the BIRDSASART discount code at checkout when purchasing your new gear from Bedfords to get 3% back on your credit card and enjoy free second-day air FedEx. Please, also, consider joining a BAA IPT. You will be amazed at how much you will learn!
Follow me on Instagram here. I am trying to feature both new and old images, especially images that have not appeared recently on the blog. Or search for birds_as_art.
BIRDS AS ART Image Optimization Service (BAA IOS)
Send a PayPal for $62.00 to birdsasart@verizon.net or call Jim at 863-692-0906 and put $62.00 on your credit card. Pick one of your best images and upload the raw file using a large file sending service like Hightail or DropBox and then send me the link via e-mail. I will download and save your raw file, evaluate the exposure and sharpness, and optimize the image as if it were my own after converting the raw file in Adobe Camera Raw. Best of all, I will make a screen recording of the entire process and send you a link to the video to download, save and study.
Induro GIT 304L Price Drop
Amazingly, we have two, brand-new-in-the-box Induro GIT 304L tripods in stock. They are $699.00 each (were $799.00) and the price now includes the insured ground shipping to the lower 48 states. Weekday phone orders only: 863-692-0906. Order yours here while they last.
|
|
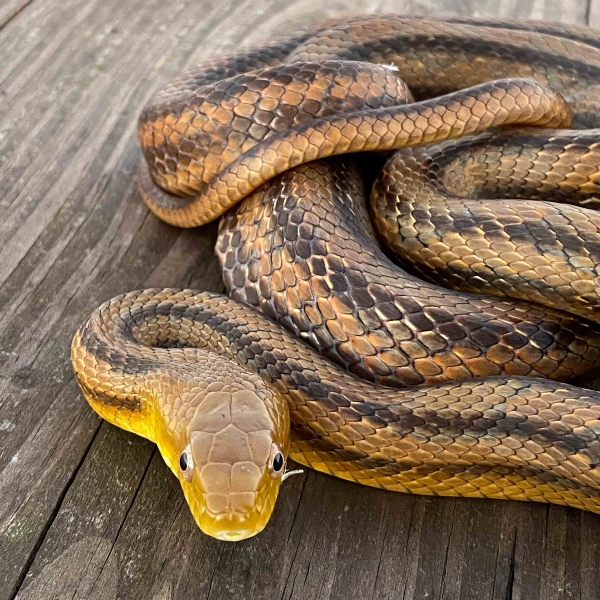
Image #1: iPhone image of small snake |
The Discovery
While finishing my morning walk on Sunday, I noticed a small snake coiled on the railing of the pier right next to a light pole. I grabbed my iPhone, turned off a Billy Joel album, and made several images. By working at 2X and holding the phone out over the lake and shooting back, I was able to eliminate the light pole. As I start my walk in the dark, this image was created well before sunrise.
The Plan
My plan was to walk back to my vehicle that had been parked near the boat ramp, photograph the remnants of a natural Osprey nest that had been blown down by Hurricane Ian with the handheld Sony 24-105, and then drive back to the pier, grab my macro set-up and a tripod, and photograph the snake on the railing. That, of course, assuming that it was still there. It was, and as I had learned earlier, it was exceedingly tame and cooperative.
|
|
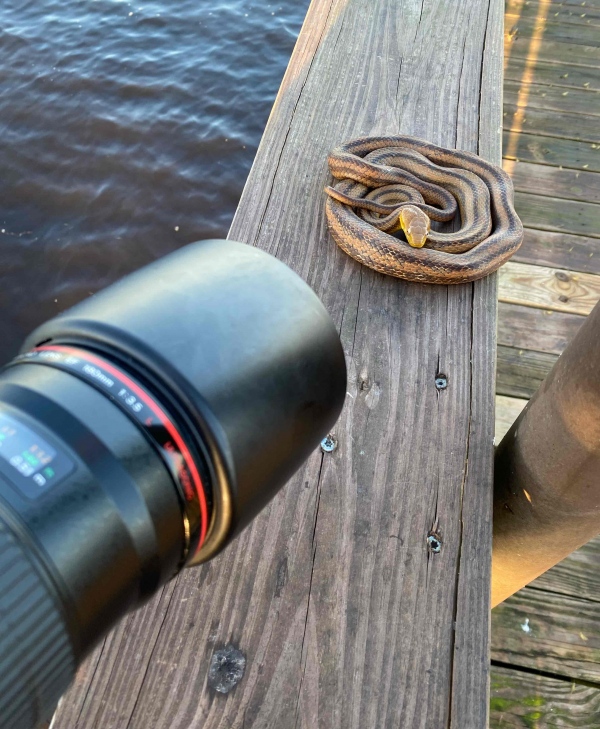
Image #2: iPhone image of the macro lens set-up |
The Set-Up
I needed to get as far left as possible so that I could shade the subject with my torso and, at the same time, minimize the impact of the fleck of shed skin on the left side of the snake’s face below its left eye (as seen in Image #1). To do that, I splayed the legs of the tripod and rested it somewhat precariously on the pier railing. That done, I’d set the exposure, steady the rig, and focus manually. Considering the slow shutter speeds and the less-then-rock solid support system, I was surprised every image made on the tripod was razor sharp
The Canon 180mm Macro Lens with Sony
I absolutely love the 180mm focal length for macro, in part, because I have a “telephoto eye.” I see the world in small rectangles and love the backgrounds provided by lenses with narrow angles of view. As compared to the Sony FE 90mm f/2.8 Macro G OSS lens, a 180mm focal length will render the subject four times larger when photographed from the same distance. Why? The size of the subject in the frame is a function of the square of the focal length.
I sold my Canon 180 when I switched to Nikon about five years ago, and then purchased a used one from old friends Alan and Sarah Levine. Since that was the slowest and worst focusing lens ever made by Canon, I knew that all would be well using manual focus and focus peaking. That as described in detail in the Sony Camera (a7R III, a7R IV, a9, & a9 II) User’s e-Guide with One Camera Set-up Video and in the SONY Alpha a1 Set-up and Info Group e-mails as well.
This rig has served me well for flowers, buds, bugs, and yes, the occasional snake. See the Green Lynx Spider image made with this lens and the Sony a7R IV in the blog post here.
|
|
|
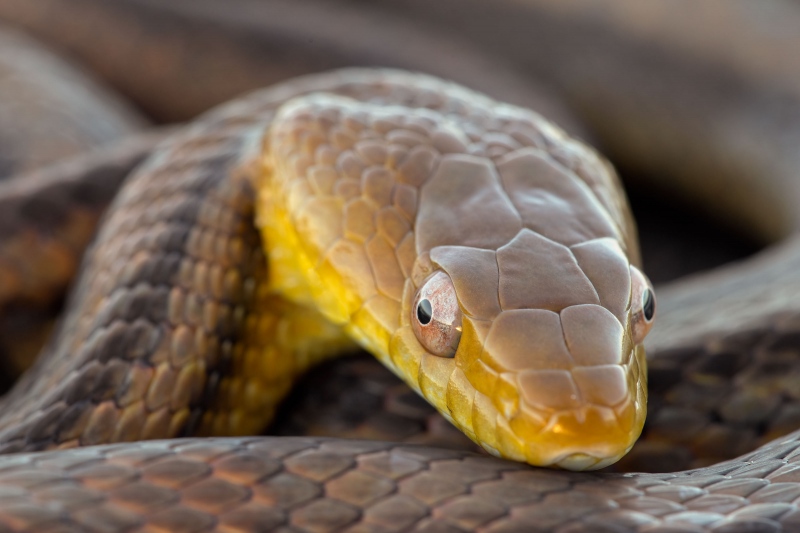
This image was created on the morning of 2 October 2022 down by the lake near my home at ILE. I used the Induro GIT 304L/FlexShooter Pro-mounted Canon EF 180mm f/3.5L Macro USM lens with the Metabones Canon EF/EF-S Lens to Sony E Mount T Smart Adapter (Fifth Generation) and The One, the Sony a1 Mirrorless Camera body. ISO 1600: 1/40 second at f/10 in Manual Mode. The exposure was determined using Zebra technology with ISO on the thumb dial and was determined by RawDigger to be dead-solid perfect. AWB at 7:42:30am in the shade of my body on a clear morning just after sunrise. Manual focus with (red) focus peaking. Click on the image to enjoy a larger version. Image #3: Eastern (Red) Ratsnake |
Getting the Color Right was a Bear
It was a bear idiom: Something that is difficult to do or deal with, a task or burden
With the subject shaded by my torso, the raw file had a large BLUE color cast. Even after I dealt with that, the image still needed to be warmed up. Working on the converted TIF file and working on a new layer, I went Filter > Camera Raw Filter, hit “I” for the Eyedropper Tool, and clicked on the grayest thing I could find, the shaded section of snake skin just below the upper left corner. Voila! I had the color I was looking for.
|
|
|
102 sold to rave reviews. The SONY e-Guide by Patrick Sparkman and Arthur Morris |
The Sony Camera User’s e-Guide (and Videos)
Click here to purchase the guide with one Camera Set-up Video. Be sure to e-mail us by clicking here to specify your camera body so that we can send you a link for the correct video.
Click here to purchase the guide with two Camera Set-up Videos. Be sure to e-mail us by clicking here to specify your two camera bodies so that we can send you links for the correct videos.
It is hard to believe that we sent out an early draft of the guide for review in early December 2019 after we had been working on it for several months. We thought that it was pretty good at that point but Ellen Anon and her son Josh both commented to this effect: not so fast!. Both took us to task by asking lots of good questions and making dozens of excellent suggestions. They did that for several versions of the guide and for that we are very thankful.
At one point Josh wrote, Remember there are free resources competing with your guide; you need to ensure your paid guide is above and beyond these and worth the money!
Here are the links that he provided:
Sony Alpha Focus Masterclass by Mark Galer, (Sony Ambassador) here.
Sony a7R IV Tips & Tutorial by Tony Northrup here.
Sony a9 Bird In Flight/Wildlife Photography Setup and Usage Guide by Mark Smith here
Now, ask yourself why I would be sharing these free resources with you? Some of the advice is halfway decent, some of it is confusing, some of it just plain wrong, and some of it is beyond insane. Good luck trying to figure out which is which … Highlights (lowlights?) include using back-button focus (and release!) and suggested Zebra values that ensure that you will never get anything close to a good exposure. Regular readers here already know that there is never any need to use back-button focus with SONY. If you missed that, the guide clearly explains why.
Later on in the process, Josh sent me another link (one that I can no longer find). IAC, I followed it and found that the creator took you through and explained all the SONY menu items exactly as detailed in the Help Guide, but never once told you what settings he used and why he used them.
In our new guide, we explain virtually every SONY menu item in detail that might be useful in bird, nature, or wildlife photography. And then we explain your options and state clearly which setting we use in different situations and why we go that route. This invaluable advice is based on many hundreds of hours in the field photographing birds and other natural history subjects.
In short, the SONY e-Guide is incredible. While I am proud of all the previously published Camera User’s Guides, my feelings about the SONY guide go far beyond that. The stuff on using Zebras with ISO on the Rear Wheel to get the right exposure every time is all Patrick Sparkman. Without his technical brilliance, this guide would not be nearly as valuable as it is. And like my good friend Dr. Cliff Oliver, Patrick is a superb researcher — if he does not know something, he will find it online very quickly, check it out, and draw his own conclusions. Not only are the SONY menus complex, but they offer a zillion options, many of which are hidden in sub-menus and Custom Settings. Patrick figured many of those out, I discovered a few, and blog regular Craig Elson came up with some incredibly helpful little menu tricks, tricks that solved some thorny problems. Thanks also to the eagle-eyed Dane Johnson who spotted a zillion typos and type-setting errors.
The longer and harder we worked on the guide, the more I wanted to price it at $200.00. But I did not want anyone to faint. The cost of the SONY Guide is $100.00. Your purchase includes the e-Guide itself and one of the four camera-specific videos. Extra camera videos cost $25.00 each. In each video, Patrick and I take you through all the relevant menu items. We urge you to follow along with your camera in hand. Here is short and timely excerpt from the guide:
Before You Begin
With the a7r iv, the a9, and the a9 ii, the last page of My Menu allows you to turn Display From My Menu on and off as needed. It is best to keep this On so that whenever you hit the Menu button on the camera, the last-viewed My Menu page will display. When you are setting up a new camera or working on your settings while following along with this guide, you should turn Display From My Menu to Off so that you do not have to scroll through endless menu items to find what you are looking for. With My Menu Off, hitting the Menu button will return you to the last viewed Menu screen.
Once you have read this far, we urge that you watch the video for your SONY body with the camera in hand while following all the instructions before consulting the remainder of this guide.
|
|
SONY Image Galleries with Educational Captions: page 48 |
The e-Guide is 103 pages. The guide contains 13 sections; among those are these:
The Introduction — This section contains a bit of the back-story on how the guide came to be.
Important Stuff — This section contains some important stuff 🙂
SONY Help Guides — Here you will find active links to the Help Guides for each camera body. Note: the Camera Manuals are pretty much useless.
Points of Emphasis In this section, we reinforce and expand upon many of the important concepts that are covered in the video.
Additional Info– Here we cover tons of new stuff that we discovered in the 3 1/2 months after we created the four videos.
Clarifications — In this section we detail nineteen fine points and sticky situations.
SONY Workflow — In this very short section we outline our SONY workflow. No great shock there!
SONY Image Gallery with Educational Captions (77 images.) This collection of stunning images is meant to inspire, educate, and show folks what is possible with SONY gear. There is tons of AF info in the captions. And lots more.
SONY Zebras Coaching Gallery (14 images.) Here we explain exactly what we did with the Zebras to come up with a perfect exposure.
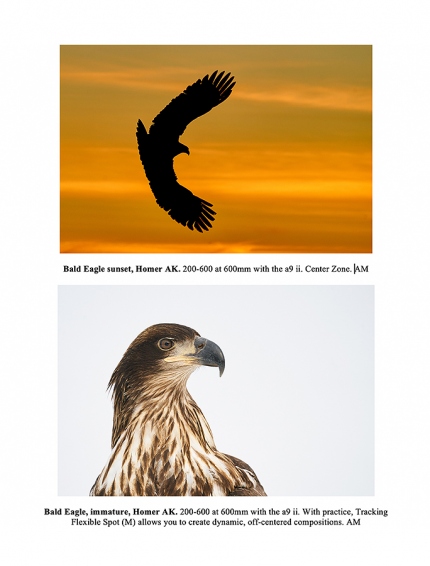
Tracking Flexible Spot Gallery 8 images.) The images here demonstrate the use of SONY’s most valuable AF Area Mode.
Thanks! Here we thank the many folks who helped us to improve the guide.
About the Authors — Learn a bit about artie and Patrick.
|
|
SONY Zebras Coaching Gallery: page 89 |
So What Does the SONY Guide Cover?
Under Points of Emphasis
Note: items without comment are self-explanatory.
Using Zebras to Get the Right Exposure in Manual Mode — Patrick’s technique allows you to make perfect or near-perfect exposures quickly and consistently.
Using Zebras to Get the Right Exposure in Manual Mode Illustrated — Thanks to an amazingly cooperative crane, this item shows how Zebras are set in an actual shooting situation.
A Final Word on Zebras –We explain the fine points of using Zebras in bright sun versus using Zebras in the shade.
Using Zebras to Get the Right Exposure in Shutter (or Aperture) Priority This technique is used by artie at times when creating pleasing blurs.
Mechanical vs Electronic Shutter It is important to know which to use with each camera …
Silent Shooting — Silent Shooting is closely linked to Mechanical vs Electronic Shutter.
Card Slots 1 & 2
Auto Review — Really valuable info here.
Focus Areas and Focus Area Limit — Along with Zebras, the info here is the meat of the guide.
a7r iv vs. a9 ii — Comparing these two great bodies.
My Menu — Learning how and what to place on your My Menus helps folks operate their SONY bodies more efficiently.
|
|
SONY Image Galleries with Educational Captions: page 66 |
Additional Info
Enlarge Initial Position — Explains how to see the area of sharpest focus in an image; it only works before the images are downloaded.
Telephoto Lens Focus Range Limiter Switch — Explains how and why to set this important switch.
Initial Focus Acquisition Problems With Telephoto Lenses — The tips here and in DMF below might be worth the price of the entire guide.
Direct Manual Focus (DMF)
Camera Direct Manual Focus (DMF)
An Important AF Note for a9 ii Users — Learn about a problematic dial on the a9 ii.
Optical Steady Shot (OSS)
Optical Steady Shot (OSS) on Telephoto Lenses
Diopter-adjustment Dial
Firmware Updates
Touch Operation
Naming Your Camera Bodies — This can save you lots of hassles.
Saving/Loading Settings
Sensor Cleaning
Anti-dust Function — New to the a9 ii only.
Reg. Custom Shoot Set
Function Menu Set & the Fn Button — Learn to customize the screen that comes up after pushing the Fn button.
More on Face/Eye Priority in AF — Super-important if you want to use the fabulous Tracking Flexible Spot (M).
The SONY Histogram Our comments here will likely surprise you.
Display Quality/a7 Series Bodies
Saving Settings to the Mode Dial
Compressed vs. Uncompressed Raw
Image Review with the Control Wheel — This was a “duh” moment for artie.
When to Turn Off Zebras — Super-important.
SONY US Repair Advice — Also super-important.
Vertical Grip — yeah or nay?
|
|
Tracking Flexible Spot Gallery: page 96 |
Under Clarifications
Power Save Start Time
AEL Button
Using SONY with an Adapter
The Eye Sensor (Tiny Window Above the Viewfinder) — Valuable stuff here …
The Mysterious Viewfinder Blackout Problem — Dealing with SONY’s most annoying problem.
Assigning Finder/Monitor to a Custom Button
Another Possible Finder/Monitor Solution
Return to Center
Bright Monitoring — A must for astrophotography.
e-Front Curtain Shutter
Manual Focus Toggle — A fabulous tip for macro photographers (often combined with Focus Magnifier below).
The Top Wheels
If You Use Rear Button Focus
Focus Magnifier — Fabulous tips for macro photographers (combined with Manual Focus Toggle above).
The Viewfinder Level
Changing the Focus and Drive Modes
AF Illuminator
AF Sensitivity
Focus Peaking
Shutter Priority for Video
|
|
SONY Image Galleries with Educational Captions: page 73 |
What They’ve Been Saying
From Fred Innamorato via e-mail
Hi Artie, I want to thank you for making the Sony e-Guide and videos available and for the work you put into the blog as well as for your books that teach us how to photograph birds and also for your camera User’s Guides. There is just no possible way I would have been able to get my Sony a9 ii camera settings so technically correct for doing birds in flight on my own without this guide. in my opinion, Sony should pay you for taking on the task of educating their customers. Sony has created an amazing camera but they fail to explain to their customers how to take full advantage of it. I appreciate that you know and have access to some very competent people with the technical backgrounds to assist you in your field experimentation to come up with the best and most practical and useful Menu Settings for bird photography. We all will benefit from your unique ability to pull this together. I am especially happy with your instructions on how to use the Zebra Settings for getting proper exposures. I really can’t thank you enough Artie for making my bird photography hobby so much more enjoyable than it would have been otherwise. My photography brings me great satisfaction. Sharing quality photographs with my family and friends has generated lots of interest in my hobby and why I do it. Life is good!
I highly recommend the purchase of your Sony e-Guide and Video(s). This information is just not available anywhere else. Even from Sony …
Fred Innamorato
Via e-Mail from Jerry Barrack
Hi Art,
I want to thank you again for your help with selling all of my Canon gear. Your advice on pricing was right-on as most items sold very quickly. As much as I loved my Canon equipment, the advances made by Sony with regard to autofocus made it a no-brainer for me to switch.
And thanks also for the SONY e-Guide, the Sony a9 video, and your Capture One Simplified video. After resisting using manual exposure for many, many years, I switched over to Patrick’s and your Zebras system with ISO on the rear wheel. I cannot believe how easy it is. It just shows that you can teach an old dog new tricks! My only complaint is that it now takes a lot longer to edit because nearly all of the images are properly exposed and in focus. The SONY focusing system along with the stuff I learned in the guide continues to amaze me. I just finished shooting Purple Martins and the percentage of sharp ones is unbelievable.
Thanks again for all your help. Stay safe and well.
Jerry
Blog comment by IPT veteran Barry Barfield
I have been actively using the set up from artie’s Sony e-Guide now for about four weeks. With my a9 ii and the 200-600 rig is easy to get the right exposure 99% of the time. I could never have figured out the settings suggested on my own, so thank you artie and Patrick. If you have Sony A9, A9ii, or one of the A7r bodies covered – you should get this guide today. Barry, Australia
From Peter Noyes via e-mail
Artie, In March, I purchased your e-Guide and Camera Set Up Video for the SONY a-7r iv mirrorless camera body. Both were great saving me a lot of time allowing me to spend more time outside enjoying my camera. The guide is surely worth a lot more than the purchase price to me.
Peter
From Thomas Bourne via e-mail
Artie, You and Patrick have done an outstanding job. Even though I own the a7 ii with its limits, I can see how you think and work. The guide was quite helpful to me. At 79 – and in great health, I may have enough time left to get another camera. Stay healthy!
Tom
Typos
With all blog posts, feel free to e-mail or to leave a comment regarding any typos or errors.



Hey Bob,
There is always something interesting on or around the pier. Would you like me to post a “Wanted to Buy” for a Canon 180mm macro lens?
with love, a
Lovely images, Artie.
Thanks, David. And thanks for sending Andrew this way.
with love, artie
Yes! I love me some Yellow Rat Snake images. What a fun subject. This snake has been identified as the Yellow Rat Snake (Elaphe Obsoleta Quadrivittata) for many decades. Just recently (I’m not sure how recently…last 10 maybe 15 years), the identification has changed to the Eastern Rat Snake (Pantherophis alleghaniensis). You are correct on the ID, although most older Floridians will call the snake a Yellow Rat as I do. I trust the scientific ID is more correct at this point, but it may be akin to calling a Roseate Spoonbill by name for your whole life then all of a sudden having to call it a Red and Pink Surf Chicken! BTW the “Fort” is now open 🙂
BTW…If someone had a larger Canon lens, would that adapter work well with the Sony camera? I didn’t realize that could be an option…
AF loses a very lot with big glass. Remember, I am manually focusing for macro …
with love, a
Excellent snake images Artie!
Hi Art, the snake is an interesting discovery. I noticed a couple of typos.
– I see the world in small rectangle (s/b rectangles)
– I sold me Canon 180 when I switched to Nikon (s/b my)
Happy New Year
Thanks and fixed with love, a
Artie
I love the snake image, how fun is that seeing something different, I bet each day you walk the pier there is something is different. Life thru the lens!
Iv’e looked for a 180 but have not found one.
Always with love b