|
|
|
This all-new card includes only images created on my JAN 2022 visit to San Diego. Click on the composite to enjoy a larger version. |
The 2022/23 San Diego Brown Pelicans (and more!) IPTs
San Diego IPT #1. 3 1/2 DAYS: WED 21 DEC thru the morning session on Saturday 24 DEC 2022. $2099.00. Deposit: $699.00. Limit: 6 photographers/Openings: 5.
San Diego IPT #2. 4 1/2 DAYS: SAT 7 JAN thru the morning session on WED 11 JAN 2023: $2699.00. Deposit: $699.00. Limit: 6 photographers/Openings: 2.
San Diego IPT #3: 3 1/2 DAYS: FRI 20 JAN thru the morning session on MON 23 JAN 2023: $2099.00. Deposit: $699.00. Limit: 6 photographers.
Please e-mail for information on personalized pre- and post-IPT sessions.
Join me in San Diego to photograph the spectacular breeding plumage Brown Pelicans with their fire-engine red and olive green bill pouches; Brandt’s (nesting) and Double-crested Cormorants; breeding plumage Wood and Ring-necked Ducks; other duck species possible including Lesser Scaup, Redhead, Northern Shoveler and Surf Scoter; a variety of gulls including Western, California, and the gorgeous Heermann’s, all in full breeding plumage; shorebirds including Marbled Godwit, Willet, Sanderling and Black-bellied Plover; many others are possible including Least, Western, and Spotted Sandpiper, Whimbrel, Black and Ruddy Turnstone, Semipalmated Plover, and Surfbird; Harbor Seals and California Sea Lions (both depending on the current regulations and restrictions). And as you can see by studying the IPT cards, there are some nice bird-scape and landscape opportunities as well. Not to mention a ton of excellent flight photography opportunities and instruction.
Please note: where permitted and on occasion, ducks and gulls may be attracted (or re-located) with offerings of grains or healthy bread.
|
|
|
San Diego offers a wealth of very attractive natural history subjects, including and especially the Pacific race of California Brown Pelican. With annual visits spanning more than four decades, I have lots of photographic experience there … Click on the composite to enjoy a larger version. |
Learning Exposure, Whether You Like It Or Not
Whether you like it or not, we will be beating the subject of exposure like a dead horse. In every new situation, you will hear my thoughts on exposure along with my thoughts on both Nikon and Canon histograms and SONY Zebras. Whether you like it or not, you will learn to work in manual mode so that you can get the right exposure every time (as long as a bird gives you ten seconds with the light constant). Or two seconds with SONY zebras … And you will learn what to do when the light is changing constantly. What you learn about exposure will be one of the great takeaways on every IPT.
|
|
|
Though the pelicans will be the stars of the show on this IPT, there will be many other handsome and captivating subjects in wonderful settings. Click on the composite to enjoy a larger version. |
It Ain’t Just Pelicans
With gorgeous subjects just sitting there waiting to have their pictures taken, photographing the pelicans on the cliffs is about as easy as nature photography gets. With the winds from the east almost every morning there is usually some excellent flight photography as well, often with 70-200mm lenses! And the pelicans are almost always doing something interesting: preening, scratching, bill pouch cleaning, or squabbling. And then there are those crazy head throws that are thought to be a form of intra-flock communication. You will be guided as to how to make the best of those opportunities. Depending on the weather, the local conditions, and the tides, there are a variety of other fabulous photo chances available in and around San Diego.
|
Did I mention that there are lots of great birds and natural history subjects in San Diego in winter? Click on the composite to enjoy a larger version. |
The San Diego Details
These IPTs will include four or five 3-hour morning photo sessions, three or four 1 1/2-hour afternoon photo sessions, and three or four working brunches that will include image review and Photoshop sessions. On rare cloudy days, we may — at the leader’s discretion, stay out in the morning for a long session and skip that afternoon. To ensure early starts, breakfasts will be your responsibility. And so that we can get some sleep, dinners will be on your own as well. In the extremely unlikely event that Goldfish Point is closed due to local ordinance (or whimsy) — that has never happened in the past fifty years, I will of course do my very best to maximize our photographic opportunities.
|
|
|
San Diego offers a wealth of very attractive natural history subjects, including and especially the Pacific race of California Brown Pelican. With annual visits spanning more than four decades, I have lots of photographic experience there … Click on the composite to enjoy a larger version. |
Deposit Info
A $699 deposit is required to hold your slot for one of the 2022/23 San Diego IPTs. You can send a check (made out to “BIRDS AS ART”) to us here: BIRDS AS ART, PO Box 7245, Indian Lake Estates, FL, 33855, or call Jim or Jennifer at the office with a credit card at 863-692-0906. Your balance, payable only by check, is due three months before the trip.
|
Variety is surely the spice of life in San Diego. Click on the composite to enjoy a larger version. |
Getting Up Early and Staying Out Late
On all BIRDS AS ART IPTS including and especially the San Diego IPT, we get into the field early to take advantage of unique and often spectacular lighting conditions and we stay out late to maximize the chances of killer light and glorious sunset silhouette situations. We often arrive at the cliffs a full hour before anyone else shows up to check out the landscape and seascape opportunities.
What’s Up?
I skipped my Wednesday morning walks and my photo session to get ready for my DeSoto road tip. I’ll drive over later today.
Speaking of which, today is Thursday 6 October 2022. Wherever you are, and whatever you are doing, I hope that you too have a great day. This blog post took about 90 minutes to prepare and makes one hundred ninety-five days in a row with a new one.
Please remember to use the B&H and Amazon links that are found on most blog pages and to use the BIRDSASART discount code at checkout when purchasing your new gear from Bedfords to get 3% back on your credit card and enjoy free second-day air FedEx. Please, also, consider joining a BAA IPT. You will be amazed at how much you will learn!
Follow me on Instagram here. I am trying to feature both new and old images, especially images that have not appeared recently on the blog. Or search for birds_as_art.
BIRDS AS ART Image Optimization Service (BAA IOS)
Send a PayPal for $62.00 to birdsasart@verizon.net or call Jim at 863-692-0906 and put $62.00 on your credit card. Pick one of your best images and upload the raw file using a large file sending service like Hightail or DropBox and then send me the link via e-mail. I will download and save your raw file, evaluate the exposure and sharpness, and optimize the image as if it were my own after converting the raw file in Adobe Camera Raw. Best of all, I will make a screen recording of the entire process and send you a link to the video to download, save and study.
Induro GIT 304L Price Drop
Amazingly, we have two, brand-new-in-the-box Induro GIT 304L tripods in stock. They are $699.00 each (were $799.00) and the price now includes the insured ground shipping to the lower 48 states. Weekday phone orders only: 863-692-0906. Order yours here while they last.
|
|
|
This image was created on 19 January 2022 on a San Diego IPT. Standing at full height, I used the no-longer available (except from BAA) Induro GIT 304L tripod/Levered-Clamp FlexShooter Pro-mounted Sony FE 600mm f/4 GM OSS lens with the Sony FE 1.4x Teleconverter, and The One, the Sony Alpha 1 Mirrorless Digital Camera.. ISO 640. The exposure was determined by Zebras with ISO on the rear wheel: 1/500 second at f/6.3 (stopped down 1/3-stop) in Manual mode. RawDigger showed that the exposure was dead-solid perfect. AWB at 10:02:11am on a mostly sunny morning. Tracking: Zone/AF-C with Bird-Eye/Face Detection performed perfectly. Click on the image to enjoy the high-res version. Image #1: Brown Pelican, Pacific-race juvenile |
Pacific-race Brown Pelicans
Separating adult Pacific-race Pelicans from the adult pelicans is child’s play. The fire-engine red/olive green bill pouches of the pelicans on the west coast are both distinctive and remarkable. The young birds, however, are quite similar, if not indistinguishable in the field. The Sibley Guide to Birds does not mention any differences in the young western and eastern birds other than that the Pacific birds average larger. Though not as flashy as their parents, their light yellow lower mandibles and bill pouches, and the varying shades of brown feathers combined with their white breasts yield handsome youngsters. In some years at La Jolla as many as 20 percent of the birds on the cliffs are juvie. In other years, you might only see one or two on some days. Visiting photographers are urged not to dismiss the young birds just because their parents are better looking.
|
|
|
This image was created on 19 January 2022 on a San Diego IPT. Standing at full height, I used the no-longer available (except from BAA) Induro GIT 304L tripod/Levered-Clamp FlexShooter Pro-mounted Sony FE 600mm f/4 GM OSS lens with the Sony FE 1.4x Teleconverter, and The One, the Sony Alpha 1 Mirrorless Digital Camera.. ISO 640. The exposure was determined by Zebras with ISO on the rear wheel: 1/500 second at f/6.3 (stopped down 1/3-stop) in Manual mode. RawDigger showed that the exposure was dead-solid perfect. AWB at 10:02:18 am on a mostly sunny morning. Tracking: Zone/AF-C with Bird-Eye/Face Detection performed perfectly. Click on the image to enjoy the high-res version. Image #2: Brown Pelican, Pacific-race juvenile preening |
Image Optimization Tip
When converting similar images from a sequence, carefully convert one of the images. Bring the next image into Adobe Camera Raw, place the cursor on the second image, hold the Control key down and left click. Then select Apply Previous Settings and you will be close to perfect. With the bird facing forward in Image #2 (the second image to be converted), the top of the head was somewhat darker than in the first image so I added 0.20 stops to the Exposure and moved the Shadows slider a bit more to the right to +32. Using Apply Previous Settings saved me several minutes of work.
These two images were created just seven seconds apart. The file numbers are 13 apart so it is likely that there were twenty or more images in the sequence. Of those, I kept only two, my favorites, today’s two featured images. Which of those is your single favorite? Please leave a comment and let us know why you made your choice.
Do take note of the absolutely perfect preening head and bill angle.
|
|
|
Click on the screen capture to better read the fine print. Image #2A: The RawDigger screen capture for the Brown Pelican, Pacific-race juvenile preening image |
Ho Hum, Another Perfect Exposure
What can I say? The combination of Zebras live in the viewfinder (with your camera set up properly) and post-capture study of the raw files in RawDigger makes it pretty much child’s play to come up with perfect exposure after perfect exposure. It would be impossible to overstate how much I have learned by studying RawDigger and how much better my exposures have become since I started with the program almost two years ago. The raw file exposure for today’s featured images are both daed-solid perfect with the G channel almost making the 16000 line. The 17 OvExp pixels out of 51,000,000 are less than negligible 🙂
RawDigger — not for the faint of heart …
Nothing has ever helped me learn to create perfect exposures to the degree that RawDigger has. I think that many folks are reluctant to learn that most of their images are underexposed by one or more full stops and that highlight warnings in Photoshop, Lightroom, Capture One, and your in-camera histogram are bogus as they are based on the embedded JPEGs. Only your raw files tell the truth all the time. Heck, I resisted RawDigger for several years … Once you get over that feeling, RawDigger can become your very best exposure friend no matter what system you are using. On the recent IPTs and In-the-Field sessions, we have demonstrated that fact. Convincingly.
The RawDigger Adapted (pink) Histogram
In the RawDigger e-Guide, you will learn exactly how to set up the Adapted “pink” RawDigger Histogram and how to use it to quickly and easily evaluate the exposure or raw file brightness of images from all digital cameras currently in use. RawDigger was especially helpful to me as I have struggled with R5 exposures and learned my new camera body, the Sony Alpha a1.
|
|
RawDigger e-Guide with Two Videos |
The RawDigger e-Guide with Two Videos
by Arthur Morris with Patrick Sparkman
The RawDigger e-Guide was created only for serious photographers who wish to get the absolute most out of their raw files.
Patrick and I began work on the guide in July 2020. At first, we struggled. We asked questions. We learned about Max-G values. We puzzled as to why the Max G values for different cameras were different. IPT veteran Bart Deamer asked lots of questions that we could not answer. We got help from RawDigger creator Iliah Borg. We learned. In December, Patrick came up with an Adapted Histogram that allows us to evaluate the exposures and raw file brightness for all images created with all digital camera bodies from the last two decades. What we learned each time prompted three complete beginning to end re-writes.
The point of the guide is to teach you to truly expose to the mega-Expose-to-the-Right so that you will minimize noise, maximize image quality, best utilize your camera’s dynamic range, and attain the highest possible level of shadow detail in your RAW files in every situation. In addition, your properly exposed RAW files will contain more tonal information and feature the smoothest possible transitions between tones. And your optimized images will feature rich, accurate color.
We teach you why the GREEN channel is almost always the first to over-expose. We save you money by advising you which version of RawDigger you need. We teach you how to interpret the Max G values for your Canon, Nikon, and SONY camera bodies. It is very likely that the Shock-your-World section will shock you. And lastly — thanks to the technical and practical brilliance of Patrick Sparkman — we teach you a simple way to evaluate your exposures and the raw file brightness quickly and easily the Adapted RawDigger histogram.
The flower video takes you through a session where artie edits a folder of images in Capture One while checking the exposures and Max-G values in RawDigger. The Adapted Histogram video examines a series of recent images with the pink histograms and covers lots of fine points including and especially how to deal with specular highlights. The directions for setting up the Adapted Histogram are in the text.
If we priced this guide based on how much effort we put into it, it would sell it for $999.00. But as this guide will be purchased only by a limited number of serious photographers, we have priced it at $51.00. You can order yours here in the BAA Online Store.
Typos
With all blog posts, feel free to e-mail or to leave a comment regarding any typos or errors.

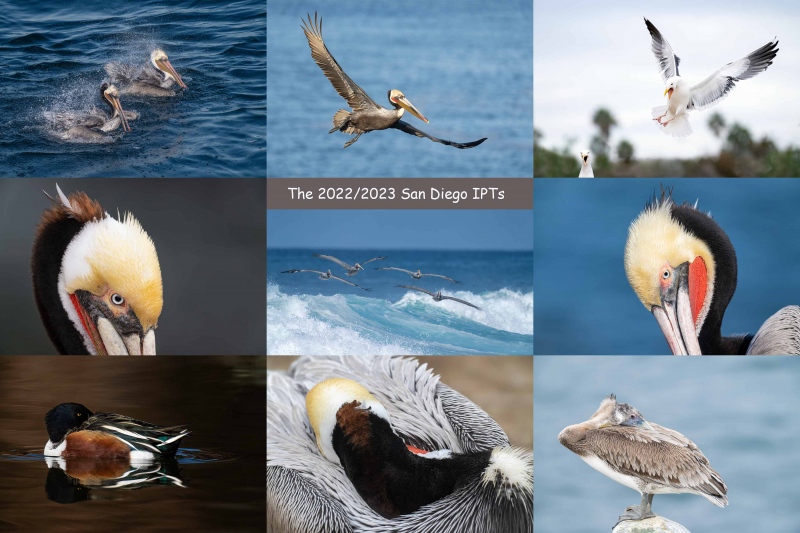
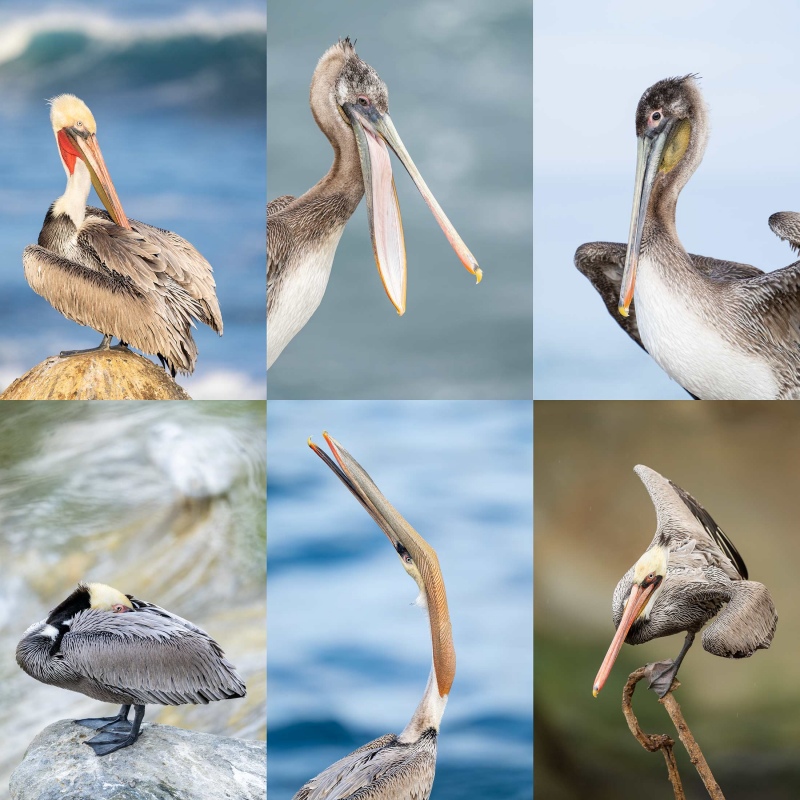
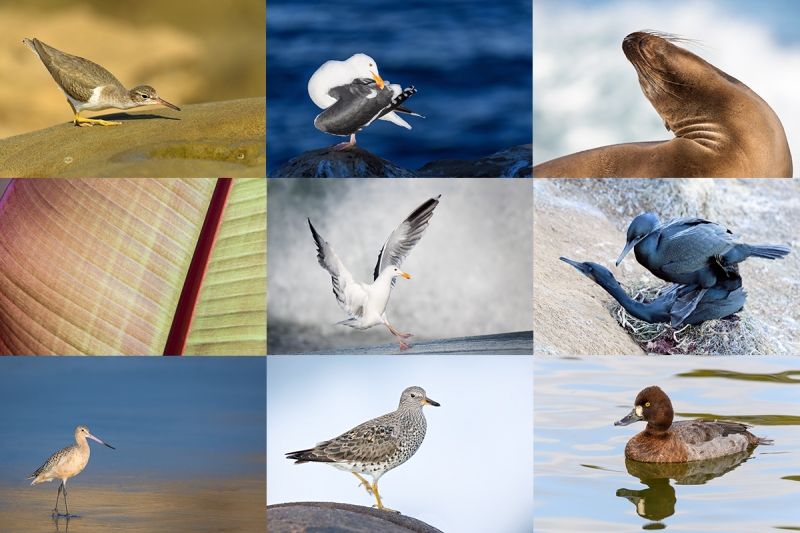
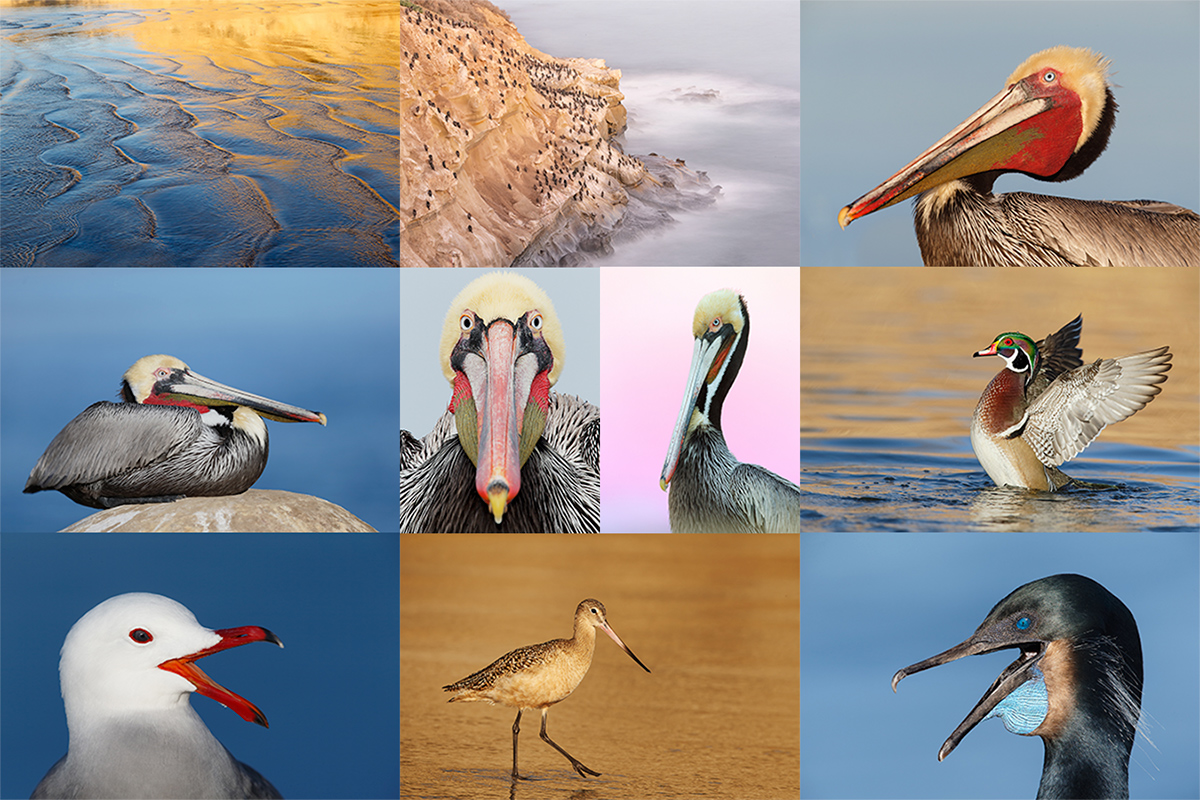
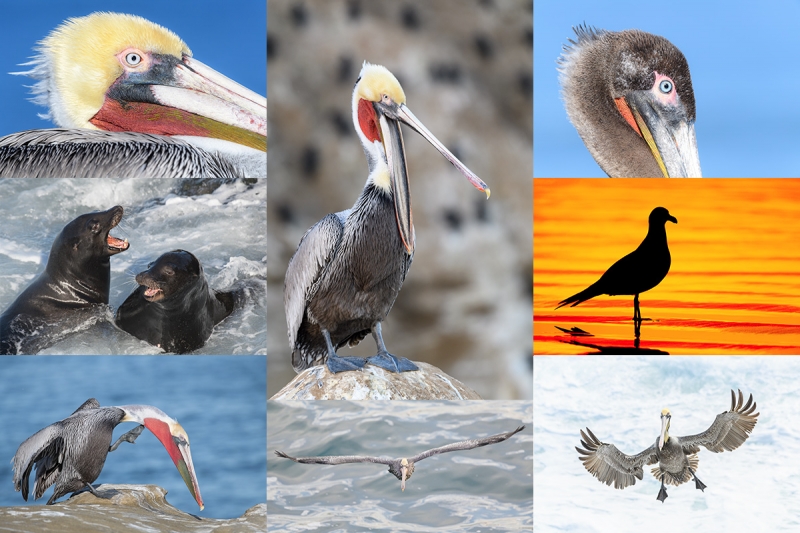
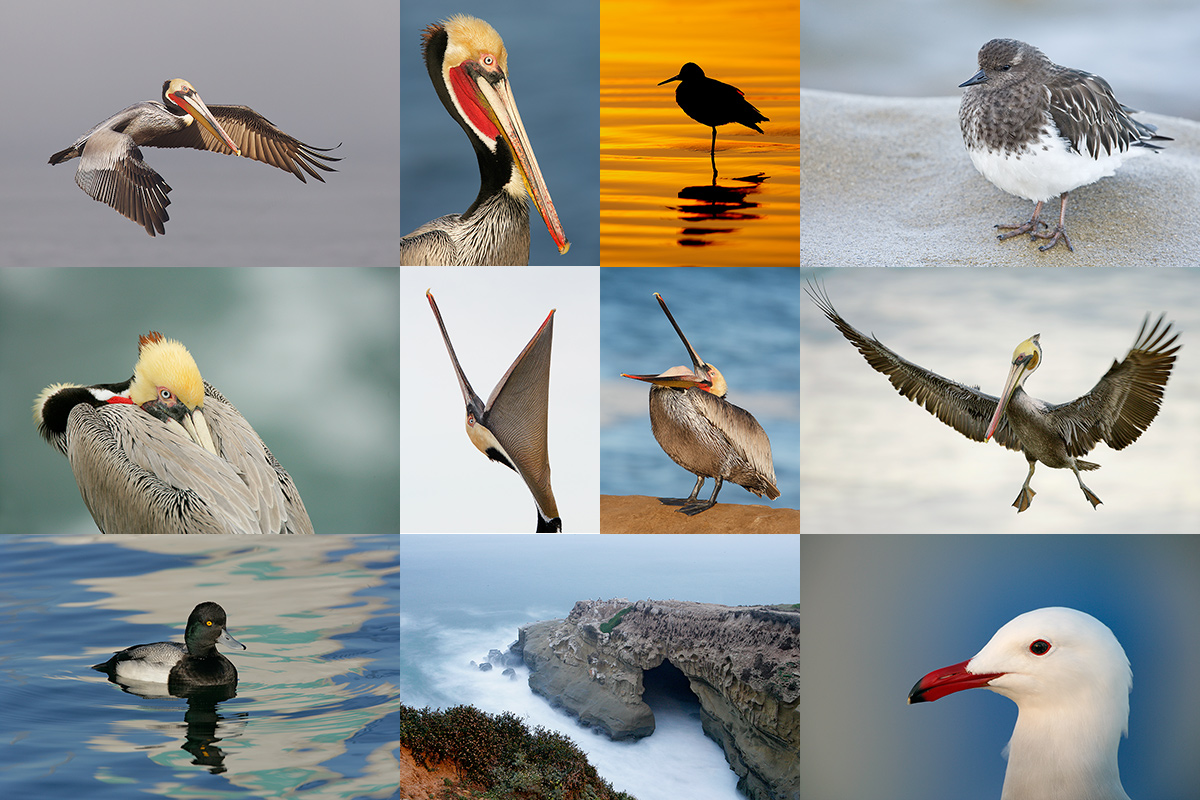
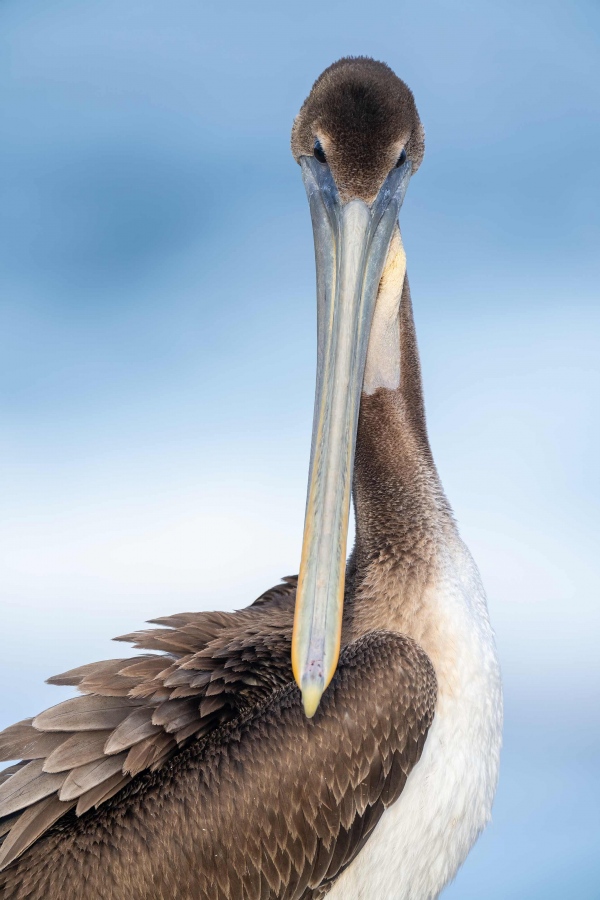
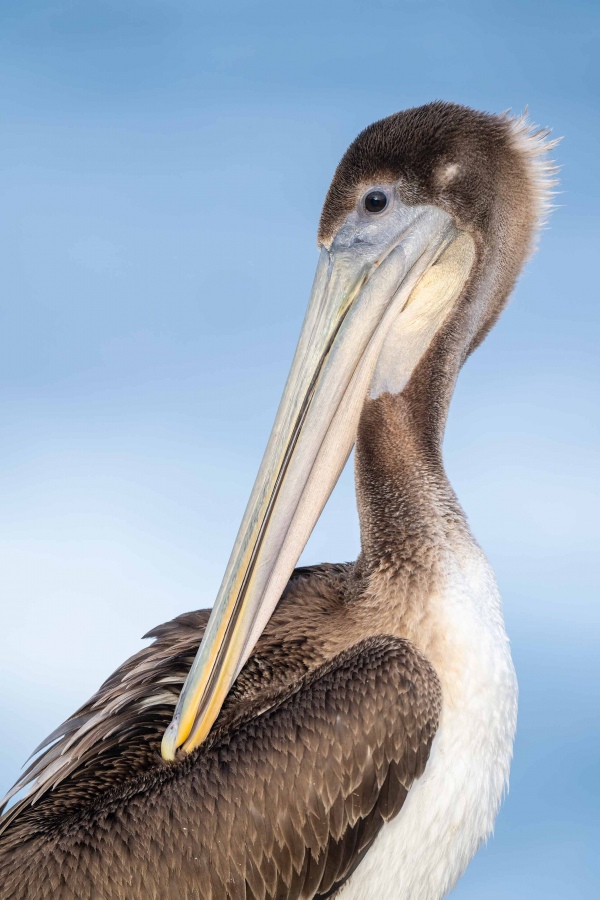
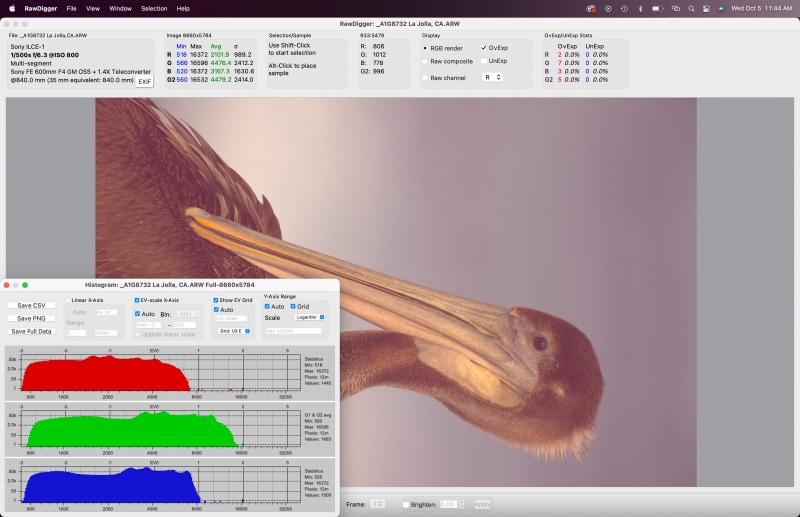
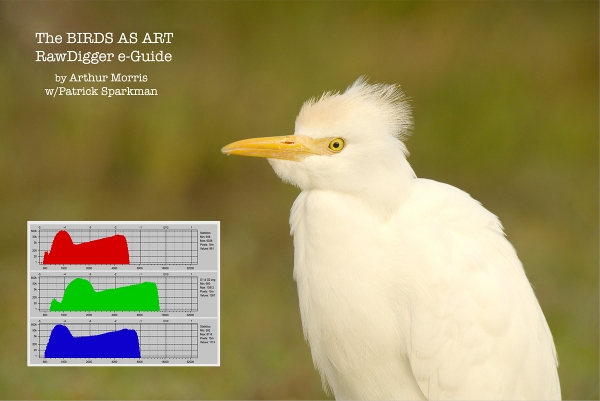


Image #1 and #2 Brown Pelican are great photos! Good colors, good close photo, good focus, good cute bird!