|
|
|
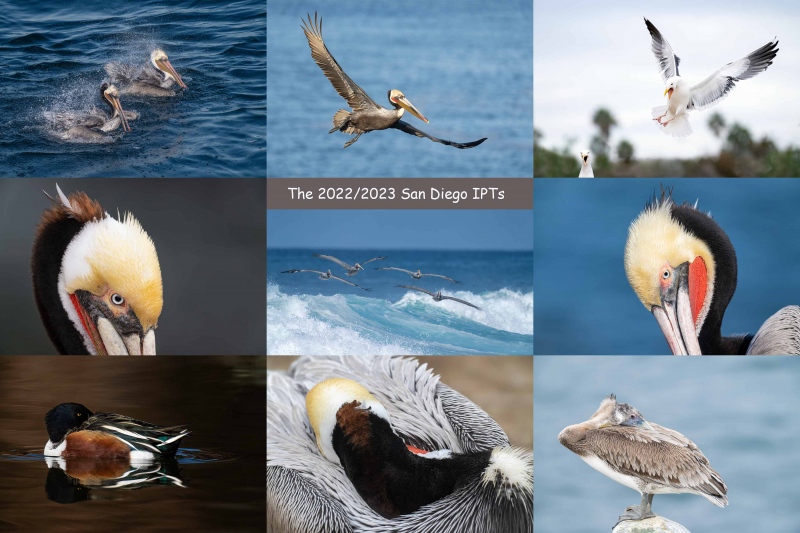
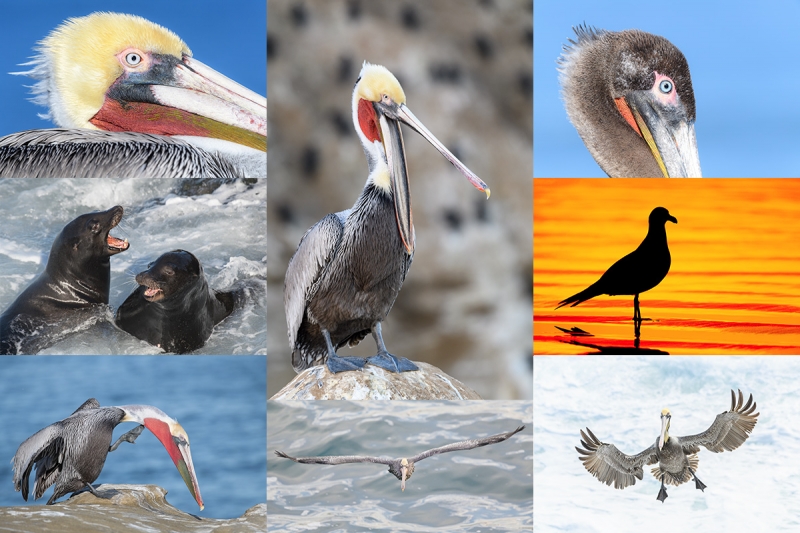
This all-new card includes images created on my JAN 2022 visit to San Diego. Click on the composite to enjoy a larger version. |
The 2023/2024 San Diego Brown Pelicans (and more!) IPTs
San Diego IPT #1. 3 1/2 DAYS: WED 27 DEC thru the morning session on Saturday 30 DEC 2023. $2099.00. Deposit: $699.00. Limit: 6 photographers.
San Diego IPT #2. 4 1/2 DAYS: TUES 9 JAN thru the morning session on SAT 13 JAN 2024: $2699.00. Deposit: $699.00. Limit: 6 photographers.
San Diego IPT #3: 4 1/2 DAYS: TUES 23 JAN thru the morning session on SAT 27 JAN 2024: $2699.00. Deposit: $699.00. Limit: 6 photographers.
Please e-mail for information on personalized pre- and post-IPT morning sessions.
Join me in San Diego to photograph the spectacular breeding plumage Brown Pelicans with their fire-engine red and olive green bill pouches; Brandt’s (nesting) and Double-crested Cormorants; breeding plumage Wood and Ring-necked Ducks; other duck species possible including Lesser Scaup, Redhead, Northern Shoveler and Surf Scoter; a variety of gulls including Western, California, and the gorgeous Heermann’s, all in full breeding plumage; shorebirds including Marbled Godwit, Willet, Sanderling and Black-bellied Plover; many others are possible including Least, Western, and Spotted Sandpiper, Whimbrel, Black and Ruddy Turnstone, Semipalmated Plover, and Surfbird; Harbor Seals and California Sea Lions (both depending on the current regulations and restrictions). And as you can see by studying the IPT cards, there are some nice bird-scape and landscape opportunities as well. Not to mention a ton of excellent flight photography opportunities and instruction.
I discovered some really neat spots on my 2022/23 visit. As a result, the first and second IPTs may include an afternoon or two of landscape photography.
Please note: where permitted and on occasion, ducks and gulls may be attracted (or re-located) with offerings of grains or healthy bread.
|
|
|
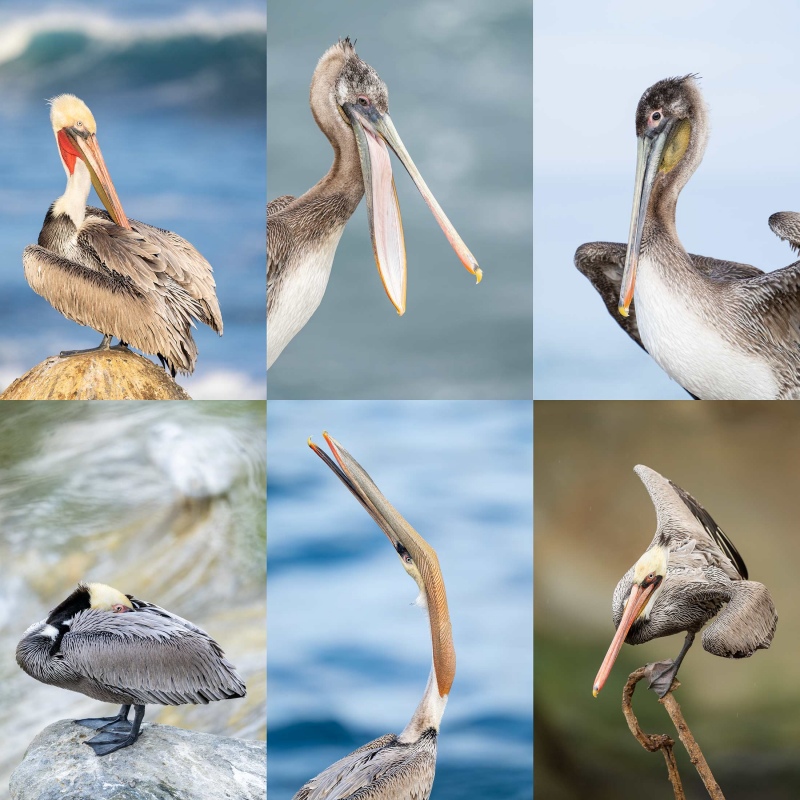
San Diego offers a wealth of very attractive natural history subjects, including and especially the Pacific race of California Brown Pelican. With annual visits spanning more than four decades, I have lots of photographic experience there … Click on the composite to enjoy a larger version. |
Learning Exposure, Whether You Like It Or Not
Whether you like it or not, we will be beating the subject of exposure like a dead horse. In every new situation, you will hear my thoughts on exposure along with my thoughts on both Nikon and Canon histograms and SONY Zebras. Whether you like it or not, you will learn to work in manual mode so that you can get the right exposure every time (as long as a bird gives you ten seconds with the light constant). Or two seconds with SONY zebras … And you will learn what to do when the light is changing constantly. What you learn about exposure will be one of the great takeaways on every IPT.
|
|
|
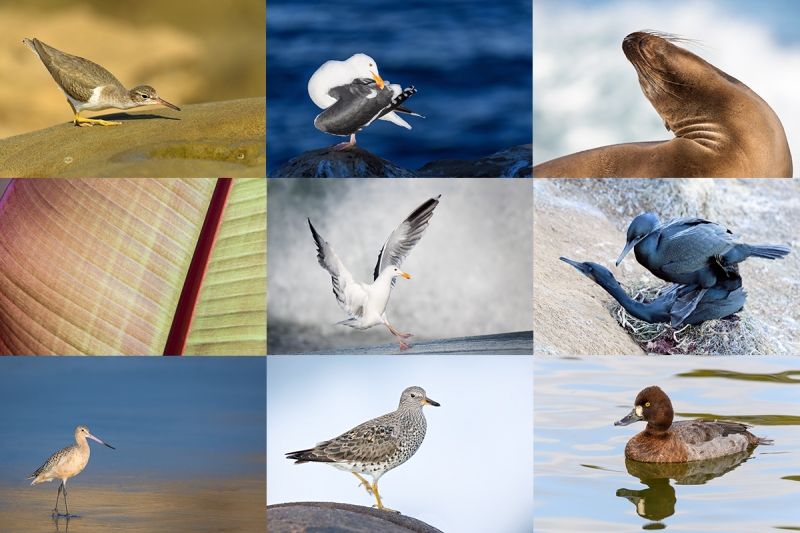
Though the pelicans will be the stars of the show on this IPT, there will be many other handsome and captivating subjects in wonderful settings. Click on the composite to enjoy a larger version. |
It Ain’t Just Pelicans
With gorgeous subjects just sitting there waiting to have their pictures taken, photographing the pelicans on the cliffs is about as easy as nature photography gets. With the winds from the east almost every morning, there is usually some excellent flight photography, at times with 70-200mm lenses! And the pelicans are almost always doing something interesting: preening, scratching, bill pouch cleaning, or squabbling. And then there are those crazy head throws that are thought to be a form of intra-flock communication. You will be guided as to how to make the best of those opportunities. Depending on the weather, the local conditions, and the tides, there are a variety of other fabulous photo chances available in and around San Diego. Each IPT will include one or two duck sessions.
|
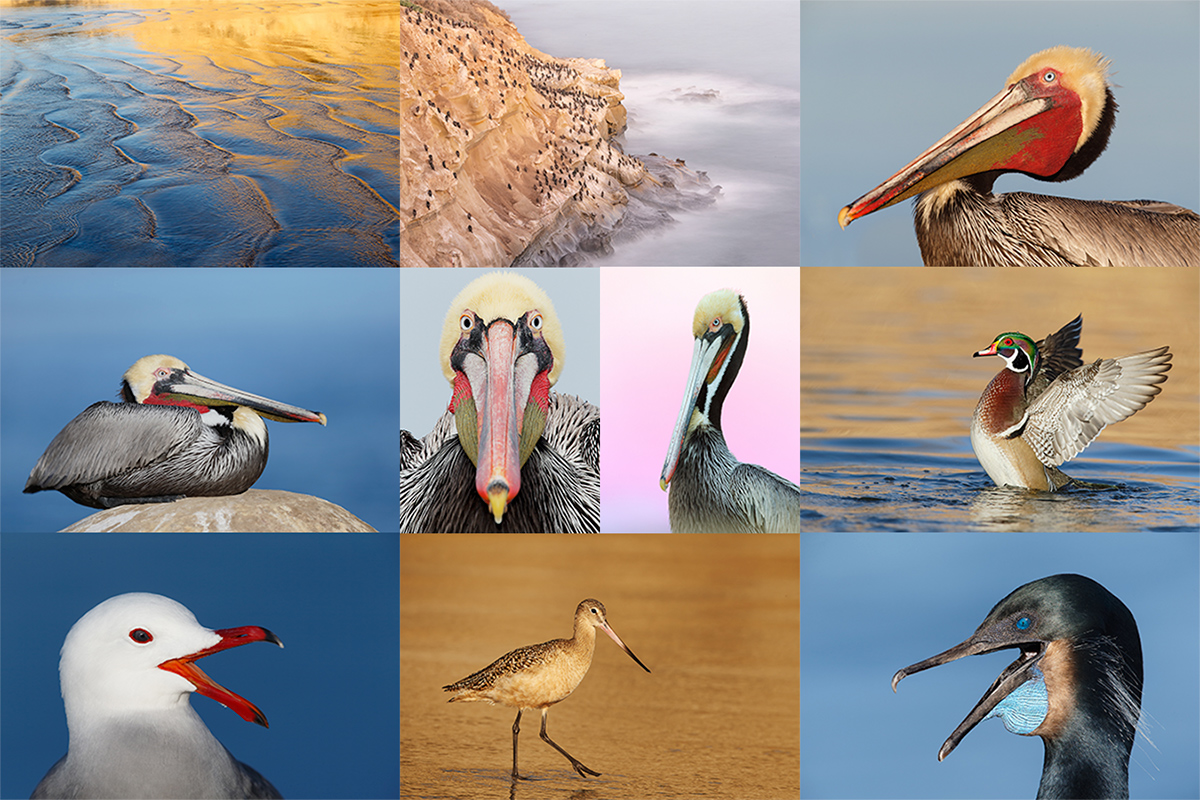
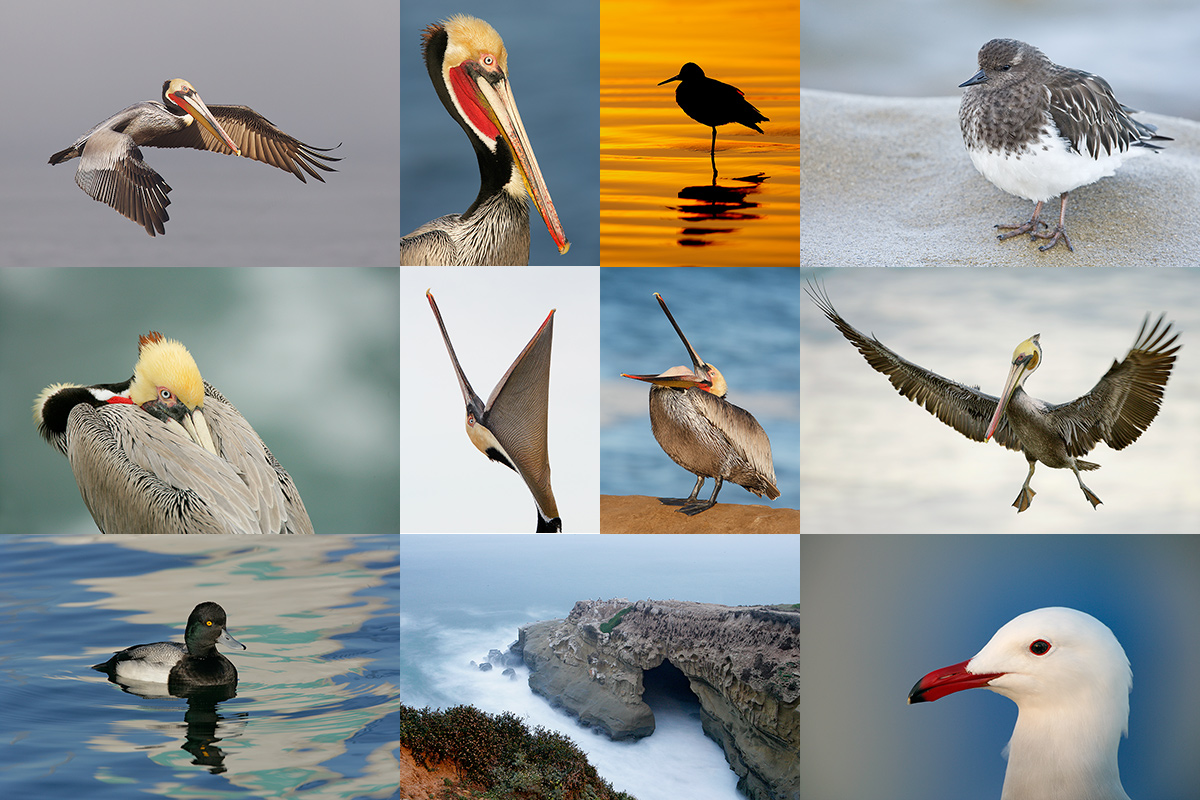
Did I mention that there are lots of great birds and natural history subjects in San Diego in winter? Click on the composite to enjoy a larger version. |
The San Diego Details
These IPTs will include four or five 3-hour morning photo sessions, three or four 1 1/2-hour afternoon photo sessions, and three or four working brunches that will include image review and Photoshop sessions. On rare cloudy days, we may — at the leader’s discretion, stay out in the morning for a long session and skip that afternoon shoot. To ensure early starts, breakfasts will be your responsibility. And so that we can get some sleep, dinners will be on your own as well. In the extremely unlikely event that Goldfish Point is closed due to local ordinance (or whimsy) — that has never happened in the past fifty years, I will of course do my very best to maximize our photographic opportunities.
|
|
|
San Diego offers a wealth of very attractive natural history subjects, including and especially the Pacific race of California Brown Pelican. With annual visits spanning more than four decades, I have lots of photographic experience there … Click on the composite to enjoy a larger version. |
Deposit Info
A $699 deposit is required to hold your slot for one of the 2023/2024 San Diego IPTs. You can send a check (made out to “BIRDS AS ART”) to us here: BIRDS AS ART, PO Box 7245, Indian Lake Estates, FL, 33855, or call Jim or Jennifer at the office with a credit card at 863-692-0906. Your balance, payable only by check, is due three months before the trip.
|
Variety is surely the spice of life in San Diego. Click on the composite to enjoy a larger version. |
Getting Up Early and Staying Out Late
On all BIRDS AS ART IPTS including and especially the San Diego IPT, we get into the field early to take advantage of unique and often spectacular lighting conditions and we stay out late to maximize the chances of killer light and glorious sunset silhouette situations. We often arrive at the cliffs a full hour before anyone else shows up to check out the landscape and seascape opportunities.
What’s Up?
Again, please remember that the blog is meant to be interactive. Even if you do not opt to leave a comment, run through the questions in your head. Doing so will help you improve your bird photography. Thanks to the many who commented on yesterday’s image. I will respond to each comment as soon as this is posted.
The first morning of the 3rd Homer IPT was quite successful as the strong north wind switched just a bit to the east. With two relatively new Sony a1 folks — Charlie Curry and IPT veteran Mark Harrington — joining Monte Brown and Bob Eastman, the last group is comprised of Sony a1 shooters. As we crossed Kachemak Bay, I reviewed and explained all of my 1.31 dot DAT file settings. We began with some decent flight photography and ended the three hour forty-five minute session doing head shots. We stayed in in the afternoon as the winds picked up. That gave us lots of time for image review. “Bear” Bob Sabin did join us for an extra morning session before beginning his trip back home to Long Island on the 5:00pm Rav’n flight to Anchorage. Bob stated many times during the trip that I was by far the most dynamic leader he had ever traveled with, offering more tips and instruction both in the field and at the hotel than anyone he had ever encountered. Thanks for that, Bob! And get home safely.
Today is Saturday 4 March 2023. The morning forecast is for a brisk wind from the northeast with sunny skies, nearly perfect for flight photography. This blog post took less than an hour to prepare and makes three hundred thirty-nine days in a row with a new educational post written just for you. Wherever you are and whatever you are doing, I hope that you too have a great day.
Please, please, pretty please remember to use my B&H or Bedford’s affiliate programs for all your new gear purchases. If you use B&H, please be sure to click on any B&H link in the blog to start your search. Or simply start with this link. There is always the option of e-mailing me for gear advice and for the correct links.
The plan is to continue to post every day until the streak reaches one year and one day and then begin posting every other day.
As above, please remember to use the B&H and Amazon links that are found on most blog pages and to use the BIRDSASART discount code at checkout when purchasing your new gear from Bedfords to get 3% back on your credit card and enjoy free second-day air FedEx. Please, also, consider joining a BAA IPT. You will be amazed at how much you will learn!
You can find some great photo accessories (and necessities, like surf booties!) on Amazon by clicking on the Stuff tab on the orange/yellow menu bar above. On a related note, it would be extremely helpful if blog-folks who, like me, spend too much money on Amazon, would get in the habit of clicking on the Amazon logo link on the right side of each blog post when they shop online. As you might expect, doing so will not cost you a single penny, but would be appreciated tremendously by yours truly. And doing so, works seamlessly with your Amazon Prime account.
Please remember that if an item — a Delkin flash card, or a tripod head — for example, that is available from B&H and/or Bedfords, is also available in the BAA Online Store, it would be great, and greatly appreciated, if you would opt to purchase from us. We will match any price. Please remember also to use my B&H affiliate links or to earn 3% cash back at Bedfords by using the BIRDSASART discount code at checkout for your major gear purchases. Doing either often earns you free guides and/or discounts. And always earns my great appreciation.
|
|
|
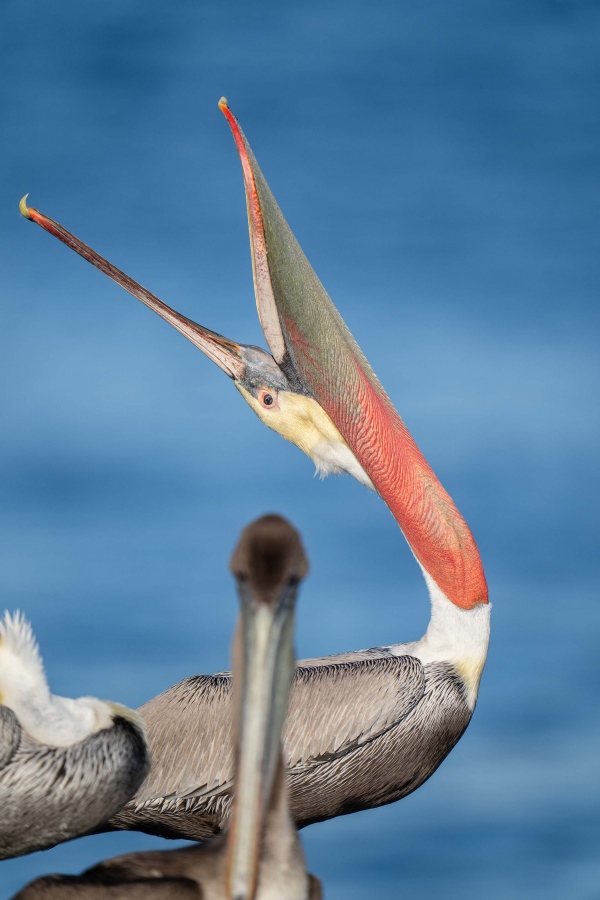
This image was created on 21 December at La Jolla, CA. While standing at full height, I used the handheld Sony FE 400mm f/2.8 GM OSS lens Tracking: Zone AF-C with Bird Face/Eye detection enabled performed to perfection. Click on the image to enjoy a high-res version. Image #1: Brown Pelican Pacific-race pre-breeding plumage head throw |
From Yesterday’s Blog Post
We have a perfectly exposed photo that captures the peak of the head throw action with a great look at the bill pouch. We managed avoid clipping the bill tip. Sharp focus is on the eye with enough of DOF to cover the entire subject that is ideally and perfectly parallel to the imaging sensor.
Keep or Delete? Why?
If this were your image, would you keep it or delete it? Either way, why?
If you would keep it, please leave a comment detailing your plans for the image optimization. How would you crop this? Where would you add canvas? Would you eliminate the out-of-focus young pelican in front of the subject? How?
Several folks stated that they would delete the image. Others suggested ways to save it. Thanks to Cliff Beittel and Eleanor Osborne who took the bull by the horns, grabbed the images from the blog, and sent me their square versions. Both were similar to my third version. Neil Hickman suggested an excellent plan that sounded easier than it was; see my comments on my version #2 below.
In general, out-of-focus elements in front of a sharply focused subject are image wreckers. But …
|
|
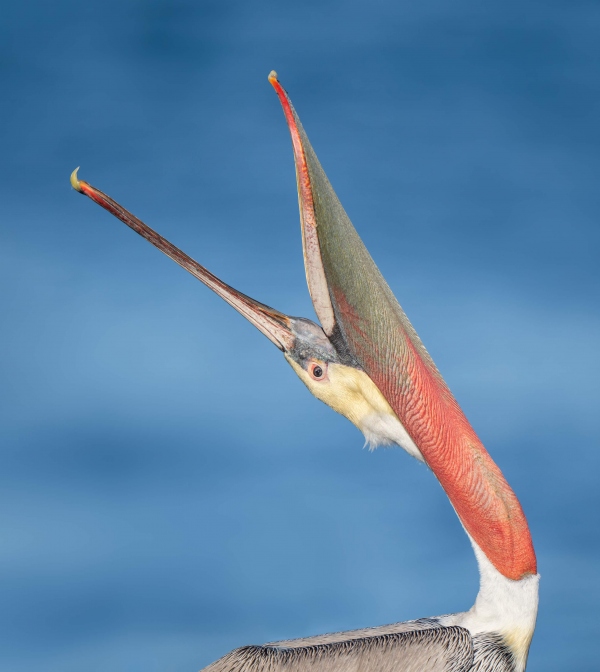
Version 1: Brown Pelican Pacific-race pre-breeding plumage head throw |
Version 1
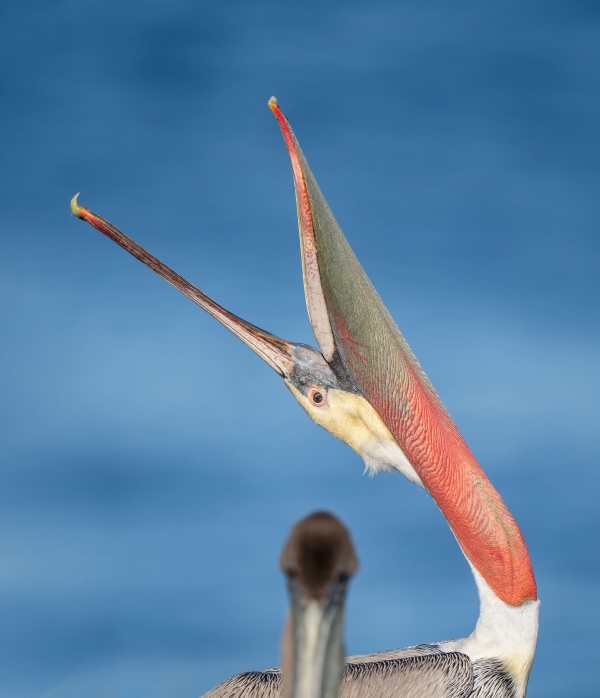
The first step for me was a very careful crop that began just above the folded white neck of the pelican on the left frame-edge. That left only that bird’s white head in the image. That was easily dealt with using Content-Aware Fill. Next, I used Content-Aware Crop to expand the frame on the left. I was surprised to note that with the very distracting elements in the lower right corner gone, the out-of-focus pelican was not as bothersome as it had been in the original image.
|
|
Version 2: Brown Pelican Pacific-race pre-breeding plumage head throw |
Version 2
Here, I used Divide and Conquer and then Content-Aware Fill to lose the out-of-focus pelican completely. Doing so made somewhat of a mess of the blue background. Next, I needed several Quick Masks of the back of the pelican. Each needed to be warped first and then refined by the addition of a Regular Layer Mask. Next, I had to smooth out the blue background just above the pelican’s back. To do that I used the Clone Stamp Tool and Content-Aware Fill. The area still looked a bit lumpy and uneven, so I applied a layer of Gaussian Blur, added a Black (Hide-all or Inverse) Layer Mask, and judiciously painted in the effect in 33% increments as needed.
|
|
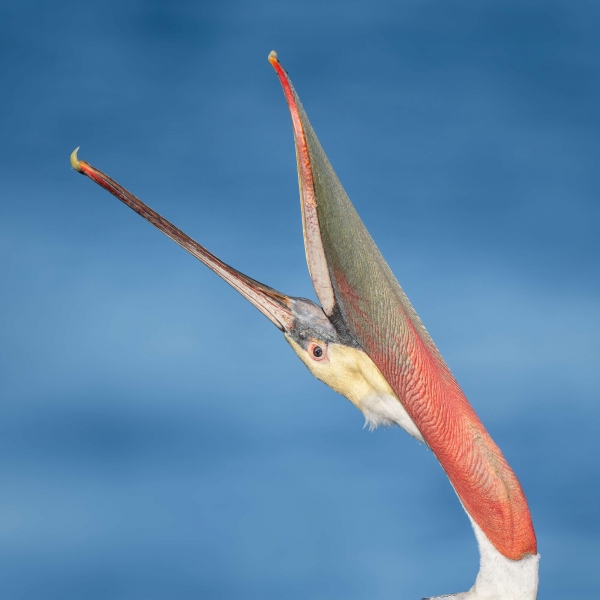
Version #3: Brown Pelican Pacific-race pre-breeding plumage head throw |
Version 3
This last version is simply a square crop of the second version.
Your Call?
Does anyone prefer Version 1 over Versions 2 and 3? If yes, why?
Of Version 2 and 3, which do you think is the stronger image? Why? I have a clear choice and will share it with you here tomorrow along with my reasons.
|
|
The BIRDS AS ART Current Workflow e-Guide (Digital Basics II).You can order your copy from the BAA Online Store here, by sending a PayPal for $40 here, or by calling Jim or Jennifer weekdays at 863-692-0906 with your credit card in hand. Be sure to specify Digital Basics II. |
The BIRDS AS ART Current Workflow e-Guide (Digital Basics II)
The techniques mentioned above and tons more great Photoshop tips and techniques — along with my complete digital workflow, Digital Eye Doctor Techniques, and all my personalized Keyboard Shortcuts — are covered in detail in the BIRDS AS ART Current Workflow e-Guide (Digital Basics II), an instructional PDF that is sent via e-mail. Note: folks working on a PC and/or those who do not want to miss anything Photoshop may wish to purchase the original Digital Basics along with DB II while saving $15 by clicking here to buy the DB Bundle.
Please note: the Divide and Conquer technique was inadvertently omitted from DB II. It is detailed in a free excerpt in the blog post here.
Folks who learn well by following along rather than by reading can check out the complete collection of MP 4 Photoshop Tutorial Videos by clicking here. Note: most of the videos are now priced at an amazingly low $5.00 each.
You can learn how and why I converted all of my Canon digital RAW files in DPP 4 in the DPP 4 RAW Conversion Guide here. More recently, I became proficient at converting my Nikon RAW (NEF) files in Adobe Camera Raw. About three years ago I began converting my Nikon and Sony RAW files in Capture One and did that for two years. You can learn more about Capture One in the Capture One Pro 12 Simplified MP4 Video here. The next step would be to get a copy of Arash Hazeghi’s “The Nikon Photographers’ Guide to Phase One Capture One Pro e-Guide” in the blog post here. Today, I convert my Sony raw files in Photoshop with Adobe Camera Raw.
You can learn advanced Quick Masking and advanced Layer Masking techniques in APTATS I & II. You can save $15 by purchasing the pair.
Typos
With all blog posts, feel free to e-mail or to leave a comment regarding any typos or errors.



Yep! No 2 is what I envisaged. I note that you rarely use a brush to assist with clean up tools. The sea background here would be classic case where there are subtle changes in tone. Cloning makes a mess. However, rather than being meticulous with these tools, if you use a brush at low (8%) opacity, an awful cloning job can be cleaned up in minutes. On its own layer of course with the bird masked out. Choose a light area, then dark area and smooth those nasty cloning effects away. If too quick reduce opacity even more – then – slowly slowly.
Hi Neil,
Thanks for commenting. I am not sure what you mean about me “rarely using a brush to assist with clean-up tools.” I rarely use the Clone Stamp Tool because it too often makes a mess. And I do use a “brush”when painting in a Gaussian Blur.
Are you saying either that you are seeing Clone Stamp marks in versions 2 and 3 or the the blue ocean is a mess? Not being defensive, just being curious.
And yes, going very soft with the Clone Stamp Tool is a great way to go.
BTW, when you mention 8% did you mean to say opacity or were you referring to brush hardness?
artie
For me, Version 2, including the bird’s back, is my favorite, but it does look a bit too straight. Regardless, they’re lovely.
BTW, both the eaglets are branching. No adults in sight.
Oh, no. Tell them to wait for me!
a
Maybe you get make it in time for the branching. I really don’t know the timeline, but they weren’t overly adventurous as of yet. However, as expected, over the last few weeks I’ve noticed that one is considerably less daunted than the other. After I was there for a short time, both both jumped back in the nest. I didn’t want to make them uncomfortable, so I left and came back. This pattern was repeated a few times, so consequently I spent considerably less time with the eaglets and more time concentrating on the other wildlife.
Based on the activity, it appears the Ospreys are done preparing their nests and are currently sitting on eggs. You’ll definitely be back in time to see those little cuties.
Have a safe trip home.
Version 2 is exactly what I envisioned so that’s my winner. I think you need the back of the bird to anchor the frame.
I agree but only 100%!
with love, artie
I find your images with the removed foreground bird more pleasing. The OOF bird would be a distraction.
Given that I, as the viewer of the image without the foreground bird, would never know it had been there, it would look natural enough to me. I don’t generally detect your removals or adjustments until you do a before-and-after panel.
Nice work.
Thanks, Guido.
with love, artie
Mmmmm….. Undecided! Image 1 is fun as a ‘photo bomb’ and is an ideal candidate for the classroom, as Image 2 depicts. One gripe with image 2; whilst the crop is in the optimum position, the birds back looks a tad too straight! Maybe it’s a true representation? Image 3, well, it hardly needed any manipulation if any, so for me it wins…. just.
Thanks for commenting. As for the bird’s back being “too straight,” I am 99.9% sure that you would not have thought that had I not revealed the original. I’ve compared it with similar images without seeing any differences at all.
a
I like version 2 by far. And it’s a learn for me, in that removing a feathery bird may not be all that hard.
Agree on version 2. It is not easy to go well.
with love, artie