Homer 2024
I have my dates for the two February 2024 Homer/Kachemak Bay Bald Eagle IPTs. If you would be interested in doing both 5-day trips (with a discount) and driving from Anchorage and Homer and back with me, please get in touch via e-mail.
What’s Up?
Thanks to the those who commented on yesterday’s image. I will respond to each comment as soon as this is posted.
As below, I knew that I would be able to create a dynamic optimized image from the washed out, properly exposed raw file. Keep reading to learn why you need to learn to expose your silhouettes far to the right.
Both sessions on Day Three of the third and last 2023 Homer IPT were epic. On a sunny morning, we worked in a shaded bay and were rewarded with dozens of banking and turning Bald Eagles in flight. The group learned why I prefer low light to full sun for eagle flight photography. Then we worked a frozen waterfall. Everyone, including Captain Gabe, was amazed when a Coyote presented itself on a snowy hillside and posed at length for the group. The afternoon session was mega-successful as the sun shined and the wind switched from NE to west. We had dozens of eagles landing right at us on natural perches. As a result of the wind switch, however, our sunset silhouette efforts were more challenging than they had been on Saturday evening. That said, we had lots of excellent chances with another colorful western sky. The sun sets very close to Iliana volcano.
Of note is the fact that other eagle tour groups almost always head back to the barn for dinner early thus missing the sweetest light and the gorgeous sunsets …
Today is Monday 6 March 2023. With partly cloudy skies all day and light breezes from the east/northeast, we will likely do two sessions, one early and one late. This blog post took more than an hour to prepare and makes three hundred forty-one days in a row with a new educational post written just for you. Wherever you are and whatever you are doing, I hope that you too have a great day.
Please, please, pretty please remember to use my B&H or Bedford’s affiliate programs for all your new gear purchases. If you use B&H, please be sure to click on any B&H link in the blog to start your search. Or simply start with this link. There is always the option of e-mailing me for gear advice and for the correct links.
The plan is to continue to post every day until the streak reaches one year and one day and then begin posting every other day.
As above, please remember to use the B&H and Amazon links that are found on most blog pages and to use the BIRDSASART discount code at checkout when purchasing your new gear from Bedfords to get 3% back on your credit card and enjoy free second-day air FedEx. Please, also, consider joining a BAA IPT. You will be amazed at how much you will learn!
You can find some great photo accessories (and necessities, like surf booties!) on Amazon by clicking on the Stuff tab on the orange/yellow menu bar above. On a related note, it would be extremely helpful if blog-folks who, like me, spend too much money on Amazon, would get in the habit of clicking on the Amazon logo link on the right side of each blog post when they shop online. As you might expect, doing so will not cost you a single penny, but would be appreciated tremendously by yours truly. And doing so, works seamlessly with your Amazon Prime account.
Please remember that if an item — a Delkin flash card, or a tripod head — for example, that is available from B&H and/or Bedfords, is also available in the BAA Online Store, it would be great, and greatly appreciated, if you would opt to purchase from us. We will match any price. Please remember also to use my B&H affiliate links or to earn 3% cash back at Bedfords by using the BIRDSASART discount code at checkout for your major gear purchases. Doing either often earns you free guides and/or discounts. And always earns my great appreciation.
|
|
|
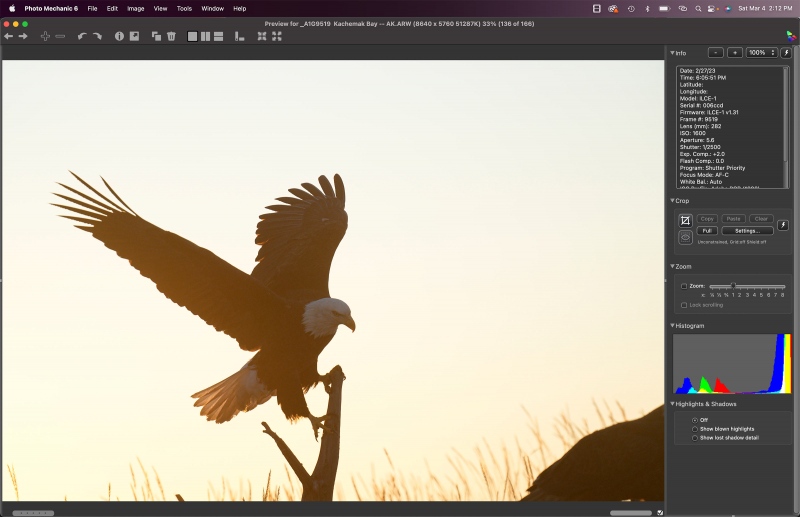
This image was created on 27 February on a Homer/Kachemak Bay Bald Eagle IPT. I used the handheld Sony FE 70-200mm f/2.8 GM OSS II lens with the Sony FE 2x teleconverter (at 282mm), and The One, the Sony Alpha 1 Mirrorless Digital Camera). The exposure was determined via Zebra technology with Exposure Compensation on the thumb dial. Shutter Priority +2-stops. AUTO ISO set ISO 1600: 1/2500 sec. at f/5.6 (wide open). When evaluated in RawDigger, the raw file exposure was determined to be dead-solid perfect. AWB at 6:05:51pam just before sunset. Tracking: Zone AF-C with Bird Face/Eye detection enabled performed perfectly. Be sure to click on the image to enjoy a high-res version. The Photo Mechanic screen capture for the Bald Eagle landing at sunset image |
From Yesterday’s Blog Post
In yesterday’s blog post, I asked the following:
What is the black shape in the lower right corner?
If this were your image, would you keep it or delete it? Either way, why?
If you would keep it, please leave a comment detailing your plans for the image optimization. Would you create a silhouette, or go for an image that revealed the tones of the eagle? How would you crop it? What would you do about the black shape in the lower right corner?
Yes, the black shape in the LRC is the body of a second eagle.
See below for my image optimization. And more.
|
|
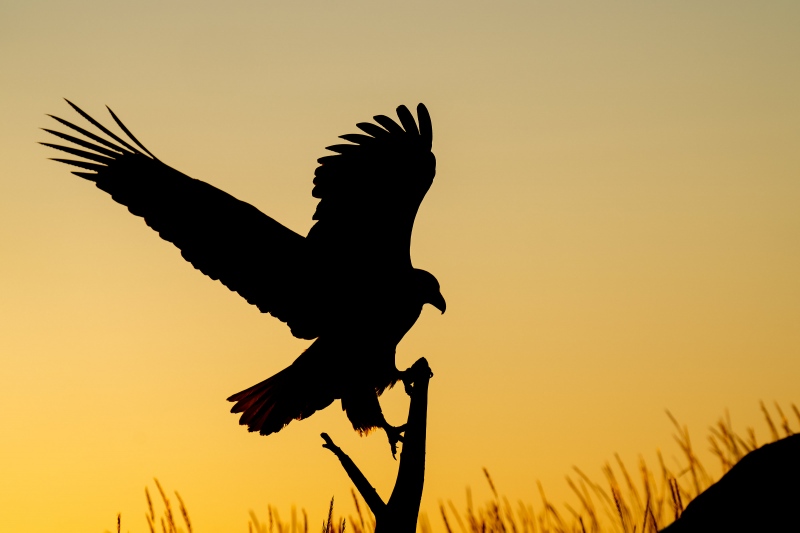
The optimized image: Bald Eagle landing at sunset |
Transforming an Eagle into a Rock
Creating a dynamic silhouette from a properly exposed (see below) raw file is quite simple. The color is there, all you need to do is bring it out. That is properly and easily done by adjusting the sliders on the Basic tab during the raw conversion in Photoshop. I thought of replacing the eagle in the LRC with grass, but like Eleanor, could not figure out a way to do that. After a very small proportional crop below right and top right, I came up with the idea of using the Clone Stamp Tool to transform the obtrusive eagle into a small boulder. I like the way that the rock balances the dark silhouetted eagle.
Note: like others, I considered a square crop but, again like Eleanor, did not love that idea.
|
|
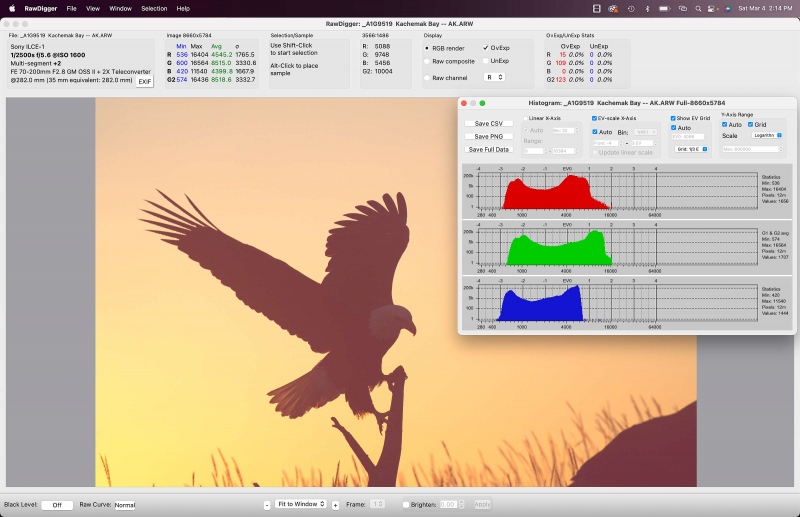
The RawDigger screen capture for the Bald Eagle landing at sunset image |
Getting the Right Exposure for Silhouettes
Most folks — often including me — do not add enough light when creating silhouettes against colorful skies. When I created this image, I was 100% sure that it would be a silhouette. Most folks like their images to look good on the rear monitor. The problem with that approach is there their good looking raw files will be much noisier than properly exposed images that look washed out. And those washed out image files will contain far more color information than underexposed image files. Click on the RawDigger screen capture to see the dead-solid perfect exposure. With only 247 OvExp pixels (out of 51 million) the raw file brightness is dead-solid perfect.
Ho Hum, Another Perfect Exposure
What can I say? The combination of Zebras live in the viewfinder (with your camera set up properly) and post-capture study of the raw files in RawDigger makes it pretty much child’s play to come up with perfect exposure after perfect exposure. It would be impossible to overstate how much I have learned by studying RawDigger and how much better my exposures have become since I started with the program almost two years ago. Again, the raw file brightness for today’s featured image is dead-solid perfect with the G channel making it all the way to the 16000 line.
RawDigger — not for the faint of heart …
Nothing has ever helped me learn to create perfect exposures to the degree that RawDigger has. I think that many folks are reluctant to learn that most of their images are underexposed by one or more full stops and that highlight warnings in Photoshop, Lightroom, Capture One, and your in-camera histogram are bogus as they are based on the embedded JPEGs. Only your raw files tell the truth all the time. Heck, I resisted RawDigger for several years … Once you get over that feeling, RawDigger can become your very best exposure friend no matter what system you are using. On the recent IPTs and In-the-Field sessions, we have demonstrated that fact. Convincingly.
The RawDigger Adapted (pink) Histogram
In the RawDigger e-Guide, you will learn exactly how to set up the Adapted “pink” RawDigger Histogram and how to use it to quickly and easily evaluate the exposure or raw file brightness of images from all digital cameras currently in use. RawDigger was especially helpful to me as I have struggled with R5 exposures and learned my new camera body, the Sony Alpha a1.
|
|
RawDigger e-Guide with Two Videos |
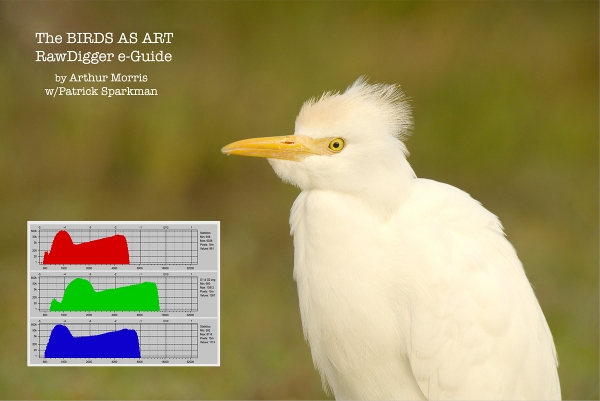
The RawDigger e-Guide with Two Videos
by Arthur Morris with Patrick Sparkman
The RawDigger e-Guide was created only for serious photographers who wish to get the absolute most out of their raw files.
Mr. Sparkman and I began work on the guide in July 2020. At first, we struggled. We asked questions. We learned about Max-G values. We puzzled as to why the Max G values for different cameras were different. IPT veteran Bart Deamer asked lots of questions that we could not answer. We got help from RawDigger creator Iliah Borg. We learned. In December, Patrick came up with an Adapted Histogram that allows us to evaluate the exposures and raw file brightness for all images created with all digital camera bodies from the last two decades. What we learned each time prompted three complete beginning to end re-writes.
The point of the guide is to teach you to truly expose to the mega-Expose-to-the-Right so that you will minimize noise, maximize image quality, best utilize your camera’s dynamic range, and attain the highest possible level of shadow detail in your RAW files in every situation. In addition, your properly exposed RAW files will contain more tonal information and feature the smoothest possible transitions between tones. And your optimized images will feature rich, accurate color.
We teach you why the GREEN channel is almost always the first to over-expose. We save you money by advising you which version of RawDigger you need. We teach you how to interpret the Max G values for your Canon, Nikon, and SONY camera bodies. It is very likely that the Shock-your-World section will shock you. And lastly — thanks to the technical and practical brilliance of Patrick Sparkman — we teach you a simple way to evaluate your exposures and the raw file brightness quickly and easily the Adapted RawDigger histogram.
The flower video takes you through a session where artie edits a folder of images in Capture One while checking the exposures and Max-G values in RawDigger. The Adapted Histogram video examines a series of recent images with the pink histograms and covers lots of fine points including and especially how to deal with specular highlights. The directions for setting up the Adapted Histogram are in the text.
If we priced this guide based on how much effort we put into it, it would sell it for $999.00. But as this guide will be purchased only by a limited number of serious photographers, we have priced it at $51.00. You can order yours here in the BAA Online Store.
Typos
With all blog posts, feel free to e-mail or to leave a comment regarding any typos or errors.


I have a special thing attached to my camera that I can click on and have light going forward to help birds and animals in dark light. It makes my pictures brighter for me.
I like the boulder idea. I just came up with another solution to the eagle that might work? I like the gold sky much better than the original light sky. But I like the original eagle exposure with the light through the tail feathers. So how about selecting the subject (the eagle) from the original, leave it at that original exposure, put it on a layer and use it to replace the silhouette eagle in the gold sky?