Your Call?
Which of today’s two featured images do you like best? Why?
An e-Mail from my Roommate
Dear Artie,
For the last year and possibly more, i had been wanting to attend one of your IPTs. I had been thinking about either Fort DeSoto in Florida or San Diego because i could drive to those locations and enjoy some amazing photo opportunities along the way. Alaska, however, had been a dream for me for 30 years and i told myself that one day i would quit dreaming about it and make it a reality.
I did just that and after much thought and many, many emails and phone calls to you, i couldn’t believe that it was becoming real. Pinch me! Artie, you gave me the tools to get on the dreadful Airplane I had feared and you helped me with booking my tickets as we talked on the phone.
As the number of days till I would fly to Anchorage grew shorter and shorter, i checked and rechecked everything 100 times. As i pulled out of my garage, my mind and body at last seemed at peace thanks to you!
The arrival at the airport was somewhat of a challenge and with the help of airport staff, I finally got to my plane’s departing gate. Alaska, here i come!
When i met you and Carolyn in the airport i was relaxed and ready for the journey to begin. In your blog posting to showcase some of my images, you hit it right on the head about how much i learned and had simplified my camera settings. I learned so much on exposure. And I learned to see the image and start firing away because everything happens so fast. In a second that one amazing shot is gone. In my three weeks, i took 62,256 images. And no, not all of them are keepers. As the trip progressed, however, i learned more and more and my images got better. On the 3rd day, i kept 1950 images. It is hard to delete an image that is so sharp on the eyes that you can see the crispy eye skin. As i go thru them, I will delete some more. Haha, maybe and maybe not, but each day we experienced something different and more amazing.
Thank you on helping get Photoshop setup and optimizing some of my photos as i watched over your shoulder. And thanks for being my roommate; we did just fine.
Artie, thank you for the trip of my lifetime and for being my friend. I love you and i thank you from the bottom of my heart.
Bob
What’s Up?
The third morning of the first DeSoto Spring IPT turned out to be fabulous as I decided to hit my backstop right off the bat. Large schools of baitfish had come in overnight so we had dozens of opportunities. Bob Handin continued to learn and make some stellar images. As Bob has been curious about Stick Marsh, we drove over to my place on Thursday afternoon and will wake early to do a spoonbill session at Stick Marsh. Bob is staying a second night so that we can do the baby cranes on Saturday morning.
Today is Friday 31 March 2023. It is the 90th day in the Gregorian calendar and marks the anniversary of the official opening of the Eiffel Tower in 1889. This blog post about 90 minutes to prepare including the time spent on the two optimizations and makes three hundred sixty-five days in a row with a new educational post written just for you. Wherever you are and whatever you are doing, I hope that you too have a great day. My plan is to continue to post every day until the streak reaches one year a (that is today) and one day (that will be tomorrow) and then begin posting every other day. The handwriting, as they say, is on the wall.
Please remember to use the B&H and Amazon links that are found on most blog pages and to use the BIRDSASART discount code at checkout when purchasing your new gear from Bedfords to get 3% back on your credit card and enjoy free second-day air FedEx. Please, also, consider joining a BAA IPT. You will be amazed at how much you will learn!
You can find some great photo accessories (and necessities, like surf booties!) on Amazon by clicking on the Stuff tab on the orange/yellow menu bar above. On a related note, it would be extremely helpful if blog-folks who, like me, spend too much money on Amazon, would get in the habit of clicking on the Amazon logo link on the right side of each blog post when they shop online. As you might expect, doing so will not cost you a single penny, but would be appreciated tremendously by yours truly. And doing so, works seamlessly with your Amazon Prime account.
Please remember that if an item — a Delkin flash card, or a tripod head — for example, that is available from B&H and/or Bedfords, is also available in the BAA Online Store, it would be great, and greatly appreciated, if you would opt to purchase from us. We will match any price. Please remember also to use my B&H affiliate links or to earn 3% cash back at Bedfords by using the BIRDSASART discount code at checkout for your major gear purchases. Doing either often earns you free guides and/or discounts. And always earns my great appreciation.
|
|
|
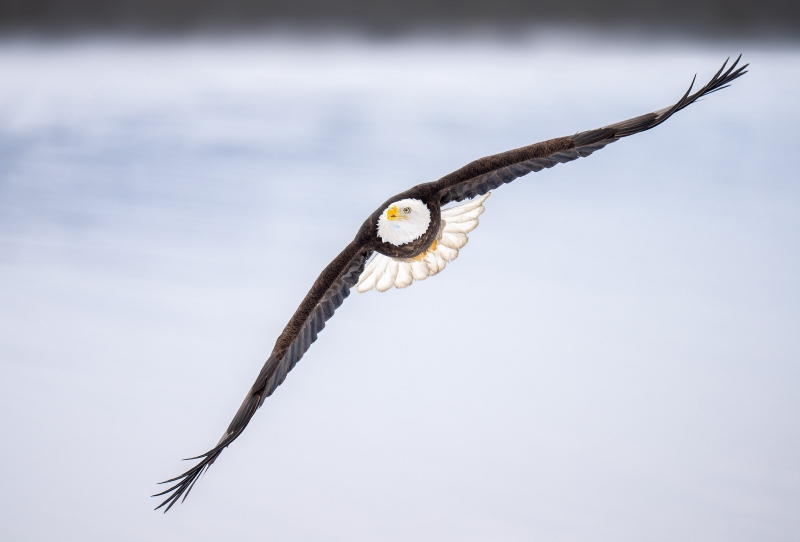
This image was created on 1 March 2023 on a Homer/Kachemak Bay IPT. Seated in the snow, I used the handheld Sony FE 400mm f/2.8 GM OSS lens and The One, the Sony Alpha 1 Mirrorless Digital Camera). The exposure was determined via Zebra technology with ISO on the Thumb Dial. ISO 1000. 1/3200 sec. at f/2.8 (wide open) in Manual mode. When evaluated in RawDigger, the raw file exposure was determined to be dead-solid perfect. AWB at 11:50:29am on a cloudy, fairly bright morning. Tracking: Zone/AF-C with Bird Face/Eye detection enabled performed to perfection. Be sure to click on the image to enjoy a high-res version. Incoming Bald Eagle |
Two from the Epic Day
Today’s two featured images were created on March 1, 2023. It was an epic day at Homer. For me, it ended as a 698-keeper day. While optimizing five of those images, the folder is down to 688 raw files. Those include the five optimized .ARW files; I never delete my digital negatives.
As I leveled this image and added a sliver of canvas this image is slightly larger than the full frame original. I am glad that I did not clip any wings! Note that the fresh snow on the ground acts as a giant reflector that illuminates the eagle’s dark underwings.
The 400mm f/2.8 Knee-Pod Resting Position
As mentioned previously, resting the 400 f/2.8 on my bent left knee while sitting makes it possible for me to shoot flight for hours as I only need to raise the lens a few inches when I spot an incoming bird. Shooting flight while standing, on the other hand, requires me to lift the lens a much longer distance when an incoming bird is spotted and results in fatigue and pain setting in very quickly. For me, this technique is a lifesaver when the action is hot and heavy as it was during every Homer 2023 session.
Do You Notice Anything Strange?
Enlarge the image by clicking on it and let us know if you notice anything strange about the eagle in Image #1? What?
|
|
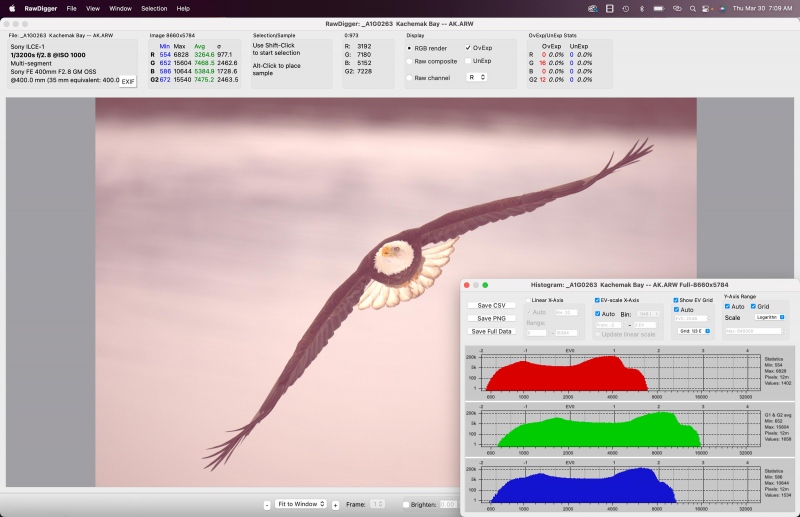
The RawDigger Screen Capture for the Incoming Bald Eagle image |
Ho Hum, Another Perfect Exposure
What can I say? The combination of Zebras live in the viewfinder (with your camera set up properly) and post-capture study of the raw files in RawDigger makes it pretty much child’s play to come up with perfect exposure after perfect exposure. It would be impossible to overstate how much I have learned by studying RawDigger and how much better my exposures have become since I started with the program almost three years ago. With the G channel coming right up to the 16000-line, the raw file brightness for today’s featured image is dead solid perfect.
RawDigger — not for the faint of heart …
Nothing has ever helped me learn to create perfect exposures to the degree that RawDigger has. I think that many folks are reluctant to learn that most of their images are underexposed by one or more full stops and that highlight warnings in Photoshop, Lightroom, Capture One, and your in-camera histogram are bogus as they are based on the embedded JPEGs. Only your raw files tell the truth all the time. Heck, I resisted RawDigger for several years … Once you get over that feeling, RawDigger can become your very best exposure friend no matter what system you are using. On the recent IPTs and In-the-Field sessions, we have demonstrated that fact over and over again. Convincingly.
The RawDigger Adapted (pink) Histogram
In the RawDigger e-Guide, you will learn exactly how to set up the Adapted “pink” RawDigger Histogram and how to use it to quickly and easily evaluate the exposure or raw file brightness of images from all digital cameras currently in use. RawDigger was especially helpful to me as I have struggled with R5 exposures and learned my new camera body, the Sony Alpha a1.
|
|
RawDigger e-Guide with Two Videos |
The RawDigger e-Guide with Two Videos
by Arthur Morris with Patrick Sparkman
The RawDigger e-Guide was created only for serious photographers who wish to get the absolute most out of their raw files.
Patrick and I began work on the guide in July 2020. At first, we struggled. We asked questions. We learned about Max-G values. We puzzled as to why the Max G values for different cameras were different. IPT veteran Bart Deamer asked lots of questions that we could not answer. We got help from RawDigger creator Iliah Borg. We learned. In December, Patrick came up with an Adapted Histogram that allows us to evaluate the exposures and raw file brightness for all images created with all digital camera bodies from the last two decades. What we learned each time prompted three complete beginning to end re-writes.
The point of the guide is to teach you to truly expose to the mega-Expose-to-the-Right so that you will minimize noise, maximize image quality, best utilize your camera’s dynamic range, and attain the highest possible level of shadow detail in your RAW files in every situation. In addition, your properly exposed RAW files will contain more tonal information and feature the smoothest possible transitions between tones. And your optimized images will feature rich, accurate color.
We teach you why the GREEN channel is almost always the first to over-expose. We save you money by advising you which version of RawDigger you need. We teach you how to interpret the Max G values for your Canon, Nikon, and SONY camera bodies. It is very likely that the Shock-your-World section will shock you. And lastly — thanks to the technical and practical brilliance of Patrick Sparkman — we teach you a simple way to evaluate your exposures and the raw file brightness quickly and easily the Adapted RawDigger histogram.
The flower video takes you through a session where artie edits a folder of images in Capture One while checking the exposures and Max-G values in RawDigger. The Adapted Histogram video examines a series of recent images with the pink histograms and covers lots of fine points including and especially how to deal with specular highlights. The directions for setting up the Adapted Histogram are in the text.
If we priced this guide based on how much effort we put into it, it would sell it for $999.00. But as this guide will be purchased only by a limited number of serious photographers, we have priced it at $51.00. You can order yours here in the BAA Online Store.
|
|
|
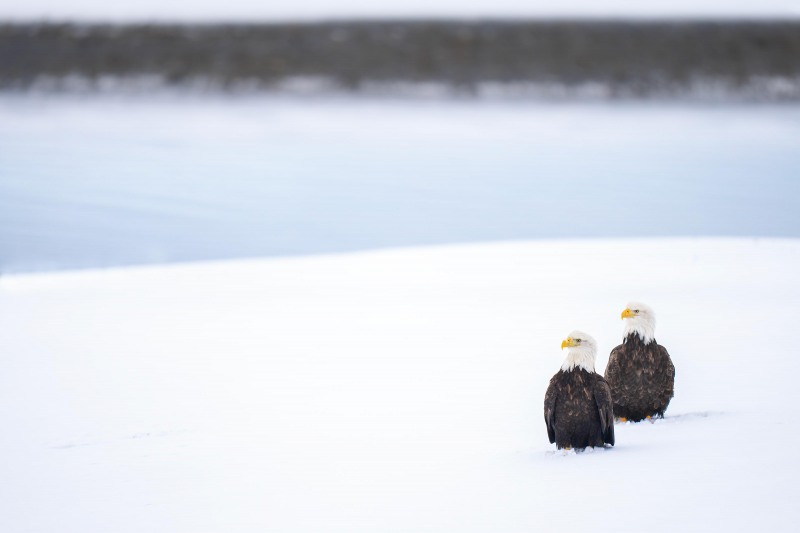
This image was also created on 1 March 2023 on a Homer/Kachemak Bay IPT. Again, seated in the snow, I used the knee-pod technique with the handheld Sony FE 400mm f/2.8 GM OSS lens and The One, the Sony Alpha 1 Mirrorless Digital Camera). The exposure was determined via Zebra technology with ISO on the Thumb Dial. ISO 1000. 1/3200 sec. at f/2.8 (wide open) in Manual mode. When evaluated in RawDigger, the raw file exposure was determined to be dead-solid perfect. AWB at 11:51:21am on a cloudy, fairly bright morning. Tracking: Expand Spot/AF-C with Bird Face/Eye detection enabled performed to perfection. Be sure to click on the image to enjoy a high-res version. Bald Eagles on Snowbank |
Bald Eagles on Snowbank Bird-scape
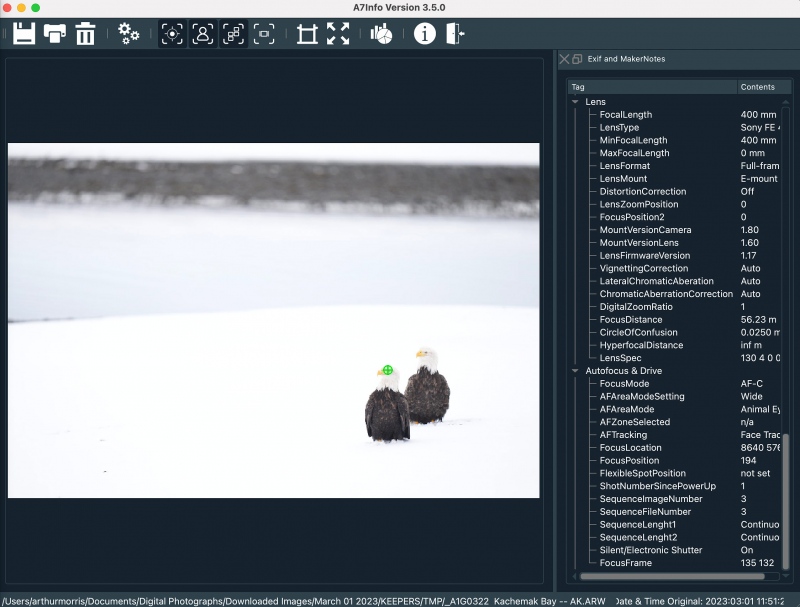
Many folks do not realize that super-telephoto lenses can be used to create bird-scapes. While visualizing this image in my mind’s eye, I was attracted by the large snowbank and the channel behind it. The strip of land across the channel is McKeon Spit. With the two bird roughly 184 feet, six inches from me, I got the framing I wanted at 400mm. It is usually best to place small-in-the-frame subjects in one of the four corners of the frame.
|
|
The A7INFO screen capture |
Tracking: Expand Spot AF Magic
In the SONY Alpha a1 Set-up and Info Notes Group e-Mail F that was sent last week, I detailed exactly how I use Tracking: Expand Spot/AF-C for much of my bird photography. I always begin with the AF icon in the dead center of the frame. Then I place the AF point on the bird I want to focus on and recompose as needed. After the AF system (remarkably) grabbed the eye of the closest eagle, I recomposed by pointing the lens up and left tucking the two eagles nicely in the lower right corner of the frame. Tracking: Expand Spot AF with Bird Face/Eye detection stuck to the subject like glue.
Image #2 Question
For those of you who took a crack at the Do You Notice Anything Strange? question above at Image #1, does either of the eagles in Image #2 look familiar?
|
|
|
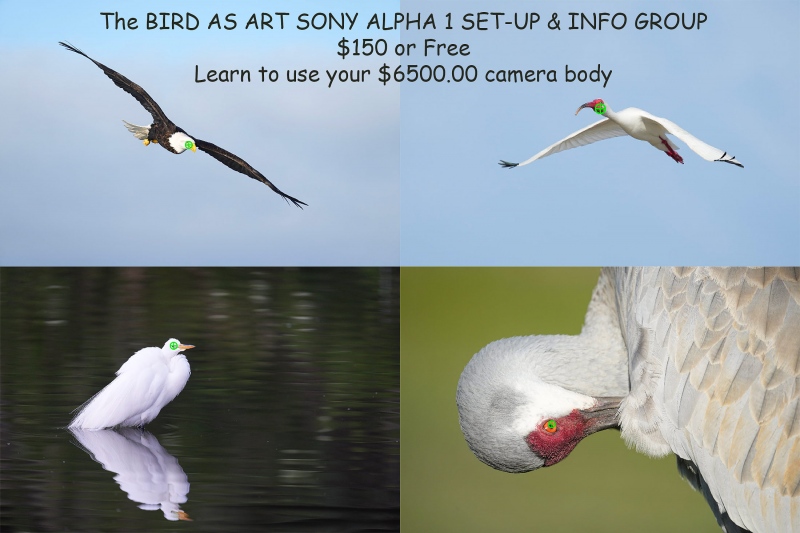
Click on the image to better see the green eye-AF boxes in action. Sony Alpha 1 Flight Photography AF Points! |
The SONY Alpha a1 Set-up Guide and Info Group: $150.00 (or Free)
The SONY Alpha a1 Set-up Guide and Info Group is going great guns as more and more folks chime in with thoughtful questions and experience-based answers. As the a1 is becoming more readily available, more and more folks are getting their hands on this amazing body. Today, the group was up to an astounding 139 lucky and blessed folks. (And more than a few folks own two or more a1 bodies! Early on, we discussed the myriad AF options. I gave my opinion as to the best one for flight and general bird photography. The best news is that everyone in the group receives an e-mail that includes a .DAT file with my a1 settings on it, and explicit directions on how to load my settings onto your a1; talk about convenience! I am now offering a .DAT file compatible with firmware update 1.20. Your entry into the group includes a consolidated Sony a1 CAMSETA2 INFO & GUIDE. New a1 folks will now receive six e-mails instead of the previous 28! You will receive new e-mails as they are published. Simply put, this e-mail guide is an incredible resource for anyone with an a1.
All who purchased their Alpha 1 bodies via a BAA affiliate link — B&H or Bedfords — will receive a free Sony Alpha a1 Set-Up Guide and free entry into the Info Updates group after shooting me their receipts via e-mail. (Note: it may take me several days to confirm B&H orders.). Others can purchase their guide here in the BAA Online Store.
|
|
|
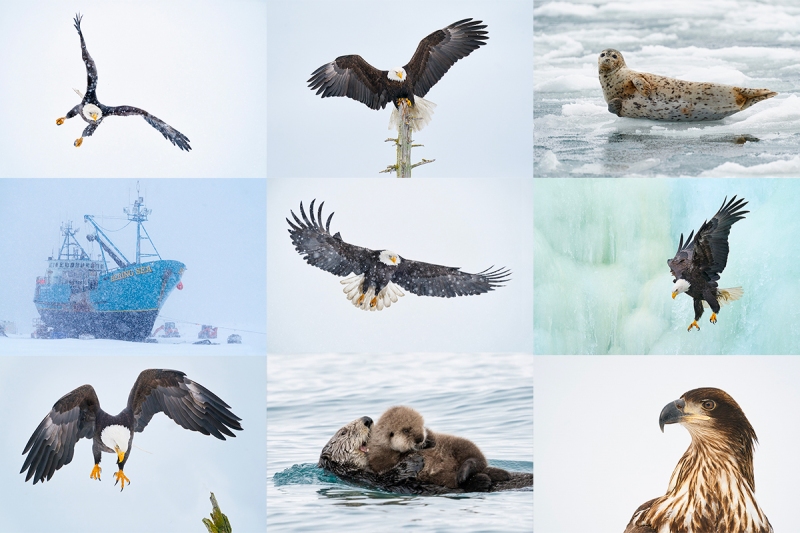
2024 Homer/Kachemak Bay Bald Eagle IPTs
IPT #1: WED 21 FEB 2024 through the full day on SUN 25 FEB 2024. Five full days/20 hours on the boat: $5500.00. Limit 5 photographers/Openings 4.
IPT #2: MON 26 FEB 2024 through the full day on FRI 1 MAR 2024. Five full days/20 hours on the boat: $5500.00. Limit 5 photographers/Openings 3.
Register for both trips to maximize your travel dollars and enjoy a $1000 discount while you are at it.
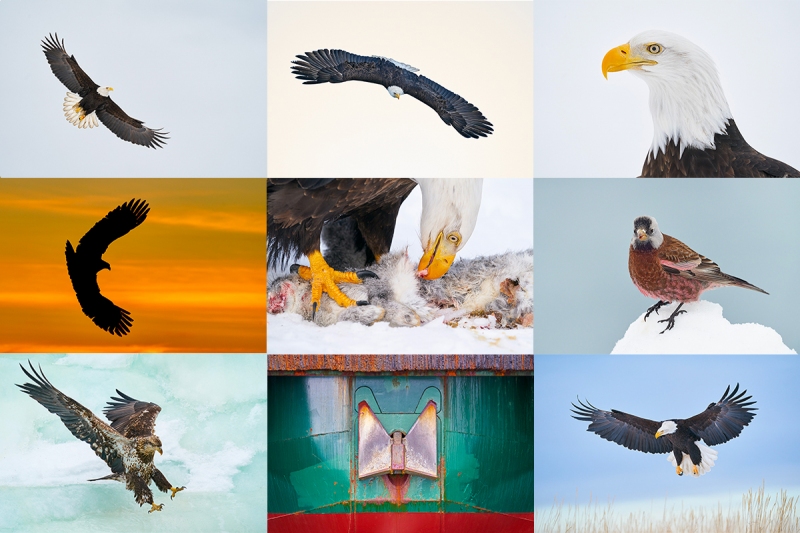
This trip features non-stop flight photography as well as many opportunities to create both environmental and point-blank portraits of one of North America’s most sought-after avian subjects: Bald Eagle (Haliaeetus leucocephalus). Other reliable subjects will include Sea Otter, Glaucous-winged and Short-billed (formerly Mew) Gulls.
In addition, we should see Common Murre, Black Guillemot, Pelagic Cormorant, two or three species of loons, and a smattering of ducks including two species of merganser, all three scoters, Common and Barrow’s Goldeneyes, Bufflehead, Harlequin, and Long-tailed Ducks. Close-range photographic chances for these species will require some good luck. Some of these species, especially when in flocks, can, however, often be used effectively when pleasing creating bird-scapes.
If we need to be out early, we will be the first boat out. If the conditions are great, we will stay out. And when there is a chance for sunset silhouettes, we will be in the right spot.
We will be traveling through gorgeous wilderness country; landscape and scenic opportunities abound.
Also featured is a professional leader, often referred to as the world’s most knowledgeable bird photography trip leader and instructor. He is conversant in Canon, Nikon, and Sony. You will learn practical and creative solutions to everyday photographic problems. You will learn to see the shot, to create dynamic images by fine-tuning your compositions, to best utilize your camera’s AF system, and how to analyze the wind, the sky conditions, and the direction and quality of the light. This is one of the very few trips Homer trips available where you will not be simply put on the birds and told to have fun. You will learn to be a better photographer. But only if that is what you want.
You will learn to get the right exposure when it is sunny, when it cloudy-bright, when it is cloudy, when it is cloudy-dark, or when it is foggy. Not to mention getting the right exposure when creating silhouettes.
You will learn to make pleasing blurs working in manual mode and to create silhouettes working in Shutter Priority mode.
Most importantly you will learn to pick your best flight photographs from tens of thousands of images.
,
You will enjoy working with the best and most creative boat captain on his sturdy, photography-spacious, seaworthy, open-deck watercraft.
Only five photographers (not the usual six), plus the leader.
Small group Photoshop, Image Review, and Image Critiquing sessions.
|
|
All images from Homer or Kachemak Bay, AK |
What’s Included
One four hour or two two-hour boat trips every day (weather permitting), all boat fees and boat-related expenses (excluding tips), ground transportation to and from the dock and back to the hotel each day, in-the-field instruction and guidance, pre-trip gear advice, small group post-processing and image review sessions, and a thank you dinner for all well-behaved participants.
What’s Not Included
Your airfare to and from Homer, AK (via Anchorage), the cost of your room at Land’s End Resort, all personal items, all meals and beverages, and tips for the boat captain and/or the first mate.
Please Note
On great days, the group may wish to photograph for more than four hours. If the total time on the boat exceeds 20 hours for the five-day trips the group will share the additional expense at a rate of $225/hour. The leader will pay for the bait.
Some folks may wish to rent their own vehicle to take advantage of local photographic opportunities around Homer. In 2023 those included Moose, Great Grey, and Short-eared Owls.
Deposit Information
A $3000 non-refundable deposit/trip is required. You may pay your deposit with credit card or by personal check (the latter made out to BIRDS AS ART) and sent via US mail only to Arthur Morris. PO Box 7245. Indian Lake Estates, FL 33855. Your balance, due 90 days before the date of departure, is payable only by check (as above).
In Closing
I have been going to Homer off and on for close to two decades. Every trip has been nothing short of fantastic. Many folks go in mid-March. The earlier you go, the better the chances for snow. The only way to assure that you are on the best of these two trips is to sign up for all of them. Can you keep up with me? If you have any questions, or are good to go for one, or two of these great trips, please let me know via e-mail or give me a call on my cell phone at 863-221-2372.
Typos
With all blog posts, feel free to e-mail or to leave a comment regarding any typos or errors.



The beak does look a bit odd but also …. what are the blue spots? Paint?
Not sure. I meant to lose them as I brought them up in Color Mixer.
a
Artie, I suspected (from experience with my own images) that the blue might be color fringing. Copying the larger JPEG and looking at it at 200 or 300% show that is the case. Magnified, you see blue around edges of the bird as well as that little bit in the white plumage. With my lenses, the blue is usually there to some degree; choosing Auto Color Balance minimizes it, at the cost of making the image unattractively warm, but shifting the color balance toward blue, which I often prefer, makes the fringing worse. Topaz DeNoise seems to aggregate/exaggerate blue fringing even more. Lately, with plain sky or water backgrounds, I’ve been using DeNoise only on the subject, then smoothing noise in the background by inverting the previous selection and using another program (a leftover older version of Imagenomic Noiseware in my case, though lots of other programs would work fine on such backgrounds).
Thank, Cliff,
The BLUE on the bird’s head is not color fringing. I will send you an e-mail showing the BLUE stuff in the unprocessed raw file.
As far as the blue color fringing around various parts of the bird, I understand that juicing up the BLUEs in Photoshop and I understand that DeNoise can exacerbate them. When I note them, I usually just ignore them in part because they are most prominent in the JPEGs. I try to keep my post-processing simple and fast.
much love, artie
Photos 1 and 2 of Bald Eagle and Bald Eagles are interesting but photo 2 is just not as close as photo 1 is.
Correct!
a
Hi, Artie. Hard to choose between the two great images. They’re so different. What do you mean when you say you never delete your digital negatives? Obviously you do delete some files. ??
Thanks, David! My digital negatives are the raw files that I keep.
a
Ouch, the cracked upper beak in photo 1. Same bird on our left in photo 2. Great birdscape.
Bingo and thanks.
a
Some kind of break at the top of the bill?
Ys, the bill was deformed.
a