My Call
My favorite Monte Brown image was the tight shot of the back of the pelican’s head and neck, Image #3. Why? Because of the incredible colors and the sweet, sweet, and distant background. Homer IPT vet and great friend Bob Eastman agreed and was the only one to note that the incoming pelican in Monte’s Image #4 was the same individual as the bird in my Image #1 in the Horizontal or Vertical for Tight Incoming Pelican Flight? blog post here. Monte vowed to stay close to me on this IPT and ask a ton of questions. He did just that with the expected results. We were, of course, standing right next to each other when that gorgeous birds flew right at us.
What’s Up
Homer and Galapagos IPT veteran Vasili Chernishof joined me this morning at La Jolla. He will be staying and photographing with me for almost a week. We got off to a very slow start his morning but when we tried my morning back-up spot, the flight photography action heated up to a boil. I created another 4000 images and kept 137 after the first edit. Because of the amazing improvements in autofocus technology, I deleted probably two thousand or more images that would have thrilled me less than a decade ago.
In today’s post blog, I share seven of my very favorites, each created with the tripod-mounted 600mm f/4. Yes, handholding in general is always better for flight photography, but only if you can comfortably manage the lens needed to do the job. Handholding the 600mm f/4 for a long shooting session is really pushing it for me. So I put the best tool on a tripod and with excellent conditions (soft light and a wind from the east) and the Levered-Clamp FlexShooter Pro, I did a pretty good job of keeping the birds in the middle of the frame. That is always step one. Then you get to pick the really special ones on your laptop.
Today is Monday 29 January and we will be heading back to La Jolla early. Wherever you are and whatever you choose to do, I hope that you too have a great day.
Please remember to use the B&H links that are found on most blog pages and to use the BIRDSASART discount code at checkout when purchasing your new gear from Bedfords to get 3% back on your credit card and enjoy free second-day air FedEx. Please, also, consider joining a BAA IPT. You will be amazed at how much you will learn!
If an item — a Delkin flash card, or a tripod head — for example, that is available from B&H and/or Bedfords, is also available in the BAA Online Store, it would be great, and greatly appreciated, if you would opt to purchase from us. We will match any price. Please remember also to use my B&H affiliate links or to earn 3% cash back at Bedfords by using the BIRDSASART discount code at checkout for your major gear purchases. Doing either often earns you free guides and/or discounts. And always earns my great appreciation.
Save 15%!
If you’d like to try out a new lens or if you need a lens for a specific trip or project (or for an IPT), LensRentals.com is the only way to go. To save 15%, simply click on the logo link above, arrange for your rental, and type in BIRDSASART15. If you type the gear you are looking for in the search box, it will pop right up. LensRentals.com offers affordable insurance. You can decline it, opt for LensCap: Damage Only, or select LensCap: Damage & Theft. Then hit PROCEED TO CHECKOUT. After you enter all of your info but before completing your order, be sure to scroll down to Promo Code box and enter the BIRDSASART15 code to save 15%.
I checked on renting a Sony FE 70-200mm f/2.8 GM OSS II lens for a week. The cost is only $122.00. LensCap: Damage Only coverage can be added for a very low $18.00. Going with LensCap: Damage & Theft would be $27.00. The shipping charge varies. They offer an interesting program called Lensrentals HD. By signing up for this shipping discount program ($99.00/year), you’ll get free Standard Shipping on all the orders you place.
Renting a Sony 600mm f/4 GM OSS lens for a week will cost you $536.00. The two coverage options come in at $76.00 or $114.00. Less your 15% discount when you enter the BIRDSASART15 code into the Promo Code box at checkout and enter the BIRDSASART15 codeine the Promo Code box at checkout to save 15%.
Remember, to save the 15% on your rental you must start your search by clicking on the logo above, or on this link: LensRentals.com


B&H
To ensure that I get credit for your B&H purchases, you can always click here. The tracking is invisible but greatly appreciated. And, you can use your PayBoo card. You must use the website to order. B&H will reopen on Fri April 14. Thanking me for the past 4000 educational blog posts could not be any easier and will not cost you one penny. Please shoot me your B&H receipt for major purchases.
Many folks have written recently stating that they purchased a Sony a1 from B&H and would like their free membership in the Sony 1 Info and Updates Group, a $150.00 value. When I check my affiliate account, their orders have not been there. When I let them know that they get credit for B&H purchases only if they use one of the many B&H affiliate links on the blog or begin their searches with this link, they are always disappointed. If in doubt, please contact me via e-mail and request a BH link. I am always glad to help and to guide you to the right gear.
Bedfords Simplified
Click here to start your search. Choose standard shipping, and when you get to the payment page, enter BIRDSASART in the discount code box and hit apply. You will be upgraded to free second day air Fed-Ex and receive 3% cash back on your credit card once your stuff ships. Either is greatly appreciated by yours truly.
Bedfords Amazing BAA Discount Policy
Folks who have fallen in love with Bedfords can now use the BIRDSASART coupon code at checkout to enjoy a post-purchase, 3% off-statement credit (excluding taxes and shipping charges) on orders paid with a credit card. The 3% credit will be refunded to the card you used for your purchase. Be sure, also, to check the box for free shipping to enjoy free Second Day Air Fed-Ex. This offer does not apply to purchases of Classes, Gift Cards, prior purchases.
Visit the Bedfords website here, shoot Steve Elkins an e-mail, or text him on his cell phone at (479) 381-2592.
Gear Questions and Advice
Too many folks attending BAA IPTs and dozens of photographers whom I see in the field and on BPN, are — out of ignorance — using the wrong gear, especially when it comes to tripods and more especially, tripod heads. And the same is true in spades when ordering new camera bodies or lenses. My advice will often save you some serious money and may help you avoid making a seriously bad choice. Please know that I am always glad to answer your gear questions via e-mail. If you are desperate, you can try me on my cell at 863-221-2372. Please leave a message and shoot me a text if I do not pick up.
|
|
|
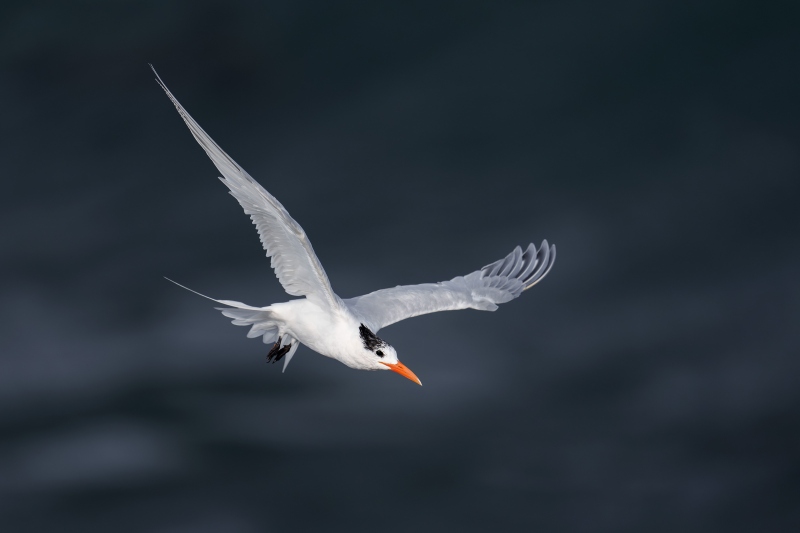
This image was created at La Jolla, CA on 28 January 2024 on a private IPT. While standing at full height, I used the Robus RC-5558 Vantage Series 3 Carbon Fiber Tripod/Levered-Clamp FlexShooter Pro-mounted Sony FE 600mm f/4 GM OSS lens and The One, the Sony Alpha 1 Mirrorless digital camera. ISO 500. Exposure was determined via Zebras with ISO on the rear dial: 1/4000 sec. at f/4 (wide open). AWB at 8:54:14am on variably sunny/variably cloudy morning. Zone/AF-C was active at the moment of exposure and performed perfectly. Be sure to click on the image to enjoy the larger version. Image #1: Royal Tern winter plumage in flight set against the dark face of a building wave |
The Recipe for Success
Put the 600 lens on the tripod. Set the shutter speed to 1/4000 sec. and the aperture wide open at f/4. Use Zone AF with Bird/Face Eye enabled. Set the Limit Range Switch to Not Full. The only variable is the ISO that depends on the light levels and the tonality of the subject. The more you practice shooting flight off a tripod the better you get.
|
|
|
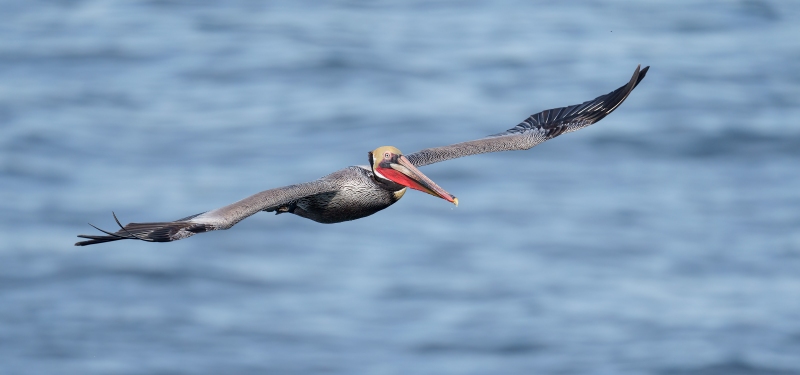
This image was also created at La Jolla, CA on 28 January 2024 on a private IPT. Again, while standing at full height, I used the Robus RC-5558 Vantage Series 3 Carbon Fiber Tripod/Levered-Clamp FlexShooter Pro-mounted Sony FE 600mm f/4 GM OSS lens and The One, the Sony Alpha 1 Mirrorless digital camera. ISO 640. Exposure was determined via Zebras with ISO on the rear dial: 1/4000 sec. at f/4 (wide open). AWB at 9:07:11am on variably sunny/variably cloudy morning. Zone/AF-C was active at the moment of exposure and performed perfectly. Be sure to click on the image to enjoy the larger version. Image #2: Brown Pelican Pacfic-race breeding plumage in gliding flight over the ocean |
Adjusting the Exposure Based on Subject Tonality
Once we had the base exposure for the most common subjects, the Royal Terns, we would add 1/3 stop of light for the Heermann’s Gulls, and 2/3 stop for the somewhat darker pelicans. Easiest is to raise the ISO to increase the exposure. As the light changes, Sony Zebras make it easy to correctly determine the base exposure.
|
|
|
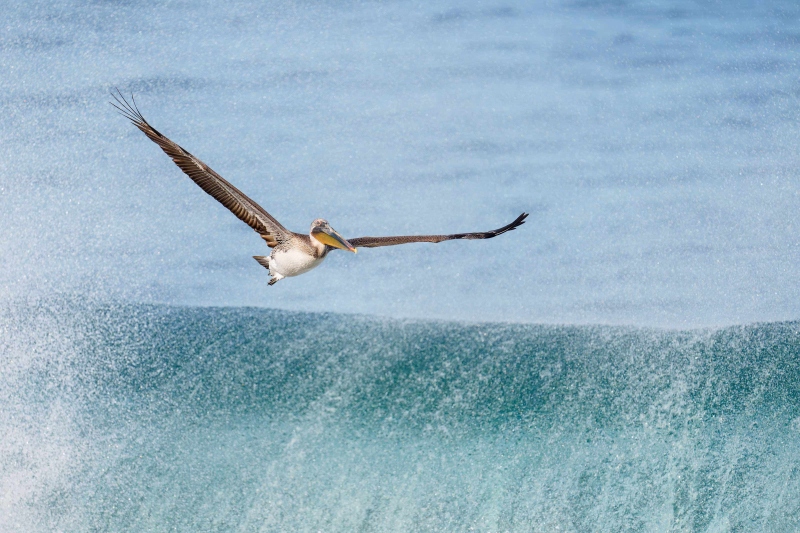
This image was also created at La Jolla, CA on 28 January 2024 on a private IPT. Again, while standing at full height, I used the Robus RC-5558 Vantage Series 3 Carbon Fiber Tripod/Levered-Clamp FlexShooter Pro-mounted Sony FE 600mm f/4 GM OSS lens and The One, the Sony Alpha 1 Mirrorless digital camera. ISO 640. Exposure was determined via Zebras with ISO on the rear dial: 1/4000 sec. at f/4 (wide open). AWB at 9:25:18am on variably sunny/variably cloudy morning. Zone/AF-C was active at the moment of exposure and performed perfectly. Be sure to click on the image to enjoy the larger version. Image #3: Brown Pelican Pacfic-race two year old in flight above breaking wave |
Include a Breaking Wave
Whenever possible, strive to include a breaking wave at the bottom of a frame. Acquire focus on a pelican, and then hope for a break 🙂
|
|
|
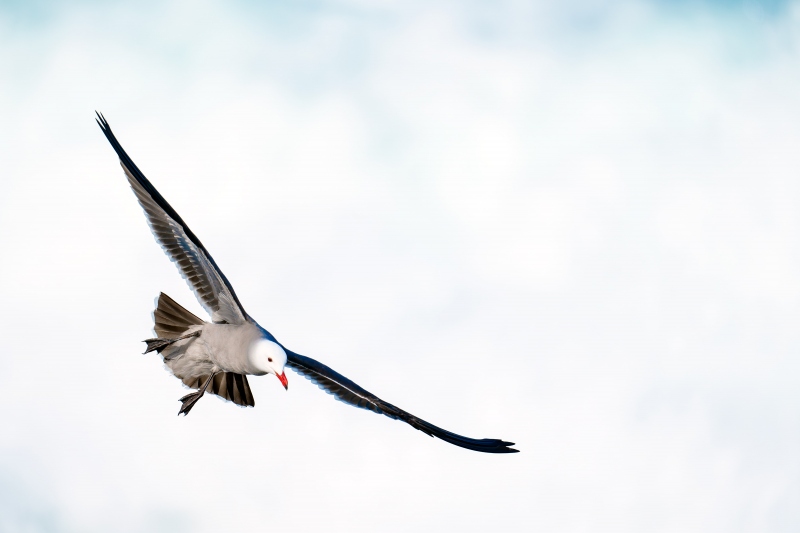
This image was also created at La Jolla, CA on 28 January 2024 on a private IPT. Again, while standing at full height, I used the Robus RC-5558 Vantage Series 3 Carbon Fiber Tripod/Levered-Clamp FlexShooter Pro-mounted Sony FE 600mm f/4 GM OSS lens and The One, the Sony Alpha 1 Mirrorless digital camera. ISO 500. Exposure was determined via Zebras with ISO on the rear dial: 1/4000 sec. at f/4 (wide open). AWB at 9:33:14am on variably sunny/variably cloudy morning. Zone/AF-C was active at the moment of exposure and performed perfectly. Be sure to click on the image to enjoy the larger version. Image #4: Heermann’s Gull on final approach/broken wave background |
Pure White Backgrounds
Once a wave breaks, a large white area of foam remains for a few seconds. The “wash” that is left behind after a big wave breaks makes for dramatic backgrounds.
|
|
|
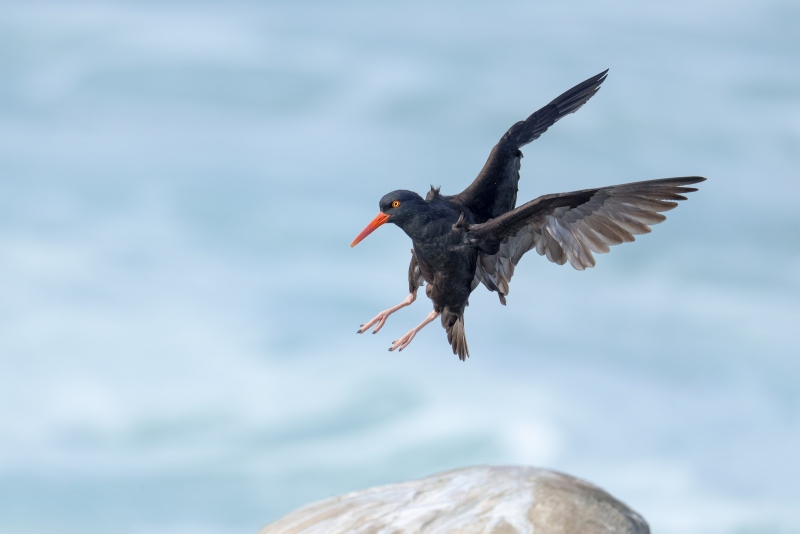
This image was also created at La Jolla, CA on 28 January 2024 on a private IPT. Again, while standing at full height, I used the Robus RC-5558 Vantage Series 3 Carbon Fiber Tripod/Levered-Clamp FlexShooter Pro-mounted Sony FE 600mm f/4 GM OSS lens and The One, the Sony Alpha 1 Mirrorless digital camera. ISO 640. Exposure was determined via Zebras with ISO on the rear dial: 1/4000 sec. at f/4 (wide open). AWB at 9:55:27am on variably sunny/variably cloudy morning. Zone/AF-C was active at the moment of exposure and performed perfectly. Be sure to click on the image to enjoy the larger version. Image #5: Black Oystercatcher landing |
Fast Reflexes Needed
When I heard the shrill, distinctive call of the oystercatchers in flight, I swung my lens to the right, acquired focus, tracked the bird as it landed, and made a decent series of images.
|
|
|
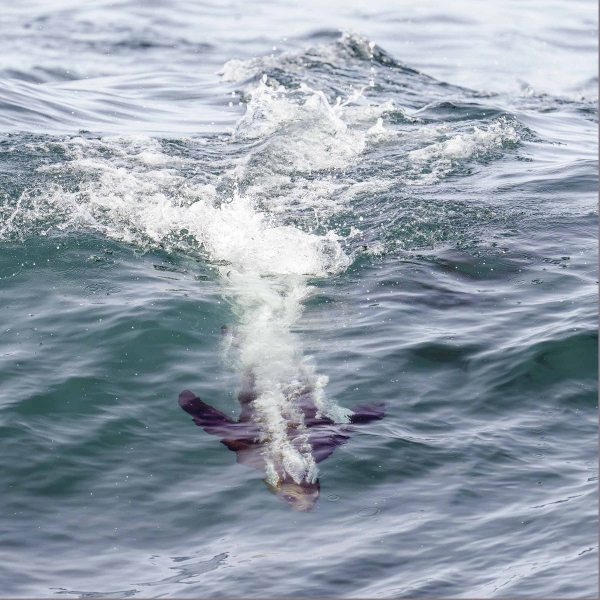
This image was also created at La Jolla, CA on 28 January 2024 on a private IPT. Again, while standing at full height, I used the Robus RC-5558 Vantage Series 3 Carbon Fiber Tripod/Levered-Clamp FlexShooter Pro-mounted Sony FE 600mm f/4 GM OSS lens and The One, the Sony Alpha 1 Mirrorless digital camera. ISO 640. Exposure was determined via Zebras with ISO on the rear dial: 1/4000 sec. at f/4 (wide open). AWB at 9:59:23am on variably sunny/variably cloudy morning. Zone/AF-C was active at the moment of exposure and performed perfectly. Be sure to click on the image to enjoy the larger version. Image #6: California Sea Lion surfing |
Virtually Impossible
At my morning back-up spot, dozens of sea lions are jumping out of the water and surfing in on the breaking waves. Getting one in the frame is extremely difficult. The funny thing is that I have no recollection of making Image #6. I would especially appreciate hearing your thoughts as to whether this image works or would be an insta-delete for you.
|
|
|
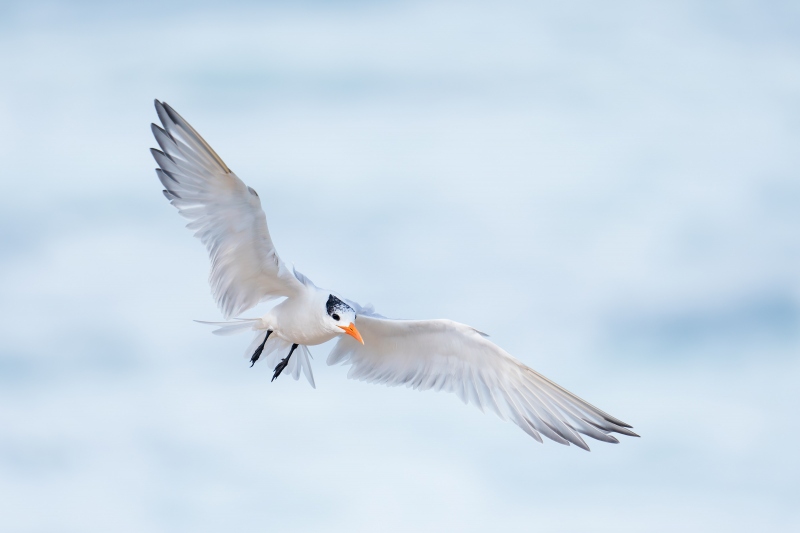
This image was also created at La Jolla, CA on 28 January 2024 on a private IPT. Again, while standing at full height, I used the Robus RC-5558 Vantage Series 3 Carbon Fiber Tripod/Levered-Clamp FlexShooter Pro-mounted Sony FE 600mm f/4 GM OSS lens and The One, the Sony Alpha 1 Mirrorless digital camera. ISO 640. Exposure was determined via Zebras with ISO on the rear dial: 1/4000 sec. at f/4 (wide open). AWB at 10:31:16am on variably sunny/variably cloudy morning. Zone/AF-C was active at the moment of exposure and performed perfectly. Be sure to click on the image to enjoy the larger version. Image #7: Royal Tern in flight — breaking surf background |
Varying Backgrounds
As the terns were dropping out of the sky, the backgrounds were changing each moment. The background for Image #1 was the dark face of a building wave. In #7, the pure white background was created by a wave that had just broken. This situation makes it abundantly clear as to why you must be in manual exposure mode with changing backgrounds. You have correctly set the exposure for the subject; the tonality of the background doesn’t change anything.
Your Call
Which do you think is the strongest image? Why? Which is the weakest image? Why?
|
|
|
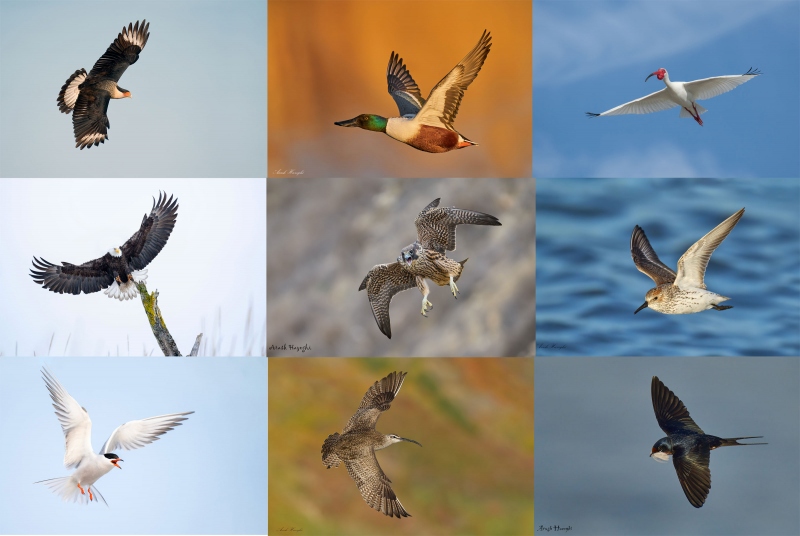
Click on the composite to view a larger version and be even more impressed. The Art & Science of Photographing Birds in Flight with the Sony α-1
|
The Art & Science of Photographing Birds in Flight with the Sony α-1
by Arash Hazeghi and Arthur Morris
First of all, if you use Nikon or Canon (or Olympus or Fuji) gear, do not be put off by the title. While a portion of the guide deals with the Sony α-1, there is a ton of priceless information, tips, and techniques that can help you become a better flight photographer. No matter what system you are using. If you do not use an α-1, be sure to read down to the bottom to save a few bucks.
Arash Hazeghi and Arthur Morris have created the definitive and most comprehensive ever treatise on photographing birds in flight. With more than sixty years of experience photographing birds, they know what you need to know but have not figured out yet! You will be astounded by the depth of their knowledge and the tips they have to offer. More than six months in the making, the guide contains 229 pages, 24,321 words,97 exceptional and inspirational flight images — each with a legendary, enlightening BIRDS AS ART caption, and 22 screen captures. The guide contains a wealth of useful, practical, and for the most part — never-before-available information.
Purchase
Click here to purchase your copy in the BAA Online Store.
What Everyone Will Learn
We will teach you the basic concepts that you need to master to become a great flight photographer along with the techniques used by the world’s best flight photographers.
You will learn that most any telephoto lens can be perfect for flight photography in a given situation; focal lengths for the images in the book range from 200mm to 1200mm and everywhere in between.
We discuss the merits of various lenses in depth, including and especially comparing the 400mm f/2.8 lenses with the 600mm f/4s.
We guide you in getting your hands on the flight photography lens that will best meet your needs. We offer a variety of handholding and rest position tips and include tips on working with a big lens on a tripod when working with a flight lens that is otherwise too heavy for you.
Both authors offer their thoughts on getting the right exposure when photographing birds in flight. You will learn to get the right exposure on foggy days and even when photographing black birds in white sky conditions.
You will learn the tremendous importance of pre-focusing, of finding the bird in the viewfinder quickly, acquiring focus almost instantly (with tips on doing all three).
You will learn the role of image stabilization in flight photography and the best settings.
Both authors share their thoughts on using the focus range limiter switch. In the same vein, you will learn to use Direct Manual Focus to make your flight photography life easier.
All will learn about the best wing positions and the importance of the background with images of birds in flight. With lots of examples.
You will learn about the best shutter speeds (and the best aperture) to use when photographing flying birds.
You will learn to photograph flight while seated and the many advantages of doing so.
You will learn the best methods of controlling high ISO noise.
All will learn to format their flash cards properly and safely.
You will learn what to do when your AF system is temporarily blinded.
All will learn the huge effect that wind strength and direction has on flight photography and to evaluate the quality and direction of the light on both sunny and cloudy days.
You will learn why it is vitally important to shoot aggressively when photographing birds in flight.
You will learn to carefully observe and evaluate a variety of bird behaviors that may shine light on some excellent opportunities for photographing birds in flight. And about getting into the best position from which to photograph.
You will learn to be a much better flight photographer.
What Sony Folks Will Learn
Exactly how Artie uses Zebras to come up with perfect exposure after perfect exposure.
The fine points and recommended settings for Optical Steady Shot (OSS).
The concept of Auto-Focus (AF) tracking in the α-1.
Everything there is to know about the complex Sony autofocus system.
About all the AF patterns, how to quickly switch them, and about those favored by each author. And why.
The Tracking and Non-tracking AF patterns. When and why Arash uses Non-Tracking Zone. And why Artie uses only two AF patterns.
How to set and use Bird Face-Eye detection for flight photography.
How and why to assign various custom functions to the various programmable buttons on the α-1 body.
The perfect settings for the many, many Menu items that are vitally related to flight photography.
How and why the Sony α-1 uses both contrast and phase detection AF to determine focus (and the benefits thereof).
Which are the best memory cards for the Sony α-1.
To quickly access frequently used menu items.
Non-Sony α-1 Discount
Using the honor system, folks who do not use a Sony α-1 body are invited to click here to save $25.00 on the purchase price of the guide.
Typos
With all blog posts, feel free to e-mail or to leave a comment regarding any typos or errors.




The composition in photos 4 and 7 looks to have the birds a little too low in the frame to me, and 7 looks to be a just a tad too far right in the frame. With their heads generally pointed downward, they look as if they’re being cramped in that direction with no room in the frame to fly into.
Good point.
a
I’m with Sue, that drowning bird is hard to look at!
Thanks for sharing Artie
Artie: I love the surfing sea lion. It’s definitely my favorite. I love bubbles, among many other things about the image. I guess my least favorite is the landing oystercatcher.
#6 sea lion is a keeper for me too. Getting the head sharp is great. #1 is my favorite for the dark background which sets off the lovely colors of the bird.
Images #1 and #2 and #3 and #4 and #5 and #7 are interesting and well made. Image #6 California Sea Lion is hard to see since the bird is in the water.
Sue
#6-OMG really, the bird in the water? It is a sea lion!!
With respect Sue Do you photograph anything?
Always with love b
Love the #1 Tern against dark background; it is a more unusual tone. The mid tones in the wings show up so beautifully against the darker background.
In the paragraph about Varying Backgrounds: Am I understanding correctly that if the exposure is set correctly for the bird, changes in background tonality do NOT require any changes in exposure settings?
Yes, thanks, and fixed.
with love, a
I really like image #1 for the dark, moody background.
Love the Sea Lion — a keeper for me.
Artie
I love the breaking wave image #3 as it sorta looks like snow even though its water droplets and you did great on the shot nicely visible and in front of the big splash.
#6 heck yeah (Wisconsin Slang) i love it actually like a torpedo airplane and you can make out the head really well, a definite keeper for me and you, now get him coming out of the water in air 🙂
Howdy Vasili hang onto your glasses!
Always with love b
Artie,
They are all great images, my favorite is #5 the Black Oystercatcher. I really like the wing position and how the black feathers and orange bill contrast against the light surf.
Many thanks, Monte. And thanks for the kind words in your e-mail. Been swamped!
with love, a