My Call
In the last blog post, my favorite image was the one of the sea lion. I liked five of the cute, well made, interesting flight shots equally well. For me, the weakest avian flight image was the oystercatcher because of the relatively harsh, somewhat off angled light. That said, I did like the wing position in that one.
Your Call
Which of today’s five featured duck images is your favorite? The best way to learn is to let us know why you made your choice.
Amazon
In its infinite wisdom, the Amazon affiliate program recently eliminated all types of generic and logo links as well as product-specific links with images such as those formerly featured on the Great (Photographic Accessory) Stuff tab here (and above on the orange-yellow menu bar).
In this and many future blog posts, I will post an item that contains my Amazon Affiliate link. If you do not wish to purchase the item, you can help support the work that I do here by clicking on the link and then continuing to shop. Please consider making it a habit to visit the blog before you do your Amazon shopping online. Great news: it will not cost you a penny more, works great with your Amazon Prime or Amazon Business accounts, and will help support the work that I do here on the blog.
The Sibley Guide to Birds, 2nd Edition
“Undoubtedly the finest guide to North American birds.”—Guy McCaskie.
If you live in North America and own only one field guide, it should be The Sibley Guide to Birds, 2nd Edition. There is a copy of the first edition on my desk at all times.
https://amzn.to/3UoeFrv
Who is Guy McCaskie?
Guy McCaskie is California’s top birder. Nobody else is even a close second. He lives in Imperial Beach about 30 minutes below San Diego. When I was a beginning bird photographer, sometime in the mid- or late 1980s, I had the pleasure of making a trip to the Salton Sea with Guy and several other top CA birders (including Richard E. Webster). Guy has mentored them all! He is an amazing gentleman, a civil engineer by trade, who recently saw his 500th species in San Diego County. Guy has nurtured the budding talents of young birders in California for more than six decades. Learn more about this incredible man in the 1992 article here. Having skimmed it, I absolutely need to give the whole thing a thorough read.
What’s Up?
Wednesday was the first day of the second 2024 San Diego IPT. Facing a dire weather forecast for the next 2 1/2 days, we made hay with a long session while the sun came in and out (after a partly cloudy early morning). With some big waves coming ahead of the next storm, the pelicans were up top for the first time in days. I used only my 70-200mm f/2.8 II lens with both TCs so that I could stay close and work extensively with newbies Tom Baker and Jeanette LaPorte. Tom is using an OM SYSTEM M. Zuiko 150-400mm f/4.5 TC 1.25 IS PRO (Zoom) lens and an OM SYSTEM OM-1 Mirrorless Camera body. Images soon. Jeanette is using the Canon EOS 5D Mark IV and the 100-400 II zoom lens. The 5D IV seems quite the dinosaur when compared to today’s blazingly fast mirrorless camera bodies. It took me a while to remember the controls on the Canon dSLR. But I did figure things out. Jeanette texted me after our morning session: “Artie. I am taking a quick look through this morning’s photos and when I look at the really haphazard shots from last year at La Jolla, well, there is just no comparison. The images from this morning represented a huge improvement! Many thanks.”
Today is Thursday 1 FEB and I will get the group together in some dry place this morning to go over tripod basics. Both Tom and Jeanette arrived with tripod heads that were simply impossible to use for bird photography -:(. Wherever you are and whatever you are doing, I hope that you too have a great day.
Please remember to use the B&H links that are found on most blog pages and to use the BIRDSASART discount code at checkout when purchasing your new gear from Bedfords to get 3% back on your credit card and enjoy free second-day air FedEx. Please, also, consider joining a BAA IPT. You will be amazed at how much you will learn!
If an item — a Delkin flash card, or a tripod head — for example, that is available from B&H and/or Bedfords, is also available in the BAA Online Store, it would be great, and greatly appreciated, if you would opt to purchase from us. We will match any price. Please remember also to use my B&H affiliate links or to earn 3% cash back at Bedfords by using the BIRDSASART discount code at checkout for your major gear purchases. Doing either often earns you free guides and/or discounts. And always earns my great appreciation.
Save 15%!
If you’d like to try out a new lens or if you need a lens for a specific trip or project (or for an IPT), LensRentals.com is the only way to go. To save 15%, simply click on the logo link above, arrange for your rental, and type in BIRDSASART15. If you type the gear you are looking for in the search box, it will pop right up. LensRentals.com offers affordable insurance. You can decline it, opt for LensCap: Damage Only, or select LensCap: Damage & Theft. Then hit PROCEED TO CHECKOUT. After you enter all of your info but before completing your order, be sure to scroll down to Promo Code box and enter the BIRDSASART15 code to save 15%.
I checked on renting a Sony FE 70-200mm f/2.8 GM OSS II lens for a week. The cost is only $122.00. LensCap: Damage Only coverage can be added for a very low $18.00. Going with LensCap: Damage & Theft would be $27.00. The shipping charge varies. They offer an interesting program called Lensrentals HD. By signing up for this shipping discount program ($99.00/year), you’ll get free Standard Shipping on all the orders you place.
Renting a Sony 600mm f/4 GM OSS lens for a week will cost you $536.00. The two coverage options come in at $76.00 or $114.00. Less your 15% discount when you enter the BIRDSASART15 code into the Promo Code box at checkout and enter the BIRDSASART15 codeine the Promo Code box at checkout to save 15%.
Remember, to save the 15% on your rental you must start your search by clicking on the logo above, or on this link: LensRentals.com


B&H
To ensure that I get credit for your B&H purchases, you can always click here. The tracking is invisible but greatly appreciated. And, you can use your PayBoo card. You must use the website to order. B&H will reopen on Fri April 14. Thanking me for the past 4000 educational blog posts could not be any easier and will not cost you one penny. Please shoot me your B&H receipt for major purchases.
Many folks have written recently stating that they purchased a Sony a1 from B&H and would like their free membership in the Sony 1 Info and Updates Group, a $150.00 value. When I check my affiliate account, their orders have not been there. When I let them know that they get credit for B&H purchases only if they use one of the many B&H affiliate links on the blog or begin their searches with this link, they are always disappointed. If in doubt, please contact me via e-mail and request a BH link. I am always glad to help and to guide you to the right gear.
Bedfords Simplified
Click here to start your search. Choose standard shipping, and when you get to the payment page, enter BIRDSASART in the discount code box and hit apply. You will be upgraded to free second day air Fed-Ex and receive 3% cash back on your credit card once your stuff ships. Either is greatly appreciated by yours truly.
Bedfords Amazing BAA Discount Policy
Folks who have fallen in love with Bedfords can now use the BIRDSASART coupon code at checkout to enjoy a post-purchase, 3% off-statement credit (excluding taxes and shipping charges) on orders paid with a credit card. The 3% credit will be refunded to the card you used for your purchase. Be sure, also, to check the box for free shipping to enjoy free Second Day Air Fed-Ex. This offer does not apply to purchases of Classes, Gift Cards, prior purchases.
Visit the Bedfords website here, shoot Steve Elkins an e-mail, or text him on his cell phone at (479) 381-2592.
Gear Questions and Advice
Too many folks attending BAA IPTs and dozens of photographers whom I see in the field and on BPN, are — out of ignorance — using the wrong gear, especially when it comes to tripods and more especially, tripod heads. And the same is true in spades when ordering new camera bodies or lenses. My advice will often save you some serious money and may help you avoid making a seriously bad choice. Please know that I am always glad to answer your gear questions via e-mail. If you are desperate, you can try me on my cell at 863-221-2372. Please leave a message and shoot me a text if I do not pick up.
|
|
|
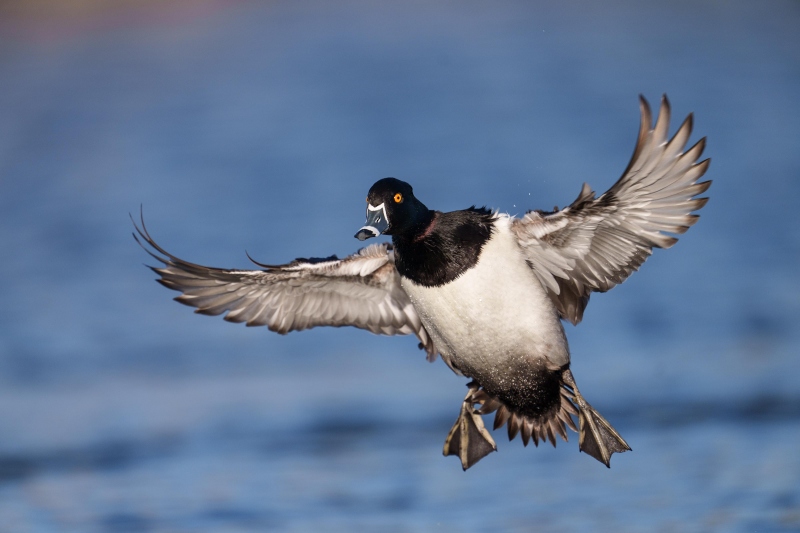
This image was created by me on 29 January at Santee Lakes on a San Diego private IPT with Homer and Galapagos veteran Vasili Chernishof. Seated on dirt and small rocks (ouch!), I used the handheld Sony FE 600mm f/4 GM OSS lens with the Sony FE 1.4x Teleconverter, and The One, the Sony Alpha 1 Mirrorless Digital Camera.. The exposure was determined by Zebra technology. Shutter Priority at zero with Exposure Compensation assigned to the Thumb Dial. AUTO ISO set ISO 640: 1/3200 second at f/5.6. AWB at 3:41:59 pm on sunny afternoon. Zone/AF-C with Bird-Eye/Face Detection performed perfectly. Click on the image to enjoy the high-res version. Image #1: Ring-necked Duck drake braking to land |
Handholding at 840mm
Ducks are fast and erratic fliers so handholding is always best if possible. But only if you can manage the lens without difficulty.
I began trying to do flight at 840mm figuring that I could get on the more distant incoming subjects before they got to the crowds. But most of the images were poorly framed and featured clipped wings, feet, and heads. For me, handholding at 840mm is a big challenge, but I did get Image #1 just right.
|
|
|
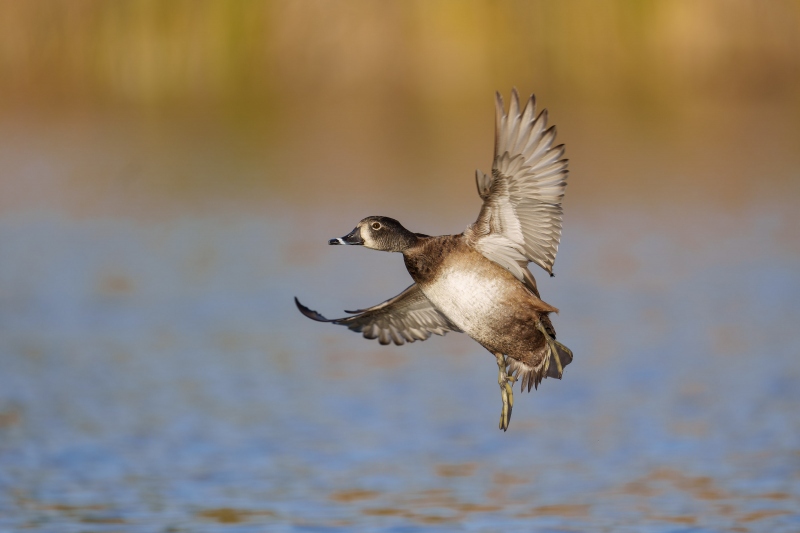
This image was also created on 29 January at Santee Lakes on a San Diego private IPT with Homer and Galapagos veteran Vasili Chernishof. Seated on dirt and small rocks (ouch!), I used the handheld Sony FE 600mm f/4 GM OSS lens and The One, the Sony Alpha 1 Mirrorless Digital Camera.. The exposure was determined by Zebra technology. Shutter Priority +0.3 stops with Exposure Compensation assigned to the Thumb Dial. AUTO ISO set ISO 400: 1/3200 second at f/4. AWB at 3:55:25 pm on sunny afternoon. Zone/AF-C with Bird-Eye/Face Detection performed perfectly. Click on the image to enjoy the high-res version. Image #2: Ring-necked Duck hen on final approach |
Dropping Back to 600mm
I quickly realized that removing the TC was the way to go. Finding the incoming duck is much easier at 600mm than it is when working at 840mm, AF is more efficient, it is much easier to keep the bird in the center of the frame, and you get more depth-of-field with birds at the same distance. And the superb image quality of a sharp, 51MP a-1 files allows for healthy crops.
|
|
|
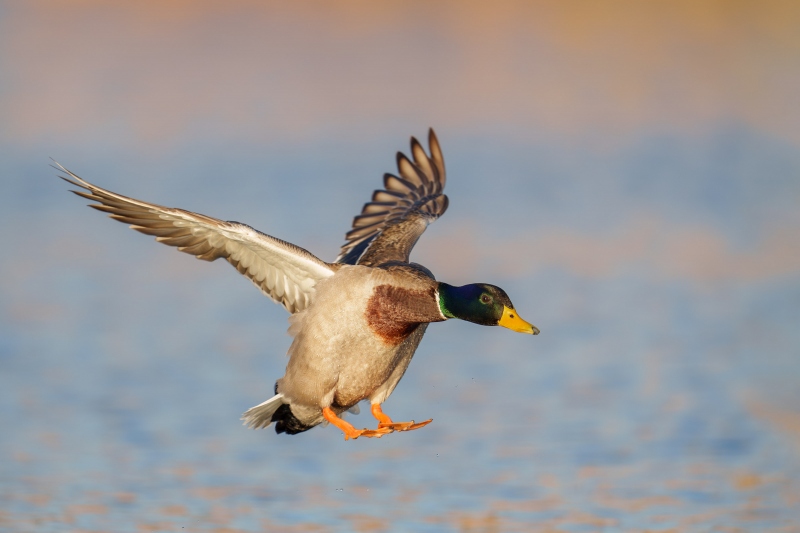
This image was also created on 29 January at Santee Lakes on a San Diego private IPT with Homer and Galapagos veteran Vasili Chernishof. Again, seated on dirt and small rocks (ouch!), I used the handheld Sony FE 600mm f/4 GM OSS lens and The One, the Sony Alpha 1 Mirrorless Digital Camera.. The exposure was determined by Zebra technology. Shutter Priority +0.3 stops with Exposure Compensation assigned to the Thumb Dial. AUTO ISO set ISO 640: 1/3200 second at f/4. AWB at 4:14:14 pm on sunny afternoon. Zone/AF-C with Bird-Eye/Face Detection performed perfectly. Click on the image to enjoy the high-res version. Image #3: Mallard drake landing |
Mallards are Difficult Exposures
With their blackish green heads and bright white underwings, drake Mallards present a difficult exposure problem. As you cannot toast the whites, you usually have to do some fancy stepping during the image optimization to bring up the color and detail of the dark heads.
Why Shutter Priority?
Shutter Priority mode for duck photography is a viable choice, especially when Sony Zebras are at hand. If I frame an image and do not see a smattering of Zebras on the highlights, I simply increase the ISO a click or two until I do. For flight I will usually go with 1/3200 or 1/4000 sec. as my chosen shutter speed. Note that with the sun out at full strength for Images 1, 2, 3, and 5 that the ECs were between +.03 and -.03. General rule: when the sun is shining the meter will usually not be far off. See more at Image #4.
|
|
|
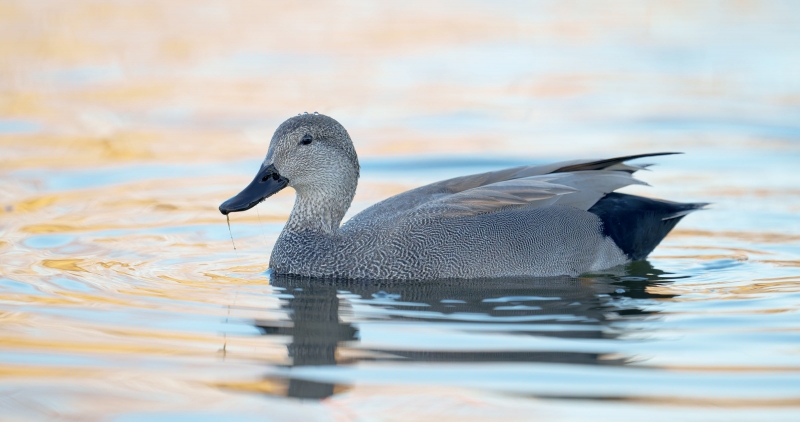
This image was also created on 29 January at Santee Lakes on a San Diego private IPT with Homer and Galapagos veteran Vasili Chernishof. Seated on wet grass and duck poop behind my flattened Robus RC-5558 Vantage Series 3 Carbon Fiber Tripod topped by a Levered-Clamp FlexShooter Pro, I used the Sony FE 600mm f/4 GM OSS lens and The One, the Sony Alpha 1 Mirrorless Digital Camera.. The exposure was determined by Zebra technology. Shutter Priority +2.0 stops with Exposure Compensation assigned to the Thumb Dial. AUTO ISO set ISO 4000: 1/1250 second at f/4. AWB at 4:58:29pm in the shade — the sun had just disappeared behind the hills to the west. Zone/AF-C with Bird-Eye/Face Detection performed perfectly. Click on the image to enjoy the high-res version. Image #4: Gadwall drake swimming |
In Low Light Conditions with Light -toned Backgrounds
In low light conditions with light -toned backgrounds, the meters in virtually all camera bodies are beyond dumb. Note that the perfect exposure for this image required an EC (Exposure Compensation of +2.0 stops (and a resulting high ISO of 4000). If I had been working in Manual mode with the ducks in flight, I would have needed to reduce the shutter speed and then would have needed to spend a few valuable seconds increasing the ISO by eight or nine clicks. With Shutter Priority, I just needed to up the EC to +2.0 and I was good to go. I do not even pay attention to the ISO.
Remember, in low light conditions with light-toned scenes, your in-camera meter is dumb as a skunk; without your help, the images will be two stops underexposed.
|
|
|
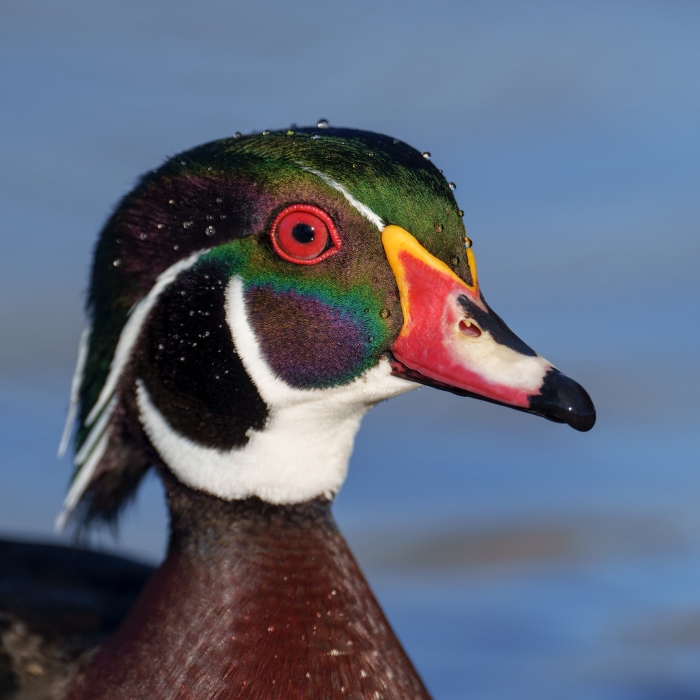
This image was created by me on 30 January at Santee Lakes on a San Diego private IPT with Homer and Galapagos veteran Vasili Chernishof. Seated on dirt behind my flattened Robus RC-5558 Vantage Series 3 Carbon Fiber Tripod topped by a Levered-Clamp FlexShooter Pro, I used the Sony FE 600mm f/4 GM OSS lens with the Sony FE 1.4x Teleconverter, and The One, the Sony Alpha 1 Mirrorless Digital Camera.. The exposure was determined by Zebra technology. Shutter Priority -0.3 stops with Exposure Compensation assigned to the Thumb Dial. AUTO ISO set ISO 800: 1/2500 second at f/5.6. AWB at 8:36:32am on sunny morning. Zone/AF-C with Bird-Eye/Face Detection performed perfectly. Click on the image to enjoy the high-res version. Image #5: Wood Duck drake tight head portrait |
With Digital, it is Always Worth Trying, Even in Seemingly Impossible Situations
Working off the tilted rear monitor at 840mm with a flattened tripod, attempting to frame a quality head shot of a point blank drake Wood Duck is very difficult at best. As is getting the exposure right. As the most dark bird was filling a good portion of the frame, I knew that I would need to use some negative EC to prevent blowing out the bright whites on the duck’s neck and the bill tip. Unlike with film, it does not cost you a penny to push the shutter button. So, I tried and came up with a winner.
High Level Question (I doubt if anyone will get this one)
You are photographing a bird with lots of dark tones and some small bright white highlights — a drake Wood Duck or a drake Ring-necked Duck, for example, and are working in an automatic exposure mode — Shutter Priority, for example. The bird is swimming toward you. Why will you need to use more and more negative Exposure Compensation as the bird gets closer and closer?
Typos
With all blog posts, feel free to e-mail or to leave a comment regarding any typos or errors.





It was fun to see my dad quoted in the article about Guy. They were great friends for such a long time and chased many, many California rarities together over the years. Thanks for sharing it.
The drake and hen are my top two in that order, though I’m particular to BIF. Interesting back story on Guy.
Artie
So how does that play out when photographing a young eagle? The Woodie has a few areas of white that you would not want to blow out and you dial in minus EC but if the subject does not have them in say the young eagle would you want more or plus EC?
Lovin the ring neck #1 and #5 the head portrait of the Woodie 🙂
Always with love b
Artie
I kinda answered my own questions in looking at the zebras, thank you for the teachings!
Always with love b
Artie like them all, my favorite is #4. The color of the water draws out the colors of the feathers on the back of the Gadwall drake.
Thanks, Monte. The key to that was twofold: a good to the right exposure and some decent processing.
with love, artie
As the bird gets closer there is less background affecting the exposure.
Correct as noted in my Reply to Joel’s second comment.
with love, a
Artie, Liking #2 back here in Naples.
Thanks, JJ. Enjoy FL.
a
I’m guessing that Joel has the answer to the exposure question.
The wood duck is my favorite photo because it is close and on the same level as the viewer giving a connection between viewer and bird. I love their color, especially the iridescent green and purple. The water drops and lovely blue background are the icing on the cake.
Wrong guess :-). See my response to Joel. The super-low perspective is the result of working off the flattened tripod. Thanks for leaving a comment.
with love, a
All 5 images are well made and interesting. Image #5 Wood Duck is so close. Photographer either got it close or just took a picture of it close.
My guess on your exposure question is that as the bird gets closer the bright white area is getting larger and thus represents more and more pixels in the final image. So, to keep the overall exposure optimum you have to dial in more negative compensation.
Good try, Doc. You wound up with the correct answer, “More negative compensation,” but your reasoning was faulty. Yes, the small white area get bigger as the bird gets closer. The bird, however, is predominantly dark so as the bird swims closer the dark dominates the bright whites more. Thus, you need more negative compensation to save to save the whites. In addition, the amount of white is such so so tiny that it will barely influence the meter at all
That goes back to a basic principle covered in the original The Art of Bird Photography in the Exposure chapter — the larger a light or dark area is in the frame, the more it will affect the meter. Even though The Art of Bird Photography uses all film images, I still urge people to study and master the information there on exposure theory as it is completely relevant with digital capture.
with love and thanks for leaving a comment.
a
So what you are saying is: the camera’s meter is reading the image as darker overall as the bird approaches and is thus trying to increase the exposure which will blow out the whites unless you dial in more negative compensation.
That’s interesting, is that true for all metering modes?
Hey Joel,
Thanks for getting back to me on this.
You are correct.
As for “all metering modes,” the answer is yes, but not, of course, for spot metering. But again, as I wrote in the original ABP, using spot metering for birds with film was very difficult at best. With digital, using it is a total waste of time. As I have long said, folks who truly want to understand exposure need to study the chapter on Exposure and Exposure Theory in the original Art of Bird Photography.
with love, a
ps: As the drake Wood Duck fills more and more of the frame, there is less light water in the background to influence the meter reading toward underexposure …