My Call?
Which of today’s six featured images is my favorite?
What’s Up?
After more than two months of sunny days since Bob Eastman arrived at my home in late October, we have been dealing with overcast and cloudy-dark conditions every morning for about a week. And that is exactly what we got at Sebastian Inlet on Saturday morning. I am proud to say that yesterday I finished sending out the new .DAT files with instructions, the Buttons and Dials Guides, and the Info Sheets for both the a9 iii (10 folks) and the a-1 ii groups. If you own either of these bodies and are not a member of the group, please e-mail for information.
After lugging the 600 and the tripod around Circle B Bar for 3 miles on Friday, I decided to give my right shoulder a break on Saturday by working with the hand held 200-600, creating lots of blurs, and experimenting with the vastly improved OSS (Sony’s image stabilization system on the a- 11). Bob stuck with his trusty 2-6 and worked on making sharp images in the gloom. My favorite of his images (Image #6) is the last featured image. On our way home, we kept a keen eye out for roadkill and scored big with a large (about 20 pounds) very smelly Raccoon and a huge (45+ pound) coyote, the first I’d ever seen in Florida. Rocky went into a cooler while the coyote was placed on the rubber mat in my rear cargo hold (with my photo gear pushed to the left side of the compartment).
Today is Sunday 29 December 2024. It is too dark and dingy to set up a roadkill cafe for flight but we might head down to the lake at about 10:00am if it brightens up. Whatever you are doing, we hope that you too choose to have fun and be happy. This afternoon I will be watching NFL football and working on a big, new YouTube video on vertical image designs for bird and nature photography.
The Time Has Never Been Better!
With the Sony 200-600 available for less than $2K (new) and the price of a-1 bodies falling, there has never been a better time to change your life. Use one of my affiliate links and I can have you set up making great images in a matter of minutes, just as I’ve done with Bob Eastman, the amazing Anita North, Pat Fishburne (at age 86!), Andrew Schonbek, Steve and Elizabeth Shore, Carolyn Johnson (at age 80), Geri Georg, and too many more to remember.
Should You Upgrade to the a-1 ii?
Aside from the improved ergonomics as compared to the a-1, other nice features include the fact that the rear screen tilts both ways. Pre-capture will surely prove to be a plus while in my option, the Speed Boost feature is a total waste for bird photography. In addition, the resolution on the rear monitor has been improved dramatically. Not to mention that Bird Face-Eye tracking on the a-1 ii is significantly better than on the a-1 and that the 51MP file are to die for.
So, the big question is, is the a-1 ii “worth” a gear upgrade. Remembering that I can never know whether or not something is worth it to you, I can say that I was not floored when using my a-1 ii. The differences between the a-1 ii and the original a-1, are neither huge nor eye-opening. The huge difference between the new camera body and the a9 iii is, of course, the 51MP a-1 raw files (as compared to the 24MP files rendered by the a9 iii).
With the price of a new a-1 having recently dropped $1500.00 to $4,998.00, the decision for new Sony buyers is a very tough one. The a-1 II sells new for 6,498.00. And the price of used a-1 bodies will continue to drop (but not as much as I had thought before using the a-1 ii).
If you do purchase an a-1 ii, be sure to use one of my two affiliate links so that you will receive my a-1 ii settings (in the form of a CAMSETii.DAT file), the Buttons and Dials Guide, and an Info Sheet. Folks who do not purchase their new a-i using my B&H link or from Bedfords here and entering the BIRDSASART discount code at checkout will be able to purchase the a-1 ii guide for $227.43. If you are at all confused and do not want to screw up your order, please get in touch via e-mail.
You can see some of my first a-1 ii images in the blog post here and several more below.
Supporting My Efforts Here
If you enjoy and learn from the blog, are all set for gear, or live overseas, consider leaving a BAA Blog Thank You Gift here.
If you enjoy and learn from the blog, please consider using one of my affiliate links when purchasing new gear. It will never cost you a single penny. To support my effort here, please order from B&H by beginning your search here. Or, click here, to order from Bedfords and enter the discount code BIRDSASART at checkout to receive 3% cash back to your credit card and enjoy free Second-Day Air Fed-Ex shipping. It is always best to write for advice via e-mail.
In many cases, I can help you save some serious dollars. And/or prevent you from purchasing the wrong gear from the wrong shop.
|
|
|
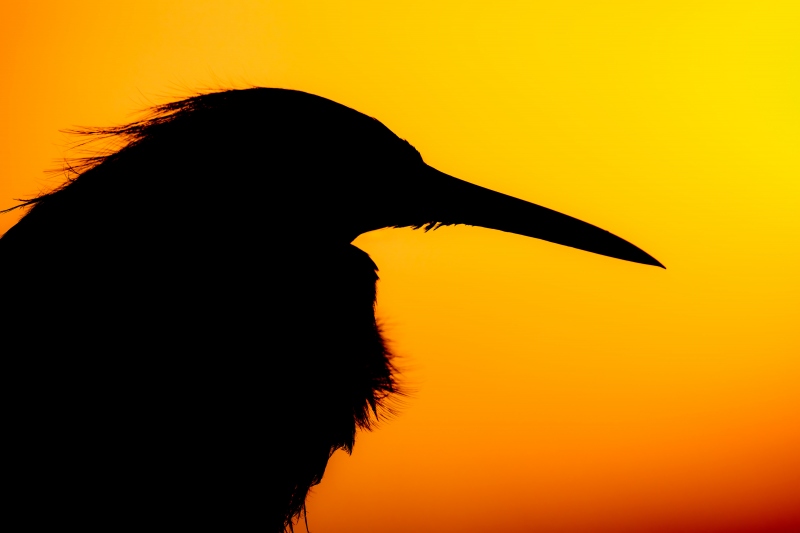
This image was created on 28 December 2024 at Sebastian Inlet, FL. Crouching on the South Jetty, I used the hand held Sony FE 200-600mm f/5.6-6.3 G OSS lens (at 600mm) and The Latest Greatest Flagship Body, the Sony a1 II Mirrorless Camera. The exposure was determined using Zebra technology with ISO on the Thumb Dial. ISO 800. 1/1600 second at f/6.3 (wide-open) in Manual Mode. AWB at 7:25:41am on a mostly cloudy morning. RawDigger showed the exposure to be dead solid perfect. Tracking: Zone/AF-C with Bird Face/Eye Detection performed perfectly. Be sure to click on the image to enjoy a high-res version. Image #1: bedraggled Snowy Egret silhouette head portrait |
One Minute of Post Sunrise Color
At 7:00am there were some clouds on the eastern horizon and it looked as if it would be a mostly sunny morning. As the sun rose, the clouds grew in size and rose as well. The sun broke through very early only once before the clouds took over.
This Snowy Egret has been hanging out at the South Jetty for at least 10 weeks. A big chunk of feathers hangs from it neck and the rest of him is totally bedraggled. He was the only silhouette-able subject so I made a few images and repaired the mess on its neck with Remove Tool.
|
|
|
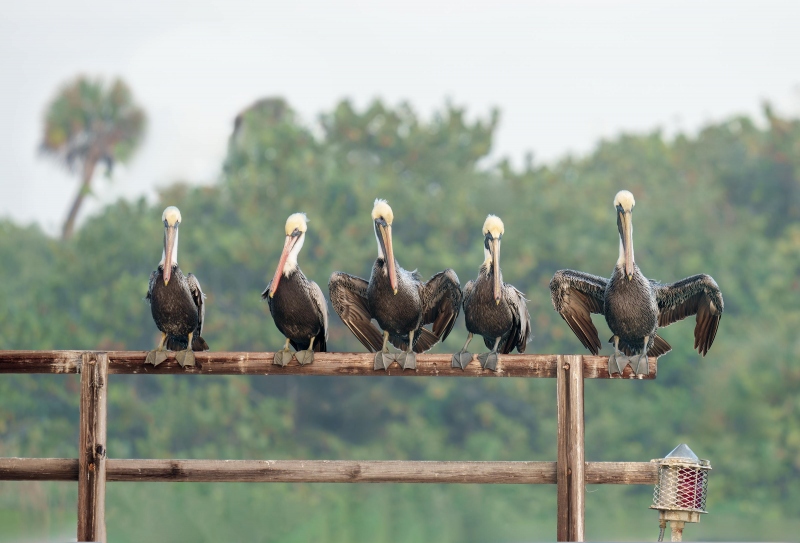
This image was also created on 28 December 2024 at Sebastian Inlet, FL. Standing just east of the bridge, I used the hand held Sony FE 200-600mm f/5.6-6.3 G OSS lens (at 600mm) and The Latest Greatest Flagship Body, the Sony a1 II Mirrorless Camera. The exposure was determined via Zebra technology with Exposure Compensation on the thumb dial. Shutter Priority +1.0 stop. AUTO ISO set ISO 125: 1/30 sec. at f/7.1 (stopped down 1/3-stop). AWB at 7:47:29am on what had become a totally mostly cloudy morning. RawDigger showed the exposure to be perfect. Tracking: Zone/AF-C with Bird Face/Eye Detection performed perfectly. Be sure to click on the image to enjoy a high-res version. Image #2: Five adult Brown Pelicans on railing of bridge abutment |
Optical Stabilization System
Canon call it Image Stabilization. Nikon calls it Vibration Reduction (VR). With Sony, it is the Optical Stabilization System (OSS). Whatever system I’ve used over the past two decades I’ve never paid much attention to these systems as when I am hand holding a large telephoto lens — something I do only rarely, I am almost always using very high shutter speeds. Thus, image stabilization has never been a major concern for me.
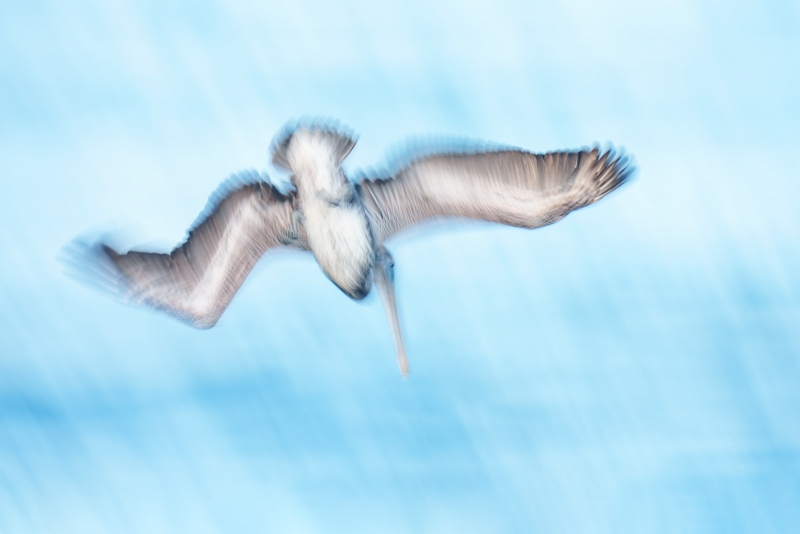
I received a text from good friend Arash Hazeghi yesterday stating that with the a-1 ii, OSS had been vastly improved. Arash does most of his amazing work with the hand held Sony 600mm f/4. So yesterday, I decided to put the a-1 ii’s in camera OSS to a test. This was the most dramatic of the many sharp images that I made. Hand holding at 1/30 second at 600mm and creating a sharp image is very impressive (to me). I am liking my a-1 ii more and more very day …
|
|
|
This image was also created on 28 December 2024 at Sebastian Inlet, FL. Standing on the South Jetty, I used the hand held Sony FE 200-600mm f/5.6-6.3 G OSS lens (at 500mm) and The Latest Greatest Flagship Body, the Sony a1 II Mirrorless Camera. The exposure was determined via Zebra technology with Exposure Compensation on the thumb dial. Shutter Priority +2.0 stops. AUTO ISO set ISO 125: 1/20 sec. at f/8 (stopped down 2/3-stop). AWB at 7:49:38am on what had become a totally mostly cloudy morning. RawDigger showed the exposure to be dead solid perfect. Tracking: Zone/AF-C with Bird Face/Eye Detection performed perfectly. Be sure to click on the image to enjoy a high-res version. Image #3: Brown Pelican immature diving |
Exposure Fine Points
Whether working sharp or trying to create pleasingly blurred images, I know that when using Shutter Priority and AUTO ISO in dingy conditions with birds in the sky I want to be at +2 2/3 to + 3 stops to avoid underexposing the young pelicans. With those birds against the green water on these cloudy days I want to be at about +1 or +1 /3 stops. Note: if you are working in Manual Mode the two exposures will work out to be the same.
|
|
|
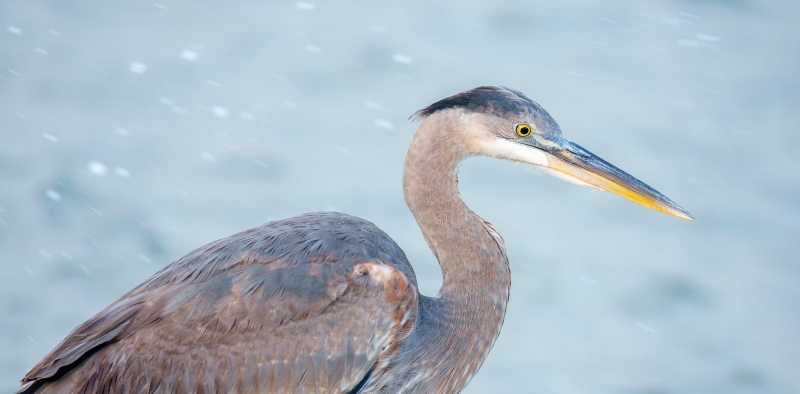
This image was also created on 28 December 2024 at Sebastian Inlet, FL. Standing on the park road southeast of the bridge, I used the hand held Sony FE 200-600mm f/5.6-6.3 G OSS lens (at 600mm) and The Latest Greatest Flagship Body, the Sony a1 II Mirrorless Camera. The exposure was determined via Zebra technology with Exposure Compensation on the thumb dial. Shutter Priority +1.7 stops. AUTO ISO set ISO 500: 1/125 sec. at f/6.3 (wide open). AWB at 8:13:09am on what had become a totally mostly cloudy morning. RawDigger showed the exposure to be dead solid perfect. Tracking: Zone/AF-C with Bird Face/Eye Detection performed perfectly. Be sure to click on the image to enjoy a high-res version. Image #4: first winter Great Blue Heron getting splashed |
More OSS Testing
If you watched the very popular Shutter Speeds for Bird Photography in the blog post here, that I would normally be working at shutter speeds of between 1/400 and 1/1000 sec. when photographing a relatively static subject at 600mm with the 200-600. So, when I took a walk along the park road, I made lots of sharp images with shutter speeds in the 1/60 to 1/250 sec. range. The big deal with the improved OSS system with the a-1 ii is that it allows you to work at lower ISOs. It is important to remember that no image stabilization system will help you to create sharp images when the subject is moving!
|
|
|
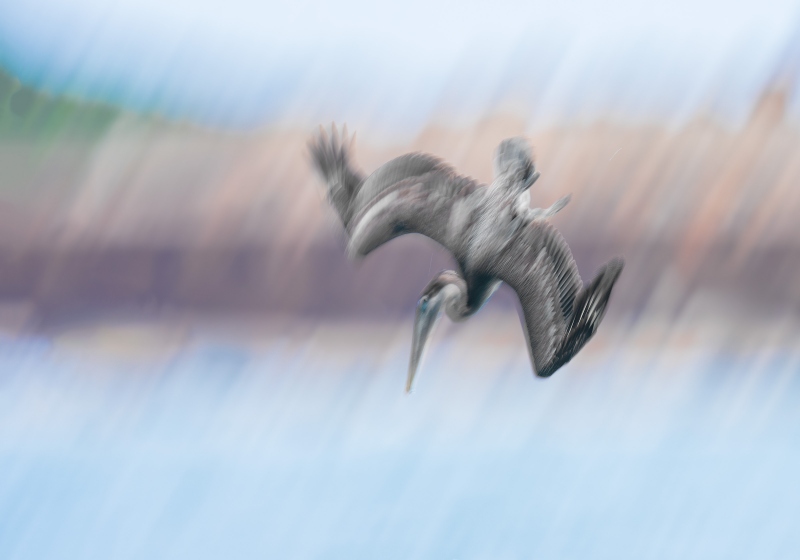
This image was also created on 28 December 2024 at Sebastian Inlet, FL. Standing on the South Jetty, I used the hand held Sony FE 200-600mm f/5.6-6.3 G OSS lens (at 407mm) and The Latest Greatest Flagship Body, the Sony a1 II Mirrorless Camera. The exposure was determined using Zebra technology with ISO on the Thumb Dial. ISO 50. 1/30 second at f/9 (stopped down one full stop) in Manual Mode. AWB at 9:25:34am on a then totally cloudy morning. RawDigger showed the exposure to be perfect. Tracking: Zone/AF-C with Bird Face/Eye Detection performed perfectly. Be sure to click on the image to enjoy a high-res version. Image #5: Brown Pelican immature diving/North Jetty construction background |
With Dark Backgrounds
With the background changing from white sky to relatively dark concrete it is must to work in Manual mode rather than in Shutter Priority with AUTO ISO as the darker backgrounds will throw off the meter. I wanted to make an image showing the North Jetty construction project in the background. So I did 🙂
|
|
|
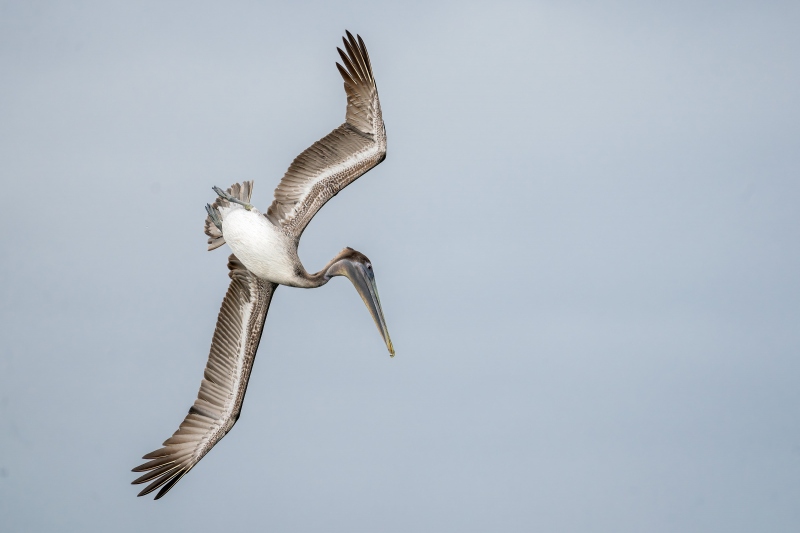
This image was created on 28 December 2024 at Sebastian Inlet, FL by my friend Bob Eastman. Standing on the South Jetty, he used the hand held Sony FE 200-600mm f/5.6-6.3 G OSS lens (at 600mm) and The One, the Sony Alpha 1 Mirrorless digital camera. ) The exposure was determined using Zebra technology with ISO on the Thumb Dial. ISO 2000. 1/2000 second at f/6.3 (wide-open) in Manual Mode. AWB at 9:29:49am on then very cloudy morning. RawDigger showed the exposure to be dead solid perfect. Tracking: Spot (S) AF-C with Bird Face/Eye Detection performed perfectly. Be sure to click on the image to enjoy a high-res version. Brown Pelican immature diving
|
Way to Go, Bob!
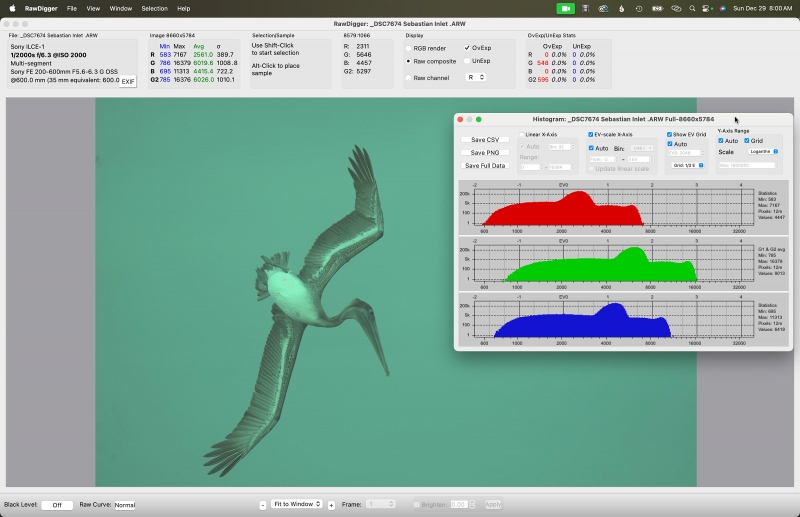
While I was doing blurs exclusively, Bob opted to work sharp. With this raw file, Bob — as you will see below, absolute nailed the perfect exposure. Note that with the low light conditions, Bob compromised a bit on shutter speed opting to go with 1/2000 sec. rather than 1/3200 sec.
|
|
The RawDigger Screen Capture for the Brown Pelican immature diving image |
What can I say? The combination of Zebras live in the viewfinder (with your camera set up properly) and post-capture study of the raw files in RawDigger makes it pretty much child’s play to come up with perfect exposure after perfect exposure. It would be impossible to overstate how much I have learned by studying RawDigger and how much better my exposures have become since I started with the program almost three years ago. With the G channel coming right up to the 16000 line, the raw file brightness for today’s featured image is dead solid perfect.
RawDigger — not for the faint of heart …
Many folks are reluctant to learn that most of their images are underexposed by one or more full stops and that highlight warnings in Photoshop, Lightroom, Capture One, and your in-camera histogram are bogus as they are based on the embedded JPEGs. Only your raw files tell the truth all the time. Heck, I resisted RawDigger for several years … Once you get over that feeling, RawDigger can become your very best exposure friend no matter what system you are using. On the recent IPTs and In-the-Field sessions, we have demonstrated that fact over and over again. Convincingly.
The RawDigger Adapted (green) Histogram
In the RawDigger e-Guide, you will learn exactly how to set up the Adapted “green” RawDigger Histogram and how to use it to quickly and easily evaluate the exposure or raw file brightness of images from all digital cameras currently in use.
Note that with the recent update to Version 1.4.9 Release Build 821 (ARM64) the previous adapted “pink” histogram view has become the adapted “green” histogram view.
|
|
RawDigger e-Guide with Two Videos |
The RawDigger e-Guide with Two Videos
by Arthur Morris with Patrick Sparkman
The RawDigger e-Guide was created only for serious photographers who wish to get the absolute most out of their raw files.
Patrick and I began work on the guide in July 2020. At first, we struggled. We asked questions. We learned about Max-G values. We puzzled as to why the Max G values for different cameras were different. IPT veteran Bart Deamer asked lots of questions that we could not answer. We got help from RawDigger creator Iliah Borg. We learned. In December, Patrick came up with an Adapted Histogram that allows us to evaluate the exposures and raw file brightness for all images created with all digital camera bodies from the last two decades. What we learned each time prompted three complete beginning to end re-writes.
The point of the guide is to teach you to truly Expose-to-the-Right so that you will minimize noise, maximize image quality, best utilize your camera’s dynamic range, produce raw files with clean natural color, and attain the highest possible level of shadow detail in your RAW files in every situation. In addition, your properly exposed RAW files will contain more tonal information and feature the smoothest possible transitions between tones. And your optimized images will feature rich, accurate colors.
We teach you why the GREEN channel is almost always the first to over-expose. We save you money by advising you which version of RawDigger you need. We teach you how to interpret the Max G values for your Canon, Nikon, SONY and Olympus camera bodies. It is very likely that the Shock-your-World section will shock you. And lastly — thanks to the technical and practical brilliance of Patrick Sparkman — we teach you a simple way to evaluate your exposures and the raw file brightness quickly and easily the Adapted RawDigger histogram.
The flower video takes you through a session where artie edits a folder of images in Capture One while checking the exposures and Max-G values in RawDigger. The Adapted Histogram video examines a series of recent images with the (then) pink histogram views and covers lots of fine points including and especially how to deal with specular highlights. The directions for setting up the Adapted (now green) Histogram views are in the text.
If we priced this guide based on how much effort we put into it, it would sell it for $999.00. But as this guide will be purchased only by a limited number of serious photographers, we have priced it at $51.00. You can order yours here in the BAA Online Store.
Typos
With all blog posts, feel free to e-mail or to leave a comment regarding any typos or errors.



I have a hunch your favorite is #3.
#3 is kinda special and that’s coming from a guy who’s not a huge fan of blurs. #3 is tremendous and must be your favorite.
Great one Bob!
I’m with Patricia on this……
Art: Knowing that you — unlike me — really like blurs, I think your favorite would be #3 or #5. I am guessing #5 because of all the soft colors in he background.