In the Last Blog Post
In the last blog post, Why Photograph Boat-tailed Grackle? here, I could not pick a favorite; I love them both for the action they depict and the sharpness. Not to mention that Pre-Capture on the Sony a-1 ii is the bomb!
Your Call?
Which of today’s five featured images do you feel is the strongest? Why did you make your choice?
What’s Up?
Photography at ILE in the mornings has been very good. All nine young cranes continue to survive and grow. There are flocks of feeding Cattle Egrets in the fields; some are looking pretty spiffy. And the two fledged Bald Eagles have provided a few good chances as well.
Today is Tuesday 15 April 2025. I will be down to the lake early to see what’s around. Whatever you opt to do, I hope that you too opt to have a wonderful day. Do remember that happiness is a choice — Byron Katie, The Work.Com.
Yesterday, I finished updating the BAA 300mm Lens Guide. Today, I will send the greatly improved revision to those who used my link to purchase their Sony 300mm GM using one of my two affiliate links and to those who purchased the guide. Right now, it is very difficult to get either a 400-800 or an a- ii. Be sure to use one of my two affiliate links to earn your free lens or camera guide. The latter includes my settings in the form of a .DAT file, instructions on getting that onto your camera, a Button and Dials Guide, and a detailed INFO sheet.
On Friday morning, older daughter Jennifer and younger daughter Alissa along with her younger son Idris will be joining Anita North and I for a very early morning sail on Lake Blue Cypress. After that, we head to Tampa for an afternoon at the North Tampa Rookery and Saturday morning at Fort DeSoto. From there, I head to Cape Coral for two days of In-the Field Instruction with longtime friend and student Pat Fishburne and the Burrowing Owls.
If an item — a Delkin flash card, or a tripod head — for example, that is available from B&H and/or Bedfords, is also available in the BAA Online Store, it would be great, and greatly appreciated, if you would opt to purchase from us. We will match any price. Please remember also to use my B&H affiliate links or to earn 3% cash back at Bedfords by using the BIRDSASART discount code at checkout for your major gear purchases. Doing either often earns you free guides and/or discounts. And always earns my great appreciation.
BILD EXPO Presented by B&H
Why Attend? Speakers, Gear, Deals, and More!
Bild Expo is back! Join us at The Javits Center in New York City for an unforgettable event featuring 100+ expert speakers, 250+ exhibitors, hands-on experiences, and the world’s greatest creative community. B&H’s incredible show specials will be the icing on the cake! Whether you’re a seasoned pro, an enthusiast, or a beginner, at Bild you will get inspired, learn, meet like-minded people, and celebrate being part of this amazing world of creativity.
Click here or on the logo link above for more information.
Click here to register.
B&H Simplified
To ensure that I get credit for your B&H purchases, you can always click here. The tracking is invisible but greatly appreciated. And, you can use your PayBoo card. You must use the website to order. You cannot get your free guides if you make a phone order. Once you have an item in your cart, you must complete the order within two hours. Huge thanks!
Bedfords Simplified
Click here to start your search. Choose standard shipping, and when you get to the payment page, enter BIRDSASART in the discount code box and hit apply. You will be upgraded to free second day air Fed-Ex and receive 3% cash back on your credit card once your stuff ships. Either is greatly appreciated by yours truly.
B&H
Many folks have written recently stating that they purchased a Sony a1 from B&H and would like their free membership in the Sony 1 Info and Updates Group, a $150.00 value. But when I check my affiliate account, their orders have not been there. When I let them know that they get credit for B&H purchases only if they use one of the many B&H affiliate links on the blog or begin their searches with this link, they are always disappointed. If in doubt, please contact me via e-mail and request a BH link. I am always glad to help and to guide you to the right gear.
Bedfords Amazing BAA Discount Policy
Folks who have fallen in love with Bedfords can now use the BIRDSASART coupon code at checkout to enjoy a post-purchase, 3% off-statement credit (excluding taxes and shipping charges) on orders paid with a credit card. The 3% credit will be refunded to the card you used for your purchase. Be sure, also, to check the box for free shipping to enjoy free Second Day Air Fed-Ex. This offer does not apply to purchases of Classes, Gift Cards, prior purchases.
Visit the Bedfords website here, shoot Steve Elkins an e-mail, or text him on his cell phone at (479) 381-2592.
Gear Questions and Advice
Too many folks attending BAA IPTs and dozens of photographers whom I see in the field and on BPN, are — out of ignorance — using the wrong gear, especially when it comes to tripods and more especially, tripod heads. And the same is true in spades when ordering new camera bodies or lenses. My advice will often save you some serious money and may help you avoid making a seriously bad choice. Please know that I am always glad to answer your gear questions via e-mail. If you are desperate, you can try me on my cell at 863-221-2372. Please leave a message and shoot me a text if I do not pick up.
YouTube Video: Tips and Thoughts on Using a Monopod with Big Glass
After 39 years, I finally tried using a monopod with a big lens for the first time in July 2022, more than three years ago. Pretty much everything that I share in the video remains accurate. Sadly, Joe Pryzbyla passed away about two years ago. This 6 1/2-minute video was created by Anke Frohlich. I talk about setting up, using, and carrying a monopod and cover lots of the positives and negatives in the video. I did forget to mention one problem when using a monopod at the beach: if you want to use the knee-pod, ankle-pod, or foot-pod techniques, you may have a hard time finding a place to put the monopod. You can order your Wimberley MonoGimbal head here. Note that in the video I was using the Robus RCM-633, the 6-section version. Today, I far prefer the Robus RCM-439, the 4-section model.
To learn more about using a monopod, check out the Tips and Thoughts on Using a Monopod with Big Glass. And a Compendium: Everything you wanted to know about using a monopod but were afraid to ask blog post here.
|
|
|
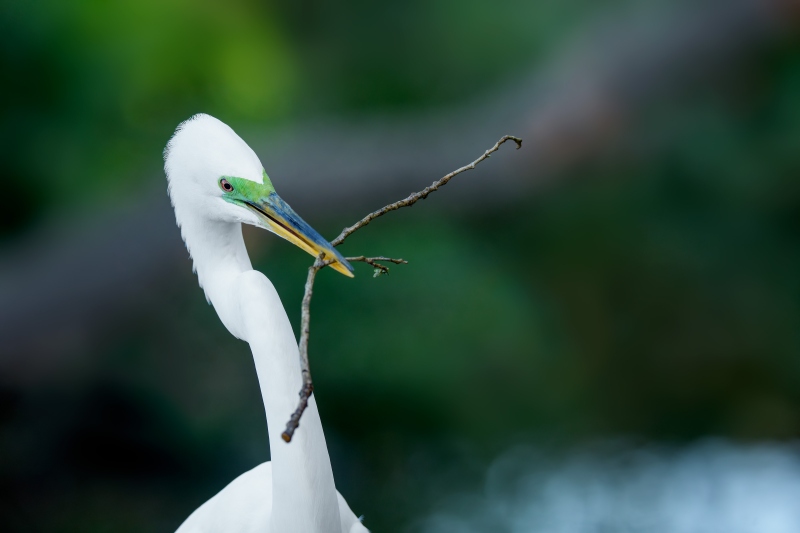
This image was created on 9 April 2025 at St. Augustine, FL. Standing at full height, I used the Robus RCM-439 4-Section Carbon Fiber Monopod, 65/Wimberley MonoGimbal Head-supported Sony FE 400-800mm f/6.3-8 G OSS lens (Sony E) (at 528mm) and The Latest Greatest Sony Flagship Body, the a1 II Mirrorless Camera. The exposure was determined by Zebras with ISO on the rear wheel. ISO 4000: 1/500 second at f/8 (wide open) in Manual mode. RawDigger showed that the exposure was dead solid perfect. AWB at 8:33:00am on a partly cloudy morning. Wide/AF-C with Bird-Eye/Face Detection performed perfectly. Click on the image to enjoy the larger, inexplicably sharper high-res version. Image #1: Great Egret breeding plumage adult with twig for nest |
Robus MonoPodding With the Sony 400-800 G Lens
As regular readers know, I have never been a huge fan of monopods. But I brought my Robus RCM-439 4-Section Carbon Fiber Monopod, 65 topped by a Wimberley MonoGimbal Head and gave it a whirl with my new favorite lens, the relatively slow and relatively heavy Sony FE 400-800mm f/6.3-8 G OSS lens (Sony E). It turned out to be a match made in heaven. Working in the shade at 1/500 hand held in the vicinity of 800mm would yield spotty results in terms of sharpness. But with the monopod, most every image at 1/500 second is sharp but for rapid subject movement.
When your lens is too heavy to hold in place for more than a few seconds and you need to be maneuverable, a monopod is clearly the best option. And the Robus RCM-439 is clearly the best on the market. Not to mention that a Robus Monopod/Wimberley MonoGimabl head rig weighs only a small fraction of a sturdy Robus tripod topped by a Levered-clamp FlexShooter Pro setup.
Monopod Stability Tip
When working with a monopod on a boardwalk, stabilize the monopod by placing it strategically against the railing. At the St. Augustine rookery, there are fenceposts every few inches; it was easy to wedge the monopod between adjacent posts to further increase stability.
|
|
|
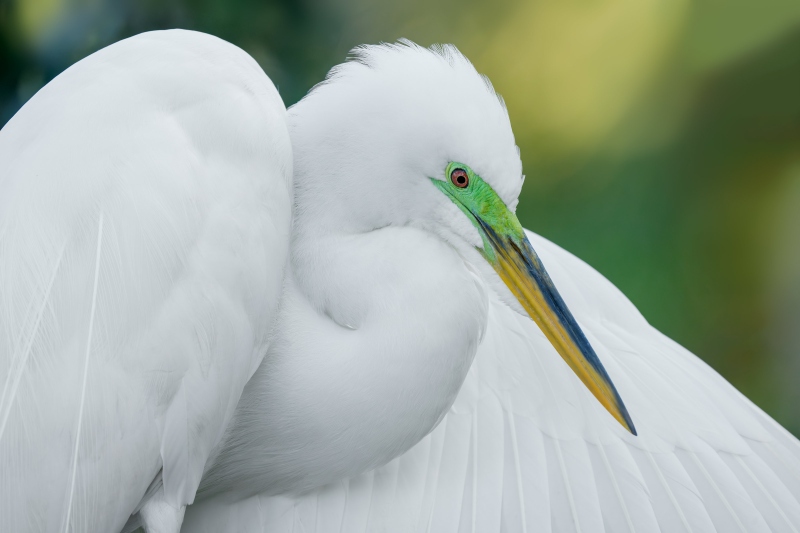
This image was also created on 9 April 2025 at St. Augustine, FL. Again, standing at full height, I used the Robus RCM-439 4-Section Carbon Fiber Monopod, 65/Wimberley MonoGimbal Head-supported Sony FE 400-800mm f/6.3-8 G OSS lens (Sony E) (at 800mm) and The Latest Greatest Sony Flagship Body, the a1 II Mirrorless Camera. The exposure was determined by Zebras with ISO on the rear wheel. ISO 3200: 1/500 second at f/8 (wide open) in Manual mode. RawDigger showed that the exposure was dead solid perfect. AWB at 8:48:00am on a partly cloudy morning. Wide/AF-C with Bird-Eye/Face Detection performed perfectly. Click on the image to enjoy the larger, inexplicably sharper high-res version. Image #2: Great Egret breeding plumage adult with stretched wing |
The Robus Monopod Twist Leg Locks
Like the Robus tripods that I love and use every day, both Robus monopods feature twist leg locks that are thicker and grippier and stickier (they tighten more snugly) than the legs locks on competing brands. So what’s good about that? They are far easier to loosen and tighten than then slimmer, more slippery-slidey legs locks of other brands. With just a quick flip of the wrist, the locks loosen and tighten instantly without your have to exert undo pressure. Older folks with hand and wrist strength or arthritic problems will find the Robus grips a blessing. Anita North struggles mightily with the leg locks on Induro and Gitzo tripods but has zero problems with Robus leg locks.
Younger, fitter folks will enjoy the speed and ease involved when shortening or lengthening the leg sections on a Robus monopod. As with the Robus tripods, the sturdy construction of the monopods stands up well to rain, sand and other grit, and even salt spray. A quick rinse with fresh water after exposure to the latter is of course advised.
Wing Question
Does the wing in the background belong to the subject bird? How do you know?
|
|
|
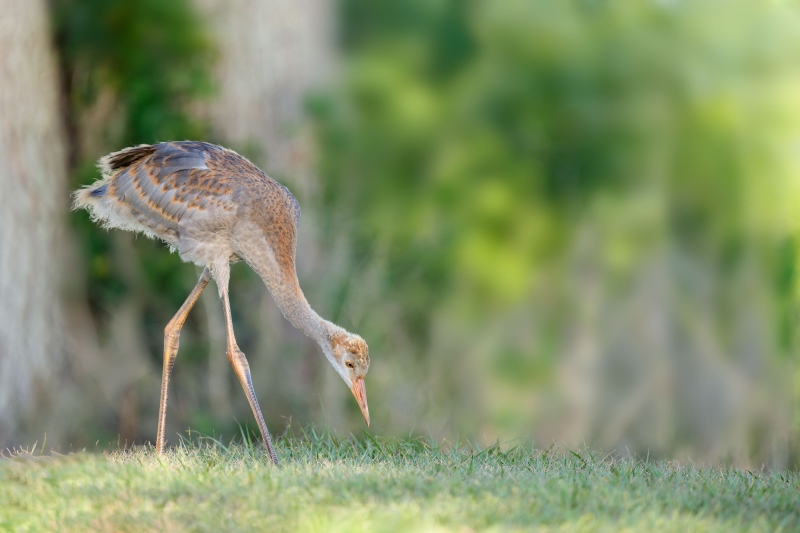
This image was created on 12 April 2025 down by the lake near my home at Indian Lake Estates, FL. Standing at the bottom of a slope that leads down to the South Canal I used the Robus RCM-439 4-Section Carbon Fiber Monopod, 65/Wimberley MonoGimbal Head-supported Sony FE 400-800mm f/6.3-8 G OSS lens (Sony E) (at 800mm) and The Latest Greatest Sony Flagship Body, the a1 II Mirrorless Camera. The exposure was determined by Zebras with ISO on the rear wheel. ISO 1250: 1/320 second at f/8 (wide open) in Manual mode. RawDigger showed that the exposure was dead solid perfect. AWB at 7:59:52am on sunny morning. Wide/AF-C with Bird-Eye/Face Detection performed perfectly. Click on the image to enjoy the larger, inexplicably sharper high-res version. Image #3: Sandhill Crane 8-week old colt in the shade on a sunny day |
The Monopod Saves the Day
With the shy colt in the shade and working at 800mm, I needed the relatively slow shutter speed of 1/320 second to come up with a decent exposure. The ground on the slopes is quite uneven and broken after being visited relentlessly by ILE’s brush hog machine. Setting up a monopod in such conditions takes only a moment. While a tripod is surely sturdier in the long run than a monopod, setting one up on a slope on rough ground is a time-consuming chore even for those with superb tripod-handling skills.
|
|
|
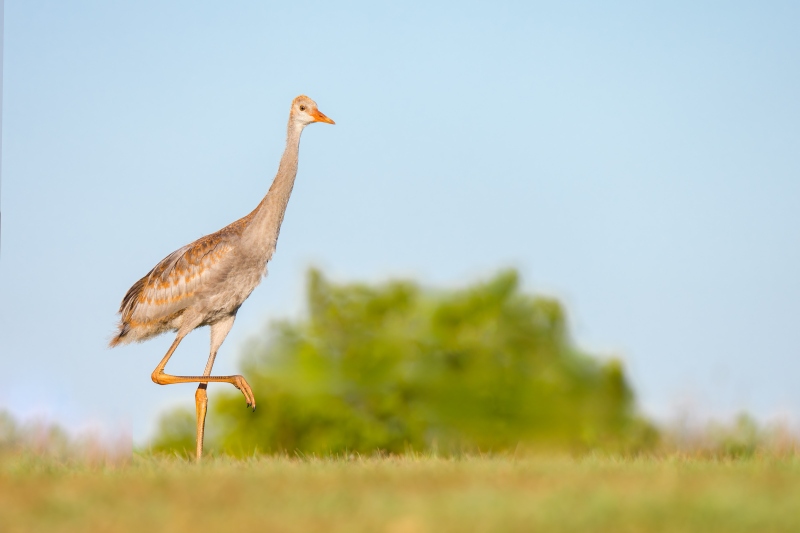
This image was created on 12 April 2025 down by the lake near my home at Indian Lake Estates, FL. Standing at the bottom of the slope that leads down to the South Canal I used the Robus RCM-439 4-Section Carbon Fiber Monopod, 65/Wimberley MonoGimbal Head-supported Sony FE 400-800mm f/6.3-8 G OSS lens (Sony E) (at 615mm) and The Latest Greatest Sony Flagship Body, the a1 II Mirrorless Camera. The exposure was determined by Zebras with ISO on the rear wheel. ISO 1250: 1/1250 second at f/8 (wide open) in Manual mode. RawDigger showed that the exposure was dead solid perfect. AWB at 8:06:37am on sunny morning. Wide/AF-C with Bird-Eye/Face Detection performed perfectly. Click on the image to enjoy the larger, inexplicably sharper high-res version. Image #4: Sandhill Crane 8-week old colt |
Superior Monopod Mobility
When the colt moved into the sunlight, it was far easier for me to move well to my right to stay on sun angle than if I had been working with a tripod.
The Two Robus Monopods
Robus RCM-439 4-Section Carbon Fiber Monopod
The Robus RCM-439 4-Section Carbon Fiber Monopod (65″) is my monopod of choice.
It quickly extends to a eye level for me with three simple turns of the twist-locks. The 4-section design provides a strong platform with no bending or bowing and the sturdy, smooth sliding 10x carbon fiber tubes offer rigidity and strength for a stable platform. It supports equipment weighing up to 39 pounds and comes with interchangeable rubber and spiked feet. I use only the rubber foot. This model folds down to 21.1″ for easy portability and storage. It weighs only 1.22 pounds and sells for a ridiculously low $139.95.
Robus RCM-633 6-Section Carbon Fiber Monopod
The other Robus monopod option is the Robus RCM-633 6-Section Carbon Fiber Monopod (65″).
This 6-section design seems lighter than the 4-section model above as the tubes are thinner, but in fact, it tips the scales at 1.27 pounds, just a bit more than the RCM-439. I would recommend this model only for folks who are dressed for packing space as it offers a smaller collapsed size. The maximum height and low price are the same as with the 4-section model.
|
|
|
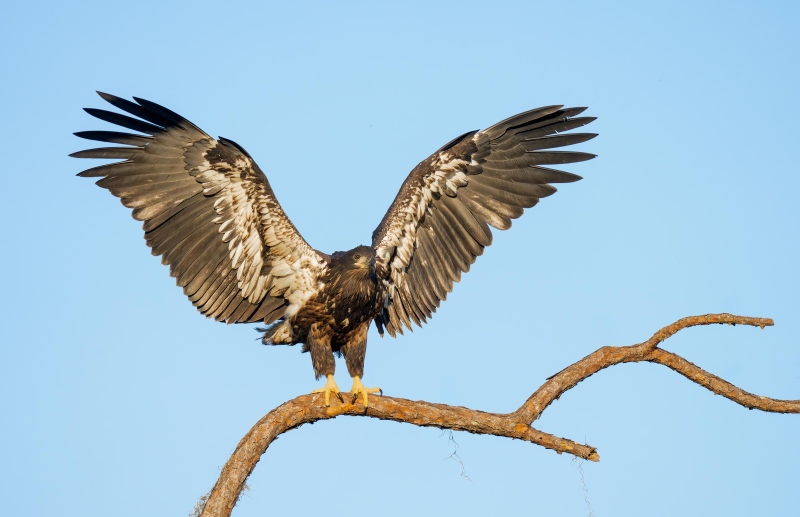
This image was created on 13 April 2025 down by the lake near my home at Indian Lake Estates, FL. Standing outside my SUV, I used the Robus RCM-439 4-Section Carbon Fiber Monopod, 65/Wimberley MonoGimbal Head-supported Sony FE 400-800mm f/6.3-8 G OSS lens (Sony E) (at 637mm) and The Latest Greatest Sony Flagship Body, the a1 II Mirrorless Camera. The exposure was determined by Zebras with ISO on the rear wheel. ISO 2500: 1/3200 second at f/8 (wide open) in Manual mode. RawDigger showed that the exposure was dead solid perfect. AWB at 7:48:58am on sunny morning. Wide/AF-C with Bird-Eye/Face Detection performed perfectly. Click on the image to enjoy the larger, inexplicably sharper high-res version. Image #5: Bald Eagle in fresh juvenal plumage with wings raised |
Setup Speed
When speed is of the essence (as is often the case with bird photography), you can set up a monopod more quickly than you can set up a tripod. With my tripod in the trunk right next to the monopod, that is why I went with the monopod when I got out of my SUV to do the perched baby eagles. The action began a moment after I got set up and in position. Note that proper technique had me leaning slightly back against the door of my car to increase stability.
The Wimberley MonoGimbal Head
Kudos to Clay Wimberley on the brilliantly clever design of the Wimberley MonoGimbal Head. With Clay’s gimbal design, lens flop is a thing of the past and lens handling is a dream. I strongly recommend placing the clamp on your right. With the 400-800, this allows easy access to both the zoom ring and the focusing ring. From where I sit, nothing– even those priced two to three times more, even qualifies for second place.
More On Monopods
Here are some facts, “artie-facts” if you would. (Thanks, Gill Arden.)
1- A tripod will always be more stable than a monopod.
2- When seated, using the knee-pod technique is at least as stable a using a shortened monopod.
3- When using a monopod to keep your lens on this or that subject for extended periods, the monopod supports the weight of your lens and camera body. Note, however, that fatigue will become a factor over time as it requires some effort on your part to stabilize the rig, to hold the monopod and keep it in the same spot. Lactic acid will build up, especially in your left arm. With a tripod the three legs provide the support needed to keep the lens in the exact same spot with no effort required on your part.
4- You cannot shoot at ground level with a monopod.
5- Unlike a tripod, you cannot use your monopod as a clothes horse on which to hang your vest (if you wear one). In the same vein, simple tasks that are easily done when working on a tripod are more difficult to execute when working on a monopod. These tasks include adding or removing teleconverters, switching cards, or changing a battery. Why? You need to hold onto the monopod while executing the chore. You do not need to hold a tripod.
6- If you are doing flight photography at the beach with the monopod and you want to switch to the knee-pod technique, finding a good spot for the monopod can be difficult. I just plunk mine down in the sand without any ill effects.
7- If you are close to your vehicle and waiting for action in an otherwise static situation, say at an eagle or Osprey nest, for example, choosing a monopod over a tripod is insanity (unless you are pressed for time or keen on experimenting with the former).
8- (Former) blog regular Adam posted this comment at the original monopod post: I returned to the redtail nest the next day with a big lens and a monopod — I didn’t want to drag the tripod through the overgrown field. I regretted every moment of as one of the fledglings kept making high speed passes at me; tracking the bird was problematic with the lens on the monopod. Once I went to handholding, there was no problem keeping the bird in the viewfinder.
Adam is 100% correct. If you are capable of hand holding a big lens (or an intermediate telephoto lens for that matter) for short periods of time, most folks will generally do a lot better handholding than working off a monopod or a tripod. But, here are the buts:
a- Many folks are simply not capable of handholding a 600mm f/4 lens, even the latest greatest lightest versions, for even a few moments.
b- Most folks, including all mortals, handholding a big lens for extended shooting sessions is simply not possible. You will never see folks like Arash Hazeghi using a monopod as at present, he is more than strong enough to hand hold a 600 f/4 for hours of flight photography.
9- Here is the great news. I have developed a new technique for shooting flight with big glass on a monopod. It’s like handholding with the lens on a sky hook. It is much easier to shoot flight off the monopod using this method than it is when working off a tripod. At places like Jacksonville, where the flight photography is nonstop, but you want and need to be light and mobile, this new technique will be a Godsend. I used this setup and technique every morning at Jacksonville. Be sure to watch the YouTube video that opens this post.
10- Folks who work with intermediate telephoto lenses who walk and stalk and point and shoot (can you say warblers and songbirds?) and have trouble with the weight of their rigs, may very well do much better with a monopod than with straight handholding. They too will benefit from the information in the Monopod/Monoball Video.
11- I have removed the hand strap from my Robus RCM-439 4-Section Carbon Fiber Monopod, 65 because I have no use for it and it occasionally gets in the way. On a related note, if you have a camera strap on your camera body when using any telephoto lens, ditch it fast.
12- When doing pure flight, I lengthen the monopod so that the viewfinder is right at eye-level.
13- The Robus RCM-439 4-Section Carbon Fiber Monopod, 65 is 65 inches tall. It should be good for flight for folks as tall as about 6-foot 3 or 4 inches tall. The only viable option that I can find for super-tall folks is the Gitzo GM4552L Series 4 Carbon Fiber Monopod. At nearly 75 inches tall, this one would work for flight for all but the very tallest NBA players, those over 7-foot 1 or 2 inches tall. It is, however, a Series 4 model that weighs 1.6 pounds, 1/2-pound heavier than the recommended Robus model. And it cost $300.88 more than the RCM-439 4.
Additional Monopod Comments
I forgot to mention that if you are using a ballhead atop your monopod rather than the Wimberley MonoGimbal Head you are making your life very difficult. For no reason at all.
It is obvious that you can get lower when using the toe-pod or foot-pod techniques and working off the tilted rear monitor than you can when working off a shortened monopod. In addition, I feel using the knee-pod technique is more stable than using a shortened monopod. At DeSoto, I will explore the possibility of using a hybrid technique: the shortened monopod/knee-pod technique. The big advantage there (if it wires!) would be that you do not have to find a parking spot for your monopod.
The Monopod Calming Effect
One thing seems perfectly clear to me: approaching a bird is a lot easier with a monopod-mounted lens than it is with a tripod-mounted lens. Most of the Great Blue Herons that sit on the pier railings at ILE do not allow a close approach. They tend to fly off when you are a mile away. Perhaps the monopod/monoball combo has some sort of tranquilizing effect on the birds at ILE.
Conclusion
I will not be selling my Robus tripods or my Levered-clamp FlexShooter Pros any time soon. I will continue to use a tripod for most of my bird photography when I am not hand holding. I have learned, however, as noted several times above, that the Robus RCM-439 4-Section Carbon Fiber Monopod (65″) is the often the best tool for the job at hand. I look forward to doing more Robus MonoPodding at places like Jacksonville, Fort DeSoto, and San Diego.
Typos
With all blog posts, feel free to e-mail or to leave a comment regarding any typos or errors.




My favorite is number two, great egret portrait.
Typo: That after, we head to Tampa for an……..
Thanks. Wonder what my brain was doing when I wrote, “That after …”
with love, a
“Which of today’s five featured images do you feel is the strongest? Why did you make your choice?”
My choice would be the Great Egret in image 2. The head of the bird off-set by the white of the wings (I believe the background wing is the birds, but you’ll probably tell me I’m wrong. Regardless, it helps the image) is lovely. The white helps the green on the bill and the color of the eye stand out. Of course, the contrasting green and yellow in the colors makes the head stand out.
Thanks for your comment Jay. Probably … Or maybe not.
with love, artie