|
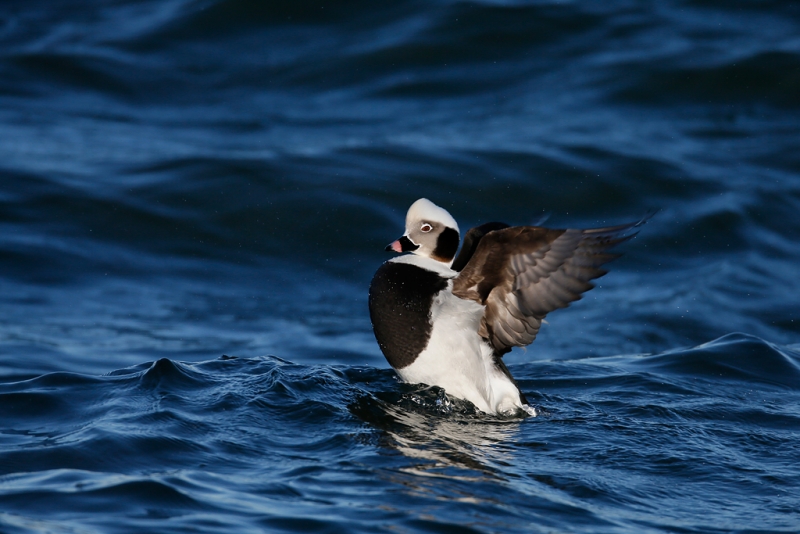
Long-tailed Duck drake flapping. I created this image created on the January Barnegat Jetty IPT with the tripod-mounted Canon EF 800mm f/5.6L IS USM Autofocus lens, the Canon 1.4x EF Extender III (teleconverter), and the Canon EOS-1D X digital SLR . ISO 800. Evaluative metering -2 stops: 1/1600 sec. at f/10 in Manual mode. Careful readers know that I am usually adding anywhere from 1/3 to 2 1/3 or more stops of light to my exposures. Why-2 full stops for this image? |
Shooting Blanks: Do As I Say, Not As I Do
I have mentioned here many times that when you get a camera back from one of the Canon Authorized Factory Repair Centers that they need to take great care and make sure that they restore all of their customized settings, especially with regards to Image type/Size. Why? 99.9% of the time the technicians clear all menu items, all custom functions, and set Image type/Size to JPEGS “S” for small. When I finally got my first 1D X back from the Jamesburg, NJ facility, I actually remembered.
Folks with two professional camera bodies can simply save (copy) the camera settings to a card via the “Save/load cam settings on card” Yellow/Wrench menu item and then load the settings onto the newly returned camera. Folks with only a single professional body need to remember to save the camera settings to a card before they send the camera in for repair and then mark it and store it carefully so that they can proceed as above when they get the camera back.
Folks with pro-sumer cameras like the EOS-5D Mark III, the EOS-7D, or the EOS 40D or 50D bodies need to restore the camera settings manually. Many do this simply by consulting one of our camera User’s Guides.
So when I got the smashed 1D X back, I copied the camera settings from the newer of my two 1D X bodies to a compact flash card, saved them to the repaired body, made sure that the Image type/Size was set to RAW (or at least that is what I remember doing…), and went off on my merry way to the Barnegat Jetty.
|
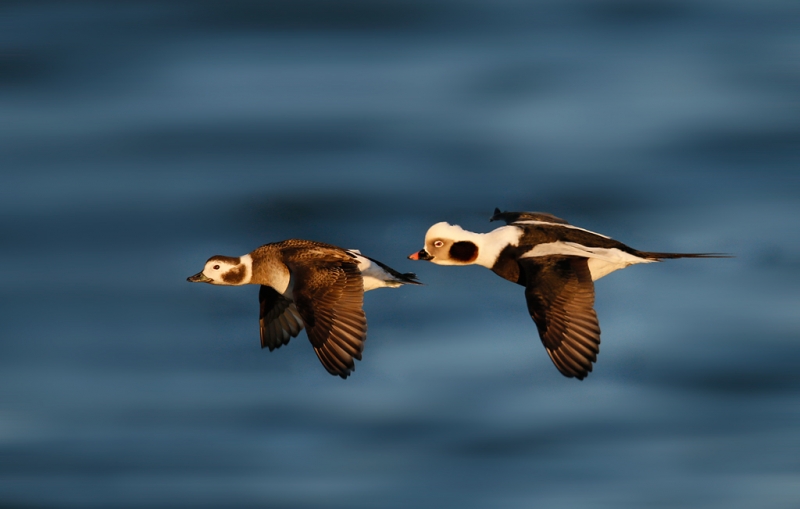
Long-tailed Duck pair in flight. On the January Barnegat Jetty IPT with the tripod-mounted Canon EF 800mm f/5.6L IS USM Autofocus lens, the Canon 1.4x EF Extender III (teleconverter), and the Canon EOS-1D X digital SLR . ISO 800. Evaluative metering -2 stops: 1/1600 sec. at f/9 in Manual mode. |
For the image above, I failed to follow my own universal flight photography advice, “pan faster.” As a result, this pair of speeding ducks was too far forward in the frame. I moved them back in the frame using APTATS II techniques but that resulted in several groups of repeated patterns. So I tried a great new Denise Ippolito trick and love the result.
|
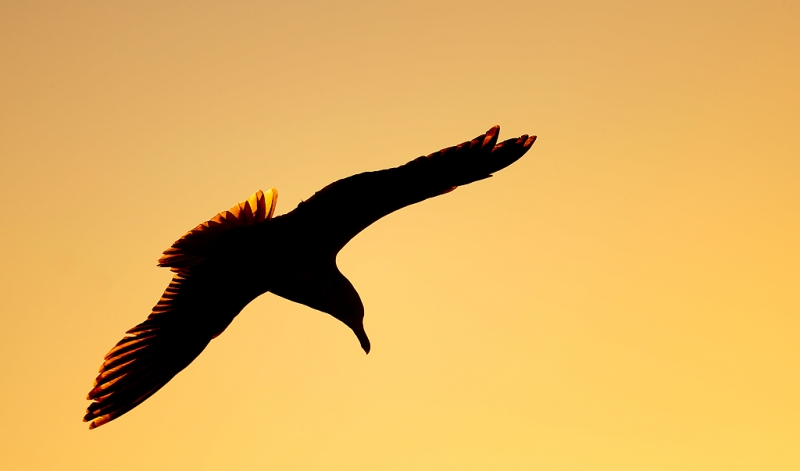
Sunrise Herring Gull. Created on the created on the Januar Barnegat Jetty IPT with the tripod-mounted Canon EF 800mm f/5.6L IS USM Autofocus lens and the Canon EOS-1D X digital SLR . ISO 500. Evaluative metering +1/3 stop: 1/1600 sec. at f/5.6 in TV mode. |
If you saw the pale original for the image above, most would be surprised that I did not add a lot more light. Does anyone have any ideas why I added only 1/3 stop of light?
|
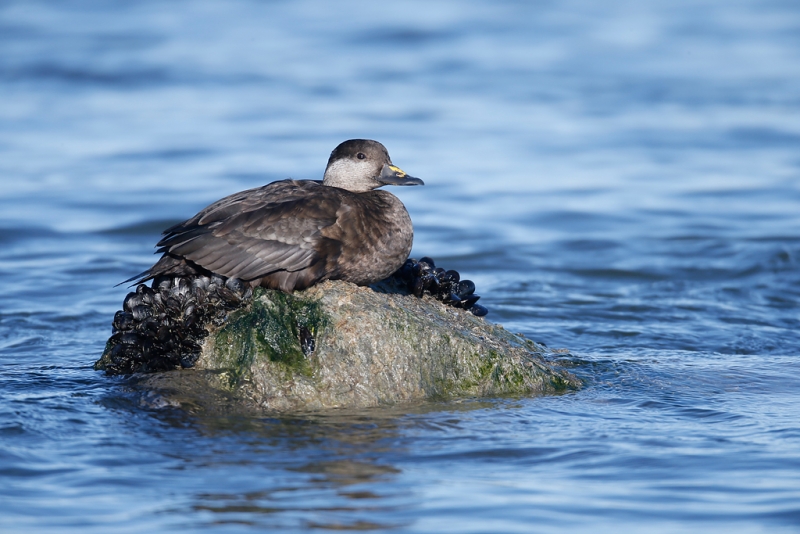
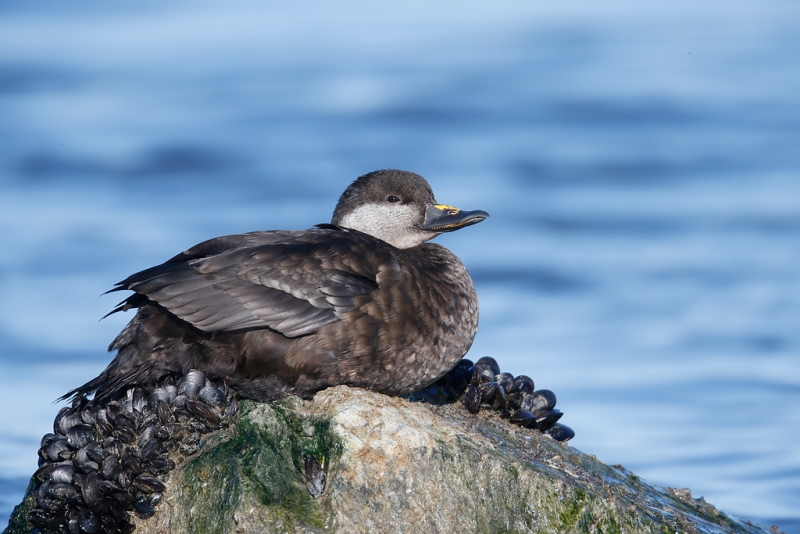
Black Scoter hen on rock.This image created on the January Barnegat Jetty IPT with the tripod-mounted Canon EF 800mm f/5.6L IS USM Autofocus lens, the Canon 1.4x EF Extender III (teleconverter), and the Canon EOS-1D X digital SLR . ISO 400. Evaluative metering +1/3 stop: 1/640 sec. at f/8 in Manual mode. |
On the way back to the cars after a relatively poor morning–as it notes in Denise Ippolito’s Barnegat Jetty Site Guide, morning sun-angles at the jetty are very tough to deal with, we came upon the Black Scoter hen above. When she hauled out and posed for us for more than 1 1/2 hours, we were all in sea duck heaven. Here I went wide to include lots of attractive habitat, the mussel and seaweed covered rock that served as her perch.
|
This larger in the frame Black Scoter hen image was created on the January Barnegat Jetty IPT with the tripod-mounted Canon EF 800mm f/5.6L IS USM Autofocus lens, the Canon 2x EF Extender III (Teleconverter), and |
For the image above, I went to the 2X III TC and focused in Live View via contrast on the sensor. Be sure to have Live Mode AF set. With the big lens on a tripod and the duck stationary on the rock, this was an ideal situation for this technique. Nearly all of the images were razor sharp.
|
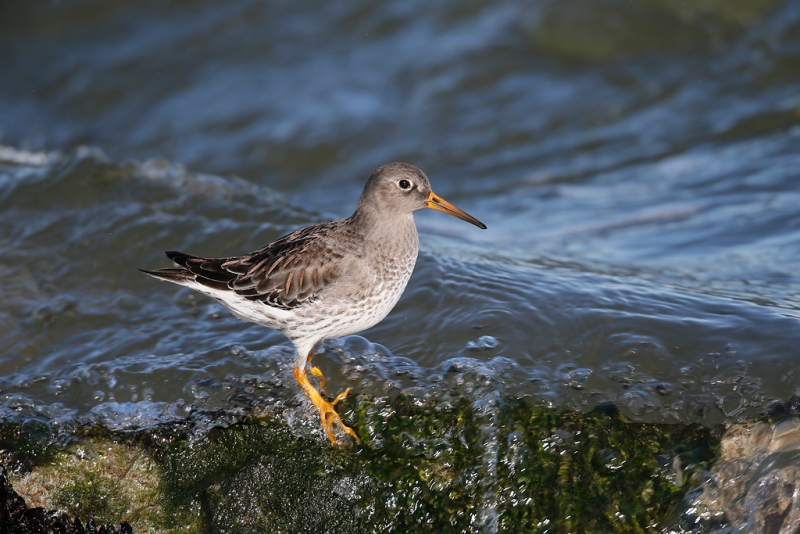
Purple Sandpiper on rock.This image created on the January Barnegat Jetty IPT with the tripod-mounted Canon EF 800mm f/5.6L IS USM Autofocus lens, the Canon 1.4x EF Extender III (teleconverter), and the Canon EOS-1D X digital SLR . ISO 400. Evaluative metering +1/3 stop: 1/640 sec. at f/9 in Manual mode. |
Everyone but me was satisfied after the long session with the Black Scoter hen. And cold. I decided to take the alternate route back to the car and came across this lovely bird feeding on a wave-tossed rock right near the lighthouse. I was till cold but very happy.
|
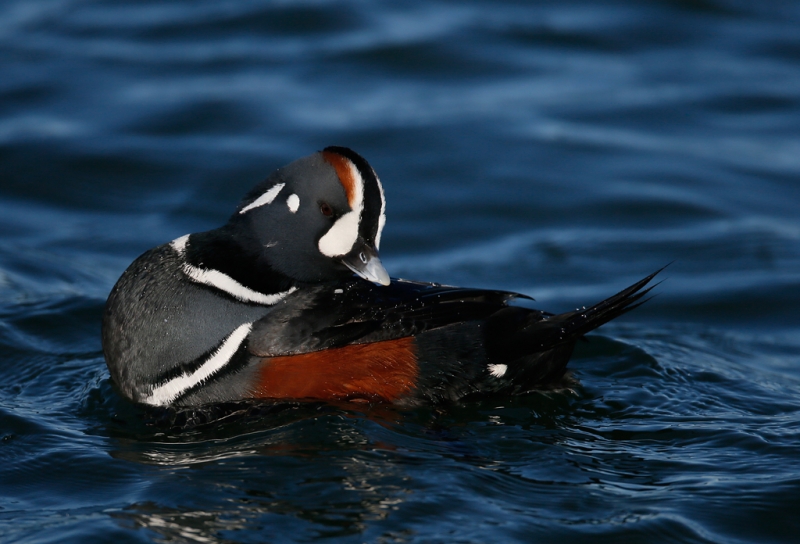
Harlequin Duck drake swimming. Created on the January Barnegat Jetty IPT with the tripod-mounted Canon EF 800mm f/5.6L IS USM Autofocus lens, the Canon 1.4x EF Extender III (teleconverter), and the Canon EOS-1D X digital SLR . ISO 800. Evaluative metering -2 stops: 1/2500 sec. at f/8 in Manual mode. |
Harlequin Ducks were pretty much dirt birds this weekend. On our three afternoons we concentrated on the drake Long-tailed Ducks.
|
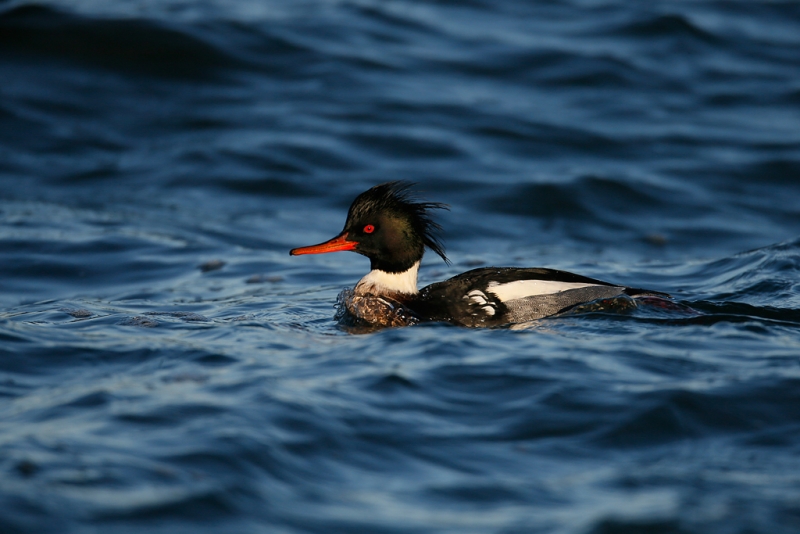
Red-breasted Merganser drake swimming. Created on the January Barnegat Jetty IPT with the tripod-mounted Canon EF 800mm f/5.6L IS USM Autofocus lens, the Canon 1.4x EF Extender III (teleconverter), and the Canon EOS-1D X digital SLR . ISO 800. Evaluative metering -1 2/3 stops: 1/1600 sec. at f/9 in Manual mode. Careful readers know that I am usually adding anywhere from 1/3 to 2 1/3 or more stops of light to my exposures. Why-1 2/3 stops for this image? |
28 years of trying to get close to a drake of this species and have medium JPEG capture set. You gotta love it.
Shooting Blanks
We were so tired after our first afternoon, that though I edited all of my images–heck, I kept about 56 of them making for a pretty good afternoon, that I did not convert a single image.
After our Saturday morning session I went to convert an image and it opened right up in Photoshop. What? I went back to BreezeBrowser and discovered that I had been creating M2 JPEGs, one notch above small. I am still not sure how that happened, but, it happened. We are so used to the incredible detail that we get with our 16 and 22mp cameras, that it was shocking to see the image quality of the relatively small JPEGs that I created accidentally. No use, however, crying over spilled milk. Next time that I get my camera back from repair, I will try to remember to triple check everything and avoid making the same mistake…..
I wound up keeping 105 medium sized JPEGs from Saturday morning…. Enjoy the football games.
Weekend Creative Nature Photography Seminar, Tampa, FL: February 23 & 24, 2013: $149 Limit: 50/Openings: 7
Join Denise Ippolito and me on the weekend of February 23-24 on the outskirts of Tampa, FL for a great weekend of fun and learning. Learn to improve your photography skills, your skill at designing images in the field, your creative vision, and your image optimization skills. Sunday critiquing session. Click here for additional details and the complete schedule.
Best to register soon as the seminar is filling up nicely.
Typos
On all blog posts, feel free to e-mail or leave a comment regarding any typos, wrong words, misspellings, omissions, or grammatical errors. Just be right. 🙂
Support the BAA Blog. Support the BAA Bulletins
We want and need to keep providing you with the latest free information, photography and Photoshop lessons, and all manner of related information. Show your appreciation by making your purchases immediately after clicking on any of our B&H or Amazon Affiliate links in this blog post. Remember, B&H ain’t just photography!


Shop Amazon
And from the BAA On-line Store:
LensCoats. I have a LensCoat on each of my big lenses to protect them from nicks and thus increase their re-sales value. All my big lens LensCoat stuff is in Hardwood Snow pattern.
LegCoat Tripod Leg Covers. I have four tripods active and each has a Hardwood Snow LegCoat on it to help prevent further damage to my tender shoulders 🙂 And you will love them in mega-cold weather….
Gizo GT3532 LS CF Tripod. This one replaces the GT3530LS Tripod and will last you a lifetime. Learn more about this great tripod here.
Mongoose M3.6 Tripod Head. Right now this is the best tripod head around for use with lenses that weigh less than 9 pounds. For heavier lenses, check out the Wimberley V2 head.
Double Bubble Level. You will find one in my camera’s hot shoe whenever I am not using flash.
The Lens Align Mark II. I use the Lens Align Mark II pretty much religiously to micro-adjust all of my gear an average of once a month and always before a major trip. Enjoy our free comprehensive tutorial here.
BreezeBrowser. I do not see how any digital photographer can exist without this program.
Delkin Flash Cards. I use and depend on Delkin compact Flash Cards and card readers most every day. Learn more about their great 700X and 1000X cards here or about my favorite Delkin card here.



Hello Artie
Gary Here .
I had A 1Dx on the CPS loan program , and I had it for 5 days , and I love this camera , the only question I have to ask , ( does this 1Dx have A 3-color light meter ) I took frame filled photos of Snowy Egrets while @ Bolsa Chica and I found that I didn’t have to do very much exposure competsation like other Canon bodies .
Best Bird Photos
Gary – Dr Bird
I do not know about the 3-color meter. I find 1D X metering very similar to 1D IV metering. There are other factors besides the size of a white bird in the frame that will affect the meter. Most notably: sun in or sun out….
m
Spending many hours at the jetty, I think you were truly blessed to get the male and female l-t together in flight as you did. The birds appear to be close but on two different focal planes. I realize that you were wide open (or close to it) at f/9 and I don’t know where your focus point is, but I’m wondering what affect an f stop of 5.6 would have had on this image. At your focal length and distance, would it have rendered one of the birds less sharp? Thanks Artie!
After spending that many hours at the jetty I was truly blessed that I did not fall and break my neck or my 800 :). They were on slightly different planes. f/5.6 is not possible with the 800/1.4X III combo: f/8 is wide open. Differences in d-o-f with big glass at relatively close range is measured in small fractions of an inch. artie
Nick obviously nailed the answer in detail. The situation is similar to your ‘Loon’ example in Dig. Basics’. However your ‘big underexposure that was needed to bring the white bits in at about 240 or so’ has caused the dark BG tones to be rendered even darker and the dark tones of the duck’s plumage can lose separation from the BG. There is a terrific variation in the colour and tone of the sea in the other images where the birds did not have ‘awkward white bits’. With the excellent methods of making a detailed selection of the subject available in Photoshop it would be easy to do so and work on a separate BG layer and render it closer to what it would have been without the minus 2 underexposure.
Is the “obviously” intended as another shot at me? I actually love the dark blue water and have no problem separating the dark wings and black breast from the background. What method would you use to make a detailed selection of the duck or the sea?
Understand that the ocean is actually one stop darker than it appeared in life, not two stops darker.
Good warning and your usual great images. Were any of the JPEGs usable? On one of my first digital cameras, which didn’t even have raw, I took a bunch of photos of Crater Lake in the smallest JPEG size by mistake and the camera was only 5MP to start with. Disaster. Now my most frequent setting error is forgetting to change the last manual settings I used. Fortunately not very frequent.
Depends on your definition of “usable.” I am pretty sure that they would be fine for small use in a magazine at least. And they are obviously more than fine for web use.
Heh, the JPEG thing also happened to me a couple of times. No technician involved, it was my fault, even though I didn’t realize how I mistakenly change the settings. I was funny enough to have dialed the JPEG large (so no pixels lost) and the dozen of photo I did in both cases didn’t need any major post-processing tweak. If the camera allows to save settings on the card, that’s the way to go (my Nikon D7000 allows it). If it doesn’t (my lightweight D5100), I advice writing down all the settings and periodically check them – this also saves in case of severe battery discharge, or in other cases when you need to do a factory reset.
… sorry, “funny enough” indeed is “lucky enough”…
If I had had large JPEG set my problems would have been greatly minimized.
Thanks for the tip on saving settings. I have filed it away for future reference.
You are quite welcome. The trick is to remember….
Regarding why you have used -2 stops on the Long-tailed Duck image, is it because the average tone of the image is dark, therefore if no negative compensation was given the darkest pixels would be near the middle of the histogram, thereby pushing the lightest pixels to far to the right and blowing out the lightest parts of the image. By subtracting 2 stops the darkest pixels are pushed to the left of the histogram and the lightest pixels are pushed back to below 255 at the right of the histogram and Mr. Morris has yet another perfectly exposed image. 🙂
Nick…You get my vote…
I’d been shooting Snowies this morning
and had to compensate in a similar fashion…
Thank you for putting it so competently.
Thanks for your vote Deirdre 🙂
Hey Nick, Correct but quite wordy :). For simplicity’s sake, I’d say that with all the dark tones and small bits of bright WHITEs that the meter would over-expose the WHITEs by a mile. Thus a big underexposure was needed to bring them in at about 240 or so.
Thanks Artie. I was a bit wordy but I like to try and explain it so people who are new to the subject can understand it, or did I confuse them? 🙂 A couple of years ago before I discovered your blog and digital basics I would have appreciated a comprehensive explanation. Thanks for your vote Deirdre.
Deirdre voted before I commented 🙂
I should have referred folks to the Exposure Simplified section in ABP II.
Great tip re the saving of settings. Does the 1D4 have that too? (I have not convinced myself it is worthwhile switching to the 1Dx yet)