|
This 3-frame in-camera HDR Art Vivid image was created with the tripod-mounted Canon EF 300mm f/2.8L IS II USM Telephoto Lens, the Canon 2x EF Extender III (Teleconverter), and the Canon EOS 5D Mark III . ISO 400. Evaluative metering +1 2/3 stops yielded a base exposure of 1/30 sec. at f/11 in Av mode. (You need to add a lot more light than you normally would when creating in-camera Art Vivid HDRs.) 2-second timer. Central sensor/AI Servo Surround/Rear Focus AF on the center of the bud. Click here if you missed the Rear Focus Tutorial. Click on the image for a larger version. |
Hey Bud
I had a fun time co-leading Denise Ippolito’s Creative Photography Iris Workshop last Thursday. We were blessed with perfect flower photography weather: cloudy bright to cloudy with a few rain drops here and there and nearly dead calm conditions until the sun finally came out at 10:45am just before the end of the workshop. Everyone had fun and learned a ton. While the irises were beautiful (flower photos coming soon) I was really attracted to the buds. The 180 macro was just too wide so I grabbed the 300 II and went to work.
|
This 3-frame in-camera HDR Art Vivid image was created with the tripod-mounted Canon EF 300mm f/2.8L IS II USM Telephoto Lens, the Canon 1.4x EF Extender III (Teleconverter), and the Canon EOS 5D Mark III . ISO 400. Evaluative metering +1 stop yielded a base exposure of 1/30 sec. at f/11 in Av mode. 2-second timer. Central sensor/AI Servo Surround/Rear Focus AF on the bottom of the flower part of the bud. Click here if you missed the Rear Focus Tutorial. Click on the image for a larger version. |
Aperture/Depth-of-Field Choice
Choosing intermediate apertures in the range of from f/8 to f/13 for the bud shots worked well. Anything smaller brought up the background too much by revealing distracting detail.
|
This 3-frame in-camera HDR Art Vivid image was created with the tripod-mounted Canon EF 300mm f/2.8L IS II USM Telephoto Lens, the Canon 1.4x EF Extender III (Teleconverter), and the Canon EOS 5D Mark III . ISO 400. Evaluative metering +2/3 stop yielded a base exposure of 1/50 sec. at f/10 in Av mode. 2-second timer. Central sensor/AI Servo Surround/Rear Focus AF on the bottom of the flower part of the bud. Click here if you missed the Rear Focus Tutorial. Click on the image for a larger version. |
Choice of Perspective/Isolating the Subject
If you walked up to any old bud with your tripod and began making images all of your backgrounds would have included a plethora of distracting background elements, usually from the next row of flowers. To get the pure green backgrounds reminiscent of my BIRDS AS ART style I needed to lower the tripod and move from side to side so as to create a background of distant grass. Doing so was a bit easier said than done as there was all manner of trees and benches about. Denise’s group marveled at the images on the back of my 5D MIII. Several grabbed their longest lens and began flattering me…. Confused? What do they say about imitation?
|
This 3-frame in-camera HDR Art Vivid image was created with the tripod-mounted Canon EF 300mm f/2.8L IS II USM Telephoto Lens, the Canon 1.4x EF Extender III (Teleconverter), and the Canon EOS 5D Mark III . ISO 400. Evaluative metering +2 stops yielded a base exposure of 1/20 sec. at f/8 in Av mode. Live View and 2-second timer. Central sensor/AI Servo Surround/Rear Focus AF on the bottom of the flower part of the bud. Click here if you missed the Rear Focus Tutorial. Click on the image for a larger version. |
Making Sharp Images At Slower Shutter Speeds
Once my shutter speeds fall below 1/30 sec. I use Live View to give me Mirror Lock. That along with the use of the 2-second timer will yield sharp images as long as there is no breeze.
|
This 3-frame in-camera HDR Art Vivid image was created with the tripod-mounted Canon EF 300mm f/2.8L IS II USM Telephoto Lens, the Canon 1.4x EF Extender III (Teleconverter), and the Canon EOS 5D Mark III . ISO 800. Evaluative metering +1/3 stop yielded a base exposure of 1/125 sec. at f/13 in Av mode. 2-second timer. Note: I should have used more + compensation for all but the first image here as the Art Vivid JPEGs are always on the dark side. Central sensor/AI Servo Surround/Rear Focus AF on the bottom of the flower part of the bud. Click here if you missed the Rear Focus Tutorial. Click on the image for a larger version. |
Tough Call
Take a moment to leave a comment and let us know which is your favorite bud image and be sure to let us know why you like the one that you chose. They are numbered 1-5.
Canon EOS-5D Mark III User’s Guide
Learn everything that I know about the EOS-5D Mark III including how I set up my camera for in-camera HDRs in the 5D Mark III User’s Guide. This guide also includes info on the following: 5D III exposure fine points, handling the WHITEs, the top LCD and all camera control buttons, all 5D Mark III drive modes, how to manually select an AF sensor, choosing an AF Area Selection Mode/how and why (includes extensive detail), and Menu Item Access. Coverage of almost all Menu Items and Custom Functions including the following: Image Quality, Auto Lighting Optimizer, Highlight Tone Priority, AF Configuration Tool (includes details on the custom setting that I use), Acceleration/deceleration tracking, Tracking sensitivity, Lens drive when AF impossible, Orientation linked AF point (I love this feature on the 5D III!), Highlight alert, Histogram display, Auto rotate, Custom Shooting Mode set-up, Safety shift, using the Q button, and setting up rear focus. The guide is–of course–written in my informal, easy-to-follow style.
More Short Notice, Dirt Cheap, Small Group, In-the-Field Nickerson Beach Photographic Instruction with Arthur Morris. May 27 (am & pm), May 28 (am & pm) and May 29 (am only). All 2013 of course. Morning sessions: 5am sharp-9:30 am. Afternoon sessions: 4pm til whenever. These are priced so low that you need to e-mail for the rates. Limit 5/session.
If you e-mail, please include all phone numbers. Payment in full due immediately via credit card after calling the office on a weekday: 863-221-2372. If you would like to join me, please get in touch via e-mail. Breeding American Oystercatcher (chicks likely) and Piping Plover (chicks possible). Common Tern and Black Skimmer/courtship behaviors. Herring and Great Black-backed Gulls. Breeding plumage Sanderling and other shorebird species. Lots of flight photography when the wind is right. Learn digital exposure and creative image design. Learn to create pleasing blurs at 5am.
Nickerson Baby Beach-nesting Birds IPT: July 23-25, 2013: $1099. Introductory slide program: Monday, July 22, 2013. Limit 12/Openings: 1. Co-leader: Denise Ippolito.
This IPT is now a go. Conditions at Nickerson are excellent. Join Denise and me on Long Island, NY this coming summer to photograph Common Tern chicks, baby American Oystercatchers, and just-hatched Black Skimmer chicks along with the adults. The opportunities will include chances to photograph a variety of breeding behaviors including courtship feeding, display flight and combat, and copulations. Car-pooling is recommended; if we opt to return to the beach before 5pm there is a $30/vehicle parking fee that is not included so it is best to share that expense. Parking in the morning is free.
Now that the trip is a go–we had been worried about the effects of Hurricane Sandy–I fully expect that this IPT will fill almost instantly. Payment in full is due by check upon registration.
IPT Info
For complete IPT info including schedule, cancellation policies, and the registration and release forms, click here.
New York City–On Location with Denise Ippolito & Arthur Morris May 25 – 26, 2013, 2-day Workshop-$495
Just two slots open.
Join Denise Ippolito and Arthur Morris for a two-day creative workshop in the Big Apple. This exciting adventure through the streets of NYC will begin with an informal get-together at our hotel on the evening of May 24th. This will give us all a chance to get to know each other before we hit the streets in the morning for our first exciting photo shoot. We will explore China Town, Little Italy, Times Square, Rockefeller Center, Grand Central Station (tripod permit included) and much more during our two days together. The emphasis will be on street photography, seeing and capturing dynamic images, and expanding your creativity using a variety of in-camera techniques including HDR and Multiple Exposure.
Please contact me via e-mail for complete details and the itinerary.
Next Year In Holland
Despite a 100-year record cold spring with very few tulip fields in bloom this trip has been a spectacular success. The colors and variety of tulips at Keukenhof simply stun the mind and the senses. Denise and I are planning our Holland trip for next year: the Keukenhof Creative Tulip Photography IPT with a Touch of Holland. If you are a Happy Camper who is interested in joining Denise and me next spring, please shoot me an e-mail. Details will be announced soon.
We are currently fleshing out the details. The dates will be about the same, in mid April. In addition to the Keukenhof and the flower fields we will do an afternoon of windmills at Kinderdijk, a day in Amsterdam including a morning at the Rijks Museum and an afternoon visit to the Ann Frank House plus some street photography. We will do some street photography and fine dining in the little town of Edam. There will be about 7-9 days of photography in all. Those will include an afternoon option for a day or two of Purple Herons for those with long lenses.
Note: not surprisingly, early interest has been huge with several folks who want to sign up right now. The formal announcement of the dates and price is imminent.
Typos
On all blog posts, feel free to e-mail or leave a comment regarding any typos, wrong words, misspellings, omissions, or grammatical errors. Just be right. 🙂
Support the BAA Blog. Support the BAA Bulletins: Shop B&H here!
We want and need to keep providing you with the latest free information, photography and Photoshop lessons, and all manner of related information. Show your appreciation by making your purchases immediately after clicking on any of our B&H or Amazon Affiliate links in this blog post. Remember, B&H ain’t just photography!


Support the Bulletins and the Blog via Amazon
Everyone buys something from Amazon, be it a big lens or deodorant. Support the blog by starting your search by typing in the little white box below. No purchase is too small to be appreciated; they all add up. Why make it a habit? Because I make it a habit of bringing you new images and information on an almost daily basis.
And from the BAA On-line Store:
LensCoats. I have a LensCoat on each of my big lenses to protect them from nicks and thus increase their re-sales value. All my big lens LensCoat stuff is in Hardwood Snow pattern.
LegCoat Tripod Leg Covers. I have four tripods active and each has a Hardwood Snow LegCoat on it to help prevent further damage to my tender shoulders 🙂 And you will love them in mega-cold weather….
Gitzo GT3532 LS CF Tripod. This one replaces the GT3530LS Tripod and will last you a lifetime. Learn more about this great tripod here.
Mongoose M3.6 Tripod Head. Right now this is the best tripod head around for use with lenses that weigh less than 9 pounds. For heavier lenses, check out the Wimberley V2 head.
Double Bubble Level. You will find one in my camera’s hot shoe whenever I am not using flash.
The Lens Align Mark II. I use the Lens Align Mark II pretty much religiously to micro-adjust all of my gear an average of once a month and always before a major trip. Enjoy our free comprehensive tutorial here.
BreezeBrowser. I do not see how any digital photographer can exist without this program.
Delkin Flash Cards. I use and depend on Delkin compact Flash Cards and card readers most every day. Learn more about their great 700X and 1000X cards here or about my favorite Delkin card here.

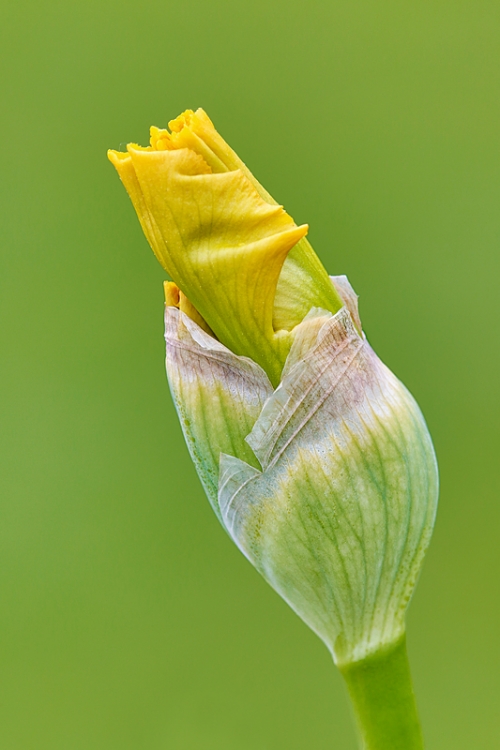
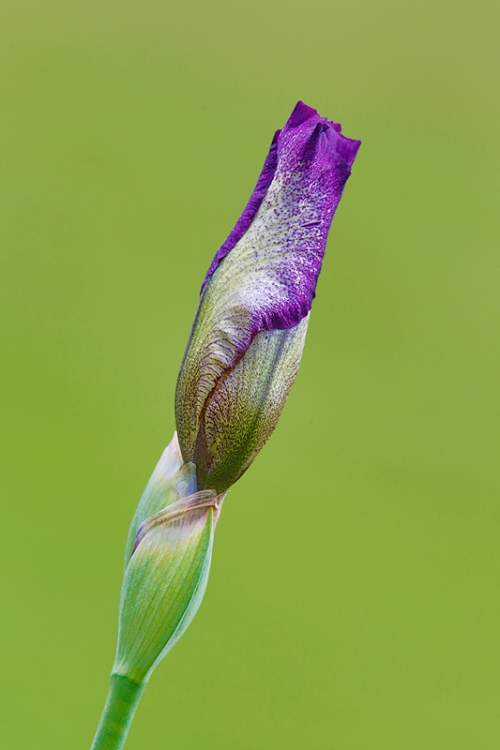
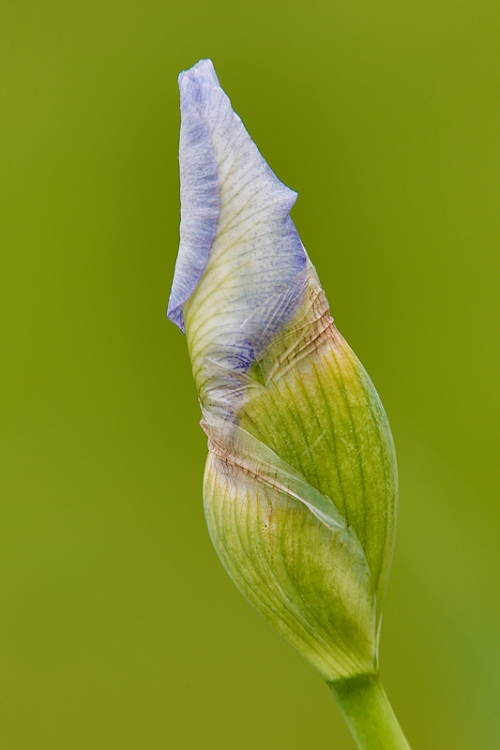
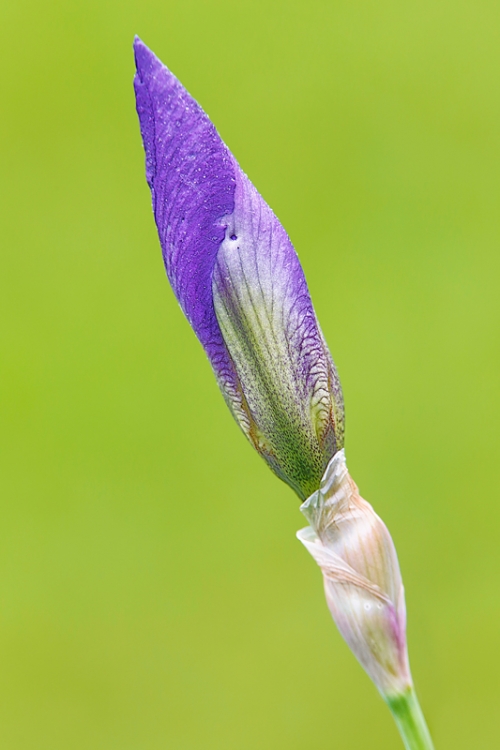
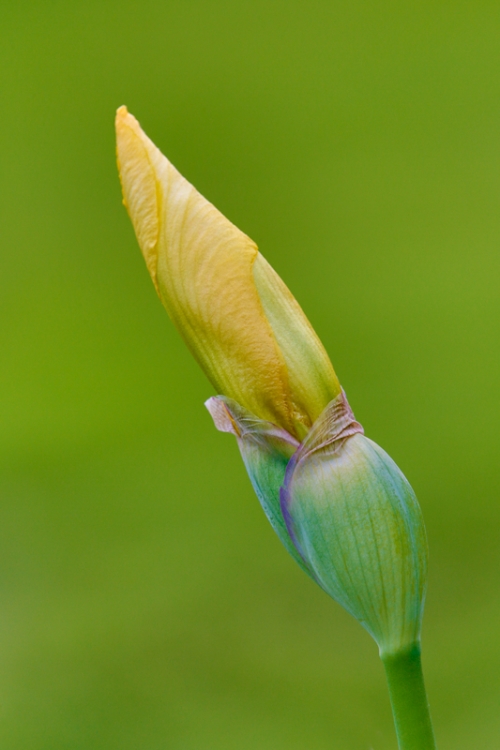


My favorite is #1. Sue said it perfectly, “because you can almost feel the movement of the bud bursting into bloom”. I also like that the bud is on a left-leaning diagonal and the main part of the tissue-thin blossom cover is creating right-leaning diagonals.
You say, “move from side to side .” Does this mean you move around to find the best composition and then take the HDR photographs? Or are there other actions that are done as you move side to side?
Just as it says: I’d get lower and move side to side to line up a clean BKGR of only grass….
Hi Art, can I ask the reason for using HDR here when the camera should be able to fully capture the dynamic range of the subject and background in a single exposure? I only use HDR where there is too much contrast for the camera to handle. Thanks.
Hi Jamie, Good question. I love the look of HDR Art Vivid images from the 5D Mark III. I get a 61mb JPEG right out of camera. In general I just need to reduce the Saturation about 10 points and usually need to lighten it a bit. Since there is no RAW conversion needed the image optimization time is reduced. I do save them as TIFF so the whole process is loss-less.
Thanks for the explanation Art, great images by the way. I do like longer lenses my self for plant portraits for the reason you suggest.
Thanks very much for posting these superb floral images and for explaining your technique — including live view and mirror lock.
YAW Stu. See more flower photography tips here and in other recent blog posts from Holland.
Hey, wait. There aren’t any birds here 🙂 Actually love them all but especially
#1 with the combination of so many beautiful shades of green and yellow.
I love #1 and #3; you were great and everyone loved having you there! Thank you 🙂
They are all stunning. My favorite is no. 1 because you can almost feel the movement of the bud almost bursting into bloom.