| [Not a valid template] |
|
This Bald Eagle juxtaposition image was created from a rocking boat near Homer, AK on the March IPTs with the Canon 800mm f/5.L IS lens, the 1.4X III TC, and the In the above situation with a large bird occupying a good portion of the frame it is imperative to figure out the correct exposure in advance by checking the histogram to make sure that it is well to the right without any blinkies. Once you determine the correct exposure, set it manually. And that is just what I did in this case. By doing so your exposure will not be thrown off if there is more black in the frame one moment and more white the next. To learn exposure theory study the chapter on exposure in the original The Art of Bird Photography; it is the great strength of a book that has sold more than 35,000 copies and laid the foundation for many of today’s great bird photographers. |
Working in Manual Mode Re-visited
It has been more than two years since I first ran Working in Manual Mode on the blog. You can see the original post here. It has an interesting link that is not included in this blog post. Though I still work in other exposure modes on occasion, I find myself working in Manual Mode more than ever. Today I’d say that I work in Manual mode about 85% of the time, Av mode about 10% of the time, Tv about 4% of the time (when creating pleasing blurs), and Program mode (when working a party with flash, and very rarely when using fill flash for songbirds).
If you are not working in Manual mode most of the time you need to study the info below and learn to become competent in it.
Here is an excerpt from The Art of Bird Photography II (ABP II: 916 pages on CD only) for those who need help with working in Manual mode.
Working in Manual Mode
Many professional and serious amateur photographers work in Manual mode most of the time. I do not because working in Av mode and entering exposure compensation is faster whenever the background is of a relatively constant tonality. When the background tonality is changing from moment to moment but the light is constant, it is best, however, to work in Manual mode. In either case, I rely on Evaluative Metering. Here are some examples of rapidly changing backgrounds: a shorebird on a rock along the edge of the ocean with waves breaking behind it. Birds flying against a blue sky with occasional white clouds. Cranes flying by in front of a variety of backgrounds that might include sky, mountains, yellowed grasses, or water.
As many folks are confused as to how to work in or set exposure compensation when working in Manual mode, I offer the following basic tutorial.
#1: When you work in Manual mode you select and set the shutter speed and you select and set the aperture. With my Canon cameras the default has you changing the shutter speed with your index finger dial and the aperture with the thumb wheel.
#2: After selecting Manual mode, point your camera at a scene or stationary subject and lock your tripod head so the framing remains constant. Next select and set the desired aperture. Then adjust the shutter speed until the analog scale in the viewfinder nulls out to zero. With Canon pro bodies this scale is laid out vertically along the right side of the viewfinder display (when you are working in horizontal format). With many of the pro-sumer bodies the analog scale is laid out horizontally at the bottom of the viewfinder display. The zero or null indicator is at the center of the analog scale. The three full stops above the null symbol (marked in 1/3-stop increments) indicate overexposure. The three full stops below the null symbol (also marked in 1/3-stop increments) indicate underexposure. If you change the aperture and you do not see the small square moving, check either the top or the bottom of the analog scale. You will note a small triangle at the top if you are way overexposed or a small triangle at the bottom if you are way underexposed. If the former, rotate the dial and choose faster shutter speeds, if the latter, choose slower shutter speeds. In either case, you will soon see the small square moving up or down the analog scale. At first, you will simply want to practice nulling the meter, that is, getting the small square to rest on the null symbol. This indicates that you have now set the metered exposure (as determined by the camera’s Evaluative Metering system.
#3: When you work in Manual mode it is not possible to set exposure compensation. To come up with the exposure that you wish, simply change the aperture or shutter speed as above until the small square indicates the amount of over- or under-exposure that you desire. If you wish to work at +2 stops, you need adjust either the shutter speed or the aperture until the small square rests on the symbol that is two full stops above the null symbol. If you wish to underexpose by 1/3 stop, you need adjust either the shutter speed or the aperture until the small square rests on the symbol that lies just below the null symbol.
With a bit of practice you should quickly become comfortable whenever the need to work in Manual mode arises.
Traveling
Please know that artie will be traveling to and from the Galapagos until July 19th. He will not have any internet access while aboard the Samba from July 3-16th. He will be home briefly July 19-20 before flying to Long Island for the sold out Nickerson Beach Baby Birds IPT. Jim will be in the office every weekday to help you with your mail order purchases and Jen will be here handling IPT registrations. The blog will continue to be active as he has prepared more than a few posts for you in advance for you to enjoy during his absence.
If you have a gear or an image processing question please e-mail me after July 19th.
Photographic Society of Chattanooga Seminar
Scroll down here for details on the Saturday seminar that Denise Ippolito and yours truly are doing in Chattanooga on October 12, 2013 and the follow-up Old Car City In-the-Field Workshop. Blog folks who sign up for both are invited to join us at a secret Urbex location in Atlanta on Friday morning October 11. Feel free to e-mail me for details after you are registered for both.
From Greg Clarkson via e-mail
Thanks so much for the awesome and inspiring weekend seminar that you and Denise put on in Brandon! It was greatly appreciated. Greg
|
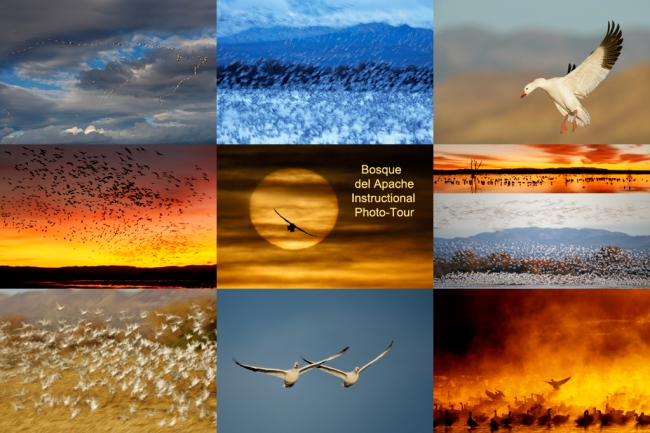
Snow Goose composite, Bosque del Apache NWR, San Antonio, NM. Click on the image for a larger version. |
Bosque del Apache 2013 IPT: “The Complete Bosque Experience.” NOV 26-DEC 2, 2013. 7-FULL DAYS: $3399. Co-leader: Denise Ippolito. Introductory Slide program: 6:30 pm on 11/25. Limit: 12.
Tens of thousand of Snow Geese, 10,000 Sandhill Cranes, ducks including point-blank American Wigeon and Wood Duck, amazing sunrises, sunsets, and blast-offs. Live, eat, and breathe photography with one of (if not the) world’s premier photographic educators at one of his very favorite locations on the planet. Top-notch Photoshop instruction. This will make 19 consecutive Novembers at Bosque for me. Nobody knows the place better than I do. Join us to learn to think like a pro, to recognize situations and to anticipate them based on the weather, especially the sky conditions, the light, and the wind direction. Every time we make a move we will let you know why. When you head home applying what you learned will prove to be invaluable. Includes all lunches and the Thanksgiving Buffet at the Crowne Plaza in Albuquerque. I hope that you can join me for what will be an unparalleled learning experience.
A $500 non-refundable deposit is required to hold your slot for this IPT. Your balance is due 4 months before the date of the IPT and is also non-refundable. If the trip fills, we will be glad to apply a credit applicable to a future IPT for the full amount less a $100 processing fee. If we do not receive your check for the balance on or before the due date we will try to fill your spot from the waiting list. If your spot is filled, you will lose your deposit. If not, you can secure your spot by paying your balance.
Please print, complete, and sign the form that is linked to here and shoot it to us along with your deposit check (made out to “Arthur Morris.”) You can also leave your deposit with a credit card by calling the office at 863-692-0906. If you register by phone, please print, complete and sign the form as noted above and either mail it to us or e-mail the scan. If you have any questions, please feel free to contact me via e-mail.
|
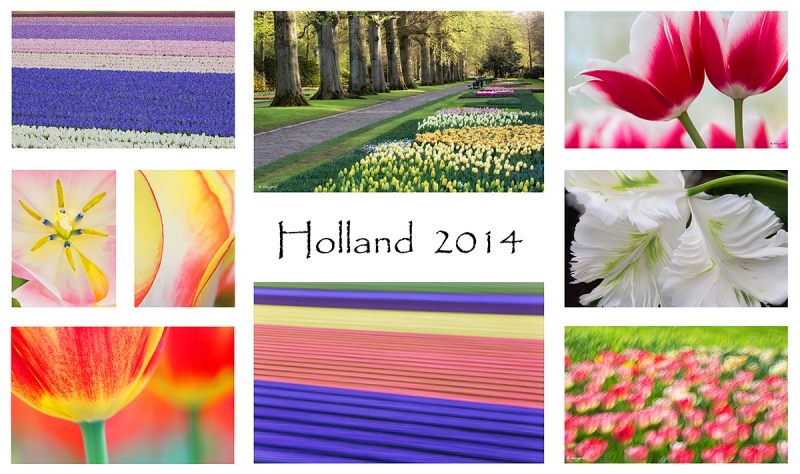
Images copyright 2012: Denise Ippoltio & Arthur Morris. Card design by Denise Ippolito. Click on the image to enjoy a spectacular larger version. |
Holland 2014 7 1/2-Day/8-Night: A Creative Adventure/BIRDS AS ART/Tulips & A Touch of Holland IPT. April 17-April 24, 2014 :$4995 Limit: 12 photographers/Openings 9
This trip needs 8 registrants to run so please do not purchase your plane tickets until you hear from us; right now we need 5 more folks.
Join Denise Ippolito, Flower Queen and the author of “Bloomin’ Ideas,” BPN Photo Gear Moderator, former Nikon shooter, and technical expert Peter Kes, and Arthur Morris, Canon Explorer of Light and one of the planet’s premier photographic educators for a great trip to Holland in mid-April 2014. Day 1 of the IPT will be April 17, 2014. We will have a short afternoon get-together and then our first photographic session at the justly-famed Keukenhof. Peter who is originally from Holland, will be our local guide/interpreter/driver. Most days we will return to the hotel for lunch, image sharing and a break. On Day 8, April 24, we will enjoy both morning and afternoon photography sessions.
The primary subjects will be tulips and orchids at Keukenhof and the spectacularly amazing tulip, hyacinth, and daffodil bulb fields around Lisse. In addition we will spend one full day in Amsterdam. There will be optional visits the Van Gogh Museum in the morning and the Anne Frank House in the afternoon; there will be plenty of time for street photography as well. And some great food. On another day we will have a wonderful early dinner at Kinderdijk and then head out with our gear to photograph the windmills and possibly some birds for those who bring their longs lenses. We will spend an afternoon in the lovely Dutch town of Edam where we will do some street photography and enjoy a superb dinner. All lodging, ground transportation, entry fees, and meals (from dinner on Day 1 through dinner on Day 8) are included.
For those who will be bringing a big lens we will likely have an optional bird photography afternoon or two or possibly three. The big attraction should be gorgeous Purple Herons in flight at a breeding marsh. We would be photographing them from the roadside. And we might be able to find a few Great-crested Grebes at a location near Keukenhof.
Click here for complete details and some previously unpublished images. And/or click here and see item one for lots more tulip photos and complete trip details.
|
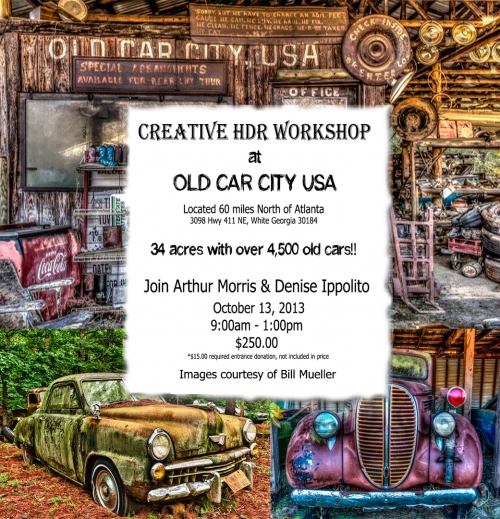
Images courtesy of and copyright 2012: Bill Mueller. Card design by Denise Ippolito. |
Old Car City Creative Photography In-the-Field HDR Workshop: Sunday, October 13, 2013/ 9am till 1pm.
White, Georgia: $250 plus a $15 entrance fee donation (cash only on the day of the event) that will go to charity. Limit: 16 photographers.
On October 13, 2013, Arthur Morris/BIRDS AS ART and Denise Ippolito/A Creative Adventure will be conducting an In-the-Field HDR Workshop at Old Car City in White, Georgia. Old Car City is about an hour north of Atlanta, GA and an hour south of Chattanooga, TN where they will, as noted above, be doing a full day seminar for the Photographic Society of Chattanooga on Saturday, October 12th. Click here for complete details.
Typos
On all blog posts, feel free to e-mail or leave a comment regarding any typos, wrong words, misspellings, omissions, or grammatical errors. Just be right. 🙂
Support the BAA Blog. Support the BAA Bulletins: Shop B&H here!
We want and need to keep providing you with the latest free information, photography and Photoshop lessons, and all manner of related information. Show your appreciation by making your purchases immediately after clicking on any of our B&H or Amazon Affiliate links in this blog post. Remember, B&H ain’t just photography!


Support the Blog


Amazon
Everyone buys something from Amazon, be it a big lens or deodorant. Support the blog by starting your search by typing in the little white box below. No purchase is too small to be appreciated; they all add up. Why make it a habit? Because I make it a habit of bringing you new images and information on an almost daily basis.
And from the BAA On-line Store:
LensCoats. I have a LensCoat on each of my big lenses to protect them from nicks and thus increase their re-sales value. All my big lens LensCoat stuff is in Hardwood Snow pattern.
LegCoat Tripod Leg Covers. I have four tripods active and each has a Hardwood Snow LegCoat on it to help prevent further damage to my tender shoulders 🙂 And you will love them in mega-cold weather….
Gitzo GT3532 LS CF Tripod. This one replaces the GT3530LS Tripod and will last you a lifetime. Learn more about this great tripod here.
Mongoose M3.6 Tripod Head. Right now this is the best tripod head around for use with lenses that weigh less than 9 pounds. For heavier lenses, check out the Wimberley V2 head.
Double Bubble Level. You will find one in my camera’s hot shoe whenever I am not using flash.
The Lens Align Mark II. I use the Lens Align Mark II pretty much religiously to micro-adjust all of my gear an average of once a month and always before a major trip. Enjoy our free comprehensive tutorial here.
BreezeBrowser. I do not see how any digital photographer can exist without this program.
Delkin Flash Cards. I use and depend on Delkin compact Flash Cards and card readers most every day. Learn more about their great 700X and 1000X cards here or about my favorite Delkin card here.


Hi Artie,
I had noticed from your image captions that you had been using Manual Mode a lot more of the time, any reason for the change in course away from Av Mode and compensation (which you had relied upon for many years)? Just curious really!
I am happy to say since getting my head fully around exposure and Canon’s Evaluative Metering pattern from your books and writings, I comfortably chop and change Exposure Mode to suit the subject/ lighting conditions and generally come up with an acceptable exposure first time, …so thank you for allowing me to gain a solid foundation from your teachings. 🙂
YAW. I have been using Manual mode more over the past few years as it is more consistent than Av as long as the light is relatively constant.
Thanks, Artie. You know, with my old Minolta film SLR, I always used manual mode. I had no choice, of course. This is a very hepful reminder. I trust you’re having a wonderful trip to the Galapagos.
Thanks for the article! I like the picture a lot! I somewhat recently began using manual mode a lmost exclusively, largely due to reading this blog (sadly, I don’t recall what post). It has helped tremendously, as it gets me the right exposure for the birds! I live in Fort Lauderdale, so many of my birds are of course bright white; over exposure and nuked whites was a frequent problem before manual mode. Thanks!
Manual mode will not get you the right exposure in any situation. Only smart photographers can do that. Or those who have studied ABP, ABP II or Digital Basics.