106
This post marks 106 straight days with a new educational blog post. With so many folks getting in the habit of using our B&H and Amazon links why quit now? To show your appreciation for my efforts here, we do ask that you use our B&H and Amazon affiliate links for all of your B&H and Amazon purchases. Please check the availability of all photographic accessories in the BIRDS AS ART Online Store. We sell only what I use and depend on. We will not sell you junk. We know what you need to make creating great images easy and fun. And we are always glad to answer your gear questions via e-mail.
You can find the following items in the store: Gitzo tripods, Mongoose M3.6 and Wimberley heads, plates, low feet, and accessories, flash brackets, , Delkin e-film Pro Compact Flash Cards, LensCoat products, and our unique line-up of educational materials including ABP I & II, Digital Basics, Site and Set-up e-Guides, Canon and Nikon Camera Users and AF e-Guides, and MP-4 Photoshop video tutorials among others.
Note: though we almost never have Mongoose M3.6 heads in stock we do have a few on the shelf right now. We are still waiting for more CR-X5 plates. As always, the best way to ensure getting one of these great heads for your intermediate or super-telephoto lens (if they are out of stock) or one of the great CR-X5 plates is to call Jim and place your order. You are then ensured of getting one from our next shipment. We will not of course bill your credit card until the item ships or drop-ships.
We would of course appreciate you using our B&H and Amazon affiliate links for all of your B&H and Amazon major gear, video, electronic, household, and personal purchases. For the photographic stuff mentioned in the paragraph above we would of course greatly appreciate your business. Here is a huge thank you to the many who have been using our links on a regular basis and visiting the BAA Online store as well.
This blog post took about 3 hours to prepare. Enjoy. And learn.
Huge Thanks!
Huge thanks to the many readers who continue to use the BAA B&H and Amazon Affiliate links for purchases large and small. March has gotten off to a great start with folks buying several Version II Super-teles, several 1D X bodies, and a 200-400. Way to go and greatly appreciated. It is wonderful to see so many folks being appreciative of the streak. Remember, every purchase helps no matter how small and getting in the habit of using the BAA links will not cost you one penny more.
|
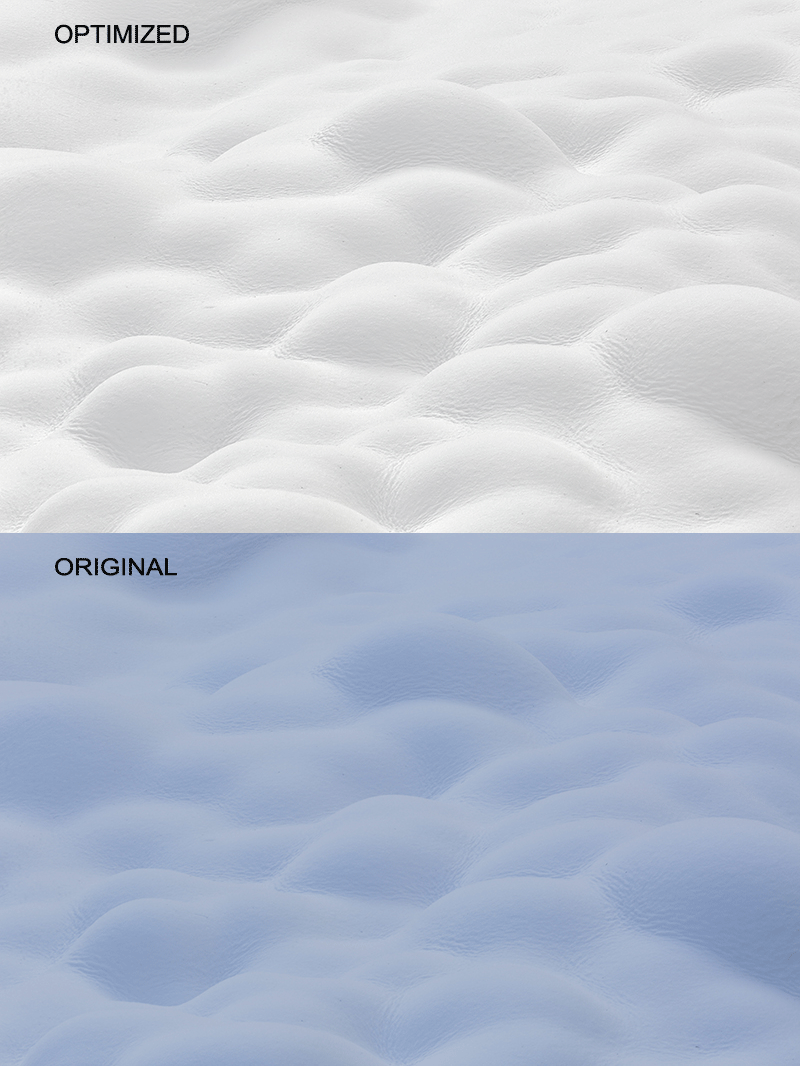
This image of a snowy-covered hillside was created at the Snow Monkey park with the Gitzo 3532 LS carbon fiber tripod, the Mongoose M3.6 head, the Canon EF 70-200mm f/2.8L IS II USM lens, the Canon Extender EF 1.4X III (tripod-mounted at 175mm), and the and the Canon EOS 5D Mark III . ISO 320. Evaluative metering +1 2/3 stops as framed: 1/60 sec. at f/20 in Av mode was a big underexposure. (See the Animated GIF below.) AWB. Central sensor/Rear Focus AI Servo AF 1/3 of the way into the frame and re-compose. Click here to see the latest version of the Rear Focus Tutorial. Click on the image to see a larger version. Image #1: Sensuous Snow Curves |
Simplicity
As we saw with the image of the two bamboo leaves in the “Special Hokkaido Treats” blog post here, simple image designs can be both powerful and artistic. Both images here illustrate that concept very nicely. I had had my eye on those little snow hills for a while and planned to do them at the end of our second uphill walk to the Monkey Park. But I had forgotten the tripod collar for my 70-200. Pat Lillich kindly loaned me whole her rig. I put it on my tripod and went to work. I created about 20 images and wound up keeping only this one, the first in the series. It is amazing how often our initial vision yields the most pleasing image design….
Image Question
Why f/20?
Why did I use a tripod for this image?
|
|
Undoing the BLUEs
After giving the Animated GIF above a few seconds to play, it is easy to see that the original image had a tremendous BLUE cast. AWB was a big mistake, but one that was easily dealt with during the image optimization process. Most of the work was done with a simple mouse click during the RAW conversion in DPP. I simply went to Click White Balance. That brought all the RGB values to within a point or two of each other. I also lightened the image nearly 2 stops; see my thoughts on getting the right exposure with snow below.
When I brought the image into Photoshop the RGB #s still looked pretty good but the image, especially the shadows, still looked BLUE. So I duplicated the entire image (Control A, Control J) and opened Hue/Saturation on that layer (Control U). I chose the BLUE channel from the dropdown menu and moved the Saturation slider to the right. The BLUE cast was obvious so I moved the Saturation slider all the way to the left to totally desaturate the BLUEs. Now the RGB values for the brightest WHITEs read 231, 231, 231. The WHITEs were now perfectly WHITE. And bright.
As I had lightened the image 1.7 stops during the DPP conversion all that was left to do was add a layer of my NIK custom 50/50 (Tonal Contrast/Detail Extractor) at 50% Opacity. Thanks again to Pat Lillich who made this image possible.
|
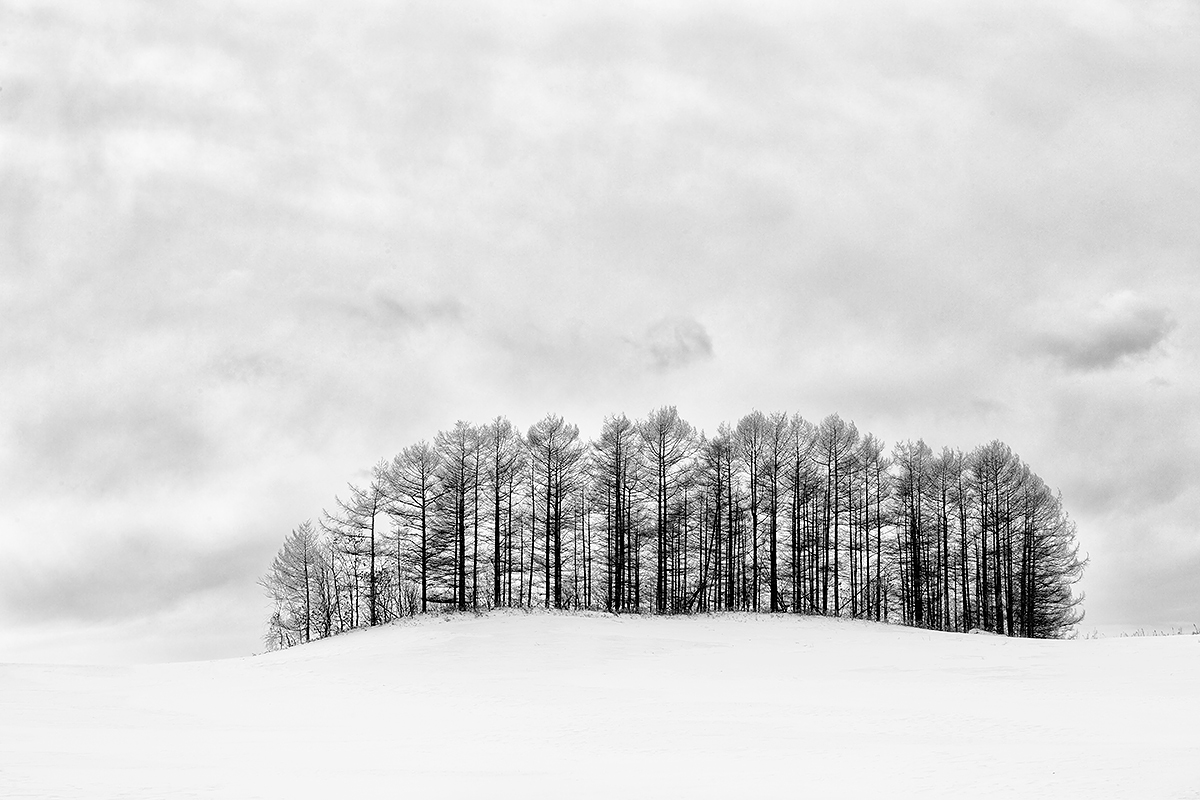
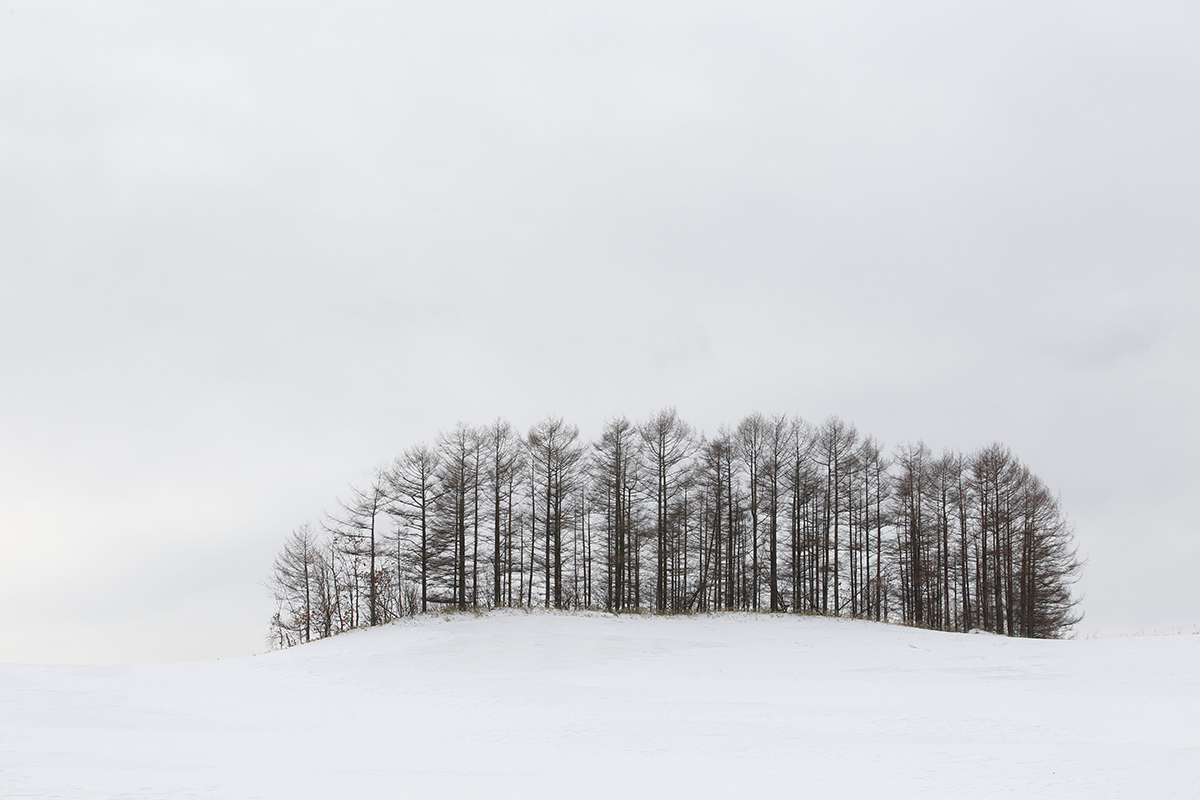
This image was created on Hokkaido on the Japan in Winter IPT with the Gitzo 3532 LS carbon fiber tripod, the Mongoose M3.6 head, the Canon EF 70-200mm f/2.8L IS II USM lens, (tripod-mounted at 70mm) and the and the Canon EOS 5D Mark III . ISO 400. Evaluative metering +1 2/3 stops as framed: 1/400 sec. at f/16 in Av mode was somewhat of an underexposure. (See the Original below.) Central sensor/Rear Focus AI Servo AF on the trees and re-compose. Click here to see the latest version of the Rear Focus Tutorial. Click on the image to see a larger version. Image #2: Tree Stand on Snowy Ridge |
Tree Stand on Snowy Ridge
As you can see by looking at the original image immediately below, the success of this image is largely due to the superb image optimization. It took me quite a while to get something that looked better than decent…. See the details below. The original was about a stop underexposed and was totally flat; there was not much color and pretty much no contrast.
But again, the simple compositional approach worked very well.
|
your text and adds |
The Image Optimization Process
After lightening the image during DPP conversion I opened the image in Photoshop. As it was obvious I should go Black and White with this image I brought it into NIK Silver Efex Pro and went with High Contrast Green. Then I ran a layer of NIK Color EFEX Pro Detail Extractor, added a Regular Layer Mask, and erased the snow on the hill as I wanted to keep that white and without detail. That was followed by a layer of NIK Viveza with Structure increased to the max to bring up the detail in the clouds. Again I added a Regular Layer Mask; this time I erased the effect on the trees and the foreground hill. By now there was tons of detail in the clouds but they were looking a bit grainy so I went with Filter/Blur/Surface Blur on a layer at about 6/12, added another Regular Layer Mask, and again erased the trees and the foreground snow. Voila!
Getting the Right Exposure with Snow Scenes on Cloudy Days
Both images here were created with an EC of +1 2/3 stops. Both were underexposed. As it turned out the opening image needed nearly four stops of over-exposure. The trees image needed nearly three stops of over-exposure. In each case, I did not push the exposure far enough to the right. With the scenes being overall light-toned there were no dire effects as a result of lightening the images during conversion. But it is always better to get things right in-camera. We had several situations where the best exposure was +4 stops off the snow. Live and learn.
Note: had the sun been out the EC would have likely been +1/3 or +2/3 with Canon, 0 or -1/3 with Nikon. Why? Because the meters are a lot smarter when the sun is out at full strength than they are in cloudy, overcast, pre-dawn light or when the subject is in the shade.
Your Favorite?
Take a moment to let us know which of these two you would hang on your wall. And please let us know why. BTW, all BAA images are available as signed prints, either traditional or canvas. Click here for more info.
IPT Info
Many of our great trips are filling up. With 5 Canadians and another couple signing up for our 4-DAY Bosque IPT; that workshop is filling up quickly. See especially info on the Holland, and Nickerson Beach IPTs. Two great leaders on most trips ensure that you will receive individual attention, have all of your questions answered, and learn a ton including how to think like a pro, see the situation, and get the right exposure every time. In addition you will have fun, and make lots of great images. Click here for IPT details and general information.
|
Images copyright 2012: Denise Ippolito & Arthur Morris. Card design by Denise Ippolito. Click on the image to enjoy a spectacular larger version. |
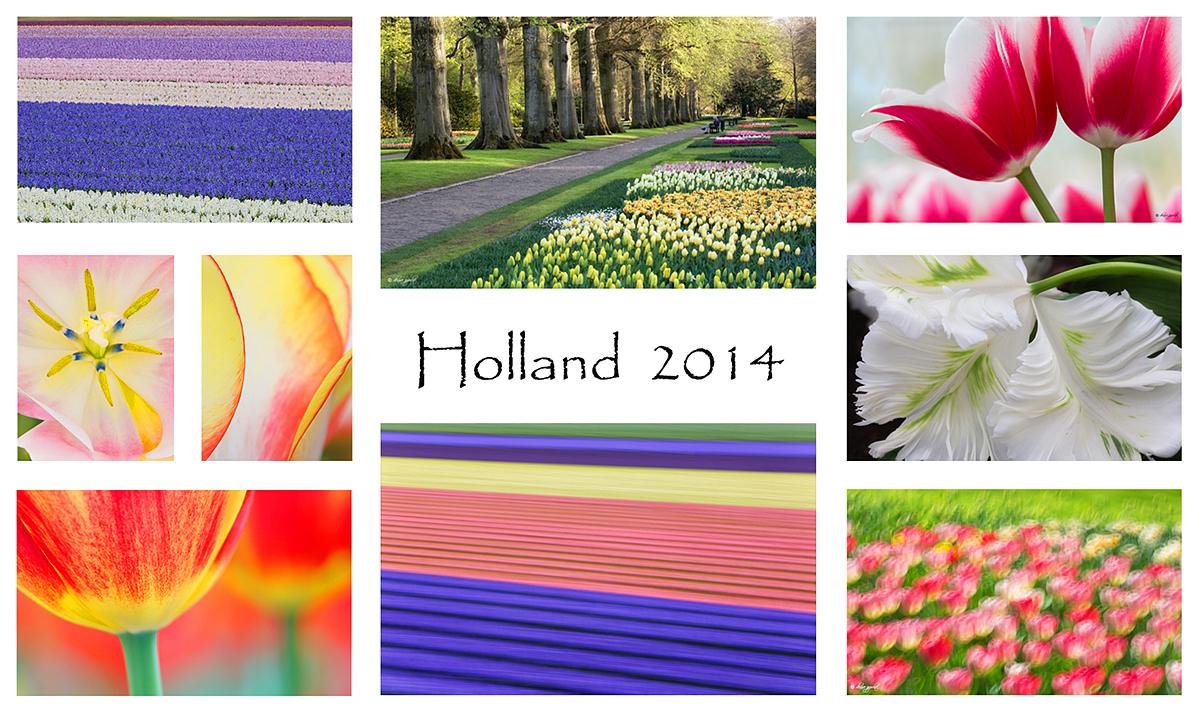
Holland 2014 7 1/2-Day/8-Night: A Creative Adventure/BIRDS AS ART/Tulips & A Touch of Holland IPT. April 17-April 24, 2014: $4995 Limit: 12/Openings: 5
We still have room for 5 more flower photographers on this great trip.
Join Denise Ippolito, Flower Queen and the author of “Bloomin’ Ideas,” and Arthur Morris, Canon Explorer of Light Emeritus and one of the planet’s premier photographic educators for a great trip to Holland in mid-April 2014. Day 1 of the IPT will be April 17, 2014. We will have a short afternoon get-together and then our first photographic session at the justly-famed Keukenhof. Most days we will return to the hotel for lunch, image sharing and a break. On Day 8, April 24, we will enjoy both morning and afternoon photography sessions.
The primary subjects will be tulips and orchids at Keukenhof and the spectacularly amazing tulip, hyacinth, and daffodil bulb fields around Lisse. In addition we will spend one full day in Amsterdam. There will be optional visits the Van Gogh Museum in the morning and the Anne Frank House in the afternoon; there will be plenty of time for street photography as well. And some great food. On another day we will have a wonderful early dinner at Kinderdijk and then head out with our gear to photograph the windmills and possibly some birds for those who bring their longs lenses. We will spend an afternoon in the lovely Dutch town of Edam where we will do some street photography and enjoy a superb dinner. All lodging, ground transportation, entry fees, and meals (from dinner on Day 1 through dinner on Day 8) are included. For those who will be bringing a big lens we will likely have an optional bird photography afternoon or two.
Click here for additional info or to register.
|
|
Join me for the 2014 Tanzania Summer Safari! |
2014 Tanzania Summer Safari, 14-day African Adventure/leave the US on August 9. Fly home on August 24: $12,999.
Co-leaders Todd Gustafson & Arthur Morris. The limit is 12. Three photographers/van; you get your own row of seats. Our trip is a bit more expensive than the average safari for good reason. It is the best. We have the best driver guides with a total of decades of experience. They have been trained over the years by Todd and by me to drive with photography in mind. We have the best and most knowledgeable leaders. We stay in the best lodges and camps. We hope that you will join us for what will be Todd’s 35th African safari, and my 8th.
If you are seriously interested please e-mail me; I will be glad to send you the illustrated PDF with the complete itinerary and deposit info.
What else makes this expedition unique?
•Pre-trip consultation and camera equipment advice
•Award-winning photographers as your guides
•A seamless itinerary visiting the right locations at the best time of year
•Hands-on photography instruction in the field
•Specially designed three roof-hatch photo safari vehicles
•Proprietary materials for preparation, including free copy of “A Photographer’s Guide to Photographing in East Africa.”
•Post-safari image critiques
All-inclusive (double-occupancy) except for your flights to and from Kilamajaro Airport, bar drinks, soda & water (except at the Intimate Tented Camp where everything is free for our entire stay), tips for drivers and camp staff, personal items, and trip insurance.
|
|
Breathe deeply, bite the bullet, and live life to its fullest; we all get only one ride on the merry-go-round… Join me on this great trip. Click on the image to enjoy a larger version. |
The Southern Ocean…
If you would like to explore the possibility of joining me on the Cheesemans’ Ecology Safaris Antarctica/The Extended Expedition Voyage< trip: Antarctic Peninsula, South Georgia and Falkland Islands: December 13, 2014 to January 10, 2015, click here for additional information and then shoot me an e-mail.
The DPP RAW Conversion Guide
To learn why I use Canon’s Digital Photo Professional (DPP) to convert every image that I work on, click here.
Support the BAA Blog. Support the BAA Bulletins: Shop B&H here!
We want and need to keep providing you with the latest free information, photography and Photoshop lessons, and all manner of related information. Show your appreciation by making your purchases immediately after clicking on any of our B&H or Amazon Affiliate links in this blog post. Remember, B&H ain’t just photography!


Amazon
Everyone buys something from Amazon, be it a big lens or deodorant. Support the blog by starting your search by clicking on the logo-link below. No purchase is too small to be appreciated; they all add up. Why make it a habit? Because I make it a habit of bringing you new images and information on an almost daily basis.
Typos
In all blog posts and Bulletins, feel free to e-mail or to leave a comment regarding any typos, wrong words, misspellings, omissions, or grammatical errors. Just be right. 🙂




Amazing. Your post processing approach to the tree shot was almost identical to mine insofar as I used Silver Efex Pro and used layer masks to keep the structure/contrast off the snow. The only difference is that I didn’t go the Viveza as I got all the structure and contrast via the various sliders in Silver Efex Pro.
Also voting for the trees photo. I love shots like that with a nicely-composed simple graphic element and a fair amount of negative space. The little bit of texture in the sky adds a lot too. Nice job.
Love image #2 I feel the cloud detail really adds a lot to a beautiful composition, and makes it pop off the page. It seems like you had to do a bit of photoshop to get it this way, but now have a master piece! This is the one that I would be happy to hang on my wall and look at every day. Just goes to prove that “It ain’t just birds” although there may be a bird, or two in those trees. 🙂 Thank you for posting theses.
Tony
Although not a particularly enthusiastic wildlife photographer I regularly follow your blog for all the advice and knowledge about technique in general.
I really like the image of the trees on the hill for it’s elegant simplicity and the beautiful crispness of the final version.
Regards
Clayton Ward