The Streak Continues
We had a great morning on Lake Blue Cypress on Saturday with dozens of opportunities to photograph landing Ospreys; both the light–the sun was filtered by light clouds, and the wind–from the east/northeast, were perfect. Multiple IPT veterans included Aaron Chandler and the amazingly talented Clemens van der Werf. They were joined by first-timer Michael Tapes of Lens Align fame. Captain Jim Neiger did his usual stellar job of piloting the boat and getting us in perfect position.
This post marks 135 straight days with a new educational blog post. With so many folks getting in the habit of using our B&H links and our Amazon logo-links why quit now? To show your appreciation for my efforts here, we do ask that you use our the B&H and Amazon affiliate links on the right side of the blog for all of your purchases. Please check the availability of all photographic accessories in the BIRDS AS ART Online Store, especially Gitzo tripods, Wimberley tripod heads, and the like. We sell only what I used, tested, and can depend on. We will not sell you junk. We know what you need to make creating great images easy and fun. And we are always glad to answer your gear questions via e-mail.
You can find the following items in the store: Gitzo tripods, Mongoose M3.6 and Wimberley heads, plates, low feet, and accessories, flash brackets, , Delkin e-film Pro Compact Flash Cards, LensCoat products, and our unique line-up of educational materials including ABP I & II, Digital Basics, Site and Set-up e-Guides, Canon and Nikon Camera Users and AF e-Guides, and MP-4 Photoshop video tutorials among others.
I would of course appreciate your using our B&H affiliate links for all of your major gear, video, and electronic purchases. For the photographic stuff mentioned in the paragraph above we, meaning BAA, would of course greatly appreciate your business. Here is a huge thank you to the many who have been using our links on a regular basis and visiting the BAA Online store as well.
This blog post took 3 1/2 hours to put together. Enjoy!
|
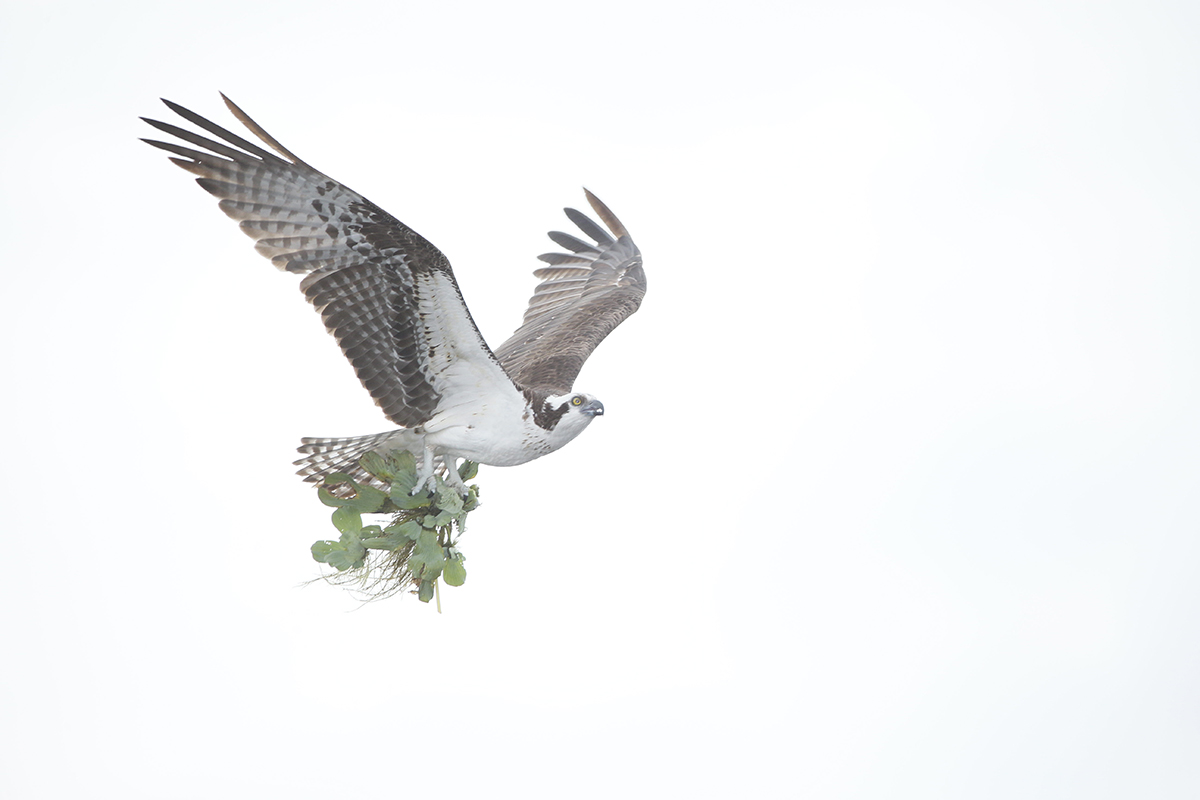
This image was created on a cloudy dark afternoon on Lake Blue Cypress on Friday afternoon April 11, 2014 at 3:02pm. There were five of us aboard Jim Neiger’s pontoon boat. I used the hand held Canon EF 200-400mm f/4L IS USM Lens with Internal 1.4x Extender (with the internal TC engaged at 560mm) and the Canon EOS-1D X. ISO 1600. Evaluative metering +3 1/3 stops off the white sky: 1/1250 sec. at f/5.6 in Manual mode. AWB. Fill flash with Better Beamer using manual flash at 1:2 with High SPeed Synch with the Canon Speedlite 600EX-RT with the Canon CP-E4 Compact Battery Pack for faster re-charging times. With all that the flash did not do much…. Central Sensor/AI Servo-Surround/Rear Focus AF on the bird’s face active at the moment of exposure. Learn everything there is to know about the 1D X and 5D III AF systems including how to manage the various AF Area Selection Modes, when to use which one, and several ways to move the AF sensor around in my 1D X AF Guide and the 5D Mark III User’s Guide. Click here to see the latest version of the Rear Focus Tutorial. Click on the image to see a larger version. .
|
The Situation
It was cloudy dark; the conditions for photographing Osprey in flight were poor at best. But knowing the amazing capabilities of digital, I felt that there were good images to be made. I metered off the dreary white sky and set my exposure manually to +3 1/3 stops. I needed ISO 1600 to get a shutter speed of 1/1250 sec. I added High Speed Sync flash in hopes that by using the flash at full power, 1:1 in manual mode, that at least some flash would hit the bird. It did not.
Exposing to the Right
When we teach folks to expose to the right we explain that in low light situations their images will look washed out on the back of the camera and washed out when they see them on a computer; see the image above for a perfect example. We continue by explaining that images that are exposed to the right will contain more data than images that are exposed darker and look pretty good on the back of the camera, that they will have less noise, and will produce higher quality image files and prints. At times, as you will see below, it is necessary to completely over-expose a white sky in order to come up with the best exposure for the subject.
|
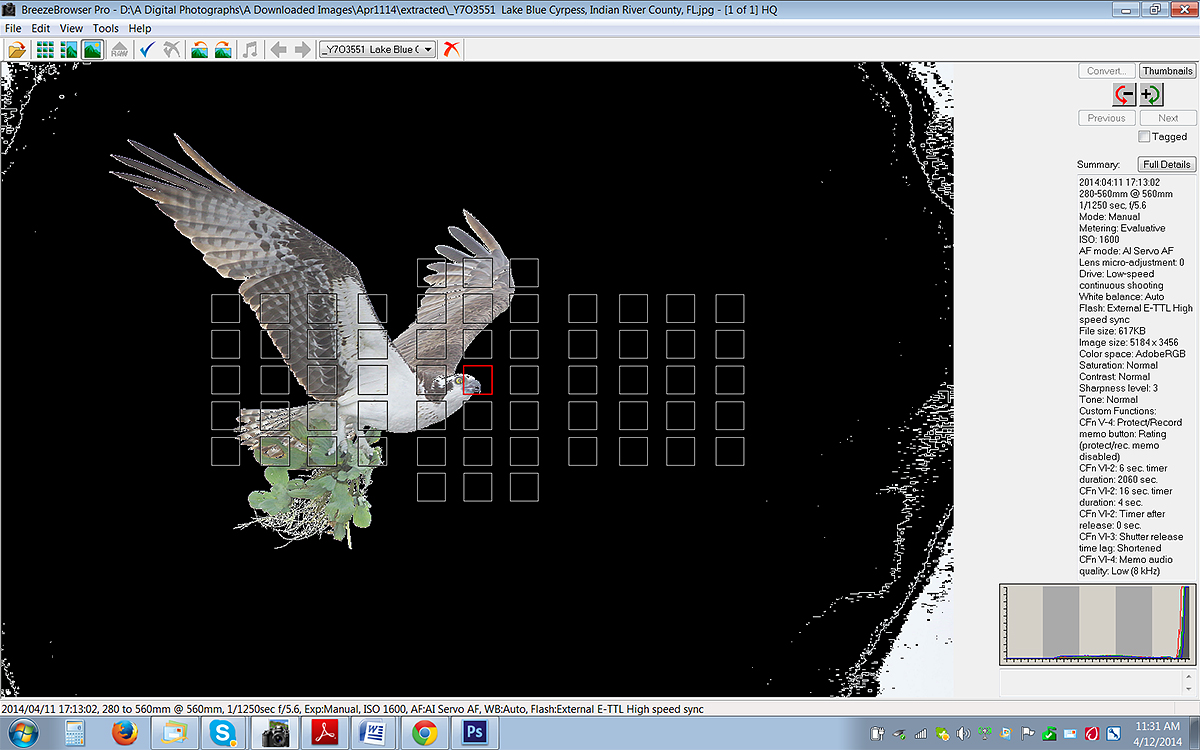
This is the BreezeBrowser Main View of today’s image. |
Creating a High Key Image
I created the BreezeBrowser Main View screen capture above while the sky was flashing black indicating a large overexposure. Most of the sky was rendered with RGB values of 255, 255, 255, detail-less white. To create the high key look below with the best exposure for the subject that is exactly what I wanted. As above, if your image looks washed out on the back of the camera it will likely be your best exposure. Here is a very fine: this image showed some vignetting from being created at the wide open aperture, f/5.6. In the screen capture the vignetting is represented by the white splotches in the corners. You can also see the vignetting by looking at the image that opens this post: the corners are darker than the rest of the sky and show some CYAN artifacting. The vignetting was eliminated during the RAW conversion in DPP by checking the Peripheral Illumination box and adjusting the slider. You can find Peripheral Illumination in the Lens Aberration Correction section under the Lens tab.
The illuminated red square shows the AF point that was selected. Note: in Breezebrowser you need to check “Show Focus Points” under View to activate this feature. To see the focus points in DPP check “AF Point” under View or hit Alt L. Hit Alt M in DPP to see Highlight Alert. To learn how and why I use DPP (Canon Digital Photo Professional) to convert my RAW files, see the info on our DPP RAW Conversion Guide here.
Note that the WHITEs in the histogram are pegged up against right side of the histogram; this indicates overexposure of the WHITEs. But again, for this high key image, that is exactly what I wanted.
BreezeBrowser
Regular readers know that I use and depend on BreezeBrowser every day of the year. It allows me to sort my keepers and delete the rejects faster than any other Windows browsing program. We use it on the main computer in the home office to catalog our images file-drawer style. And the companion program, Downloader Pro allows me to download my images quickly and conveniently. It automatically adds my IPTC data and the shooting location. I have it set up to create a folder named by the Month/date/year. The Breezebrowser/Downloader Pro combo saves me many hours each week. To learn more or to purchase this great PC only program, click here. As far as the BreezeBrowser/Downloader Pro Combo goes, if you are using a Windows platform and are not using these two great programs you are at best, wasting your valuable time. My understanding is that Photo Mechanic is best for Mac-users who do not opt to run Parallels or VM Ware fusion on their Macs so that they can enjoy the many advantages of BreezeBrowser. See BreezeBrowswer on a Mac for details.
|
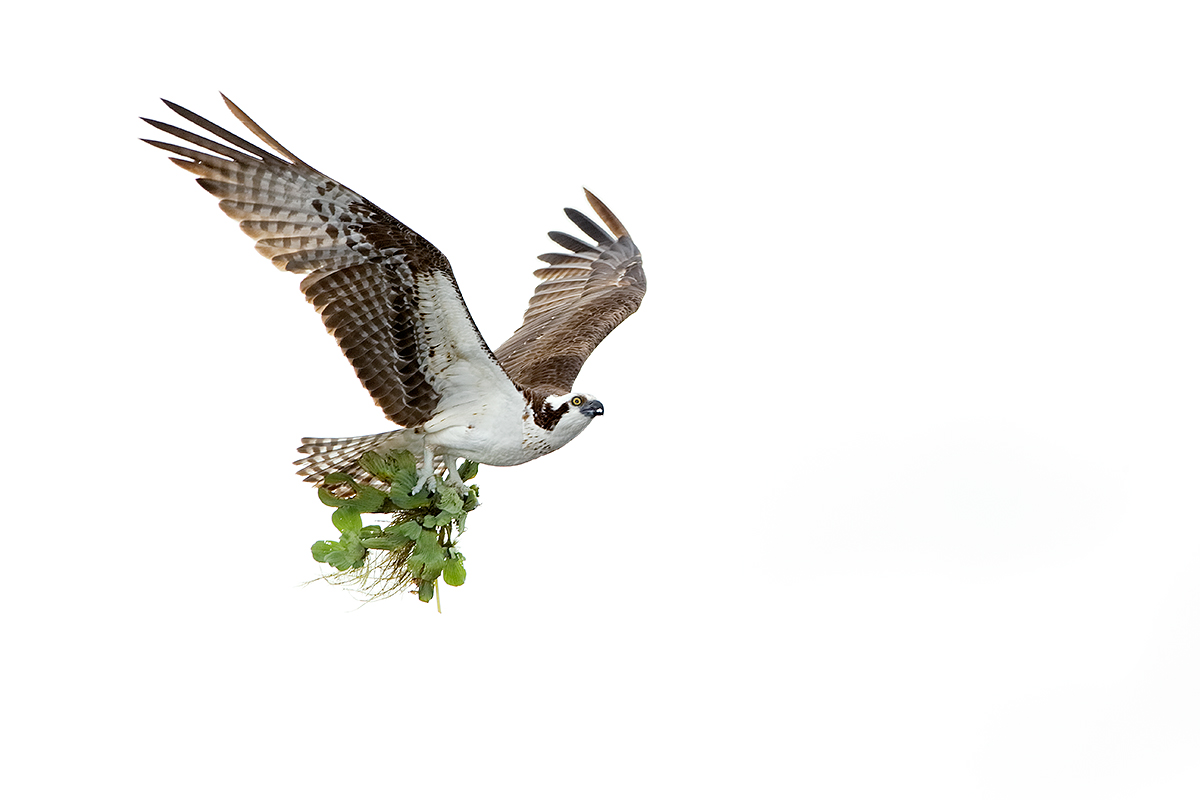
This is the optimized image. Be sure to click on it to view the spectacular larger version. |
Burn the Sky and Wind Up in (Osprey) Heaven…
The Image Optimization
Once I converted the RAW file I brought the washed out image into Photoshop 6. While working on a Levels adjustment layer I pulled in the Shadow slider while holding down the ALT key and backed off a bit when I noticed the first speckles. That gave the image some much needed punch. Next was a layer of my NIK 50/50 Tonal Contrast/Detail Extractor recipe on the bird only. (I used the Quick Selection Tool to select the bird.) That was followed by adding 4 points of BLACK to the BLACKs and the NEUTRALs in Selective Color, the latter done by hitting the f/9 key twice to run my Selective Color action. Then a bit of Eye Doctor work and a contrast mask on the face only (by painting a Quick Mask of the face) put the finishing touches on what I consider a very fine image made in difficult conditions.
The DPP RAW Conversion Guide
To learn why I use Canon’s Digital Photo Professional (DPP) to convert every image that I work on, click here.
Digital Basics
Are you tired of making your images look worse in Photoshop? Do you have no clue as to how I optimized the image above? The Photoshop stuff mentioned above plus tons more is detailed in my Digital Basics File, an instructional PDF that is sent via e-mail. It includes my complete digital workflow, dozens of great Photoshop tips, the use of Contrast Masks, several different ways of expanding canvas, all of my time-saving Keyboard Shortcuts, Quick Masking, Layer Masking, and NIK Color Efex Pro basics, my killer image clean-up techniques, Digital Eye Doctor, creating time-saving actions, and lots more.
APTATS I & II
Learn the details of advanced Quick Masking techniques in APTATS I. Learn Advanced Layer Masking Techniques in APTATS I. Mention this blog post and apply a $5 discount to either with phone orders only. Buy both APTATS I and APTATS II and we will be glad to apply at $15 discount with phone orders only.
Remember: Expose to the Right
Remember to expose to the right. If you have ten seconds with a subject in the same light, there are no hard exposures with digital. Just get some data well into the rightmost histogram box and you will have an exposure that you can work with to produce a high quality image file. You can learn everything that you need to know about exposure theory in original classic, The Art of Bird Photography and in the Exposure Simplified section of The Art of Bird Photography II (ABP II:916 pages, 900+ images on CD only). You can save $10 by purchasing the 2-book bundle here.
|
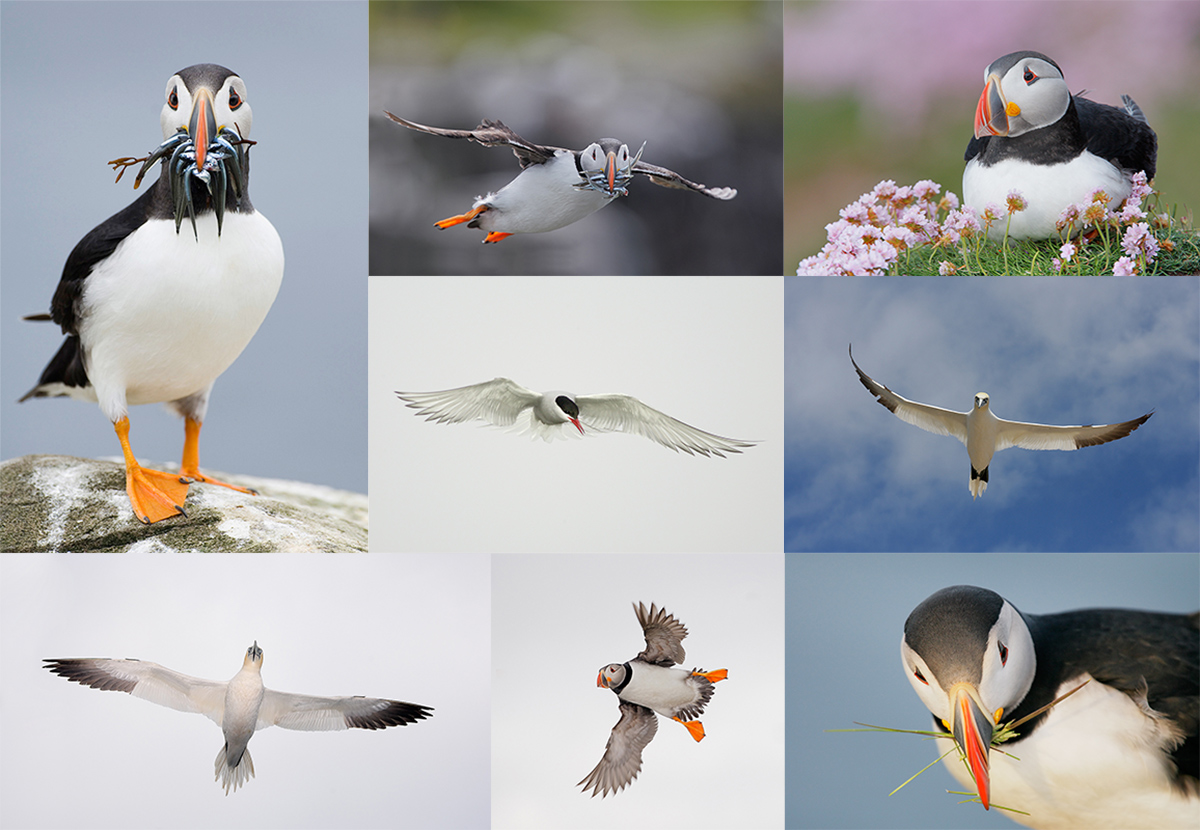
I hope that you can join us on this great trip. The vertical puffin image was created by David Tipling. The rest–almost all from the UK, are mine :). |
UK Puffins and Gannets IPT July 2-9, 2014. 5 full days of puffins and two half-days of gannet boat photography: $4,999 USD. Limit 10 + the 2 leaders.
Desperately seeking: 1 female roommate & 1 male roommate.
With 5 folks registered, this trip is a go.
Fly to Edinburgh (say “ED-in-BRUH”), Scotland on a red eye flight on July 1st arriving on the early morning of July 2 or certainly before 10am. UK folks who plan on driving please contact me via e-mail immediately.
There are direct flights to Edinburgh from both Philadelphia and Toronto. If you learn of any others please advise via e-mail so that I may share with all the interested folks. Fly home mid-morning on July 9. UK locals and our many European friends are of course welcome.
With 5 deposits in hand, this trip is a go; you can buy your flights now :).
What’s included:
5 full DAYS on the best UK puffin boat; trips to 2 different islands–all dependent on decent weather, i.e, no major storms. Seabirds including scads of Atlantic Puffin both in flight and perched, Razorbill, Great Cormorant, Shag, and others likely. The trip is timed to maximize the opportunities for photographing the puffins bringing fish back to the nests. All boat fares and landing fees are included. The boat leaves at 9:30am. We have two hours on the first island. We are then picked up and head to the 2nd island for a 2+ hour session. The weather is typically cloudy bright.
One late-afternoon (2 July) and one early morning (probably 8 July) trip on a gannet photography boat where the birds are fed and dive very close to the boat. Both are dependent on good weather but we do have some flexibility. Boat fares and the cost of the fish are covered. Each will consist of a one hour outbound ride, two hours of diving Northern Gannet photography (with 6 boxes of fish) and the one hour return trip.
The tentative, weather-dependent itinerary:
July 2: airport pick-up no later than 10am UK time. Lunch on your dime. Drive to hotel. Afternoon gannet boat trip/time TBD.
July 3, 4, 5, 6, & 7: Full Day Puffin Boat trips as noted above.
July 8: early morning Gannet Boat trip. Afternoon: Small group Image review and Photoshop sessions. Pack for the trip home.
July 9: early morning departure for Edinburgh Airport (EDI).
The itinerary is subject to change to ensure the best possible photographic opportunities.
A super-telephoto lens is not required on this trip. The 300mm f/2.8s are ideal. I will be bringing one along with my 200-400mm with Internal Extender, my 70-200 f/2.8L IS II, and a shorter zoom lenses. Plus three 1.4X and two 2X TCs, a Gitzo 3532 LS Carbon Fiber tripod, and my Mongoose M3.6. I may go tripod-less on the puffin trips at times…. Or not…. All photography on the gannet boat will be hand held. It is likely that the 70-200s will be ideal for the gannets.
7 nights lodging in an older but excellent hotel just a few minutes from the puffin boat dock with about a 70 minute ride to the gannet boat. Double occupancy will be the rule though we might be able to offer a single supplement at an exorbitant price. See the hotel info here.
All breakfasts and dinner (at the hotel) from dinner on July 2 through dinner on July 8. And breakfast on our get-away day unless we need to leave earlier than they serve to make our flights home…
Airport pick-up until 10am on July 2–this should not be a problem as there are lots of red-eye flights from the US to Edinburgh.
All ground transportation. Airport return on the early morning of July 9. We may be getting up very early on July 9th.
Two great leaders; Denise Ippolito and yours truly will provide personalized and small group in-the-field instruction. As usual, the closer you stay to us and the more questions that you ask the more you will learn. We will of course point out the best situations. You will learn to see these great situations for yourself, to get the right exposure every time after making a single test exposure, to work in Manual mode, and to design pleasing images by mastering your camera’s AF system. You will learn the basics of photographing birds in flight and how the relationship between light direction and wind direction impacts the photography of both birds in flight and perched puffins. And tons more.
We will be conducting informal, small group image review and Photoshop sessions after dinner. All are invited to bring their laptops. Image critiques of your five best images will be done after the trip upon request.
Early morning castle photography right near the hotel is an option for the early risers. In the event of inclement weather or stormy seas there is the possibility of bird photography along the coast. Early evening bird photography along the coast is also optional.
Not included: all lunches–for the most part we will need to pack lunches for the puffin trips, or you may opt to skip lunch. Your round trip airfare from home to Scotland. Booze, wine, and any other beverages other than coffee and tea at breakfast.
A non-refundable deposit of $2,000 USD is required to hold your spot so please check on flights and your schedule before committing. The balance will be due on 15 May so you may wish to pay the whole thing at once. Overseas folks may e-mail for wire transfer info. Our $15 wire transfer fee will be added to your balance.
Trip insurance is highly recommended as your deposit (less a $200 cancellation fee) will not be refunded unless the trip fills completely. I, and my family, use Travel Insurance Services.
After letting us know via e-mail that you will be coming, please send your deposit check made out to “Arthur Morris” to us as follows:
Arthur Morris/BIRDS AS ART
PO Box 7245 (US mail) or 4041 Granada Drive (if by courier).
Indian Lake Estates, FL 33855
My friend David Tipling, with multiple BBC honored images and the author of dozens of photo illustrated books, helped with the planning and arrangements for this trip.
If you have any questions, please contact me via e-mail.
Support the BAA Blog. Support the BAA Bulletins: Shop B&H here!
We want and need to keep providing you with the latest free information, photography and Photoshop lessons, and all manner of related information. Show your appreciation by making your purchases immediately after clicking on any of our B&H or Amazon Affiliate links in this blog post. Remember, B&H ain’t just photography!
….. …..
Typos
In all blog posts and Bulletins, feel free to e-mail or to leave a comment regarding any typos, wrong words, misspellings, omissions, or grammatical errors. Just be right. 🙂





Or should that have been “affect”?
Nope. Effect is correct. Affect is a verb.
I love this image. It’s dynamic and very direct. I especially like the underside of the near wing, which has a beautiful hand-painted effect.
Many thanks. I love it too.
Hi, Artie, and thanks. Beautiful photo. I didn’t know that ospreys ate salad. 🙂 I have done similar at times–washed out the sky to get a properly exposed bird–but I always wish I could get both properly exposed, either to get a nice blue sky or to see some cloud detail. I think I’d like your image even better that way as well.
The water hyacinth is lining for the nest. I like it much better this way than with a blue sky with all the resultant shadows. High key images are an acquired taste. Perhaps there is hope for you :)….
I hope there’s hope for me.:) Thanks. Yes, I knew it wasn’t really eating salad.
I hope there’s hope for me! Thanks. Yes, I knew it wasn’t really eating the salad.
Perfectly exposed Osprey – looks great – salad for with his fish supper, no doubt. Since the shot was hand-held, what were you doing with the Mongoose Integrated Flash Arm?
Best wishes, Gerald
Thanks. Another cut and paste typo. It has been fixed. artie
I love the high-key look and the greenery adds so much! Beautiful wing positions and head angle 🙂
Thanks Lady D.