The Streak Continues: 249
This post was published at 6:38am from my home at Indian Lake Estates, FL. Yesterday, I enjoyed a nice swim, an ice bath, a productive but relaxing day of work, and another good night of sleep. This post, which took me about 2 hours to prepare, marks 249 consecutive days with a new enjoyable and educational blog post. Again, today’s post is quite educational. 🙂
With so many folks getting in the habit of using our B&H links and our Amazon logo-links, why quit now? April, May, and June were fantastic. July was good. Lots of folks are getting the message: using my affiliate links does not cost you a penny and helps support my efforts here. To show your appreciation, I do ask that you use our B&H and Amazon affiliate links on the right side of the blog for all of your purchases. Please check the availability of all photographic accessories in the BIRDS AS ART Online Store, especially Gitzo tripods, Wimberley tripod heads, and the like. We sell only what I have used and tested, and know that you can depend on. We will not sell you junk. We know the tools that you need to make creating great images easy and fun. And we are always glad to answer your gear questions via e-mail.
You can find the following items in the store: Gitzo tripods, Mongoose M3.6 and Wimberley heads, plates, low feet, and accessories, flash brackets, , Delkin e-film Pro Compact Flash Cards, LensCoat products, and our unique line-up of educational materials including ABP I & II, Digital Basics, Site and Set-up e-Guides, Canon and Nikon Camera Users and AF e-Guides, and MP-4 Photoshop video tutorials among others.
I would of course appreciate your using our B&H affiliate links for all of your major gear, video, and electronic purchases. For the photographic stuff mentioned in the paragraph above we, meaning BAA, would of course greatly appreciate your business. Here is a huge thank you to the many who have been using our links on a regular basis and visiting the BAA Online store as well.
|
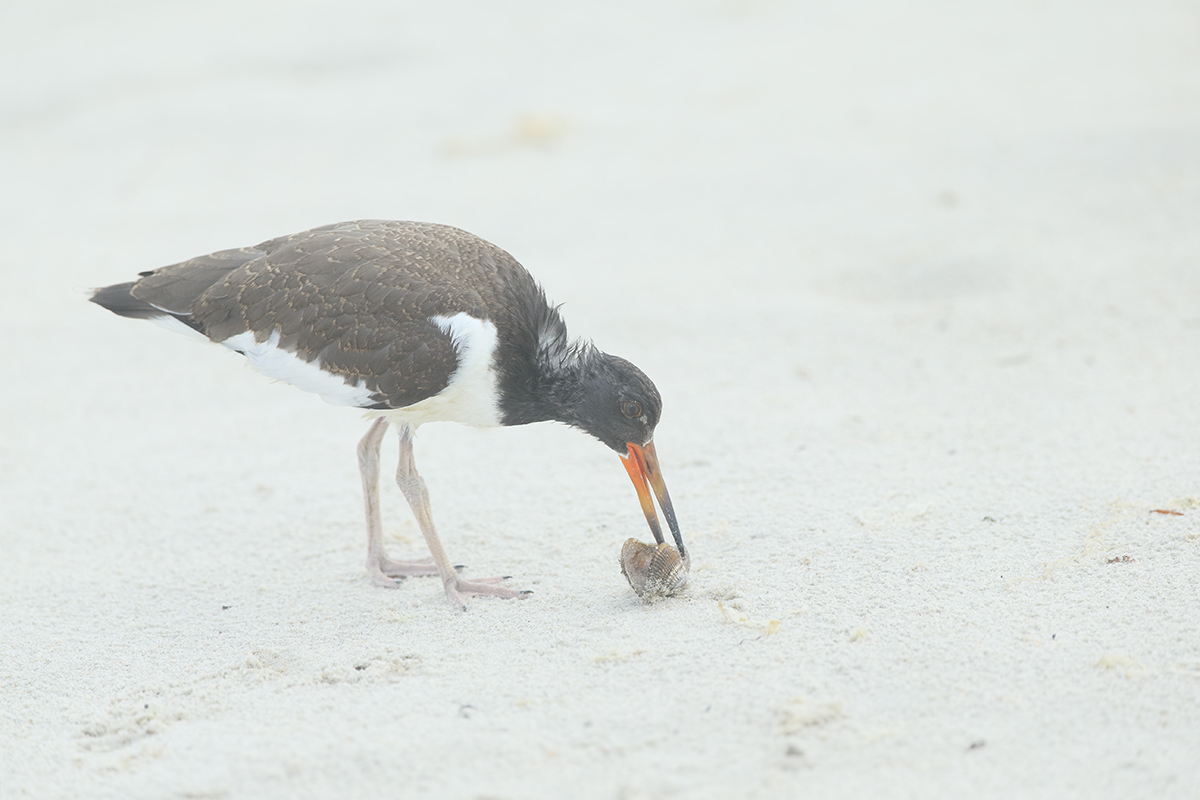
This image was created on first (very foggy) morning of this July’s Nickerson Beach IPT with the hand held Canon EF 300mm f/2.8L IS II USM lens, the Canon Extender EF 1.4X III, and the Canon EOS-1D X. ISO 400. Evaluative metering +2 stops off sand: 1/800 sec. at f/4.5 in Manual mode was a slight under-exposure. AWB. One sensor to the left of the central sensor/AI Servo-Surround Rear Focus AF was active at the moment of exposure. Click on the image to see a larger version. This JPEG represents the original image as it came out of camera. |
The Image Optimization
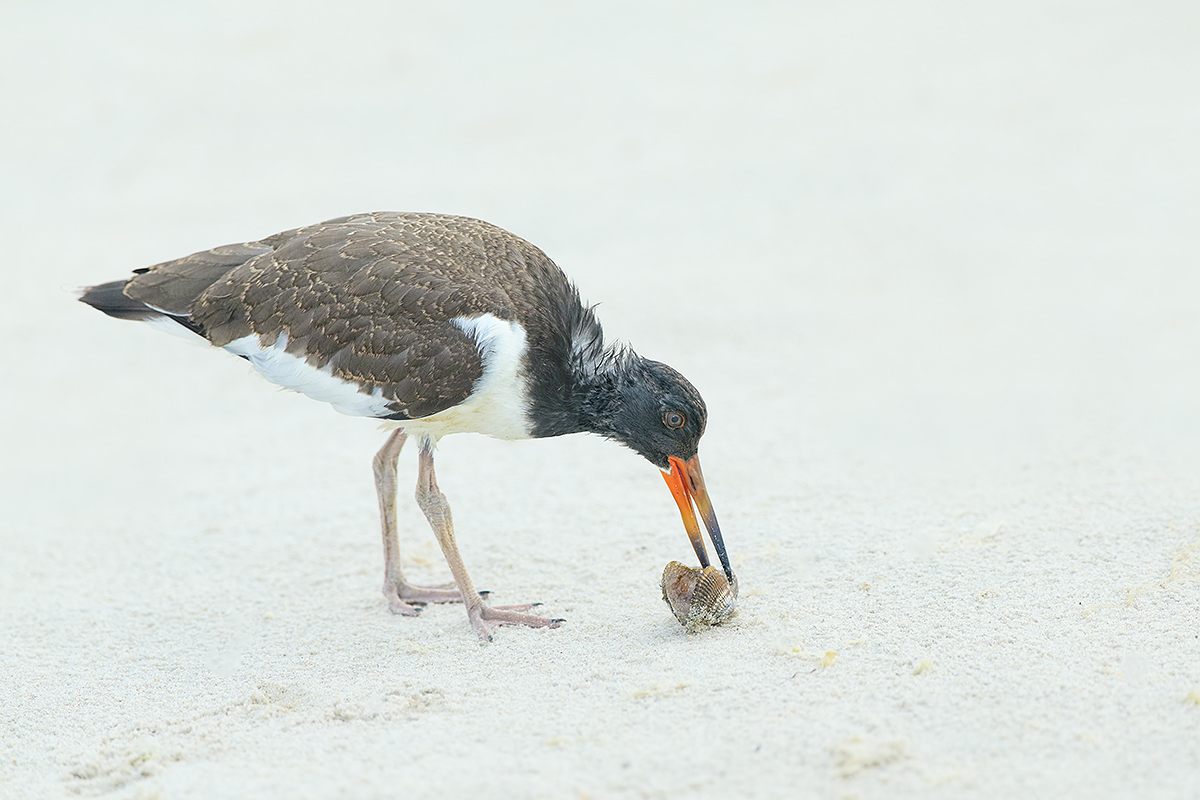
The original image above was flat and a bit under-exposed. Note particularly the dull, dead look of the the bird’s face….After converting the image in DPP, I brought it into Photoshop CS-6. There, I did some beach clean-up with the Patch Tool, the Clone Stamp Tool, and the Spot Healing Brush. Next I selected the bird only (including the legs, feet, and bill) using the Quick Selection Tool, saved the selection, put the selection on a layer (Ctrl J), and ran my NIK 50-50 pre-set on the bird layer. (See below for detailed instructions on how to create your own pre-set recipes in NIK Color Efex Pro 4.) I flattened the image and still not happy with the pop, I duplicated my Background Copy layer, ran Auto Contrast on that layer, and reduced the opacity to about 30%. Next I re-loaded the selection, put it on its own layer, and applied a 15/65/0 Contrast Mask. To finish up I boosted the Vibrance, did just a bit of Eye Doctor work, did some Selective Color work on the whole image by adding 3 points of BLACK to the BLACKs and to the NEUTRALS, and finished the image off with some Tim Grey Dodge and Burn adjustments. You can see the optimized image below.
Image Capture Question
What could I/should I have done to create a more intimate image?
The DPP RAW Conversion Guide
To learn why I use Canon’s Digital Photo Professional (DPP) 3.14 to convert every image that I work on, click here.
Coming soon: the DPP 4.0 RAW Conversion Guide by Arash Hazeghi with Arthur Morris. I will be starting to use DPP 4.0 this week as I get into editing the new guide.
Digital Basics
Most everything that I did to optimize today’s image above is detailed in my Digital Basics File–written in my easy-to-follow, easy-to-understand style. Are you tired of making your images look worse in Photoshop? Digital Basics File is an instructional PDF that is sent via e-mail. It includes my complete digital workflow, dozens of great Photoshop tips, details on using all of my killer clean-up tools, the use of Contrast Masks, several different ways of expanding and filling in canvas, all of my time-saving Keyboard Shortcuts, Quick Masking, Layer Masking, and NIK Color Efex Pro basics, Digital Eye Doctor, Tim Grey Dodge and Burn, how to create time-saving actions, and lots more.
APTATS I & II
Learn the details of advanced Quick Masking techniques in APTATS I. Learn Advanced Layer Masking Techniques in APTATS I. Mention this blog post and apply a $5 discount to either with phone orders only. Buy both APTATS I and APTATS II and we will be glad to apply at $15 discount with phone orders only. Please call Jim or Jennifer at 863-692-0906 weekdays to order.
|
This, the optimized image, was created from the original image that opened this blog post. Note especially the pop of the optimized image as compared to the original image and note the improved look of the young American Oystercatcher’s face. There were more than a dozen young oystercatchers on the beach during the Nickerson Beach IPT–all of them were silly tame. |
NIK Color Efex Pro 4
I began using NIK Color Efex Pro 4, my eyes opened as usual by Denise Ippolito. Simply put, there is nothing that can compare to Tonal Contrast and Detail Extractor in CEP4. Years ago, the entire NIK suite was quite expensive and most folks usually purchased only one or two the programs. Denise and I had a NIK affiliate account and we did very well for a few years. Then Google purchased NIK, drastically slashed the cost of the suite (all good), and eliminated the affiliate program (all bad :)). IAC, you can still save 15% by entering the code BAA at check-out.
From yesterday’s comments:
Jack Goodman
August 5, 2014 at 12:31 pm
Artie, I can’t seem to find a Nik 50-50 preset in my collection. Under which program will I find it.
Arthur Morris/BIRDS AS ART
August 5, 2014 at 6:08 pm
Jack, Please see tomorrow’s blog post for a tutorial. artie
So, this one’s for Jack:
NIK Color Efex Pro 4 Fifty-Fifty (50/50) Pre-set Tutorial
First use the Quick Selection Tool (my keyboard shortcut W) to select only the bird. Then place the selection on its own layer (Ctrl J). Then go to Filter/NIK/Color Efex Pro 4. Then Select Tonal Contrast from the list of Nature filters on the left. Now go to the right side of the NIK dialogue box. Click on the downward facing arrow just to the left of the words Control Points and then move the Opacity slider to 50%. Then click on Add Filter and select Detail Extractor from the list of Nature filters on the left. Again, click on the downward facing arrow just to the left of the words Control Points and then move the Opacity slider to 50%.
Now you are ready to save your recipe. Click on Save Recipe; it is right next to Add Filter. The program will prompt you to enter the name for your recipe. You can name it 50-50 TC/DE, TC for Tonal Contrast and DE for Detail Extractor. Then hit OK and your new recipe will be applied to the layer.
Whenever you would like to apply your 50-50 recipe simply click on the recipe on the side of the NIK dialogue box when the program opens. You may have to click on Recipes to see your recipe list or it may open to that. In most cases I reduce the opacity of the NIK 50-50 layer to about 50%. Rarely I leave it at 100% Opacity. With some landscape and flower images I apply my 50-50 pre-set to the whole image. You can always use a Regular Layer Mask to paint away the effect (at varying levels of opacity).
MP4 Photoshop Tutorial Videos
Some folks learn much better by seeing and listening than by reading the instructions. If you are in that group, you can learn a ton by watching me work in Photoshop by purchasing a few of our MP4 Photoshop Tutorial Videos. Click here to see the collection.
|
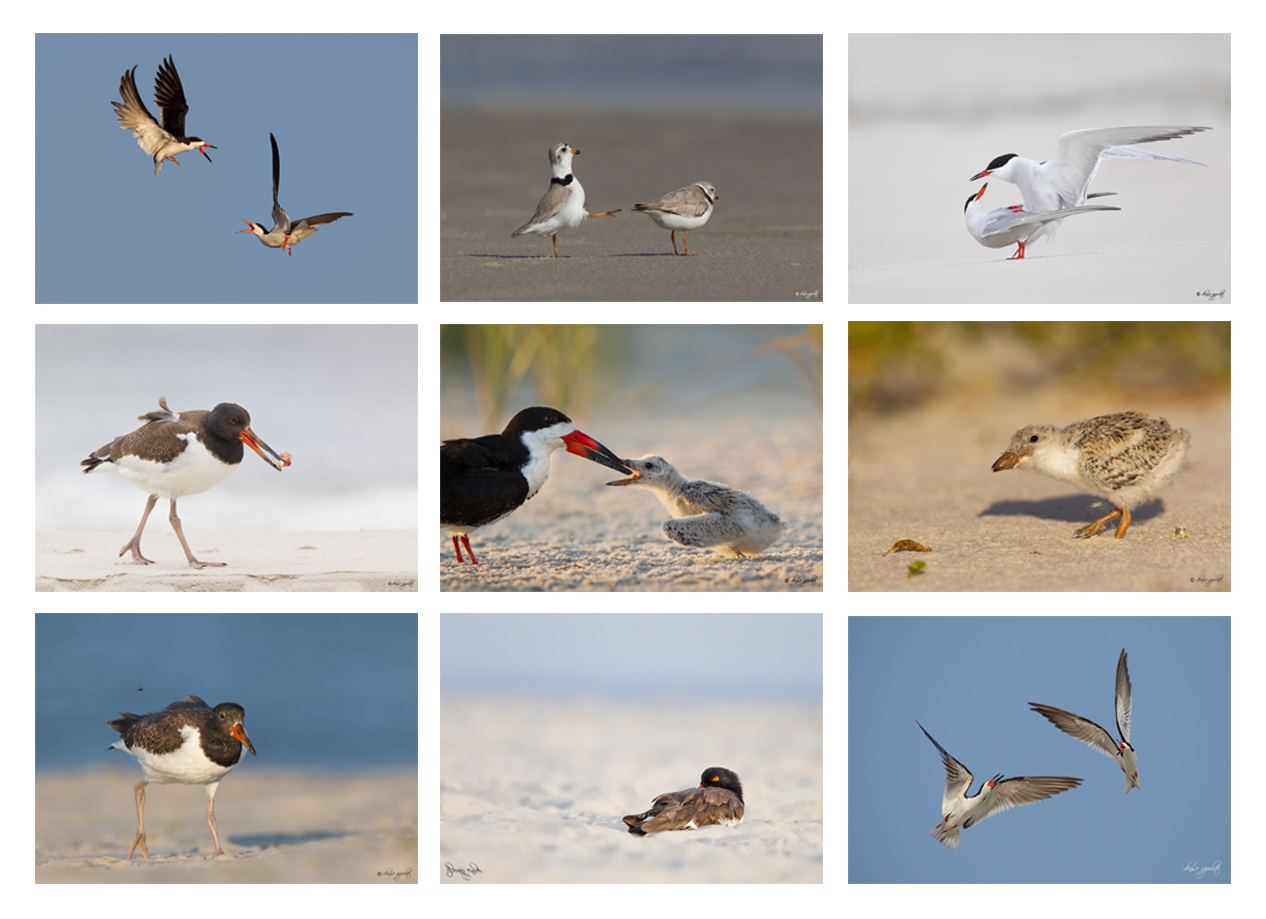
Images and card design by Denise Ippolito/A Creative Adventure |
Denise Ippolito Nickerson Beach Workshop ~ Saturday & Sunday August 23-24th, $699.00 includes 4 photo sessions and 2 Image Review/ Photoshop sessions.
One great leader! Please let Denise know that you learned of this workshop through BIRDS AS ART. Click here and scroll down to register.
From Denise
There is just too much going on at Nickerson to stay away. I have decided to do a 2-day workshop at Nickerson Beach this August. By then lots of the Black Skimmer chicks will be hatched and there should also be plenty of action! The skimmers are lots of fun to photograph in flight, especially when they battle. We should also have good opportunities to photograph American Oystercatcher, Common Tern and maybe even some Least Terns and Piping Plovers. I will do my very best to get the group in position to capture great images. I will share with you my flight techniques and my techniques on getting you close to your subject. I will help you to recognize good situations and become a better bird photographer. This workshop needs 6 participants.
Saturday Schedule: 5:45am- 9:45am morning photography session, Lunch Break – Photoshop/Image Review, Gear and Camera settings session, Afternoon Break, 4:30pm- 7:30pm afternoon photography session.
Sunday Schedule: 5:45am- 9:45am morning photography session, Lunch Break- Photoshop/Image Review, Afternoon Break, 4:30pm- 7:30pm afternoon photography session.
We will photograph in the morning on Saturday, then break for an early lunch (included in the price). During lunch we will do image review and Photoshop lessons. After lunch I will go over gear handling tips and camera settings with the group. Then we will take an afternoon rest. This will give you time to download your images and have some time to yourself before we head back out in the late afternoon/early evening. Sunday we will wake up and have basically the same schedule as Saturday. This schedule is subject to change depending on conditions and wildlife. 🙂
Gear Suggestions:
I recommend that you bring your longest lens. If that is a 70-200mm lens than you will need a teleconvertor. You should have at the very least 400mm of focal length. A sturdy tripod- preferably w/o a center column. A complete list of gear recommendations as well as hotel recommendations and general information sheet will be provided at sign up.
Please contact Denise via e-mail with any questions.
Be sure to like and follow BAA on Facebook by clicking on the logo link upper right. Tanks a stack!
Support the BAA Blog. Support the BAA Bulletins: Shop B&H here!
We want and need to keep providing you with the latest free information, photography and Photoshop lessons, and all manner of related information. Show your appreciation by making your purchases immediately after clicking on any of our B&H or Amazon Affiliate links in this blog post. Remember, B&H ain’t just photography!
Amazon Canada
Many kind folks from north of the border, ay, have e-mailed stating that they would love to help us out by using one of our affiliate links but that living in Canada and doing so presents numerous problems. Now, they can help us out by using our Amazon Canada affiliate link by starting their searches by clicking here. Many thanks to those who have written.
Typos
In all blog posts and Bulletins, feel free to e-mail or to leave a comment regarding any typos, wrong words, misspellings, omissions, or grammatical errors. Just be right. 🙂


OT — I’d like to know what laptop are you using. All I can find is an blog from about 5 years ago when you bought an HP. Maybe I missed something more recent. I need a new one… Thanks!
I used a killer rugged HP for more than 5 years…. Right now I am in a state of flux. I hope to have some news for you fairly soon so stay tuned. artie
Artie, when you use the Nik filter(s) do you change anything aside from the opacity? I often use Tonal Contrast and Detail Extractor in my workflow but I nearly always find myself tweaking more than the opacity to suit my eye. For instant under Tonal Contrast you have Highlights, Midtones, Shadows, and Saturation sliders along with a few “Contrast Types.” There are also 2 additional Shadows and Highlights sliders that I generally don’t play with. The same applies to the Detail Extractor filter with different sliders. Thanks and best wishes.
I rarely touch the various sliders…. artie
Thanks so much for the Nik 50-50 tutorial. It’s been mentioned so many times in your blog and now I finally know the formula.
YAW. I have typed those words before but could not figure out where or when 🙂 artie
Artie, I imported your image to PSCC2014 and here are my adjustments: temperature -3, exposure -0.15, contrast +5, shadows +3, blacks -51, and vibrance +3. It warms the beak and eye area. The bird stands out from the white sand a little more. Maybe next I might adjust the back round. Thanks for the 50/50 tutorial.
Thanks Art. Feel free to shoot me a 1200 wide jpeg via e-mail. As I say here often, if you had the same person optimize the same image for 7 straight days sitting at the same computer in a controlled lighting situation they would come up with 7 images each at least slightly different from the rest. Then throw in the great variety of ambient light that we are working in and the differences in the monitors that each of us is using and it is easy to see how a given image can look so different at times….
I think you should have/could have gotten down much lower, ideally close to the level of the oystercatcher’s head and the shell, to create a much more intimate portrait rather than shooting down on it. It might have added a little variety in the background as well, perhaps the color of the water which perhaps could have made the foggy conditions more apparent to the viewer.
For those who have purchased 2 or more NIK suites individually in the past (I had purchased Color Efex 2 and the HDR suite on separate occasions) and registered with them, my understanding is that if you contact NIK they will give you the entire suite now that they have the new pricing structure. They did that for me when I moved to a new computer. However, with all the improvements in Lightroom 5 such as the adjustment brush and radial filter, I rarely use any of the NIK programs (or any other processing software) any more. I like that Lightroom, unlike NIK, is non destructive to RAW files so if you decide in the future that you don’t like what you’ve done with it you can go back to the original RAW file and reprocess it.
All good but the stuff about NIK being destructive…. You should be saving your optimized TIFF file and your RAW file. Thus, if you want to start over you can simply start with the RAW file….
True. I’ve screwed up by not always doing that and regretted it later.
What could I/should I have done to create a more intimate image?
This is based on a few assumptions, but adding the 2x to fill the
frame more of the head/beak/shell vs a whole a body shot or maybe
back a little a more, behind the legs…something to put more emphasis
on the beak and shell.
Of course you could always to try and get closer without the 2x by
moving up or swapping the 300 for the 200-400 or 600 if you had it.
Doug
Good try Doug, but no cigar. The bird was silly tame; I could have petted it.
Here is a clue: I was being a bit lazy…. artie
The only thing I can think of when I hear ‘lazy’ is not getting lower to
the ground.
Doug
That’s exactly the answer he is looking for if you ask me :).
Are you referring to Jack? 🙂
Sorry Artie I don’t have the slightest idea who Jack is? Maybe a reference a Dutch person won’t get? 😛 But I meant that I think Doug was totally right about getting lower to the ground.
Jack is the guy who requested the NIK tutorial. As your comment left room for confusion, I asked. No problema. artie
Artie still calls me Dennis 🙂
Doug