|
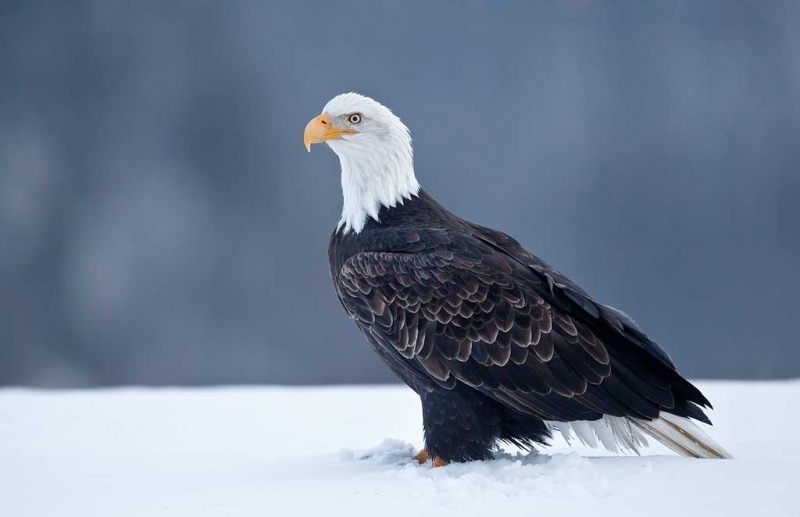
Bald Eagle, adult on snow. Near Homer, AK. This image was created with the tripod-mounted Canon 800mm f/5.6L IS lens and the EOS-1D Mark IV. ISO 400. Evaluative metering at zero: 1/125 sec. at f/5.6 set manually was well underexposed. Lightened and ran noise reduction in ACR. Central Sensor/Rear Focus/AI Servo AF and recompose. Click here if you missed the Rear Focus Tutorial. Lens/camera body Micro-adjustment: +2. For a greater appreciation of the image, click on the photo. Then click on the enlarged version to close it. |
So It’s Bald Eagles You Wanted…
Homer has been great. The second group has two days left. Lots more on the two IPTs in the next BAA Bulletin. I leave Homer on Friday night for my red-eye flights. I am scheduled to arrive in Orlando just after 5pm on Saturday and should be back in ILE in time for dinner and LSU/Alabama.
I am using NIK Color Efexx Pro 4.1 on almost every image now; it is changing my workflow. I will share more on this amazing plug-in here soon. For the image above I did two Color Efex layers, one for tonal contrast at 70% and to improve the look and the apparent sharpness of the bird only (using a hide-all mask) and another with Detail Extractor at 20% to bring up the detail in the head only again using a Hide-All mask (and then painting away the head only). If you are totally confused by Layer Masks (as I was for ten years) see “Layer Masking for Dummies” in the last free update of Digital Basics. DB is a PDF sent via e-mail (only $20) that contains my complete digital workflow and dozens and dozens of great Photoshop techniques.
You can save 15% on all NIK products by clicking here and entering BAA in the Promo Code box at check-out. Then hit Apply to see your savings. I have been using and learning and loving COLOR EFEX and Viveza and SILVER EFEX also. We will be bringing you lots especially on those first two soon.
|
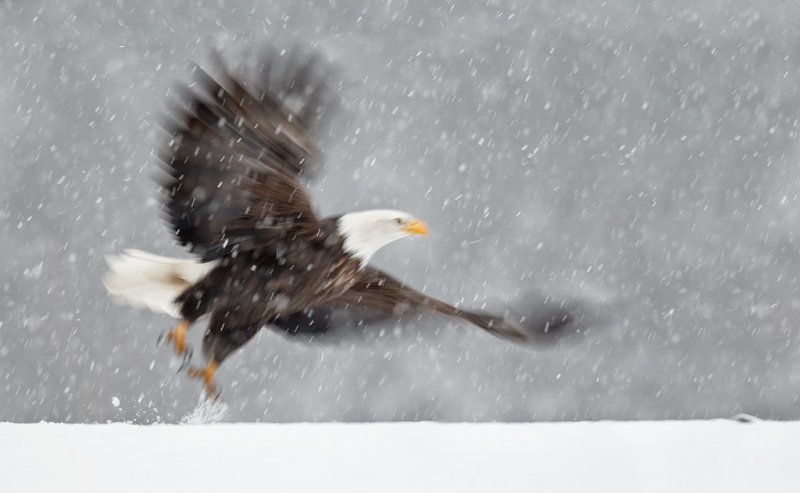
Bald Eagle taking flight in snow, Near Homer, AK. This image was created with the tripod-mounted Canon 800mm f/5.6L IS lens, the 1.4X III TC, and the EOS-1D Mark IV. ISO 400. Evaluative metering +2/3 stop: 1/100 sec. at f/8 set manually. Central Sensor (by necessity) Rear Focus/AI Servo AF. See below for additional details. Click here if you missed the Rear Focus Tutorial. Lens/TC/camera body Micro-adjustment: +4. For a greater appreciation of the image, click on the photo. Then click on the enlarged version to close it. |
It got a bit brighter so I added the 1.4X TC to photograph this bird. I was doing portraits when it started to take flight. In such a low contrast situation I knew that pressing the rear focus button in an attempt to focus track the bird would be futile so I simply framed the bird as it took off as best I could and made a few images. I knew that at only 1/100 sec. I had at least a decent chance to create a pleasingly blurred image. Added canvas top and right, filled in with several Quick Masks, and did a bit of Eye Doctor work all as described in detail in Digital Basics. DB is a PDF sent via e-mail (only $20) that contains my complete digital workflow and dozens and dozens of great Photoshop techniques. As with the two images above, Nik Color Efex made this one sing for me.
|
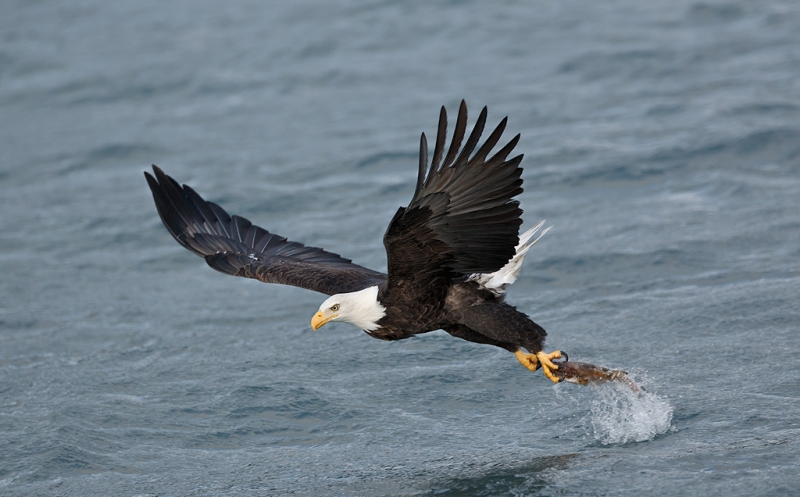
This image was created with the Canon 70-200mm f/2.8L IS II lens, the 1.4X III TC (handheld at 215mm) with the Canon EOS-1D Mark IV. ISO 800. Evaluative metering +1 1/3 stops off a gray cloud: 1/1000 sec. at f/4 set manually. Lens/TC/camera body Micro-adjustment: -8. Central Sensor/Rear Focus/AI Servo AF active at the moment of exposure. To see a larger size, click on the photo. Then click on the enlarged version to close it. |
I actually prefer cloudy bright (as in the image above) to full sun for most bald eagle photography. This one qualifies as a dime a dozen image as we are tossing pollack (sold as bait to fishermen) to attract the birds to the boat. Due to my travel schedule I will not be returning to Homer until March 2013. If you are seriously interested in joining me then please shoot me an e-mail with the words Homer March 2013 cut and pasted into the Subject line.
|
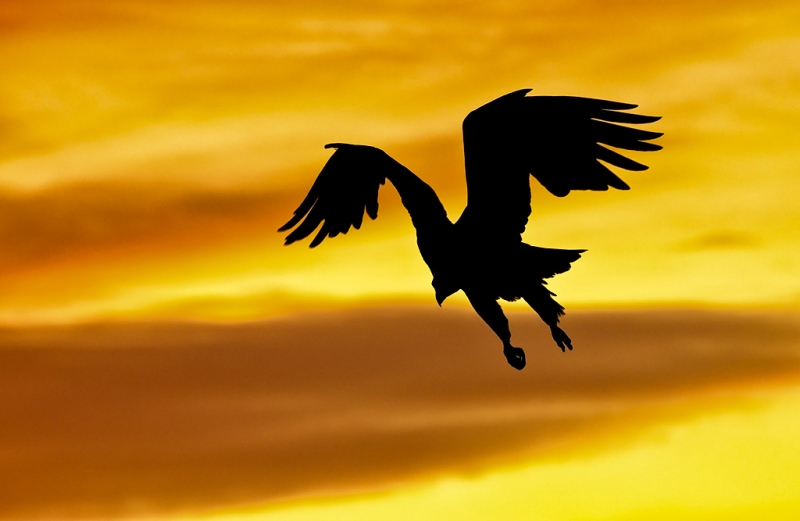
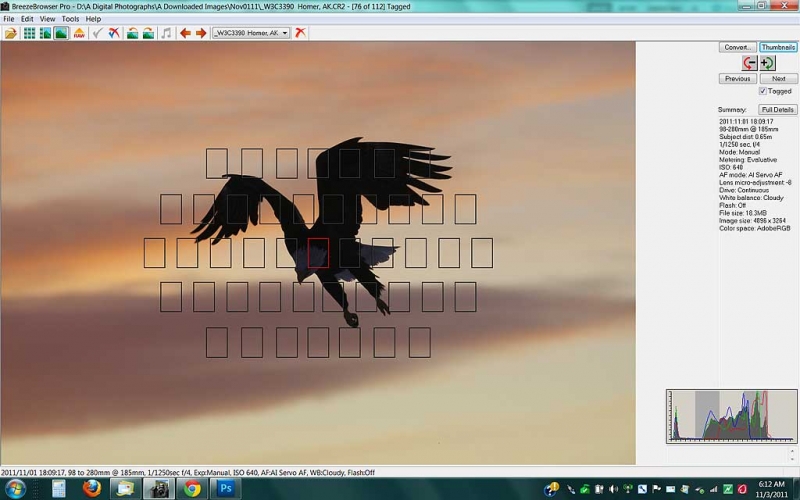
This image was created with the Canon 70-200mm f/2.8L IS II lens, the 1.4X III TC (handheld at 185mm) with the Canon EOS-1D Mark IV. ISO 640. Evaluative metering +1 1/3 stops off the sky: 1/1250 sec. at f/4 set manually. Lens/TC/camera body Micro-adjustment: -8. Central Sensor/Rear Focus/AI Servo AF active at the moment of exposure. To see a larger size, click on the photo. Then click on the enlarged version to close it. |
As you can see in the BreezeBrowser screen capture below, I cropped this image from the right and from below to improve the composition and then juiced up the sunset colors. If you missed the silhouette lessons click here and here.
|
As always you can learn a ton by studying this BreezerBroswer Main View screen capture. |
Which is Your Favorite?
Take a moment to leave a comment and let us know which of the four eagle images is your favorite, and why. It’s OK if you love all four of them equally :).
Earn Free Contest Entries and Support both the Bulletins and the Blog by making all your B & H purchases here.
More and more folks are earning multiple contest entries with their B & H purchases. See here for details on that. Eleven great categories, 34 winning and honored images, and prize pools valued in excess of $20,000. Click here to visit the competition home page.
Shopper’s Guide
Below is a list of the gear used to create the images in today’s blog post. Thanks a stack to all who have used the Shopper’s Guide links to purchase their gear as a thank you for all the free information that we bring you on the Blog and in the Bulletins. Before you purchase anything be sure to check out the advice in our Shopper’s Guide.
Canon 800mm f/5.L IS lens. Right now this is my all time favorite super-telephoto lens.
Canon 70-200mm f/2.8L IS II lens. Man, I am loving this lens on my shoulder with the 2X III teleconverter. I also use it a lot with the 1.4X III TC.
Canon 1.4X III Teleconverter. Designed to work best with the new Series II super-telephoto lenses.
Canon EOS-1D Mark IV professional digital camera body. My two Mark IVs are my workhorse digital camera bodies.
And from the BAA On-line Store:
LensCoats. I have a LensCoat on each of my big lenses to protect them from nicks and thus increase their re-sales value. All my big lens LensCoat stuff is in Hardwood Snow pattern.
LegCoat Tripod Leg Covers. I have four tripods active and each has a Hardwood Snow LegCoat on it to help prevent further damage to my tender shoulders 🙂
Gitzo GT3530LS Tripod. This one will last you a lifetime.
Mongoose M3.6 Tripod Head. Right now this is the best tripod head around for use with lenses that weigh less than 9 pounds. For heavier lenses, check out the Wimberley V2 head.
CR-80 Replacement Foot for Canon 800. When using the 800 on a Mongoose as I do, replacing the lens foot with this accessory lets the lens sit like a dog whether pointed up or down and prevents wind-blown spinning of your lens on breezy days by centering the lens directly over the tripod.
Double Bubble Level. You will find one in my camera’s hot shoe whenever I am not using flash.
Be sure to check out our camera body User’s Guides here.
The Lens Align Mark II. I use the Lens Align Mark II pretty much religiously to micro-adjust all of my gear an average of once a month and always before a major trip. Enjoy our free comprehensive tutorial here.
Canon EOS-1D Mark IV User’s Guide. Learn to use your Mark IV the way that I use mine. Also available for the 7D and the Mark III here.



I love the blur!!There is such a strong sense of movement that it almost seems that you could click on it and you would be there in the cold snow with the eagle.
Hi Artie: Glad you had a great Homer trip. My question is, at what point in your workflow do you apply the Nik fliters? Thanks. Love, Mike
Thanks Mikie. I run Tonal Contrast on it’s own layer (usually reducing the Opacity to 50-80%) when I bring the image into Photshop after converting. And I run Detail Extractor also on its own layer (usually at about 20%) either then or after doing whatever I need to do in Photoshop (such as background clean-up or Eye Doctor work). The latter is far better than either Multiply or Linear Burn. I usually use either a Hide-All or a regular layer mask so that I can paint the effects that I want either in or out. Details on the latter in Digital Basics. I will be showing some examples soon. artie
I love both the snowy shots, and the silhouette is epic. But to call the fish catch dime a dozen, when this bird looks a million dollars! Well young man, you should be ashamed. ;¬)
Artie
Love all th p[ictures but my choice is the Silhouette because it is differnt not the same old same old.
BTW I have been using the NIK filter to spice up my pictures also they are A-1
:-(!
:-), TY – obviously didn’t look far enough!!
Thanks all for your kind comments. My very favorite is the blur for the motion and for the fact that I decided to push the shutter button even though I knew that the image would be blurred… The first image and the silhouette are tied for 2nd place for me. The dime a dozen would be my last place choice (though it is still a fine image. 🙂 artie
The blur is my favorite by a mile – very creative and dynamic. The heavy snow really adds to it. The silhouette would be my 2nd pick. The rest, as you eluded to, are “a dime a dozen” in Homer 🙂
I like no. 3 for the action/motion and sharpness but I like no.1 too and the silhouette, I’m not a big fan of blurs.
As seems to happen a lot for me, which I like depends on how I imagine viewing it. As a print I like #1 best. I could spend a lot of time studying the feather detail, especially between the wing and neck. For online viewing I prefer #2, the motion everywhere (bird and snow) is nice. It also reminds me of some of the better illustrations in children’s books for capturing a spirit.
I like number 3 – the eagle snatching the fish because you caught it perfectly at the full extension of it’s wings, got the talons in clear focus and still have astounding detail in the rest of the shot. Very cool. Number 1 is my second favorite for it’s ‘attitude’, closeness and detail.
My favorite is the first one, for the reasons previously stated . . . majestic, real, and who can get THAT close to a Bald Eagle and have that kind of photo op?! Not me, here in Minnesota on the Mississippi River! Would love to get to Homer sometime. Now, I’d love to see a similar capture of a Golden Eagle! :o) There’s a challenge for you.
Sorry Becky. Homer IPTs are by small boat only. But, nobody has ever gotten seasick. It can be a bit choppy–even rough–when we cross the inlet but the bay that we photograph in is almost always calm… artie
Oh yeah, :-), images #1 and #3 both grab my gut. #1 is simply majestic!
Mate, your books are the “bees-knees”! All of them in .pdf are in my computer and also on my iPad (app = GoodReader) so that I can refer to them on the iPad while working on an image on the laptop screen. Your DB is so comprehensive that it should be relabeled – Digital Basics For Dummies!
Now, specifically to the topic of “Layer Masking For Dummies”, I have the MARCH 2011 copy where all of the updates are in red. Is there a newer update because, while masking appears to start on p.69 with Quick Masking Basics and goes to p. 73, there isn’t a specific heading “Layer Masking For Dummies”.
Perhaps, I am the dummy and you are simply making a generalized reference to the the layer information; or, there is a newer update!
In any case, pls keep the education flowing!!
TY
YAW. And thanks for your kind words. Yes to the I am the dummy; I did a search for the work “dummies” which took me immediately to Layer Masking for Dummies on page 98 of the March 20111 free Update of Digital Basics. In red yet…. artie
Your stuff is always amazing.
I like al the images. I hope I don’t cause any offence (it is not intentional) but your images are first class … and as far as I am concerned they always have been. I am not against progress or new technology but your first image of the eagle really is amazing, now this may be partly attributable to the new plug in but I bet had you not used it you would have still produced one heck of a good image. My favourite – the first by a mile – love the detail – silhouettes are good but for me they don’t come close to seeing some real detail.
Yes, I could have achieved a similar look in Photoshop but the amazing stuff about Color Efex is that it does things simply and quickly with just a single keystroke. In Photoshop the same work would have been much more difficult and involved and would have taken a lot longer…. And not done it as well. artie
After taking a second look at #1 it is not a relaxed pose but one of alertness. Waiting to take flight at a moments notice. Still my favorite!!
I like #1 the best. I like the relaxed pose and the coldness the image portrays.
I like the third photo best. Why? Because it was the most difficult to capture. Exposure is spot on and the eye of the eagle is in sharp focus. To capture an eagle in flight and keep its eye in perfect focus is quite an accomplishment. Great shot, Artie.
Thanks Charlie. Actually, images like this are a dime a dozen on the Homer IPTs. We teach folks how to get the right exposure and how to achieve sharp focus with both Canon and Nikon gear. artie
Love the silhouette.
Artie, in the first image you indicated you used the central sensor (by necessity). Is that because you were shooting in manual? There was no extender involved.
Thanks Becky. Just a brain typo now repaired:) artie
ps: Let us know which is your fave, and why 🙂