|
|
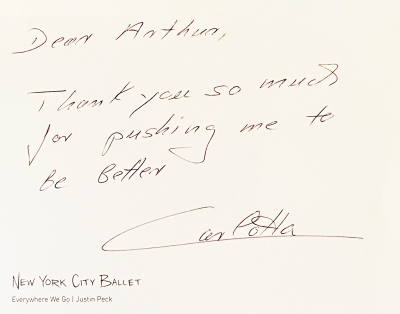
Thank you note from Carlotta Grenier |
Via e-Mail from Carlotta Grenier
Dear Artie,
I just ordered the RawDigger guide and will book a morning session with you in the coming weeks. Thanks again for the great session on Thursday August 4th. Once you loaded my settings onto my a1 body it was as if I had a new camera. I could not believe how well the AF system performed, how sharp the images were even with teleconverters with your simplified AF Methods (only two!), and how easy it was to get the right exposure with Zebras.
On a personal note, you look so good right now, better than I have ever seen you look. You should get at least to 100 and continue being productive as you need to share your knowledge with people who love to learn.
Best
Carlotta
Carlotta is a very young 80 years old. She knew me when my floppy sun hat was new, close to 25 years ago. She loves to photograph horses and birds. Her images continue to do well in her local Connecticut photo club contests.
What’s Up?
There were more clear skies and more southwest winds to deal with on Monday morning. I came up with another new technique for dealing with these difficult, wind-against-sun conditions: I photographed incoming backlit skimmers and terns, many with carrying baitfish for their chicks, with the tripod-mounted 600 GM/2X TC/a/1 rig. I sat to eliminate the distant background of cabanas and buildings and replaced that with a row of beach grass along the bottom of the frame.
On Monday afternoon, with winds in excess of 28 mph in the forecast, I opted to stay in to protect my gear from windblown sand. Just one grain under the Playback button will have you sending your camera in for repairs.
I will be making my first visit to the East Pond at JBWR on Wednesday morning. Water levels and the weather are looking ideal. See below to join me.
Today is Tuesday 9 August 2022. I will be heading to Nickerson early to enjoy the challenge of another wind-against-sun morning. Wherever you are and whatever you are doing, I hope that you too have a great day. This blog post took about 90 minutes to prepare and makes one hundred thirty-eight days in a row with a new one.
So far, seven folks have been in touch about joining me at either Nickerson or JBWR in the coming weeks for an In-the-Field session or two. The first window for doing shorebirds at the East Pond at Jamaica Bay Wildlife Refuge is from 10-12 August, the second window is 24-26 August. See the additional details below.
Please remember to use the B&H and Amazon links that are found on most blog pages and to use the BIRDSASART discount code at checkout when purchasing your new gear from Bedfords to get 3% back on your credit card and enjoy free second-day air FedEx. Please, also, consider joining a BAA IPT. You will be amazed at how much you will learn!
|
|
|
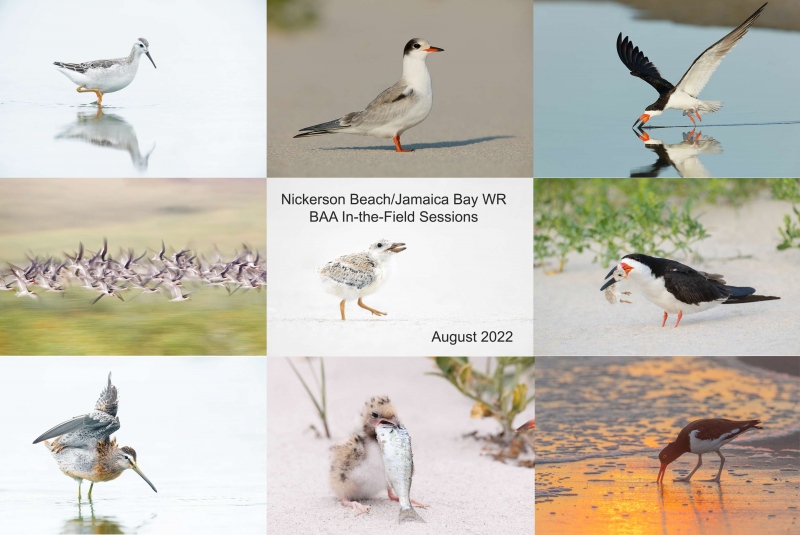
Clockwise from the upper left corner back around to the center: Wilson’s Phalarope, JBWR; just fledged Common Tern, Nickerson; Black Skimmer, adult skimming, Nickerson; Black Skimmer killing tiny skimmer chick, Nickerson; American Oystercatcher foraging at sunrise, Nickerson; Common Tern chick swallowing baby bluefish, Nickerson; Short-billed Dowitcher, juvenile, double overhead wing stretch, JBWR; Black Skimmers, predawn flock blur, Nickerson; Black Skimmer, 10-day old chick, Nickerson. Click on the card to view a larger version. Nickerson Beach/East Pond JBWR composite |
Nickerson Beach/East Pond at Jamaica Bay (JBWR) In-the Field Workshops
Both Nickerson Beach and the East Pond at JBWR offer some of the best midsummer bird photography on the planet. Hundreds of pairs or Black Skimmers and Common Terns along with more than a dozen pairs of American Oystercatchers breed at Nickerson each season so there are lots of chicks of all sizes and handsome fledged young to photograph. Provided that the water levels are low, hundreds of young shorebirds in their handsome fresh juvenile plumages stop by the pond each August on their way south.
Nickerson often reveals nature at it rawest, most basic level. Most days we get to photograph all sorts of dramatic behaviors ranging from skimmers and terns fishing and feeding (and tending) their you. There are often chances to shoot a variety of predatory encounters — gulls eating large skimmer chicks, skimmers eating skimmer babies, and Peregrine Falcons hunting. And rarely, if we are lucky, Peregrine Falcons catching! Consider joining me to learn a ton both about bird photography and the birds.
|
|
|
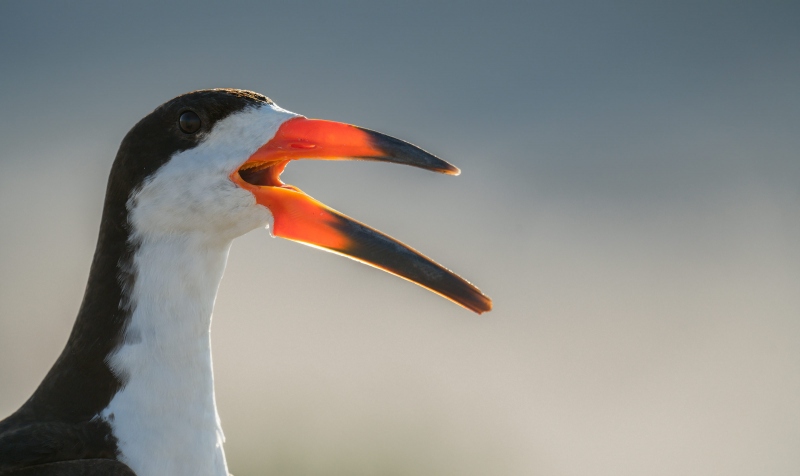
This image was created on 6 August 2022 at Nickerson Beach Park, Lido Beach, Long Island, NY. While seated on dry sand, I used the lowered, no-longer available except from BIRDS AS ART, Induro GIT 304L tripod/Levered-Clamp FlexShooter Pro-mounted Sony FE 600mm f/4 GM OSS lens, the Sony FE 2.0x Teleconverter, and The One, the Sony Alpha 1 Mirrorless Digital Camera). The exposure was determined via Zebra technology with ISO on the thumb dial. ISO 800. 1/800 sec. at f/8 (wide open) in Manual mode. When evaluated in RawDigger, it was determined that there were 20,000 over-exposed pixels. Keep reading to learn why that was a perfect exposure in this situation. AWB at 7:10:41am on a mostly sunny morning. Tracking: Spot S/AF-C with Bird-Eye/Face Detection performed perfectly. Be sure to click on the image to enjoy a high-res version. Image #1: Backlit Black Skimmer chick |
Can an Image with 20,000 Over Exposed Pixels be the Best Exposure?
The key to the success of this image was the light coming through and illuminating the translucent orange of the proximal half of the bird’s bill.
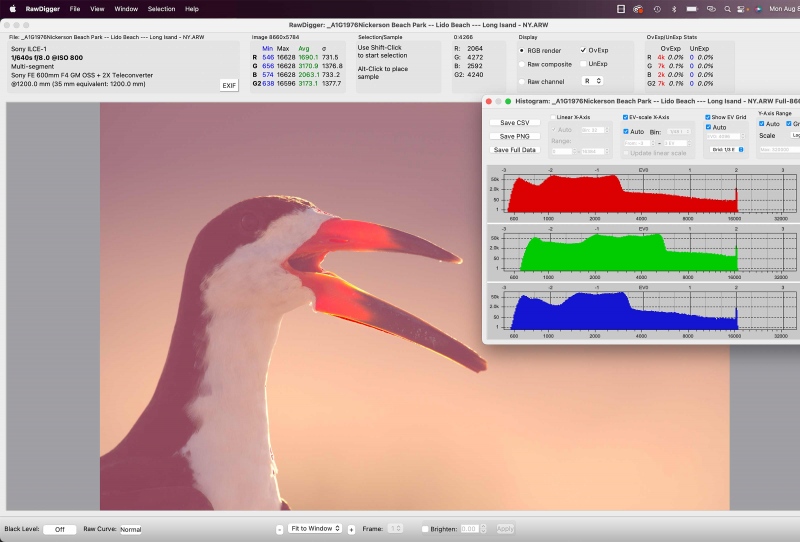
As you can see in the RawDigger screen capture below, nearly all of the OvExp pixels are in the specular highlights along the bottom edge of the bill (as shown by the pink to red OvExp warnings). There are also a few OvExp pixels on the forehead. So why not set the exposure a lot darker and eliminate all of the OvExp pixels? As you are basically looking at a reflection of the sun itself, you would need to shoot many stops darker. Even decreasing the exposure by 10-12 (or more) stops would not do away with the over-exposed line along the bottom of the bill. And if you did shoot to minimize the over-exposure there, the shadowed side of the subject would be rendered so dark that opening up the tones would tremendously increase the noise on the bird and would muddy the colors as well.
Note: in the old days, and even today, flash can be used to light the shadowed side of the backlit subject. You would not, however, be able to use a Better Beamer to increase the power of the flash. Why? As the lens is pointed towards the sun, the fresnel screen would burn holes in your flash or your hand or forearm. (I learned both of those from experience).
The Lesson
When the wind is blowing against the sun, creating backlit images is one of your best options.
Backlit Basics
1- Use your longest effective focal length for a narrow angle of view that reduces background clutter.
2- Set your exposure so that the rim light is over-exposed so as to avoid under-exposing the shadowed side of the subject.
3- Place the subject on the same line as the sun to get the most dramatic backlight. Only rarely will you want the sun in the frame on clear days as it is far too bright.
4- Look for situations where translucent, brightly colored portions of the subject are glowing from the strong backlight.
Second Verse, Same as the First!
With one small addition, today’s lessons are pretty much identical to the stuff we covered in yesterdays blog post.
|
|
Image #1A: The RawDigger screen capture for the Backlit Black Skimmer chick image |
More of the Same
Many students need the lessons to be repeated over and over again so that they can understand and master them. So, here we go.
First, note that the histograms in all three color channels are pegged against the right-hand axis of the graph, indicating severe over-exoposure.
Again and always, when shooting backlit creatures, we strive to include rim-lit areas in an effort to create dramatic images. If you expose dark enough to avoid over-exposing the rim light, the shaded side of the subject will be grossly under-exposed; the entire image would be nearly black. Lightening under-exposed tones, will introduce lots of noise and will muddy the colors. By pushing the exposure to the right and toasting the rim light, you will create a raw file with at least some detail in the shaded feathers and will have produced an image that you can work with during the raw conversion and then in Photoshop.
What can I say? The combination of Zebras live in the viewfinder (with your camera set up properly) and post-capture study of the raw files in RawDigger makes it pretty much child’s play to come up with perfect exposure after perfect exposure, even in super-difficult situations. It would be impossible to overstate how much I have learned by studying RawDigger and how much better my exposures have become since I started with the program almost two years ago. The raw file brightness for today’s featured image is perfect with the G channel almost making the 16000 line. In other words, the raw file brightness is perfect.
RawDigger — not for the faint of heart …
Nothing has ever helped me learn to create perfect exposures to the degree that RawDigger has. I think that many folks are reluctant to learn that most of their images are underexposed by one or more full stops and that highlight warnings in Photoshop, Lightroom, Capture One, and your in-camera histogram are bogus as they are based on the embedded JPEGs. Only your raw files tell the truth all the time. Heck, I resisted RawDigger for several years … Once you get over that feeling, RawDigger can become your very best exposure friend no matter what system you are using. On the recent IPTs and In-the-Field sessions, we have demonstrated that fact. Convincingly.
The RawDigger Adapted (pink) Histogram
In the RawDigger e-Guide, you will learn exactly how to set up the Adapted “pink” RawDigger Histogram and how to use it to quickly and easily evaluate the exposure or raw file brightness of images from all digital cameras currently in use. RawDigger was especially helpful to me as I have struggled with R5 exposures and learned my new camera body, the Sony Alpha a1.
|
|
|
Click on the image to better see the green eye-AF boxes in action. Sony Alpha 1 Flight Photography AF Points! |
The SONY Alpha a1 Set-up Guide and Info Group: $150.00 (or Free)
The SONY Alpha a1 Set-up Guide and Info Group is going great guns as more and more folks chime in with thoughtful questions and experience-based answers. As the a1 is becoming more readily available, more and more folks are getting their hands on this amazing body. By June 1, 2022, the group was up to an astounding 124 lucky and blessed folks. (More than a few folks own two or more a1 bodies! Early on, we discussed the myriad AF options. I gave my opinion as to the best one for flight and general bird photography. The best news is that everyone in the group receives an e-mail that includes a .DAT file with my a1 settings on it, and explicit directions on how to load my settings onto your a1; talk about convenience! I am now offering a .DAT file compatible with firmware update 1.20. Your entry into the group includes a consolidated Sony a1 CAMSETA2 INFO & GUIDE. New a1 folks will now receive six e-mails instead of the previous 28! You will receive new e-mails as they are published. Simply put, this e-mail guide is an incredible resource for anyone with an a1.
All who purchased their Alpha 1 bodies via a BAA affiliate link — B&H or Bedfords — will receive a free Sony Alpha a1 Set-Up Guide and free entry into the Info Updates group after shooting me their receipts via e-mail. (Note: it may take me several days to confirm B&H orders.). Others can purchase their guide here in the BAA Online Store.
Typos
With all blog posts, feel free to e-mail or to leave a comment regarding any typos or errors.




Arthur, Backlit Black Skimmer chick is cute and looks like it is talking and maybe to you!!! HaHaHa!!