October 24th, 2014 The Streak Continues: 328
Yesterday was a typical day of work at BAA for me. As is usual, I made time for my morning meditation, an easy swim followed by ten minutes of forced laughter, and an ice bath. This blog post, the 328th in a row, took me more than 5 hours to prepare including the time spent on preparing today’s images and the two cards. Throw in another five hours planning the Hooptie ITP but heck, that’s on me :). This blog post was published just after 6:15am from my home at Indian Lake Estates, FL.
Please help us out…
To show your appreciation for my efforts here, we ask that you use our the B&H and Amazon affiliate links on the right side of the blog for all of your purchases. B&H Is recommended for you major photography gear purchases, Amazon for your household, entertainment, and general purpose stuff. Please check the availability of all photographic accessories in the BIRDS AS ART Online Store, especially Gitzo tripods, Wimberley tripod heads, and the like. We sell only what I have used, have tested, and can depend on. We will not sell you junk. We know what you need to make creating great images easy and fun. And we are always glad to answer your gear questions via e-mail.


If what you learned here on my blog about the Canon EOS-7D Mark II has inspired you to purchase this great new camera body, please consider using the logo link above to support our efforts here in bringing you the latest, greatest educational materials on daily basis.
|
|
|
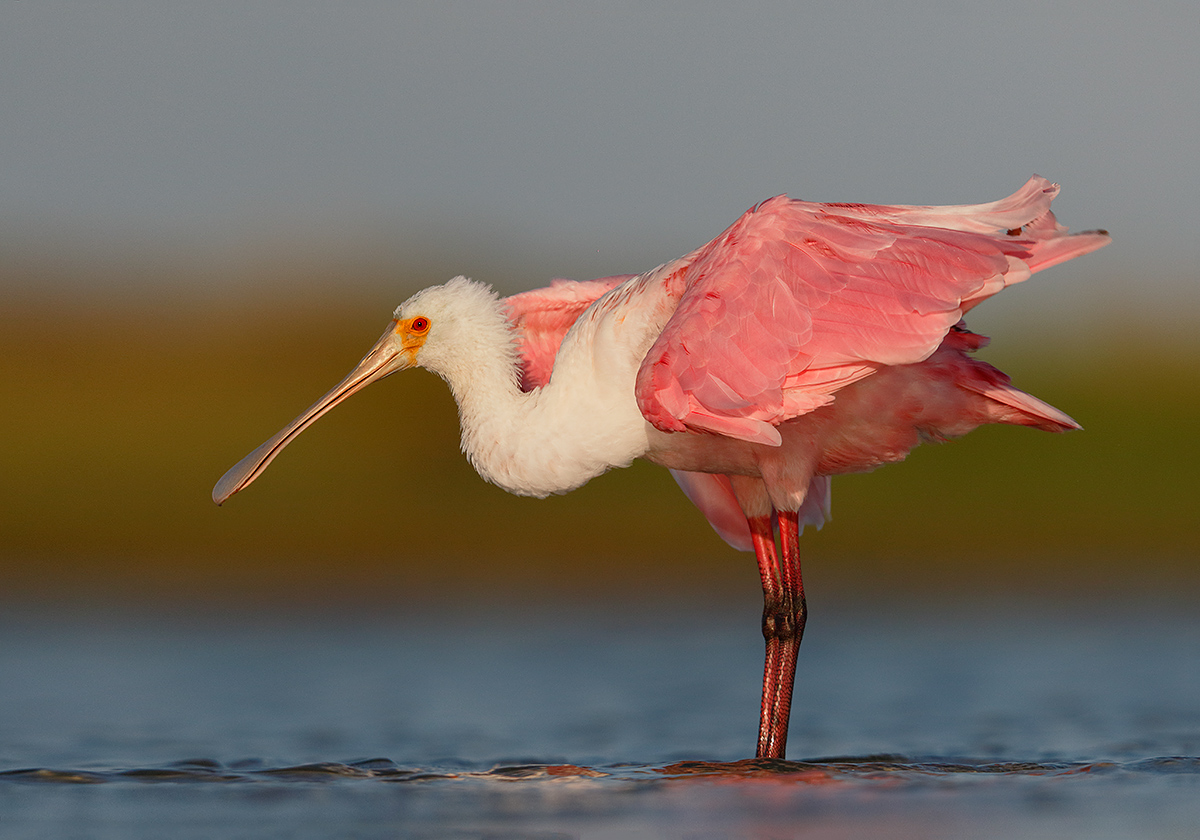
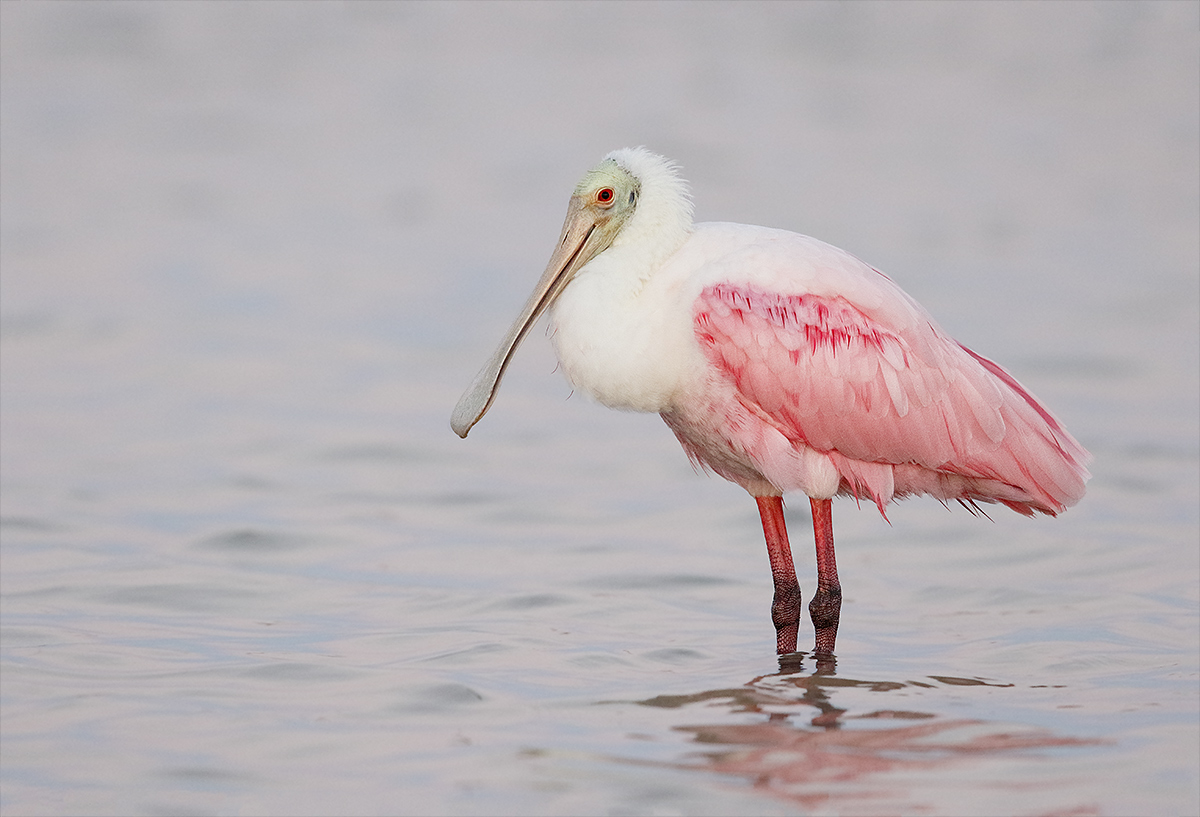
This image was created at 7:13pm on the cloudy afternoon of October 11, 2014 on Day 1 of the recently concluded DeSoto October IPT. I used the Gitzo 3532 LS carbon fiber tripod, the Mongoose M3.6 head, with the Canon EF 600mm f/4L IS II USM lens and a beta version of the Canon EOS 7D Mark II . ISO 3200. Evaluative metering +1 1/3 stops as framed: 1/160 sec. at f/4.5 in Av mode. AWB.
Central sensor/AI Servo/Rear Focus AF on the bird’s eye and re-compose. Click here to see the latest version of the Rear Focus Tutorial. Click on the image to see a larger version.
Non-breeding plumage Roseate Spoonbill
|
ISO 3200 Spoonbill
After our great, hour-long experience with a single, rather gorgeous spoonbill, the group was thrilled when a flock of a half-dozen more flew in at dusk. If you missed “The EOS-7D Mark II Does Pink” blog post, which described our experience with that beautiful lone spoonbill, you can check it out here.
Working at an equivalent focal length of 960mm made it relatively easy to isolate a single bird while I was standing behind my tripod. If I had gotten down on one knee I would have introduced background birds into the image design; getting low is not always the best way to go.
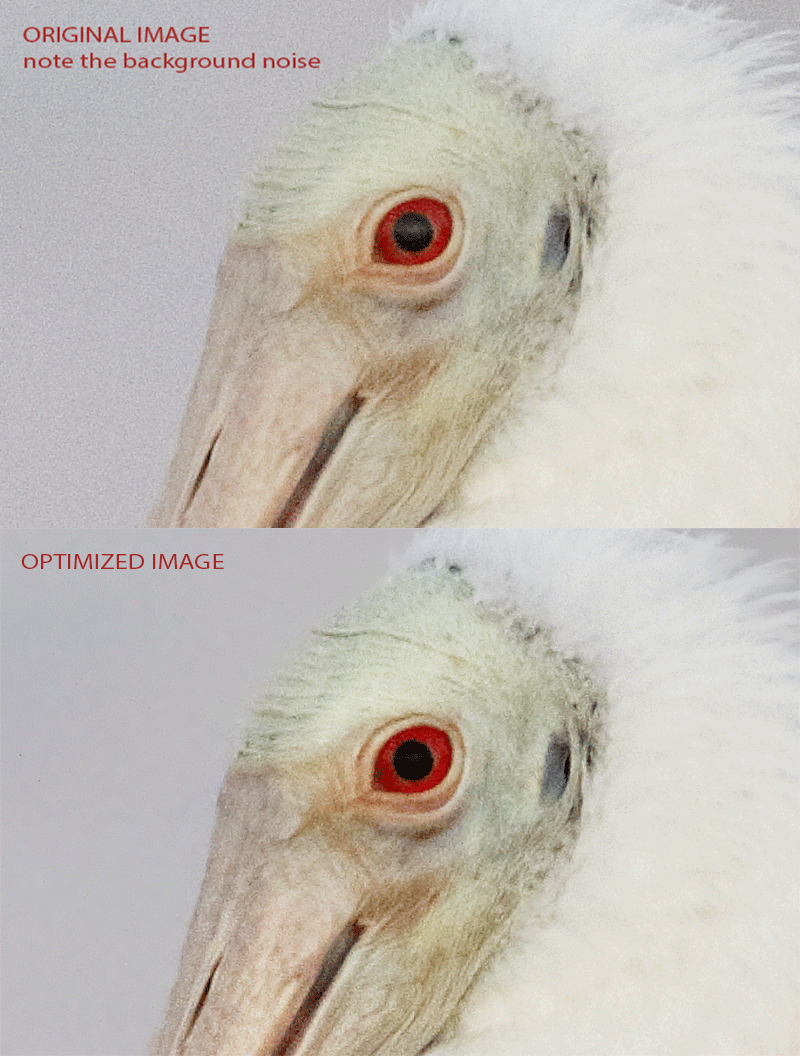
This animated GIF represents the views at 200%.
|
The Image Optimization
In the animated GIF above, note the ISO 3200 background noise in the original and the compare that to the smooth background in the optimized image. After converting the RAW file in DPP v.3.14.41.0, I brought the image into Photoshop and ran a healthy layer of Filter > Blur > Surface Blur on the whole image. This of course destroyed significant detail on the bird so I added a Regular Layer Mask and painted away the bird at 100% working carefully at fairly high magnification along the edges. Lastly, I hit X, changed the opacity of my brush to 33%, and painted back in 1/3 of the noise reduction on the face while avoiding the edges.
It is very likely that you can do something similar with some type of third party NR (including and especially NIK Dfine which I have not tried yet). I plan on trying Dfine in the near future. IAC, NR properly applied to the background only makes high ISO noise a non-issue.
Note that the noise at ISO 3200 is not excessive and that as we have seen before with 7D II images, it appears smoother than noise in previous cameras.
In addition to the NR I selected and sharpened the face with the Quick Selection Tool and applied both a Contrast Mask and my NIK 25-25 recipe. Then, using Digital Eye Doctor Techniques I painted a Quick Mask of the pupil, put the selection on a layer, and darkened it by pulling down the curve. Then I selected all the pink feathers, again with the Quick Selection Tool, and applied my NIK 25-25 recipe to that layer.
The DPP RAW Conversion Guide
To learn why I use Canon’s Digital Photo Professional (DPP) to convert every image that I work on, click here. The current guide will teach you how to best convert all of your Canon images in all 3 point something versions of Canon Digital Photo Professional including the current v.3.14.41.0.
The DPP 4.0 RAW Conversion Guide by Arash Hazeghi and Arthur Morris will likely be offered for sale here tomorrow. The more that I use DPP 4.0 for my 1D X and 5D III RAW conversions–I remember those–the more I learn about it. And the more I learn about it the more I am impressed with it. Note: at present, DPP 4.0 will work only with 1D X, 5D III, and 6D images. I am hoping that at some point Canon will release a new version of DPP 4 that will support 7D II images. Do understand that if it comes to be that DPP 4 does eventually support 7D II image files that the NR in DPP v4.whatever will be much more effective than the NR in DPP v.3.14.41.0.
Digital Basics
Everything that I did to optimize today’s images is covered in detail in my Digital Basics File–written in my easy-to-follow, easy-to-understand style. Are you tired of making your images look worse in Photoshop? Digital Basics File is an instructional PDF that is sent via e-mail. It includes my complete digital workflow, dozens of great Photoshop tips (including Surface Blur settings), details on using all of my image clean-up tools, the use of Contrast Masks, several different ways of expanding and filling in canvas, all of my time-saving Keyboard Shortcuts, Quick Masking, Layer Masking, and NIK Color Efex Pro basics, Contrast Masks, Digital Eye Doctor, using Surface and Gaussian Blurs, Tim Grey Dodge and Burn, how to create time-saving actions, and tons more.
APTATS I & II
Learn the details of advanced Quick Masking techniques in APTATS I. Learn Advanced Layer Masking Techniques in APTATS II. Mention this blog post and apply a $5 discount to either with phone orders only. Buy both APTATS I and APTATS II and we will be glad to apply at $15 discount with phone orders only. Please call Jim or Jennifer at 863-692-0906 weekdays to order.
|
|
|
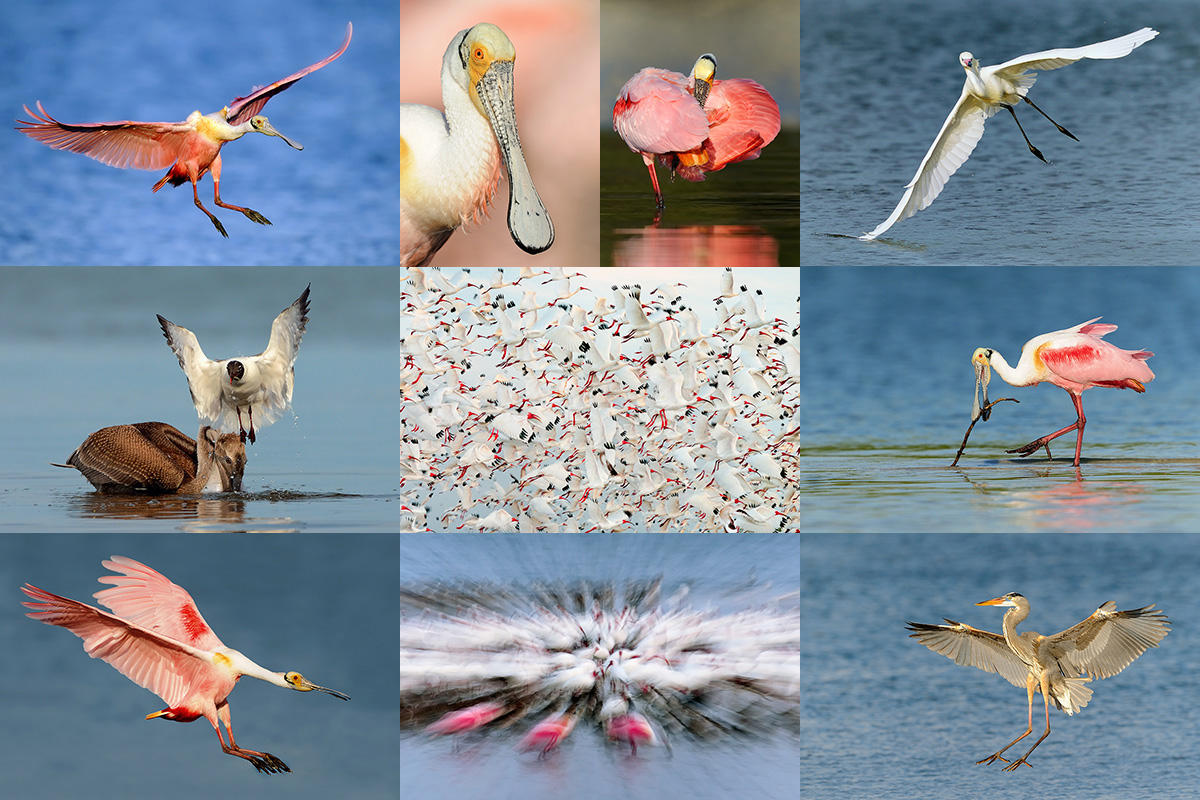
Images courtesy of and copyright Captain James Shadle (aka Froggie). All of the images here were created at Alafia Banks. Card creation and design by Arthur Morris/BIRDS AS ART.
|
The Hooptie Deux/Roseate Spoonbills and More Instructional Photo-Tour via pontoon boat. 4 1/2 DAYs: $3200. SUN FEB 22 thru lunch on THUR FEB 26, 2015/Strict Limit: 6 photographers/Openings 3.
Meet and greet on the evening of SAT 21 FEB. Two great leaders: Captain James Shadle (Nikon) and Canon Explorer of Light Emeritus Arthur Morris.
Roseate Spoonbill is one of if not the most sought after avian photographic subjects in Florida. They are generally hard to find and somewhat difficult to approach. They are relatively easy to find at Alafia Banks—heck, you can’t miss seeing them, but even there they can on some days be somewhat difficult to approach. On some days we may be able to get ridiculously close to them. The huge incentive to get out to Alafia Banks in mid-February is the chance to photograph this species at the height of its spectacular breeding plumage….
Weather permitting there will be nine boat trips: 5 mornings and 4 afternoons! Mornings to Alafia Banks for spoonbills and Brown Pelicans (with lots of flight photography with the birds likely carrying nesting material), cormorants, ibises (both Glossy and White in breeding plumage. Many of the White Ibises will be sporting their spectacular, distended, red, naked (un-feathered) throat pouches—typically larger in the females. In addition we will get to photograph egrets including Great and Reddish, both in full breeding plumage, shorebirds, and more. There will be lots of flight photography opportunities. Afternoon trips either to Alafia Banks for spoonbills and more or to a more sheltered inland rookery location for a variety of nesting birds. In the event of horrific weather artie will either take the group to Fort DeSoto or will conduct an image review/Photoshop session. This IPT includes five lunches that will be followed by small group image sharing and review and some over-the-shoulder Photoshop instruction.
Important Notes
We stay in Brandon, FL for this IPT. From our hotel there it is is only about 20 minutes to the dock. The plan is for all nine sessions to be by boat. For the Alafia Banks segments, Captain Shadle provides light weight chest waders as much of the photograph will be done while we are standing in fairly shallow water behind our tripods. We help you get in and out of the boat with your gear. This is likely not the best trip for folks with balance problems. Note however that some folks may opt to stay on the boat. They usually have lots of chances for flight photography of spoonbills and other species but are almost always pretty far away from the spoonbills that land.
I recently saw a similar trip advertised two months too late for breeding plumage spoonbills (and two months too late for most of the rest of the species in breeding plumage). 5 Days: $3200. With only four boat trips…. The Hooptie IPT represents an incredible opportunity and with 3 slots filled already the remaining three spots should fill very quickly. We hope that you can join us. Scroll down for registration info.
|
|
|
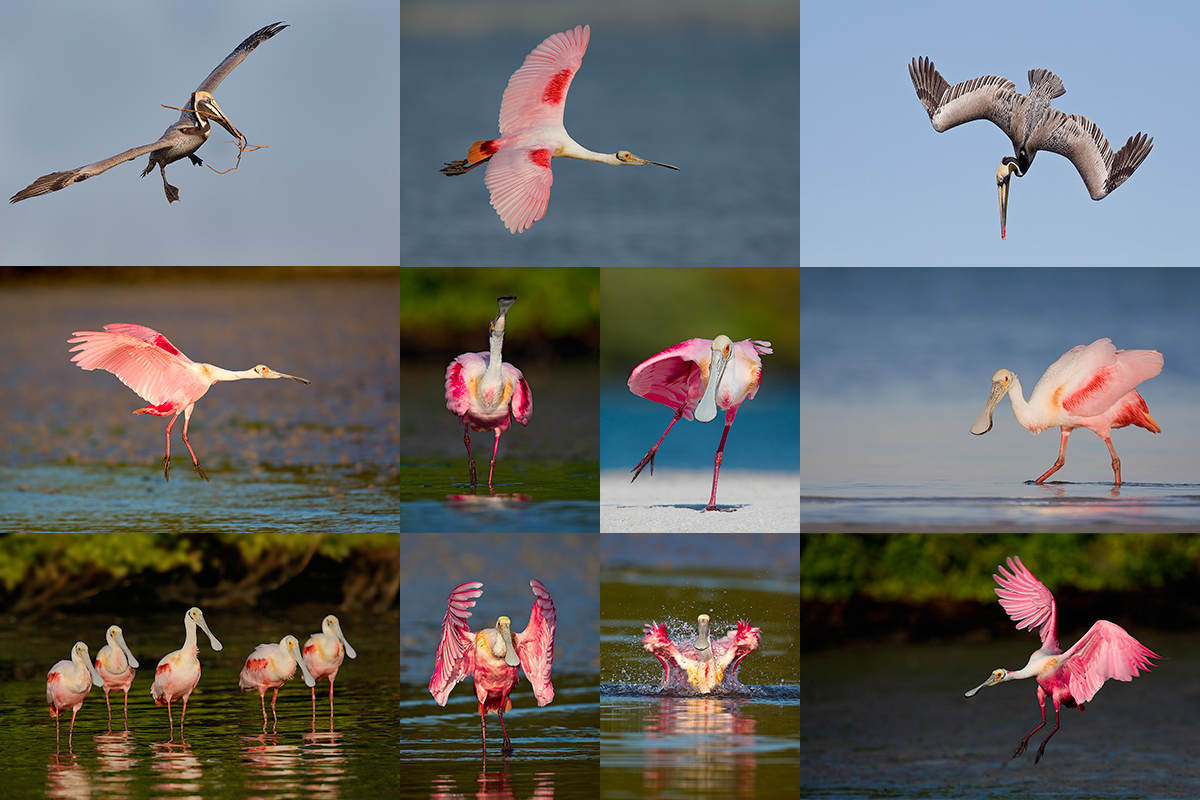
All of the images here were created at Alafia Banks in the month of February. Images copyright Arthur Morris/BIRDS AS ART. Card creation and design by Arthur Morris/BIRDS AS ART.
|
Hooptie IPT Registration Info
A $449 non-refundable deposit is required to hold your slot for this IPT. Your balance, payable only by check, will be due on 11/22/2014. If you cancel and the trip fills, we will be glad to apply a credit applicable to a future IPT for the full amount less a $100 processing fee. If we do not receive your check for the balance on or before the due date we will try to fill your spot from the waiting list. If your spot is filled, you will lose your deposit. If not, you can secure your spot by paying your balance.
Please print, complete, and sign the form that is linked to here and shoot it to us along with your deposit check (made out to “Arthur Morris.”) You can also leave your deposit with a credit card by calling the office at 863-692-0906. If you register by phone, please print, complete and sign the form as noted above and either mail it to us or e-mail the scan. If you have any questions, please feel free to contact me via e-mail.
|

|
|
The Fort DeSoto Add-on Mini IPT will give us lots of chances to photograph a wide variety of species. Many of the birds at DeSoto are silly-tame.
|
Fort DeSoto Add-on Mini IPT: $349. Two shooting sessions: the afternoon of THUR FEB 26 and the morning of Friday FEB 27, 2015. Limit 12 photographers. One great leader: Arthur Morris.
Shorebirds, wading birds, terns, pelicans, gulls and more. Includes lunch on Friday and small group image sharing and Photoshop session on Friday. Payment in full for this one-day IPT is due upon registration either by check or credit card. If the former, please e-mail us immediately so that we can save you a slot.
2015 San Diego 4 1/2-DAY BIRDS AS ART Instructional Photo-Tour (IPT): FEB 1 thru the morning of FEB 5, 2015: $1799 (Limit: 8/Sold Out)
Please contact us via e-mail if you would like your name placed on the waiting list.
Coming Soon
More 7D II ISO 3200 will be featured in an upcoming blog post here soon.
Facebook
Be sure to like and follow BAA on Facebook by clicking on the logo link upper right. Tanks a stack!
Support the BAA Blog. Support the BAA Bulletins: Shop B&H here!
We want and need to keep providing you with the latest free information, photography and Photoshop lessons, and all manner of related information. Show your appreciation by making your purchases immediately after clicking on any of our B&H or Amazon Affiliate links in this blog post. Remember, B&H ain’t just photography!
…..
Amazon.com
Those who prefer to support BAA by shopping with Amazon may use this link:
Amazon Canada
Many kind folks from north of the border, eh, have e-mailed stating that they would love to help us out by using one of our affiliate links but that living in Canada and doing so presents numerous problems. Now, they can help us out by using our Amazon Canada affiliate link by starting their searches by clicking here. Many thanks to those who have written.
Typos
In all blog posts and Bulletins, feel free to e-mail or to leave a comment regarding any typos or errors. Just be right :).
October 23rd, 2014 The Streak Continues: 327
Yesterday was a typical day of work at BAA for me. With help from daughter Jennifer, I am working on transitioning to my new Apple 15.4″ MacBook Pro Notebook Computer with Retina Display (Mid-2014). I worked with right hand man Jim Litzenburg getting six images ready to print for the upcoming Birds of the World exhibit in San Diego (see below). I always make time for my morning meditation, an easy swim, and an ice bath. After my swim yesterday I added ten minutes of forced laughter. (Studies have found that laughing exercise can raise the flow of blood in the body by as much as 22 per cent, as the heart and lungs work harder to supply oxygen to key muscles. As well as boosting blood flow, relaxed arteries also help regulate blood pressure at normal levels.)
It was good friend and healthy living guru Dr. Cliff Oliver who reminded me about forced laughter…. Visit Cliff’s site and check out the neat interview video done a few year’s back on New Zealand TV.
This blog post, the 327th in a row, took me more than 2 1/2 hours to prepare including the time spent on the image optimizations in DPP v3.14.41.0. It was published just before 7:00am from my home at Indian Lake Estates, FL.
Please help us out…
To show your appreciation for my efforts here, we ask that you use our the B&H and Amazon affiliate links on the right side of the blog for all of your purchases. B&H Is recommended for you major photography gear purchases, Amazon for your household, entertainment, and general purpose stuff. Please check the availability of all photographic accessories in the BIRDS AS ART Online Store, especially Gitzo tripods, Wimberley tripod heads, and the like. We sell only what I have used, have tested, and can depend on. We will not sell you junk. We know what you need to make creating great images easy and fun. And we are always glad to answer your gear questions via e-mail.
|
|
|
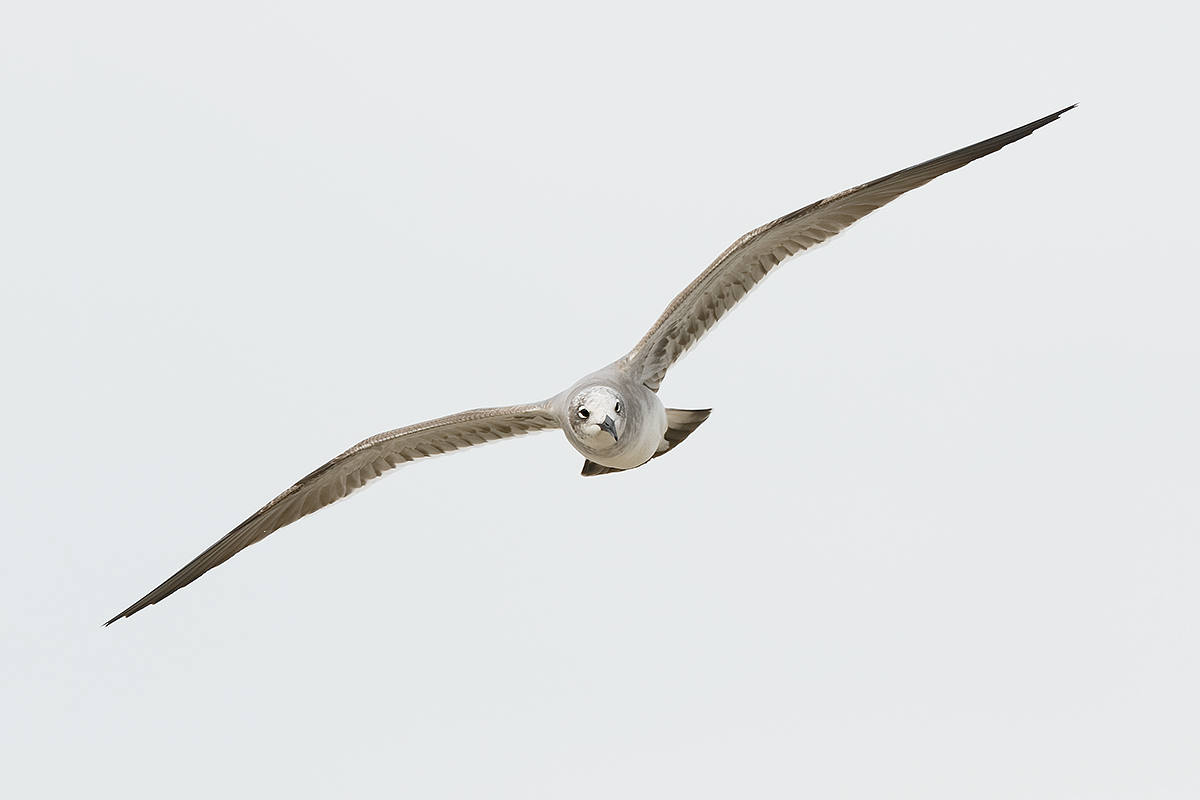
This image was created at Fort DeSoto Park in cloudy conditions on the morning of October 21, 2014. I used the hand held Canon EF 300mm f/2.8L IS II USM lens and a beta version of the Canon EOS 7D Mark II . ISO 400. Evaluative metering +2 1/3 stops off the sky: 1/1600 sec. at f/5 in Manual mode was a slight underexposure. Cloudy WB.
Center Zone Shutter Button AF selected the central sensor and one additional sensor to its left. Both were active at the moment of exposure. The left hand of those two sensors was squarely on the bird’s face and covered both eyes (as originally framed). It is no wonder that this image was so incredibly sharp on the face. Click on the image to see a larger version.
Image #1: Laughing Gull incoming
|
The 300II/7D II Combo for Hand Held Flight
The Canon 300mm f/2.8L IS II lens and the Canon EOS-7D Mark II may very well be the most lethal combo ever for hand held flight photography. Most folks including me are able to hand hold this combination for long shooting sessions. It may be too heavy for some folks. If that it the case they might consider the Canon EF 70-200mm f/2.8L IS II USM lens with a 1.4X III TC (or even with the 2X III TC when they need additional reach). Folks who need to go even lighter are steered towards the tiny but deadly Canon EF 70-200mm f/4L IS USM lens. With this one we’d recommend only the 1.4X TC. Both of the above with a new 7D Mark II of course.
So what’s so great about the 300II/7D II combo for hand held flight photography? Lots. First off, the equivalent 480mm focal length with lots of pixels on the bird gives you lots of reach and produces incredibly sharp, high quality images. Next, as I am learning quickly, the Zone AF Area Selection Mode with its new, five X five center zone seems to be a big improvement on previous iterations of the Zone AF Area Selection Mode… See more on the new Zone AF (and on iTR) below. And the ten frame per second frame rate is nothing to sneeze at.
Lastly please do not forget that many folks will enjoy the lighter weight of the 7D II as compared to the 1D X. Which is heavier boys and girls, the 7D II coming in at a svelte 2 lbs, 5 oz, or the much larger 1D x that tips the scales at 3 lbs, 6.5 oz? At one pound, 1 1/2 ounces heavier, the 1D X is a shade more than 47% heavier than the 7D II. Over the course of a long flight photography session, the 1D X would seem a ton heavier.
|
|
|
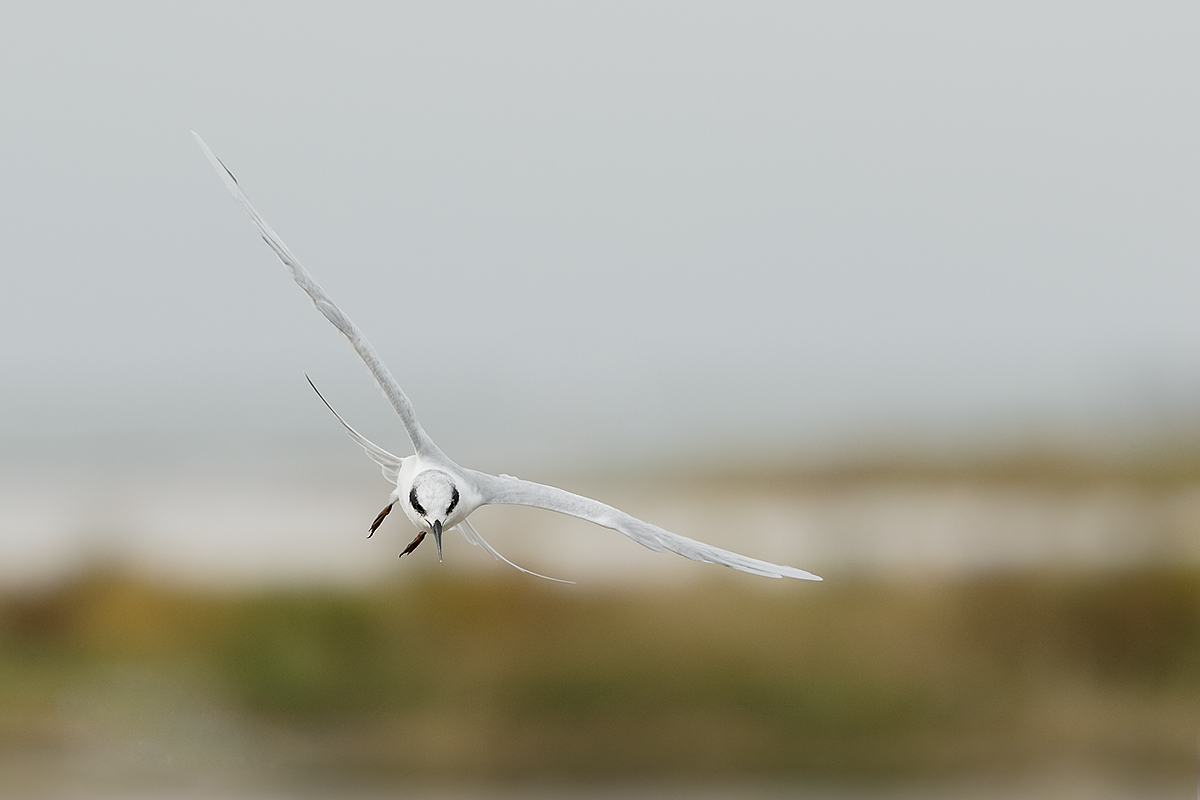
This image was created at Fort DeSoto Park in cloudy becoming cloudy-bright conditions on the morning of October 21, 2014. I used the hand held Canon EF 300mm f/2.8L IS II USM lens and a beta version of the Canon EOS 7D Mark II . ISO 400. Evaluative metering +1 2/3 stops off the sky: 1/2500 sec. at f/4 in Manual mode. Cloudy WB
Center Zone Shutter Button AF had only the central sensor active at the moment of exposure. As originally framed the active sensor was right above the bird and hit nothing but the distant horizon line. Click on the image to see a larger version.
Image #2: Forster’s Tern incoming
|
The New (wider) Zone AF Area Selection Mode
With both the 5D Mark III and the 1D X I tried Zone AF but was not impressed. As I have long found it difficult to keep the central sensor only on the bird’s face, head or neck, I have always done my flight photography with more than just the central sensor active. With the two previously mentioned camera bodies, I tried Zone AF briefly but must not have been very impressed as I soon de-activated it on both the 5D III and the 1D X.
With the 7D II I have found the new (wider) Zone AF to be a great improvement, not just for flight but for lots of general bird photography as well. In two instances here the new AF system produced sharp flight images with the sensor nowhere near the bird. This is a reflection of several things: the new AF system; the new wider Zone AF Area Selection Mode; and the effectiveness of my custom-created Case 3 AF settings.
Please do not assume every single 300II/7D II image is sharp on the bird’s eyes and face. Most are sharp enough, many are insanely sharp, and some are not sharp. The latter due entirely to operator error, to not getting the sensor on the bird’s eye or eyes, face, or neck and panning smoothly with the subject as the system tracks the subject. That said, I firmly believe that this combo will prove to be the best ever for flight photography. At San Diego and other locations where the birds may be too close in flight to fit into the frame I will turn to the aforementioned Canon EF 70-200mm f/2.8L IS II USM lens with or without the 1.4X III TC.
|
|
|
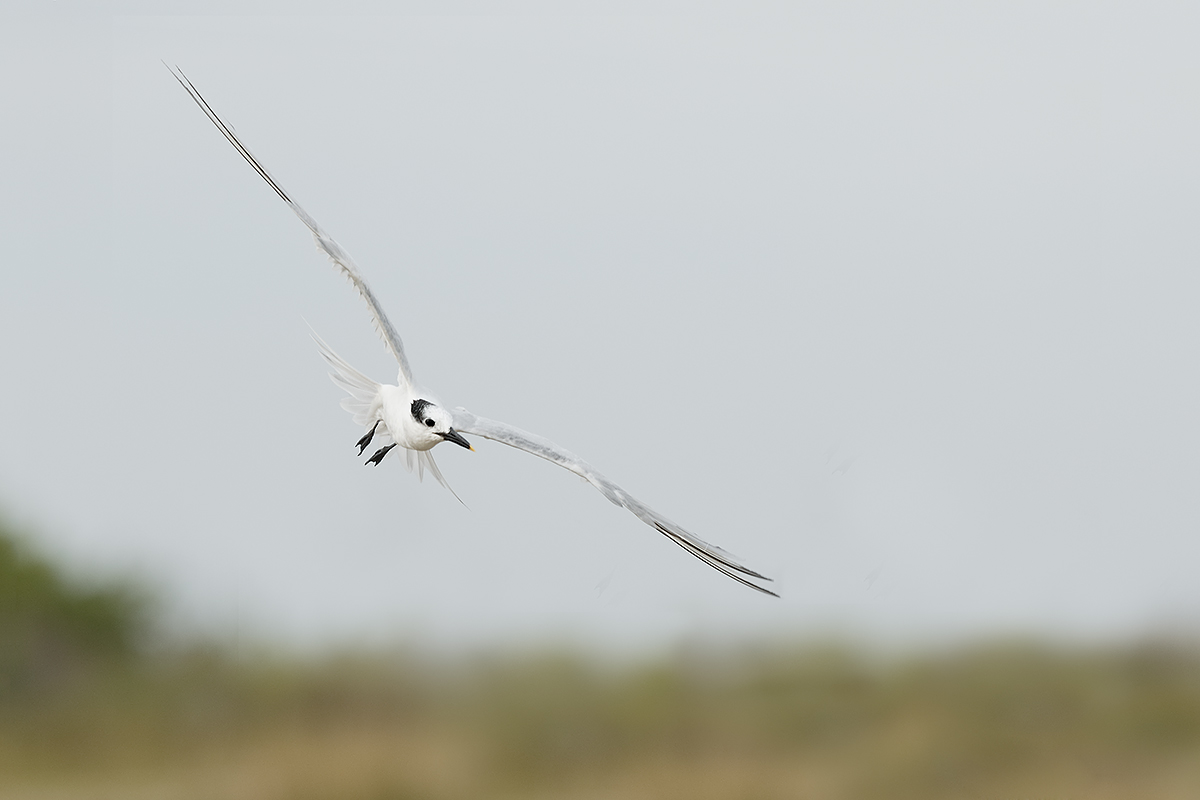
This image was created at Fort DeSoto Park in cloudy conditions on the morning of October 21, 2014. I used the hand held Canon EF 300mm f/2.8L IS II USM lens and a beta version of the Canon EOS 7D Mark II . ISO 400. Evaluative metering +2 1/3 stops off the sky: 1/2000 sec. at f/4 in Manual mode was a slight underexposure. Cloudy WB.
Center Zone Shutter Button AF selected the central sensor. It was active at the moment of exposure and covered the base of the bird’s left wing just past the bill as originally framed. This image is plenty sharp. Click on the image to see a larger version. You can see the original image below.
Image #3: Sandwich Tern incoming
|
Incoming
Like many other folks, I have always had a hard time producing consistently sharp images of birds flying directly at the camera. The 7D II with its new AF system seems to do an outstanding job in this difficult situation. I can’t wait to get to Bosque with a 7D II on a morning with a nice southeast wind….
Your Favorite?
Please take a moment to let us know which of the three flight images you consider best. And do let us know why you made your choice.


|
|
|
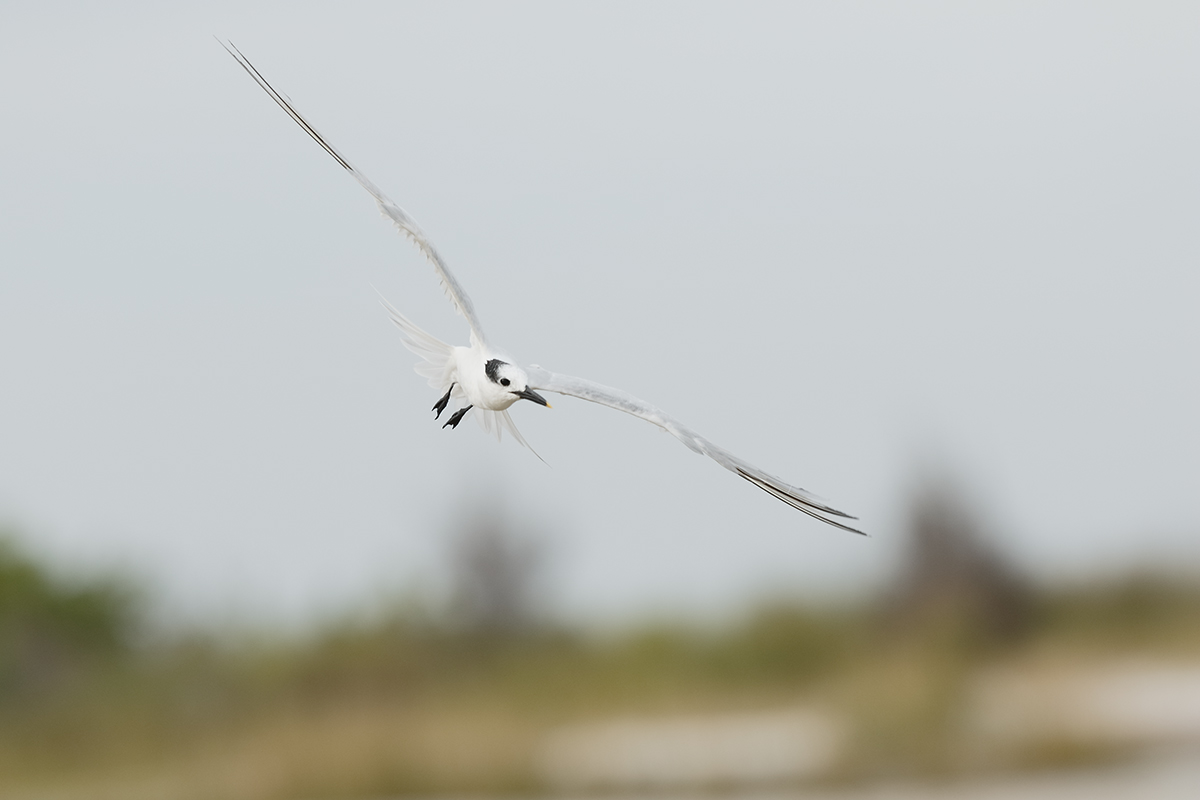
This unsharpened JPEG represents the original image from which the optimized version above was created.
|
The Image Optimization
First I leveled the image by rotating it more than 3.5 degrees clockwise. Then I filled in the missing canvas using the John Haedo Content Aware Fill method. Then I moved the bird left in the frame using techniques from APTATS I and APTATS II and refined those layers with the addition of Regular Layer Masks. On the two tern images I applied my NIK 50-50 recipe to the bird only and fine tuned those with Regular Layer Masks. Lastly I sharpened the faces with a Contrast Mask (Unsharp Mask at 15/65/0).
The DPP RAW Conversion Guide
To learn why I use Canon’s Digital Photo Professional (DPP) to convert every image that I work on, click here. The current guide will teach you how to best convert all of your Canon images in all 3 point something versions of Canon Digital Photo Professional including the current v.3.14.41.0.
Coming on Monday: The DPP 4.0 Guide by Arash Hazeghi and Arthur Morris. The more that I use DPP 4.0 for my 1D X and 5D III RAW conversions–I remember those–the more I learn about it. And the more I learn about it the more I am impressed with it. Note: at present, DPP 4.0 will work only with 1D X, 5D III, and 6D images. I am hoping that at some point Canon will release a new version of DPP 4 that will support 7D II images.
Digital Basics
Everything that I did to optimize today’s images is covered in detail in my Digital Basics File–written in my easy-to-follow, easy-to-understand style. Are you tired of making your images look worse in Photoshop? Digital Basics File is an instructional PDF that is sent via e-mail. It includes my complete digital workflow, dozens of great Photoshop tips (including Surface Blur settings), details on using all of my image clean-up tools, the use of Contrast Masks, several different ways of expanding and filling in canvas, all of my time-saving Keyboard Shortcuts, Quick Masking, Layer Masking, and NIK Color Efex Pro basics, Contrast Masks, Digital Eye Doctor, using Surface and Gaussian Blurs, Tim Grey Dodge and Burn, how to create time-saving actions, and tons more.
APTATS I & II
Learn the details of advanced Quick Masking techniques in APTATS I. Learn Advanced Layer Masking Techniques in APTATS II. Mention this blog post and apply a $5 discount to either with phone orders only. Buy both APTATS I and APTATS II and we will be glad to apply at $15 discount with phone orders only. Please call Jim or Jennifer at 863-692-0906 weekdays to order.
|
|
|
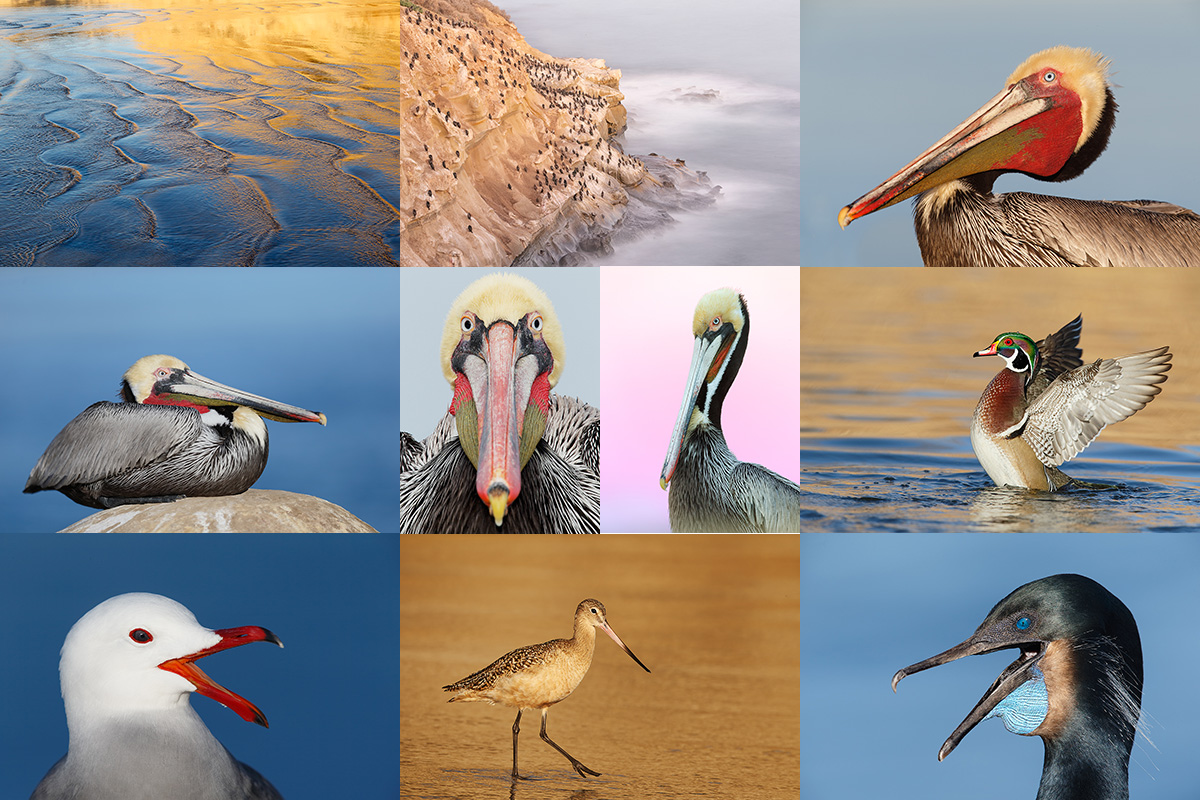
San Diego offers a wealth of very attractive natural history subjects. With annual visits spanning more than three decades I have lot of experience there….
|
2015 San Diego 4 1/2-DAY BIRDS AS ART Instructional Photo-Tour (IPT): FEB 1 thru the morning of FEB 5, 2015: $1799 (Limit: 8/Openings: 2)
Meet and Greet after dinner on your own at 7:00pm on JAN 31
Just two slots left!
Join me in San Diego to photograph the spectacular breeding plumage Brown Pelicans with their fire-engine red bill pouches; Brandt’s and Double-crested Cormorants in breeding plumage with their amazing crests; breeding plumage Wood and Ring-necked Duck; other species possible including Lesser Scaup, Redhead, and Surf Scoter; a variety of gulls including Western, California, and the gorgeous Heerman’s, all in full breeding plumage; shorebirds including Marbled Godwit, Willet, Sanderling and Black-bellied Plover; many others possible including Least, Western, and Spotted Sandpiper, Whimbrel, Black and Ruddy Turnstone, Semipalmated Plover, and Surfbird; Harbor Seals (depending on the current regulations) and California Sea Lions likely; and Bird of Paradise flowers. And as you can see by studying the two IPT cards there are some nice landscape opportunities as well.
Did I mention that there are wealth of great birds and natural history subjects in San Diego in winter?
This IPT will include five 3 1/2 hour morning photo sessions, four 2 1/2 hour afternoon photo sessions, five lunches, after-lunch image review and Photoshop sessions, and two fine dinners. To ensure early starts, breakfasts will be your responsibility.
A $499 non-refundable deposit is required to hold your slot for this IPT. You can send a check (made out to “Arthur Morris) to use at BIRDS AS ART, PO Box 7245, Indian Lake Estates, FL, 33855. Or call Jim or Jennifer at the office with a credit card at 863-692-0906. Your balance, payable only by check, will be due on 12/1//2014. If the trip fills, we will be glad to apply a credit applicable to a future IPT for the full amount less a $100 processing fee. If we do not receive your check for the balance on or before the due date we will try to fill your spot from the waiting list. If your spot is filled, you will lose your deposit. If not, you can secure your spot by paying your balance. Please print, complete, and sign the form that is linked to here and shoot it to us along with your deposit check. If you register by phone, please print, complete and sign the form as noted above and either mail it to us or e-mail the scan. If you have any questions, please feel free to contact me via e-mail.
|
|
|
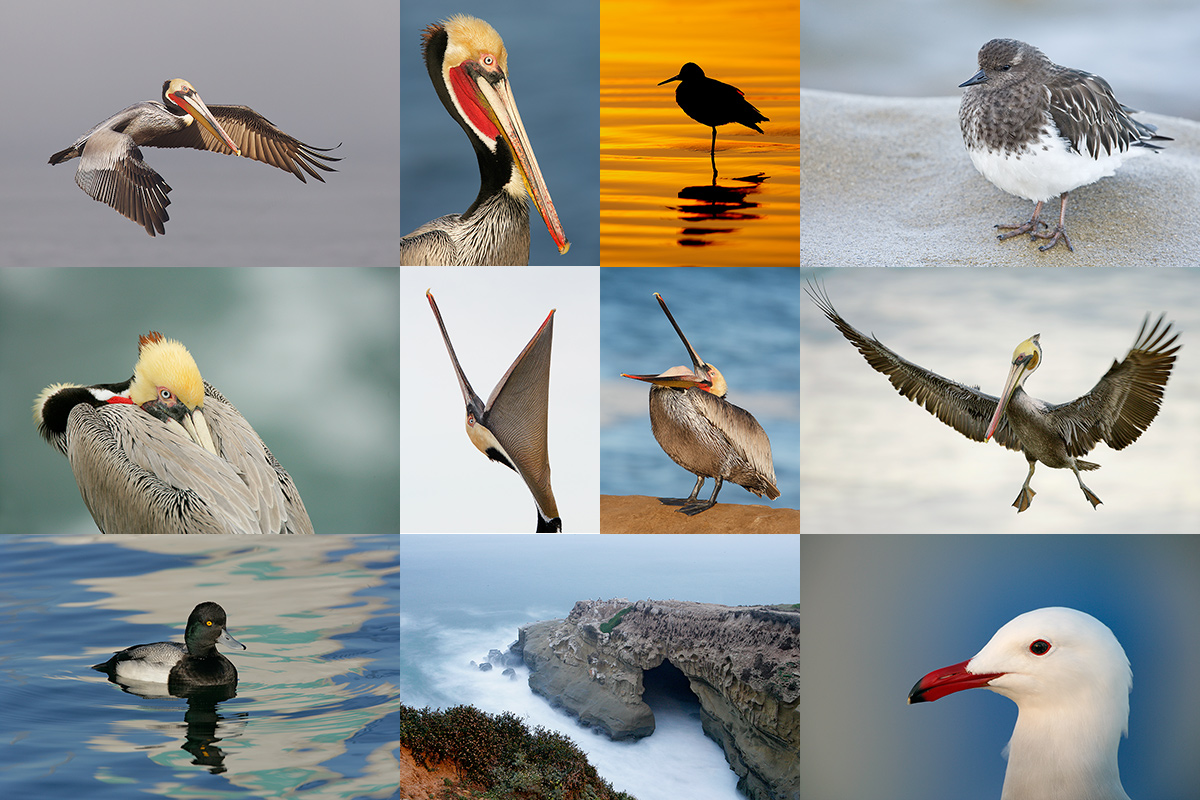
Though the pelicans will be the stars of the show on this IPT there will be many other handsome and captivating subjects in wonderful settings.
|
San Diego Natural History Museum Program & The Birds of the World Exhibit
On Saturday morning, February 7, 2015 I will be presenting “A Bird Photographer’s Story” at the San Diego Natural History Museum to kick off the Birds of the World photographic exhibit that will feature the images of about a dozen of the world’s top avian photographers. This program,which is being generously sponsored by the Canon Explorers of Light program, will be free and open to the public. I am proud to say that both Denise Ippolito and I will have images hanging in the show. The exhibit opening is scheduled for later that same day, February 7, 2015. (Times TBA).
Folks on the IPT who wish to stay over and attend the program and the exhibit opening on Saturday are invited to join me for a photo session on Friday morning as follows:
Friday Morning Add-on Photo Session: February 6, 2015: $299.
This workshop includes 3 hours of in-the-field pelican photography instruction and brunch with image review and Photoshop instruction. For now, this session is open only to folks attending the IPT.
…..
Bosque del Apache 2014 BIRDS AS ART/A Creative Adventure Instructional Photo-Tour (IPT). NOV 29 (afternoon photo session)-DEC 3 (morning session), 2014. Totaling 4 FULL-DAYS: $1449. Leaders: Arthur Morris and Denise Ippolito. Introductory Slide program: 7:00pm on Saturday 11/29. Limit 16/Openings: 2
With yet another recent cancellation, there are now two openings on this long sold out trip.
|
|
|
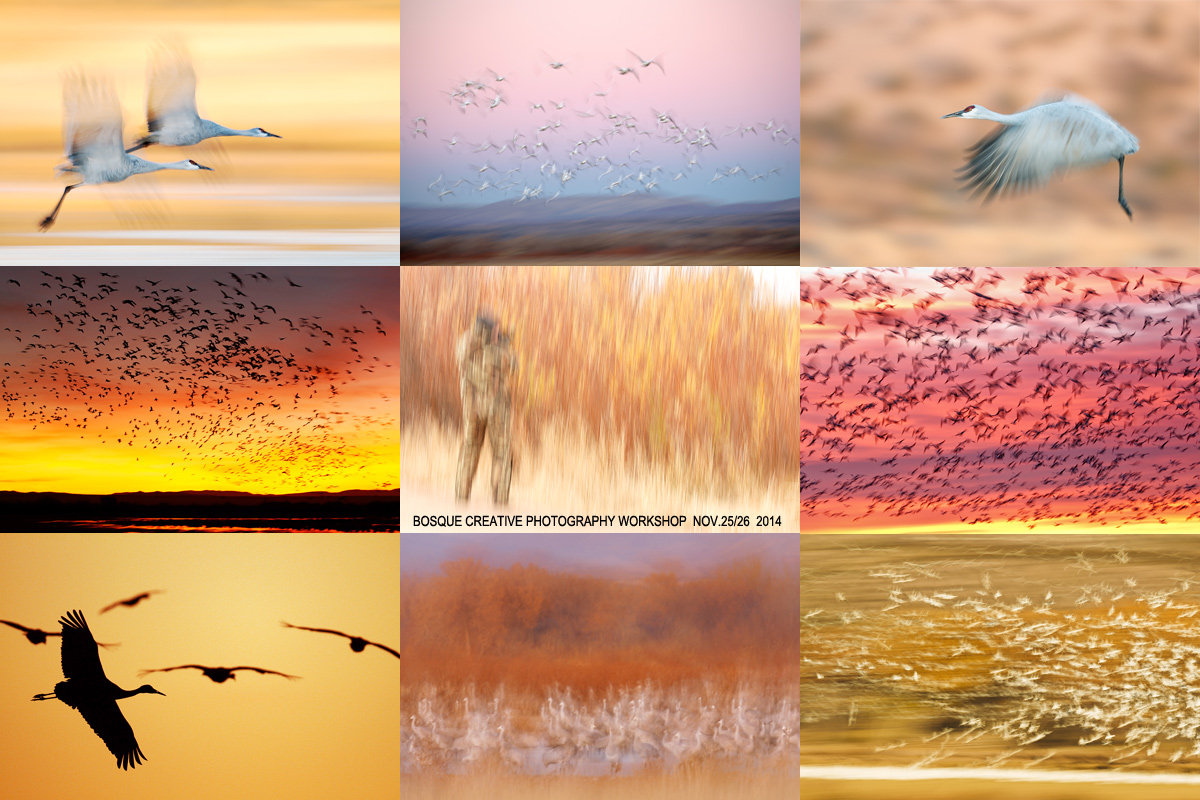
Join Denise Ippolito and Arthur Morris for two great days of photography, fun, and learning at one of our favorite soul places. We will surely be taking you out of the box on this workshop. Please click on the card to enjoy a larger version.
|
Bosque del Apache 2014 A Creative Adventure/BIRDS AS ART “Creative Photography Instructional Photo-Tour.” (IPT). NOV 24-25, 2014. 2-FULL DAYS: $729. Leaders: Denise Ippolito & Arthur Morris. Introductory Slide program: 7:00pm on Sunday 11/23.
Lots of traditional goose and crane photography combined with out-of-the-box techniques
The creative IPT can easily be piggy-backed with several Festival of the Cranes events with artie and denise. See here for details.
Facebook
Be sure to like and follow BAA on Facebook by clicking on the logo link upper right. Tanks a stack!
Support the BAA Blog. Support the BAA Bulletins: Shop B&H here!
We want and need to keep providing you with the latest free information, photography and Photoshop lessons, and all manner of related information. Show your appreciation by making your purchases immediately after clicking on any of our B&H or Amazon Affiliate links in this blog post. Remember, B&H ain’t just photography!
…..
Amazon.com
Those who prefer to support BAA by shopping with Amazon may use this link:
Amazon Canada
Many kind folks from north of the border, ay, have e-mailed stating that they would love to help us out by using one of our affiliate links but that living in Canada and doing so presents numerous problems. Now, they can help us out by using our Amazon Canada affiliate link by starting their searches by clicking here. Many thanks to those who have written.
Typos
In all blog posts and Bulletins, feel free to e-mail or to leave a comment regarding any typos or errors. Just be right :).
October 22nd, 2014 The Streak Continues: 326
I photographed at DeSoto yesterday morning with client-friend Bill Eaton who drove over on Sunday afternoon from his home in Stuart FL. (See more on Bill below.) Despite what most would rate as dismal conditions, we had a great morning and we both learned a ton. We used lots of high ISOs and Bill learned to expose to the right to produce the highest quality image files with the least noise. I have several new high ISO images to share with you and more than a few good flight images as well, the latter despite limited chances. I will do that asap.
This blog post, the 326th in a row, took me about 1 1/2 hours to prepare including the time spent on the image optimization in DPP v3.14.41.0. It was published just before 5:30am from my home at Indian Lake Estates, FL.
Please help us out…
To show your appreciation for my efforts here, we ask that you use our the B&H and Amazon affiliate links on the right side of the blog for all of your purchases. B&H Is recommended for you major photography gear purchases, Amazon for your household, entertainment, and general purpose stuff. Please check the availability of all photographic accessories in the BIRDS AS ART Online Store, especially Gitzo tripods, Wimberley tripod heads, and the like. We sell only what I have used, have tested, and can depend on. We will not sell you junk. We know what you need to make creating great images easy and fun. And we are always glad to answer your gear questions via e-mail.
|
|
|
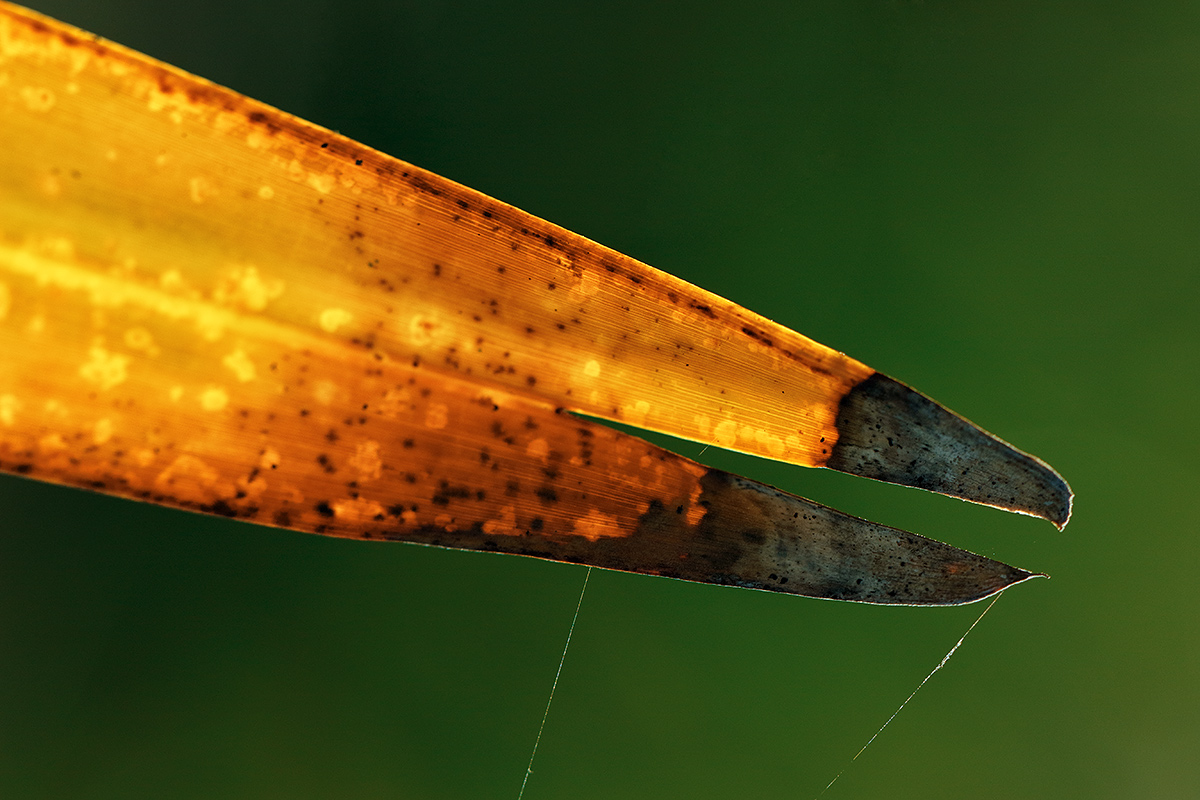
This image was created with the hand held Canon EF 100mm f/2.8L Macro IS USM lens and a beta version of the Canon EOS 7D Mark II . ISO 400. Evaluative metering -1 stop as framed: 1/1250 sec. at f/4 in Av mode. AWB.
Central sensor/AI Servo Surround/Rear Focus AF as framed was active at the moment of exposure. Click here to see the latest version of the Rear Focus Tutorial. Click on the image to see a larger version.
|
Canon EOS-7D Mark II Mystery Image
What does this look like to you? Is it the bill of a tropical bird? If so, what family? What species? If not, what is it?
Bill Eaton
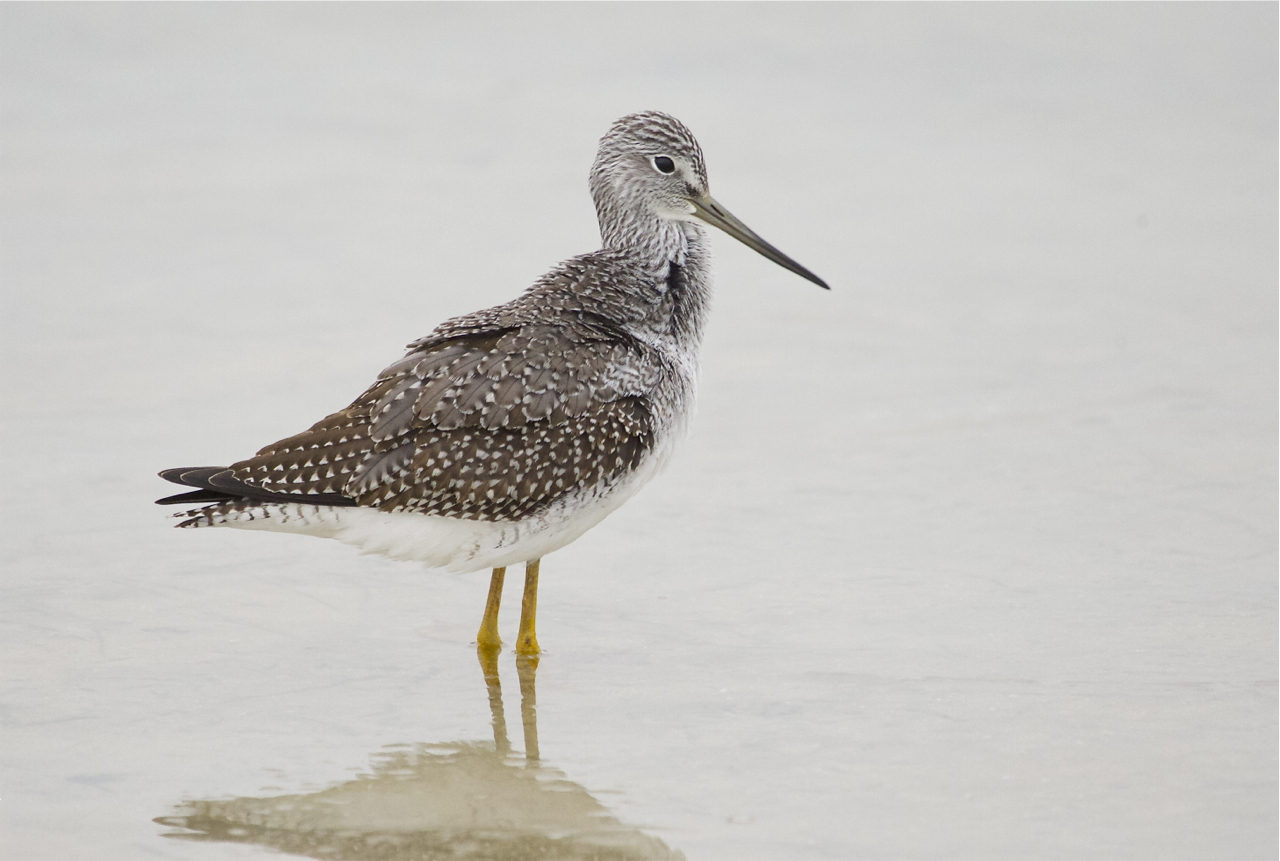
After joining us last weekend for the sold out DeSoto ITF Meet-up session and all day on Saturday, Bill joined me again yesterday. Bill kindly shared four of his images with me last night including the lovely first winter Greater Yellowlegs. In addition to photography lessons Bill got shorebird ID and natural history lessons as well. He did a great job with all four images.
Here is the e-mail that I received from him after what turned out to be a one on one morning for him.
Hey Art, I just wanted to take a moment and offer a heartfelt THANKS for a wonderful day at Ft DeSoto!! Your tips kept coming one after another and your obvious interest in my learning curve was wonderful and very well received by this amateur behind the camera. Four hours seemed to fly by in a matter of minutes. I especially enjoyed learning to push my histograms to the right. The soft light this morning and the gentle wavelets on the water yielded wonderful images with a fantastic water color effect. Not to mention that going to the high ISOs allowed me to consistently create sharp, high quality images. Good stuff!!
From angle of light to exposure tips to composition thoughts to getting in the right position relative to the flocks for flight photography made for a really a great day. It was also a pleasure to trade stories of places we have been and some of our experiences ranging from those truly special images to the dumbest of mistakes. All is all it was a great day! Best Wishes and good shooting at Bosque.
Shorebirds/Beautiful Beachcombers
If shorebirds confuse you at all, get yourself a copy of my Shorebirds/Beautiful Beachcombers. Includes ID tips, shorebird biology, migration, and tons more. All in my simple-to-read easy-to-read style.
Used Canon EOS-1D Mark III Digital Camera Body
Price reduced $251 on 10/22/2014!
Michael Zajac is offering a Canon EOS-1D Mark III professional digital camera body in Excellent condition for only $999. The sale includes the battery charger, one battery, the original paperwork, the camera strap, the original box, and shipping to the continental US.
Please contact Michael via e-mail or by phone at 732-979 -6644. Photos are available upon request.
I have seen lots of great flight images that Michael made with this camera. This body features a 1.3X crop factor sensor and is a great step-up for someone who wants to move to a pro body. It’s powerful battery drives AF much faster than the pro-sumer bodies especially with f/4 lenses and either a 1.4X or 2X teleconverter in place. As you can see with Bill Eaton’s image above, high ISO performance is excellent as long learn as you learn to expose well to the right. I have a great 1D III image of a gator swallowing a young Brown Pelican that was made at ISO 6400. It made the finals of the BBC contest several times. With the price drop this body is a steal.
Used EOS-1D Mark IV Digital Camera Body
Marc Lombardi is offering a used EOS-1D Mark IV digital camera body in excellent condition for $2699. The body has one minor cosmetic scratch on top. The sale includes the charger and two batteries, a RRS plate, and insured ground shipping to US addresses only. Your camera will be shipped only after your check clears unless other arrangements are made.
Please contact Marc via e-mail or by phone at 610-585-3500 (Eastern time).
Two Mark IVs served as my workhorse bodies for more than three years.

 Use the BAA Affiliate logo link above to pre-order your 7D II, shoot me your receipt via e-mail, and I will do my very best to have your order expedited once the camera begins shipping.
Ship-date News
Amazingly, both B&H and Amazon.com are showing 30 October as the revised ship-date for the about to be released EOS-7D Mark II. I e-mailed Chuck Westfall of Canon for confirmation and addition details. I will update asaihfh (as soon as I hear from him).
This just in…
This just in via e-mail from Chuck Westfall:
Shipment of the 7D Mark II from our warehouses to authorized US dealers will begin on October 30th. It will probably take at least a day or two for the shipments to arrive at the dealers.
Facebook
Be sure to like and follow BAA on Facebook by clicking on the logo link upper right. Tanks a stack!
Support the BAA Blog. Support the BAA Bulletins: Shop B&H here!
We want and need to keep providing you with the latest free information, photography and Photoshop lessons, and all manner of related information. Show your appreciation by making your purchases immediately after clicking on any of our B&H or Amazon Affiliate links in this blog post. Remember, B&H ain’t just photography!
…..
Amazon.com
Those who prefer to support BAA by shopping with Amazon may use this link:
Amazon Canada
Many kind folks from north of the border, ay, have e-mailed stating that they would love to help us out by using one of our affiliate links but that living in Canada and doing so presents numerous problems. Now, they can help us out by using our Amazon Canada affiliate link by starting their searches by clicking here. Many thanks to those who wrote.
Typos
In all blog posts and Bulletins, feel free to e-mail or to leave a comment regarding any typos or errors. Just be right :).
October 21st, 2014 The Streak Continues: 325
Yesterday was a full day of photography for me alone at Fort DeSoto with lots of image processing during my midday break. And answering a few e-mails. But I am still miles behind. This blog post, the 325th in a row, took me about 2 1/2 hours to prepare including the time spent on the four image optimizations. It was published at about 5:15am from my motel room in St. Pete Beach. I am meeting repeat client Bill Eaton at DeSoto early this morning. And then drive back to ILE.
To show your appreciation for my efforts here, we ask that you use our the B&H and Amazon affiliate links on the right side of the blog for all of your purchases. B&H Is recommended for you major photography gear purchases, Amazon for your household, entertainment, and general purpose stuff. Please check the availability of all photographic accessories in the BIRDS AS ART Online Store, especially Gitzo tripods, Wimberley tripod heads, and the like. We sell only what I have used, have tested, and can depend on. We will not sell you junk. We know what you need to make creating great images easy and fun. And we are always glad to answer your gear questions via e-mail.
|
|
|
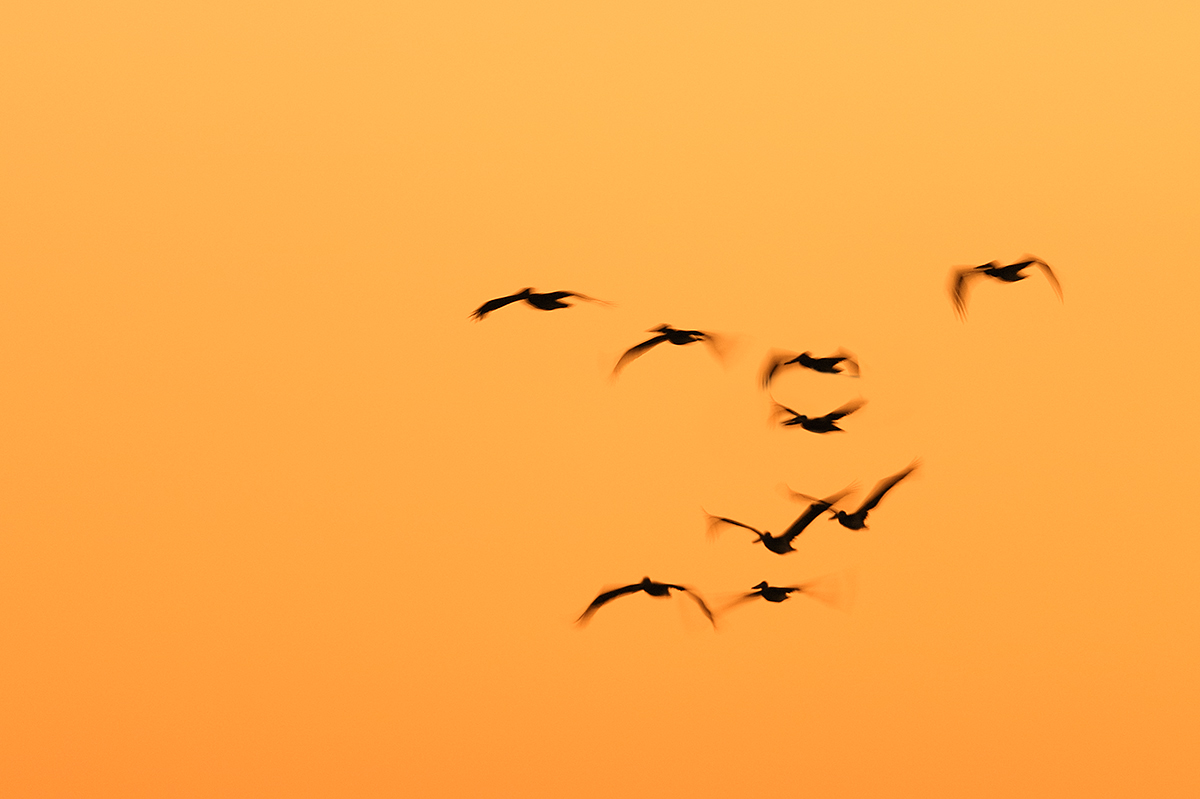
This image was created pre-dawn on the clear morning of October 20, 2014 at Fort DeSoto Park. I used the Gitzo 3532 LS carbon fiber tripod, the Mongoose M3.6 head, with the Canon EF 600mm f/4L IS II USM lens and a beta version of the Canon EOS 7D Mark II . ISO 500 (via ISO Safety Shift). Evaluative metering +1 stop as framed: 1/15 sec. at f/4 in Tv mode. Color temperature: 8000K.
Central Zone AF/AI Servo/Rear Focus AF activated two sensors in near the lower right of the grid that were active at the moment of exposure. Click here to see the latest version of the Rear Focus Tutorial. Click on the image to see a larger version.
Image #1: Brown Pelican squadron on dawn patrol
|
Dealing With So-so Sunrise or Sunset Colors
With somewhat blah sky colors it can be fun to raise the Color Temperature. I did that with the image above by setting it to 8000 Kelvin. Anywhere from 7500 and up can work well. I used my standard blur set-up: 1/15 sec at +1 stop of exposure compensation. And yes, you can do the same thing in post processing but it is more fun to do it in the field and there are supposed to be some advantages of doing it at the time of capture.
I did remove a single bird that merged with two others; I used a series of Quick Masks that were refined by adding Regular Layer Masks.
|
|
|
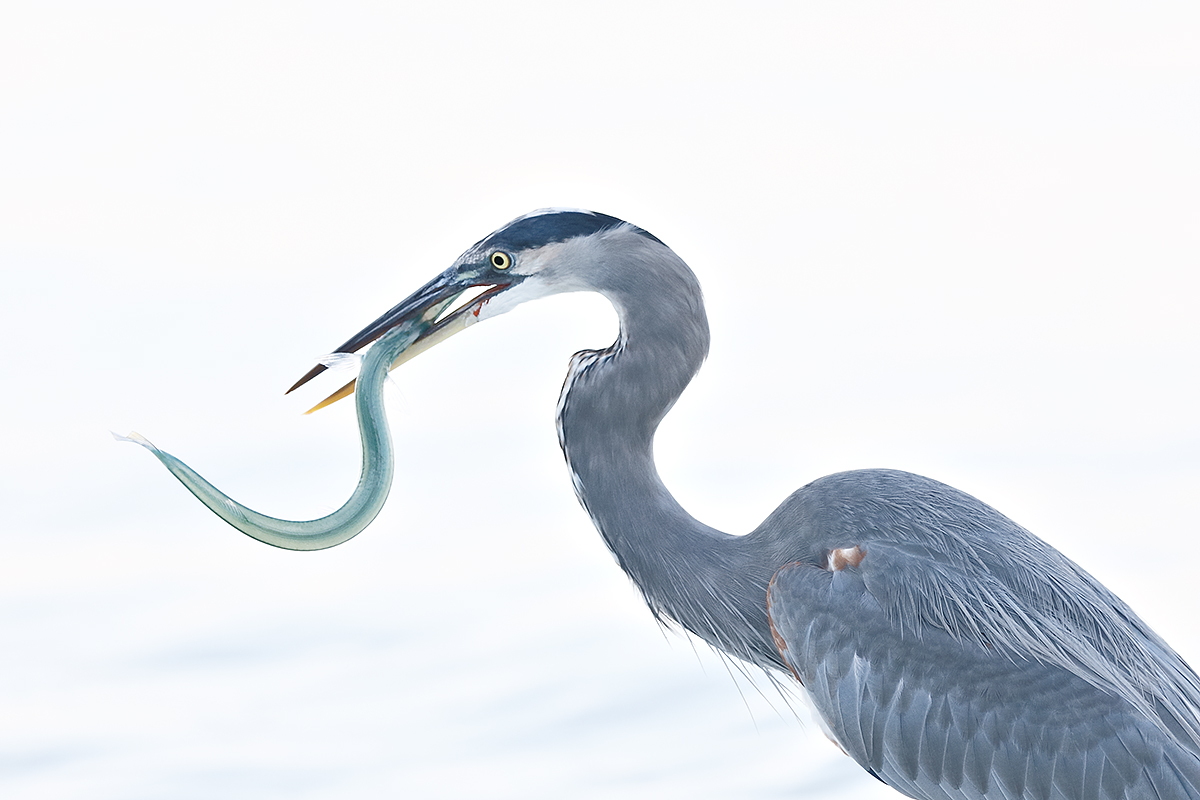
This image was created in the shade of a big stand of trees on the clear morning of October 20, 2014 at Fort DeSoto Park. I used the hand held Canon EF 300mm f/2.8L IS II USM lens and a beta version of the Canon EOS 7D Mark II . ISO 640 (via ISO Safety Shift). Evaluative metering +2 stops as framed: 1/1000 sec. at f/2.8 in Tv mode. AWB.
Central Sensor/AI Servo Surround/Rear Focus AF on the bend of the bird’s upper neck was active at the moment of exposure. Click here to see the latest version of the Rear Focus Tutorial. Click on the image to see a larger version.
Image #2: High Key Great Blue Heron with fish–possibly a needlefish
|
Well…
Well, at least the fish angle is perfect. I tried my best but could just not get ahead of the bird but it kept angling ahead of me….
|
|
|
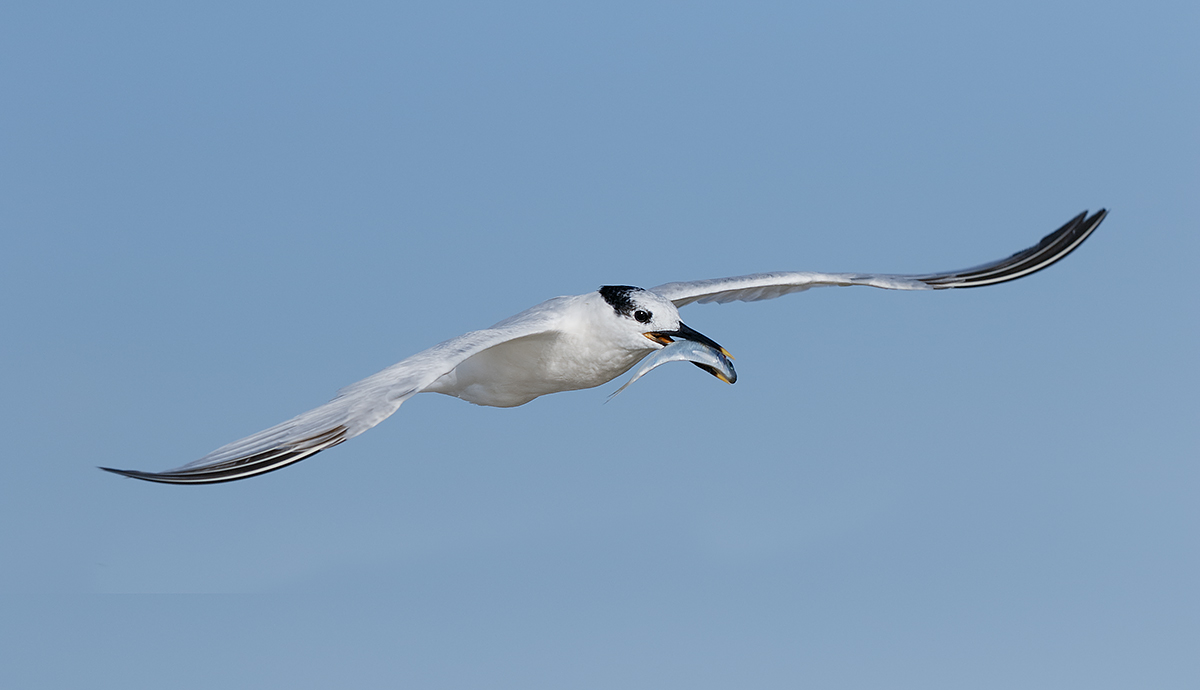
This image was created on the clear morning of October 20, 2014 at Fort DeSoto Park. Again I used the hand held Canon EF 300mm f/2.8L IS II USM lens and a beta version of the Canon EOS 7D Mark II . ISO 400. Evaluative metering +1/3 stop off the sky: 1/6400 sec. at f/5 in Manual mode. AWB.
Central Sensor/AI Servo Surround/Rear Focus AF barely caught the top of the tern’s head as originally framed and was active at the moment of exposure. Click here to see the latest version of the Rear Focus Tutorial. Click on the image to see a larger version.
Image #3: Sandwich Tern with greenback
|
The Situation
The tide was coming in at the spit. I had been trying for flight with the 300 II/1.4X III/7D II combo for a while without much success. To change things up I took off the TC and got closer. Then I got lucky.
|
|
|
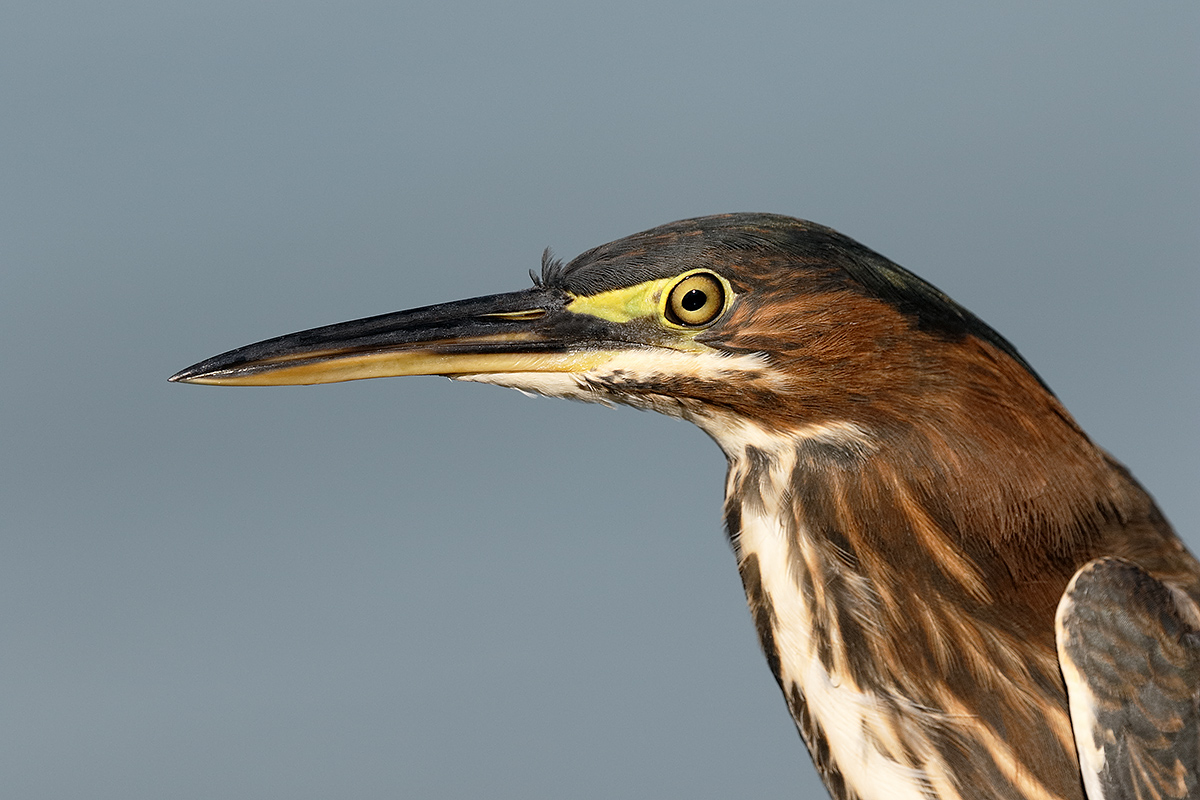
This image was created on the clear morning of October 20, 2014 at Fort DeSoto Park. Again I used the hand held Canon EF 300mm f/2.8L IS II USM lens, with the Canon Extender EF 2X III, and a beta version of the Canon EOS 7D Mark II . ISO 400. Evaluative metering at zero: 1/1600 sec. at f/8 in Av mode. AWB.
Upper Central Zone/AI Servo/Rear Focus AF selected four sensors, the one just above the central sensor and the three directly above that one. This array nailed the eye and the face and was active at the moment of exposure. Click here to see the latest version of the Rear Focus Tutorial. Click on the image to see a larger version.
Image #4: Juvenile Green Heron
|
Atypical…
When a Green Heron flew by the spit and disappeared to the east I said to a new acquaintance, “Good luck photographing that species here. I am not ever sure that I have seen one in the park before.” In a few minutes I took a walk down the beach and was amazed to see the bird in the Gulf. As I approached, the bird flew but it went only a short distance and landed on tree stump with the top sawed off. In other words, not very attractive. I added the 2X III TC to the mix to eliminate the stump and got as close as possible. I am starting to figure out when and how to use the new wider Zone AF.
Which is the best image?
Please take a moment to leave a comment and let us now which is your favorite and why you like it.
|

|
|
San Diego offers a wealth of very attractive natural history subjects. With annual visits spanning more than three decades I have lot of experience there….
|
2015 San Diego 4 1/2-DAY BIRDS AS ART Instructional Photo-Tour (IPT): FEB 1 thru the morning of FEB 5, 2015: $1799 (Limit: 8/Openings: 3)
Meet and Greet after dinner on your own at 7:00pm on JAN 31
Join me in San Diego to photograph the spectacular breeding plumage Brown Pelicans with their fire-engine red bill pouches; Brandt’s and Double-crested Cormorants in breeding plumage with their amazing crests; breeding plumage Wood and Ring-necked Duck; other species possible including Lesser Scaup, Redhead, and Surf Scoter; a variety of gulls including Western, California, and the gorgeous Heerman’s, all in full breeding plumage; shorebirds including Marbled Godwit, Willet, Sanderling and Black-bellied Plover; many others possible including Least, Western, and Spotted Sandpiper, Whimbrel, Black and Ruddy Turnstone, Semipalmated Plover, and Surfbird; Harbor Seals (depending on the current regulations) and California Sea Lions likely; and Bird of Paradise flowers. And as you can see by studying the two IPT cards there are some nice landscape opportunities as well.
Did I mention that there are wealth of great birds and natural history subjects in San Diego in winter?
This IPT will include five 3 1/2 hour morning photo sessions, four 2 1/2 hour afternoon photo sessions, five lunches, after-lunch image review and Photoshop sessions, and two fine dinners. To ensure early starts, breakfasts will be your responsibility.
A $499 non-refundable deposit is required to hold your slot for this IPT. You can send a check (made out to “Arthur Morris) to use at BIRDS AS ART, PO Box 7245, Indian Lake Estates, FL, 33855. Or call Jim or Jennifer at the office with a credit card at 863-692-0906. Your balance, payable only by check, will be due on 12/1//2014. If the trip fills, we will be glad to apply a credit applicable to a future IPT for the full amount less a $100 processing fee. If we do not receive your check for the balance on or before the due date we will try to fill your spot from the waiting list. If your spot is filled, you will lose your deposit. If not, you can secure your spot by paying your balance. Please print, complete, and sign the form that is linked to here and shoot it to us along with your deposit check. If you register by phone, please print, complete and sign the form as noted above and either mail it to us or e-mail the scan. If you have any questions, please feel free to contact me via e-mail.
|

|
|
Though the pelicans will be the stars of the show on this IPT there will be many other handsome and captivating subjects in wonderful settings.
|
San Diego Natural History Museum Program & The Birds of the World Exhibit
On Saturday morning, February 7, 2015 I will be presenting “A Bird Photographer’s Story” at the San Diego Natural History Museum to kick off the Birds of the World photographic exhibit that will feature the images of about a dozen of the world’s top avian photographers. This program,which is being generously sponsored by the Canon Explorers of Light program, will be free and open to the public. I am proud to say that both Denise Ippolito and I will have images hanging in the show. The exhibit opening is scheduled for later that same day, February 7, 2015. (Times TBA).
Folks on the IPT who wish to stay over and attend the program and the exhibit opening on Saturday are invited to join me for a photo session on Friday morning as follows:
Friday Morning Add-on Photo Session: February 6, 2015: $299.
This workshop includes 3 hours of in-the-field pelican photography instruction and brunch with image review and Photoshop instruction. For now, this session is open only to folks attending the IPT.
Facebook
Be sure to like and follow BAA on Facebook by clicking on the logo link upper right. Tanks a stack!
Support the BAA Blog. Support the BAA Bulletins: Shop B&H here!
We want and need to keep providing you with the latest free information, photography and Photoshop lessons, and all manner of related information. Show your appreciation by making your purchases immediately after clicking on any of our B&H or Amazon Affiliate links in this blog post. Remember, B&H ain’t just photography!
…..
Amazon.com
Those who prefer to support BAA by shopping with Amazon may use this link:
Amazon Canada
Many kind folks from north of the border, ay, have e-mailed stating that they would love to help us out by using one of our affiliate links but that living in Canada and doing so presents numerous problems. Now, they can help us out by using our Amazon Canada affiliate link by starting their searches by clicking here. Many thanks to those who have written.
Typos
In all blog posts and Bulletins, feel free to e-mail or to leave a comment regarding any typos or errors. Just be right :).
October 20th, 2014 The Streak Continues: 324
Yesterday was more work, more swim, an ice bath, and NFL on the tube. Arash should be just about finishing the final PDF of the DPP 4 RAW Conversion Guide as I type on Sunday evening. We should have it for sale this coming week. This blog post, the 324th in a row–that’s a lot, no?, took me about 3 1/2 hours to prepare including the time for image optimizations. I completed it at 6:00pm on Sunday night and am publishing it from my home at Indian Lake Estates, FL, early on Monday–2:59 am to be exact. Next I finish packing the car and head over to Fort DeSoto for a short busman’s holiday.
To show your appreciation for my efforts here, we ask that you use our the B&H and Amazon affiliate links on the right side of the blog for all of your purchases. B&H Is recommended for you major photography gear purchases, Amazon for your household, entertainment, and general purpose stuff. Please check the availability of all photographic accessories in the BIRDS AS ART Online Store, especially Gitzo tripods, Wimberley tripod heads, and the like. We sell only what I have used, have tested, and can depend on. We will not sell you junk. We know what you need to make creating great images easy and fun. And we are always glad to answer your gear questions via e-mail.
Super Short Notice Fort DeSoto In-the Field Tuesday Morning Offering
DeSoto has been great. I know where the birds and where and when the best opps are. I will be driving over to DeSoto very early on Monday morning. I will be photographing on Monday morning, Monday afternoon, and Tuesday morning and then heading back to ILE.
If you would like to join me and learn a ton, here are your remaining options:
Monday afternoon only, one 3+ hour photo session: $125.
Tuesday morning, one 3+ hour photo session: $150.
Both are quite a bargain. The limit is 6. I have one for Tuesday morning. If you would like to join me please call Jim or Jen at the office on Monday morning at 863-692-0906 to register. In addition, please shoot me an e-mail, and include a call back number. I hope that you can join me. If you are desperate at the last minute try my cell at 863-221-2372 and leave a message if I do not pick up.
A Note on the Three Image Optimizations
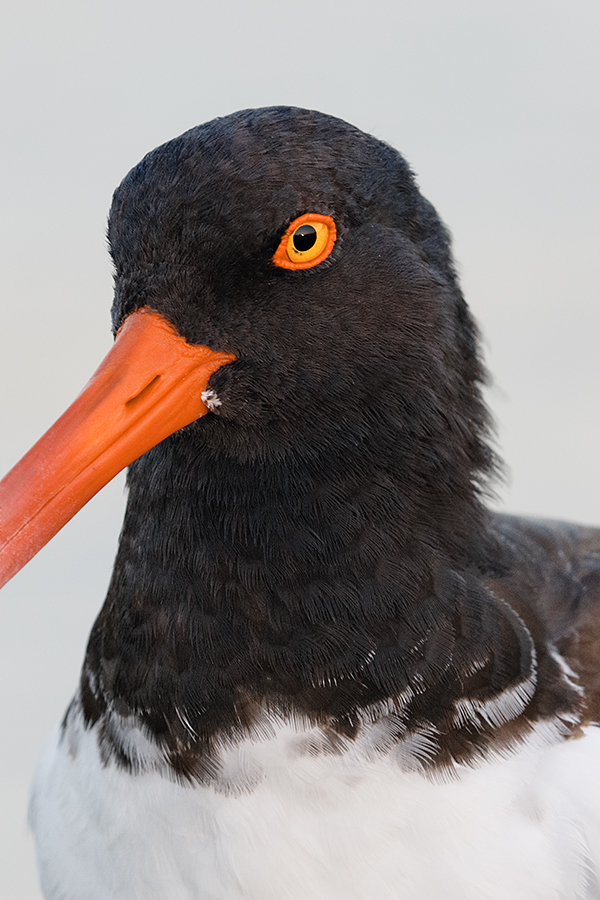
All of today’s images were converted in DPP v.3.14.41.0 using the recommended settings for both Chrominance and Luminance noise reduction. Looking at the noise in the large crops makes it hard to believe that the optimized images look so darned good. I am very proud of how I handled the BLACKs on the oystercatcher, the pink of godwit’s bill, and the cranes RED crown. All is detailed in Digital Basics. See below for info on DB.
The DPP RAW Conversion Guide
To learn why I use Canon’s Digital Photo Professional (DPP) to convert every image that I work on, click here. The current guide will teach you how to best convert all of your Canon images in all 3 point something versions of Canon Digital Photo Professional including the current v.3.14.41.0.
Coming next week: The DPP 4.0 RAW Conversion Guide by Arash Hazeghi and Arthur Morris. The more that I use DPP 4.0 for my 1D X and 5D III RAW conversions the more I learn about it. And the more I learn about it the more I am impressed with it. Note: at present, DPP 4.0 will work only with 1D X, 5D III, and 6D images. I am hoping against hope that at some point Canon will release a new version of DPP 4 that will support 7D II images.
Digital Basics
Everything that I did to optimize today’s images is covered in detail in my Digital Basics File–written in my easy-to-follow, easy-to-understand style. Are you tired of making your images look worse in Photoshop? Digital Basics File is an instructional PDF that is sent via e-mail. It includes my complete digital workflow, dozens of great Photoshop tips (including Surface Blur settings), details on using all of my image clean-up tools, the use of Contrast Masks, several different ways of expanding and filling in canvas, all of my time-saving Keyboard Shortcuts, Quick Masking, Layer Masking, and NIK Color Efex Pro basics, Digital Eye Doctor, using Surface and Gaussian Blurs, Tim Grey Dodge and Burn, how to create time-saving actions, and tons more.
APTATS I & II
Learn the details of advanced Quick Masking techniques in APTATS I. Learn Advanced Layer Masking Techniques in APTATS II. Mention this blog post and apply a $5 discount to either with phone orders only. Buy both APTATS I and APTATS II and we will be glad to apply at $15 discount with phone orders only. Please call Jim or Jennifer at 863-692-0906 weekdays to order.

 Use the BAA Affiliate logo link above to pre-order your 7D II, shoot me your receipt via e-mail, and I will do my very best to have your order expedited once the camera begins shipping.
|
|
|
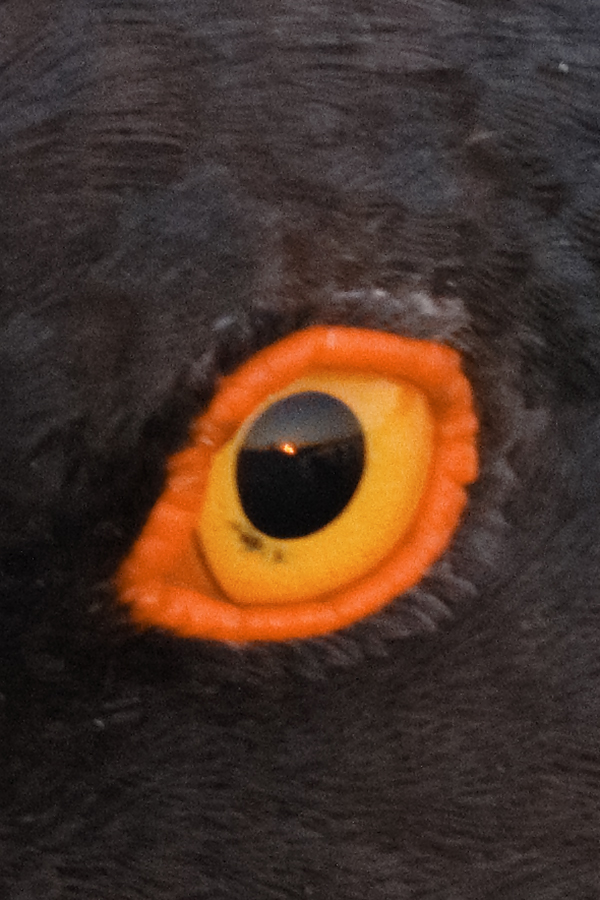
This unsharpened JPEG represents a 100% crop of the TIFF created by converting the RAW file in DPP v3.14.41.
|
The 100% AMOY Crop
Everything looks pretty good here but for some Chrominance noise in the BLACKs DPP 4 does well with color noise; in DPP 3 point whatever it is terrible–it destroys fine detail. If you are familiar with viewing your images at 100%, please feel free to let us know what you think of the noise and the image quality here at ISO 1600.
|
|
|
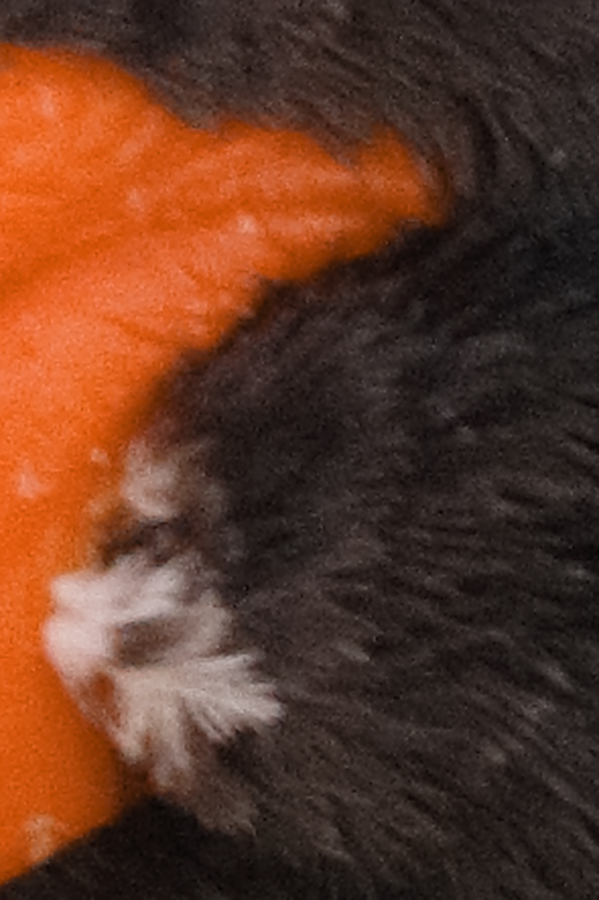
This unsharpened JPEG represents a 200% crop of the TIFF created by converting the RAW file in DPP v3.14.41.
|
The 200% AMOY Crop
With the relatively huge crop here we are seeing some degradation of feather detail but all in all, not too bad. Do take a look at the optimized image above. If you are familiar with viewing your images at 200%, please feel free to let us know what you think of the noise and the image quality here at ISO 1600.
|
|
|
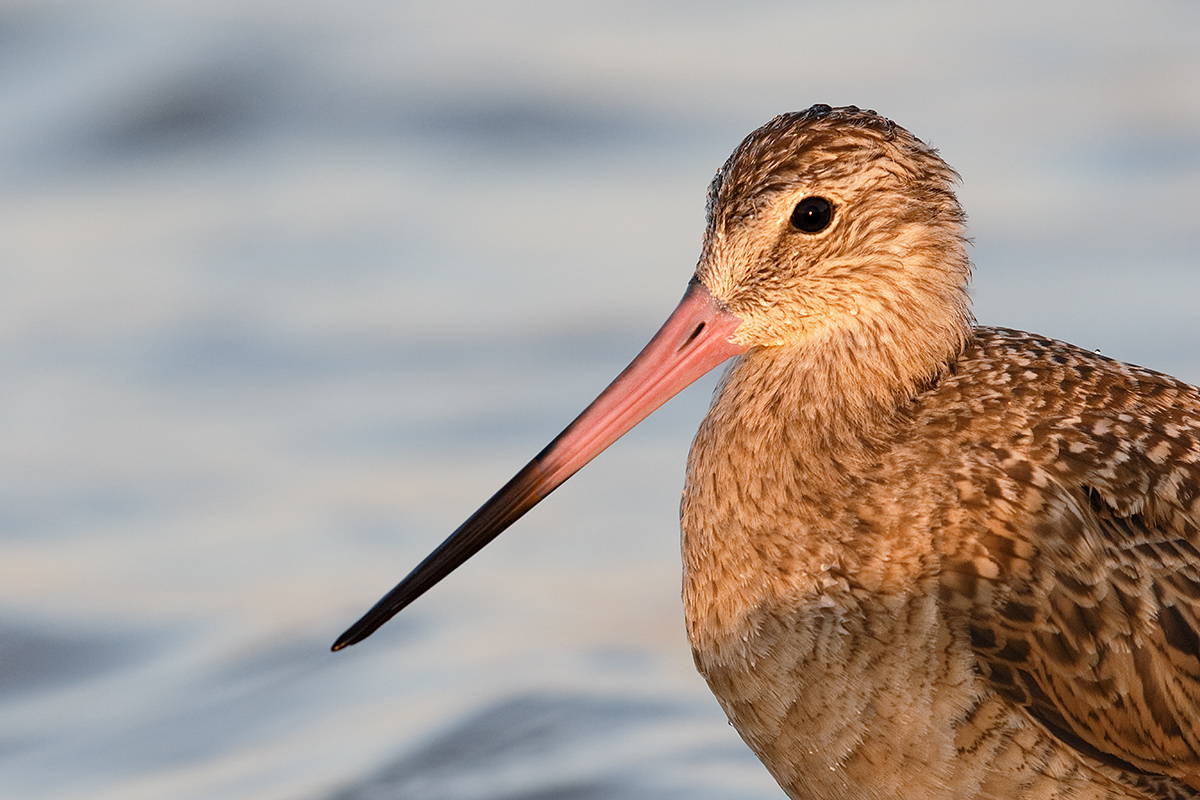
This Marbled Godwit image was created at 6:53pm on October 11 on DAY 1 of the recently concluded Fort DeSoto IPT with the Gitzo 3532 LS carbon fiber tripod, the Mongoose M3.6 head, the Canon EF 600mm f/4L IS II USM lens, the Canon Extender EF 2X III, and a beta version of the Canon EOS 7D Mark II . ISO 1600. Evaluative metering +2/3 stop: 1/320 sec. at f/9 in AV mode. AWB.
Central sensor (by necessity)/AI Servo Expand/Rear Focus AF on the middle of the bird’s bill as framed was active at the moment of exposure. Click here to see the latest version of the Rear Focus Tutorial. Click on the image to see a larger version.
This JPEG represents the optimized image.
|
Marbled Godwit
When I saw a young Marbled Godwit on the South Flats of the East Pond at Jamaica Bay Wildlife Refuge some 37 or 38 years ago I had no idea that the experience would change the course of the remainder of my adult life. But it did just that in many ways. All for the good.
|
|
|
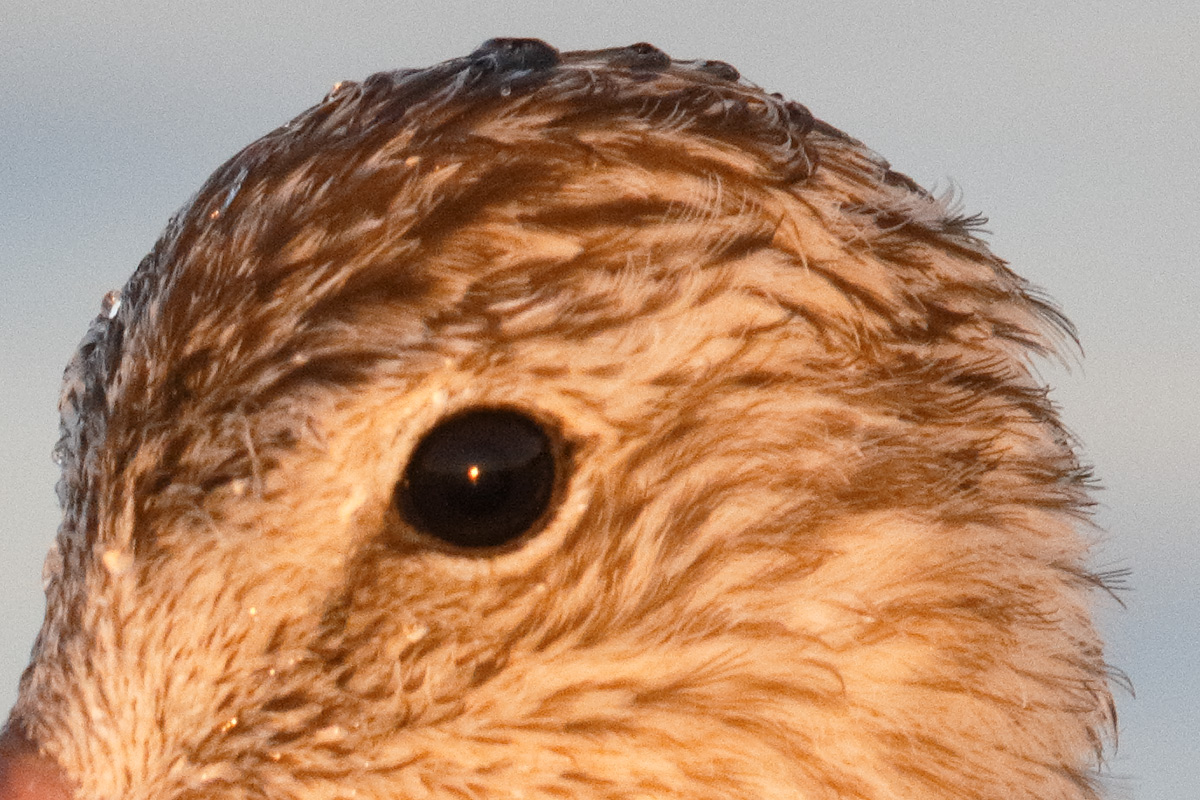
This unsharpened JPEG represents a 100% crop of the TIFF created by converting the RAW file in DPP v3.14.41.
|
The 100% MAGO Crop
Everything here looks great with some nice feather detail and a nice sharp eye. If you are familiar with viewing your images at 100%, please feel free to let us know what you think of the noise and the image quality here at ISO 1600.
|
|
|
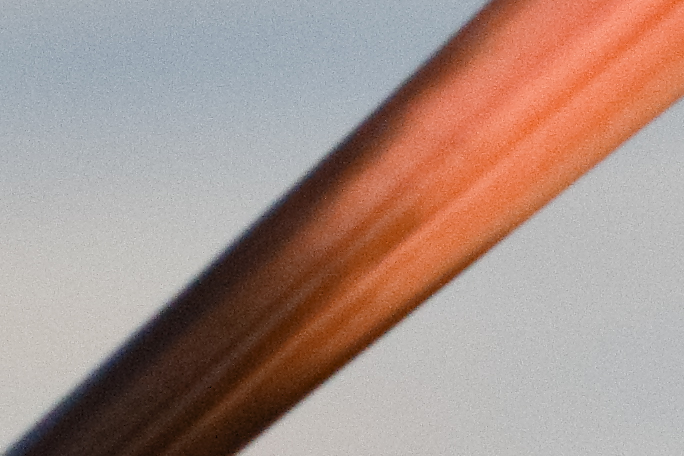
This unsharpened JPEG represents a 200% crop of the TIFF created by converting the RAW file in DPP v3.14.41.
|
The 200% MAGO Crop
With the relatively huge crop here we are seeing significant Luminance noise on the bill and in the background. But as others have noted the noise seems relatively smooth, much less harsh than with images from previous camera bodies. With all three images here a dose of Filter > Blur > Surface Blur applied to the backgrounds only does wonders. If you are familiar with viewing your images at 200%, please feel free to let us know what you think of the noise and the image quality here at ISO 1600.
|
|
|
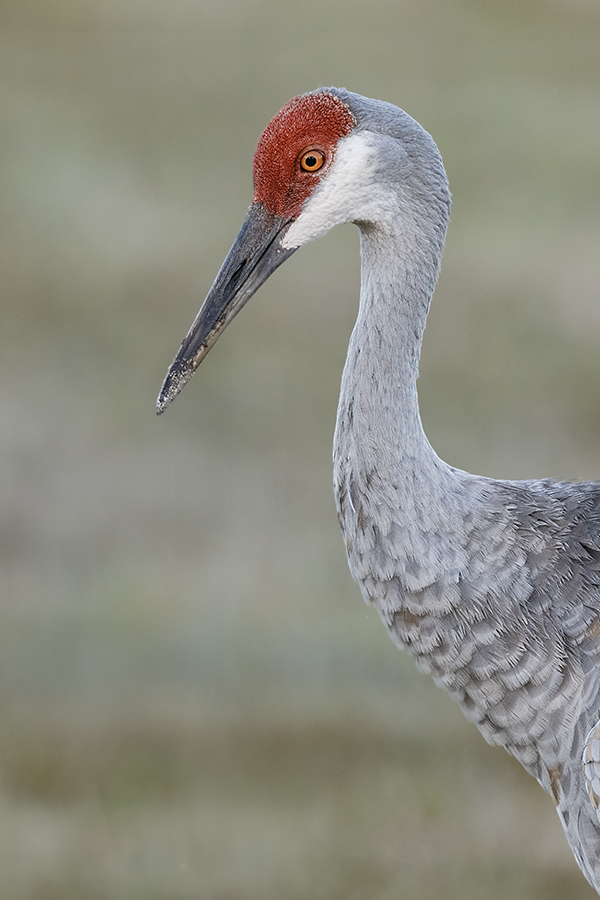
This image was created at 7:49am on the morning of 19 October down by the lake near my home. Working from my vehicle I used the BLUBB-supported/hand held Canon EF 200-400mm f/4L IS USM lens with Internal 1.4x Extender (hand held with the internal extender in place at 436mm) and a beta version of the Canon EOS 7D Mark II . ISO 1600. Evaluative metering +1/3 stop as framed: 1/800 sec. at f/5.6 in Av mode was a full half stop too dark.
65-point Automatic Selection Rear Focus/AI Servo AF selected two sensors in the upper right corner of the array. They were active at the moment of exposure. Click here to see the latest version of the Rear Focus Tutorial. Click on the image to see a larger version.
|
65-point Automatic Selection with iTR Face Detection
Here again we see how well the 65-point Automatic Selection AF Area Selection Mode works in conjunction with iTR Face Detection. I was somewhat remiss in the blog post here by not mentioning that iTR (( Intelligent Tracking and Recognition) ain’t just for faces. That it can detect shapes and colors and patterns and not just eyes and skin tones makes it relevant for bird and wildlife photography. After it detects what it detects it tells the AF system not to wander thus producing images like the one above that are sharp where you want them to be sharp. Is it perfect? No. But it is significantly improved from the iTR in the 1D X.
|
|
|
This unsharpened JPEG represents a 100% crop of the TIFF created by converting the RAW file in DPP v3.14.41.
|
The 100% SACR Crop
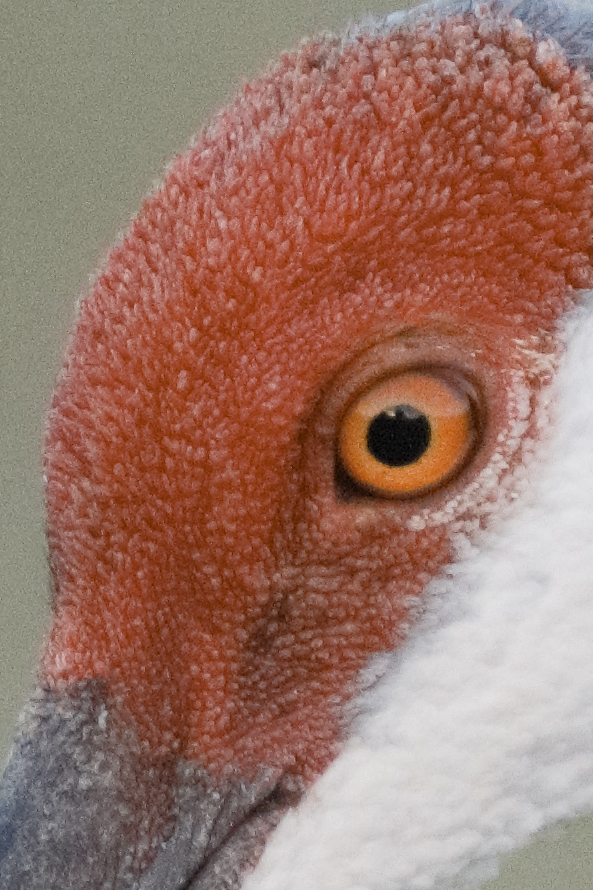
REDs are tough as they often come out of the camera either a bit over-saturated or a bit funky. They require special handling. DPP 4 has an HSL (Hue/Saturation/Luminance)tab that will make things easier. Everything else looks pretty good for ISO 1600. I will share my tips for handing the REDs when we take a close look at the image optimization here in a day or two. If you are familiar with viewing your images at 100%, please feel free to let us know what you think of the noise and the image quality here at ISO 1600.
|
|
|
This unsharpened JPEG represents a 200% crop of the TIFF created by converting the RAW file in DPP v3.14.41.
|
The 200% Crop
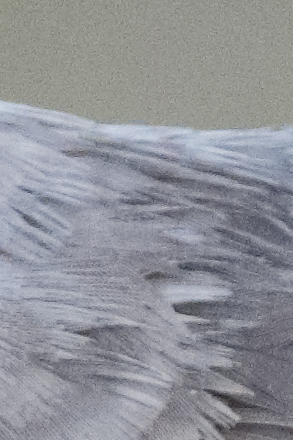
With the relatively huge crop here the feather detail here is at least decent. We are seeing significant noise in the background. A nice a dose of Filter > Blur > Surface Blur applied to the background only as detailed in my Digital Basics File rendered the BKGR here smooth as a the proverbial baby’s tush. If you are familiar with viewing your images at 200%, please feel free to let us know what you think of the noise and the image quality here at ISO 1600.
The Image Optimization
We will take a close look at the before and after versions of this image in a blog post here in a day or three. Yes, all ISO 1600 images are going to exhibit some significant noise. But dealing with that noise is not rocket science.
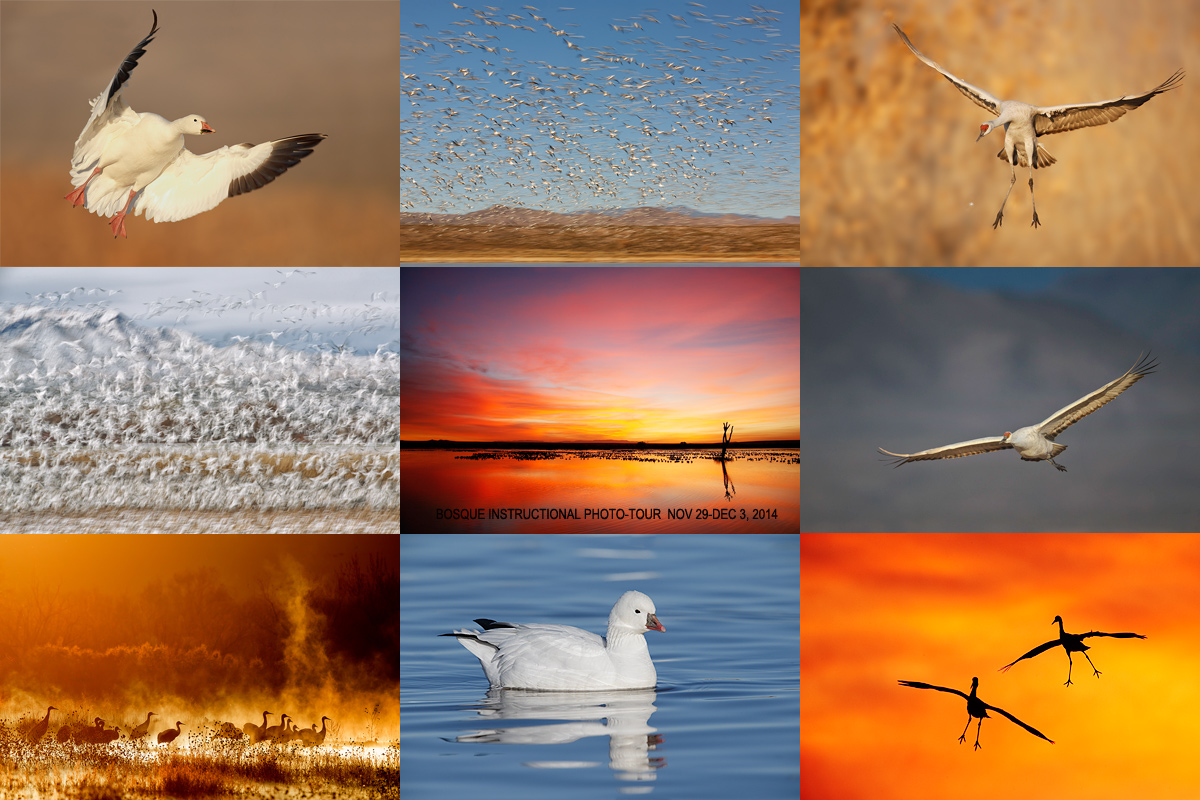
“Love Affair with Bosque.” Sponsored by Canon USA/Explorers of Light. Friday, NOV 21, 2014; 1:00 to 2:40pm. Free, at the Bodega Restaurant, Socorro.
A slide program by Arthur Morris/BIRDS AS ART. Limit 200. Please see the important registration information below.
Arthur Morris first visited Bosque del Apache Refuge in December, 1992 while on sabbatical with his late-wife Elaine While leading his first Bosque del Apache photographic workshop in December, 1994, quite soon after Elaine’s death, he created two iconic Bosque images. His “Blizzard in Blue” was honored in the prestigious 1998 BBC Wildlife Photographer of the Year Competition. “Fire in the Mist” was similarly honored in the 2001 BBC competition and soon thereafter was featured as wrap-around cover art on the coffee table book, Life on the Earth, a celebration of 30 years of the best images from the Wildlife Photographer of the Year Competitions. Those two images laid the foundation for his more than two decade love affair with the refuge. He has returned every year since then at the Thanksgiving season while leading BIRDS AS ART Instructional Photo-Tours. In addition, he has two February visits along with two September visits, the latter visits in conjunction with the Bosque del Apache Open Windows Volunteer Program that he founded. Join us for Artie’s photographic celebration of his “Love Affair with Bosque.”
Even though this is free event, you need to click here to register.
|
|
|
Join Denise Ippolito and me for four great days of photography and learning at one of our soul places. Please click on the card to enjoy a larger version.
|
Bosque del Apache 2014 BIRDS AS ART/A Creative Adventure Instructional Photo-Tour (IPT). NOV 29 (afternoon photo session)-DEC 3 (morning session), 2014. Totaling 4 FULL-DAYS: $1449. Leaders: Arthur Morris and Denise Ippolito. Introductory Slide program: 7:00pm on Saturday 11/29. Limit 16/Openings: 1
Once again, there is a single opening due to a cancellation.
Tens of thousands of Snow Geese, 10,000 Sandhill Cranes, ducks, amazing sunrises, sunsets, and blast-offs. Live, eat, and breathe photography with two of the world’s premier photographic educators at one of their very favorite photography locations on the planet. Top-notch in-the-field and Photoshop instruction. This will make 21 consecutive Novembers at Bosque for artie. This will be denise’s 6th workshop at the refuge. Nobody knows the place better than artie does. Join us to learn to think like a pro, to recognize situations and to anticipate them based on the weather, especially the sky conditions, the light, and the wind direction. Every time we make a move we will let you know why. When you head home being able to apply what you’ve learned on your home turf will prove to be invaluable.
This workshop includes 4 afternoon (11/29 through 12/2), 4 morning (11/30 to 12/3) photography sessions, an inspirational introductory slide program after dinner on Saturday, 11/29, all lunches, and after-lunch digital workflow, Photoshop, and image critiquing sessions.
There is never a strict itinerary on a Bosque IPT as each day is tailored to the local conditions at the time and to the weather. We are totally flexible in order to maximize both the photographic and learning opportunities. We are up early each day leaving the hotel by 5:30 am to be in position for sunrise. We usually photograph until about 10:30am. Then it is back to Socorro for lunch and then a classroom session with the group most days. We head back to the refuge at about 3:30pm each day and photograph until sunset. We will be photographing lots of Snow Geese and lots of Sandhill Cranes with the emphasis on expanding both your technical skills and your creativity.
A $449 non-refundable deposit is required to hold your slot for this IPT. Your balance, payable only by check, will be due on 7/25/2014. If the trip fills, we will be glad to apply a credit applicable to a future IPT for the full amount less a $100 processing fee. If we do not receive your check for the balance on or before the due date we will try to fill your spot from the waiting list. Whether or not your spot is filled, you will lose your deposit. If not, you can secure your spot by paying your balance.
Please print, complete, and sign the form that is linked to here and shoot it to us along with your deposit check (made out to “Arthur Morris.”) You can also leave your deposit with a credit card by calling the office at 863-692-0906. If you register by phone, please print, complete and sign the form as noted above and either mail it to us or e-mail the scan. If you have any questions, please feel free to contact me via e-mail.
|

|
|
Join Denise Ippolito and Arthur Morris for two great days of photography, fun, and learning at one of our favorite soul places. We will surely be taking you out of the box on this workshop. Please click on the card to enjoy a larger version.
|
Bosque del Apache 2014 A Creative Adventure/BIRDS AS ART “Creative Photography Instructional Photo-Tour.” (IPT). NOV 24-25, 2014. 2-FULL DAYS: $729. Leaders: Denise Ippolito & Arthur Morris. Introductory Slide program: 7:00pm on Sunday 11/23.
Get Out of Your Box!
The Creative Bosque IPT is perfect for folks who want to learn to think outside the box, to create new and different images. This workshop is the perfect add-on for folks who are planning on attending the Festival of the Cranes. Learn to unleash your creative juices at the wondrous Bosque del Apache National Wildlife Refuge in San Antonio, New Mexico with two great leaders including the amazingly talented and creative Denise Ippolito. In-the-field instruction will include tips on gear set-up, on creating a variety of pleasing blurs, on getting the right exposure, and on designing pleasing images. And lots more. From vertical pan blurs to subject motion blurs to zoom blurs to multiple exposures we will cover it all. If conditions are perfect, we will not hesitate to take advantage of them to do some traditional bird photography. This workshop will include an inspirational introductory slide program on Sunday evening, 11/23, after dinner on your own, two morning and two afternoon photography sessions, all lunches, a digital workflow and Photoshop session after lunch on Monday, and an image critiquing session after lunch on Tuesday.
A $329 non-refundable deposit is required to hold your slot for this IPT. Your balance, payable only by check, will be due on 7/25/2014. If the trip fills, we will be glad to apply a credit applicable to a future IPT for the full amount less a $100 processing fee. If we do not receive your check for the balance on or before the due date we will try to fill your spot from the waiting list. If your spot is filled, you will lose your deposit. If not, you can secure your spot by paying your balance.
Please print, complete, and sign the form that is linked to here and shoot it to us along with your deposit check (made out to “Arthur Morris.”) You can also leave your deposit with a credit card by calling the office at 863-692-0906. If you register by phone, please print, complete and sign the form as noted above and either mail it to us or e-mail the scan. If you have any questions, please feel free to contact me via e-mail.
Facebook
Be sure to like and follow BAA on Facebook by clicking on the logo link upper right. Tanks a stack!
Support the BAA Blog. Support the BAA Bulletins: Shop B&H here!
We want and need to keep providing you with the latest free information, photography and Photoshop lessons, and all manner of related information. Show your appreciation by making your purchases immediately after clicking on any of our B&H or Amazon Affiliate links in this blog post. Remember, B&H ain’t just photography!
…..
Amazon.com
Those who prefer to support BAA by shopping with Amazon may use this link:
Amazon Canada
Many kind folks from north of the border, ay, have e-mailed stating that they would love to help us out by using one of our affiliate links but that living in Canada and doing so presents numerous problems. Now, they can help us out by using our Amazon Canada affiliate link by starting their searches by clicking here. Many thanks to those who have written.
Typos
In all blog posts and Bulletins, feel free to e-mail or to leave a comment regarding any typos or errors. Just be right :).
October 19th, 2014 The Streak Continues: 323
Yesterday was more work, more swim, and an ice bath. Arash should be finishing the final PDF of the DPP 4 RAW Conversion Guide today. We hope to have it for sale this coming week. This blog post, the 323rd in a row, took me about 3 hours to prepare. It was published at about 7:30am from my home at Indian Lake Estates, FL.
To show your appreciation for my efforts here, we ask that you use our the B&H and Amazon affiliate links on the right side of the blog for all of your purchases. B&H Is recommended for you major photography gear purchases, Amazon for your household, entertainment, and general purpose stuff. Please check the availability of all photographic accessories in the BIRDS AS ART Online Store, especially Gitzo tripods, Wimberley tripod heads, and the like. We sell only what I have used, have tested, and can depend on. We will not sell you junk. We know what you need to make creating great images easy and fun. And we are always glad to answer your gear questions via e-mail.
Super Short Notice Fort DeSoto In-the Field Offerings
DeSoto has been great. I know where the birds and where and when the best opps are. I will be driving over to DeSoto very early on Monday morning. I will be photographing on Monday morning, Monday afternoon, and Tuesday morning and then heading back to ILE.
If you would like to join me and learn a ton, here are your options:
Monday full day, two 3+ hour photo sessions plus a working lunch with image review and Photoshop: $300.
Monday morning only with a working lunch (lunch included) with image review and Photoshop: $200.
Monday afternoon only, one 3+ hour photo session: $125.
Tuesday morning, one 3+ hour photo session: $150.
All quite a bargain. The limit is 6 but I am hoping for at least one :). Please call me at 863-692-0906 on Sunday between 9:15am and 7:00pm with questions or to register. If no answer, please shoot me an e-mail, and include a call back number. I hope that you can join me.
Those who are staying over on Sunday or Monday are invited to call or to write for motel info. I just booked my room for Monday night and they likely have rooms for Sunday night as well.
|
|
|
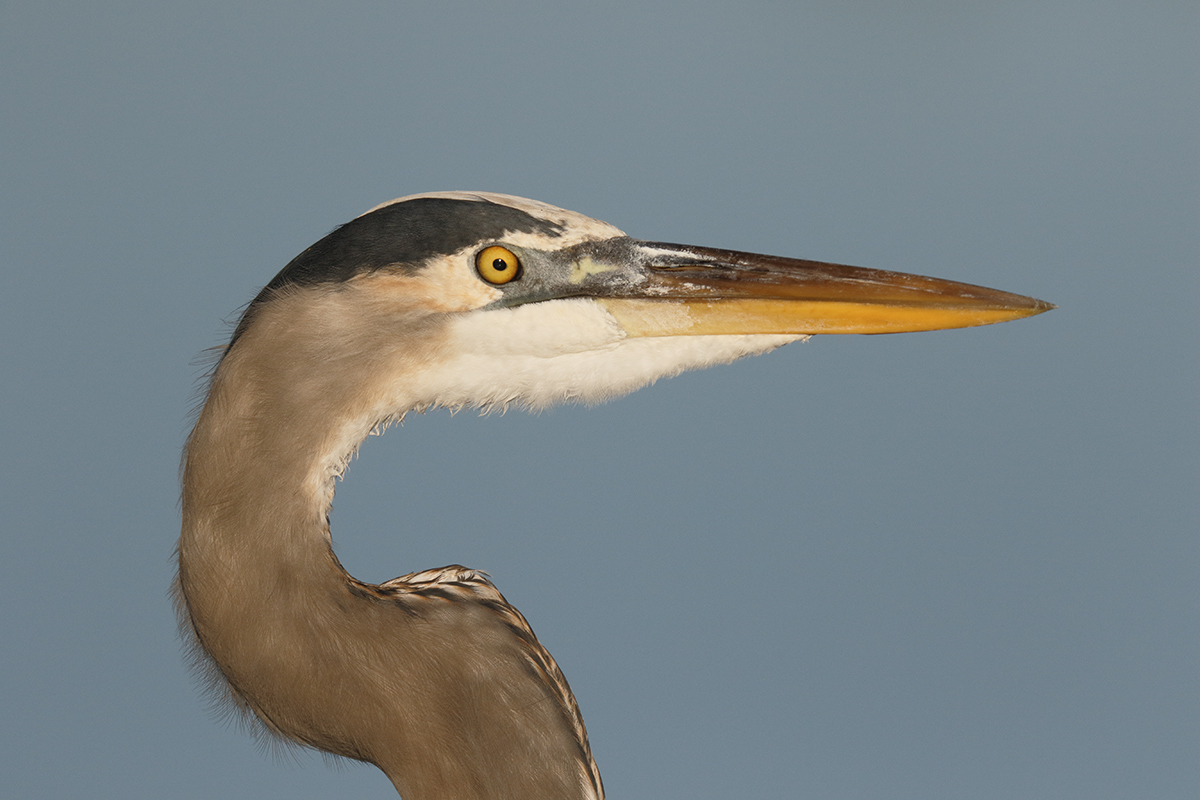
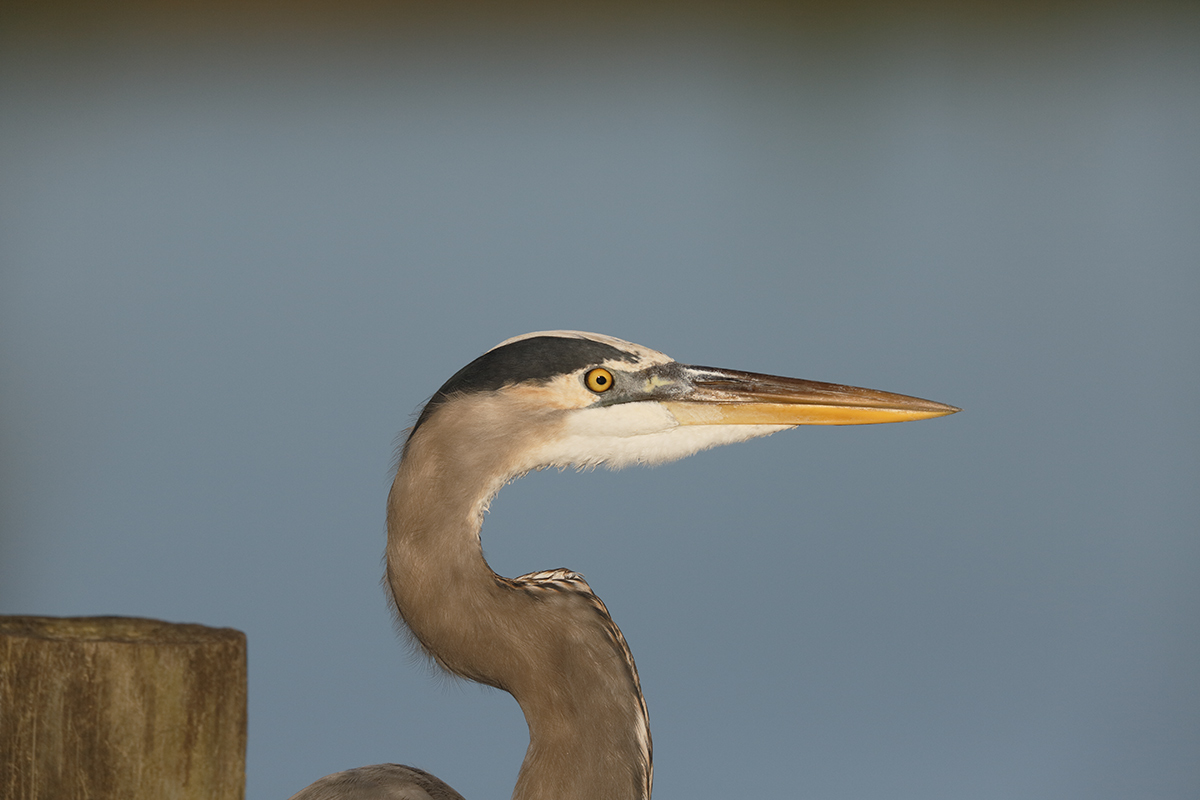
This Great Blue Heron image was created on the morning of October 18 down by the lake near my home with the Canon EF 600mm f/4L IS II USM lens, the Canon Extender EF 2X III, and a beta version of the Canon EOS 7D Mark II . ISO 400. Evaluative metering -1/3 stop as framed: 1/2500 sec. at f/8 in AV mode. AWB.
Central sensor (by necessity)/AI Servo Expand/Rear Focus AF on the bird’s eye and recompose. Click here to see the latest version of the Rear Focus Tutorial. Click on the image to see a larger version.
From the Sequoia with the lens supported by the BLUBB (my custom-designed, hand made Big Lens Ultimate Bean Bag). When working on a beanbag with a long lens and re-composing be absolutely sure that the focusing ring does not rest on the beanbag lest you throw off accurate focus when re-composing.
#1: This JPEG represents the unsharpened 600 II/2XIII/7D II image after RAW conversion in DPP v3.14.41.0.
|
The 1.6X Crop Factor Image
Note that in the image above, the one made with the 7D II and its 1.6X crop factor, the heron’s head is turned about 1 1/2 degrees towards us.
They Thought that it Would Be Easy
Many folks said, “Make a few images of a bird with the 7D Mark II. Without moving the lens, remove the camera and replace is with a full frame body, either a 1D X or a 5D III. Make a few images. Crop the best image made with the full frame camera to the same subject size as in the 7D II (1.6X crop factor) image. Blow them up to 100 or 200% and compare them.”
“You will always see that the image made with the full frame camera is clearly better in terms of image quality and noise.”
In the blog post here, in response to a comment left by Jim Magowan, I wrote:
Hi Jim, Thanks for sharing your thoughts and the info above. I have long tried to stay out of discussions on this topic as I really do not understand the concept very well, I am not very good at pixel math, and I feel that the arguments are in large part semantic in nature… Lastly, seeing the image larger in the frame and larger on the LCD viewing screen gives many folks added confidence… That said I will try to remember to shoot some side by side images with all three cameras when I get my hands on a 7D II. I will likely need a sleeping bird.
best and respectfully, artie
Heck, even I thought that it would be easy….
|
|
|
Same bird, same time, same place. This one created with the Canon EF 600mm f/4L IS II USM lens, the Canon Extender EF 2X III, and the Canon EOS 5D Mark III . ISO 400. Evaluative metering at zero: 1/2500 sec. at f/8 in AV mode. AWB.
Central sensor (by necessity)/AI Servo Expand/Rear Focus AF on the bird’s eye and recompose. Click here to see the latest version of the Rear Focus Tutorial. Click on the image to see a larger version.
From the Sequoia with the lens supported by the BLUBB (my custom-designed, hand made Big Lens Ultimate Bean Bag). When working on a beanbag with a long lens and re-composing be absolutely sure that the focusing ring does not rest on the beanbag lest you throw off accurate focus when re-composing. If that is unavoidable you must work in AI Servo AF with AF active at the moment of exposure as I did here.
#2: This JPEG represents the unsharpened 600 II/2XIII/5D III image after RAW conversion in DPP v3.14.41.0. Converting the 5DIII image in DPP 4 would have given it an unfair advantage.
|
The Full Frame Body Image
Note that in the image above, the one made with the full frame 5D III, the heron’s head is pretty much perfectly square to the imaging sensor. When working with long effective focal lengths, small or even tiny differences in head angle can have significant effects on image sharpness.
The Developing Piss Fight
When I wrote Just a Bit on the Crop Factor Debate in the blog post here, a bit of a piss fight developed with the full frame is better folks on one side of the fence and the crop factor folks on the other side of the fence. Folks in each camp were adamant that they were correct.
Though one thing that neither side mentioned is the fact that not all pixels (and not all sensors) are created equal, I wisely stayed out of the discussion :). I figured that I would create some comparison images and see which were better.
Canon USA’s Chuck Westfall, in response to this question: “Is the EOS-7D Mark II 1.6X crop factor real or bogus?” chimed in as follows:
IMO, the crop factor of APS-C affects two aspects of image quality: DOF and noise.
On the first point, if you reduce the focal length on an APS-C camera to match the angle of view on a full frame camera while shooting at the same distance and aperture with both cameras, you end up with approximately one more stop’s worth of depth-of-field. This might be a good thing for some kinds of photography, but not all. It becomes a matter of personal taste.
On the second point, the photodiodes on an APS-C sensor will obviously be smaller than on a full frame sensor if the resolution is the same. This is not a big issue at moderate ISO speeds, but differences in favor of the full frame sensor become more pronounced at speeds above 1600 or so, IMO. Again it becomes a matter of personal taste.
I suppose there is a third element to consider, although it is not directly related to image quality: the size , weight and cost of lenses with equivalent angles of view and maximum aperture are clearly smaller, lighter and more affordable with APS-C vs. full frame.
For bird photography, I think the scale tips in favor of APS-C as long as noise levels remain acceptable. And the image quality of the 7D Mark II is good enough IMO under most lighting conditions that bird photographers are likely to encounter.
Best Regards,
Chuck
The Animated GIF
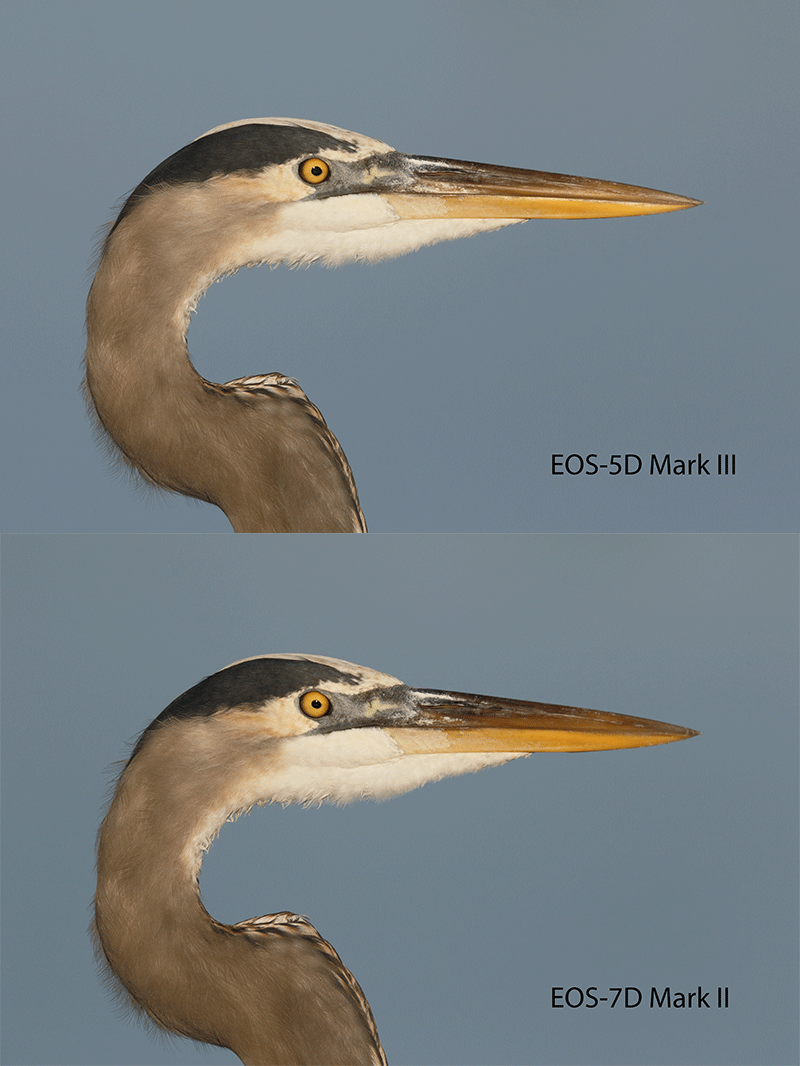
The animated GIF above compares the 7D II image with the 5D III image cropped as closely as possible to the same subject size. Do note how the slight difference in head angle dramatically affects the appearance of the bird’s bill. Do continue on to the 100 and 200% comparisons below.
It was Not at All Easy…
I began by trying to make comparison images of the local cranes. I thought it would be easy to find one sleeping. It was not. Many times I’d make a few images with the 7D II only to have the bird change position. Did the lens shift on the BLUBB?
I tried photographing a sign figuring that signs never move much. Those efforts revealed many variables. Was focus perfectly accurate with each camera? Were the camera body settings identical? (After several days of struggling with color I found that the 1D X that I was using inadvertently had Landscape as the Picture Style; this left a ton of MAGENTA in the BLUEs.) Did the lens move ever so slightly. Did the lens/TC/camera body in use need to be re-micro-adjusted?
Whatever the subject, would small differences in the exposures or the RAW conversions effect the amount of noise? Likely so. The aforementioned all exacerbated by the fact that the 7D II images need a bit less light than the 1D X/5D III images.
No. It has not been easy. I do hope to get the sign right this morning weather permitting. It is actually an interesting image.
The 100% Crop Comparison
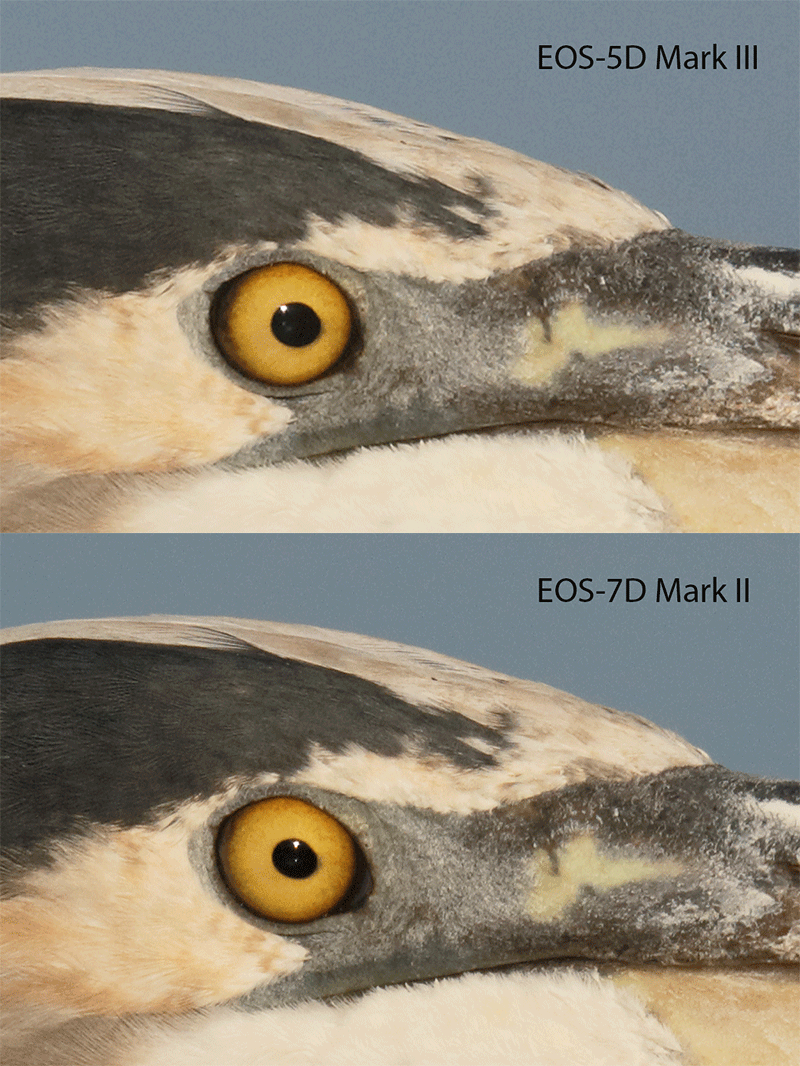
All things being “equal” here, two things stand out to me in the comparison of the 100% crops:
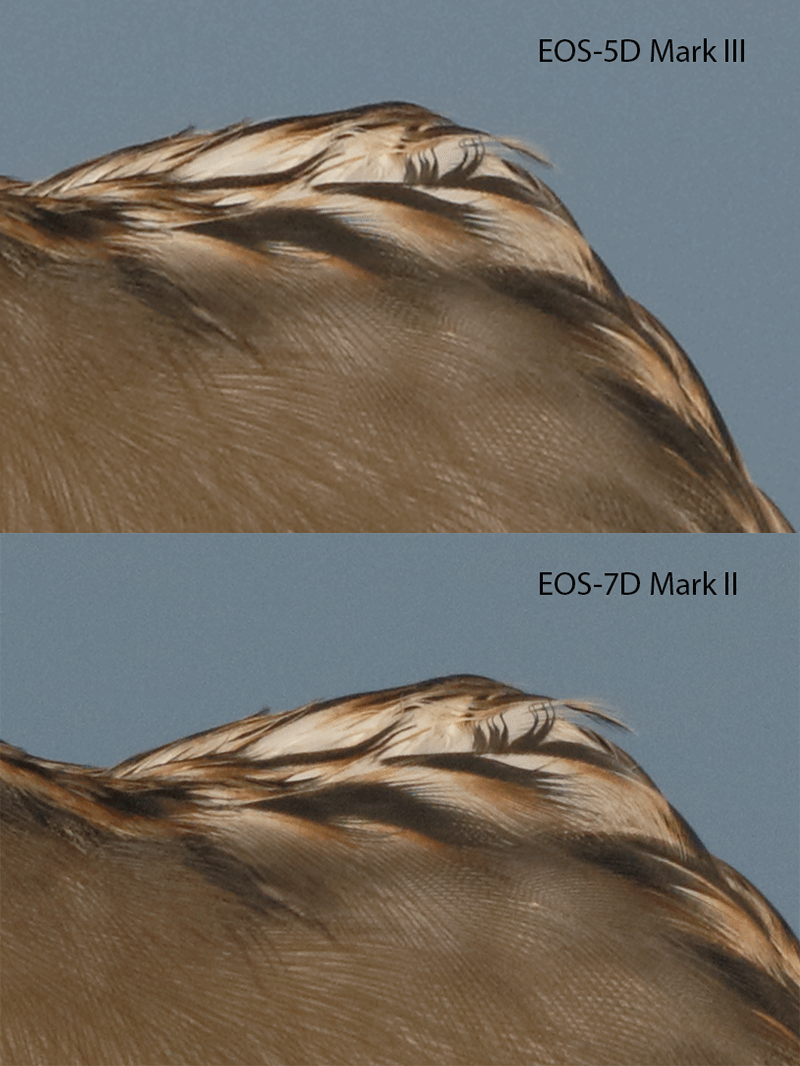
1-The feathers behind and above the bird’s eye are sharper in the 7D II image than in the 5D III image.
2-As far as noise, the 7D II image looks a lot cleaner.
Of course, as we learned above it is difficult to be sure that all things were in fact equal. None-the-less, I was so stunned by what I was seeing that I kept having to go back and check to see which was the 7D II image and which was the 5D III image….
What are you seeing in the 100% crop comparison?
The 200% Crop Comparison
Again, with all things being “equal” here, two things stand out to me in the comparison of the 200% crops:
1-Fine feather detail looks better in the 7D II image than in the 5D III image. Note especially the appearance of the five dark, sort of curlicue feathers in the upper right.
2-As far as noise in this comparison, the 5D III image looks a lot cleaner in the 200% comparison. Please do not ask me why.
As above, we know that it is difficult (if not impossible) to be sure that all things were in fact equal (even when a heron seems to be standing still as a statue. None-the-less, it seems pretty clear to me that the 7D Mark II is an amazing camera. And when you consider the ridiculously low price, it is also an amazing value.
What are you seeing in the 200% crop comparison?
I will continue to try and create similar series for comparison. I am hoping to catch a sleeping Marbled Godwit at DeSoto and photograph it with all three bodies. I do not, however, expect the images to be identical :).
Please Understand
Please understand that the sample size here–one comparison–is quite limited :). That said, I am always doing my best. It would not shock me to see that in the long run, cropped images from the 1D X and the 5D III are actually superior in terms of image quality, fine feather detail, and noise than images from the 7D II. Nor would it surprise me if the 7D II images turn out to be clearly best. Stay tuned.
Coming Tomorrow: An In-depth Look at 7D II ISO 1600 I and Noise
In the next blog post we will be taking a close look at some 7D II ISO 1600 images.

 Use the BAA Affiliate logo link above to pre-order your 7D II, shoot me your receipt via e-mail, and I will do my very best to have your order expedited once the camera begins shipping.
Facebook
Be sure to like and follow BAA on Facebook by clicking on the logo link upper right. Tanks a stack!
Support the BAA Blog. Support the BAA Bulletins: Shop B&H here!
We want and need to keep providing you with the latest free information, photography and Photoshop lessons, and all manner of related information. Show your appreciation by making your purchases immediately after clicking on any of our B&H or Amazon Affiliate links in this blog post. Remember, B&H ain’t just photography!
…..
Amazon.com
Those who prefer to support BAA by shopping with Amazon may use this link:
Amazon Canada
Many kind folks from north of the border, ay, have e-mailed stating that they would love to help us out by using one of our affiliate links but that living in Canada and doing so presents numerous problems. Now, they can help us out by using our Amazon Canada affiliate link by starting their searches by clicking here. Many thanks to those who have written.
Typos
In all blog posts and Bulletins, feel free to e-mail or to leave a comment regarding any typos or errors. Just be right :).
October 18th, 2014 The Streak Continues: 322
Yesterday was work, swim, and ice bath. The pool is down to 76 degrees. It is time to turn on the heater. I sent the final edit of the DPP 4 RAW Conversion Guide to Arash this morning. One more short phone conference and Arash will be creating the final PDF. This blog post, the 322nd in a row, took me about 2 hours to prepare. It was published at about 5:45am from my home at Indian Lake Estates, FL.
To show your appreciation for my efforts here, we ask that you use our the B&H and Amazon affiliate links on the right side of the blog for all of your purchases. Please check the availability of all photographic accessories in the BIRDS AS ART Online Store, especially Gitzo tripods, Wimberley tripod heads, and the like. We sell only what I have used, have tested, and can depend on. We will not sell you junk. We know what you need to make creating great images easy and fun. And we are always glad to answer your gear questions via e-mail.
|
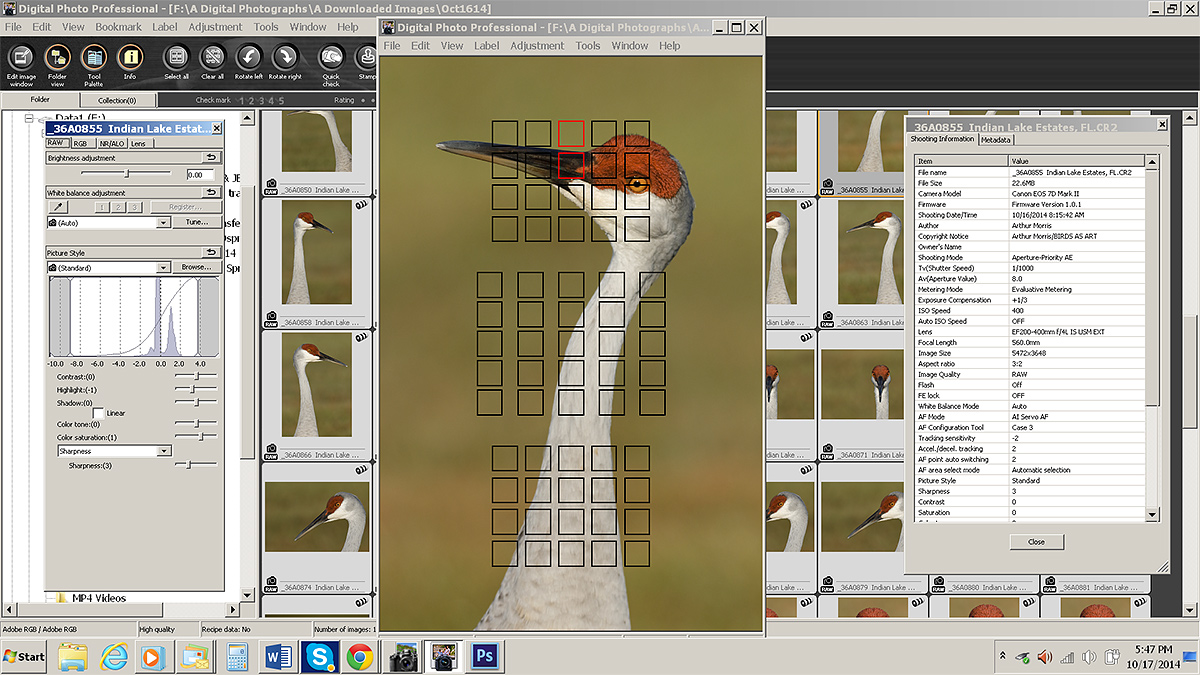
|
|
This is the DPP v3.14.41.0 screen capture for today’s image.
|
The DPP v3.14.41.0 Screen Capture
The two AF sensors illuminated in red show what a great job the 65-Point AF Selection Area Mode did in helping me create the image design that I wanted. The new widest-ever AF array makes it easy to avoid winding up with the bird positioned too low in a vertical frame.
The Sandhill Crane here was watching several other cranes fly by.
Does EOS-7D Mark II iTR AF with Face Detection Actually Work with Birds?
While EOS iTR AF has been around for quite some time, EOS iTR AF with Face Detection was introduced in the EOS-1D X. This feature is not available in the EOS-5D Mark III. With iTR AF the camera’s metering system communicates with the AF system and helps it to better track the subject only when you are in an AF mode that offers automatic AF point selection. iTR with Face Detection takes things a step further. Here is how it works: the RGB metering system uses a combination of skin tone and facial detail and shape to recognize the subject as a human face. And the EOS iTR AF allows this face recognition system to “talk” to the AF system. I tried this new feature with the 1D X for creating tall-in-the frame vertical head and shoulders portraits similar to today’s featured image. It never really worked. Even if I started AF on the bird’s face (with the subject parallel to the imaging sensor), the system almost always shifted to sensors that were lower down, effectively shifted the active AF points to the bird’s torso (which being wider was closer to the camera).
My early impression is that 7D Mark II iTR ( Intelligent Tracking and Recognition) AF with Face Detection actually does work. If you select and start with a sensor that falls on the bird’s face it tends to stay on the face rather than shifting downwards. I have other examples–most notably with two Yellow-crowned Night Herons from the Fort DeSoto IPT–that I will share with you here.
|
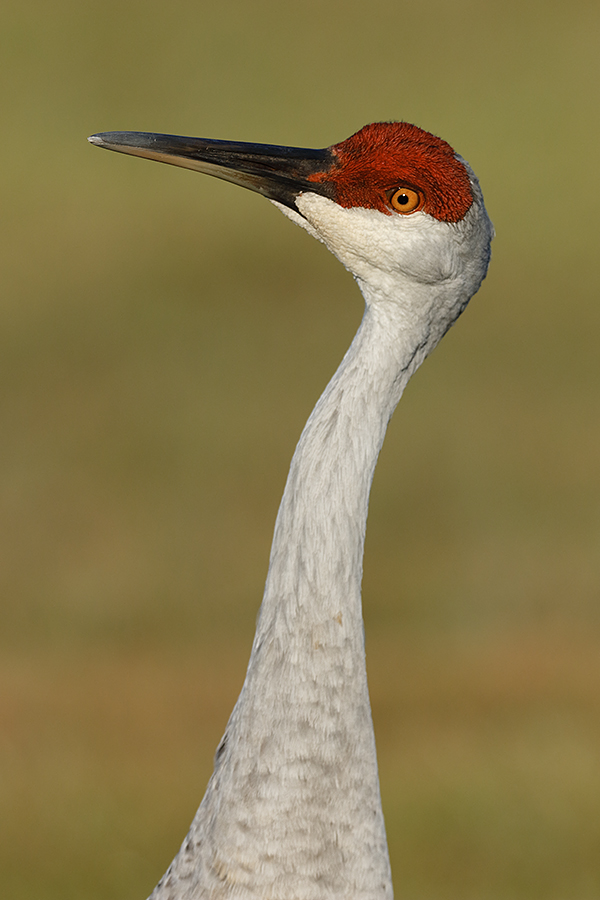
|
|
This image was created at 8:16am on the morning of 16 October down by the lake at Indian Lake Estates. Working from my vehicle I used the BLUBB-supported/hand held Canon EF 200-400mm f/4L IS USM lens with Internal 1.4x Extender (with the internal extender in place at 560mm) and a beta version of the Canon EOS 7D Mark II . ISO 400. Evaluative metering +1/3 stop as framed: 1/1000 sec. at f/8 in Av mode.
65-point Automatic Selection Rear Focus/AI Servo AF selected the fifth and sixth sensors directly above the central sensor that fell on and just above the base of the bird’s bill and were of course active at the moment of exposure. (See the DPP v3.14.41.0 screen capture below to view the active AF points.) Click here to see the latest version of the Rear Focus Tutorial. Click on the image to see a larger version.
|
Whaddya Mean BLUBB-supported/Hand Held?
When attempting to follow the action or when I need extra freedom of movement to get the exact framing that I want I will rest the hood of a big lens on the saddle of the BLUBB, my custom-designed, handmade Big Lens Ultimate Beanbag. I hold the camera body with my right hand with my finger on the shutter button. My left hand supports the lens just behind the tripod collar. It is much easier to frame an image using this technique than it is when the center of the lens is resting on the big beanbag. The latter, however, is best when working at shutter speeds below 1/250 sec.
The BLUBB is made of durable nylon pack cloth and each section is individually hot-cut to sear the edges; this prevents raveling. As nylon can be rather noisy and slippery, the surface that the lens is placed on has a layer of heavy duty cotton duck fabric sewn on top of the nylon fabric. The entire upper surface of the BLUBB is concave so that the lens will stay put. The inner surfaces that are placed over the door-frame or car window have a large piece of Toughtek non-slip fabric sewn in place to help keep the bag from slipping, especially in vehicles where the driver’s window angles downward to the right. All of the fabrics have a water-repellent (but not water-proof) finish. The entire bag is sewn with nylon thread used in the parachute industry. The bag closes with a top quality YKK nylon zipper. All seams are sewn twice to help prevent failure. The bags are made in the USA and each is individually hand-sewn to extremely high standards.
Beware of smaller, cheaper, far-inferior imitations :). As is usually the case, you get what you pay for.
|
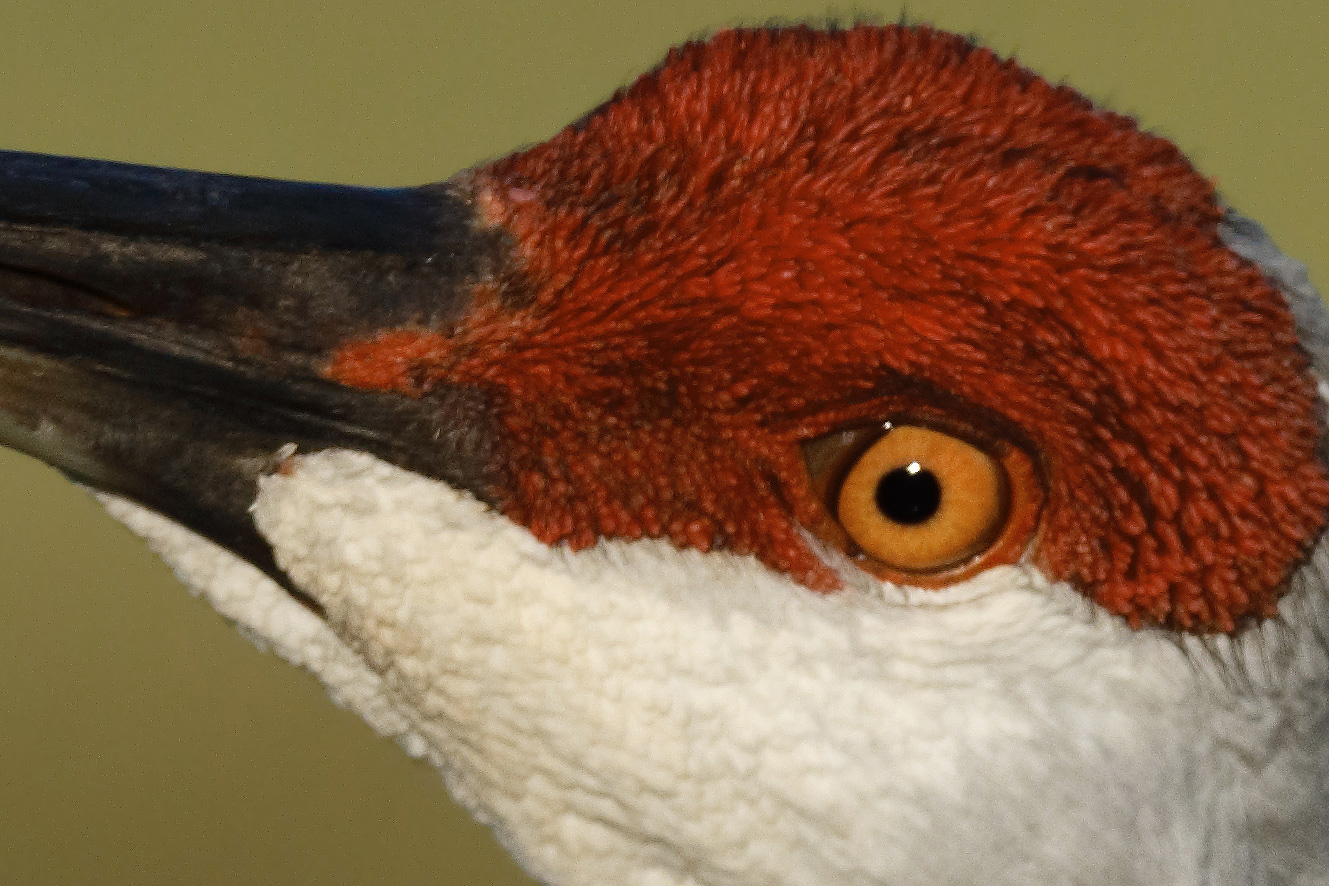
|
|
This is a sharpened 100% crop of the optimized image. How does it look to you in terms of image quality and noise?
|
The Image Optimization
After converting the image in DPP v3.14.41.0 I brought the image into Photoshop. I applied an 80% layer of NIK Color Efex Pro Detail Extractor to the WHITEs only that had been selected with the Quick Selection Tool. Then I painted a Quick Mask of the pupil and put it on its own layer. To darken the pupil only I pulled down the Curve (Ctrl + M). Then I selected the background only with the Magic Wand Tool, ran Select > Refine Edge, placed the selection on a layer, and applied a very small amount of Filter > Blur > Surface Blur to remove the noise that was barely noticeable at 200% in the ISO 400 image.
The DPP RAW Conversion Guide
To learn why I use Canon’s Digital Photo Professional (DPP) to convert every image that I work on, click here. The current guide will teach you how to best convert all of your Canon images in all 3 point something versions of Canon Digital Photo Professional including the current v.3.14.41.0.
Coming very soon: The DPP 4.0 RAW Conversion Guide by Arash Hazeghi and Arthur Morris. The more that I use DPP 4.0 for my 1D X and 5D III RAW conversions the more I learn about it. And the more I learn about it the more I am impressed with it. Note: at present, DPP 4.0 will work only with 1D X, 5D III, and 6D images. I am hoping against hope that at some point Canon will release a new version of DPP 4 that will support 7D II images.
Digital Basics
Everything that I did to optimize today’s images is covered in detail in my Digital Basics File–written in my easy-to-follow, easy-to-understand style. Are you tired of making your images look worse in Photoshop? Digital Basics File is an instructional PDF that is sent via e-mail. It includes my complete digital workflow, dozens of great Photoshop tips (including Surface Blur settings), details on using all of my image clean-up tools, the use of Contrast Masks, several different ways of expanding and filling in canvas, all of my time-saving Keyboard Shortcuts, Quick Masking, Layer Masking, and NIK Color Efex Pro basics, Digital Eye Doctor, using Surface and Gaussian Blurs, Tim Grey Dodge and Burn, how to create time-saving actions, and tons more.
APTATS I & II
Learn the details of advanced Quick Masking techniques in APTATS I. Learn Advanced Layer Masking Techniques in APTATS II. Mention this blog post and apply a $5 discount to either with phone orders only. Buy both APTATS I and APTATS II and we will be glad to apply at $15 discount with phone orders only. Please call Jim or Jennifer at 863-692-0906 weekdays to order.


|

|
|
San Diego offers a wealth of very attractive natural history subjects. With annual visits spanning more than three decades I have lot of experience there….
|
2015 San Diego 4 1/2-DAY BIRDS AS ART Instructional Photo-Tour (IPT): FEB 1 thru the morning of FEB 5, 2015: $1799 (Limit: 8/Openings: 3)
Meet and Greet after dinner on your own at 7:00pm on JAN 31
Join me in San Diego to photograph the spectacular breeding plumage Brown Pelicans with their fire-engine red bill pouches; Brandt’s and Double-crested Cormorants in breeding plumage with their amazing crests; breeding plumage Wood and Ring-necked Duck; other species possible including Lesser Scaup, Redhead, and Surf Scoter; a variety of gulls including Western, California, and the gorgeous Heerman’s, all in full breeding plumage; shorebirds including Marbled Godwit, Willet, Sanderling and Black-bellied Plover; many others possible including Least, Western, and Spotted Sandpiper, Whimbrel, Black and Ruddy Turnstone, Semipalmated Plover, and Surfbird; Harbor Seals (depending on the current regulations) and California Sea Lions likely; and Bird of Paradise flowers. And as you can see by studying the two IPT cards there are some nice landscape opportunities as well.
Did I mention that there are wealth of great birds and natural history subjects in San Diego in winter?
This IPT will include five 3 1/2 hour morning photo sessions, four 2 1/2 hour afternoon photo sessions, five lunches, after-lunch image review and Photoshop sessions, and two fine dinners. To ensure early starts, breakfasts will be your responsibility.
A $499 non-refundable deposit is required to hold your slot for this IPT. You can send a check (made out to “Arthur Morris) to use at BIRDS AS ART, PO Box 7245, Indian Lake Estates, FL, 33855. Or call Jim or Jennifer at the office with a credit card at 863-692-0906. Your balance, payable only by check, will be due on 12/1//2014. If the trip fills, we will be glad to apply a credit applicable to a future IPT for the full amount less a $100 processing fee. If we do not receive your check for the balance on or before the due date we will try to fill your spot from the waiting list. If your spot is filled, you will lose your deposit. If not, you can secure your spot by paying your balance. Please print, complete, and sign the form that is linked to here and shoot it to us along with your deposit check. If you register by phone, please print, complete and sign the form as noted above and either mail it to us or e-mail the scan. If you have any questions, please feel free to contact me via e-mail.
|

|
|
Though the pelicans will be the stars of the show on this IPT there will be many other handsome and captivating subjects in wonderful settings.
|
San Diego Natural History Museum Program & The Birds of the World Exhibit
On Saturday morning, February 7, 2015 I will be presenting “A Bird Photographer’s Story” at the San Diego Natural History Museum to kick off the Birds of the World photographic exhibit that will feature the images of about a dozen of the world’s top avian photographers. This program,which is being generously sponsored by the Canon Explorers of Light program, will be free and open to the public. I am proud to say that both Denise Ippolito and I will have images hanging in the show. The exhibit opening is scheduled for later that same day, February 7, 2015. (Times TBA).
Folks on the IPT who wish to stay over and attend the program and the exhibit opening on Saturday are invited to join me for a photo session on Friday morning as follows:
Friday Morning Add-on Photo Session: February 6, 2015: $299.
This workshop includes 3 hours of in-the-field pelican photography instruction and brunch with image review and Photoshop instruction. For now, this session is open only to folks attending the IPT.
Facebook
Be sure to like and follow BAA on Facebook by clicking on the logo link upper right. Tanks a stack!
Support the BAA Blog. Support the BAA Bulletins: Shop B&H here!
We want and need to keep providing you with the latest free information, photography and Photoshop lessons, and all manner of related information. Show your appreciation by making your purchases immediately after clicking on any of our B&H or Amazon Affiliate links in this blog post. Remember, B&H ain’t just photography!
…..
Amazon.com
Those who prefer to support BAA by shopping with Amazon may use this link:
Amazon Canada
Many kind folks from north of the border, ay, have e-mailed stating that they would love to help us out by using one of our affiliate links but that living in Canada and doing so presents numerous problems. Now, they can help us out by using our Amazon Canada affiliate link by starting their searches by clicking here. Many thanks to those who have written.
Typos
In all blog posts and Bulletins, feel free to e-mail or to leave a comment regarding any typos or errors. Just be right :).
October 17th, 2014 The Streak Continues: 321
Yesterday during a long working lunch I met with my ART (Active Release Technique) chiropractor, Dr. TJ McKeon, and his interior designer, Shelly. TJ is re-doing his office space and will be using a selection of BIRDS AS ART images as part of the re-decoration. I still managed a late swim and a really cold ice bath; the water temp was 58.9 degrees when I got out of the tub! I should be sending my final edit ofthe DPP 4.0 RAW Conversion Guide ready to Arash early tomorrow morning. I hope to get the final PDF from him no later than Monday.
This blog post, the 321st in a row, took me about 1 1/2 hours to prepare. It was published just after 5:30am from my home at Indian Lake Estates, FL.
To show your appreciation for my efforts here, we ask that you use our the B&H and Amazon affiliate links on the right side of the blog for all of your purchases. Please check the availability of all photographic accessories in the BIRDS AS ART Online Store, especially Gitzo tripods, Wimberley tripod heads, and the like. We sell only what I have used, have tested, and can depend on. We will not sell you junk. We know what you need to make creating great images easy and fun. And we are always glad to answer your gear questions via e-mail.
You can find the following items in the store: Gitzo tripods, Mongoose M3.6 and Wimberley heads, plates, low feet, and accessories, flash brackets, , Delkin e-film Pro Compact Flash Cards, LensCoat products, and our unique line-up of educational materials including ABP I & II, Digital Basics, Site and Set-up e-Guides, Canon and Nikon Camera Users and AF e-Guides, and MP-4 Photoshop video tutorials among others.
|
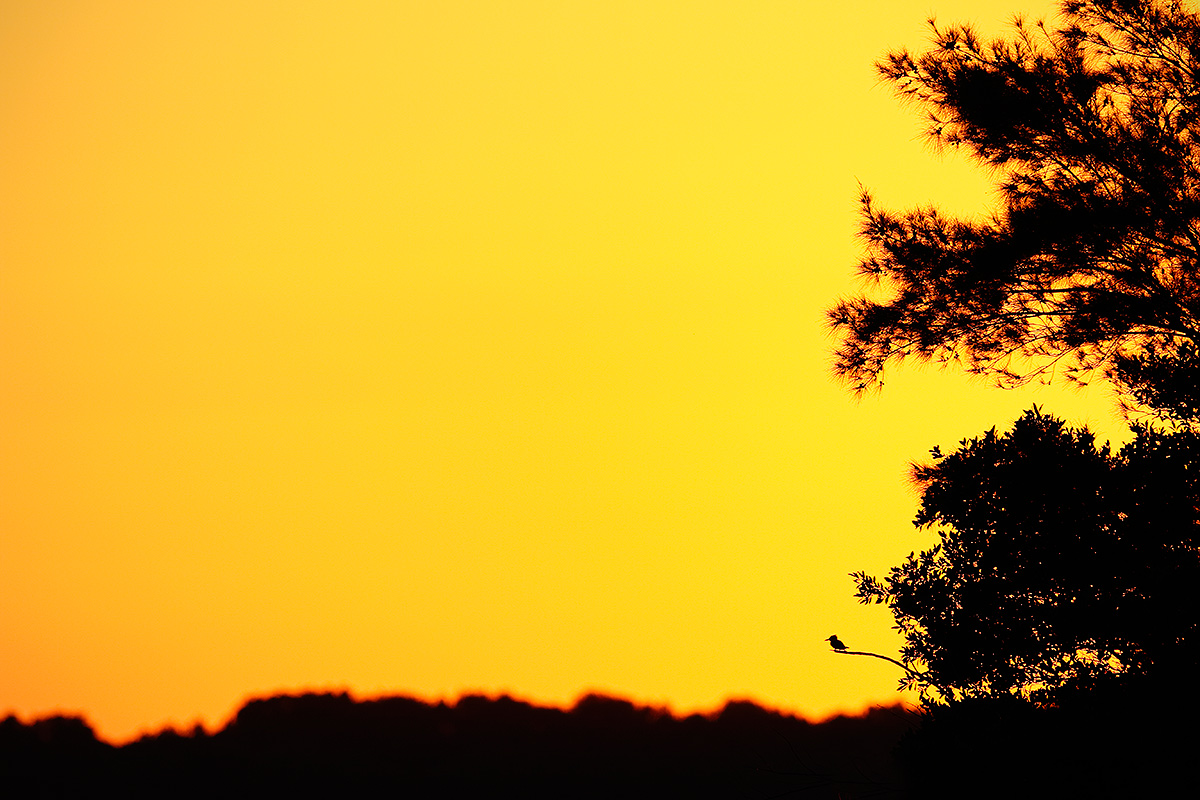
|
|
This image was created just after sunrise on the morning of October 12, 2014 on day 2 of the recently concluded Fort DeSoto IPT. I used the Gitzo 3532 LS carbon fiber tripod, the Mongoose M3.6 head, with the Canon EF 600mm f/4L IS II USM lens and a beta version of the Canon EOS 7D Mark II . ISO 200 (via ISO Safety Shift). Evaluative metering +1 1/3 stops as framed: 1/1000 sec. at f/4.5 in Tv mode. AWB.
Central Sensor/AI Servo/Rear Focus AF on the kingfisher and recompose. Click here to see the latest version of the Rear Focus Tutorial. Click on the image to see a larger version.
|
The Situation
As regular readers might surmise, IPT groups are routinely in the field well before sunrise to take advantage of a great variety of exciting and sometimes unexpected lighting conditions. At my favorite DeSoto dawn location, we often have a variety of birds flying through the color in the eastern sky. As there was not a whole lot going on on this particular morning, I decided to create a silhouette tree-scape with my long lens. As I rear-focused on the lower tree, I saw the distant Belted Kingfisher sitting on the perfect perch. I re-focused on the bird, re-framed the image, pressed the shutter button once, and watched the bird take flight.
I checked out the image on the rear LCD and pretty much began jumping for joy. Then I ran around sharing the image with all seven folks who were with me that day. All were glad for me. It was a once in a lifetime totally serendipitous situation. In bird photography the situation is often there for just an instant. And either you get it or you miss it. Usually the latter. But not this time :).
From: “Arthur Morris/BIRDS AS ART”
To: “artie”
Subject: Blog Image Template general
Date: Thursday, August 07, 2014 6:17 PM
|
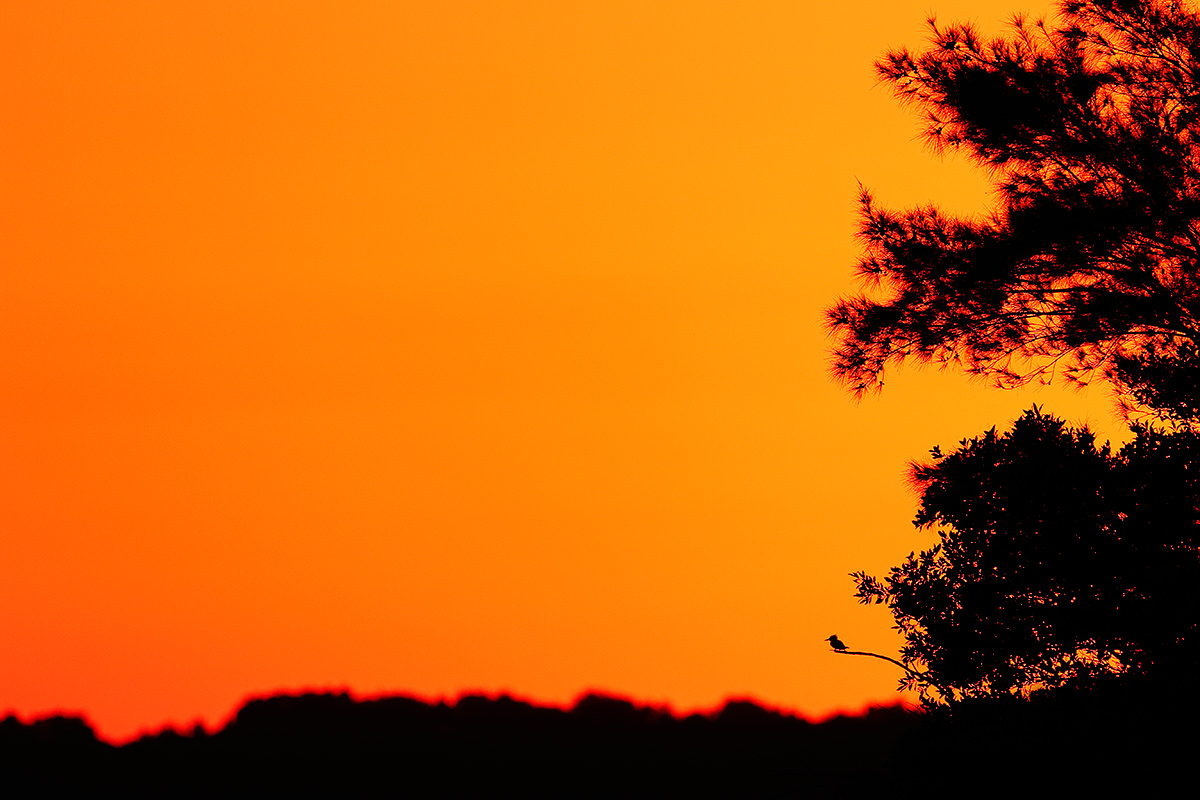
|
|
This is a darker, more orange version that I created after answering Gary Axton’s question about the sky color. It was probably somewhere between the two versions.
Which one do you like best?
|
Selling Your Used Photo Gear Through BIRDS AS ART
Selling your used (or like-new) photo gear through the BAA Blog or via a BAA Online Bulletin is a great idea. We charge only a 5% commission. One of the more popular used gear for sale sites charges a minimum of 20% plus assorted fees! Yikes. The minimum item price here is $500 (or less for a $25 fee). If you are interested please e-mail with the words Items for Sale Info Request cut and pasted into the Subject line :). Stuff that is priced fairly–I offer free pricing advice, usually sells in no time flat. In the past few months, we have sold just about everything in sight.
Used Gear Cautions
Though I am not in a position to post images of gear for sale here or elsewhere, prospective buyers are encouraged to request for photos of the gear that they are interested in purchasing via e-mail. Doing so will help to avoid any misunderstandings as to the condition of the gear. Sellers are advised to take care to photograph their used gear with care against clean backgrounds so that the stuff is represented accurately and in the best light; please pardon the pun :).
Used EOS-1D Mark IV Digital Camera Body
Marc Lombardi is offering a used Canon EOS-1D Mark IV in excellent condition for $2699. The body has one minor cosmetic scratch on top. The sale includes the charger and two batteries, a RRS plate, and insured ground shipping to US addresses only. Your camera will be shipped only after your check clears unless other arrangements are made.
Please contact Marc via e-mail or by phone at 610-585-3500 (Eastern time).
Two Mark IVs served as my workhorse bodies for more than three years.
Used Canon EF 100-400 f 4.5-5.6 L IS Lens
Multiple IPT veteran Jack Panzeca is offering a used Canon EF 100-400 f 4.5-5.6 L IS lens in very good + condition for $999 including insured shipping via UPS Ground to US addresses only. The tripod collar has one small scratch. The sale includes the original tough fabric case, the original box, the front and rear caps, the lens hood, and the strap. Your gear will be shipped only after your check clears.
Please contact Jack via e-mail or by phone at 817 819 1756. Central Time Zone.
The 100-400 is a versatile intermediate telephoto zoom lens with 1,000+ uses. It makes a great starter lens especially for folks who do general nature and wildlife in addition to birds. I’ve sold 100s of images made with a 1-4 and denise loved hers for many years forsaking it only recently for the Canon EF 70-200mm f/2.8L IS II USM lens. Jack’s 100-400 is priced to sell.
Used Canon EF 500mm f/4L IS (Image Stabilizer) USM Lens
Price reduced $350 on 10/17/2014!
Dan Womack is offering a used Canon EF 500mm f/4L IS (Image Stabilizer) USM lens in excellent condition with clean glass with a few small nicks on the lens hood for $5150. B&H is offering a virtually identical used “old 500” for $6,299.95; you can save more than $1000 by grabbing Dan’s lens asap. The sale includes the front leather hood, the rear dust cap, the original case with keys, and insured shipping to US addresses only. Your lens will be shipped only after your check clears unless other arrangements are made.
Please contact Dan via e-mail or by phone at 337 412 1898.
Used Canon EF 70-300mm f/4.5-5.6 DO IS USM Lens
Price reduced $100 on 10/17/2014
Multiple IPT veteran Shelly Goldstein is also offering a Canon EF 70-300mm f/4.5-5.6 DO IS USM lens, this one in excellent condition for a ridiculously low $699. The lens sells new for $1,399.00. The sale includes the front lens cap, the lens shade, the rear dust cap, and insured shipping via Fed Ex Ground to US addresses only. The lens was cleaned and checked by Canon in September 2014.
You can contact Shelly via e-mail or by phone at 646-423-0392 (EST). Your lens will be shipped only after your check clears.
The lightweight, relatively tiny, but optically excellent 70-300mm f/4.5-5.6 DO IS is a great one-lens-fits-all walk-around or travel lens. And it would do well on your shoulder at places like Bosque as well.
Used Canon TS-E 90mm f/2.8 Tilt-Shift Manual Focus Lens
Price reduced $100 on 10/17/2014
Multiple IPT veteran Shelly Goldstein is offering a used Canon TS-E 90mm f/2.8 Tilt-Shift Manual Focus lens in excellent condition for the ridiculously low price of $799. The lens sells new for $1,399.00. The sale includes the front lens cap, the lens shade, the rear dust cap, and insured shipping via Fed Ex Ground to US addresses only. The lens was cleaned and checked by Canon in September 2014.
You can contact Shelly via e-mail or by phone at 646-423-0392 (EST). Your lens will be shipped only after your check clears.
The 90 Tilt Shift is a specialized lens that enable precise control of depth of field along with perspective control. It is useful for portrait, product, and landscape photography. George Lepp loves it for flower field and macro photography, using it often with the 2X III teleconverter.
Used Canon Wide Angle Tilt Shift TS-E 24mm f/3.5L Manual Focus Lens
Price reduced $100 on 10/17/2014
Multiple IPT veteran Shelly Goldstein is offering a used Canon Wide Angle Tilt Shift TS-E 24mm f/3.5L Manual Focus Lens in excellent condition for a ridiculously low $749. The sale includes the front lens cap, the lens shade, the rear dust cap, and insured shipping via Fed Ex Ground to US addresses only. The lens was cleaned and checked by Canon in September 2014.
You can contact Shelly via e-mail or by phone at 646-423-0392 (EST). Your lens will be shipped only after your check clears.
This specialized lens provides tilt-shift functions to control perspective and correct convergence of lines. It is especially useful in architecture, landscape, and product photography. The optical tilt mechanisms enable precise control of depth of field along with perspective control.
Used Canon EF 500mm f/4L IS (Image Stabilizer) USM Lens
IPT veteran Stuart Hahn is offering a used original owner Canon EF 500mm f/4L IS (Image Stabilizer) USM lens in excellent condition with clean glass for $5250. B&H is offering a virtually identical used “old 500” for $6,299.95; you can save more than $1000 by grabbing Stu’s lens asap. The sale includes the front leather lens hood, the rear dust cap, a used RRS B-91 Flash Bracket, the original case with keys, and insured shipping via UPS Ground to US addresses only. Your lens will be shipped only after your check clears unless other arrangements are made.
Please contact Stu via e-mail or by phone (after October 3) at 916-485-1630 (Pacific time).
Canon 400mm EF f/5.6L USM Lens
Bob Bass is offering a used Canon 400mm EF f/5.6L USM lens in excellent condition for $999. The sale includes the original box, the tough fabric case, the front and rear lens caps, the instruction CD, and insured shipping via UPS Ground to US addresses only. Your new gear will be shipped only after your check clears unless other arrangements are made. You can contact Bob via e-mail or by phone at 781-275-5230 EST.
Original owner. The lens was purchased in 2012 and used infrequently. It was recently returned from Canon Professional Services where it received a clean and check. Images of the lens are available upon request as are images made with the lens.
The 400 f/5.6, my old “toy lens” is an ideal flight or starter lens for younger folks with a steady hand. It will AF with a 1.4X TC with the new 7D II….
Used Canon EOS-1D Mark III Digital Camera Body
Michael Zajac is offering a Canon EOS-1D Mark III professional digital camera body in Excellent condition for $1250. The sale includes the battery charger, one battery, the original paperwork, the camera strap, the original box, and shipping to the continental US.
Please contact Michael via e-mail or by phone at 732-979 -6644. Photos are available upon request.
Some EOS-1D Mark III bodies originally had AF problems. Michael’s did not. I have seen his great flight images made with this camera. This body features a 1.3X crop factor sensor and is a great step-up for someone who wants to take a big step up from a 7D. It’s powerful battery drives AF much faster than the pro-sumer bodies especially with either a 1.4X or 2X teleconverter in place.
Facebook
Be sure to like and follow BAA on Facebook by clicking on the logo link upper right. Tanks a stack!
Support the BAA Blog. Support the BAA Bulletins: Shop B&H here!
We want and need to keep providing you with the latest free information, photography and Photoshop lessons, and all manner of related information. Show your appreciation by making your purchases immediately after clicking on any of our B&H or Amazon Affiliate links in this blog post. Remember, B&H ain’t just photography!
…..
Amazon.com
Those who prefer to support BAA by shopping with Amazon may use this link:
Amazon Canada
Many kind folks from north of the border, ay, have e-mailed stating that they would love to help us out by using one of our affiliate links but that living in Canada and doing so presents numerous problems. Now, they can help us out by using our Amazon Canada affiliate link by starting their searches by clicking here. Many thanks to those who have written.
Typos
In all blog posts and Bulletins, feel free to e-mail or to leave a comment regarding any typos or errors. Just be right :).
October 16th, 2014 The Streak Continues: 320
I spent a full day in the office yesterday and got back to my usual routine: swim, healthy eating, and ice bath. Today and tomorrow I will be working on getting the DPP 4.0 RAW Conversion Guide ready to send to Arash. I hope to get the final PDF from him no later than Monday. Exciting times.
This blog post, the 320th in a row, took me about 2 1/2 hours to prepare. It was published just after 7:30am from my home at Indian Lake Estates, FL.
To show your appreciation for my efforts here, we ask that you use our the B&H and Amazon affiliate links on the right side of the blog for all of your purchases. Please check the availability of all photographic accessories in the BIRDS AS ART Online Store, especially Gitzo tripods, Wimberley tripod heads, and the like. We sell only what I have used, have tested, and can depend on. We will not sell you junk. We know what you need to make creating great images easy and fun. And we are always glad to answer your gear questions via e-mail.
You can find the following items in the store: Gitzo tripods, Mongoose M3.6 and Wimberley heads, plates, low feet, and accessories, flash brackets, , Delkin e-film Pro Compact Flash Cards, LensCoat products, and our unique line-up of educational materials including ABP I & II, Digital Basics, Site and Set-up e-Guides, Canon and Nikon Camera Users and AF e-Guides, and MP-4 Photoshop video tutorials among others.
|
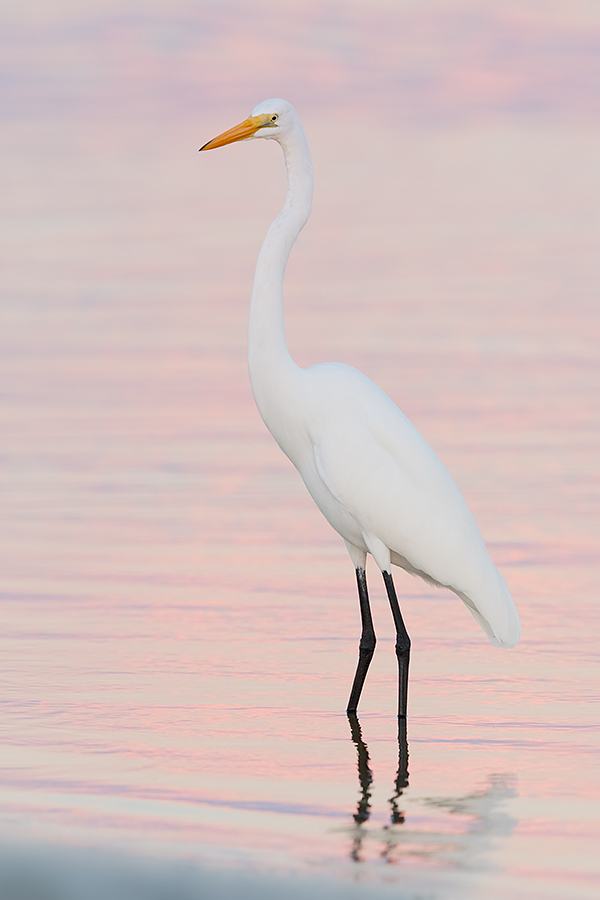
|
|
This image was created just before sunset on the afternoon of October 12, 2014 on day 2 of the recently concluded Fort DeSoto IPT. I used the Gitzo 3532 LS carbon fiber tripod, the Mongoose M3.6 head, with the Canon EF 600mm f/4L IS II USM lens and a beta version of the Canon EOS 7D Mark II . ISO 800. Evaluative metering +1 stop as framed: 1/200 sec. at f/6.3 in Av mode.
Central Sensor/AI Servo/Rear Focus AF on the bird’s eye and recompose. Click here to see the latest version of the Rear Focus Tutorial. Click on the image to see a larger version.
Image #1: Great Egret in pink reflections
|
One Problem With the EOS-7D Mark II
One problem with the EOS-7D Mark II is that you will often find yourself with too much reach. To fit the whole bird in the frame with a nice border for this image I needed to back up about fifteen yards. Here is a tip on moving back safely: turn around and walk back or at least turn sideways otherwise you might trip on something and wind up flat on your back with damaged gear…. The situation is even more dangerous when you are working in a foot or two of water so use extreme care when doing so. And that applies whether you are backing up or getting closer.
Having too much reach is a nice problem for most bird photographers. Those who go over to the 7D II will like want one on their big tripod-mounted lens and another on a Black Rapid RS-7 Strap on their shoulder with a 70-200 II or the promised 100-400 II….
A Note on the Image Optimization
I painted a Quick Mask of the sandy triangle at the bottom of the frame, put that on its own layer, and applied a 100 pixel Gaussian Blur to give the sand the same dreamy quality as the rest of the background. In addition, some distracting shells and pebbles disappeared as well.
The DPP RAW Conversion Guide
To learn why I use Canon’s Digital Photo Professional (DPP) to convert every image that I work on, click here. The current guide will teach you how to best convert all of your Canon images in all 3 point something versions of Canon Digital Photo Professional including the current v.3.14.41.0.
Coming very soon: The DPP 4.0 RAW Conversion Guide by Arash Hazeghi and Arthur Morris. The more that I use DPP 4.0 for my 1D X and 5D III RAW conversions the more I learn about it. And the more I learn about it the more I am impressed with it. Note: at present, DPP 4.0 will work only with 1D X, 5D III, and 6D images. I am hoping against hope that at some point Canon will release a new version of DPP 4 that will support 7D II images.
Digital Basics
Everything that I did to optimize today’s images is covered in detail in my Digital Basics File–written in my easy-to-follow, easy-to-understand style. Are you tired of making your images look worse in Photoshop? Digital Basics File is an instructional PDF that is sent via e-mail. It includes my complete digital workflow, dozens of great Photoshop tips (including Surface Blur settings), details on using all of my image clean-up tools, the use of Contrast Masks, several different ways of expanding and filling in canvas, all of my time-saving Keyboard Shortcuts, Quick Masking, Layer Masking, and NIK Color Efex Pro basics, Digital Eye Doctor, using Surface and Gaussian Blurs, Tim Grey Dodge and Burn, how to create time-saving actions, and tons more.
APTATS I & II
Learn the details of advanced Quick Masking techniques in APTATS I. Learn Advanced Layer Masking Techniques in APTATS II. Mention this blog post and apply a $5 discount to either with phone orders only. Buy both APTATS I and APTATS II and we will be glad to apply at $15 discount with phone orders only. Please call Jim or Jennifer at 863-692-0906 weekdays to order.

 Use the BAA Affiliate logo link above to pre-order your 7D II, shoot me your receipt via e-mail, and I will do my very best to have your order expedited once the camera begins shipping.
|
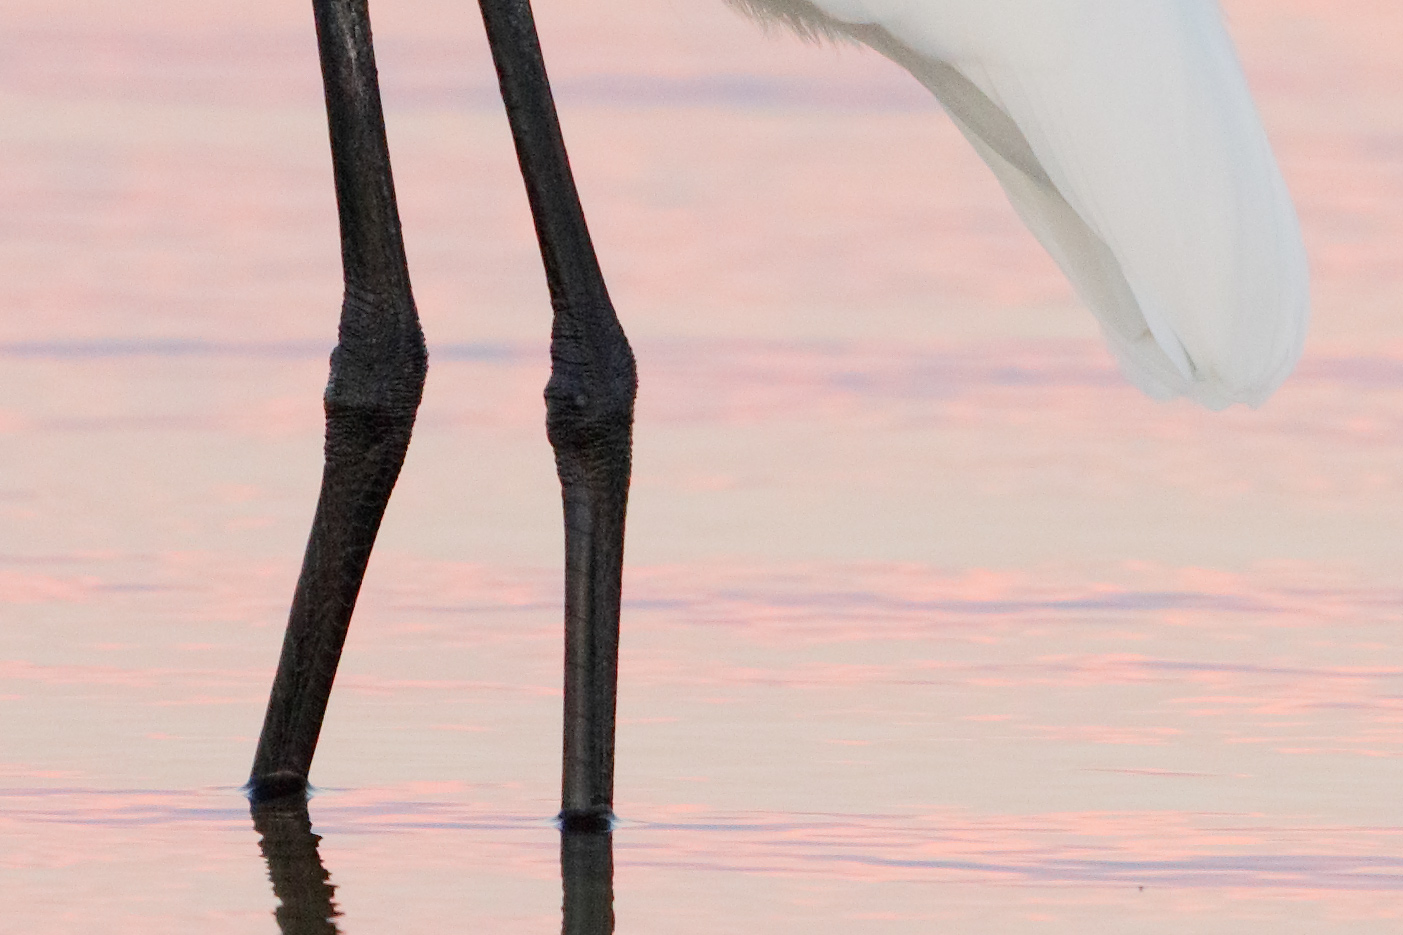
|
|
This unsharpened JPEG represents a 100% crop of the TIFF created by converting the RAW file in DPP v3.14.41.
|
The 100% Crop
Note here especially the virtual lack of noise in the black legs. The dark areas are always most susceptible to noise. If you are familiar with viewing your images at 100%, please feel free to let us know what you think of the noise and the image quality here at ISO 800.
|
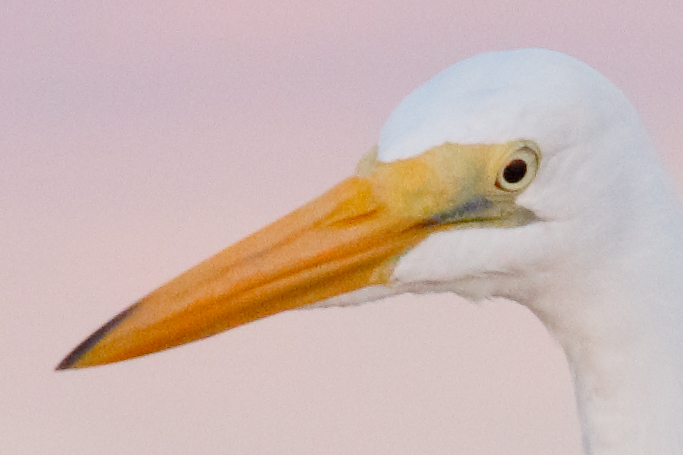
|
|
This unsharpened JPEG represents a 200% crop of the TIFF created by converting the RAW file in DPP v3.14.41.
|
The 200% Crop
With the relatively huge crop here we are beginning to see some significant noise in the darker yellow tones and for those with excellent close-up vision, in the pupil. To my eye, the noise in the background and the white feathers is minimal. With all three images here a dose of Filter > Blur > Surface Blur applied to the backgrounds only would render them smooth as a baby’s tush.
If you are familiar with viewing your images at 200%, please feel free to let us know what you think of the noise and the image quality here at ISO 800.
|
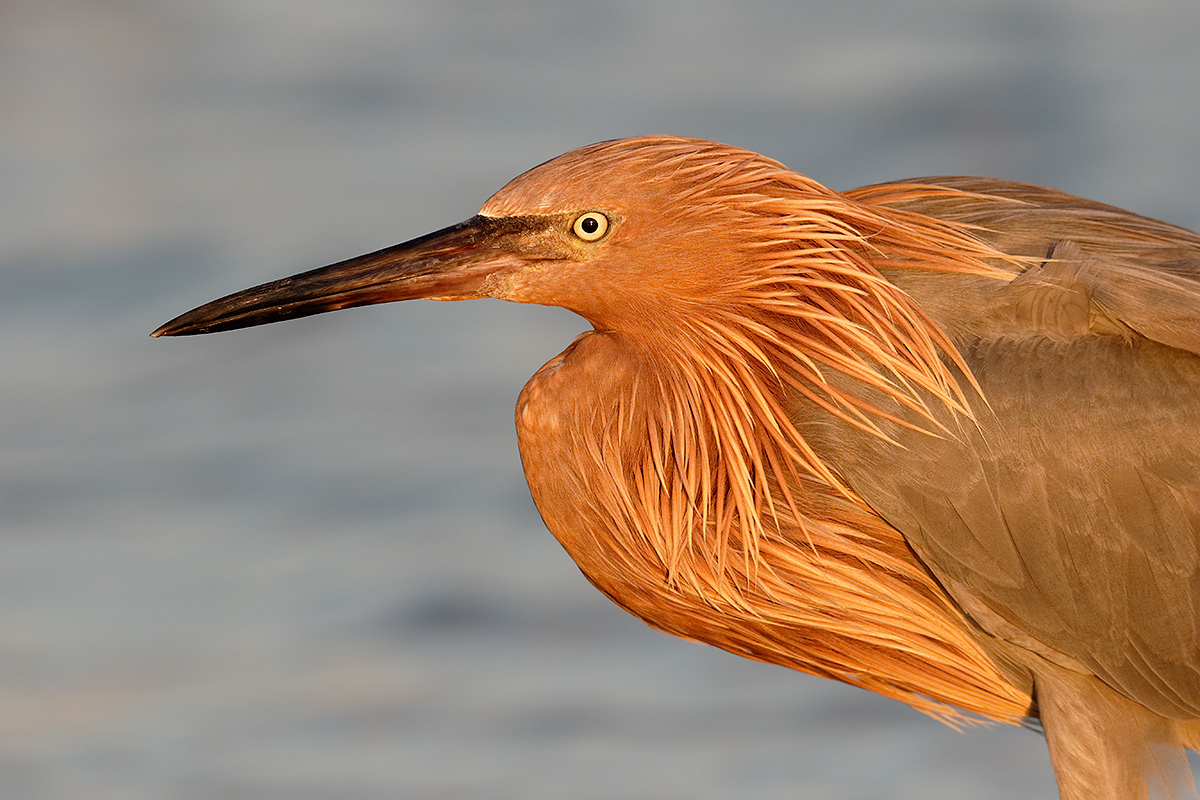
|
|
This image was created at 6:42pm on the clear afternoon of October 11 on day one of the Fort DeSoto October IPT with the Gitzo 3532 LS carbon fiber tripod, the Mongoose M3.6 head, the Canon EF 600mm f/4L IS II USM lens, the Canon Extender EF 1.4X III, and a beta version of the Canon EOS 7D Mark II . ISO 800. Evaluative metering +1/3 stop as framed: 1/800 sec. at f/8 in Av mode.
One sensor to the right and one row up from the central sensor/AI Servo Surround/Rear Focus AF fell on a spot just below and behind the bird’s eye and was active at the moment of exposure. Click here to see the latest version of the Rear Focus Tutorial. Click on the image to see a larger version.
Image #2: Non-breeding plumage Reddish Egret
|
Light Makes Right
I’d much prefer to photograph this species in its loverly breeding plumage in early spring but the sweet light of late afternoon got me to overcome my reluctance. Part of the key to success here was making images when the bird was perfectly parallel to the back of the camera. F/8 and working at 1.6 crop factor distance yielded more than enough depth-of-field while still leaving the image with a pleasingly blurred background.
|
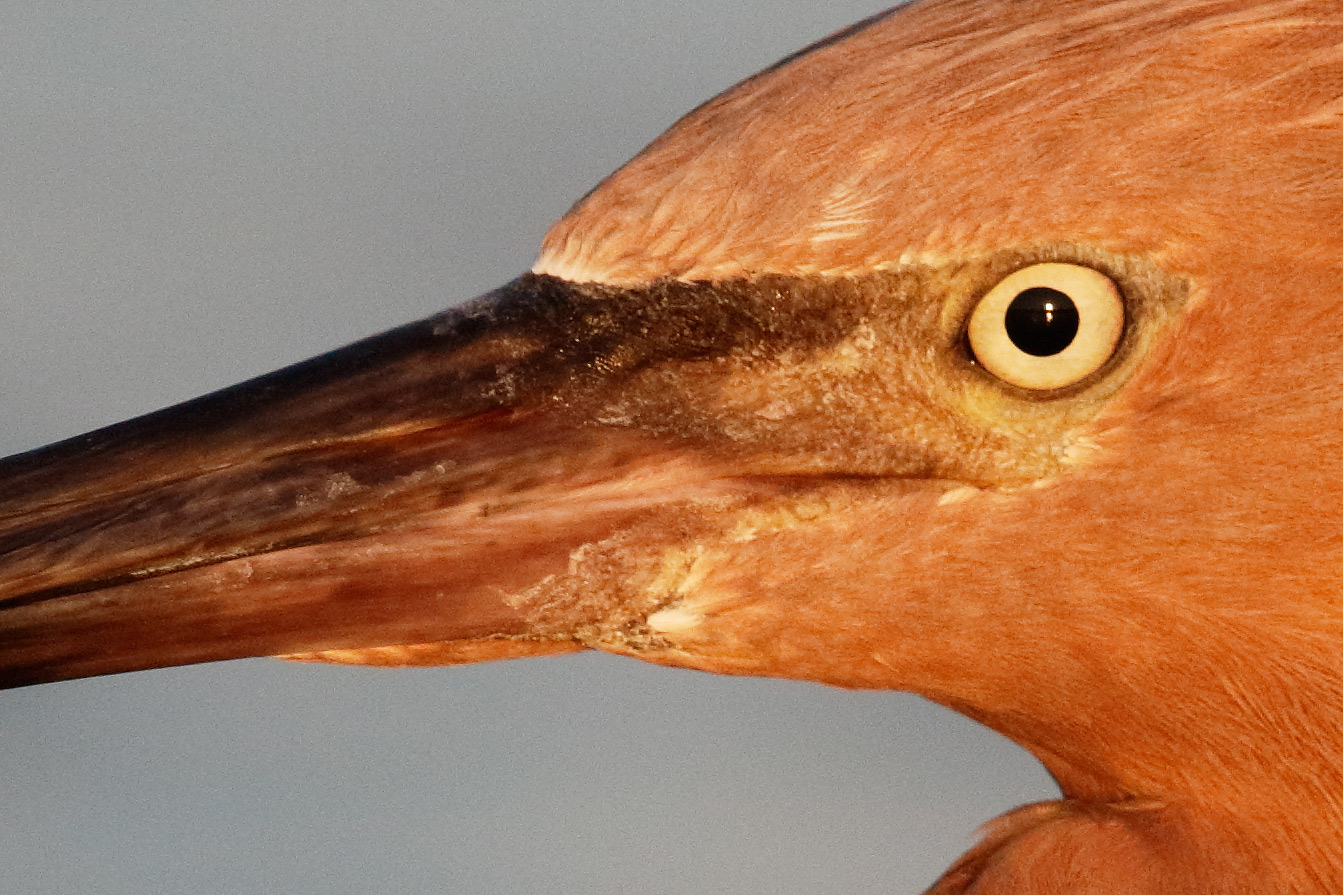
|
|
This unsharpened JPEG represents a 100% crop of the TIFF created by converting the RAW file in DPP v3.14.41.
|
The 100% Crop
Note the incredible sharpness achieved with an equivalent focal length of 1344mm. This represents 26.88X magnification. Image quality on the bill and the eye looks fine, less so on the bird’s feathers, the latter in part due to mild over-saturation of the REDs from the rich late afternoon light.
If you are familiar with viewing your images at 100%, please feel free to share your thoughts on the noise and the image quality here at ISO 800.
|
|
|
This unsharpened JPEG represents a 200% crop of the TIFF created by converting the RAW file in DPP v3.14.41.
|
The 200% Crop
With the relatively huge crop here we see some loss of fine feather detail and the appearance of some background noise as well. The latter is easily dealt with by applying Filter > Blur > Surface Blur to the background only. I am confident that if DPP 4 eventually does support 7D II images that controlling the noise during the RAW conversion will yield improved results as DPP 4 allows photographers to deal with both chrominance and luminance noise. In DPP 3 we recommend never using any luminance noise reduction.
If you are familiar with viewing your images at 200%, please feel free to let us know what you think of the noise and the image quality here at ISO 800.
Noise Primer
Here is a small excerpt from the DPP 4.0 RAW Conversion Guide that I added last night while putting the final polish on the text:
Your digital camera’s sensor is made up of millions of tiny pixels. Each one of those pixels is incredibly small. The tinier they are, the less surface area there is to collect light. Smaller amounts of light mean less information to work with and less information to work with leads to errors. Some of the pixels might register the wrong color (resulting in color or chrominance noise). Others wind up with the wrong quantity of light (resulting in luminance noise). As the amount of light diminishes, both types of noise increase with the darker tones being more susceptible than the lighter tones.
|
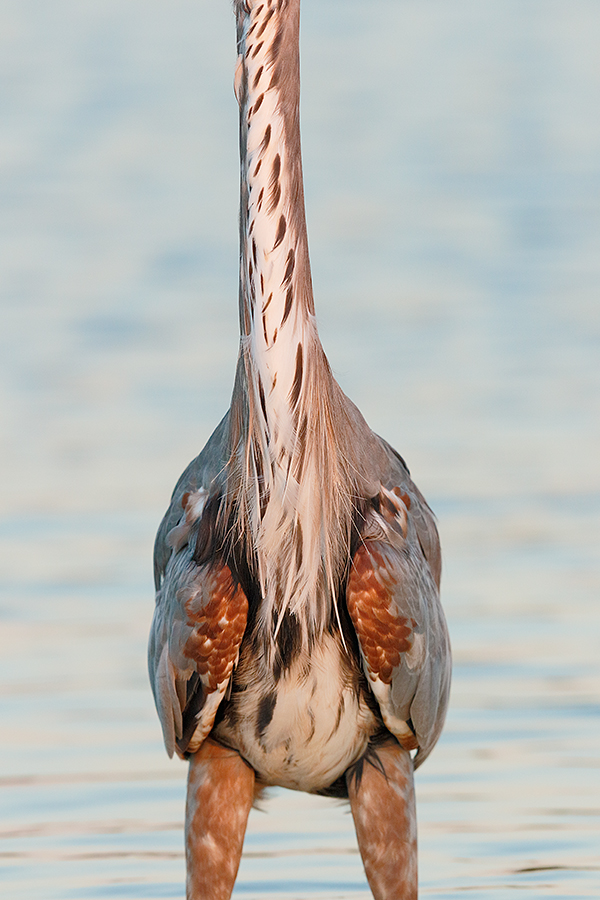
|
|
This image was created at 5:57 pm on the afternoon of October 12, 2014, day 2 of the recently concluded Fort DeSoto IPT. I used the Gitzo 3532 LS carbon fiber tripod, the Mongoose M3.6 head, with the Canon EF 600mm f/4L IS II USM lens and a beta version of the Canon EOS 7D Mark II . ISO 800. Evaluative metering +2/3 stop as framed: 1/320 sec. at f/5.6 in Av mode.
65-point Automatic Selection Rear Focus/AI Servo AF selected an array of three sensors on the base of the bird’s neck that was active at the moment of exposure. Click here to see the latest version of the Rear Focus Tutorial. Click on the image to see a larger version.
Image #3: Great Blue Heron neck, close-up of torso, neck, and legs
|
The Torso Shot
Many Great Blue Herons have ratty-looking faces in summer, late fall, and winter. What to do? Concentrate on making close-up images of their necks and chests which always feature a collection of beautifully colored and detailed feathers and patterns.
|
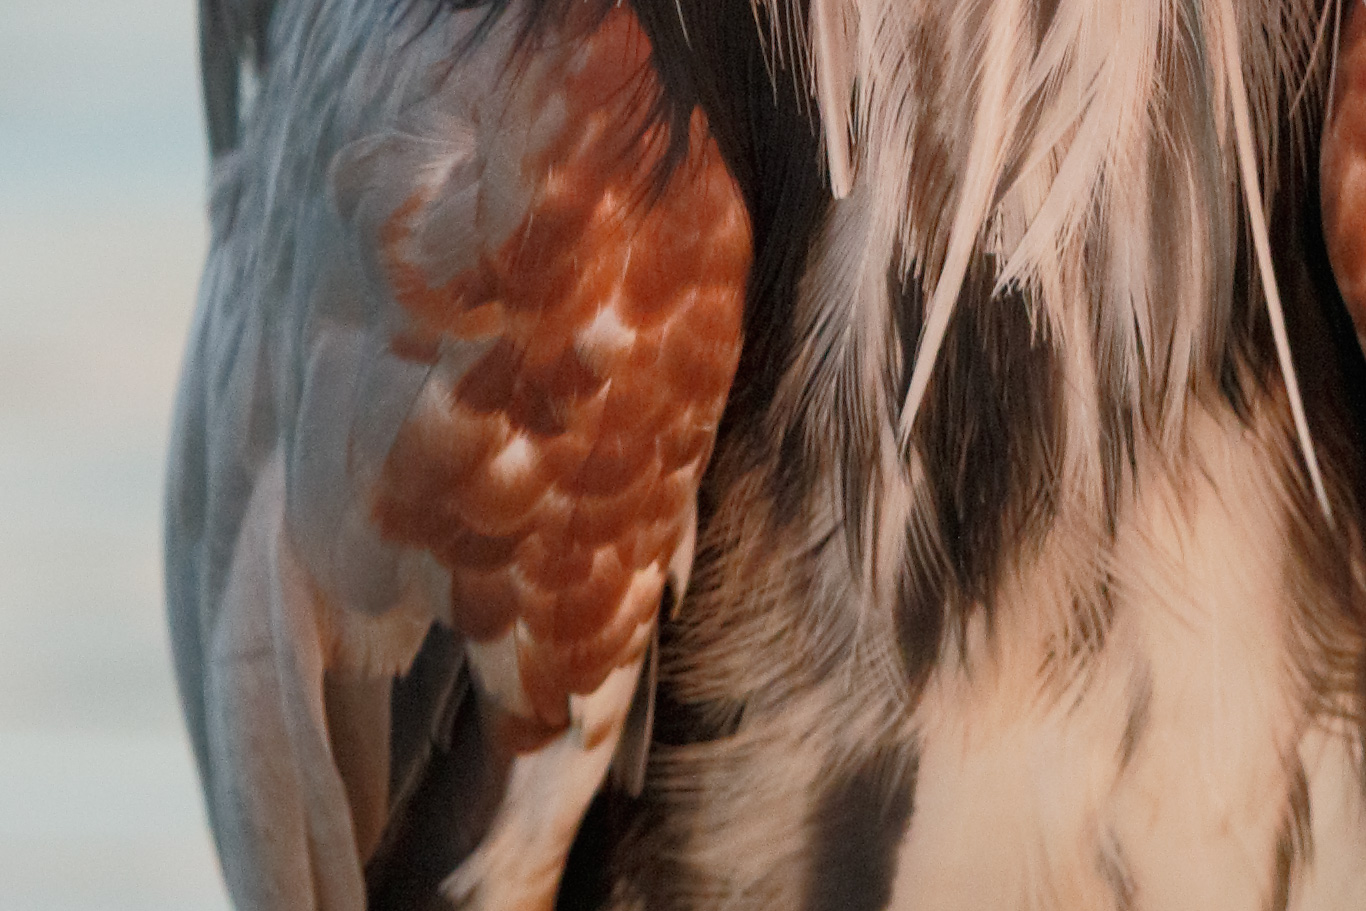
|
|
This unsharpened JPEG represents a 100% crop of the TIFF created by converting the RAW file in DPP v3.14.41.
|
The 100% Crop
Here again we see a smattering of noise in the darker feathers but not much background noise. If you are familiar with viewing your images at 100%, please feel free to share your thoughts on the noise and the image quality here at ISO 800.
|
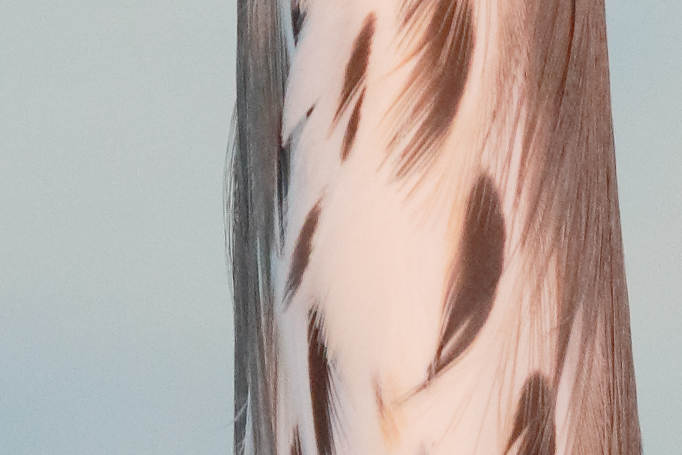
|
|
This unsharpened JPEG represents a 200% crop of the TIFF created by converting the RAW file in DPP v3.14.41.
|
The 200% Crop
With the relatively huge crop here we again see the somewhat expected loss of fine feather detail; background noise looks pretty good to me. Please realize that all of the the 100% and 200% crops here are straight out of camera with nothing but a tiny amount of capture-sharpening applied in DPP v3.14.41.0 during the RAW conversion. If you are familiar with viewing your images at 200%, please feel free to let us know what you think of the noise and the image quality here at ISO 800.
7D Mark II RAW File Offer
If you would like to receive a download link to the RAW file for one or more of today’s featured images for inspection and study only, please send a Paypal to us at birdsasart@verizon.net for $5.00 each, or $10 for all three, (to cover our handling costs) or give Jim or Jennifer a buzz at 863-692-0906 during weekday business hours with a credit card in hand. Whether by Paypal or phone be sure to specify exactly which image or images you want. We will send your link or links via Hightail. You can then download and save the RAW file. Note: you may need to download and install DPP v3.14.41.0 in order to view the images and you will surely need to have that on your computer if you wish to convert them. Thanks to all who ordered yesterday’s RAW file. I will be offering additional high ISO RAW files in the coming days and weeks. Please note that all rights remain with Arthur Morris/BIRDS AS ART.
|

|
|
Join Denise Ippolito and me for four great days of photography and learning at one of our soul places. Please click on the card to enjoy a larger version.
|
Bosque del Apache 2014 BIRDS AS ART/A Creative Adventure Instructional Photo-Tour (IPT). NOV 29 (afternoon photo session)-DEC 3 (morning session), 2014. Totaling 4 FULL-DAYS: $1449. Leaders: Arthur Morris and Denise Ippolito. Introductory Slide program: 7:00pm on Saturday 11/29. Limit 16/Openings: 1
Long sold out, the 4-DAY Bosque IPT has a single opening due to non-payment of balance.
Tens of thousands of Snow Geese, 10,000 Sandhill Cranes, ducks, amazing sunrises, sunsets, and blast-offs. Live, eat, and breathe photography with two of the world’s premier photographic educators at one of their very favorite photography locations on the planet. Top-notch in-the-field and Photoshop instruction. This will make 21 consecutive Novembers at Bosque for artie. This will be denise’s 6th workshop at the refuge. Nobody knows the place better than artie does. Join us to learn to think like a pro, to recognize situations and to anticipate them based on the weather, especially the sky conditions, the light, and the wind direction. Every time we make a move we will let you know why. When you head home being able to apply what you’ve learned on your home turf will prove to be invaluable.
This workshop includes 4 afternoon (11/29 through 12/2), 4 morning (11/30 to 12/3) photography sessions, an inspirational introductory slide program after dinner on Saturday, 11/29, all lunches, and after-lunch digital workflow, Photoshop, and image critiquing sessions.
There is never a strict itinerary on a Bosque IPT as each day is tailored to the local conditions at the time and to the weather. We are totally flexible in order to maximize both the photographic and learning opportunities. We are up early each day leaving the hotel by 5:30 am to be in position for sunrise. We usually photograph until about 10:30am. Then it is back to Socorro for lunch and then a classroom session with the group most days. We head back to the refuge at about 3:30pm each day and photograph until sunset. We will be photographing lots of Snow Geese and lots of Sandhill Cranes with the emphasis on expanding both your technical skills and your creativity.
A $449 non-refundable deposit is required to hold your slot for this IPT. Your balance, payable only by check, will be due on 7/25/2014. If the trip fills, we will be glad to apply a credit applicable to a future IPT for the full amount less a $100 processing fee. If we do not receive your check for the balance on or before the due date we will try to fill your spot from the waiting list. Whether or not your spot is filled, you will lose your deposit. If not, you can secure your spot by paying your balance.
Please print, complete, and sign the form that is linked to here and shoot it to us along with your deposit check (made out to “Arthur Morris.”) You can also leave your deposit with a credit card by calling the office at 863-692-0906. If you register by phone, please print, complete and sign the form as noted above and either mail it to us or e-mail the scan. If you have any questions, please feel free to contact me via e-mail.
|

|
|
Join Denise Ippolito and Arthur Morris for two great days of photography, fun, and learning at one of our favorite soul places. We will surely be taking you out of the box on this workshop. Please click on the card to enjoy a larger version.
|
Bosque del Apache 2014 A Creative Adventure/BIRDS AS ART “Creative Photography Instructional Photo-Tour.” (IPT). NOV 24-25, 2014. 2-FULL DAYS: $729. Leaders: Denise Ippolito & Arthur Morris. Introductory Slide program: 7:00pm on Sunday 11/23.
Get Out of Your Box!
The Creative Bosque IPT is perfect for folks who want to learn to think outside the box, to create new and different images. This workshop is the perfect add-on for folks who are planning on attending the Festival of the Cranes. Learn to unleash your creative juices at the wondrous Bosque del Apache National Wildlife Refuge in San Antonio, New Mexico with two great leaders including the amazingly talented and creative Denise Ippolito. In-the-field instruction will include tips on gear set-up, on creating a variety of pleasing blurs, on getting the right exposure, and on designing pleasing images. And lots more. From vertical pan blurs to subject motion blurs to zoom blurs to multiple exposures we will cover it all. If conditions are perfect, we will not hesitate to take advantage of them to do some traditional bird photography. This workshop will include an inspirational introductory slide program on Sunday evening, 11/23, after dinner on your own, two morning and two afternoon photography sessions, all lunches, a digital workflow and Photoshop session after lunch on Monday, and an image critiquing session after lunch on Tuesday.
A $329 non-refundable deposit is required to hold your slot for this IPT. Your balance, payable only by check, will be due on 7/25/2014. If the trip fills, we will be glad to apply a credit applicable to a future IPT for the full amount less a $100 processing fee. If we do not receive your check for the balance on or before the due date we will try to fill your spot from the waiting list. If your spot is filled, you will lose your deposit. If not, you can secure your spot by paying your balance.
Please print, complete, and sign the form that is linked to here and shoot it to us along with your deposit check (made out to “Arthur Morris.”) You can also leave your deposit with a credit card by calling the office at 863-692-0906. If you register by phone, please print, complete and sign the form as noted above and either mail it to us or e-mail the scan. If you have any questions, please feel free to contact me via e-mail.
Facebook
Be sure to like and follow BAA on Facebook by clicking on the logo link upper right. Tanks a stack!
Support the BAA Blog. Support the BAA Bulletins: Shop B&H here!
We want and need to keep providing you with the latest free information, photography and Photoshop lessons, and all manner of related information. Show your appreciation by making your purchases immediately after clicking on any of our B&H or Amazon Affiliate links in this blog post. Remember, B&H ain’t just photography!
…..
Amazon.com
Those who prefer to support BAA by shopping with Amazon may use this link:
Amazon Canada
Many kind folks from north of the border, ay, have e-mailed stating that they would love to help us out by using one of our affiliate links but that living in Canada and doing so presents numerous problems. Now, they can help us out by using our Amazon Canada affiliate link by starting their searches by clicking here. Many thanks to those who have written.
Typos
In all blog posts and Bulletins, feel free to e-mail or to leave a comment regarding any typos or errors. Just be right :).
October 15th, 2014 The Streak Continues: 319
I enjoyed a fine early morning of bird photography yesterday at DeSoto. It featured sun in the east and dark blue/black storm clouds in the west. I made lots of bird-scapes with both the 24-70 and the 70-200. Next was lunch and the 2 1/2 hour drive home. Apologies to those who are still waiting on replies to their e-mails or to having their new gear listed. I hope to finish up the last edit of the DPP 4.0 RAW Conversion Guide this morning and speak with Arash this afternoon. Then it will be time to catch up on e-mails. This blog post, the 319th in a row, took me about 3 1/2 hours to prepare. It was published just after 7:00am from my home at Indian Lake Estates, FL.
To show your appreciation for my efforts here, we ask that you use our the B&H and Amazon affiliate links on the right side of the blog for all of your purchases. Please check the availability of all photographic accessories in the BIRDS AS ART Online Store, especially Gitzo tripods, Wimberley tripod heads, and the like. We sell only what I have used, have tested, and can depend on. We will not sell you junk. We know what you need to make creating great images easy and fun. And we are always glad to answer your gear questions via e-mail.
|
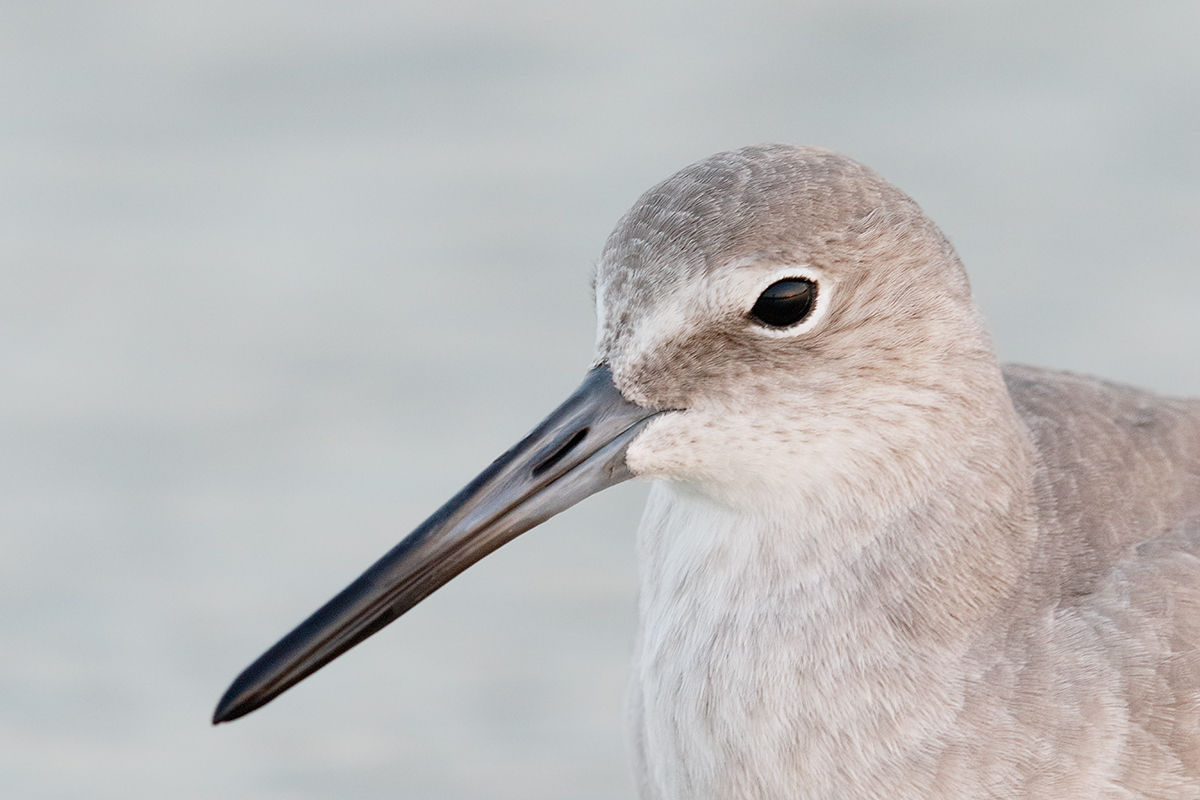
|
|
This Willet head portrait was created at 7:03pm on Day 2 of the Fort DeSoto October IPT with the Gitzo 3532 LS carbon fiber tripod, the Mongoose M3.6 head, the Canon EF 600mm f/4L IS II USM lens, the Canon Extender EF 2X III, and a beta version of the Canon EOS 7D Mark II . ISO 1600. Evaluative metering +2/3 stop as framed: 1/80 sec. at f/10 in Manual mode was about a 2/3 stop underexposure.
Central sensor (by necessity)/AI Servo Expand/Rear Focus AF on the top of the bird’s bird’s bill just behind the nares (nostrils) as framed was active at the moment of exposure. Click here to see the latest version of the Rear Focus Tutorial. Click on the image to see a larger version.
|
ISO 1600 Willet with the EOS-7D Mark II
To create this image I was working at an effective focal length of 600 X 2 X 1.6 = 1920mm. This is a magnification of 38.4X. Being able to create sharp images at extreme focal lengths at very slow shutter speeds (1/80 sec here) is a testament to the great 4-stop Image Stabilization system of the 600 II, the incredible optical qualities of the lens and the Series III teleconverter, and the use of superb advanced sharpness techniques by yours truly.
Note that with the long effective focal length the angle of declination to the subject appeared quite shallow even though I was standing at full height behind my tripod. Most folks would think that I had either been seated or on my knees when I made this image.
Note also that the bill, even though it is angled quite a bit towards me, is fairly sharp even at the tip when compared to a similarly framed image created with a full frame sensor camera and the same gear. To do that of course you would need to be closer to the bird.
7D Mark II RAW File Offer
If you would like to receive a download link to the RAW file for today’s featured images for inspection and study only, please send a Paypal to us at birdsasart@verizon.net for $5.00 each (to cover our handling costs) or give Jim or Jennifer a buzz at 863-692-0906 during weekday business hours with a credit card in hand. Whether by Paypal or phone be sure to specify “Willet Head Shot.” We will send your links via Hightail. You can then download and save the RAW file. Note: you may need to download and install DPP v3.14.41.0 in order to view the images and you will surely need to have that on your computer if you wish to convert them. Thanks to all who ordered yesterday’s RAW file. I will be offering additional high ISO RAW files in the coming days and weeks. Please note that all rights remain with Arthur Morris/BIRDS AS ART.
|
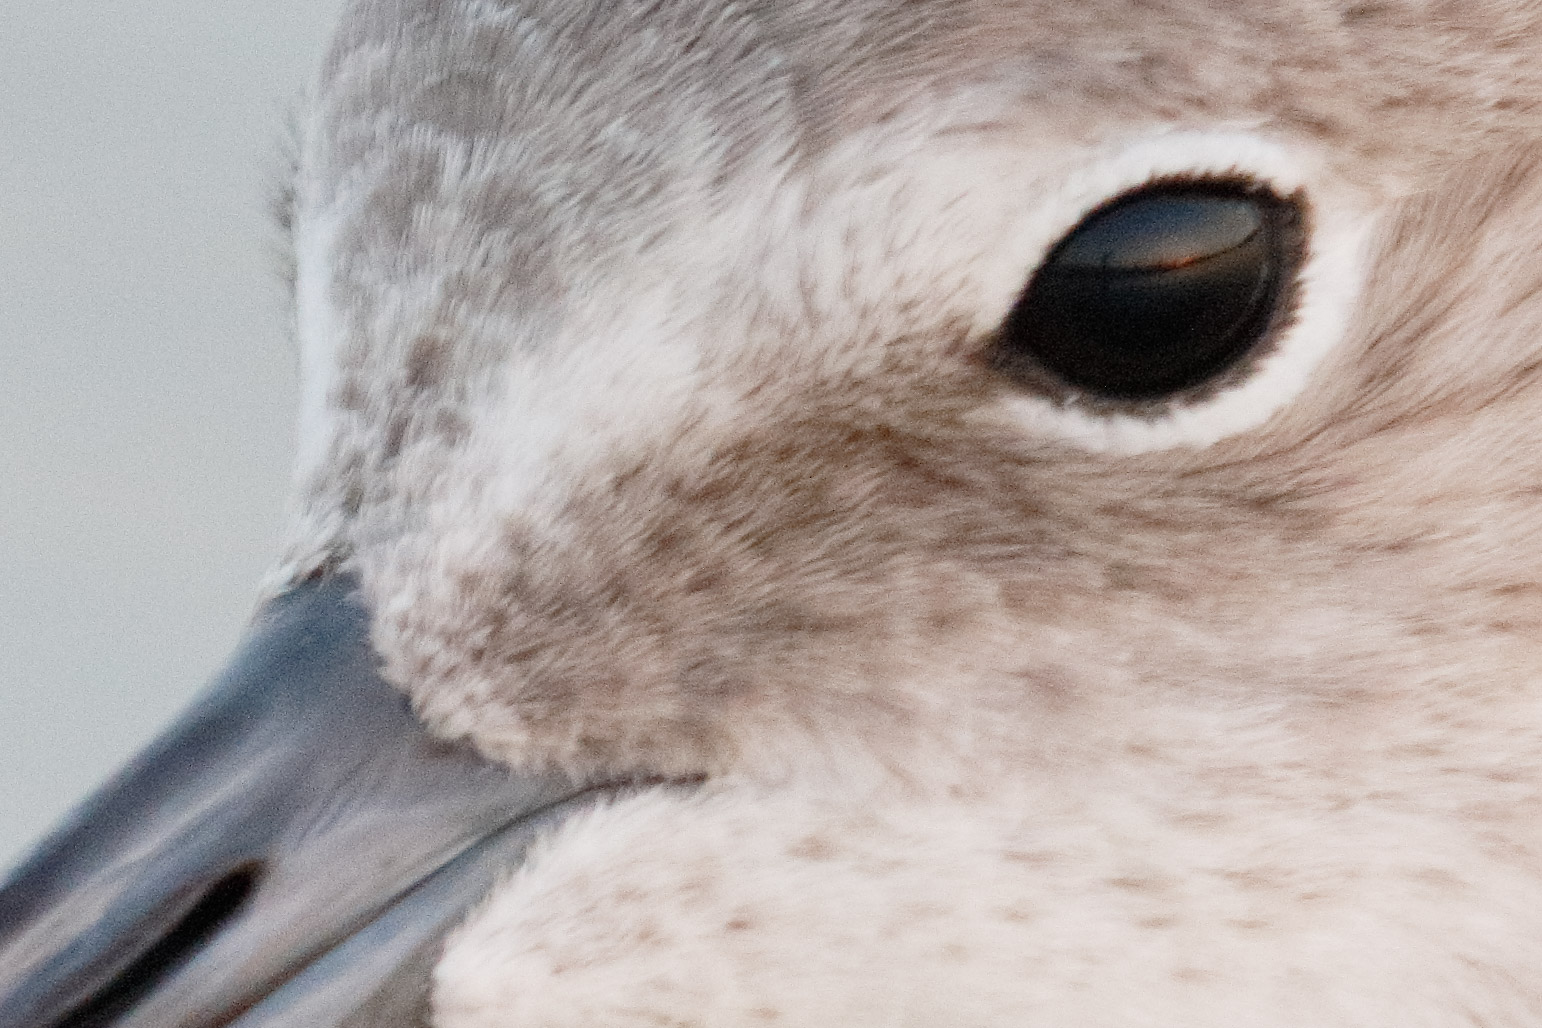
|
|
This unsharpened JPEG represents a 100% crop of the TIFF created by converting the RAW file in DPP v3.14.41.
|
The 100% Crop
To create a 3X2 100% crop double click on the zoom tool, use the Rectangular Marquee Tool, select fixed ratio with a width of 3 and a height of 2, and then set your crop by click-dragging. Next is Image > Crop (my Keyboard Shortcut Ctrl + C) and you are ready to save your image file.
If you are familiar with viewing your images at 100%, please feel free to let us know what you think of the noise here at ISO 1600.
|
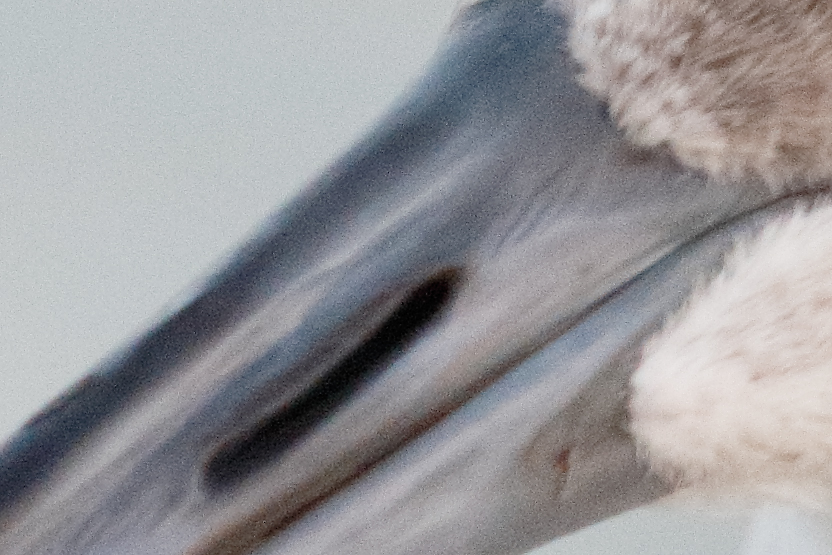
|
|
This unsharpened JPEG represents a 200% crop of the TIFF created by converting the RAW file in DPP v3.14.41. Note: had this image been properly exposed, i.e., been 2/3 stops lighter, the noise would have been reduced.
|
The 200% Crop
To create a 3X2 200% crop first double click on the Zoom Tool to get to 100%, then click on the image with the Zoom Tool to get to 200%. Then activate the Rectangular Marquee Tool, select fixed ratio with a width of 3 and a height of 2, and then set your crop by click-dragging. Next is Image > Crop (my Keyboard Shortcut Ctrl + C) and you are ready to save your image file.
If you are familiar with viewing your images at 200%, please feel free to let us know what you think of the noise and image quality here at ISO 1600.
Is the EOS-7D Mark II 1.6X Crop Factor Real or Bogus?
I put this question to Canon USA’s top technical representative Chuck Westfall.Here is his response:
IMO, the crop factor of APS-C affects two aspects of image quality: DOF and noise.
On the first point, if you reduce the focal length on an APS-C camera to match the angle of view on a full frame camera while shooting at the same distance and aperture with both cameras, you end up with approximately one more stop’s worth of depth-of-field. This might be a good thing for some kinds of photography, but not all. It becomes a matter of personal taste.
On the second point, the photodiodes on an APS-C sensor will obviously be smaller than on a full frame sensor if the resolution is the same. This is not a big issue at moderate ISO speeds, but differences in favor of the full frame sensor become more pronounced at speeds above 1600 or so, IMO. Again it becomes a matter of personal taste.
I suppose there is a third element to consider, although it is not directly related to image quality: the size , weight and cost of lenses with equivalent angles of view and maximum aperture are clearly smaller, lighter and more affordable with APS-C vs. full frame.
For bird photography, I think the scale tips in favor of APS-C as long as noise levels remain acceptable. And the image quality of the 7D Mark II is good enough IMO under most lighting conditions that bird photographers are likely to encounter.
Best Regards,
Chuck
Coming Next: In-depth Looks at 7D II High ISO Noise
Over the course of the next week, we will–as requested by so many–be taking a close look at some the 7D II images that I have made at the higher ISO settings including ISO 800, 1600, 3200, and even 6400.

 Use the BAA Affiliate logo link above to pre-order your 7D II, shoot me your receipt via e-mail, and I will do my very best to have your order expedited once the camera begins shipping.
|
|
|
It’s been a 20+ year love affair….
|
“Love Affair with Bosque.” Sponsored by Canon. Friday, NOV 21, 2014; 1:00 to 2:40pm. Free, at the Bodega Restaurant, Socorro.
A slide program by Arthur Morris/BIRDS AS ART. Limit 200. Please click here to register.
Arthur Morris first visited Bosque del Apache Refuge in December, 1992 while on sabbatical with his late-wife Elaine While leading his first Bosque del Apache photographic workshop in December, 1994, quite soon after Elaine’s death, he created two iconic Bosque images. His “Blizzard in Blue” was honored in the prestigious 1998 BBC Wildlife Photographer of the Year Competition. “Fire in the Mist” was similarly honored in the 2001 BBC competition and soon thereafter was featured as wrap-around cover art on the coffee table book, Life on the Earth, a celebration of 30 years of the best images from the Wildlife Photographer of the Year Competitions. Those two images laid the foundation for his more than two decade love affair with the refuge. He has returned every year since then at the Thanksgiving season while leading BIRDS AS ART Instructional Photo-Tours. In addition, he has two February visits along with two September visits, the latter visits in conjunction with the Bosque del Apache Open Windows Volunteer Program that he founded. Join us for Artie’s photographic celebration of his “Love Affair with Bosque.”
Facebook
Be sure to like and follow BAA on Facebook by clicking on the logo link upper right. Tanks a stack!
Support the BAA Blog. Support the BAA Bulletins: Shop B&H here!
We want and need to keep providing you with the latest free information, photography and Photoshop lessons, and all manner of related information. Show your appreciation by making your purchases immediately after clicking on any of our B&H or Amazon Affiliate links in this blog post. Remember, B&H ain’t just photography!
…..
Amazon.com
Those who prefer to support BAA by shopping with Amazon may use this link:
Amazon Canada
Many kind folks from north of the border, ay, have e-mailed stating that they would love to help us out by using one of our affiliate links but that living in Canada and doing so presents numerous problems. Now, they can help us out by using our Amazon Canada affiliate link by starting their searches by clicking here. Many thanks to those who have written.
Typos
In all blog posts and Bulletins, feel free to e-mail or to leave a comment regarding any typos or errors. Just be right :).
October 14th, 2014 The Streak Continues: 318
Today is get-away day for me. After packing I head to Fort DeSoto for a busman’s holiday. Then lunch and the 2 1/2 hour drive home. Apologies to those who are waiting on replies to their e-mails or to have new gear listed. I will be catching up over the next few days. This blog post, the 318th in a row, took me a bit less than 2 hours to prepare. It was published just before 4:45 from my soon-to-be former motel room in St. Petersburg Beach, FL.
To show your appreciation for my efforts here, we ask that you use our the B&H and Amazon affiliate links on the right side of the blog for all of your purchases. Please check the availability of all photographic accessories in the BIRDS AS ART Online Store, especially Gitzo tripods, Wimberley tripod heads, and the like. We sell only what I have used, have tested, and can depend on. We will not sell you junk. We know what you need to make creating great images easy and fun. And we are always glad to answer your gear questions via e-mail.
|
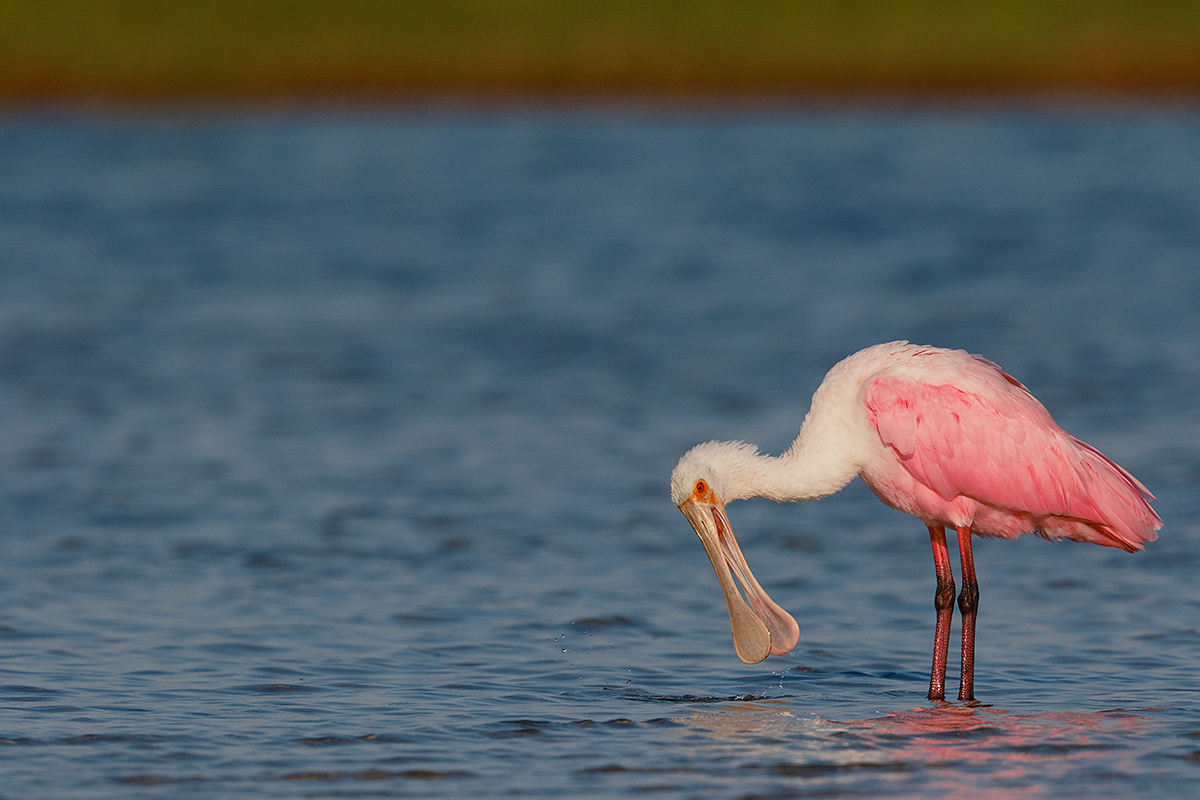
|
|
This image was created at 5:57pm on the clear afternoon of October 11 on on day one of the Fort DeSoto October IPT with the Gitzo 3532 LS carbon fiber tripod, the Mongoose M3.6 head, the Canon EF 600mm f/4L IS II USM lens, the Canon Extender EF 1.4X III, and a beta version of the Canon EOS 7D Mark II . ISO 400. Evaluative metering -1 stop as framed: 1/2000 sec. at f/10 in Manual mode.
The fourth sensor to the right of the central sensor/AI Servo/Rear Focus AF fell on a spot just forward of the bend of the wing and was active at the moment of exposure. Click here to see the latest version of the Rear Focus Tutorial. Click on the image to see a larger version.
Image #1: Non-breeding Roseate Spoonbill shaking water off bill prior to preening
|
The Situation
I had the group at one of my very favorite afternoon spots. We had been talking about Roseate Spoonbills, hoping for might be a better way to put it, when a single bird flew in and landed on the far side of a nice flock of Marbled Godwits, Willets, Laughing Gulls, terns, and a few smaller shorebirds. Not to mention a dark form Reddish Egret. I approached slowly hoping to get a head portrait with the 600/2XIII/7D II combo but I took one step too many and the bird flew. But is flew only 30 yards or so to the next spit on our right. I said, “I am gonna get that bird right now. You are all welcome to come with me. Nobody came.
In two minutes I was in half way decent position. I got down on the ground, seated behind my tripod, created a few images, and butt-advanced my way closer and closer. I invited the group more emphatically this time and they all came. Within a few minutes everyone was snapping away as we talked about exposure and image design. Having the bird completely isolated was a huge plus as were the green marsh grasses in the distant background. Eventually, birds from the larger flock spread out and surrounded everyone’s favorite Florida avian subject.
|
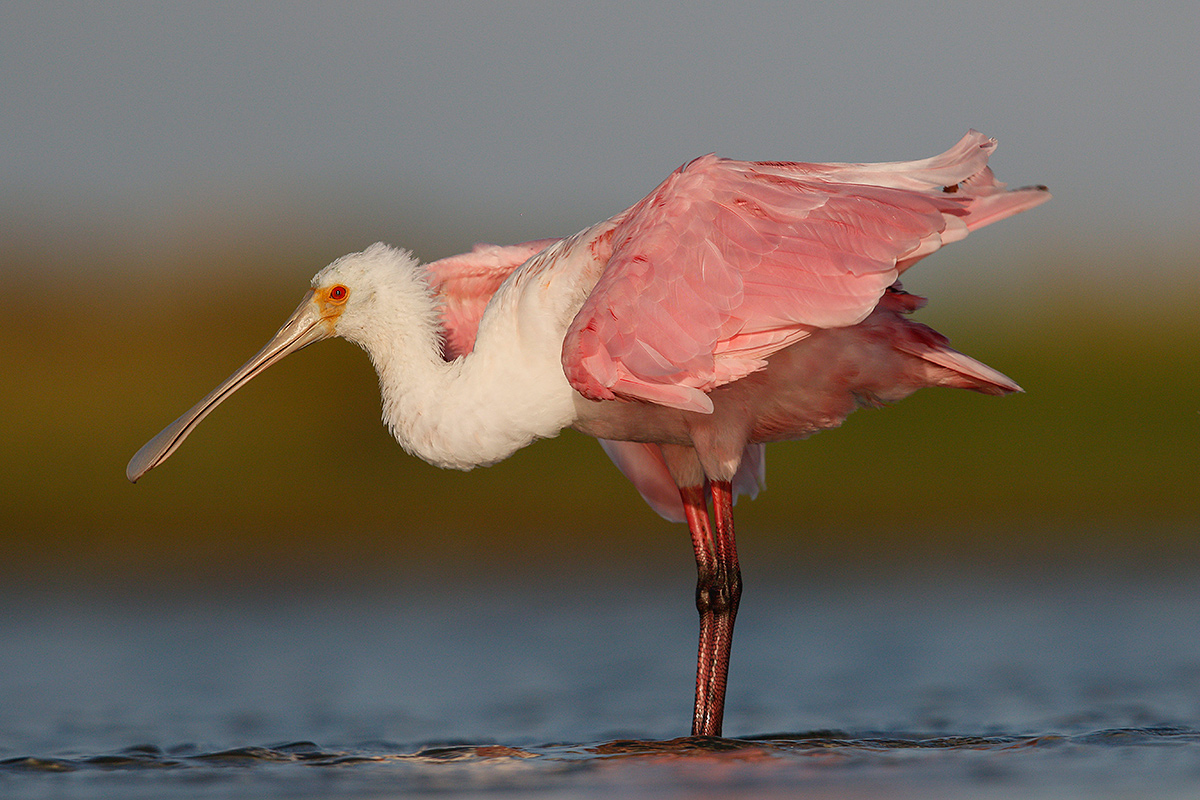
|
|
This 1200 pixel wide image represents the embedded JPEG that in turn is a pretty good representation of the RAW file.
|
Problems
1-The image is not level.
2-The bird is a bit too big in the frame.
3-There is too much room behind the bird and not enough room in front of the bird.
My Mistake
I simply got too close. When the bird leaned forward and ruffled I did point the lens to the left but did not want to clip the tail. That is why I wound up with a too-centered composition….
The Image Optimization
1-I leveled the image using Image > Rotate > Arbitrary.
2-I filled in the long skinny triangles using John Haedo Content Aware Fill. It worked perfectly.
3-I added some blank canvas in front and above the bird by dragging the crop tool love handles.
4-Using the Rectangular Marquee Tool I selected a top to bottom swatch in front of the bird that included about an inch of the bird’s bill. I put that on its own layer, hit Control + T for the Transform Tool, and then stretched the layer about 40%. The trick is to stretch the canvas judiciously. Then I added a Regular Layer Mask and erased the stretch bill. That revealed the original below perfectly.
5-I added some blue sky above in the same manner.
6-I cropped from the rear.
7-I darkened the pupil using digital Eye Doctor techniques/
8-I selected the bill and the lores and the face and applied a Contrast Mask at 15/65/0.
9-I boosted the REDs using Selective Color and then increased the Vibrance.
The DPP RAW Conversion Guide
To learn why I use Canon’s Digital Photo Professional (DPP) to convert every image that I work on, click here. The current guide will teach you how to best convert all of your Canon images in all 3 point something versions of Canon Digital Photo Professional including the current v.3.14.41.0.
Coming soon: The DPP 4.0 RAW Conversion Guide by Arash Hazeghi and Arthur Morris. The more that I use DPP 4.0 for my 1D X and 5D III RAW conversions the more I learn about it. And the more I learn about it the more I am impressed with it. Note: at present, DPP 4.0 will work only with 1D X, 5D III, and 6D images. Scroll down for the latest DPP/7D Mark II info.
Digital Basics
Everything that I did to optimize today’s image is covered in detail in my Digital Basics File–written in my easy-to-follow, easy-to-understand style. Are you tired of making your images look worse in Photoshop? Digital Basics File is an instructional PDF that is sent via e-mail. It includes my complete digital workflow, dozens of great Photoshop tips (including Surface Blur settings), details on using all of my image clean-up tools, the use of Contrast Masks, several different ways of expanding and filling in canvas, all of my time-saving Keyboard Shortcuts, Quick Masking, Layer Masking, and NIK Color Efex Pro basics, Digital Eye Doctor, Tim Grey Dodge and Burn, how to create time-saving actions, and tons more.
APTATS I & II
Learn the details of advanced Quick Masking techniques in APTATS I. Learn Advanced Layer Masking Techniques in APTATS II. Mention this blog post and apply a $5 discount to either with phone orders only. Buy both APTATS I and APTATS II and we will be glad to apply at $15 discount with phone orders only. Please call Jim or Jennifer at 863-692-0906 weekdays to order.

 Use the BAA Affiliate logo link above to pre-order your 7D II, shoot me your receipt via e-mail, and I will do my very best to have your order expedited once the camera begins shipping.
|
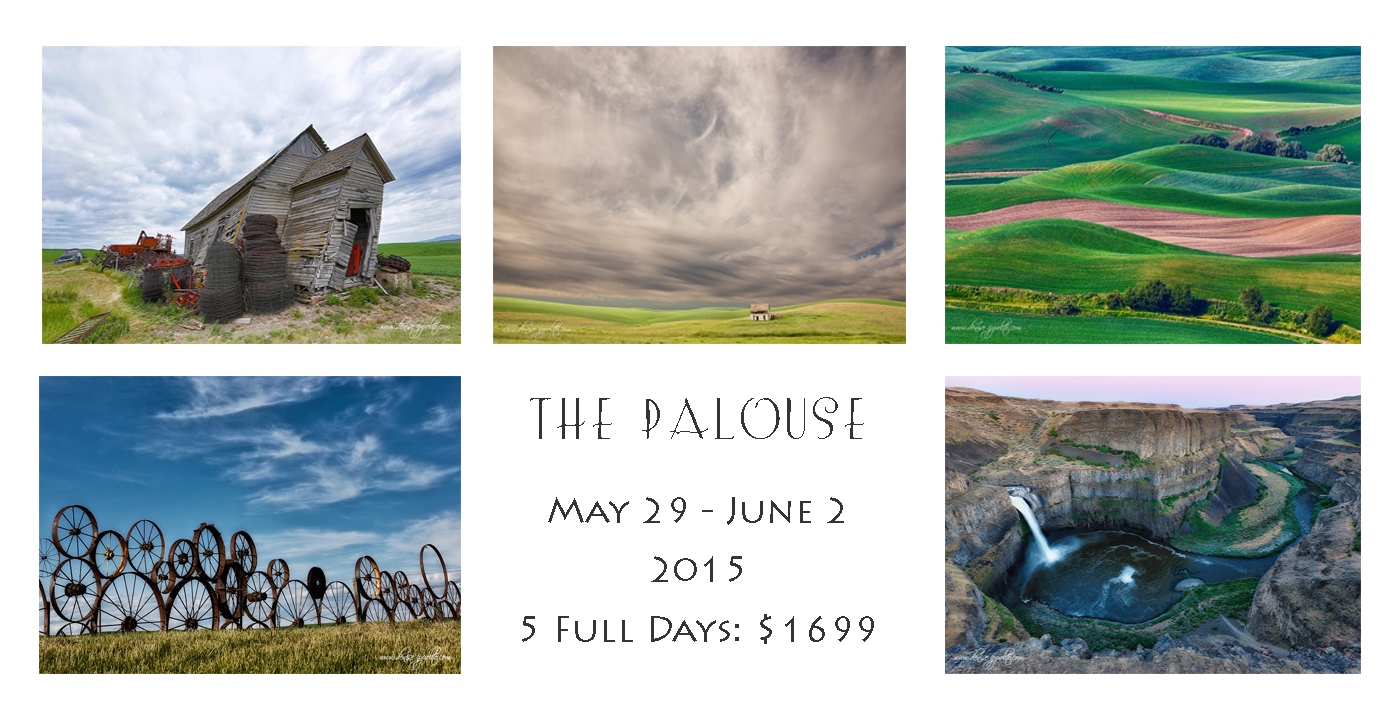
|
|
Card and design by Denise Ippolito. Scroll down here to see lots more of Denise’s Palouse images.
|
Palouse #1. The Palouse A Creative Adventure/BIRDS AS ART Instructional Photo-Tour (IPT)/Eastern Washington State. May 29-June 2, 2015/5 Full Days: $1699/Limit 12 photographers/Openings: 0.
Due to a recent cancellation, we now have a single opening on Palouse #1. Please see the details below.
|
|
|
Please note that there are two Palouse IPTs scheduled. We hope that you can join us 🙂 Card and design by Arthur Morris/BIRDS AS ART.
|
The Palouse A Creative Adventure/BIRDS AS ART Instructional Photo-Tour (IPT)/Eastern Washington State. June 5-9, 2015/5 Full Days: $1699/Limit 12 photographers/Openings 1
Rolling farmlands provide a magical patchwork of textures and colors, especially when viewed from the top of Steptoe Butte where we will likely enjoy spectacular sunrises and possibly a nice sunset or two. We will photograph grand landscapes and mini-scenics of the rolling hills and farm fields. We will take you to some really neat old abandoned barns and farmhouses in idyllic settings. There is no better way to improve your compositional and image design skills and to develop your creativity than to join us for this trip. Two great leaders: Denise Ippolito and Arthur Morris. Photoshop and image sharing sessions when we have the time and energy…. We get up early and stay out late and the days are long.
After 6 days of back-breaking scouting work in early June 2014 we found all of the iconic locations and, in addition, lots of spectacular new old barns and breath-taking landforms and views. We will teach you what makes one situation prime and another seemingly similar one a waste of your time.
What’s included: In-the-field instruction, guidance, lessons, and inspiration, our newfound but very extensive knowledge of the area, all lunches, motel lobby breakfasts, and Photoshop and image sharing sessions when possible.
You will learn and hone both basic and advanced compositional and image design skills. You will learn to get the right exposure every time. You will learn to develop your creative eye. You will learn the basics of HDR (high dynamic range) photography. You will learn a variety of in-camera creative techniques; Canon 5D Mark III bodies are a plus. And most importantly you will learn to see the situation and to create a variety of top-notch images. Do see both of our blogs for lots more on that in the coming weeks. You will learn how the quality and direction of light combine to determine the success of your images. And–please don’t gasp–we will be working quite a bit with sidelight when creating landscapes. Lastly, we will be touching on infrared photography.
A non-refundable $699 deposit is due now. The balance will be due on January 29, 2015. Please let me know via e-mail if you would like to join us. Then you can either call Jim or Jennifer at 863-692-0906 during business hours with a credit card in hand or send us a check; the latter is preferred.
Please send your deposit check made out to “Arthur Morris” to us at Arthur Morris/BIRDS AS ART, PO Box 7245, Indian Lake Estates, FL, 33855. If you have any questions, please feel free to contact me via e-mail. You can also contact denise via e-mail here
Facebook
Be sure to like and follow BAA on Facebook by clicking on the logo link upper right. Tanks a stack!
Support the BAA Blog. Support the BAA Bulletins: Shop B&H here!
We want and need to keep providing you with the latest free information, photography and Photoshop lessons, and all manner of related information. Show your appreciation by making your purchases immediately after clicking on any of our B&H or Amazon Affiliate links in this blog post. Remember, B&H ain’t just photography!
…..
Amazon.com
Those who prefer to support BAA by shopping with Amazon may use this link:
Amazon Canada
Many kind folks from north of the border, ay, have e-mailed stating that they would love to help us out by using one of our affiliate links but that living in Canada and doing so presents numerous problems. Now, they can help us out by using our Amazon Canada affiliate link by starting their searches by clicking here. Many thanks to those who have written.
Typos
In all blog posts and Bulletins, feel free to e-mail or to leave a comment regarding any typos, wrong words, misspellings, omissions, or grammatical errors. Just be right. 🙂
October 13th, 2014 The Streak Continues: 317
The three great folks on the IPT– Deirdre Sheerr-Gross, Catherine Costolo, and Dr. Dennis Cassidy–all repeat clients, were joined for the day by three BIRDS AS ART newbies. At the end of the day, a gushingly happy, hugging, and smiling Laura Benassi thanked me for the three great sessions and told me that she had never ever learned so much in a single day. John McCartney and Sharon Young told me that they had been on numerous photo tours all over the world but that nobody had ever bothered to teach them about histograms, about autofocus, about creating sharp images, and about getting close to birds. Again, there was no time for meditation or for a swim or for ice baths but there is lots of great bird photography and learning going on. This blog post, the 317th in a row, took me about 2 1/2 hours to prepare. It was published just before 5:30am from my motel room in St. Petersburg Beach, FL.
To show your appreciation for my efforts here, we ask that you use our the B&H and Amazon affiliate links on the right side of the blog for all of your purchases. Please check the availability of all photographic accessories in the BIRDS AS ART Online Store, especially Gitzo tripods, Wimberley tripod heads, and the like. We sell only what I have used, have tested, and can depend on. We will not sell you junk. We know what you need to make creating great images easy and fun. And we are always glad to answer your gear questions via e-mail.
|
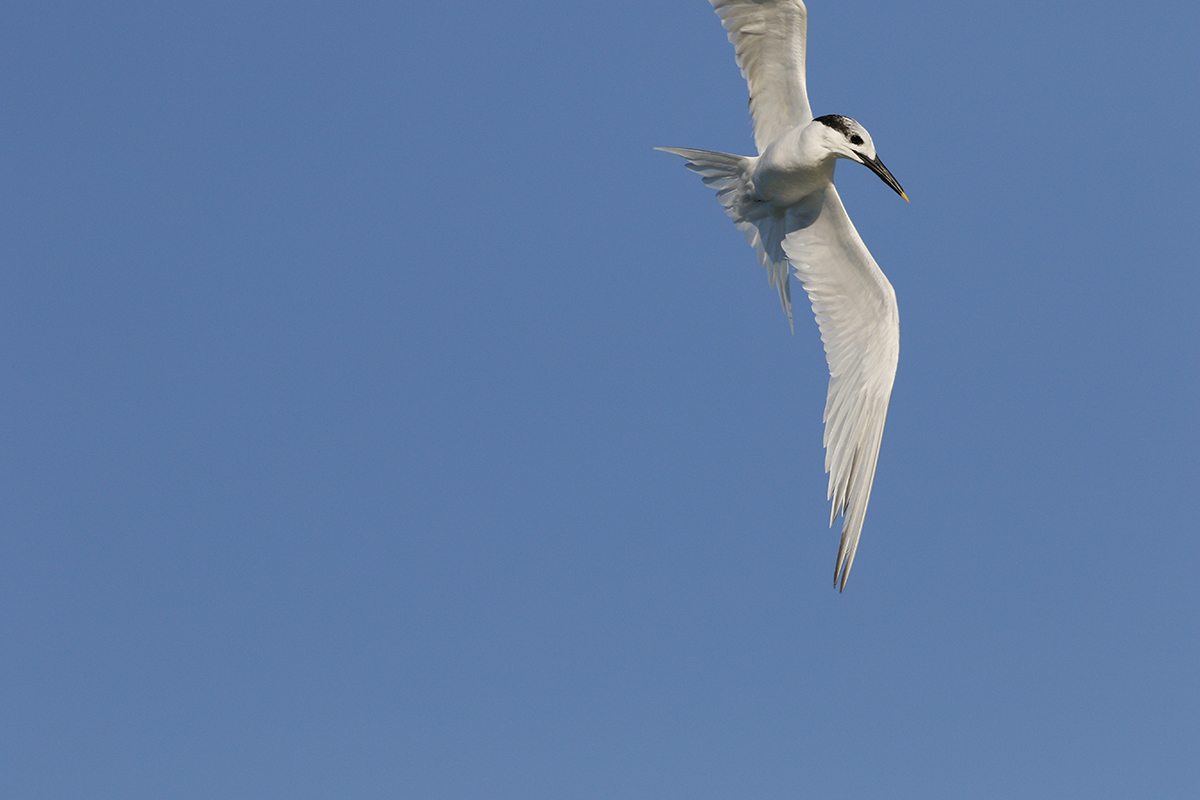
|
|
This image was created at 8:39:36am on the morning of 11 October, DAY 2 of the Fort DeSoto October IPT. I used the the hand held Canon EF 200-400mm f/4L IS USM lens with Internal 1.4x Extender (with the internal extender in place at 406mm) and a beta version of the Canon EOS 7D Mark II . ISO 400. Evaluative metering +2/3 stop off the light sky 30 degrees above the horizon: 1/2000 sec. at f/8 in Manual mode.
Central sensor/AI Servo Surround/Shutter Button AF missed the bird completely and was active at the moment of exposure but resulted in a sharp image. Please don’t ask me how that works.
|
Sandwich Tern Turning to Dive/Operator Error #1
The tern was flying toward us and then turning a bit to the east into the wind as they looked for the greenbacks below them. Here highly skilled Mr. Famous Bird Photographer completely mis-framed the image. Note: though none of the nine active sensors were anywhere near the bird the image is sharp on the eye.
|
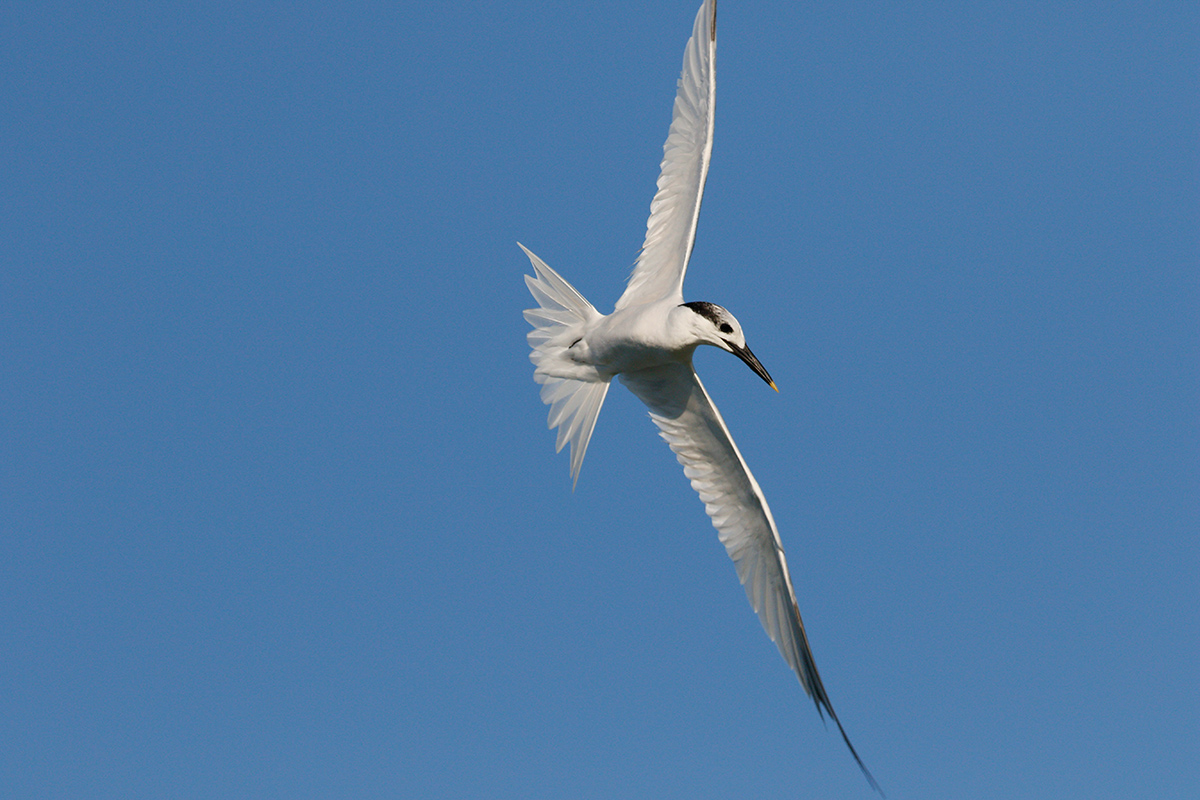
|
|
This, the next frame in the sequence was also created at 8:39:36am on the morning of 11 October, DAY 2 of the Fort DeSoto October IPT. With the hand held Canon EF 200-400mm f/4L IS USM lens with Internal 1.4x Extender (with the internal extender in place at 406mm) and a beta version of the Canon EOS 7D Mark II . ISO 400. Evaluative metering +2/3 stop off the light sky 30 degrees above the horizon: 1/2000 sec. at f/8 in Manual mode.
Central sensor/AI Servo Surround/Shutter Button AF on the base of the bird’s tail just below the undertail coverts was active at the moment of exposure. This image is sharp on the eye.
|
Sandwich Tern Stalling a Bit Before the Dive/Operator Error #2
The tern stalled a bit in flight. This let me know that a dive was imminent. Though I had zoomed out a bit between the 1st and 2nd frames in the series, from 212 to 206mm I was still tight enough to clip the the primary tips top and bottom…. Wouldn’t a vertical have been nice? Here highly skilled Mr. Famous Bird Photographer mis-framed the image: the bird is far too centered.
|
|
|
Frame 3 in the series: created at 8:39:37am on the morning of 11 October, DAY 2 of the Fort DeSoto October IPT. Also and of course with the hand held Canon EF 200-400mm f/4L IS USM lens with Internal 1.4x Extender (with the internal extender in place at 412mm) and a beta version of the Canon EOS 7D Mark II . ISO 400. Evaluative metering +2/3 stop off the light sky 30 degrees above the horizon: 1/2000 sec. at f/8 in Manual mode.
Central sensor/AI Servo Surround/Shutter Button AF; again all nine active sensors missed the bird completely but were active at the moment of exposure. Again, the resulting image was sharp. Again, please don’t ask me how that works.
|
Sandwich Tern Diving/Operator Error #3
Even though I knew the dive was coming I was not quick enough. Here again highly skilled Mr. Famous Bird Photographer completely mis-framed the image. Amazingly, the AF system of the new EOS-7D Mark II continued to track the bird perfectly in flight.
|
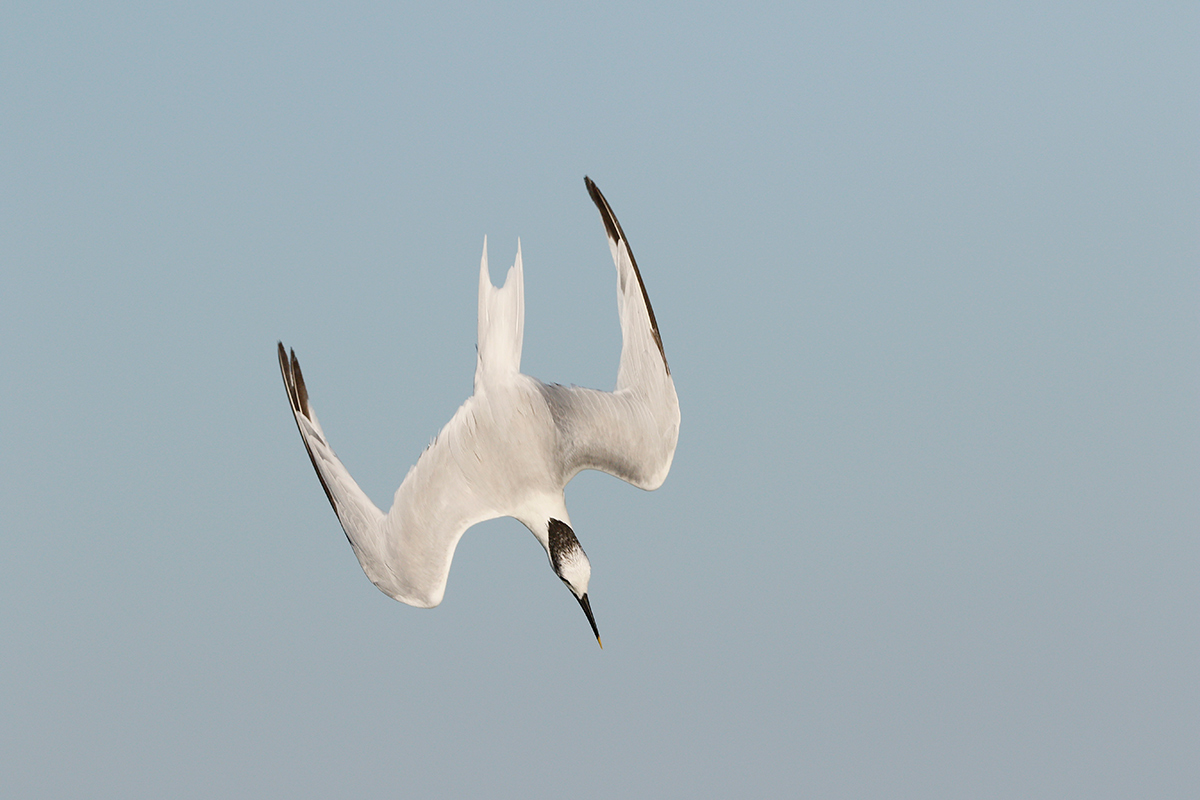
|
|
This is the last frame in the sequence: 8:39:37am. With the hand held Canon EF 200-400mm f/4L IS USM lens with Internal 1.4x Extender (with the internal extender in place at 406mm) and a beta version of the Canon EOS 7D Mark II . ISO 400. Evaluative metering +2/3 stop off the light sky 30 degrees above the horizon: 1/2000 sec. at f/8 in Manual mode.
Central sensor/AI Servo Surround/Shutter Button AF on the trailing edge of the bird’s left was active at the moment of exposure. This image is exceedingly sharp.
|
Sandwich Tern Diving/Determination Pays Off!
Once he bird started to dive I frantically jerked the camera down in an effort to center it in the frame. I must assume that my rapid downward panning allowed me to catch up with the bird and amazingly, the 7D II AF system continued to track the subject despite my worst efforts :).
When I saw the lovely diagonal lines when reviewing the images on the back of the camera I just could not wait till I got home and did something that I rarely do in the field: I zoomed into 100% to check for sharpness. Then I started jumping up and down for joy and began showing the image off to the group. Subdued I am not.
Most everything in flight that I shot that morning was sharp on the bird’s eye. And I did get probably another five or six very excellent flight images. Nothing however came close to this one. Image next is the optimized image.
|
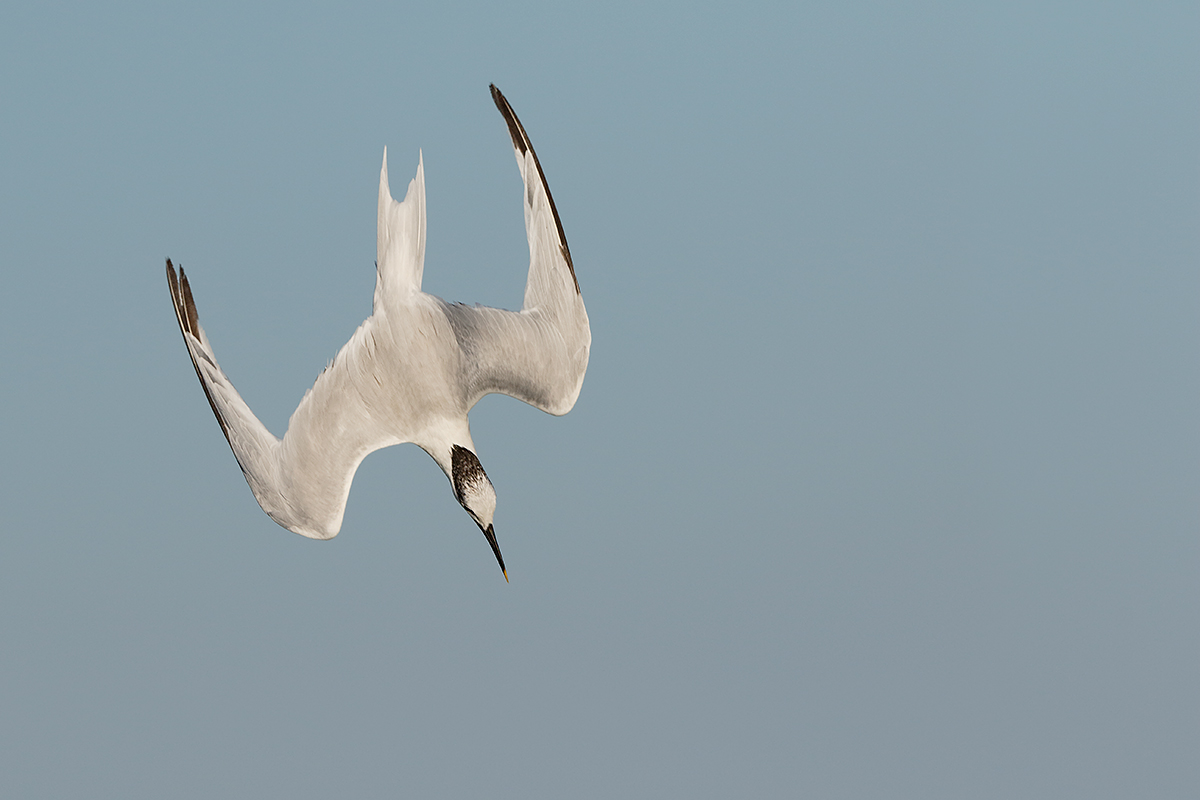
|
|
This is the optimized image that was created from the 4th frame of the sequence.
|
The Image Optimization
The RAW file was of course converted in DPP v3.14.41.0.
Though this image would work very well pretty much right out of camera, I wanted to move the bird a bit up and back in the frame. I used techniques from APATATS II to do that in less than a minute. The group was amazed. Then I selected the bird very carefully with the Quick Selection Tool, saved the selection, ran Select Refine Mask, applied a layer of NIK Color EFEX Pro Detail Extractor, reduced the opacity to about 25%, and painted some of the effect away with a Regular Layer Mask. After merging that layer I loaded the saved selection, hit Alt + Ctrl + I to Select Inverse, thus selecting only the sky. I put the sky on its own layer and pulled down the curve (Ctrl + M) to darken the sky just a bit. Then I selected the cap and the bill, again with the Quick Selection Tool, and sharpened that layer only with a Contrast Mask.
I saved the master file as a TIFF and then created my 1200 pixel wide JPEG. All that during a great working lunch with the group at the Sea Porch Cafe. All lunches are included in the cost of an IPT. All meals are included in the cost of the UK Puffins and Gannets IPT. (See more on this IPT below.)
The DPP RAW Conversion Guide
To learn why I use Canon’s Digital Photo Professional (DPP) to convert every image that I work on, click here. The current guide will teach you how to best convert all of your Canon images in all 3 point something versions of Canon Digital Photo Professional including the current v.3.14.41.0.
Coming soon: The DPP 4.0 RAW Conversion Guide by Arash Hazeghi and Arthur Morris. The more that I use DPP 4.0 for my 1D X and 5D III RAW conversions the more I learn about it. And the more I learn about it the more I am impressed with it. Note: at present, DPP 4.0 will work only with 1D X, 5D III, and 6D images. Scroll down for the latest DPP/7D Mark II info.
Digital Basics
Everything that I did to optimize today’s image is covered in detail in my Digital Basics File–written in my easy-to-follow, easy-to-understand style. Are you tired of making your images look worse in Photoshop? Digital Basics File is an instructional PDF that is sent via e-mail. It includes my complete digital workflow, dozens of great Photoshop tips (including Surface Blur settings), details on using all of my image clean-up tools, the use of Contrast Masks, several different ways of expanding and filling in canvas, all of my time-saving Keyboard Shortcuts, Quick Masking, Layer Masking, and NIK Color Efex Pro basics, Digital Eye Doctor, Tim Grey Dodge and Burn, how to create time-saving actions, and tons more.
APTATS I & II
Learn the details of advanced Quick Masking techniques in APTATS I. Learn Advanced Layer Masking Techniques in APTATS II. Mention this blog post and apply a $5 discount to either with phone orders only. Buy both APTATS I and APTATS II and we will be glad to apply at $15 discount with phone orders only. Please call Jim or Jennifer at 863-692-0906 weekdays to order.

 Use the BAA Affiliate logo link above to pre-order your 7D II, shoot me your receipt via e-mail, and I will do my very best to have your order expedited once the camera begins shipping.
|
|
|
Images and card design copyright 2014: Arthur Morris/BIRDS AS ART. Click on the card to enjoy a spectacular larger version.
|
The 2015 UK Puffins and Gannets IPT
June 29 through July 5, 2015: $5499: Limit 10 photographers/Openings 3. Two great leaders: Denise Ippolito and Arthur Morris.
Here are the plans for next year: take a red eye from the east coast of the US on 28 June arriving in Edinburgh, Scotland on the morning of Monday 29 June (or simply meet us then either at the Edinburgh Airport (EDI) or later in the day at our cottages if you are driving your own vehicle either from the UK or from somewhere in Europe. Stay 7 nights in two gorgeous modern country cottages.
There are 5 days of planned puffin/seabird trips—weather permitting, and 1 full day of gannet photography with 2 sessions on the boat.
|
|
|
Images and card design copyright 2014: Arthur Morris/BIRDS AS ART. Click on the card to enjoy a spectacular larger version.
|
The Details
All breakfasts, lunches and dinners are included. All 5 puffins boat lunches will need to be prepared in advance, taken with, and consumed at your leisure. I usually eat mine on the short boat trip from one island to the other. Also included is a restaurant lunch on the gannet boat day and a farewell fine dining thank you dinner. The cost of your National Heritage Trust is also included; that covers the twice a day landing fees.
Plan to fly home on the early morning of Monday 6 July or to continue your stay or travels.
We are planning this as double-occupancy only but we should be able to arrange for singles by renting a 3rd cottage. We would need to know well in advance, i.e., soon, and it would be pricey and would need to be paid with your non-refundable deposit of $2,000. The shared rooms are decent-sized, each with two roomy single beds and a private bathroom. There are two king rooms available for couples. The upscale country-side cottages are beyond lovely with large living areas and lots of open space for image sharing and Photoshop lessons.
|
|
|
Images and card design copyright 2014: Arthur Morris/BIRDS AS ART. Click on the card to enjoy a spectacular larger version. Scroll down to join us in the UK in 2015.
|
Single Supplement Info
The single supplement is $1475. As we will be renting a third cottage the $1475 is due with your deposit and is also non-refundable.
If you are good to go please send your $2,000 deposit check now to save a spot. We do expect this workshop to sell out very quickly as we have already sold 2 slots even though the trip has not yet been formally announced till right now. Not to mention that everyone loves puffins. Please make your check out to “Arthur Morris” and send it to Arthur Morris/BIRDS AS ART, PO Box 7245, Indian Lake Estates, FL, 33855.
We do hope that you can join us.
Facebook
Be sure to like and follow BAA on Facebook by clicking on the logo link upper right. Tanks a stack!
Support the BAA Blog. Support the BAA Bulletins: Shop B&H here!
We want and need to keep providing you with the latest free information, photography and Photoshop lessons, and all manner of related information. Show your appreciation by making your purchases immediately after clicking on any of our B&H or Amazon Affiliate links in this blog post. Remember, B&H ain’t just photography!
…..
Amazon.com
Those who prefer to support BAA by shopping with Amazon may use this link:
Amazon Canada
Many kind folks from north of the border, ay, have e-mailed stating that they would love to help us out by using one of our affiliate links but that living in Canada and doing so presents numerous problems. Now, they can help us out by using our Amazon Canada affiliate link by starting their searches by clicking here. Many thanks to those who have written.
Typos
In all blog posts and Bulletins, feel free to e-mail or to leave a comment regarding any typos, wrong words, misspellings, omissions, or grammatical errors. Just be right. 🙂
October 12th, 2014 The Streak Continues: 316
Three great folks on the IPT, a gorgeous location, and lots of tame and beautiful birds. As always, life is good. But just a little more good than usual :). No time for meditation or for a swim or for ice baths but there is lots of great bird photography and learning going on. This blog post, the 316th in a row, took me about an hour to prepare if you don’t count the 2+ hours that I spent on the misfires! It was published just before 5:45am from my motel room in St. Petersburg Beach, FL.
To show your appreciation for my efforts here, we ask that you use our the B&H and Amazon affiliate links on the right side of the blog for all of your purchases. Please check the availability of all photographic accessories in the BIRDS AS ART Online Store, especially Gitzo tripods, Wimberley tripod heads, and the like. We sell only what I have used, have tested, and can depend on. We will not sell you junk. We know what you need to make creating great images easy and fun. And we are always glad to answer your gear questions via e-mail.
It’s not too late to join the DeSoto IPT on Monday
Join us for on Monday for a full day including lunch and image review for for $299. Or join us for the morning for $199 including lunch and image review. Since there is no one in the office you need to contact me on Sunday via e-mail. I will respond before I hit the sack tonight at about 9:30pm.
|
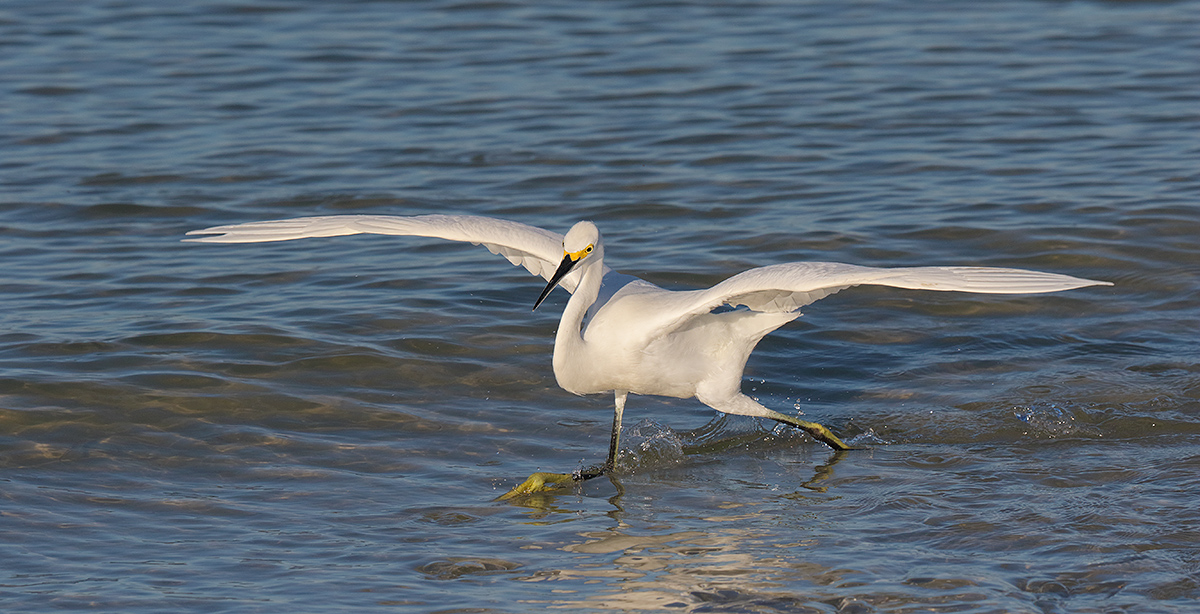
|
|
This image was created at 8:32am on the morning of 11 October, on the Fort DrSeSoto IPT with the hand held Canon EF 300mm f/2.8L IS II USM lens and a beta version of the Canon EOS 7D Mark II . ISO 400. Evaluative metering -1/3 stop as originally framed: 1/2000 sec. at f8 in Manual mode.
65-point Automatic Selection/AI Servo/Rear Focus AF activated two slightly off-centered sensors as seen in the DPP screen capture below. AF was of course actively tracking the subject at the moment of exposure. Click here to see the latest version of the Rear Focus Tutorial. Click on the image to see a larger version.
Speeding Snowy Egret fishing
|
DeSoto Rocking With the EOS-7D Mark II
On Saturday, day 1 of the Fort DeSoto October IPT, we enjoyed a very good morning and a fantastic afternoon. The highlight of yesterday afternoon was a lovely Roseate Spoonbill that allowed fairly close approach for the entire group. I will share some of those with ya’ll here asap. After the sun was down six more spoonbill flew in. I created lots of images at ISO 1600 and ISO 3200 as many of you have requested. I will share those too here when I have some breathing room.
Since I need to return the beta version 7D II that is on loan from Canon USA on Wednesday, I have committed to using only that camera body on this trip. While working along the shore of the Gulf yesterday morning there were times–with the equivalent 480mm focal length (300 X 1.6)–when I had to back up considerably to fit the fishing Snowy Egrets and Tricolored Herons in the frame with a bit of room all around. For the Black-bellied Plovers I added a 1.4X III TC. All images were sharp and of high quality.
|
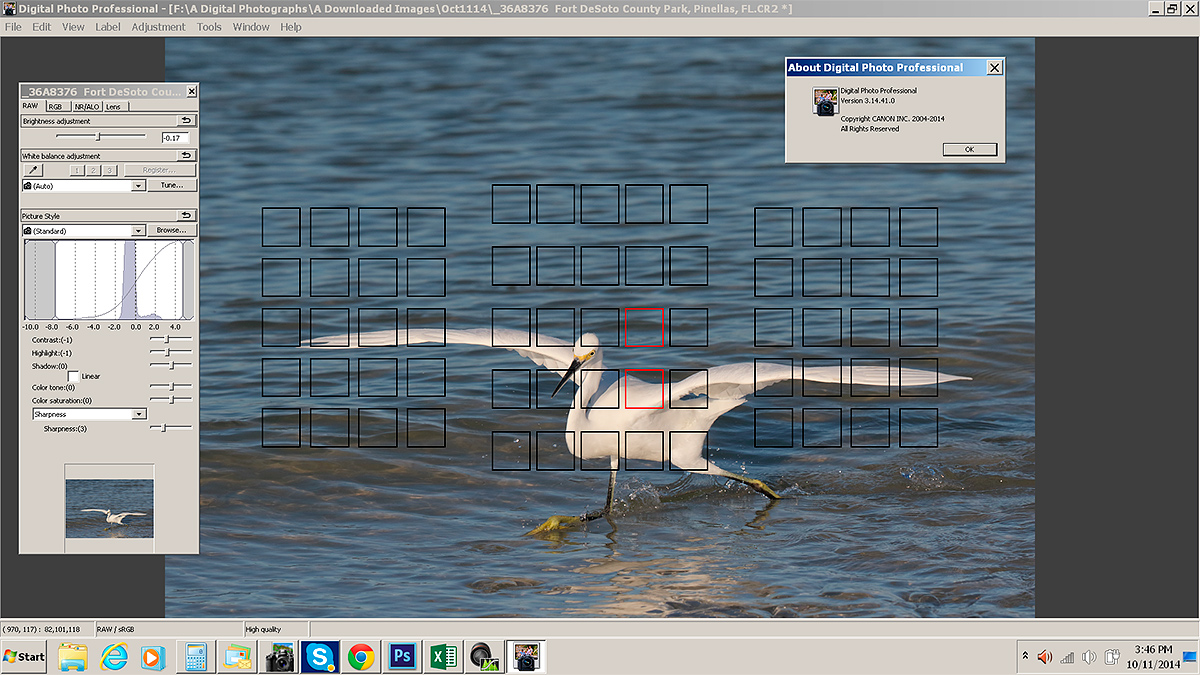
|
|
This is a DPP 3.41.14.0 screen capture for today’s image.
|
Digital Photo Professional 3.14.41 Updater
In the DPP screen capture above, note the two AF points that were selected by the 7D II and were active at the moment of exposure. Understand that when you are in AI Servo AF with 65-point that the AF points will be constantly shifting like so many jumping beans as the system tracks the subject. Here we see how effectively 65-point Automatic Selection performed during and yesterday morning in an extremely difficult situation. Is 65-Point perfect? No, there is some operator skill required. I did have a few instances where the system grabbed the background and the subject was severely out of focus. But for the Snowy Egret image it performed superbly and enabled me to create an exciting action image.
The latest version of DPP is V3.14.41; right now only it will support 7D Mark II files. It is currently available for download here. Click on Drivers and Software and then on Software. Then click directly on the Digital Photo Professional 3.14.41 Updater for Windows (or Mac), check the Disclaimer box, and then click on the Download arrow. When the file is downloaded double-click on it and follow the prompts. I just finished updating :).
Note: if you do not already have an older version of DPP 3.whatever installed on your computer you will either need to download the entire software suite or first install a prior version of DPP from the disk that came in the box with your previous EOS camera body in order to install DPP 3.14.41.
Reader Confusion with EOS-7D II 65-point Automatic Selection AF
In the “More 7D Mark II Images–What Do You Think?” blog post here, I shared two images created using the 7D II’s new 65-point Automatic Selection AF Area Selection Mode in which the camera selects the active sensor or sensors from the very wide array of 65 AF points. I the next blog post, “Four New Canon EOS-7D Mark II Great Egret Images,” I never once mentioned the words “65-point Automatic Selection AF,” yet several readers asked if I selected the AF points manually or if the camera selected them? Being so busy with the group I have not yet had even a moment to answer those (and other) questions yet. I will at some point, but please understand that the only time that the camera selects the active AF sensors is when you are in 65-point Automatic Selection AF Area Selection Mode. I have learned a ton about the setting options for this AF Area Selection Mode and will share those with you here at some point.
In short, if I am not in 65-point Automatic Selection AF then I–not the camera–selected the active AF point.
Facebook
Be sure to like and follow BAA on Facebook by clicking on the logo link upper right. Tanks a stack!
Support the BAA Blog. Support the BAA Bulletins: Shop B&H here!
We want and need to keep providing you with the latest free information, photography and Photoshop lessons, and all manner of related information. Show your appreciation by making your purchases immediately after clicking on any of our B&H or Amazon Affiliate links in this blog post. Remember, B&H ain’t just photography!
…..
Amazon.com
Those who prefer to support BAA by shopping with Amazon may use this link:
Amazon Canada
Many kind folks from north of the border, ay, have e-mailed stating that they would love to help us out by using one of our affiliate links but that living in Canada and doing so presents numerous problems. Now, they can help us out by using our Amazon Canada affiliate link by starting their searches by clicking here. Many thanks to those who have written.
Typos
In all blog posts and Bulletins, feel free to e-mail or to leave a comment regarding any typos, wrong words, misspellings, omissions, or grammatical errors. Just be right. 🙂
October 11th, 2014 A Long Strange Day But The Streak Continues: 315
Yesterday was not a typical day for me. I awoke at about 4:30am, finished yesterday’s blog post, had breakfast–a fresh tuna cheddar melt, and headed down to the lake where not much was going on. Once I was back in the house I started packing and answering e-mails. Jim Litzenberg helped me prepare fish and chicken for my breakfasts on my short road trip. I plan on being home late on Tuesday.
I left for DeSoto after lunch–baked flounder and butternut squash, at 12:30pm and arrived at East Beach just after 3:00pm after a few short pit stops. I did not even have time for a nap. Everything worked out great for the rest of the afternoon and we did not leave the beach till the sun touched the western horizon over the Gulf. After we checked into the hotel co-leader Bob Kimbrell, Deirde Scheer Gross and I went for a quick dinner at the Seaporch Grill. Having left my insulin in the fridge at the hotel room I order only a cerviche but it was so good that I had another one. My body reacted well as my blood sugar was only 87 at 9:30pm. I had three small bites of chicken for some additional protein and injected 3 units of fast acting insulin along with my overnight 5 units of slow acting. This morning my blood sugar was 75. 83 is the target.
Then I started working on a Turkey Vulture head shot for the blog but could not get the REDs right. Tried a crane head shot from the morning with the same problem; the REDs were way off. I think that I need to re-color calibrate this laptop…. Then tried a shorebird group shot and decided that I did not like it. By the time I was happy with the Marbled Godwit image below it was nearly midnight and the Orioles Royals MLB playoff game was tied at 5. Not wanting to stay up till the end I turned off the TV, set the alarm for 5:00am, read for two minutes, and fell asleep quickly.
From 9:00 till midnight I was in a sort of non-tired zombie state knowing that I should be tired but continuing to work…. As I said, it was a long strange day for me. Without a nap.
This blog post, the 315th in a row, took me about an hour to prepare if you don’t count the 2+ hours that I spent on the misfires! It was published just before 7:15am from my motel room in St. Petersburg Beach, FL.
To show your appreciation for my efforts here, we do ask that you use our the B&H and Amazon affiliate links on the right side of the blog for all of your purchases. Please check the availability of all photographic accessories in the BIRDS AS ART Online Store, especially Gitzo tripods, Wimberley tripod heads, and the like. We sell only what I have used, have tested, and can depend on. We will not sell you junk. We know what you need to make creating great images easy and fun. And we are always glad to answer your gear questions via e-mail.
|
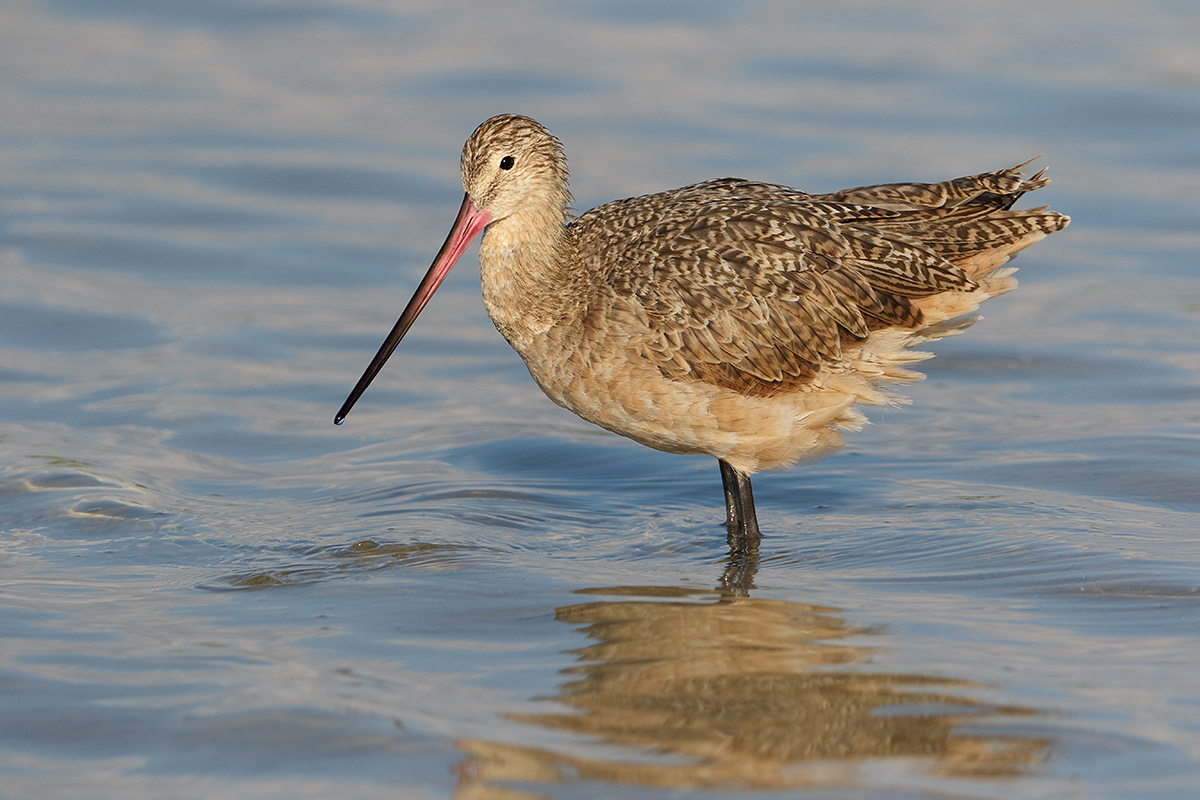
|
|
This image was created at 5:23pm on the afternoon of 10 October, on the first-ever BIRDS AS ART Meet-up In-the-Field Workshop. While seated in the very warm lagoon water employing my knee-pod technique, I used the the hand held Canon EF 200-400mm f/4L IS USM lens with Internal 1.4x Extender with the internal extender in place at 513mm) and a beta version of the Canon EOS 7D Mark II . ISO 400. Evaluative metering +2/3 stop as framed: 1/2500 sec. at f/6.3 in Manual mode.
Central sensor/AI Servo Surround/Rear Focus AF on the spot where the bird’s breast meets the bird’s belly was active at the moment of exposure. Click here to see the latest version of the Rear Focus Tutorial. Click on the image to see a larger version.
Marbled Godwit
|
A Very Nice Combo
Wanting to keep things simple, I went with the hand held 200-400 and the 7D II for most of the afternoon. By 5:30pm, hand holding the 200-400 became too much of a chore. Co-leader Robert Kimbrell kindly loaned me a sturdy off-brand tripod topped with a Wimberley V-2 Tripod head. This combo worked just fine. I used it with and without the internal TC engaged and at times I added an external TC to give me a maximum reach of 784mm. That times the 1.6 crop factor left me at an effective or equivalent focal length of 1254.4mm. You had better be holding that puppy still.
I created about 150 images of Marbled Godwit yesterday afternoon. This leaning forward pose was one of my favorites.

 Use the BAA Affiliate logo link above to pre-order your 7D II, shoot me your receipt via e-mail, and I will do my very best to have your order expedited once the camera begins shipping.
Facebook
Be sure to like and follow BAA on Facebook by clicking on the logo link upper right. Tanks a stack!
Support the BAA Blog. Support the BAA Bulletins: Shop B&H here!
We want and need to keep providing you with the latest free information, photography and Photoshop lessons, and all manner of related information. Show your appreciation by making your purchases immediately after clicking on any of our B&H or Amazon Affiliate links in this blog post. Remember, B&H ain’t just photography!
…..
Amazon.com
Those who prefer to support BAA by shopping with Amazon may use this link:
Amazon Canada
Many kind folks from north of the border, ay, have e-mailed stating that they would love to help us out by using one of our affiliate links but that living in Canada and doing so presents numerous problems. Now, they can help us out by using our Amazon Canada affiliate link by starting their searches by clicking here. Many thanks to those who have written.
Typos
In all blog posts and Bulletins, feel free to e-mail or to leave a comment regarding any typos, wrong words, misspellings, omissions, or grammatical errors. Just be right. 🙂
October 10th, 2014 The Streak Continues: 314
Yesterday was a typical day of work and relaxation with another nice 1/2 mile swim. I got out both morning and afternoon with the 7D II and enjoyed some bird photography in the sun. Today I drive over to St. Pete for the DeSoto In-the-field Meet and Greet afternoon Workshop followed by the DeSoto IPT. This blog post, the 314th in a row, took me about 3 hours to prepare. It was published just before 7:15am from my home in Indian Lake Estates, FL.
To show your appreciation for my efforts here, we do ask that you use our the B&H and Amazon affiliate links on the right side of the blog for all of your purchases. Please check the availability of all photographic accessories in the BIRDS AS ART Online Store, especially Gitzo tripods, Wimberley tripod heads, and the like. We sell only what I have used, have tested, and can depend on. We will not sell you junk. We know what you need to make creating great images easy and fun. And we are always glad to answer your gear questions via e-mail.
Fort DeSoto October Updates
The Friday Afternoon October 10 BAA Fort DeSoto In-the-Field Workshop meet-up is now sold out.
For information on the October Fort DeSoto IPT and the highest ever late registration discount please scroll down in this blog post.
Join us for a day on Saturday, Sunday, or Monday for $299 including lunch and image review. Or join us for a morning on Saturday, Sunday, or Monday for $199 including lunch and image review.
|
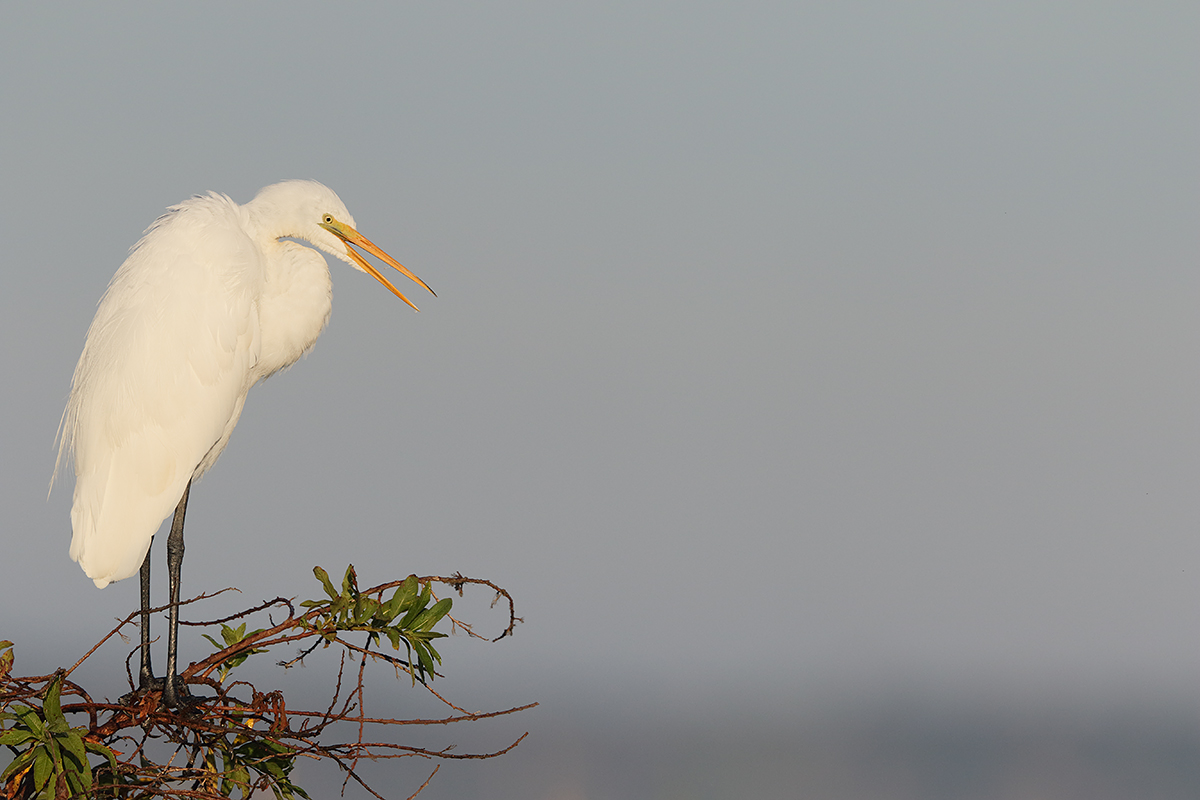
|
|
This Great Egret image was created at 8:04:02am on October 9, a clear sunny morning 2014 here at Indian Lake Estates. I used the Canon EF 600mm f/4L IS II USM lens, the Canon Extender EF 1.4X III, and a beta version of the Canon EOS 7D Mark II . ISO 400. Evaluative metering -1/3 stop as framed: 1/1600 sec. at f/7.1 in Manual mode.
Four sensors to the left and two rows up from the central sensor/AI Servo/Rear Focus AF on the bird’s neck just below the chin was active at the moment of exposure. Click here to see the latest version of the Rear Focus Tutorial. Click on the image to see a larger version.
From the Sequoia with the lens supported by the BLUBB (my custom-designed, hand made Big Lens Ultimate Bean Bag). When working on a beanbag with a long lens and re-composing be absolutely sure that the focusing ring does not rest on the beanbag lest you throw off accurate focus when re-composing. If that is unavoidable you must work in AI Servo AF with AF active at the moment of exposure as I did here.
Image #1: Non-breeding plumage Great Egret laughing
|
7D II Exposure Heads Up
I learned quickly that in many situations the 7D Mark II needs less light for a proper exposure than either the 1D X or the 5D III. Just forty minutes after sunrise +2/3 stop would have been perfect with either the 1D X or the 5D III yet -1/3 here left me with some RGB values for the WHITEs in the mid-240s. I’d prefer them no higher than the mid-230s. Check out Brightness and Highlight sliders in the DPP v3.14.41.0 screen capture below to see how I toned down the WHITEs.
|
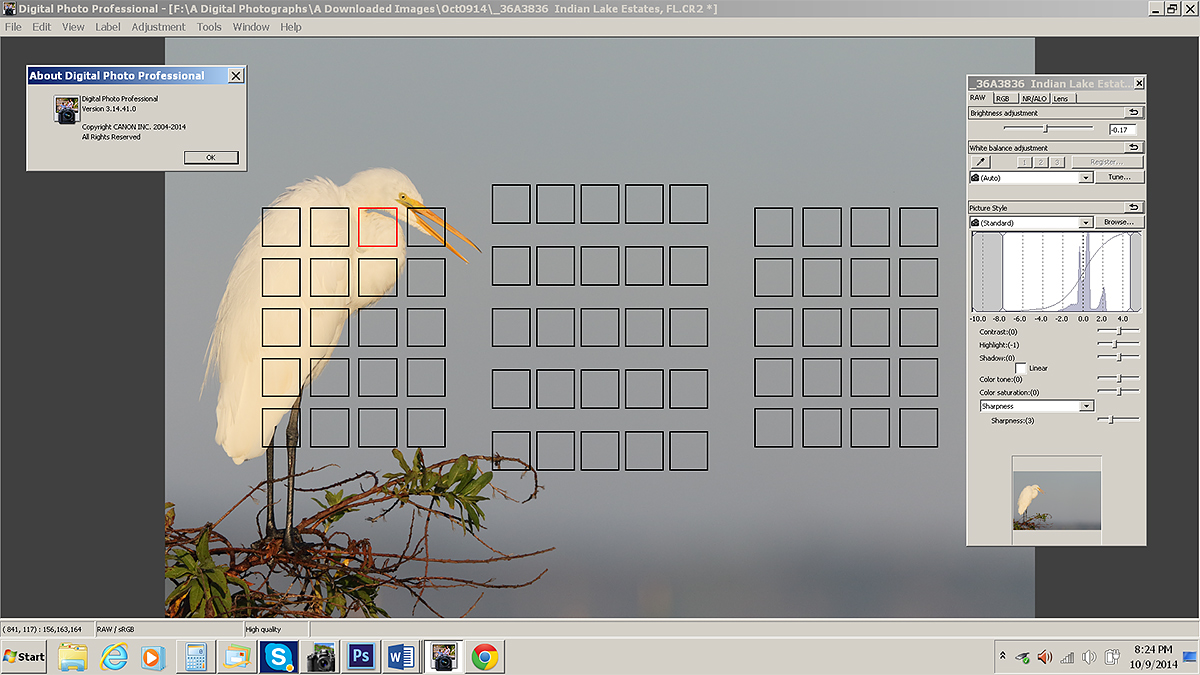
|
|
This is the DPP 3.41.14.0 screen capture for today’s opening image.
|
Digital Photo Professional 3.14.41 Updater
The screen capture above shows that from side to side the 7D II has the widest AF array of any Canon digital camera body ever. And for whatever reasons the outer AF points function seemingly as well as the central sensor. The new wide array allows you to place your subjects pretty much as far off center as you wish.
The latest version of DPP is V3.14.41; it will support 7D Mark II files. It is currently available for download here. Click on Drivers and Software and then on Software. Then click directly on the Digital Photo Professional 3.14.41 Updater for Windows (or Mac), check the Disclaimer box, and then click on the Download arrow. When the file is downloaded double-click on it and follow the prompts.
Note: if you do not have a previous version of DPP 3.whatever installed you will need to either download the entire software suite or first install any prior version of DPP to install DPP 3.14.41 from scratch. There is a version of DPP on the CD that came in the box with your Canon digital camera.
As I understand it, the word from Canon Japan is that DPP 4.0 will not supportEOS-7D Mark II image files….
|
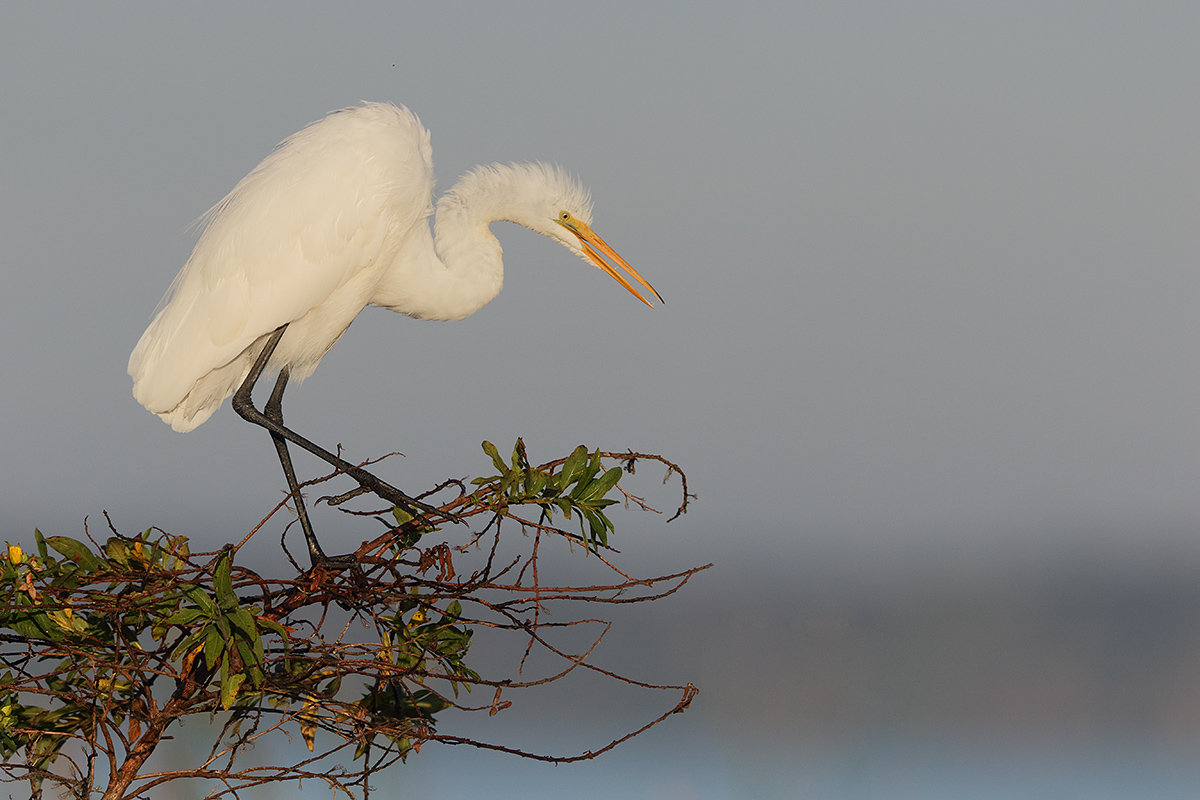
|
|
This Great Egret image was created 20 seconds later at 8:04:22am on October 9, a clear sunny morning 2014 here at Indian Lake Estates. Again I used the Canon EF 600mm f/4L IS II USM lens, the Canon Extender EF 1.4X III, and a beta version of the Canon EOS 7D Mark II . ISO 400. Evaluative metering -1/3 stop as framed: 1/1600 sec. at f/7.1 in Manual mode.
Three sensors to the left and two rows up from the central sensor/AI Servo/Rear Focus AF on the bird’s folded wing just behind the base of the neck was active at the moment of exposure. Click here to see the latest version of the Rear Focus Tutorial. Click on the image to see a larger version.
From the Sequoia with the lens supported by the BLUBB (my custom-designed, hand made Big Lens Ultimate Bean Bag). When working on a beanbag with a long lens and re-composing be absolutely sure that the focusing ring does not rest on the beanbag lest you throw off accurate focus when re-composing. If that is unavoidable you must work in AI Servo AF with AF active at the moment of exposure as I did here.
Image #2: Non-breeding plumage Great Egret leaning forward horizontal
|
How to Handle “Too YELLOW”
YELLOWs, like REDs, often become over-saturated in early morning or late afternoon light and that was the case for the four images here. My solution? I put the whole image on a layer (Ctrl + J), opened Hue/Saturation on that layer (Ctrl + U), selected YELLOWs from the drop down menu, and moved the Saturation slider to about -25. The white feathers and the face and bill looked much better but the vegetation had lost its pop. Most folks do not realize that there is always a ton of YELLOW in the GREENs. I added a regular Layer Mask, chose a large, soft, brush, and painted the YELLOWs back into the GREENs.
Additional Image Optimization
I did some Eye Doctor work on each image by painting a small Quick Mask and then pulling down the Curve (Ctrl + M) to darken the pupil. In addition, I used the Quick Selection Tool (my keyboard shortcut W–I use M for the Magic Wand Tool) to select the eyes, lores, and bill of each bird, put the selection on a layer (Ctrl + J), and then applied a Contrast Mask to selectively sharpen the layer.
The DPP RAW Conversion Guide
To learn why I use Canon’s Digital Photo Professional (DPP) to convert every image that I work on, click here. The current guide will teach you how to best convert all of your Canon images in all 3 point something versions of Canon Digital Photo Professional including the current v.3.14.41.0.
Coming soon: The DPP 4.0 RAW Conversion Guide by Arash Hazeghi and Arthur Morris. The more that I use DPP 4.0 for my 1D X and 5D III RAW conversions the more I learn about it. And the more I learn about it the more I am impressed with it. Note: at present, DPP 4.0 will work only with 1D X, 5D III, and 6D images. Scroll down for the latest DPP/7D Mark II info.
Digital Basics
Everything that I did to optimize today’s image is covered in detail in my Digital Basics File–written in my easy-to-follow, easy-to-understand style. Are you tired of making your images look worse in Photoshop? Digital Basics File is an instructional PDF that is sent via e-mail. It includes my complete digital workflow, dozens of great Photoshop tips (including Surface Blur settings), details on using all of my image clean-up tools, the use of Contrast Masks, several different ways of expanding and filling in canvas, all of my time-saving Keyboard Shortcuts, Quick Masking, Layer Masking, and NIK Color Efex Pro basics, Digital Eye Doctor, Tim Grey Dodge and Burn, how to create time-saving actions, and tons more.
APTATS I & II
Learn the details of advanced Quick Masking techniques in APTATS I. Learn Advanced Layer Masking Techniques in APTATS II. Mention this blog post and apply a $5 discount to either with phone orders only. Buy both APTATS I and APTATS II and we will be glad to apply at $15 discount with phone orders only. Please call Jim or Jennifer at 863-692-0906 weekdays to order.
|
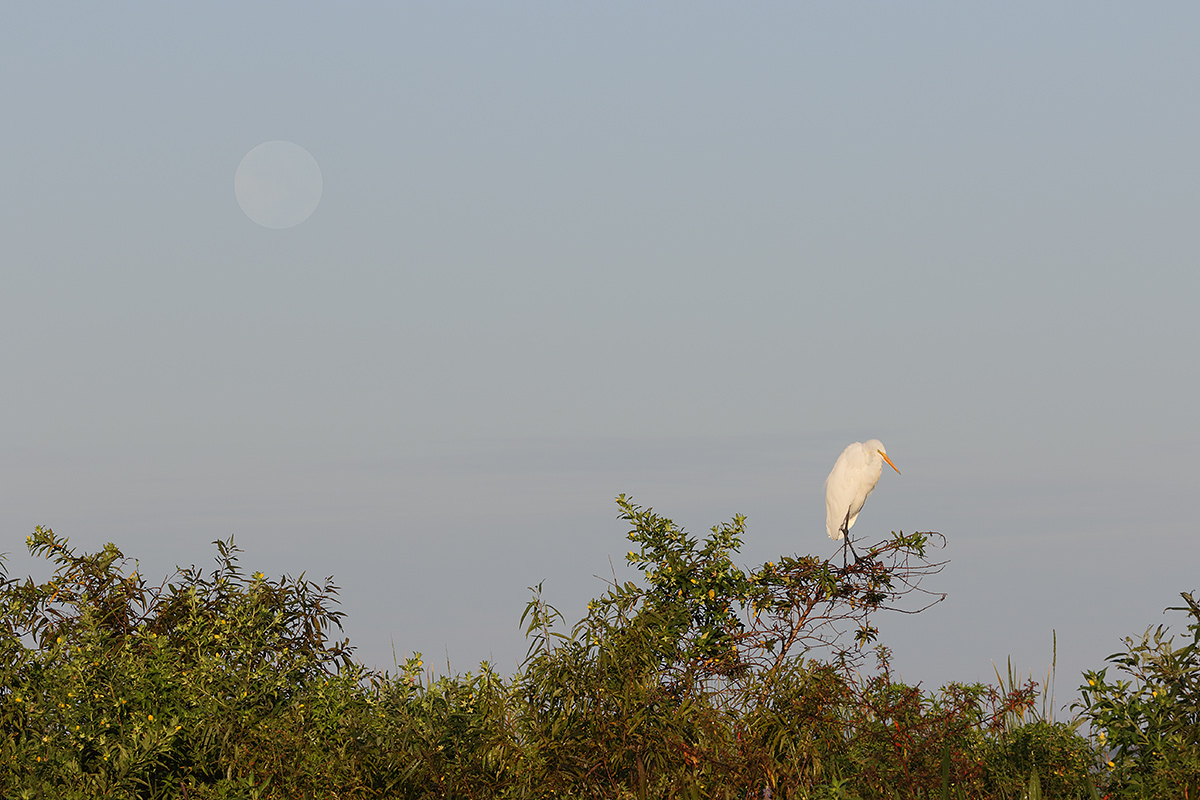
|
|
This Great Egret image was created at 8:09:33am on October 9, a clear sunny morning 2014 here at Indian Lake Estates. I used the Canon EF 70-200mm f/2.8L IS II USM lens (hand held at 200mm) and a beta version of the Canon EOS 7D Mark II . ISO 400. Evaluative metering at zero as framed: 1/400 sec. at f/14 in Manual mode.
Central sensor/AI Servo Surround/Rear Focus AF on the bird and recompose. Click here to see the latest version of the Rear Focus Tutorial. Click on the image to see a larger version.
Image #3: Non-breeding plumage Great Egret and full moon
|
Full Moon Trick
When you find it necessary to select a perfect full moon for whatever reason, use the Elliptical Marquee Tool and hold the Shift key down to produce a perfect circle….
Here, I darkened the sky with a Curves adjustment on a layer but that left the moon too dark. I added a Regular Layer Mask and used a hard brush at 20% opacity to lighten the moon one click. That worked perfectly but I was not happy with the edges of the circle. To rectify that situation I selected the moon with the Elliptical Marquee Tool as described above, placed that selection on its own layer, went back to my Background layer, used a large soft Clone Stamp Tool brush to get rid of the original misshapen moon, and then moved the new full moon back to its original position. Much much better.
As usual, all of the techniques that I used are described in detail in my Digital Basics File.
|
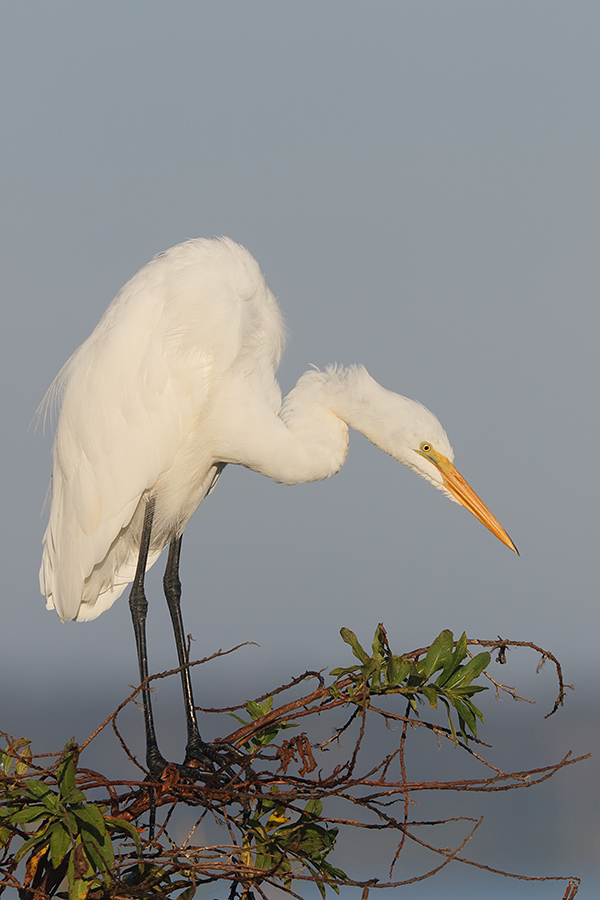
|
|
This Great Egret image was created at 8:14:31am on October 9, a clear sunny morning 2014 here at Indian Lake Estates. I used the Canon EF 600mm f/4L IS II USM lens, the Canon Extender EF 2X III, and a beta version of the Canon EOS 7D Mark II . ISO 400. Evaluative metering at zero as framed: 1/320 sec. at f/16 in Manual mode.
Central sensor (by necessity)/AI Servo Expand/Rear Focus AF on the middle of the lowest curve of the bird’s neck was active at the moment of exposure. Click here to see the latest version of the Rear Focus Tutorial. Click on the image to see a larger version.
From the Sequoia with the lens supported by the BLUBB (my custom-designed, hand made Big Lens Ultimate Bean Bag). When working on a beanbag with a long lens and re-composing be absolutely sure that the focusing ring does not rest on the beanbag lest you throw off accurate focus when re-composing. If that is unavoidable you must work in AI Servo AF with AF active at the moment of exposure as I did here.
Image #4: Non-breeding plumage Great Egret leaning forward vertical
|
Compositional Principles
Consider the image design for each of today’s photographs. I began with the window of my Sequoia raised too much. That left a pretty large strip of lake below the dark strip that was the distant shore on the other side of the lake. You can see a bit of that in image #2 and just a hint of it at the bottom of the frame in Image #4. What to do? I simply lowered the window so that the lens was pointing more up. This eliminated the large strip of lake that had been at the bottom of the frame. I love the amount of the dark strip in Image #1. Many folks don’t like it when I include a strip of this or that in the frame to act as somewhat of a border. But I do and that is all that matters to me. You are the artist. Only you get to make the compositional choices. Also with regards to Image #1, I love the new wide array for AF sensors in the 7D II as they open up many more image design options while allowing you to keep AI Servo AF active.
Comparing Images #1 and #2 note that as the bird changed its position by learning forward, I opted to re-design the image by pointing the lens down. That I was able to include all of the the curved branch at the bottom center of the frame with a small border was a big plus. It took me nearly ten minutes to spot the setting full moon but once I did I grabbed the 70-200, mounted the 7D II on it, got out of the SUV very slowly and made about six images. The design choice here is obvious to the experienced eye. With the bird in the lower right corner and the moon in the upper left, perfect compositional balance was achieved. The result was a diagonally balanced rule of thirds composition.
Once I went to the 2X III TC I needed to go vertical in order to fit the bird in the frame. In retrospect I wish that I had pointed the lens down to include the curved branch that I mentioned above with a small border and to reduce the amount of sky above the bird.
Image Question
Why did I opt not to re-compose Image #4?
Improving Your Image Design Skills
To learn to create pleasingly designed images, look at as many good images as humanly possible. Study them. Ask lots of questions. Even better, learn the basics by studying Chapter Seven, Designing the Image, pages 102-113, in the original The Art of Bird Photography, (160 pages in soft cover). Next, master the principles detailed in Chapter II, Advanced Composition and Image Design, pages 164-254 in the single pages for easy reading version of The Art of Bird Photography II. ABP II: 916 pages, 900+ images on CD only. You can save $10 by ordering the two book combo.

 Use the BAA Affiliate logo link above to pre-order your 7D II, shoot me your receipt via e-mail, and I will do my very best to have your order expedited once the camera begins shipping.
7D Mark II RAW File Offer
If you would like to receive a link to one or more the RAW files for today’s featured images for inspection and study only, please send a Paypal to us at birdsasart@verizon.net for $5.00 each (to cover our handling costs) or give Jim or Jennifer a buzz at 863-692-0906 during weekday business hours with a credit card in hand. Whether by Paypal or phone be sure to specify which file or files you want by both Image # and name. We will send your links (s) via Hightail. You can then download and save the RAW file. Note: you may need to download and install DPP v3.14.41.0 in order to view the images and you will surely need to have that on your computer if you wish to convert them. Thanks to all who ordered yesterday’s RAW file. I will be offering additional RAW files in the coming days and weeks. Please note that all rights remain with Arthur Morris/BIRDS AS ART.
|
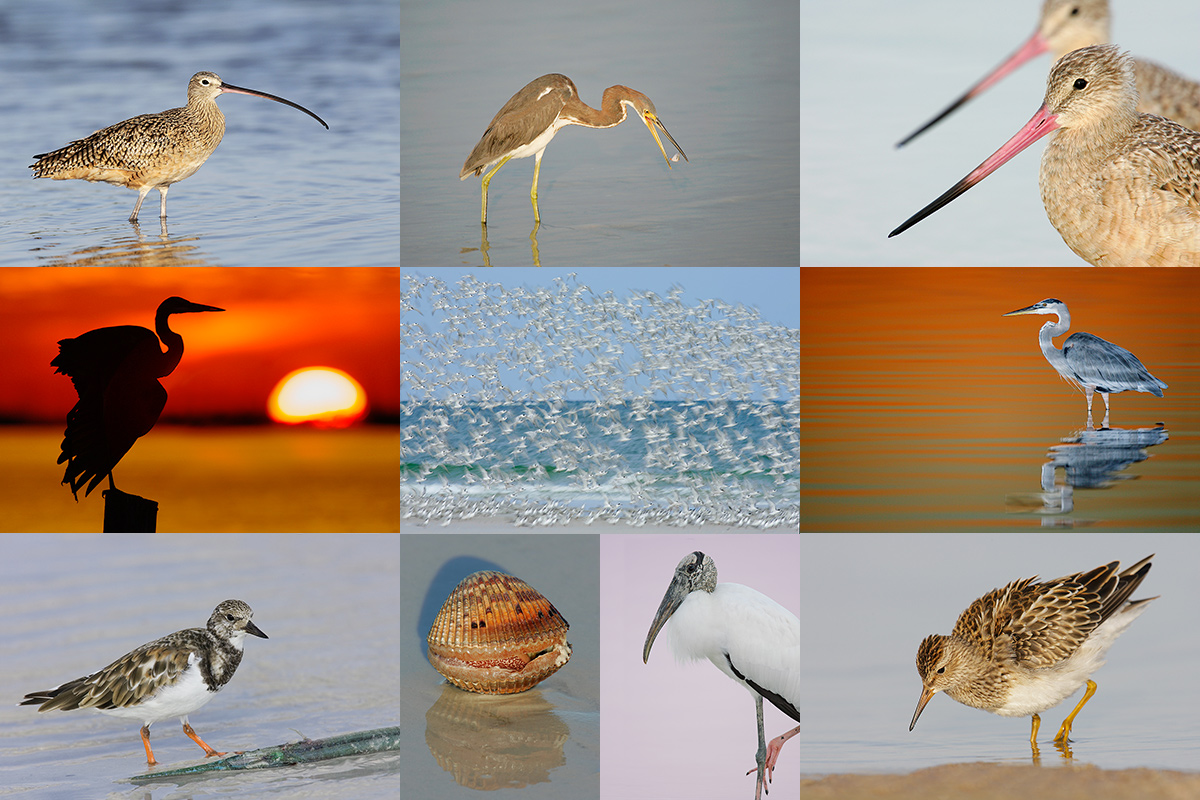
|
|
Obviously folks attending the IPT will be out in the field early and stay late to take advantage of sunrise and sunset colors. The good news is that the days are relatively short in October. Click on the composite to enjoy a larger version.
|
Fort DeSoto Fall IPT/October 11-13, 2014. 3 FULL DAYs: $1099. Limit 8/Openings: 5.
$300 Last Minute Registration Discount!
Fort DeSoto, located just south of St. Petersburg, FL, is a mecca for migrant shorebirds in fall. There they join hundreds of egrets, herons, night-herons, gulls, and terns who winter on the T-shaped peninsula that serves as their wintering grounds. With any luck, we should get to photograph two of Florida’s most desirable shorebird species: Marbled Godwit and the spectacular Long-billed Curlew. Black-bellied Plover and Willet are easy, American Oystercatcher likely. Great Egret, Snowy Egret, Great Blue Heron, and Tricolored Heron are easy as well and we will almost surely come up with a tame Yellow-crowned Night-Heron or two. We should get to do some Brown Pelican flight photography. And Royal, Sandwich, Forster’s, and Caspian Terns will likely provide us with some good flight opportunities as well. Though not guaranteed Roseate Spoonbill and Wood Stork would not be unexpected.
|
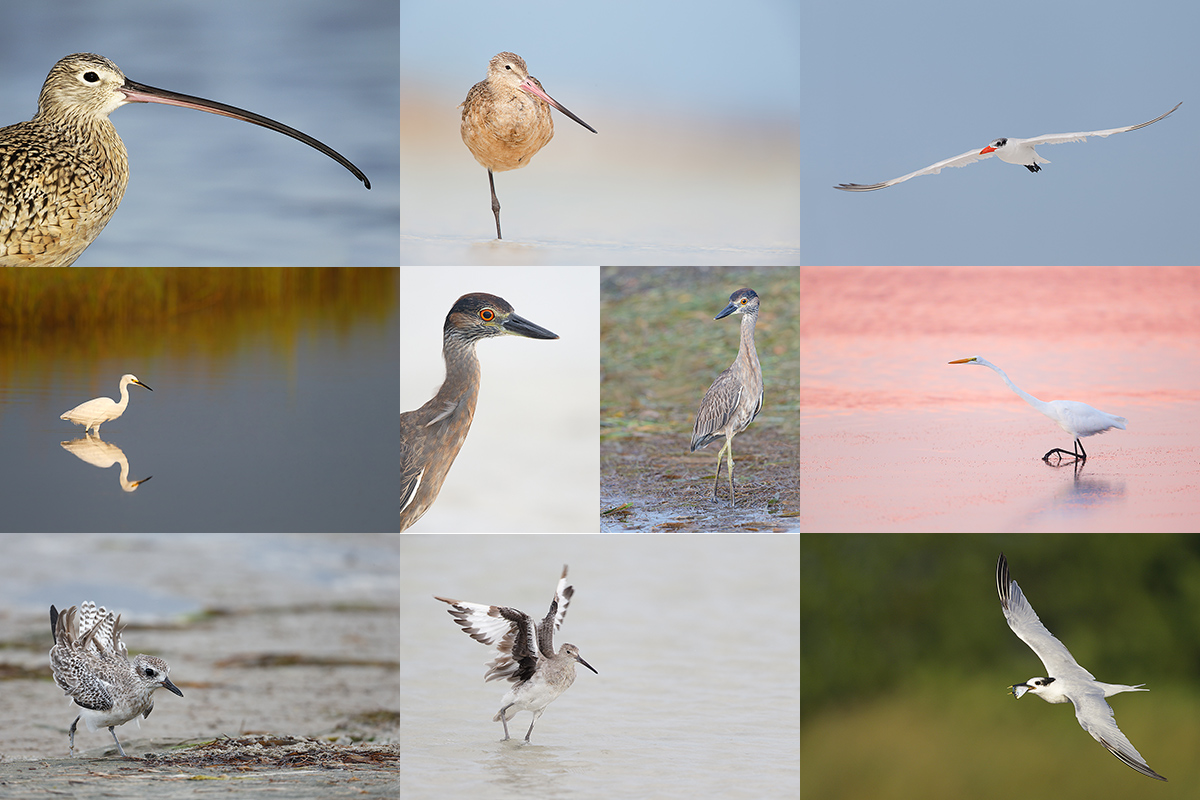
|
|
Fort DeSoto in fall is rich with tame birds. All of the images in this card were created at Fort DeSoto in either late September or early October. I hope that you can join me there this October. Click on the composite to enjoy a larger version.
|
More on the DeSoto IPT
On the IPT you will learn basics and fine points of digital exposure and to get the right exposure every time after making a single test exposure, how to approach free and wild birds without disturbing them, to understand and predict bird behavior, to identify many species of shorebirds, to spot the good situations, to choose the best perspective, to see and understand the light, to, and to design pleasing images by mastering your camera’s AF system. And you will learn learn how and why to work in Manual mode (even if you’re scared of it).
At lunch (included) we will review my images–folks learn a ton watching me edit–why keep this one and delete that one. If you opt to bring your laptop, we will take a look at five of your best images from the morning session. We will process a few of my images in Photoshop after converting them in DPP. That followed by Instructor Nap Time.
If you decide to register and are traveling to attend this IPT, please make your reservations at the Beachcomber Beach Resort, 6200 Gulf Blvd, St. Petersburg (St. Pete Beach), FL 33706 (727-367-1902) as soon as possible as rooms for the weekend days are scarce: ARR: 10 OCT/DEP 14 OCT. I stayed there on my last DeSoto visit and was quite happy with it. Lodging is tough in Florida at this season…. The best airport is Tampa (TPA). It is always best if IPT folks stay in the same hotel so if you are interested it would be a good idea to register now and make your hotel reservations as well. We can, however, coordinate easily with local folks who opt to stay at home either by cell phone or e-mail.
Because of the relatively late date, payment is full is due upon registration either by check or credit card. If the former, please e-mail us immediately so that we can save you a spot. If the latter, please call Jim or Jennifer during weekday business hours at 863-692-0906 with a credit card in hand to register . Your registration fee is non-refundable unless the IPT sells out with eight so please check your plans carefully before committing. You will receive a confirmation e-mail with detailed instructions, gear advice, and first morning meeting place about one month before this IPT.
|

|
|
BAA Site Guides are the next best thing to being on an IPT.
|
Fort DeSoto Site Guide
Can’t make the IPT? Get yourself a copy of the Fort DeSoto Site Guide. Learn the best spots, where to be when in what season in what weather. Learn the best wind directions for the various locations. BAA Site Guides are the next best thing to being on an IPT. You can see all of them here.
Facebook
Be sure to like and follow BAA on Facebook by clicking on the logo link upper right. Tanks a stack!
Support the BAA Blog. Support the BAA Bulletins: Shop B&H here!
We want and need to keep providing you with the latest free information, photography and Photoshop lessons, and all manner of related information. Show your appreciation by making your purchases immediately after clicking on any of our B&H or Amazon Affiliate links in this blog post. Remember, B&H ain’t just photography!
…..
Amazon.com
Those who prefer to support BAA by shopping with Amazon may use this link:
Amazon Canada
Many kind folks from north of the border, ay, have e-mailed stating that they would love to help us out by using one of our affiliate links but that living in Canada and doing so presents numerous problems. Now, they can help us out by using our Amazon Canada affiliate link by starting their searches by clicking here. Many thanks to those who have written.
Typos
In all blog posts and Bulletins, feel free to e-mail or to leave a comment regarding any typos, wrong words, misspellings, omissions, or grammatical errors. Just be right. 🙂
October 9th, 2014 The Streak Continues: 313
Yesterday was a typical day of work and relaxation with a nice 1/2 mile swim. I got out yesterday afternoon with the 7D II and enjoyed some bird photography in the sun. I will share some of those images with you here soon. This blog post, the 313th in a row, took me about 2 hours to prepare. It was published just before 7:45am from my home in Indian Lake Estates, FL.
To show your appreciation for my efforts here, we do ask that you use our the B&H and Amazon affiliate links on the right side of the blog for all of your purchases. Please check the availability of all photographic accessories in the BIRDS AS ART Online Store, especially Gitzo tripods, Wimberley tripod heads, and the like. We sell only what I have used, have tested, and can depend on. We will not sell you junk. We know what you need to make creating great images easy and fun. And we are always glad to answer your gear questions via e-mail.
Fort DeSoto October Updates
The Friday Afternoon October 10 BAA Fort DeSoto In-the-Field Workshop meet-up is now sold out.
For information on the October Fort DeSoto IPT and the late registration discount please scroll down in this blog post.
Join us for a day on Saturday, Sunday, or Monday for $299 including lunch and image review. Or join us for a morning on Saturday, Sunday, or Monday for $199 including lunch and image review.
GALAPAGOS Photo Cruise of a Lifetime IPT/The Complete Galapagos Photographic Experience. July 14-28, 2015 on the boat. 13 FULL and two half-days of photography: $12,499. Limit 14 including the leader:/Openings: 3 or 4.
If you are considering this trip it would be best to act soon as there are now only 3 or 4 slots left on this amazing Photo-Cruise IPT. Scroll down in this blog post for additional information or e-mail for the complete itinerary.
|
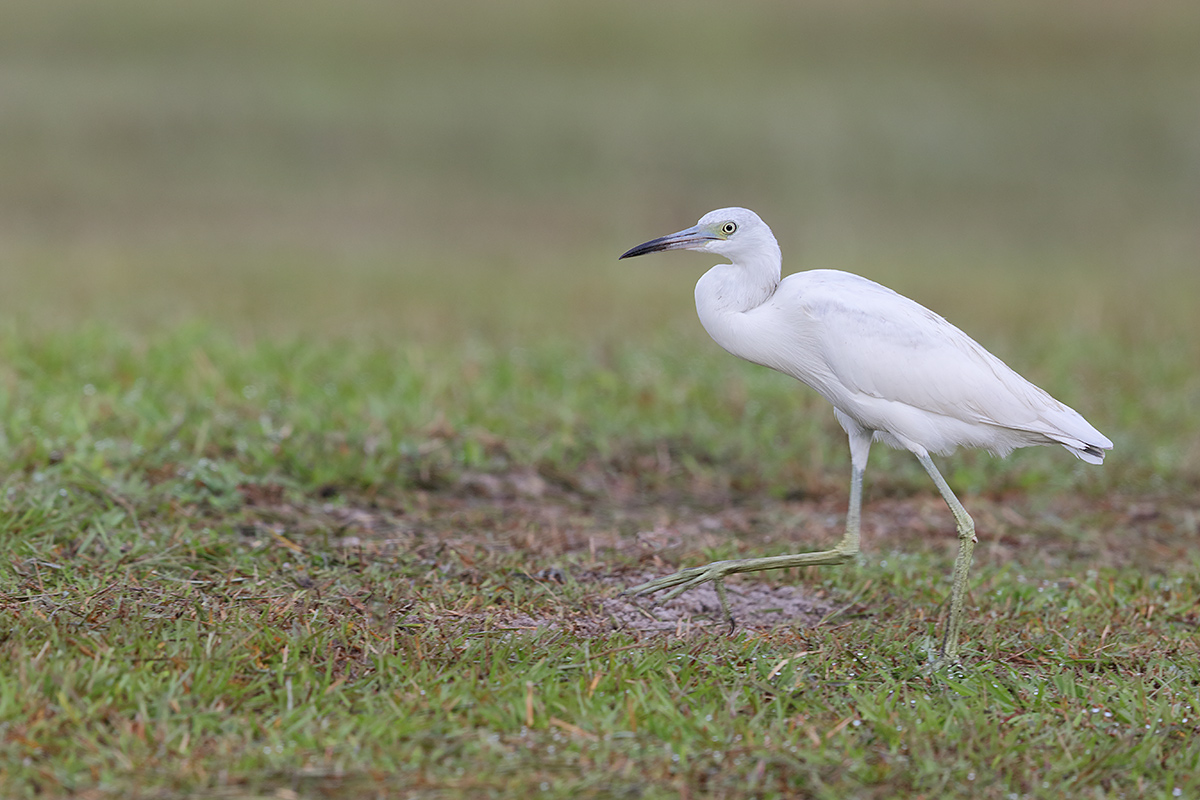
|
|
This image was created on the cloudy almost-bright morning of October 8, 2014 at Indian Lake Estates with the Canon EF 600mm f/4L IS II USM lens and a beta version of the Canon EOS 7D Mark II . ISO 400. Evaluative metering +1 stop as framed: 1/320 sec. at f/5.6 in Manual mode.
65-point Automatic Selection/AI Servo/Rear Focus AF activated an array of three sensors on the bird’s face and were of course actively tracking the subject at the moment of exposure. Click here to see the latest version of the Rear Focus Tutorial. Click on the image to see a larger version.
From the Sequoia with the lens supported by the BLUBB (my custom-designed, hand made Big Lens Ultimate Bean Bag). When working on a beanbag with a long lens and re-composing be absolutely sure that the focusing ring does not rest on the beanbag lest you throw off accurate focus when re-composing.
Immature Little Blue Heron hunting. This JPEG represents the optimized image.
|
Initial 7D Mark II AF and Other Impressions
With a bit more light yesterday morning it became obvious that the AF system of the 7D II is indeed superb. I was so impressed that I relied quite a bit on the 65-point Automatic Selection AF Selection Mode. Right now I am still struggling to gain full understanding of this AF Selection Mode…. I will try to get Rudy Winston on the phone today to clarify a few things for me. The 7D II offers a new way (aside from the MFn button) of toggling through the various AF Area Selection Modes: If I get down to the lake this morning, I will try to figure out how and whether or not to use the new the new AF Area Selection lever. I am hoping to get some good flight photography opportunities this coming weekend on the Fort DeSoto IPT.
7D II Image Quality and Color
At ISO 400 image quality with the 7D II is on a par with 1D X and 5D III images. The image files feature natural, accurate colors.
7D Mark II RAW File Offer
If you would like to receive a link to either one or both of the RAW files featured in today’s blog for inspection and study only, please send a Paypal to us at birdsasart@verizon.net for $5.00 each (to cover our handling costs) or give Jim or Jennifer a buzz at 863-692-0906 during weekday business hours with a credit card in hand. We will send your links (s) via Hightail. You can then download and save the RAW file. Whether by Paypal or phone, be sure to specify either “7D II Immature Little Blue Heron hunting RAW File” or “7D II Sandhill Crane striding towards the camera RAW File.” Or both. Thanks to all who ordered yesterday’s RAW file. I will be offering additional RAW files in the coming days and weeks. Please note that all rights remain with Arthur Morris/BIRDS AS ART.
|
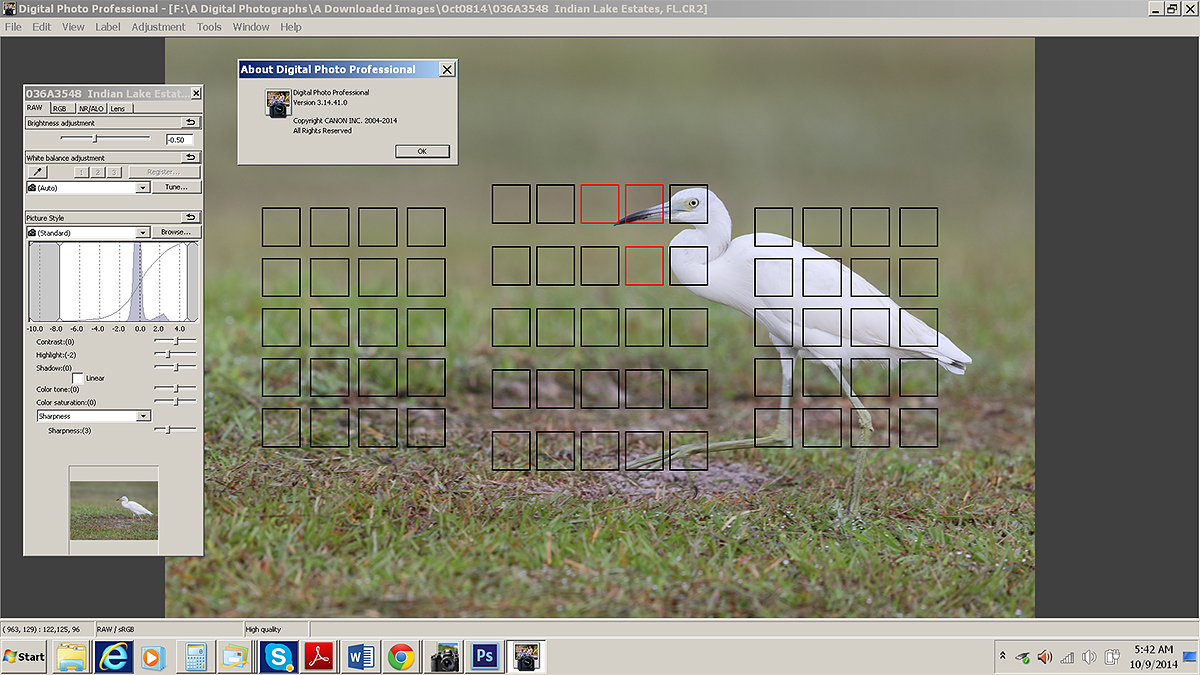
|
|
This is a DPP 3.41.14.0 screen capture.
|
Digital Photo Professional 3.14.41 Updater
The screen capture above shows how effectively 65-point Automatic Selection performed for me yesterday morning.
The latest version of DPP is V3.14.41; it will support 7D Mark II files. It is currently available for download here. Click on Drivers and Software and then on Software. Then click directly on the Digital Photo Professional 3.14.41 Updater for Windows (or Mac), check the Disclaimer box, and then click on the Download arrow. When the file is downloaded double-click on it and follow the prompts. I just finished updating :).
Note: if you do not already have a previous version of DPP 3.whatever installed you will need to download the entire software suite to install DPP 3.14.41 from scratch.
|
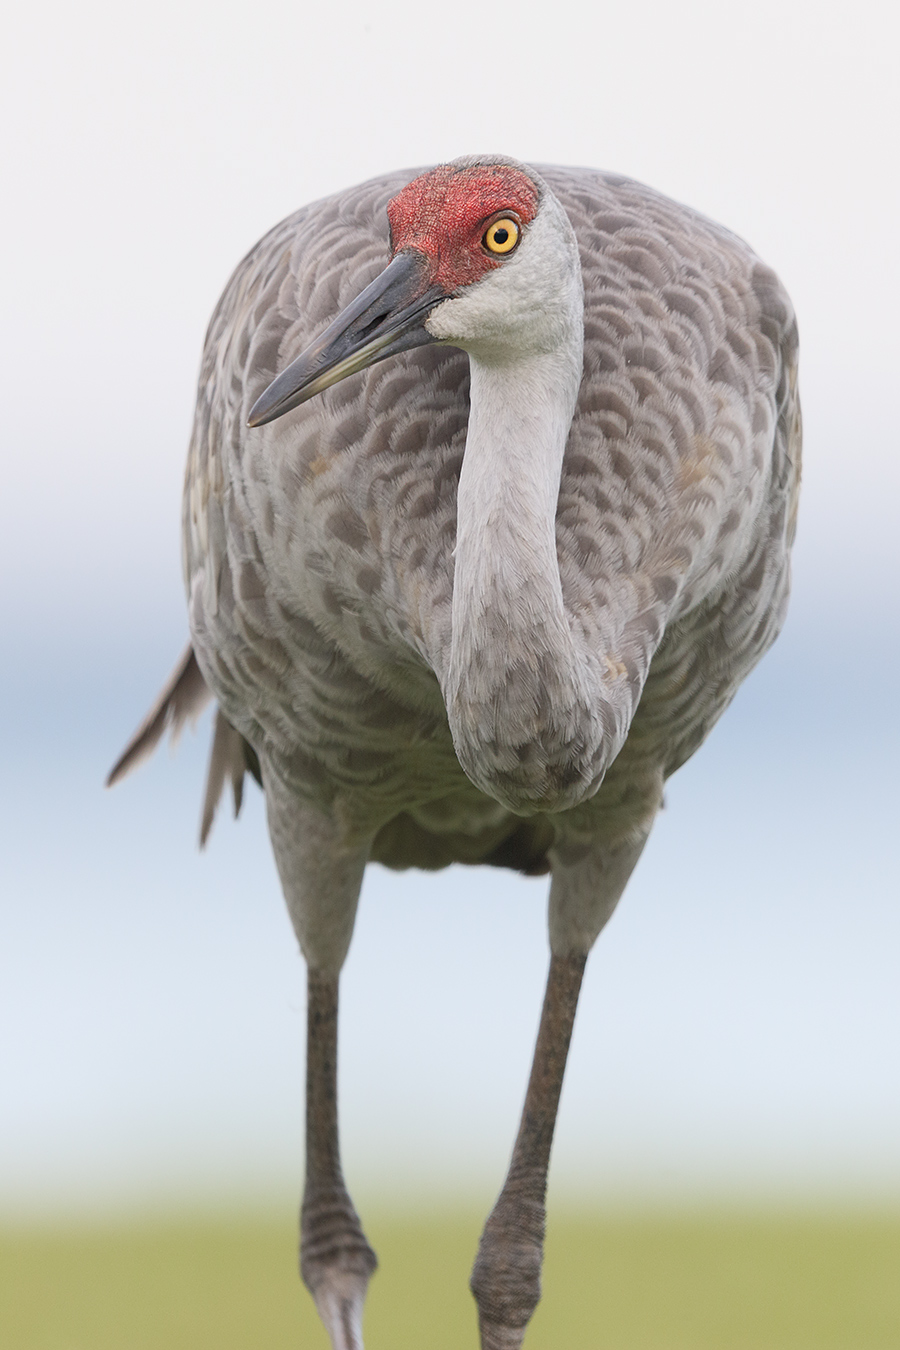
|
|
This image was also created on the cloudy almost-bright morning of October 8, 2014 at Indian Lake Estates with the Canon EF 600mm f/4L IS II USM lens, the Canon Extender EF 1.4X III, and a beta version of the Canon EOS 7D Mark II . ISO 400. Evaluative metering +1 1/3 stops as framed: 1/250 sec. at f/5.6 in Manual mode.
65-point Automatic Selection/AI Servo/Rear Focus AF activated an array of three sensors just to the left of the bird’s neck; they were actively tracking the subject at the moment of exposure. Though the automatically selected AF points were not quite ideal–the resulting image was more than sharp enough even at the wide open aperture. Click here to see the latest version of the Rear Focus Tutorial. Click on the image to see a larger version.
From the Sequoia with the lens supported by the BLUBB (my custom-designed, hand made Big Lens Ultimate Bean Bag). When working on a beanbag with a long lens and re-composing be absolutely sure that the focusing ring does not rest on the beanbag lest you throw off accurate focus when re-composing.
Sandhill Crane striding towards the camera. This JPEG represents the optimized image.
|
Your Opinion?
Click on the image to enlarge it and then let us know what you think of 7D Mark II image quality and color.

 Use the BAA Affiliate logo link above to pre-order your 7D II, shoot me your receipt via e-mail, and I will do my very best to have your order expedited once the camera begins shipping.
|

|
|
Obviously folks attending the IPT will be out in the field early and stay late to take advantage of sunrise and sunset colors. The good news is that the days are relatively short in October. Click on the composite to enjoy a larger version.
|
Fort DeSoto Fall IPT/October 11-13, 2014. 3 FULL DAYs: $1099. Limit 8/Openings: 5.
$200 Last Minute Registration Discount!
Fort DeSoto, located just south of St. Petersburg, FL, is a mecca for migrant shorebirds in fall. There they join hundreds of egrets, herons, night-herons, gulls, and terns who winter on the T-shaped peninsula that serves as their wintering grounds. With any luck, we should get to photograph two of Florida’s most desirable shorebird species: Marbled Godwit and the spectacular Long-billed Curlew. Black-bellied Plover and Willet are easy, American Oystercatcher likely. Great Egret, Snowy Egret, Great Blue Heron, and Tricolored Heron are easy as well and we will almost surely come up with a tame Yellow-crowned Night-Heron or two. We should get to do some Brown Pelican flight photography. And Royal, Sandwich, Forster’s, and Caspian Terns will likely provide us with some good flight opportunities as well. Though not guaranteed Roseate Spoonbill and Wood Stork would not be unexpected.
|

|
|
Fort DeSoto in fall is rich with tame birds. All of the images in this card were created at Fort DeSoto in either late September or early October. I hope that you can join me there this October. Click on the composite to enjoy a larger version.
|
More on the DeSoto IPT
On the IPT you will learn basics and fine points of digital exposure and to get the right exposure every time after making a single test exposure, how to approach free and wild birds without disturbing them, to understand and predict bird behavior, to identify many species of shorebirds, to spot the good situations, to choose the best perspective, to see and understand the light, to, and to design pleasing images by mastering your camera’s AF system. And you will learn learn how and why to work in Manual mode (even if you’re scared of it).
At lunch (included) we will review my images–folks learn a ton watching me edit–why keep this one and delete that one. If you opt to bring your laptop, we will take a look at five of your best images from the morning session. We will process a few of my images in Photoshop after converting them in DPP. That followed by Instructor Nap Time.
If you decide to register and are traveling to attend this IPT, please make your reservations at the Beachcomber Beach Resort, 6200 Gulf Blvd, St. Petersburg (St. Pete Beach), FL 33706 (727-367-1902) as soon as possible as rooms for the weekend days are scarce: ARR: 10 OCT/DEP 14 OCT. I stayed there on my last DeSoto visit and was quite happy with it. Lodging is tough in Florida at this season…. The best airport is Tampa (TPA). It is always best if IPT folks stay in the same hotel so if you are interested it would be a good idea to register now and make your hotel reservations as well. We can, however, coordinate easily with local folks who opt to stay at home either by cell phone or e-mail.
Because of the relatively late date, payment is full is due upon registration either by check or credit card. If the former, please e-mail us immediately so that we can save you a spot. If the latter, please call Jim or Jennifer during weekday business hours at 863-692-0906 with a credit card in hand to register . Your registration fee is non-refundable unless the IPT sells out with eight so please check your plans carefully before committing. You will receive a confirmation e-mail with detailed instructions, gear advice, and first morning meeting place about one month before this IPT.
|

|
|
BAA Site Guides are the next best thing to being on an IPT.
|
Fort DeSoto Site Guide
Can’t make the IPT? Get yourself a copy of the Fort DeSoto Site Guide. Learn the best spots, where to be when in what season in what weather. Learn the best wind directions for the various locations. BAA Site Guides are the next best thing to being on an IPT. You can see all of them here.
Facebook
Be sure to like and follow BAA on Facebook by clicking on the logo link upper right. Tanks a stack!
Support the BAA Blog. Support the BAA Bulletins: Shop B&H here!
We want and need to keep providing you with the latest free information, photography and Photoshop lessons, and all manner of related information. Show your appreciation by making your purchases immediately after clicking on any of our B&H or Amazon Affiliate links in this blog post. Remember, B&H ain’t just photography!
…..
Amazon.com
Those who prefer to support BAA by shopping with Amazon may use this link:
Amazon Canada
Many kind folks from north of the border, ay, have e-mailed stating that they would love to help us out by using one of our affiliate links but that living in Canada and doing so presents numerous problems. Now, they can help us out by using our Amazon Canada affiliate link by starting their searches by clicking here. Many thanks to those who have written.
Typos
In all blog posts and Bulletins, feel free to e-mail or to leave a comment regarding any typos, wrong words, misspellings, omissions, or grammatical errors. Just be right. 🙂
October 8th, 2014 The Streak Continues: 312
Yesterday was a typical day of work and relaxation with a nice 1/2 mile swim. The pool is back up to a shade below 78 degrees after falling below 77 with the last cold snap. This blog post, the 312th in a row, took me about 3 hours to prepare. It was published just before 7:15am from my home in Indian Lake Estates, FL.
To show your appreciation for my efforts here, we do ask that you use our the B&H and Amazon affiliate links on the right side of the blog for all of your purchases. Please check the availability of all photographic accessories in the BIRDS AS ART Online Store, especially Gitzo tripods, Wimberley tripod heads, and the like. We sell only what I have used, have tested, and can depend on. We will not sell you junk. We know what you need to make creating great images easy and fun. And we are always glad to answer your gear questions via e-mail
Fort DeSoto October Updates
The Friday Afternoon October 10 BAA Fort DeSoto In-the-Field Workshop meet-up is now sold out.
For information on the October Fort DeSoto IPT and the late registration discount please see the blog post here.
Join us for a day on Saturday, Sunday, or Monday for $299 including lunch and image review. Or join us for a morning on Saturday, Sunday, or Monday for $199 including lunch and image review.
GALAPAGOS Photo Cruise of a Lifetime IPT/The Complete Galapagos Photographic Experience. July 14-28, 2015 on the boat. 13 FULL and two half-days of photography: $12,499. Limit 14 including the leader:/Openings: 3 or 4.
If you are considering this trip it would be best to act soon as there are now only 3 or 4 slots left on this amazing Photo-Cruise IPT. Scroll down in this blog post for additional information or e-mail for the complete itinerary.
|
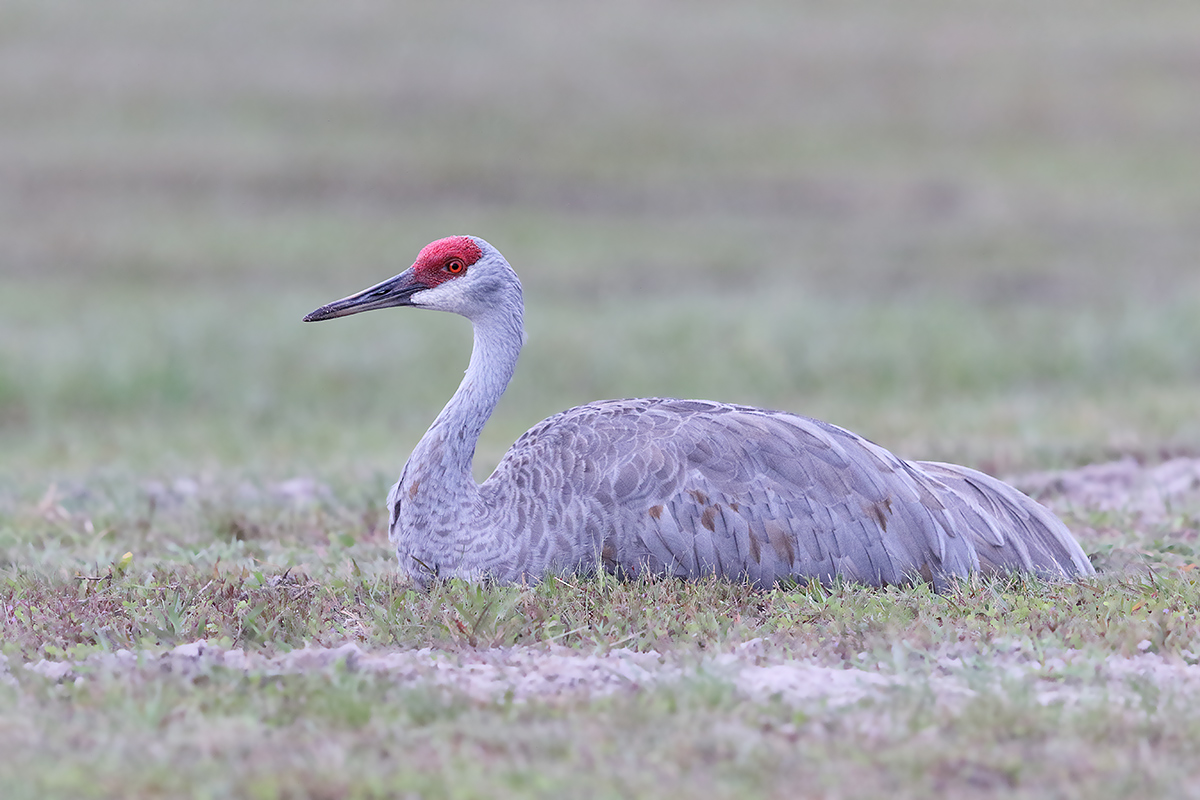
|
|
This image was created on the dark, drizzly afternoon of October 7, 2014 at Indian Lake Estates with the Canon EF 600mm f/4L IS II USM lens and a beta version of the Canon EOS 7D Mark II . ISO 3200. Evaluative metering +1 stop as framed: 1/320 sec. at f/5.6 in Manual mode.
Central Sensor/AI Servo/Rear Focus AF on the bird’s face and re-compose. Click here to see the latest version of the Rear Focus Tutorial. Click on the image to see a larger version.
From the Sequoia with the lens supported by the BLUBB (my custom-designed, hand made Big Lens Ultimate Bean Bag). When working on a beanbag with a long lens and re-composing be absolutely sure that the focusing ring does not rest on the beanbag lest you throw off accurate focus when re-composing.
Resting Sandhill Crane. This JPEG represents the optimized image.
|
EOS-7D Mark II General Impressions
I got my hands on a beta version of an EOS-7D II yesterday afternoon. The beta version of a product is used in the final stages of testing before it is commercially released. I like the feel and the build of the 7D II. Setting up the camera was relatively simple as it is quite similar to both the 1D X and the 5D III. While going through the menus and Custom Functions I was pleasantly surprised to see that it offers both in-camera Multiple Exposures and in-camera HDR options. There were a few new features that I need to study and figure out but none of those kept me from heading down to the lake and using the camera effectively. Those coming from a 7D or a 1D IV will have a much tougher time with the AF system. After deleting all copyright info (goodbye and thanks George Lepp) I entered my name and copyright info. I kept screwing up and because I could not figure out how to delete a single letter I would start from scratch. After about ten minutes of frustration I called Rudy Winston at Canon. He said, “Place the cursor to the right of the character that you want to remove and hit the garbage can icon.” I was so happy :).
The viewfinder level is pretty neat; you need to rotate the lens almost imperceptibly to get the side to side dot to indicate perfectly level. That will be much easier to do when on a tripod than when effectively hand holding while using the BLUBB. It will be great when hand holding for scenics and even better when hand holding a fish eye lens.
The analog exposure scale is on the right side of the viewfinder as it is on the 1D X (and on previous pro bodies). The individual marks on the analog scale seem to me to be slightly smaller than on all previous bodies…. The single negative for me was that I needed to carefully adjust the position of my eye in relation to the viewfinder; if my eye was a bit too much to my left the analog scale became slightly blocked from view. I am sure that over time I will adjust though I think that I will always be wishing that the marks on the analog scale appeared to be a bit larger.
Yikes. I almost forgot the amazing frame rate. With the advance set to Continuous High I thought that I was using a 1D X.
Will I Own a 7D II?
Overall I was quite impressed with Canon’s latest offering. Will I purchase one? It is much too soon to know but I can’t wait to give the new camera a good workout in a variety of conditions. I will be doing that at Fort DeSoto on the coming holiday weekend.
1D X or 5D III Direct Comparsion
Many have asked that I create images from the same exact spot with the 7D II and one of the full frame bodies. I attempted to do that yesterday and came close, but there are so many variables that I opted not to publish a 7D II/1D X cropped to the same subject size comparison. For a completely fair comparison I need to find a sleeping bird….
|
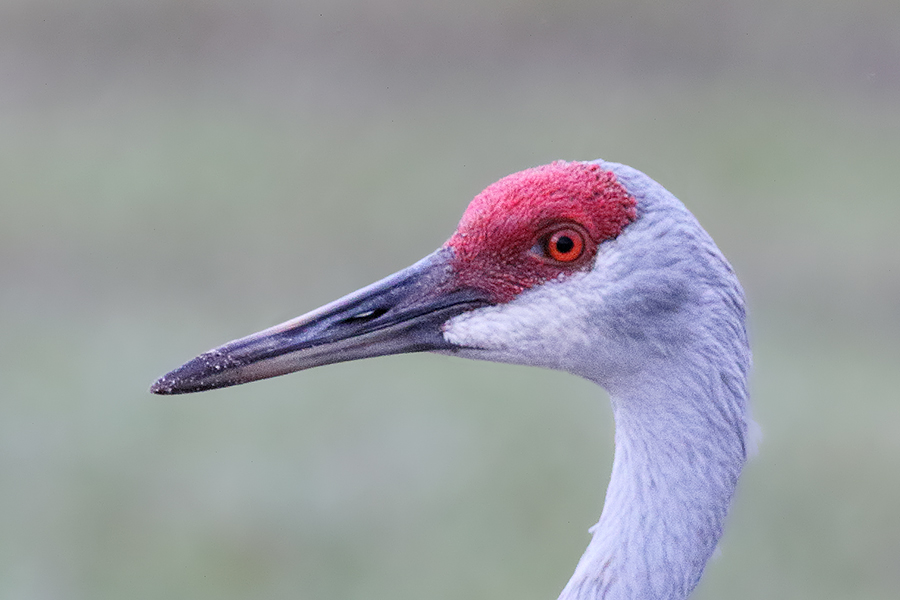
|
|
This is a tight crop of the head of the bird from the optimized image. See image next to have a look at the original image after conversion in DPP 3.14.41. Details on that coming soon.
|
The Image Optimization
After converting the image in DPP 3.14.41 with the Noise Reduction settings as per the original DPP RAW Conversion Guide I brought the image into Photoshop CS-6. I selected the bird, ran Refine Edge, saved the selection, and applied a 75% layer of my NIK Color Efex Pro 25/25 recipe (25% Detail Extractor and 25% Tonal Contrast). Then I darkened the pupil using my Eye Doctor techniques. Next I applied a Contrast Mask to the bird’s face. All selections were made with the Quick Selection Tool. Then merged the layer I had been working on, loaded the selection of the bird, inverted it, and applied a healthy does of Filter > Blur > Surface Blur. That pretty much eliminated the background noise but you can still note a bit of the ISO 3200 noise in the bird’s feathers in the image above. All in all I was quite impressed with high ISO performance. I did a bit of color correction that in retrospect I wish I had not done as the optimized file is a bit too magenta as compared to the converted original below.
The DPP RAW Conversion Guide
To learn why I use Canon’s Digital Photo Professional (DPP) to convert every image that I work on, click here. Coming very soon: The DPP 4.0 RAW Conversion Guide by Arash Hazeghi and Arthur Morris. The more that I use DPP 4.0 for my RAW conversions the more I learn about it and the more I learn about it the more I am impressed with it. Note: at present, DPP 4.0 will work only with 1D X, 5D III, and 6D images. Scroll down for the latest DPP/7D Mark II info.
Digital Basics
Everything that I did to optimize today’s image is covered in detail in my Digital Basics File–written in my easy-to-follow, easy-to-understand style. Are you tired of making your images look worse in Photoshop? Digital Basics File is an instructional PDF that is sent via e-mail. It includes my complete digital workflow, dozens of great Photoshop tips (including Surface Blur settings), details on using all of my image clean-up tools, the use of Contrast Masks, several different ways of expanding and filling in canvas, all of my time-saving Keyboard Shortcuts, Quick Masking, Layer Masking, and NIK Color Efex Pro basics, Digital Eye Doctor, Tim Grey Dodge and Burn, how to create time-saving actions, and tons more.
APTATS I & II
Learn the details of advanced Quick Masking techniques in APTATS I. Learn Advanced Layer Masking Techniques in APTATS II. Mention this blog post and apply a $5 discount to either with phone orders only. Buy both APTATS I and APTATS II and we will be glad to apply at $15 discount with phone orders only. Please call Jim or Jennifer at 863-692-0906 weekdays to order.
Digital Photo Professional 3.14.41 Updater
The latest version of DPP is V3.14.41; it will support 7D Mark II files. It is currently available for download here. Click on Drivers and Software and then on Software. Then click directly on the Digital Photo Professional 3.14.41 Updater for Windows (or Mac), check the Disclaimer box, and then click on the Download arrow. When the file is downloaded double-click on it and follow the prompts. I just finished updating :).
Note: if you do not already have a previous version of DPP 3.whatever installed you will need to download the entire software suite to install DPP 3.14.41 from scratch.
|
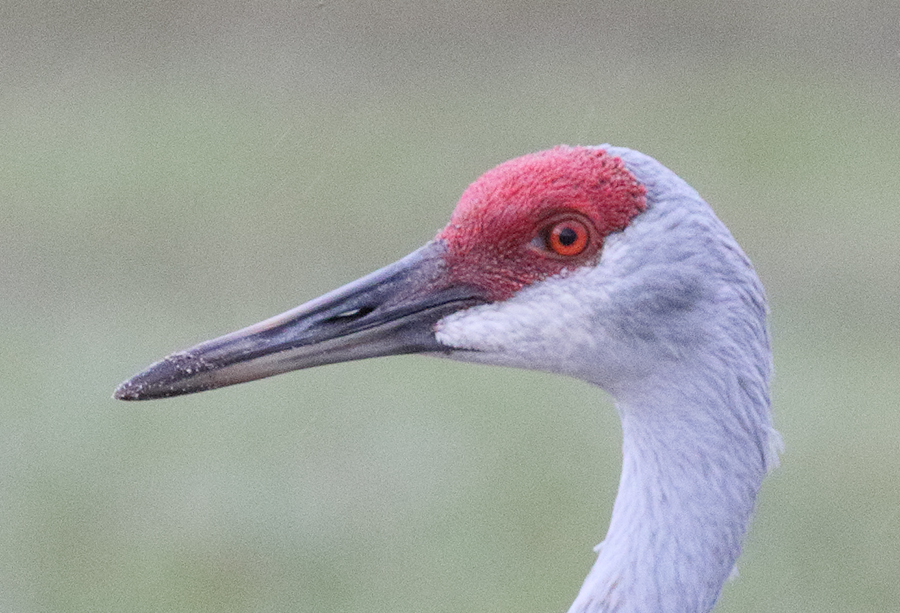
|
|
This is an unsharpened tight crop of the DPP 3.14.41 converted RAW file. ISO 3200 Noise Reduction was applied as per Arash’s recommendations in the original DPP RAW Conversion Guide.
|
The Converted RAW File
The JPEG above represents an unsharpened tight crop of the DPP 3.14.41 converted RAW file. ISO 3200 Noise Reduction was applied as per Arash’s recommendations in the original DPP RAW Conversion Guide. Though I do not have a great eye for fine detail I would judge the high ISO noise levels here as about the same as or perhaps a bit better than noise levels with the 5D III of the 1D X.
7D Mark II RAW File Offer
If you would like to receive a link to the RAW file for today’s featured image for inspection and study only, please send us a Paypal for $5.00 (to cover our handling costs) to birdsasart@verizon.net or give Jim or Jennifer a buzz at 863-692-0906 during weekday business hours with a credit card in hand. We will send you a link via Hightail. You can the download and save the RAW file. Whether by Paypal or phone, be sure to specify “7D II resting Sandhill Crane RAW File” as I will be offering additional RAW files in the coming days and weeks. Please note that all rights remain with Arthur Morris/BIRDS AS ART.

 Use the BAA Affiliate logo link above to pre-order your 7D II, shoot me your receipt via e-mail, and I will do my very best to have your order expedited once the camera begins shipping.
Facebook
Be sure to like and follow BAA on Facebook by clicking on the logo link upper right. Tanks a stack!
Support the BAA Blog. Support the BAA Bulletins: Shop B&H here!
We want and need to keep providing you with the latest free information, photography and Photoshop lessons, and all manner of related information. Show your appreciation by making your purchases immediately after clicking on any of our B&H or Amazon Affiliate links in this blog post. Remember, B&H ain’t just photography!
…..
Amazon.com
Those who prefer to support BAA by shopping with Amazon may use this link:
Amazon Canada
Many kind folks from north of the border, ay, have e-mailed stating that they would love to help us out by using one of our affiliate links but that living in Canada and doing so presents numerous problems. Now, they can help us out by using our Amazon Canada affiliate link by starting their searches by clicking here. Many thanks to those who have written.
Typos
In all blog posts and Bulletins, feel free to e-mail or to leave a comment regarding any typos, wrong words, misspellings, omissions, or grammatical errors. Just be right. 🙂
October 7th, 2014 The Streak Continues: 311
Yesterday was a typical day of work and relaxation with a nice 1/2 mile swim. I have lost 7 1/2 pounds since getting home from Long Island and getting back in the groove of healthy eating. This blog post, the 311th in a row, took me about 2 1/2 hours to prepare. All of the work was done on Tuesday morning. It was published just before 8:45am from my home in Indian Lake Estates, FL.
To show your appreciation for my efforts here, we do ask that you use our the B&H and Amazon affiliate links on the right side of the blog for all of your purchases. Please check the availability of all photographic accessories in the BIRDS AS ART Online Store, especially Gitzo tripods, Wimberley tripod heads, and the like. We sell only what I have used, have tested, and can depend on. We will not sell you junk. We know what you need to make creating great images easy and fun. And we are always glad to answer your gear questions via e-mail
Fort DeSoto October Updates
The Friday Afternoon October 10 BAA Fort DeSoto In-the-Field Workshop meet-up is now sold out.
For information on the October Fort DeSoto IPT and the late registration discount please see the blog post here.
Join us for a day on Saturday, Sunday, or Monday for $299 including lunch and image review. Or join us for a morning on Saturday, Sunday, or Monday for $199 including lunch and image review.
GALAPAGOS Photo Cruise of a Lifetime IPT/The Complete Galapagos Photographic Experience. July 14-28, 2015 on the boat. 13 FULL and two half-days of photography: $12,499. Limit 14 including the leader:/Openings: 3 or 4.
If you are considering this trip it would be best to act soon as there are now only 3 or 4 slots left on this amazing Photo-Cruise IPT. Scroll down in this blog post for additional information or e-mail for the complete itinerary.
|
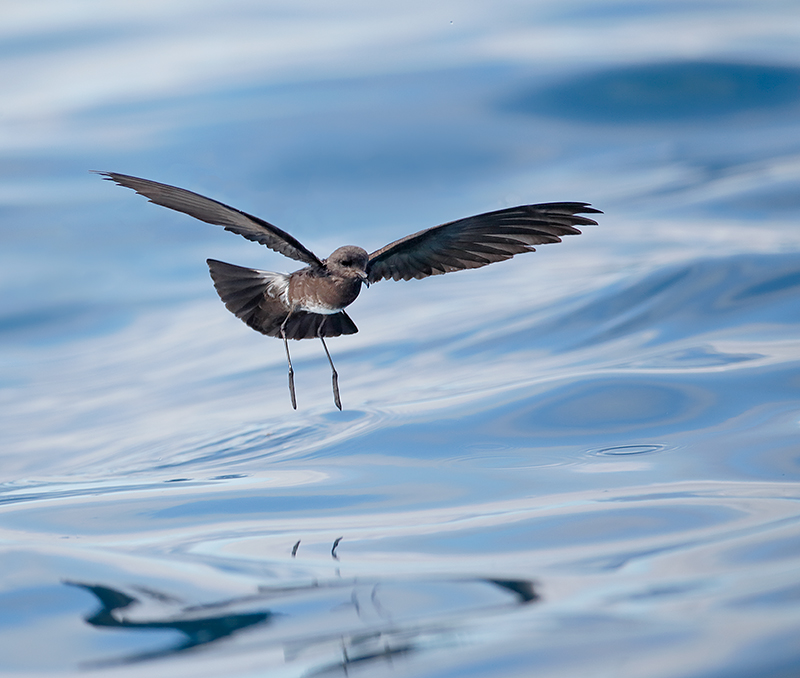
|
|
This image was created on the 2013 Galapagos Photo-Cruise with the hand held the Canon EF 200-400mm f/4L IS USM Lens with Internal 1.4x Extender (with the internal TC engaged at 560mm) and the Canon EOS-1D X. ISO 800. Evaluative metering +1 1/3 stops off the light blue water: 1/2000 sec. at f/5.6 in Manual mode was about 1/2 stop too dark. AWB.
Central Sensor/AI Servo-Surround/Rear Focus AF barely caught the petrel’s right wing as originally framed and was of course active at the moment of exposure. Learn everything there is to know about the 1D X and 5D III AF systems including how to manage the various AF Area Selection Modes, when to use which one, and several ways to move the AF sensor around in my 1D X AF Guide and the 5D Mark III User’s Guide. Click here to see the latest version of the Rear Focus Tutorial. Click on the image to see a larger version. .
Galapagos Storm Petrel dip feeding
|
The Situation
The panga (zodiac) was tied up to the Samba after our very last landing on North Seymour, rife with Blue-footed Boobies and both species of frigatebirds. It had been a great morning with lots of nests of all three species with chicks of varying sizes. As usual, I was the last one to get off the panga. As I gathered my gear I noticed that some storm petrels were feeding right off the stern of the boat. I called to the group but most were already down in their cabins. Those who heard me answered, “What’s wrong with you? The trip is over and we are beat.”
I had fun. 🙂
Painstaking, or Not?
Did this image take 8 minutes to optimize? Or one hour and eight minutes to optimize? Is there any evidence that major Photoshop “fowl” play or is this pretty much straight out of camera with a fairly large crop? If the former, what did I do?
|
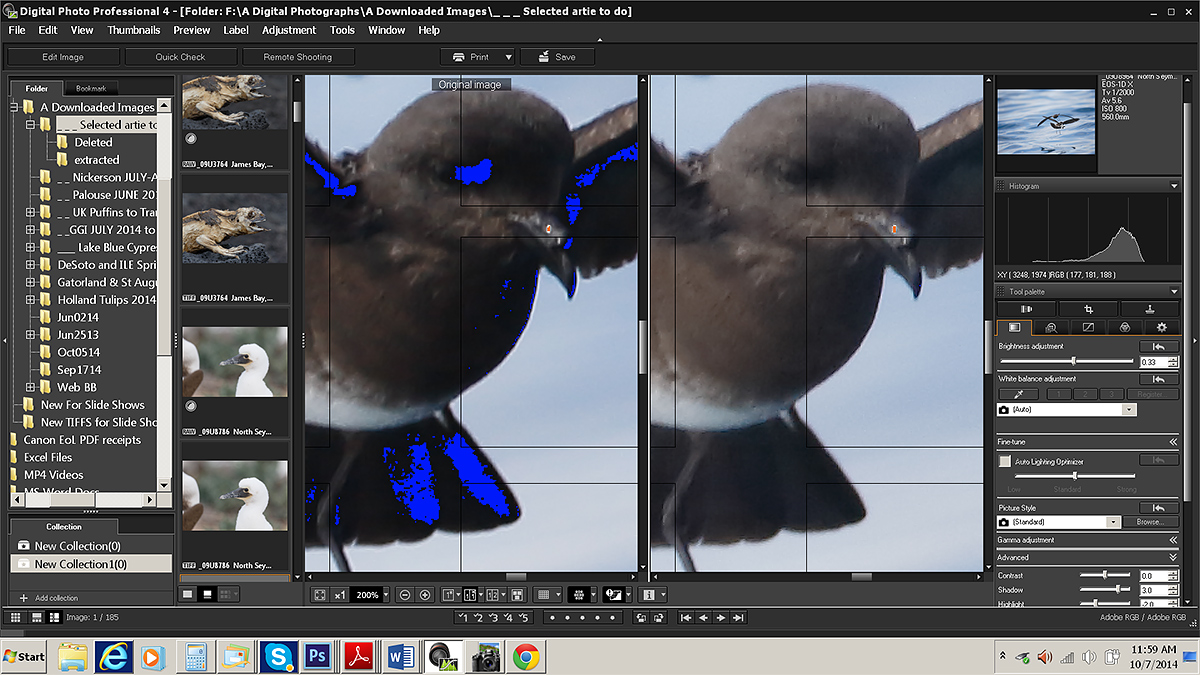
|
|
This is a DPP 4.0 screen capture.
|
DPP 4.0 Complexity/Or Not?
The first time that I opened DPP 4.0 I felt as if I were sitting in the cockpit of a Boeing 747. And I had as much chance of properly converting a RAW file as I did of flying a 747. But after studying and re-crafting Arash Hazeghi’s first draft of the DPP of our DPP 4.0 RAW Conversion Guide I soon realized that working in DPP was fairly simple. As long as you know what you are doing.
The DPP RAW Conversion Guide
To learn why I use Canon’s Digital Photo Professional (DPP) to convert every image that I work on, click here. Coming very soon: The DPP 4.0 RAW Conversion Guide by Arash Hazeghi and Arthur Morris. The more that I use DPP 4.0 for my RAW conversions the more I learn about it and the more I learn about it the more I am impressed with it. Note: at present, DPP 4.0 will work only with 1D X, 5D III, and 6D images.
The new guide should be available for purchase within two weeks at the most. It will sell for $40.
|
|
|
Do consider joining me for a once in a lifetime trip to the Galapagos archipelago in July, 2015.
|
GALAPAGOS Photo Cruise of a Lifetime IPT/The Complete Galapagos Photographic Experience. July 14-28, 2015 on the boat. 13 FULL and two half-days of photography: $12,499. Limit 14 including the leader:/Openings: 3 or 4.
There are now only 3 or 4 slots left on this amazing Photo-Cruise IPT.
My two-week Galapagos Photo-Cruises are without equal. The world’s best guide, a killer itinerary, a great boat (the Samba), and the best leader with eight Galapagos cruises under his belt. Pre-trip and pre-landing location-specific gear advice. In-the-field photo instruction and guidance. Jeez, I almost forgot: fine dining at sea!
The great spots that we will visit include Tower Island (including Prince Phillips Steps and Darwin Bay), Hood Island (including Punta Suarez, the world’s only nesting site of Waved Albatross, and Gardner Bay)—each of the preceding are world class wildlife photography designations that rank right up there with Antarctica, Africa, and Midway. We will also visit Fernandina, Puerto Ayora for the tortoises, Puerto Egas—James Bay, North Seymour and Isla Lobos for nesting Blue-footed Booby (most years), South Plaza, Floreana, and Urbina Bay, all spectacular in their own right. We visit every great spot on a single trip. Plus tons more. And there will he lots of opportunities to snorkel on sunny mid-days for those like me who wish to partake.
We will be the first boat on each island in the morning and the last boat to leave each island every afternoon. If we are blessed with overcast weather, we will often spend 5-6 hours at the best sites. And as noted above, mid-day snorkeling is an option on most sunny days depending on location. Note: some of the walks are a bit strenuous. Great images are possible on all landings with a hand held 70-200mm lens and a 1.4X teleconverter. I bring a longer lens ashore on most landings as that fits my style. I generally work with either the Canon 300mm f/2.8L IS or the Canon 200-400mm f/4 L IS with Internal Extender.
Do know that there is a NatureScapes Galapagos trip: one week for $8495. Thus, my trip represents a tremendous value; why go all that way and miss half of the great photographic locations?
The Logistics
Fly to Guayacil, Ecuador on July 12, 2015. Travel insurance/rest day: July 13 (We may or may not offer a photo outing on the 13th). Fly to the archipelago on July 14 and board the Samba. Get off the boat on July 28. Fly to Guayacil that afternoon. Fly home on the early morning of July 29 unless you are staying on or going elsewhere (or catching a red-eye flight on the evening of the 28th).
$12,499 includes just about everything: all transfers, guide and park fees, all food on the boat, transfers and ground transportation, your flights to the archipelago, and three nights (double occupancy) in a top notch hotel in Guayacil. If you are good to go, a non-refundable deposit of $5,000 per person is due immediately. The second payment of $4,000 is not due until 11/1/14. The final payment of $3749 per person will be due on 2/1/15. A $200 discount will be applied to each of the balances for couples or friends who register at the same time.
Purchasing travel insurance within 2 weeks of our cashing your deposit check is strongly recommended. On my past two cruises a total of 5 folks were forced to cancel less than one week prior to the trip. My family and I use Travel Insurance Services and strongly recommend that you do the same.
Not included: your round trip airfare from your home to and from Guayacil, beverages on the boat, phone calls, your meals in Guayacil, personal items, and a $600/person cash tip for the crew and the guide—this works out to roughly $40/day to be shared by the 7 folks who will be waiting on us hand and foot every day for two weeks. The service is so wonderful that many folks choose to tip extra.
Please e-mail for the complete itinerary and for additional info and images. Please cut and paste “Galapagos 2015 Info Please) into the Subject line.
Facebook
Be sure to like and follow BAA on Facebook by clicking on the logo link upper right. Tanks a stack!
Support the BAA Blog. Support the BAA Bulletins: Shop B&H here!
We want and need to keep providing you with the latest free information, photography and Photoshop lessons, and all manner of related information. Show your appreciation by making your purchases immediately after clicking on any of our B&H or Amazon Affiliate links in this blog post. Remember, B&H ain’t just photography!
…..
Amazon.com
Those who prefer to support BAA by shopping with Amazon may use this link:
Amazon Canada
Many kind folks from north of the border, ay, have e-mailed stating that they would love to help us out by using one of our affiliate links but that living in Canada and doing so presents numerous problems. Now, they can help us out by using our Amazon Canada affiliate link by starting their searches by clicking here. Many thanks to those who have written.
Typos
In all blog posts and Bulletins, feel free to e-mail or to leave a comment regarding any typos, wrong words, misspellings, omissions, or grammatical errors. Just be right. 🙂
October 6th, 2014 The Streak Continues: 310
I began yesterday with 30 minutes of meditation–see more on that immediately below. Then I worked a bit, enjoyed an easy 1/2 mile swim, took a nice nap, watched lots of pro football, and enjoyed a solid seven hours of sleep. This blog post, the 310th in a row, took me about 2 1/2 hours to prepare. All of the work was done on Monday morning. It was published just after 7:30am from my home in Indian Lake Estates, FL.
To show your appreciation for my efforts here, we do ask that you use our the B&H and Amazon affiliate links on the right side of the blog for all of your purchases. Please check the availability of all photographic accessories in the BIRDS AS ART Online Store, especially Gitzo tripods, Wimberley tripod heads, and the like. We sell only what I have used, have tested, and can depend on. We will not sell you junk. We know what you need to make creating great images easy and fun. And we are always glad to answer your gear questions via e-mail.
Click here to learn about the $200 Last Minute Registration Discount offer for the Fort DeSoto IPT. Join us and you just might get a chance to try out a 7D II for a few minutes…..
Enjoying Peacefulness Through Meditation
Since I began mentioning my morning meditation here a while back, I have been receiving many e-mails asking exactly what I do. To that end I share the following with you.
As best as I can understand it, one form of meditation teaches us to keep the mind clear by learning to concentrate on our breathing. My very favorite meditation CD is one by Jon Kabat-Zinn: Guided Mindfulness Meditation Series 1
He has the softest, most peaceful voice you could ever imagine, and he is a skilled instructor. When I wake up each morning I make a pit stop, lie with my back on the floor next to the bed, my calves resting on it, my thighs perpendicular to the floor, and my arms stretched out by my side. Then I click my Bose CD player on and listen to Jon Kabat-Zinn: the object is not to fall asleep, but to fall awake.
You can learn about additional mindfulness meditation CDs here
My Second Favorite Meditation CD
My 2nd favorite meditation CD is by Cliff Oliver’s late-friend, world class drummer Layne Redmond: Heart Chakra Meditations
I enjoy several tracks on this CD. From it I learned Bhramari Pranayama, the humming Bee Breath. Though I am not sure that Jon Kabat-Zinn would approve of it, I often do both the 4-7-8 breathing that I wrote about here and the bee breath while listening to Jon’s Mindfulness Meditation CD. And I often do the bee breathing to help fall asleep.
Layne Redmond was an American drummer, frame drum expert, writer, teacher, historian, and mythologist. Drum maker Remo created a frame drum designed by Redmond as their first Signature Series product. Layne died of breast cancer on October 28, 2013. Most would enjoy When the Women Were Drummers with Layne Redmond. When she was young, her Mom told her “The drums are for the boys; stick to tap dancing.” Layne obviously did not listen. I spoke to her several years ago by phone, learned later from Cliff that she was sick, but did not know that she had died until this morning. It is wonderful that she lives on through her music and other work.
Quoting Layne, A lot of the drums were painted red, the color of blood. I started to realize that the drum represented the first sound, the first sound that we hear in the womb is the sound of our mother’s blood pulsing through her arteries.
Back to the 4-7-8 Breathing
Back to the 4-7-8 breathing, I recently received a nice e-mail from a subscriber on her experiences with it:
Hi Artie, I just wanted to drop you a quick note about the 4-7-8 breathing. I have been doing it for almost two weeks now, and I can say I am much calmer and more relaxed. And even my muscles feel that way too! Also I seem to have much more patience and lose my temper much less often. Also, and maybe the most extraordinary part is that I used to come home from work and binge eat, just from stress I think. Now I just eat because I am hungry, and I feel that I now have a choice to eat or not. It is so simple to do, yet the returns on a three minute investment are almost miraculous. This is now part of my lifestyle. Thanks for sharing this technique.
I suggested that she follow up the breathing by doing The Work of Byron Katie if she wanted to find additional peace.
|
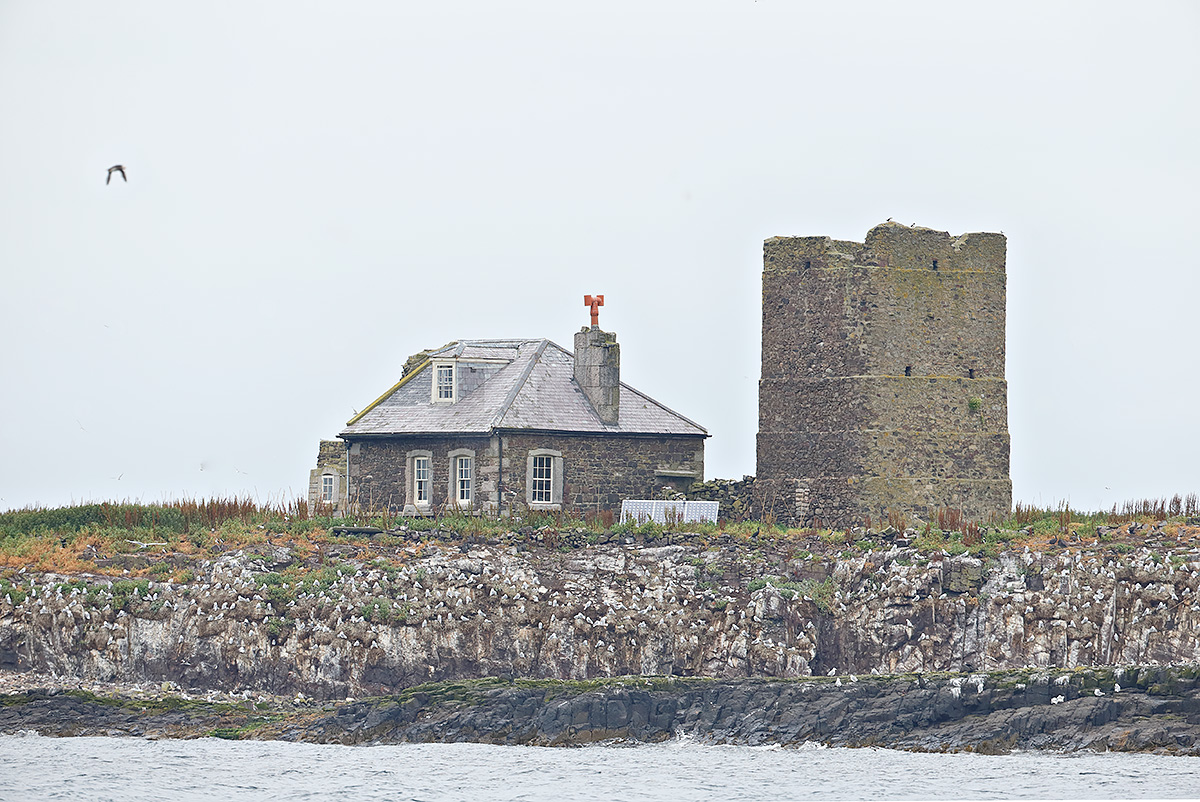
|
|
This image was created from the puffin boat on last July’s UK Puffins and Gannets IPT. I used the hand held the Canon EF 200-400mm f/4L IS USM Lens with Internal 1.4x Extender (at 300mm) and the Canon EOS-1D X. ISO 800. Evaluative metering +3 1/3 stops off the white sky: 1/800 sec. at f/5.6 in Manual mode. AWB.
Three sensors to the right of the central Sensor/AI Servo-Surround/Rear Focus AF on the left side of the structure on the right (as framed) was active at the moment of exposure. Practicing so that you are able to change AF sensors on the fly is an important skill to work on. Learn everything there is to know about the 1D X and 5D III AF systems including how to manage the various AF Area Selection Modes, when to use which one, and several ways to move the AF sensor around in my 1D X AF Guide and the 5D Mark III User’s Guide. Click here to see the latest version of the Rear Focus Tutorial. Click on the image to see a larger version. .
Stone Structures
|
Hand Holding Peacefulness
On the puffin days we do the morning session on one island and then take the boat to another island that is a bit closer to the mainland. While sailing we sometimes get in close to the cliffs to photograph a variety of birds on their nests. At other times we are afforded scenic views of stone structures like those in today’s image (and the occasional distant castle.
The stone house in the image above caught my eye as we approached it. The scene looked so utterly peaceful that I knew the moment that I saw it that I wanted to photograph it. I was not quite ready in time and was blocked by the wheelhouse. But in a rare for me fit of patience a different view materialized as we continued on. I had already determined the exposure by reading 3 1/3 stops off the sky and setting it manually. As I zoomed to properly frame the image I moved the active sensor well to the right so that it would fall on the right hand structure. BTW, if you know what the structure on the right is please do let us know.
Exposure Questions
Why so much plus Exposure Compensation (+EC) to the reading off the sky?
Would I have metered in the same manner on a sunny blue sky day? Why or why not?
200-400 Hand Holding Tips & Techniques
Click here for more on hand holding the 200-400.
|
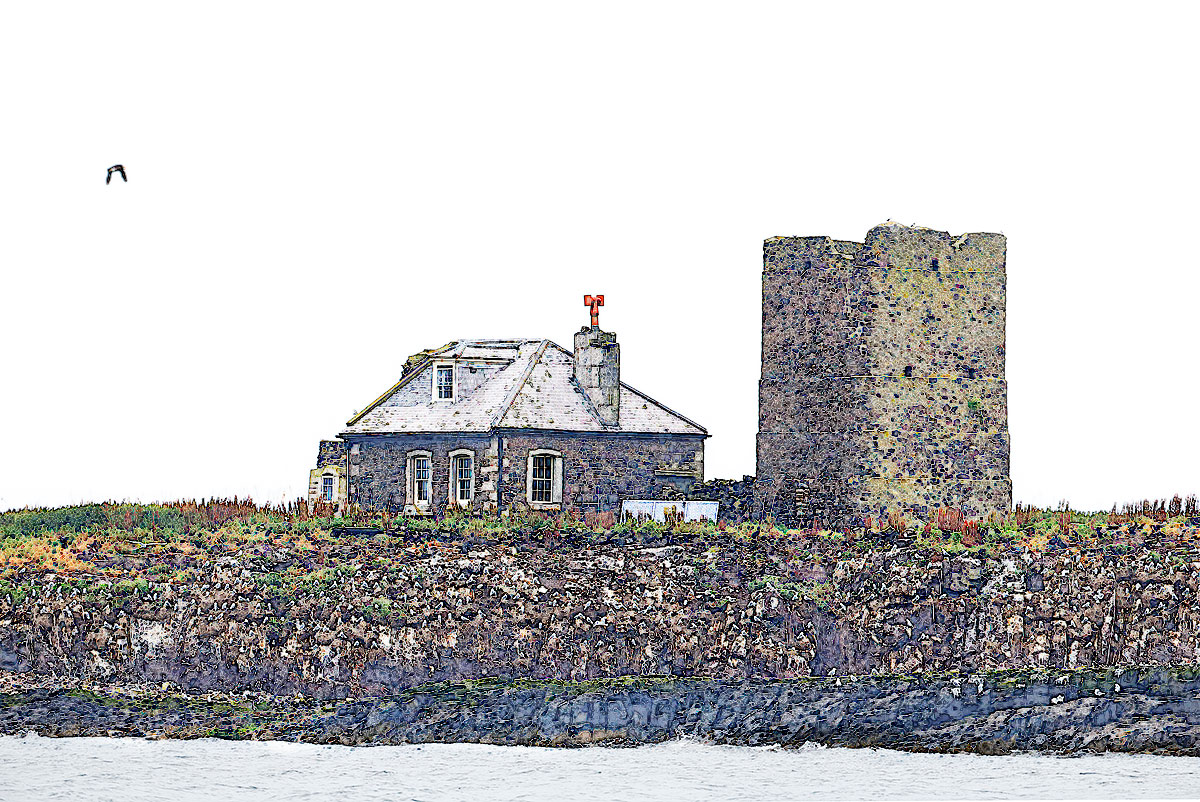
|
|
This image was created from the original above using Denise Ippolito’s Photoshop “Sketch” action.
|
Denise Ippolito’s Photoshop “Sketch” Action
Denise was always great at creating a sketched look in Fractlius, a stand alone Photoshop (PC only) plug-in. But she recently created two complex actions in Photoshop that yielded a similar effect. She named them “Sketch” and “Sketch II” and kindly shared them both with me. Thanks a stack Lady D.
Your Favorite?
Please take a moment to leave a comment and let us know which version you like best, the original version or the sketched version. And do let us know why.
|

|
|
Images and card design copyright 2014: Arthur Morris/BIRDS AS ART. Click on the card to enjoy a spectacular larger version.
|
The 2015 UK Puffins and Gannets IPT
June 29 through July 5, 2015: $5499: Limit 10 photographers/Openings 3. Two great leaders: Denise Ippolito and Arthur Morris.
Here are the plans for next year: take a red eye from the east coast of the US on 28 June arriving in Edinburgh, Scotland on the morning of Monday 29 June (or simply meet us then either at the Edinburgh Airport (EDI) or later in the day at our cottages if you are driving your own vehicle either from the UK or from somewhere in Europe. Stay 7 nights in two gorgeous modern country cottages.
There are 5 days of planned puffin/seabird trips—weather permitting, and 1 full day of gannet photography with 2 sessions on the boat.
|

|
|
Images and card design copyright 2014: Arthur Morris/BIRDS AS ART. Click on the card to enjoy a spectacular larger version.
|
The Details
All breakfasts, lunches and dinners are included. All 5 puffins boat lunches will need to be prepared in advance, taken with, and consumed at your leisure. I usually eat mine on the short boat trip from one island to the other. Also included is a restaurant lunch on the gannet boat day and a farewell fine dining thank you dinner. The cost of your National Heritage Trust is also included; that covers the twice a day landing fees.
Plan to fly home on the early morning of Monday 6 July or to continue your stay or travels.
We are planning this as double-occupancy only but we should be able to arrange for singles by renting a 3rd cottage. We would need to know well in advance, i.e., soon, and it would be pricey and would need to be paid with your non-refundable deposit of $2,000. The shared rooms are decent-sized, each with two roomy single beds and a private bathroom. There are two king rooms available for couples. The upscale country-side cottages are beyond lovely with large living areas and lots of open space for image sharing and Photoshop lessons.
|

|
|
Images and card design copyright 2014: Arthur Morris/BIRDS AS ART. Click on the card to enjoy a spectacular larger version. Scroll down to join us in the UK in 2015.
|
Single Supplement Info
The single supplement is $1475. As we will be renting a third cottage the $1475 is due with your deposit and is also non-refundable.
If you are good to go please send your $2,000 deposit check now to save a spot. We do expect this workshop to sell out very quickly as we have already sold 2 slots even though the trip has not yet been formally announced till right now. Not to mention that everyone loves puffins. Please make your check out to “Arthur Morris” and send it to Arthur Morris/BIRDS AS ART, PO Box 7245, Indian Lake Estates, FL, 33855.
We do hope that you can join us.
Facebook
Be sure to like and follow BAA on Facebook by clicking on the logo link upper right. Tanks a stack!
Support the BAA Blog. Support the BAA Bulletins: Shop B&H here!
We want and need to keep providing you with the latest free information, photography and Photoshop lessons, and all manner of related information. Show your appreciation by making your purchases immediately after clicking on any of our B&H or Amazon Affiliate links in this blog post. Remember, B&H ain’t just photography!
…..
Amazon.com
Those who prefer to support BAA by shopping with Amazon may use this link:
Amazon Canada
Many kind folks from north of the border, ay, have e-mailed stating that they would love to help us out by using one of our affiliate links but that living in Canada and doing so presents numerous problems. Now, they can help us out by using our Amazon Canada affiliate link by starting their searches by clicking here. Many thanks to those who have written.
Typos
In all blog posts and Bulletins, feel free to e-mail or to leave a comment regarding any typos, wrong words, misspellings, omissions, or grammatical errors. Just be right. 🙂
October 5th, 2014 The Streak Continues: 309
I have now received all of four DPP 4.0 RAW Conversion Guide manuscripts from the reviewers via e-mail and will began incorporating the suggestions yesterday. I will ship the revised ms off to Arash so that he can create the PDF as soon as my work is done. I enjoyed an easy 1/2 mile swim yesterday and four great MLB playoff games. This blog post, the 309th in a row, took me exactly 1 hour, 54 minutes and 11.9 seconds to prepare, all of the work done on Sunday morning. It was published just before 7:00am from my home in Indian Lake Estates, FL.
To show your appreciation for my efforts here, we do ask that you use our the B&H and Amazon affiliate links on the right side of the blog for all of your purchases. Please check the availability of all photographic accessories in the BIRDS AS ART Online Store, especially Gitzo tripods, Wimberley tripod heads, and the like. We sell only what I have used, have tested, and can depend on. We will not sell you junk. We know what you need to make creating great images easy and fun. And we are always glad to answer your gear questions via e-mail.
Scroll down in this blog post to learn about the $200 Last Minute Registration Discount offer for the Fort DeSoto IPT. Join us and you just might get a chance to try out a 7D II for a few minutes…..
Wow!
Right after publishing this blog post I stepped out onto the pool deck to barbecue my breakfast of chicken and Brussels sprouts and was shocked by how cold it was: 59 chilly degrees. I had heard that a front was coming through last night. The pool had already been down below 78 degrees. Yikes for today’s swim!
|
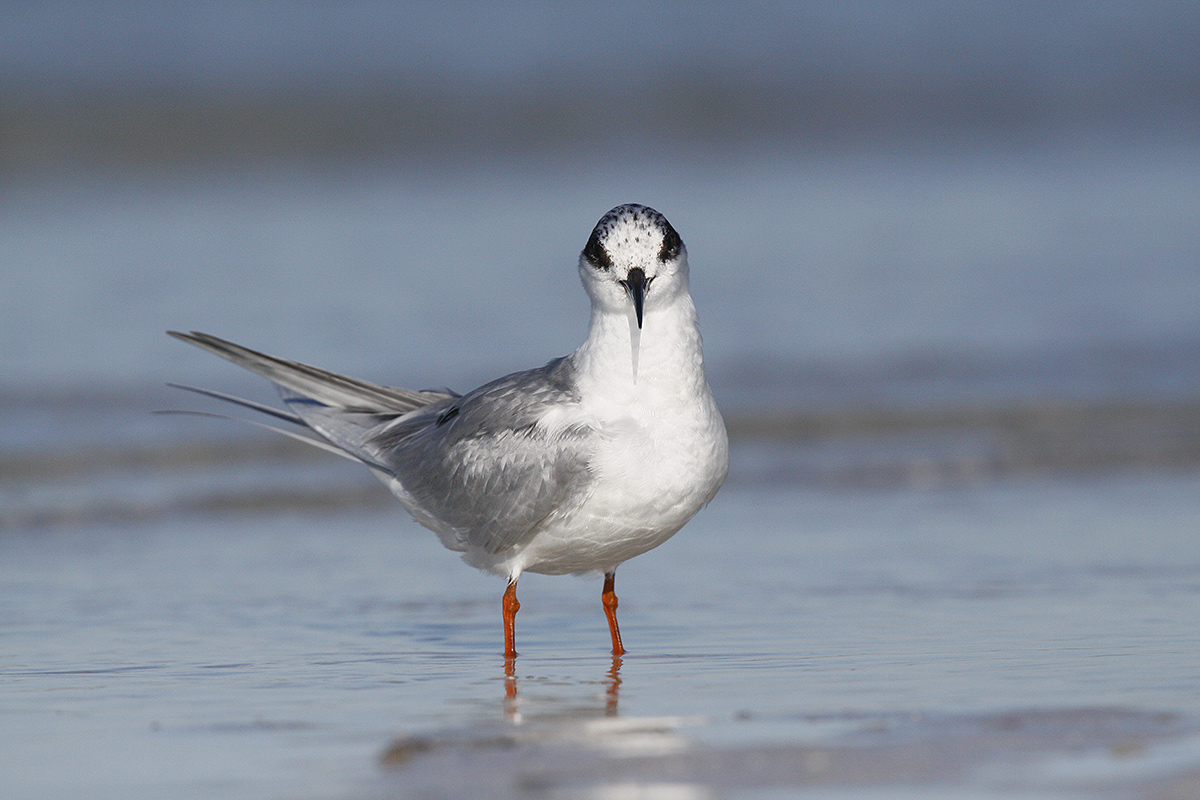
|
|
This image was created at Fort DeSoto Park in 2009 with the hand held Canon EF 400mm f/4 DO IS USM lens and the (long ago) EOS-50D soon to be replaced by the Canon EOS 7D Mark II. ISO 500. Evaluative metering -1/3 stop: 1/6400 sec. at f/6.3 in Av mode. (Note: this is the equivalent of 1/3 stop darker than my standard, oft-recommended sunny/ISO 400 exposure for SUPER bright WHITEs: 1/2500 sec. at f/8)
9-Point AI Servo shutter button AF. Talk about the old days!
Image #1: 9:13.50am
|
Your Mission
Your mission here, should you decide to accept it, is to let us know which of today’s six images you would keep, which you would delete, and why. As always, should you or any of your BAA Force be caught or killed, Arthur Morris will disavow any knowledge of your actions. This blog post will will self-destruct in ten seconds. Good luck.
|
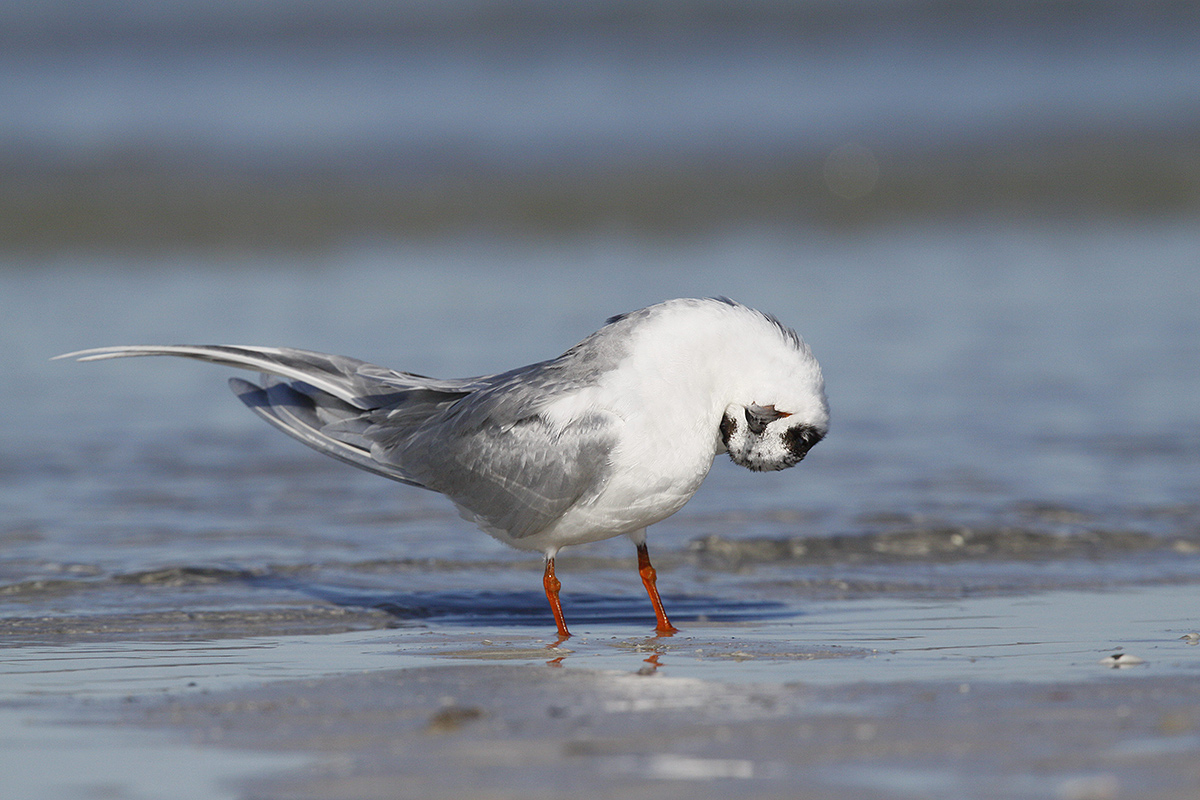
|
|
This image was created at Fort DeSoto Park in 2009 with the hand held Canon EF 400mm f/4 DO IS USM lens and the (long ago) EOS-50D soon to be replaced by the Canon EOS 7D Mark II. ISO 400. Evaluative metering -1/3 stop: 1/3200 sec. at f/8 in Av mode. (Note: this is the equivalent of 1/3 stop darker than my standard, oft-recommended sunny/ISO 400 exposure for SUPER bright WHITEs: 1/2500 sec. at f/8)
9-Point AI Servo shutter button AF. Talk about the old days!
Image #2: 9:14.07am
|
Sitting Down on the Job
For images #1-#4 I was using my knee-pod: I was seated resting my left forearm on my left knee to stabilize the lens. Learn more about knee-podding here. And learn why you need to be in active AI Servo AF when hand holding in the “Best Ever Hand Holding Tip” blog post here.
|
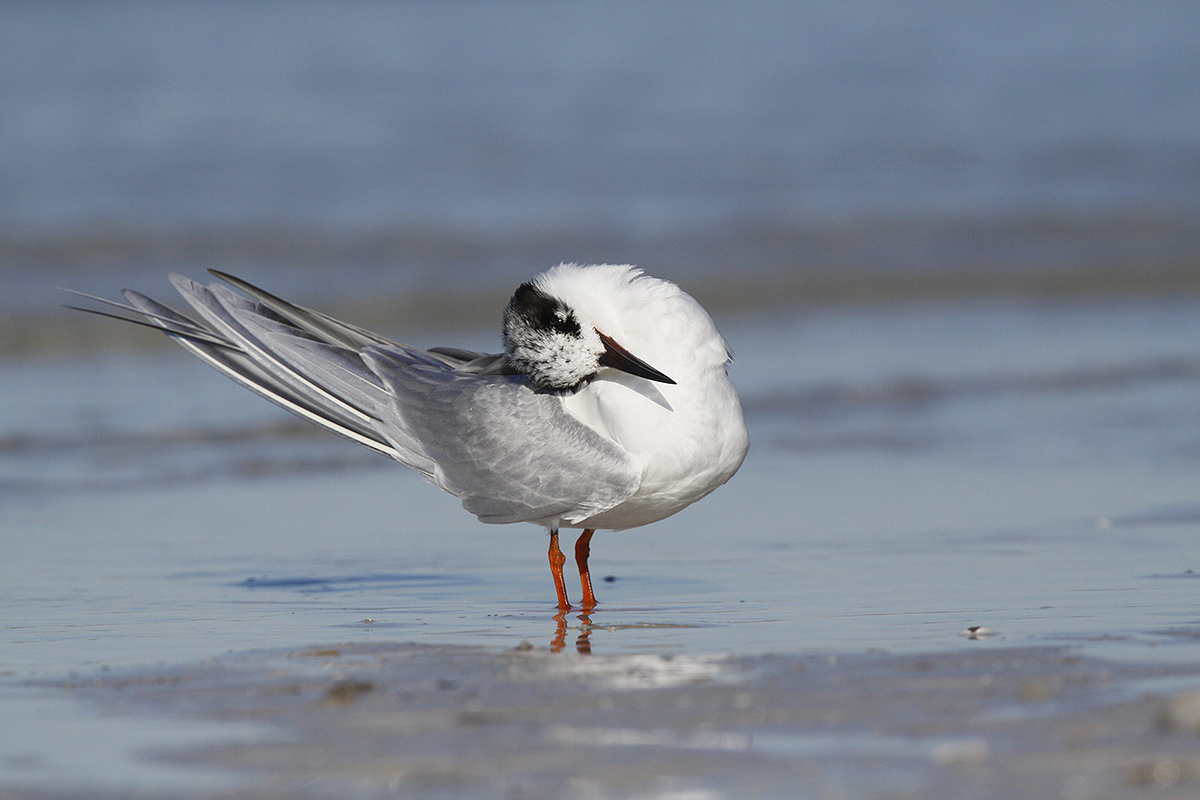
|
|
This image was created at Fort DeSoto Park in 2009 with the hand held Canon EF 400mm f/4 DO IS USM lens and the (long ago) EOS-50D soon to be replaced by the Canon EOS 7D Mark II. ISO 400. Evaluative metering -1/3 stop: 1/3200 sec. at f/8 in Av mode. (Note: this is the equivalent of 1/3 stop darker than my standard, oft-recommended sunny/ISO 400 exposure for SUPER bright WHITEs: 1/2500 sec. at f/8)
9-Point AI Servo shutter button AF. Talk about the old days!
Image #3: 9:14.20am
|
Photographing Preening Birds
When photographing preening birds it is almost always best to strive to press the shutter button when the eye is clearly visible and when the bird’s head is pretty much parallel to the imaging sensor, i.e., to the back of the camera.
|
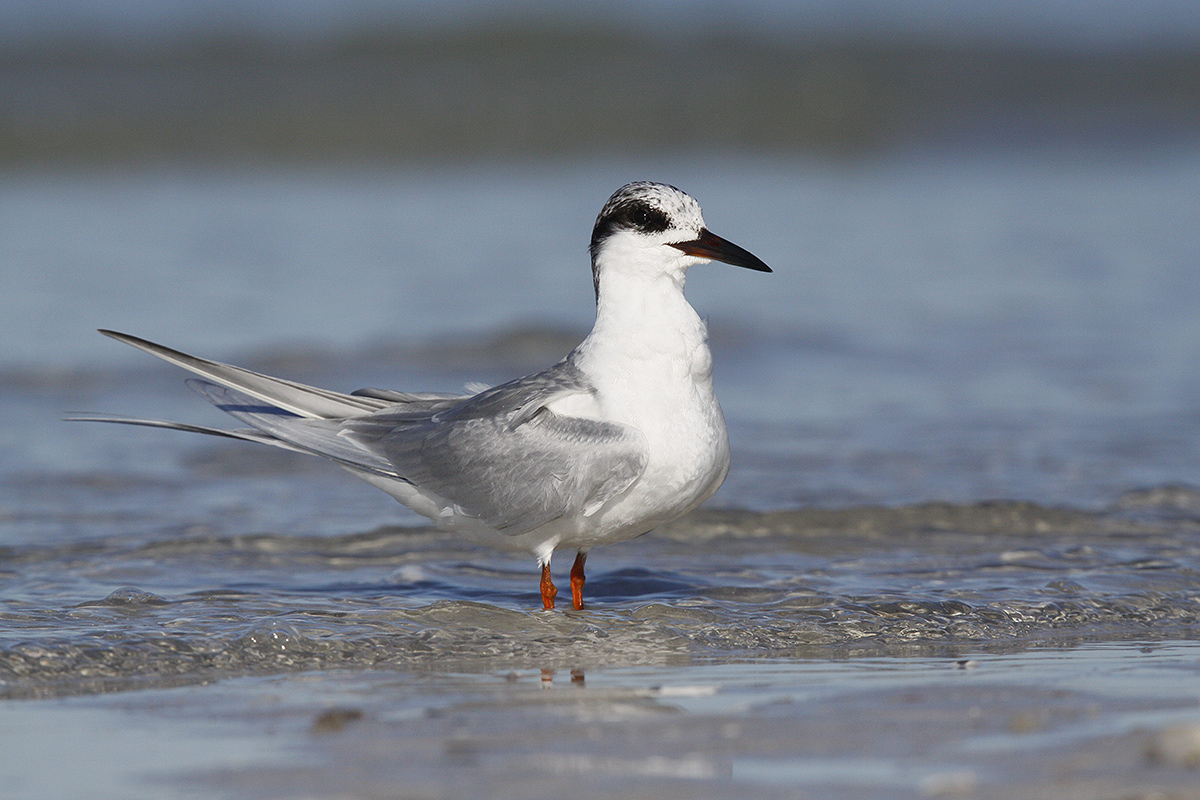
|
|
This image was created at Fort DeSoto Park in 2009 with the hand held Canon EF 400mm f/4 DO IS USM lens and the (long ago) EOS-50D soon to be replaced by the Canon EOS 7D Mark II. ISO 400. Evaluative metering -1/3 stop: 1/3200 sec. at f/8 in Av mode. (Note: this is the equivalent of 1/3 stop darker than my standard, oft-recommended sunny/ISO 400 exposure for SUPER bright WHITEs: 1/2500 sec. at f/8)
9-Point AI Servo shutter button AF. Talk about the old days!
Image #4: 9:14.33am
|
Coming Soon…
The thought of hand holding either a 400 f4 IS DO or a 300mm f/2.8L IS lens with the new 7D II and its 1.6 crop factor is intriguing. Some folks believe that the crop factor is an illusion, others like me believe that it is a plus for many folks. In that group you can include all the folks who have made good images with the EOS-40D, the EOS-50D, and more recently, the EOS-7D.
Here, unedited, is a comment left by Jim Magowan at one of the many 7D II-related blog posts here. Jim is obviously on the other side of the fence. My response, in green, is included.
Art,
You mention being able to use lighter lenses with the 7D II due to the crop factor. I have read much the same idea about the crop factor from other well known photographers. My first Canon (a 20D) had an 8 mp sensor. I believe the full frame model below the 1Ds was the 1D; whatever it was, when I calculated the pixel density (pixels per sq mm) for the two cameras it was identical. If images were shot with the same focal length lens from the same location (or distance) the 1D image, if cropped to show the same part of the image as the 20D image had the same number of pixels (resolution) as the 20D image. If all other things (pixel size or quality, etc.,) are equal this means that you could shoot the full frame image and if you want to get the 1.6 ‘magnification’ of the aps-c sensor just crop the image in Photoshop.
Of course, the sensors in the full frame cameras are supposed to be better so actually you got a better image using the full frame camera and cropping in PS. In short, if the pixels in the full frame camera are of equal or better quality to the aps-c pixels, image-wise, shooting full frame is like shooting with both cameras.
The ‘magnification’ of the aps-c sensor has nothing to do with the sensor, it is a function of the way the images are displayed and printed. The aps-c image is ‘blown up to fill the same area on the screen as the full frame image.
The advantages of the 1.6 crop factor do not include being able to work with shorter lenses unless you simply prefer to crop with the camera rather than PS. There is an advantage in being able to use lenses specifically designed for the 1.6 bodies in that they can be made smaller and lighter for the same focal length and speed because they do not have to project as large an image onto the sensor (not as much glass, etc.). When a full frame lens is used on a 1.6 body much of the image does not hit the sensor.
The question I would ask is how a 1.6 crop of an image from the 1Dx compares with the image from the 7D II? I would love to see the result if you were to shoot from the same location with the same lens on the 1Dx and the 7DII and print the 7DII image and the 1Dx crop at successively greater enlargements to compare image quality.
The advantages of the 1.6 bodies are:
1. They are (more) affordable for people like me than the full frame bodies.
2. You can leave the dual battery holder off to save weight and bulk, if desired.
3. 1.6 specific lenses can be lighter and cheaper than the equivalent full frame lenses.
4. The bodies can be more compact and lighter because components such as mirrors and sensors are smaller.
5. They usually have a built in flash which is often better than no flash.
6. On the 7D (and I assume the II)you can turn off the on camera flash, but still trigger off camera Speedlights with it.
The image magnification, however, is a myth. If I shoot a bird with my 7D (or maybe someday with a 7DII) from the same place as you shoot the same bird with your 1Dx, using the same lens (focal length) and you crop your image to match my 1.6 image your cropped image can be blown up far more than my 1.6 image because your 1Dx has ‘better’ pixels (or so they tell me).
Hi James, Thanks for sharing your thoughts and the info above. I have long tried to stay out of discussions on this topic as I really do not understand the concept very well, I am not very good at pixel math, and I feel that the arguments are in large part semantic in nature….
Lastly, seeing the image larger in the frame and larger on the LCD viewing screen gives many folks added confidence….
That said I will try to remember to shoot some side by side images with all three cameras when I get my hands on a 7D II. I will likely need a sleeping bird.
best and respectfully, artie
|
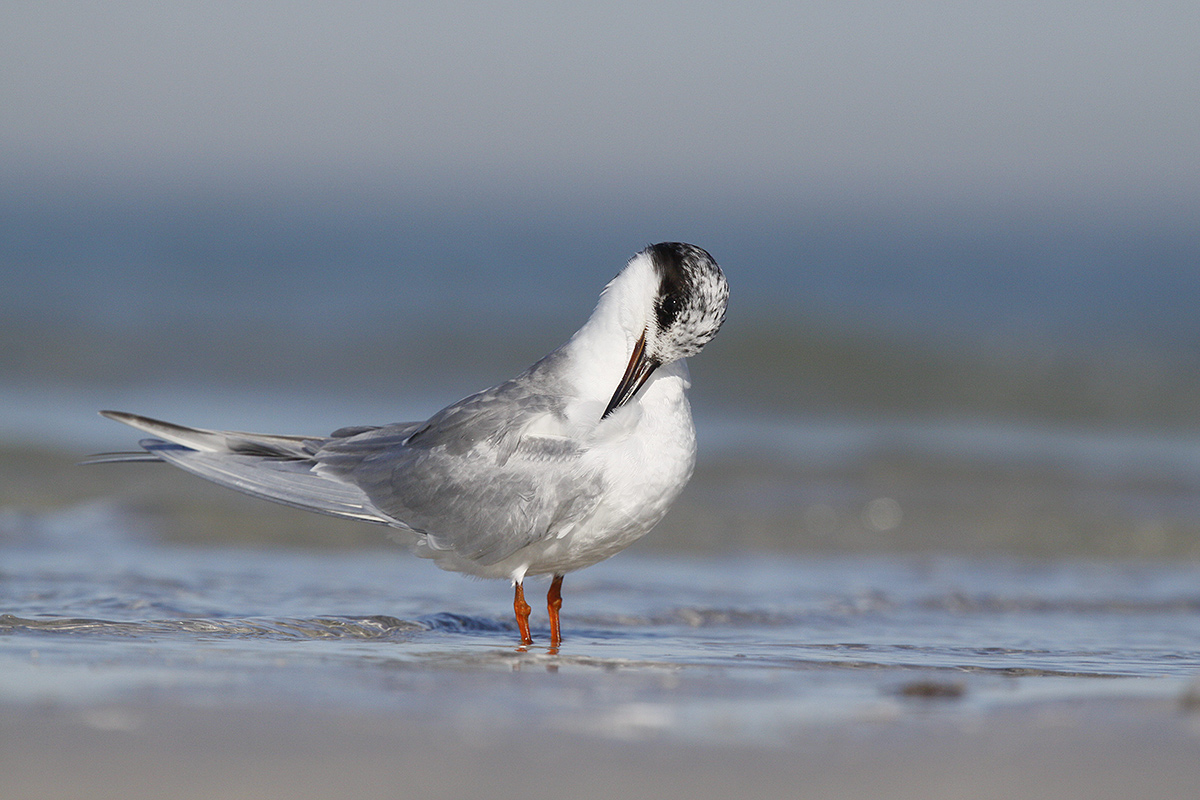
|
|
This image was created at Fort DeSoto Park in 2009 with the hand held Canon EF 400mm f/4 DO IS USM lens and the (long ago) EOS-50D soon to be replaced by the Canon EOS 7D Mark II. ISO 400. Evaluative metering -1/3 stop: 1/2500 sec. at f/8 in Av mode. (Note: this is the equivalent of my standard, oft-recommended sunny/ISO 400 exposure for SUPER bright WHITEs: 1/2500 sec. at f/8)
9-Point AI Servo shutter button AF. Talk about the old days!
Image #5: 9:14.52am
|
Today’s Featured Lens
Used Canon EF 400mm f/4 IS DO UMS Lens
Multiple IPT veteran Shelly Goldstein is giving away a Canon EF 400mm f/4 IS DO UMS lens in very good + condition for a ridiculously low $4100. The lens has been protected by a LensCoat since day one thus there are only a few small blemishes on the tripod collar. There are several extras. The sale includes a Really Right Stuff quick release lens plate (MAPR-1b), a LensCoat, the original lens trunk, the original leather front lens cover, the rear dust cap, and insured shipping via Fed Ex Ground to US addresses only. The lens was cleaned and checked by Canon in September 2014.
You can contact Shelly via e-mail or by phone at 646-423-0392 (EST). Your lens will be shipped only after your check clears.
I owned and used and loved my 400 DO for about five years. If you missed my comments on this lightweight–hand holdable for most–telephoto lens (and 14 great images) please see this blog post: The Canon 400mm f/4 IS DO Lens: Fourteen Images that Prove that the Internet Experts are (As Usual) Idiots.
|
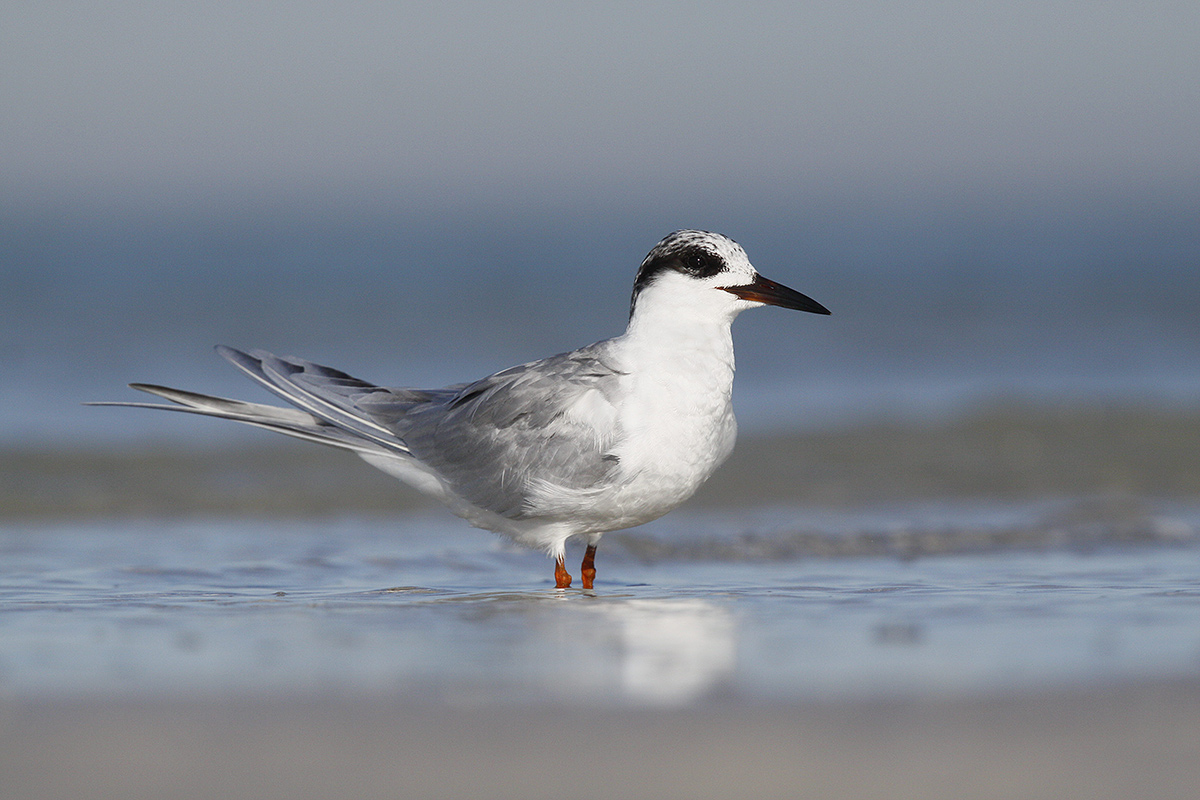
|
|
This image was created at Fort DeSoto Park in 2009 with the hand held Canon EF 400mm f/4 DO IS USM lens and the (long ago) EOS-50D soon to be replaced by the Canon EOS 7D Mark II. ISO 400. Evaluative metering -1/3 stop: 1/2500 sec. at f/8 in Av mode. (Note: this is the equivalent my standard, oft-recommended sunny/ISO 400 exposure for SUPER bright WHITEs: 1/2500 sec. at f/8)
9-Point AI Servo shutter button AF. Talk about the old days!
Image #6: 9:16:23am
|
Lying Down on the Job
For images #5 & 6, I was lying down on the wet sand. Note the lower perspective in both images. And note the tilted horizon in Image #5; it is harder to create level images when hand holding and lying down than when hand holding and sitting down or standing. When on a tripod it only takes a second to check the electronic level on the rear LCD.
The new 7D II will be the first Canon dSLR to offer an optional electronic level in the viewfinder. This will be a boon to hand holders.
Most interesting is to compare the two portraits, image #4 and image #6. Feel free to comment if you wish….
ID Quiz
What species? If you own a field guide, take a peek. It does not get any easier than this.

 Use the BAA Affiliate logo link above to pre-order your 7D II, shoot me your receipt via e-mail, and I will do my very best to have your order expedited once the camera begins shipping.
|

|
|
Fort DeSoto in fall is rich with tame birds. All of the images in this card were created at Fort DeSoto in either late September or early October. I hope that you can join me there this October. Click on the composite to enjoy a larger version.
|
First-ever BIRDS AS ART In-the-Field/Meetup Workshop Session (ITF/MWS): $50
Join me on the afternoon of October 10, 2014 for 3-hours of photographic instruction at Fort DeSoto Park. Beginners are welcome. Lenses of 300mm or longer are recommended but even those with 70-200s should get to make some nice images. Teleconverters are always a plus.
You will learn the basics of digital exposure and image design, autofocus basics, and how to get close to free and wild birds. We should get to photograph a variety of wading birds, shorebirds, terns, and gulls. This inexpensive afternoon workshop is designed to give folks a taste of the level and the quality of instruction that is provided on BIRDS AS ART Instructional Photo-tours. I hope to meet you there.
To register please call Jim or Jennifer during weekday business hours with a credit card in hand to pay the nominal registration fee. Your registration fee is non-refundable. You will receive a short e-mail with instructions, gear advice, and meeting place at least two weeks before the event.
|

|
|
Obviously folks attending the IPT will be out in the field early and stay late to take advantage of sunrise and sunset colors. The good news is that the days are relatively short in October. Click on the composite to enjoy a larger version.
|
Fort DeSoto Fall IPT/October 11-13, 2014. 3 FULL DAYs: $1099. Limit 8/Openings: 5.
$200 Last Minute Registration Discount!
Fort DeSoto, located just south of St. Petersburg, FL, is a mecca for migrant shorebirds in fall. There they join hundreds of egrets, herons, night-herons, gulls, and terns who winter on the T-shaped peninsula that serves as their wintering grounds. With any luck, we should get to photograph two of Florida’s most desirable shorebird species: Marbled Godwit and the spectacular Long-billed Curlew. Black-bellied Plover and Willet are easy, American Oystercatcher likely. Great Egret, Snowy Egret, Great Blue Heron, and Tricolored Heron are easy as well and we will almost surely come up with a tame Yellow-crowned Night-Heron or two. We should get to do some Brown Pelican flight photography. And Royal, Sandwich, Forster’s, and Caspian Terns will likely provide us with some good flight opportunities as well. Though not guaranteed Roseate Spoonbill and Wood Stork would not be unexpected.
Folks who sign up for the IPT are welcome to join us on the ITF/MWS on Friday afternoon as my guest. See above for details on that.
On the IPT you will learn basics and fine points of digital exposure and to get the right exposure every time after making a single test exposure, how to approach free and wild birds without disturbing them, to understand and predict bird behavior, to identify many species of shorebirds, to spot the good situations, to choose the best perspective, to see and understand the light, to, and to design pleasing images by mastering your camera’s AF system. And you will learn learn how and why to work in Manual mode (even if you’re scared of it).
At lunch (included) we will review my images–folks learn a ton watching me edit–why keep this one and delete that one. If you opt to bring your laptop, we will take a look at five of your best images from the morning session. We will process a few of my images in Photoshop after converting them in DPP. That followed by Instructor Nap Time.
If you decide to register and are traveling to attend this IPT, please make your reservations at the Beachcomber Beach Resort, 6200 Gulf Blvd, St. Petersburg (St. Pete Beach), FL 33706 (727-367-1902) as soon as possible as rooms for the weekend days are scarce: ARR: 10 OCT/DEP 14 OCT. I stayed there on my last DeSoto visit and was quite happy with it. Lodging is tough in Florida at this season…. The best airport is Tampa (TPA). It is always best if IPT folks stay in the same hotel so if you are interested it would be a good idea to register now and make your hotel reservations as well. We can, however, coordinate easily with local folks who opt to stay at home either by cell phone or e-mail.
Because of the relatively late date, payment is full is due upon registration either by check or credit card. If the former, please e-mail us immediately so that we can save you a spot. If the latter, please call Jim or Jennifer during weekday business hours at 863-692-0906 with a credit card in hand to register . Your registration fee is non-refundable unless the IPT sells out with eight so please check your plans carefully before committing. You will receive a confirmation e-mail with detailed instructions, gear advice, and first morning meeting place about one month before this IPT.
|

|
|
BAA Site Guides are the next best thing to being on an IPT.
|
Fort DeSoto Site Guide
Can’t make the IPT? Get yourself a copy of the Fort DeSoto Site Guide. Learn the best spots, where to be when in what season in what weather. Learn the best wind directions for the various locations. BAA Site Guides are the next best thing to being on an IPT. You can see all of them here.
Facebook
Be sure to like and follow BAA on Facebook by clicking on the logo link upper right. Tanks a stack!
Support the BAA Blog. Support the BAA Bulletins: Shop B&H here!
We want and need to keep providing you with the latest free information, photography and Photoshop lessons, and all manner of related information. Show your appreciation by making your purchases immediately after clicking on any of our B&H or Amazon Affiliate links in this blog post. Remember, B&H ain’t just photography!
…..
Amazon.com
Those who prefer to support BAA by shopping with Amazon may use this link:
Amazon Canada
Many kind folks from north of the border, ay, have e-mailed stating that they would love to help us out by using one of our affiliate links but that living in Canada and doing so presents numerous problems. Now, they can help us out by using our Amazon Canada affiliate link by starting their searches by clicking here. Many thanks to those who have written.
Typos
In all blog posts and Bulletins, feel free to e-mail or to leave a comment regarding any typos, wrong words, misspellings, omissions, or grammatical errors. Just be right. 🙂
|
|


