April 16th, 2014 The Streak Continues: 138
I am publishing this blog post at 7:56am in Amsterdam, 1:56am in Florida. I am waiting for my bags. With severe thunderstorms in Orlando I just made my connection in Detroit. The flight was an easy one and I got a few hours of sleep towards the end. It feels like morning here 🙂
This post marks 138 straight days with a new educational blog post. With so many folks getting in the habit of using our B&H links and our Amazon logo-links why quit now? To show your appreciation for my efforts here, we do ask that you use our the B&H and Amazon affiliate links on the right side of the blog for all of your purchases. Please check the availability of all photographic accessories in the BIRDS AS ART Online Store, especially Gitzo tripods, Wimberley tripod heads, and the like. We sell only what I used, tested, and can depend on. We will not sell you junk. We know what you need to make creating great images easy and fun. And we are always glad to answer your gear questions via e-mail.
You can find the following items in the store: Gitzo tripods, Mongoose M3.6 and Wimberley heads, plates, low feet, and accessories, flash brackets, , Delkin e-film Pro Compact Flash Cards, LensCoat products, and our unique line-up of educational materials including ABP I & II, Digital Basics, Site and Set-up e-Guides, Canon and Nikon Camera Users and AF e-Guides, and MP-4 Photoshop video tutorials among others.
I would of course appreciate your using our B&H affiliate links for all of your major gear, video, and electronic purchases. For the photographic stuff mentioned in the paragraph above we, meaning BAA, would of course greatly appreciate your business. Here is a huge thank you to the many who have been using our links on a regular basis and visiting the BAA Online store as well.
This blog post took 3 hours to put together. Enjoy!
|

|
|
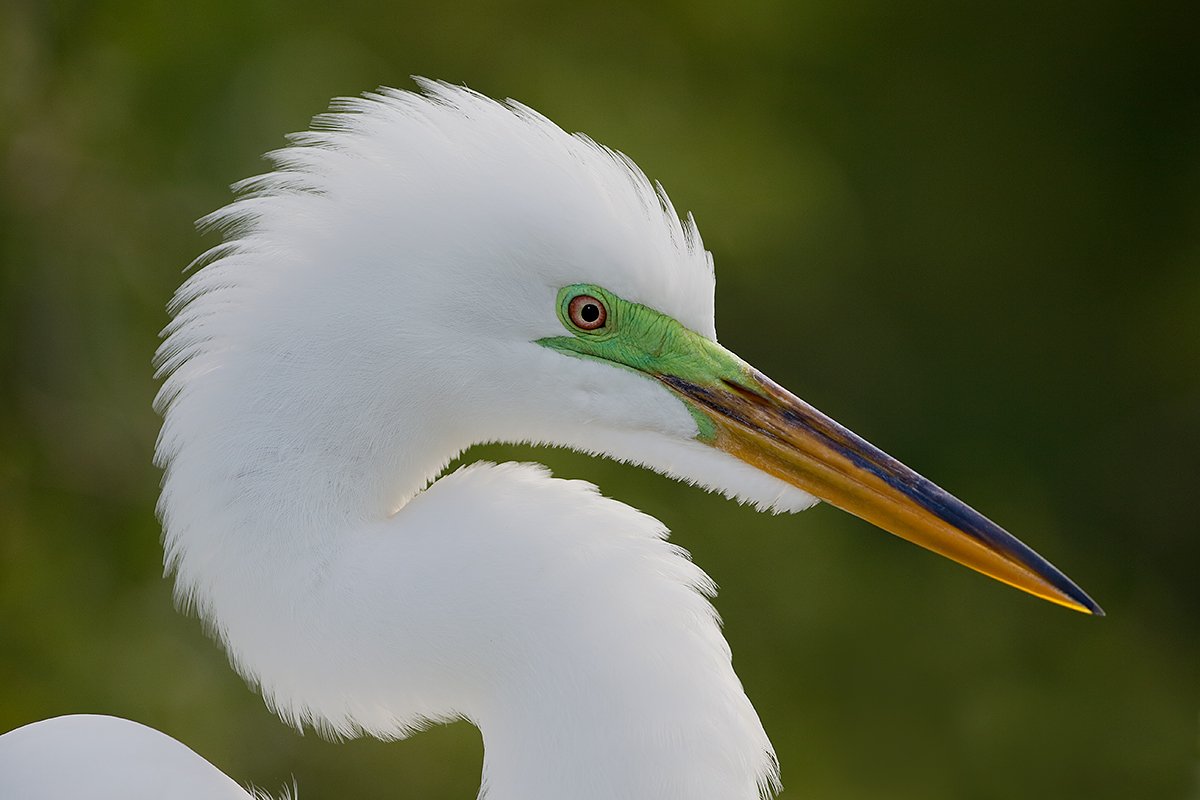
Fort DeSoto in spring is rich with tame birds. With many in breeding plumage it is a photographer’s paradise. I hope that you can join me there in mid-May.
|
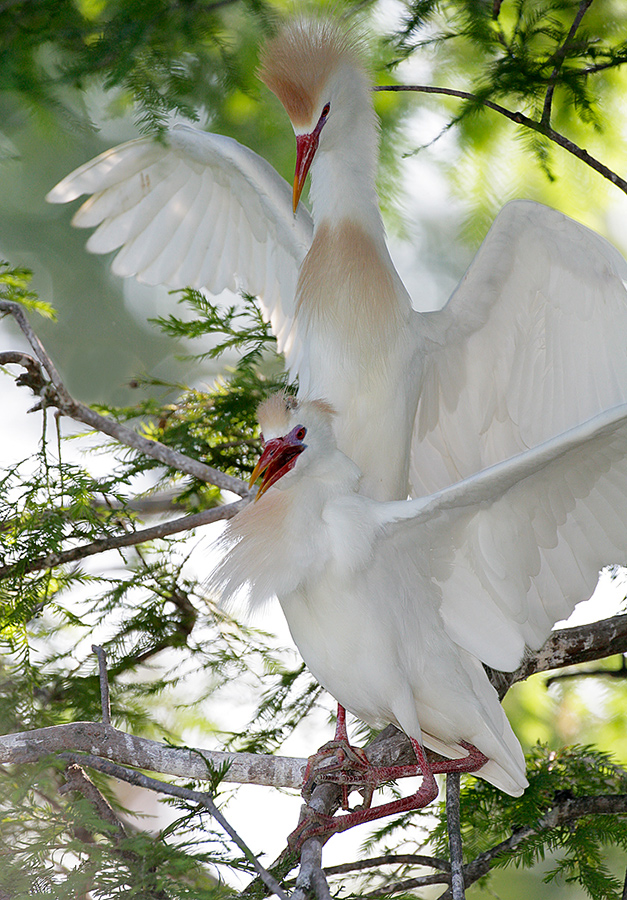
Image Quiz #1
Can you identify the birds here:
Left column top?
Left column middle?
Top row/first vertical?
Middle column, middle row?
Be sure to click on the composite to see the larger version. You can cut and paste the text above into your comment and then type your answers. Be sure to indicate Quiz #1.
Short Notice Fort DeSoto IPT/In-the-Field Workshops: May 9, 10, & 11, 2014
IPT–3 FULL DAYs: $1099
In-the-Field Workshops: $399/day
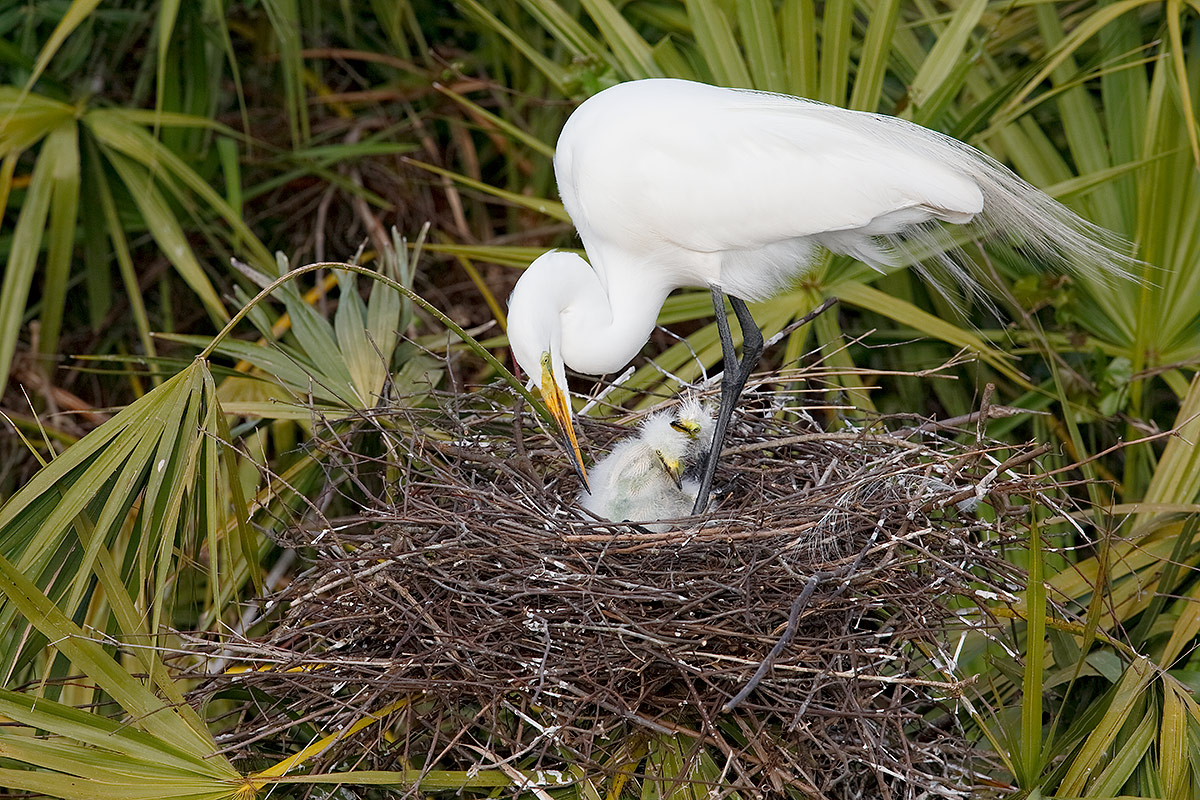
Fort DeSoto in spring is so good that I needed to create two cards in order to give folks an idea of what is possible. Even then I have barely scratched the surface. If you are coming from out of town you will surely want to do all 3 days, the entire IPT. Local folks may wish to join me for one or more full days.
There will Lots of tame birds including breeding plumage Laughing Gull and Royal and Sandwich Terns courting and copulating. American Oystercatcher plus lots of sandpipers and plovers, some in breeding plumage. Red Knot in breeding plumage likely. Lots of wading birds including Great and Snowy Egrets, both color morphs of Reddish Egret, Great Blue, Tricolored and Little Blue Heron, and Yellow-crowned Night-Heron. Roseate Spoonbill and WOod Stork between possible and likely…. Lots of flight photography with the gulls and terns and with Brown Pelican.
You will learn how to approach free and wild birds without disturbing them, to understand and predict bird behavior, to identify many species of shorebirds, to spot the good situations, to choose the best perspective, to see and understand the light, to get the right exposure every time after making a single test exposure, and to design pleasing images by mastering your camera’s AF system. And you will learn learn how and why to work in Manual mode (even if you are scared of it).
At lunch we will review my images–folks learn a ton watching me edit–why keep this one and delete that one. If you opt to bring your laptop, we will take a look at five of your best images from the morning session. We will process a few of my images in Photoshop after converting them in DPP. That followed by Instructor Nap Time.
This is the IPT hotel: Comfort Inn St. Petersburg, FL. 2260 54th Ave N., St. Petersburg, FL 33714. tel: 1-727-362-0075. The best airport is Tampa (TPA).
Payment in full via credit card is due upon registering. Please call Jim or Jennifer at 863-692-0906 to register.
|
|
|
Fort DeSoto in spring is rich with tame birds. With many in breeding plumage it is a photographer’s paradise. I hope that you can join me there in mid-May.
|
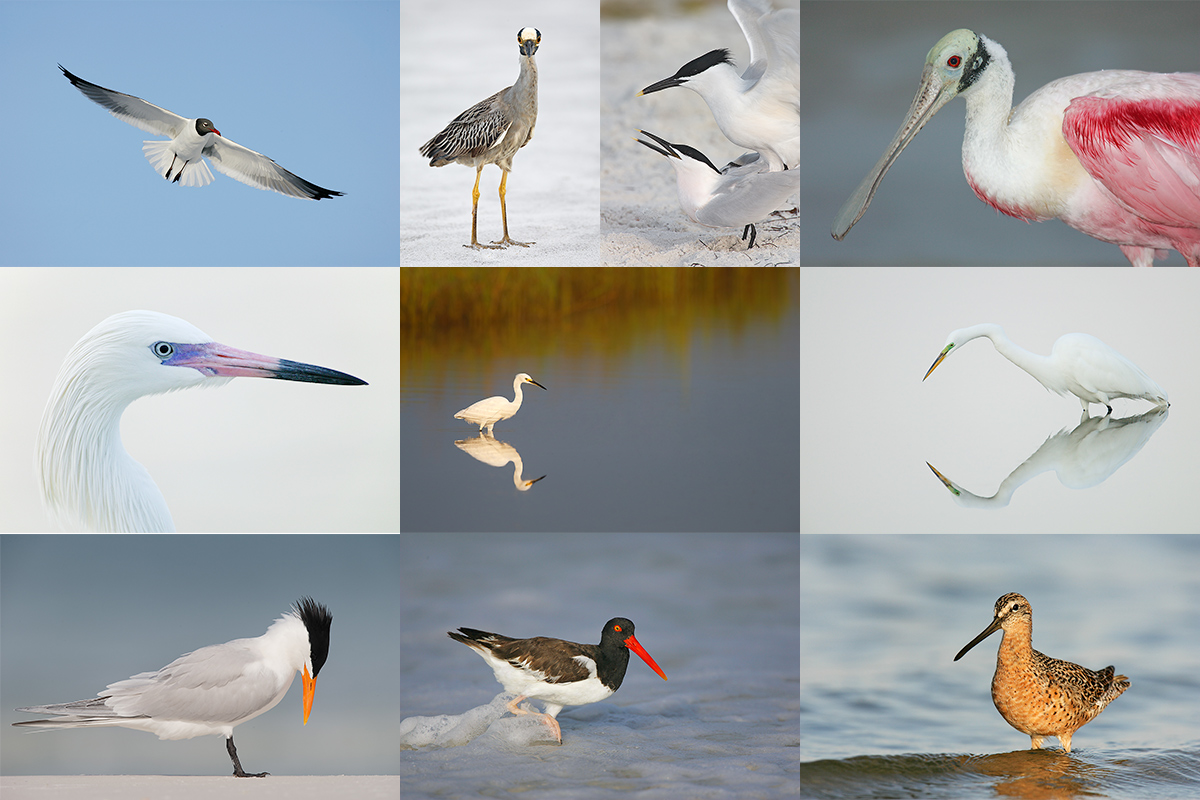
Image Quiz #2
Can you identify the birds here:
Top row/first vertical?
First column middle?
First column bottom?
Last column, last row?
Be sure to click on the composite to see the larger version. You can cut and paste the text above into your comment and then type your answers. Be sure to indicate Quiz #2.
Fort DeSoto Site Guide
Can’t make it in mid-May? Get yourself a copy of the Fort DeSoto Site Guide. Learn the best spots, where to be when in what season in what weather. Learn the best wind directions for the various locations. BAA Site Guides are the next best thing to being on an IPT. You can see all of them here.
Shorebirds/Beautiful Beachcombers
If the shorebirds in the ID quiz gave you pause, get yourself a copy of my Shorebirds/Beautiful Beachcombers. Includes ID tips, shorebird biology, migration, and tons more. All in my simple-to-read easy-to-read style.
Canon Gear for Sale
Doug Bolt is offering a used Canon 400mm f/4L IS DO lens in very good to excellent condition for $4599. The sale includes the lens trunk and lens cover; the seller will pay shipping to US addresses only. This one should sell in minutes to someone looking for a lightweight super-telephoto. The item will ship only when the check clears.
Please contact Doug for additional info and/or a link to photos via e-mail or try him by phone at home: at 301-937-3112 or on his cell at 301-537-8073.
Doug is also offering a used EOS-5D Mark II in very good to excellent condition for $1199. There is a shallow scratch on the body and a faint smudge on the top LCD. The sale includes a RRS L-plate, a vertical grip, and the original box and all the stuff that came in it. The seller will pay shipping to US addresses only. This one is a great body for flowers and landscapes. Mine saved me on a Southern Oceans cruise when I trashed two EOS-1D Mark IV bodies in a rainstorm; it was a great back-up camera body. The item will ship only when the check clears.
Again, please contact Doug for additional info and/or a link to photos via e-mail or try him by phone at home: at 301-937-3112 or on his cell at 301-537-8073.
|
|
|
Join me at Gatorland for a ton of learning. If you want to learn to use your flash, you will not want to miss this one. Click on the composite image to enjoy a larger version. Click on the composite to enjoy the larger size.
|
Another Gatorland Short Notice Saturday Full-Day In-the-Field Workshop
Saturday May 3, 2014. 7:15am till 10:15am & 4:00pm till dusk. Lunch, image review, and Photoshop session included. Limit 6. A very small group is again likely: $399.
The cost of your Gatorland Photographer’s Pass is not included.
Chicks in nests likely. Breeding plumage Cattle and Snowy Egrets. And tons more. You will learn to spot the good situations, to choose the best perspective, to see and understand the light, to get the right exposure every time after making a single test exposure, and to design pleasing images by mastering your camera’s AF system. A big part of the above is that you will learn how and why you must work in Manual mode 90% of the time at Gatorland.
At lunch we will review my images, take a look at five of your best images from the morning session (for those who opt to bring their laptops), and process a few of my images in Photoshop after converting them in DPP. That followed by Instructor Nap Time. Last Saturday all 3 folks had a great time and learned a ton. And the weather for this coming Saturday is looking good.
Payment in full via credit card is due upon registering. Please call Jim or Jennifer at 863-692-0906 to register.
Support the BAA Blog. Support the BAA Bulletins: Shop B&H here!
We want and need to keep providing you with the latest free information, photography and Photoshop lessons, and all manner of related information. Show your appreciation by making your purchases immediately after clicking on any of our B&H or Amazon Affiliate links in this blog post. Remember, B&H ain’t just photography!
….. …..
Typos
In all blog posts and Bulletins, feel free to e-mail or to leave a comment regarding any typos, wrong words, misspellings, omissions, or grammatical errors. Just be right. 🙂
April 15th, 2014 Another Gatorland Short Notice Saturday Full-Day In-the-Field Workshop: Saturday May 3, 2014
Announced Here for the First Time
Please scroll down for details.
The Streak Continues: 137
It is 5:42 am. Though I leave for the airport at 10:30am for my flights to Amsterdam for the Holland Tulip IPT, I still have not begun packing my two checked bags…. My Think Tank rolling bag is packed. I decided to take the 300 II and leave the 200-400 at home and to leave one of my two 1D X bodies at home since we will be doing only a few birds at most and I will be depending on my 5D Mark III for the tulips and the flower fields.
This post marks 137 straight days with a new educational blog post. With so many folks getting in the habit of using our B&H links and our Amazon logo-links why quit now? To show your appreciation for my efforts here, we do ask that you use our the B&H and Amazon affiliate links on the right side of the blog for all of your purchases. Please check the availability of all photographic accessories in the BIRDS AS ART Online Store, especially Gitzo tripods, Wimberley tripod heads, and the like. We sell only what I used, tested, and can depend on. We will not sell you junk. We know what you need to make creating great images easy and fun. And we are always glad to answer your gear questions via e-mail.
You can find the following items in the store: Gitzo tripods, Mongoose M3.6 and Wimberley heads, plates, low feet, and accessories, flash brackets, , Delkin e-film Pro Compact Flash Cards, LensCoat products, and our unique line-up of educational materials including ABP I & II, Digital Basics, Site and Set-up e-Guides, Canon and Nikon Camera Users and AF e-Guides, and MP-4 Photoshop video tutorials among others.
I would of course appreciate your using our B&H affiliate links for all of your major gear, video, and electronic purchases. For the photographic stuff mentioned in the paragraph above we, meaning BAA, would of course greatly appreciate your business. Here is a huge thank you to the many who have been using our links on a regular basis and visiting the BAA Online store as well.
This blog post took 3 hours to put together. Enjoy!
|
|
|
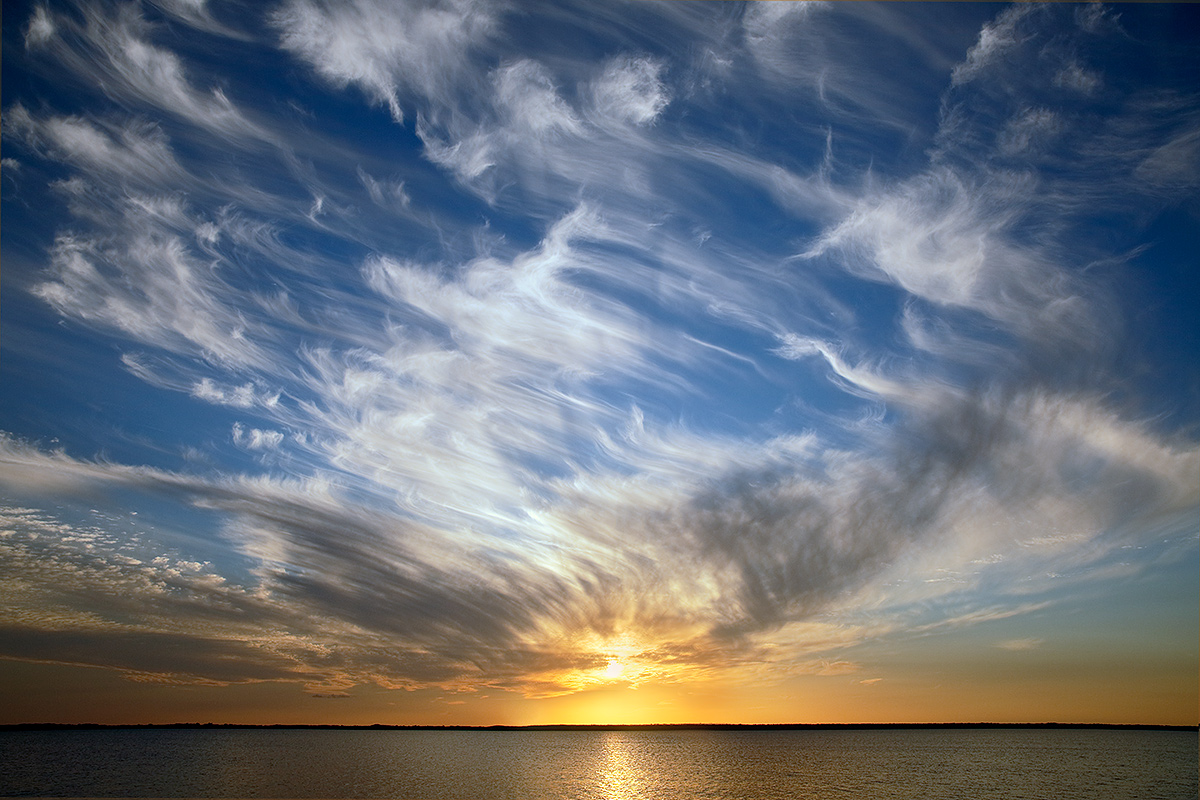
This image was created at 7:23pm on Saturday April 12, 2014 aboard Jim Neiger’s customized pontoon boat with the Canon EF 24-70mm f/2.8L II USM lens (hand held at 24mm) and the Canon EOS 5D Mark III. ISO 800. Evaluative metering +2/3 stop as framed: 1/2500 sec. at f/5.6 in Av mode. Color temperature: 10,000K.
Central sensor/AI Servo/Surround Rear Focus AF on the horizon line and re-compose. Click here to see the latest version of the Rear Focus Tutorial. Click on the image to see a larger version.
Image #1:It’s All About the Clouds
|
One Business You Do Not Want to Get Into
We first noticed the swirly clouds at about 5pm. By 7:30, most were–going by the gorgeous patterns of the light clouds on the eastern horizon, predicting a killer colorful sunset. Though I agreed, I did caution: “One business that you do not want to get into is predicting sunset color….”
Within 20 minutes, my caution rang true.
Image Optimization Note
I wanted to try adding a reduced opacity later of Auto Contrast (ALT-SHIFT-CNTRL L) as taught to me by Denise Ippolito) but I accidentally hit SHIFT-CNTRL L. Wow, that really popped the BLUEs, similar to what White Neutralizer does in NIK but a lot faster. A bit of searching showed that I had hit the default keyboard shortcut for Auto Tone. I reduced the opacity to 80% and was thrilled with my new discovery. I shall not forget it.
|
|
|
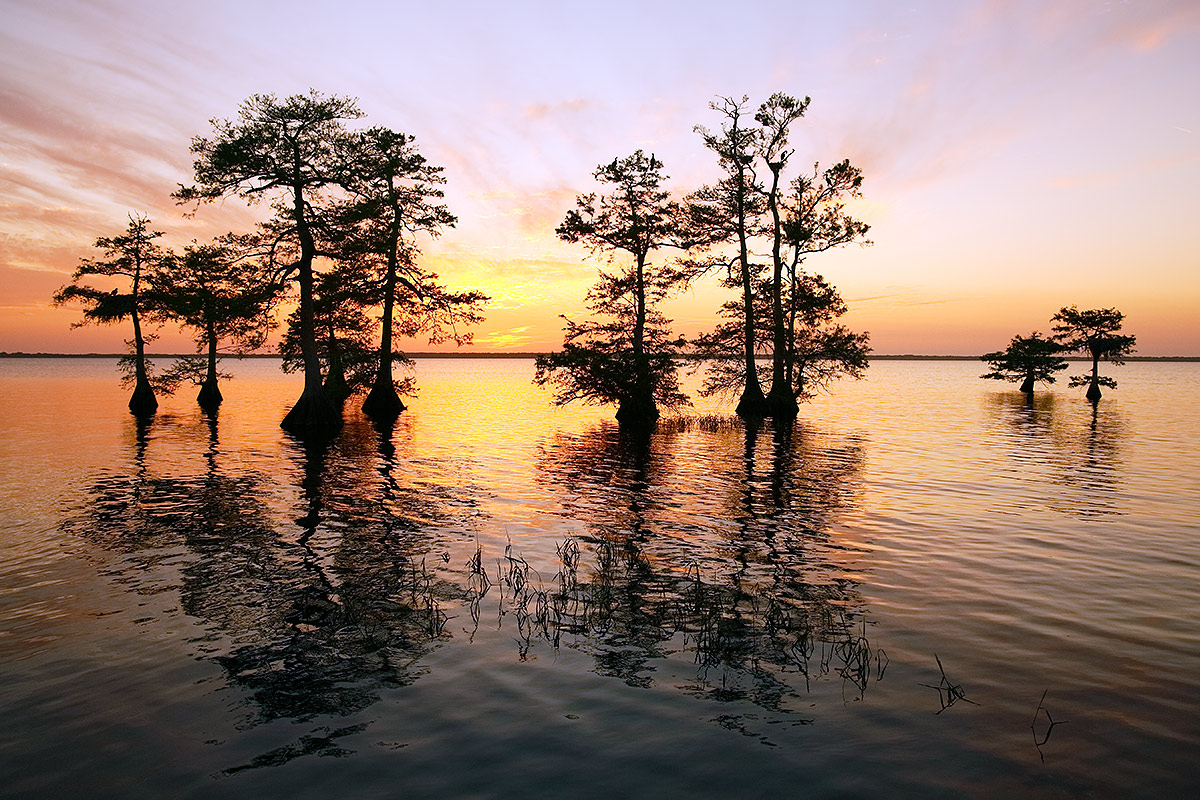
This image was created at 7:45pm on Saturday April 12, 2014 aboard Jim Neiger’s customized pontoon boat with the Canon EF 24-70mm f/2.8L II USM lens (hand held at 26mm) and the Canon EOS 5D Mark III. ISO 800. Evaluative metering +1 1/3 stops: 1/640 sec. at f/4 in Av mode. Color temperature: 10,000K.
Three sensors to the left of the central sensor/AI Servo/Surround Rear Focus AF as framed active at the moment of exposure. Click here to see the latest version of the Rear Focus Tutorial. Click on the image to see a larger version.
Image #2: Cypress Trees Straight Up
|
Straight Up
Once Jim positioned the boat grabbing the 24-70 and going wide with it was the obvious choice. With a bit of color above the horizon I went with the traditional approach by creating a sharp image.
Image Question
What 2 species of birds can be identified in this photo? Note: clicking on the image to enlarge it will help.
|
|
|
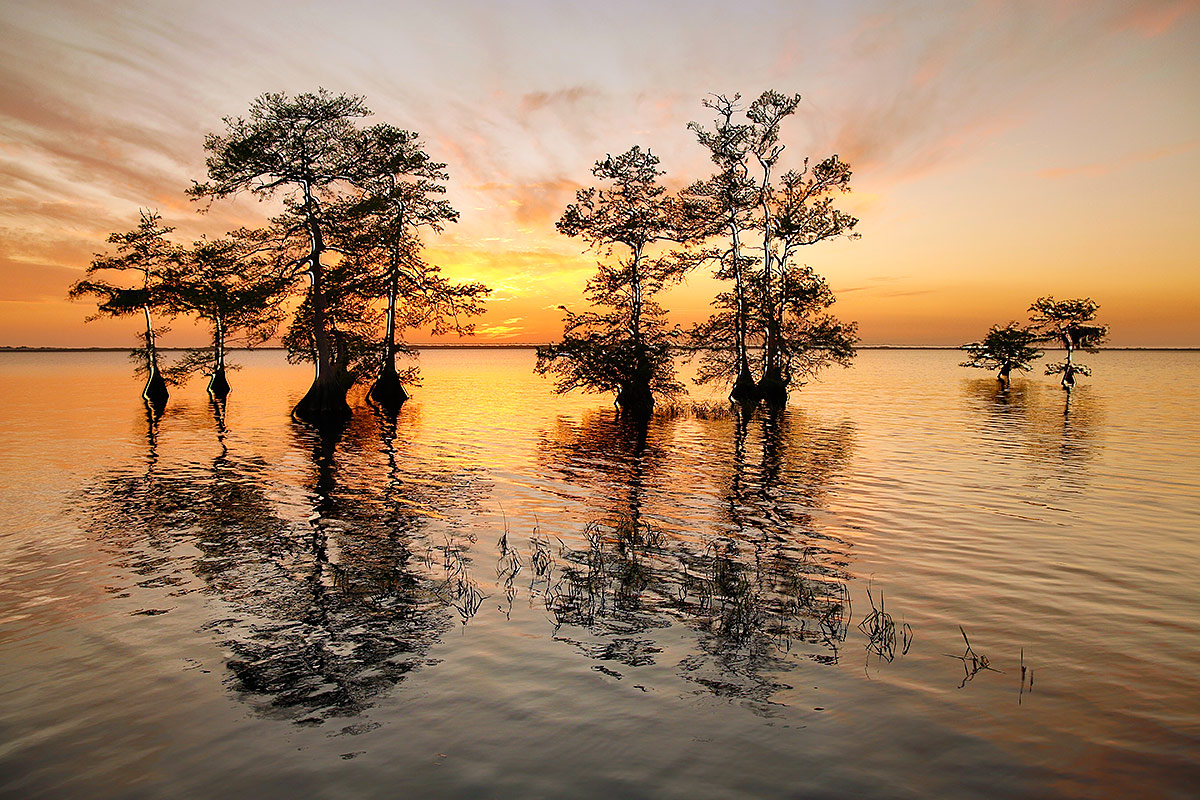
This 3-frame in-camera HDR Art Vivid image was created at 7:46pm on Saturday April 12, 2014 aboard Jim Neiger’s customized pontoon boat with the Canon EF 24-70mm f/2.8L II USM lens (hand held at 24mm) and the Canon EOS 5D Mark III. ISO 800. Evaluative metering +1 2/3 stops: 1/125 sec. at f/4 in Av mode. Color temperature: 10,000K.
Three sensors to the left of the central sensor/AI Servo/Surround Rear Focus AF as framed were active at the moment of each exposure. Click here to see the latest version of the Rear Focus Tutorial. Click on the image to see a larger version.
Image #3: Cypress Trees HDR Art Vivid Funky Outlines
|
What to Do With a Fizzle?
In-camera Art Vivid HDR
My first thought was to boost the color by going in-camera HDR Art Vivid, offered only in the Canon EOS-D Mark III. I know that with the boat rocking that both the horizon line and the trees would feature funky black outlining. I was right.
|
|
|
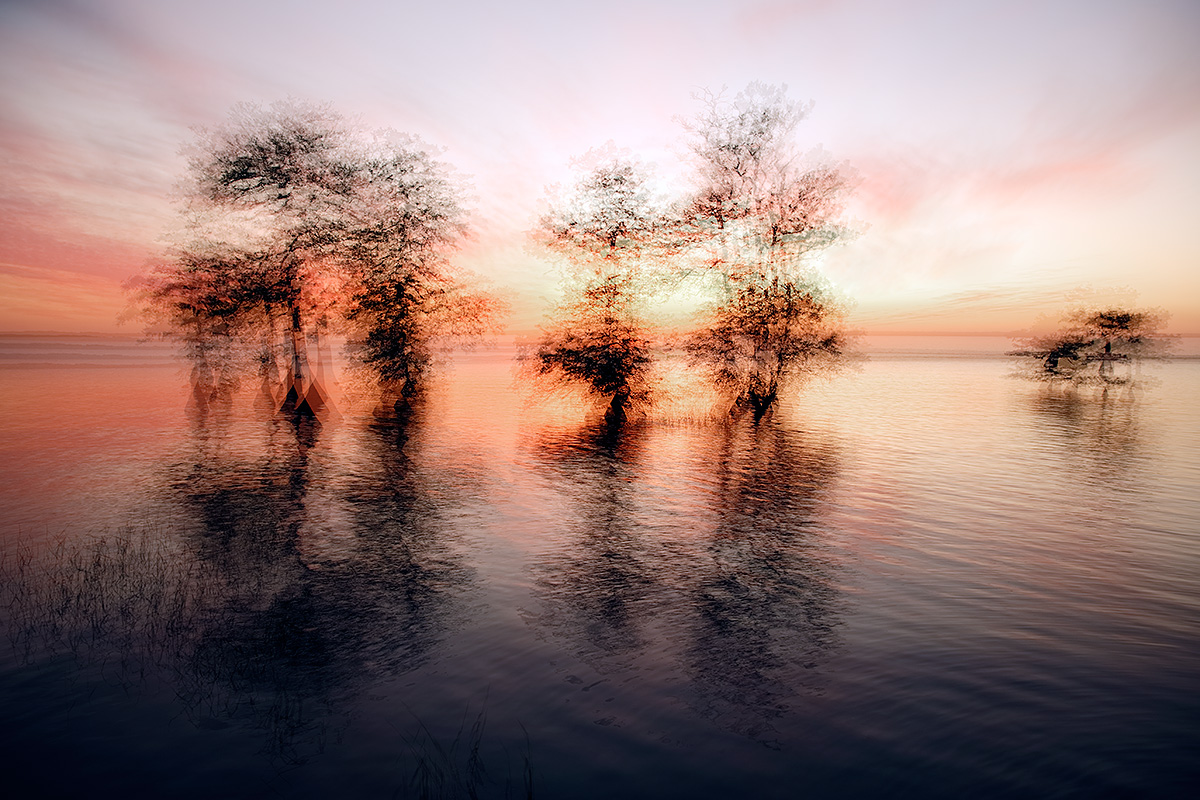
This 5-frame in-camera multiple exposure was created at 7:53pm on Saturday April 12, 2014 aboard Jim Neiger’s customized pontoon boat with the Canon EF 24-70mm f/2.8L II USM lens (hand held at 26mm) and the Canon EOS 5D Mark III. ISO 800. Evaluative metering +1 2/3 stops: 1/125 sec. at f/4 in Av mode. Color temperature: 10,000K.
Three sensors to the left of the central sensor/AI Servo/Surround Rear Focus AF as framed active at the moment of exposure. Click here to see the latest version of the Rear Focus Tutorial. Click on the image to see a larger version.
Image #4: Ghost Cypress Trees
|
What to Do With a Fizzle?
In-camera Multiple Exposure
Just for the heck of it I decided to try an in-camera Multiple Exposure. The first one looked quite ghostly so I created 5 more. This one is my favorite.
Your Favorite
After enlarging each image, please take a moment to let us know which one you like best and why.
The Feather Button
I access both the in-camera HDR feature and the in-camera Multiple Exposure feature via the Artist’s Brush button on the back of the 5D Mark III. Learn everything that there is to know about these 2 great features, everything that there is to know about the 5D III’s great new AF system, and pretty much everything that there is to know about this great camera in our 5D MK III User’s Guide.
Get a Free Copy of Our 5D Mark III User’s Guide
Purchase a Canon EOS-5D Mark III using one of our product-specific B&H affiliate links above or by clicking on the logo link below and shoot me your B&H receipt via e-mail. Once and if the purchase appears in my account–it should unless you screwed up somehow and did not use the link :), I will be glad to have Jim send you a free copy of our 5D Mark III User’s Guide.
|

|
|
Join me at Gatorland for a ton of learning. If you want to learn to use your flash, you will not want to miss this one. Click on the composite image to enjoy a larger version. Click on the composite to enjoy the larger size.
|
Another Gatorland Short Notice Saturday Full-Day In-the-Field Workshop
Saturday May 3, 2014. 7:15am till 10:15am & 4:00pm till dusk. Lunch, image review, and Photoshop session included. Limit 6. A very small group is again likely: $399.
The cost of your Gatorland Photographer’s Pass is not included.
Chicks in nests likely. Breeding plumage Cattle and Snowy Egrets. And tons more. You will learn to spot the good situations, to choose the best perspective, to see and understand the light, to get the right exposure every time after making a single test exposure, and to design pleasing images by mastering your camera’s AF system. A big part of the above is that you will learn how and why you must work in Manual mode 90% of the time at Gatorland.
At lunch we will review my images, take a look at five of your best images from the morning session (for those who opt to bring their laptops), and process a few of my images in Photoshop after converting them in DPP. That followed by Instructor Nap Time. Last Saturday all 3 folks had a great time and learned a ton. And the weather for this coming Saturday is looking good.
Payment in full via credit card is due upon registering. Please call Jim or Jennifer at 863-692-0906 to register.
Support the BAA Blog. Support the BAA Bulletins: Shop B&H here!
We want and need to keep providing you with the latest free information, photography and Photoshop lessons, and all manner of related information. Show your appreciation by making your purchases immediately after clicking on any of our B&H or Amazon Affiliate links in this blog post. Remember, B&H ain’t just photography!
….. …..
Typos
In all blog posts and Bulletins, feel free to e-mail or to leave a comment regarding any typos, wrong words, misspellings, omissions, or grammatical errors. Just be right. 🙂
April 14th, 2014 The Streak Continues
Well. I am starting to think about packing for my flights to Holland leaving Orlando on Tuesday afternoon and getting into Amsterdam on Wednesday morning. The Holland Tulip IPT begins on Thursday afternoon.
This post marks 136 straight days with a new educational blog post. With so many folks getting in the habit of using our B&H links and our Amazon logo-links why quit now? To show your appreciation for my efforts here, we do ask that you use our the B&H and Amazon affiliate links on the right side of the blog for all of your purchases. Please check the availability of all photographic accessories in the BIRDS AS ART Online Store, especially Gitzo tripods, Wimberley tripod heads, and the like. We sell only what I used, tested, and can depend on. We will not sell you junk. We know what you need to make creating great images easy and fun. And we are always glad to answer your gear questions via e-mail.
You can find the following items in the store: Gitzo tripods, Mongoose M3.6 and Wimberley heads, plates, low feet, and accessories, flash brackets, , Delkin e-film Pro Compact Flash Cards, LensCoat products, and our unique line-up of educational materials including ABP I & II, Digital Basics, Site and Set-up e-Guides, Canon and Nikon Camera Users and AF e-Guides, and MP-4 Photoshop video tutorials among others.
I would of course appreciate your using our B&H affiliate links for all of your major gear, video, and electronic purchases. For the photographic stuff mentioned in the paragraph above we, meaning BAA, would of course greatly appreciate your business. Here is a huge thank you to the many who have been using our links on a regular basis and visiting the BAA Online store as well.
This blog post took 3 1/2 hours to put together. Enjoy!
|
|
|
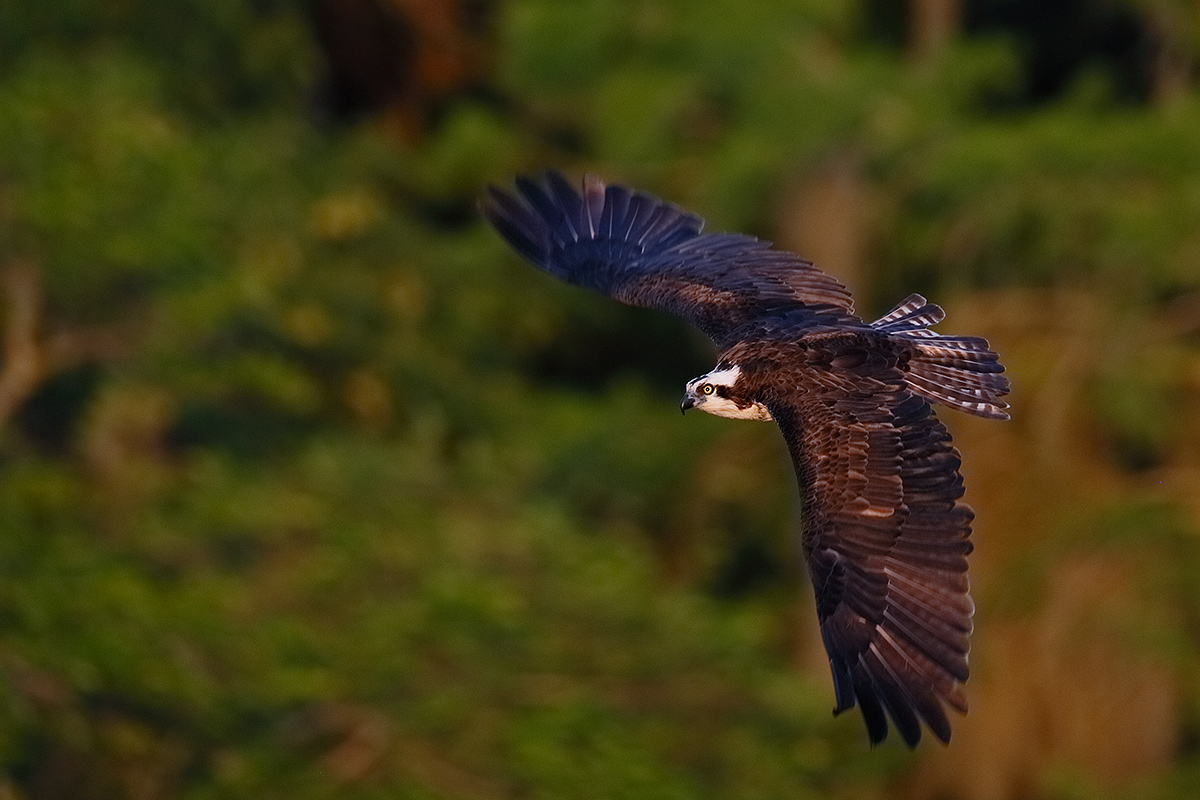
This Osprey top shot was created very late in the day (7:30pm) on a mostly clear afternoon on Lake Blue Cypress on Saturday, April 12. There were five of us aboard Jim Neiger’s pontoon boat. I used the hand held Canon EF 300mm f/2.8L IS II USM lens, the Canon Extender EF 2X III, and the Canon EOS-1D X. ISO 1600. Evaluative metering -1/3 stop off the green vegetation: 1/640 sec. at f/5.6 in Manual mode. AWB.
Central Sensor/AI Servo-Surround/Rear Focus AF as originally framed was active at the moment of exposure. The image was cropped from behind and from above. Learn everything there is to know about the 1D X and 5D III AF systems including how to manage the various AF Area Selection Modes, when to use which one, and several ways to move the AF sensor around in my 1D X AF Guide and the 5D Mark III User’s Guide. Click here to see the latest version of the Rear Focus Tutorial. Click on the image to see a larger version. .
|
The Story
On Saturday afternoon, after three great flight photography sessions while hand holding the Canon EF 200-400mm f/4L IS USM lens with Internal 1.4x Extender the muscles along the back of my neck and shoulders ached. Actually, I was totally beat by the end of Friday, the first of the two days on Jim Neiger’s pontoon boat. And Saturday morning was by far the best osprey flight photography session that I have ever enjoyed.
Clear and sunny conditions on Saturday afternoon featured very little in the way of flight photography as a strong east wind resulted in all the birds flying and landing away from us and away from the light. With wind against sun sometimes you need to lie down on the bottom of the boat and take a nap. And that is exactly what I did. By 6:30pm the wind had abated a bit and Jim took us to a nice sheltered spot with Osprey and Barred Owl. We had seen a Barn Owl there on Friday afternoon. It was a first-ever Florida sighting for both Jim and me. And even more amazingly, the Barn Owl was attacked by a Barred Owl. On Saturday afternoon we saw the area Peregrine attack one of the Barred Owls. At one point the Peregrine flared right in front of us offering a killer photo opportunity. As nobody had seen it coming only Jim Neiger got a frame, but that only after the bird had turned away. In retrospect we all agreed that the handsome falcon had magically appeared out of nowhere.
|
|
|
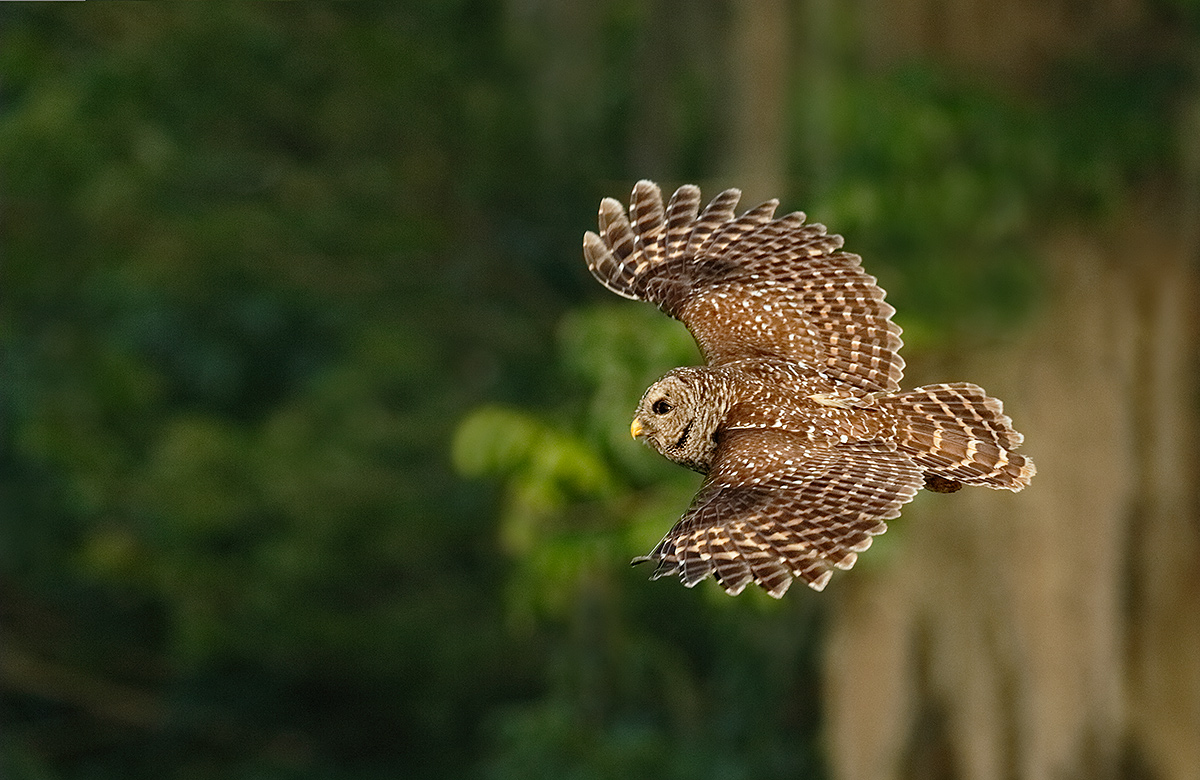
This Barred Owl top shot was created late in the day (6:45pm) on a mostly clear afternoon on Lake Blue Cypress on Saturday, April 12 aboard Jim Neiger’s pontoon boat. I used the hand held Canon EF 300mm f/2.8L IS II USM lens, the Canon Extender EF 2X III, and the Canon EOS-1D X. ISO 1600. Evaluative metering – about 1 1/3s stop off the green vegetation: 1/1600 sec. at f/6.3 in Manual mode was a large underexposure error. DPP did a nice job of controlling the noise in the dark areas. AWB.
Central Sensor/AI Servo-Surround/Rear Focus AF on the base of the owl’s tail as originally framed was active at the moment of exposure. The image was cropped from behind and from above and below. Learn everything there is to know about the 1D X and 5D III AF systems including how to manage the various AF Area Selection Modes, when to use which one, and several ways to move the AF sensor around in my 1D X AF Guide and the 5D Mark III User’s Guide. Click here to see the latest version of the Rear Focus Tutorial. Click on the image to see a larger version. .
|
The Canon 300mm f/2.8L IS II/2X III/1D X: An Unexpectedly Viable Rig for Hand Held Flight Photography
In any case, by Saturday afternoon I was too tired to even think about lifting the 200-400. I did have the 300mm f/2.8L IS along and remembering the success that Denise Ippolito had had with that combo in Japan, I grabbed it and one of my 2X III TCs and went to work. At 5.19 pounds, the 300 II is 2.79 lbs. lighter than the 7.98 pound 200-400 zoom. Thus, hand holding it for flight was a dream; seemingly light as a feather it was much easier for me to acquire the bird in the frame and to keep the image properly framed.
Initial focusing acquisition with the 1D X was very fast as would be expected with any pro body. The speed of Initial focusing acquisition, however, would not be as fast with a 5D III or a 7D as the battery voltage is lower with the pro-sumer bodies. Even with two batteries in the vertical grip the situation would not improve as the camera uses only one battery at a time. AF tracking was accurate, and, as you can see here, image sharpness was excellent. This due in to the 300 II’s great 4-stop IS system and in part to the superb sharpness of the prime lens. As most of my flight images with the 200-400 were made at 560mm I will in the future turn to the 300 II/2X III/1D X combination more often for flight photography especially when the need for reach is paramount.
|
|
|
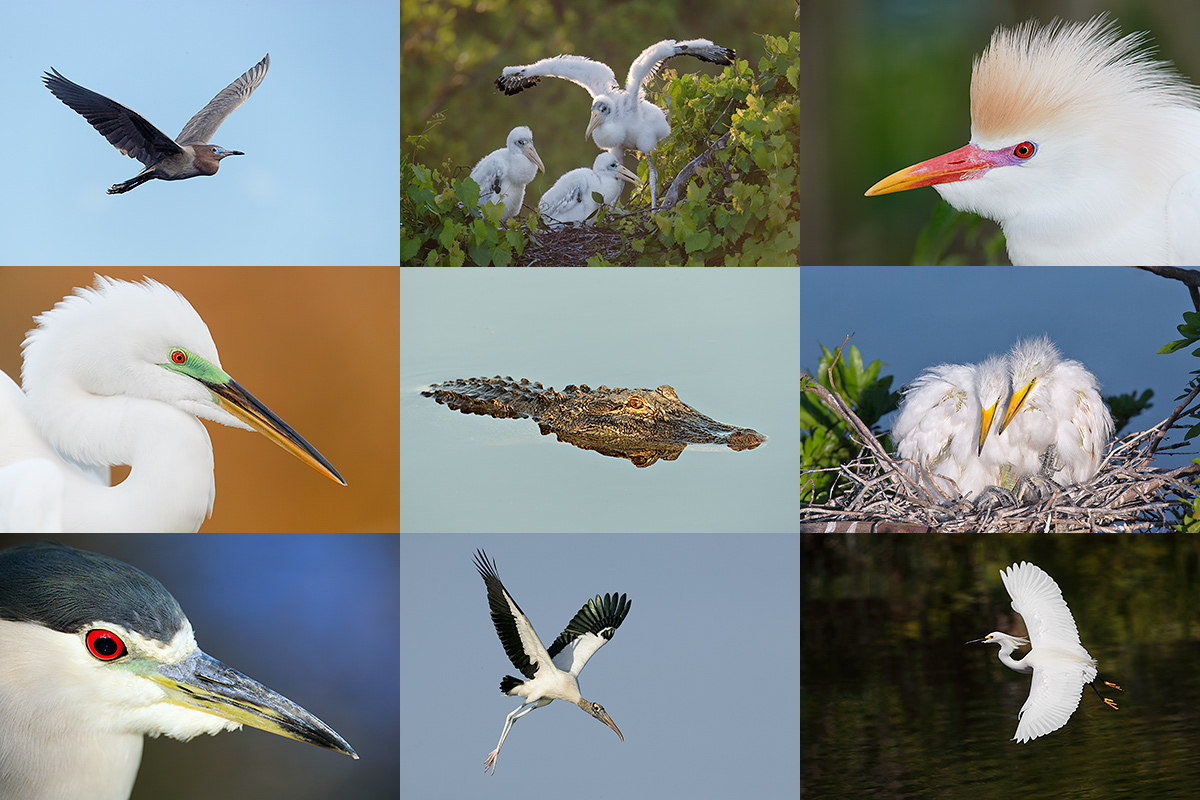
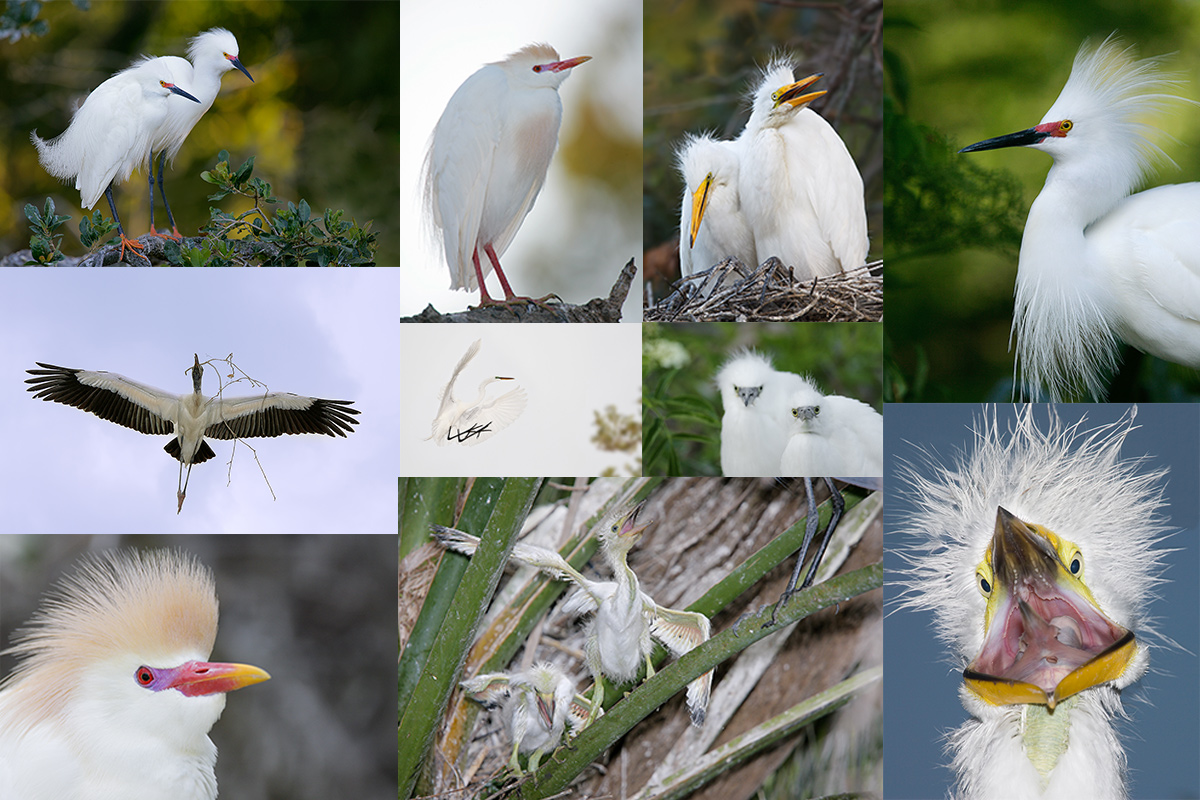
All of the images created at the St. Augustine Alligator Farm and copyright Arthur Morris/BIRDS AS ART
From top left clockwise to center: Snowy Egret pair in breeding plumage, breeding plumage Cattle Egret with fill flash, large Great Egret chicks in the nest, killer breeding plumage Snowy Egret displaying, flash-as-main light Great Egret chick happy to see mom, Little Blue Heron chicks, Cattle Egret breeding plumage head portrait, flash flight Wood Stork with nesting material, Great Egret landing at the nest, large Snowy Egret chicks.
Click on the image to enjoy a larger version.
|
St. Augustine Alligator Farm Short-Notice IPT. 3-FULL DAYS. Early entry/Late stay. May 5-7, 2014. Meet and greet at 8pm on Sunday May 4: $1299. Two Great Leaders: Arthur Morris and Denise Ippolito
This trip needs four to run.
Breeding herons, egrets, and Wood Storks. Eggs and chicks in the nest. Some fledged young possible. Breeding behaviors including displaying and copulations. Flight and flash flight. Great Egret, Snowy Egret, Little Blue Heron, Cattle Egret, Tricolored Heron, Wood Stork. Early May rocks at the Farm as the weather is usually gorgeous and there should be lots of both small and large chicks in the nest. And you avoid the possibly oppressive heat of June and July.
Includes in-the-field instruction, early entry, late stay, $5/person late-stay gratuity, informal, small group Photoshop and image review sessions. Three lunches.
Not included: your lodging, your St. Augustine Alligator Farm photographer’s pass ($79.95 for the year); we will be more than glad to pre-order your pass for you. Please let us know when you register.
What you will learn:
How to see the good situations.
How to best avoid the clutter of a rookery by choosing the very best perspective.
How to properly evaluate the histogram and come up with the right exposure every time after making a single test exposure
How to see and understand the light.
How to design pleasing images by mastering your camera’s AF system.
Why you must work in Manual mode 95% of the time when photographing at a rookery and how to do it.
How to evaluate and process your images.
Via intensive instruction how to use fill flash flash as main light, and Manual flash.
Flash flight techniques including the necessary use of high speed sync.
And tons more.
Please call Jim or Jen at 863-692-0906 to hold your spot with your non-refundable $299 credit card deposit and then put your check in the mail along with your signed registration form; you can find the form here.
Suitable airports: Jacksonville (JAX), Daytona Beach (DAB), Orlando MCO).
We look forward to seeing you in the nation’s oldest city for three days of fun and learning.
Note: Folks interested in possibly continuing on to Fort DeSoto–great in spring, are invited to shoot me an e-mail.
Support the BAA Blog. Support the BAA Bulletins: Shop B&H here!
We want and need to keep providing you with the latest free information, photography and Photoshop lessons, and all manner of related information. Show your appreciation by making your purchases immediately after clicking on any of our B&H or Amazon Affiliate links in this blog post. Remember, B&H ain’t just photography!
….. …..
Typos
In all blog posts and Bulletins, feel free to e-mail or to leave a comment regarding any typos, wrong words, misspellings, omissions, or grammatical errors. Just be right. 🙂
April 13th, 2014 The Streak Continues
We had a great morning on Lake Blue Cypress on Saturday with dozens of opportunities to photograph landing Ospreys; both the light–the sun was filtered by light clouds, and the wind–from the east/northeast, were perfect. Multiple IPT veterans included Aaron Chandler and the amazingly talented Clemens van der Werf. They were joined by first-timer Michael Tapes of Lens Align fame. Captain Jim Neiger did his usual stellar job of piloting the boat and getting us in perfect position.
This post marks 135 straight days with a new educational blog post. With so many folks getting in the habit of using our B&H links and our Amazon logo-links why quit now? To show your appreciation for my efforts here, we do ask that you use our the B&H and Amazon affiliate links on the right side of the blog for all of your purchases. Please check the availability of all photographic accessories in the BIRDS AS ART Online Store, especially Gitzo tripods, Wimberley tripod heads, and the like. We sell only what I used, tested, and can depend on. We will not sell you junk. We know what you need to make creating great images easy and fun. And we are always glad to answer your gear questions via e-mail.
You can find the following items in the store: Gitzo tripods, Mongoose M3.6 and Wimberley heads, plates, low feet, and accessories, flash brackets, , Delkin e-film Pro Compact Flash Cards, LensCoat products, and our unique line-up of educational materials including ABP I & II, Digital Basics, Site and Set-up e-Guides, Canon and Nikon Camera Users and AF e-Guides, and MP-4 Photoshop video tutorials among others.
I would of course appreciate your using our B&H affiliate links for all of your major gear, video, and electronic purchases. For the photographic stuff mentioned in the paragraph above we, meaning BAA, would of course greatly appreciate your business. Here is a huge thank you to the many who have been using our links on a regular basis and visiting the BAA Online store as well.
This blog post took 3 1/2 hours to put together. Enjoy!
|
|
|
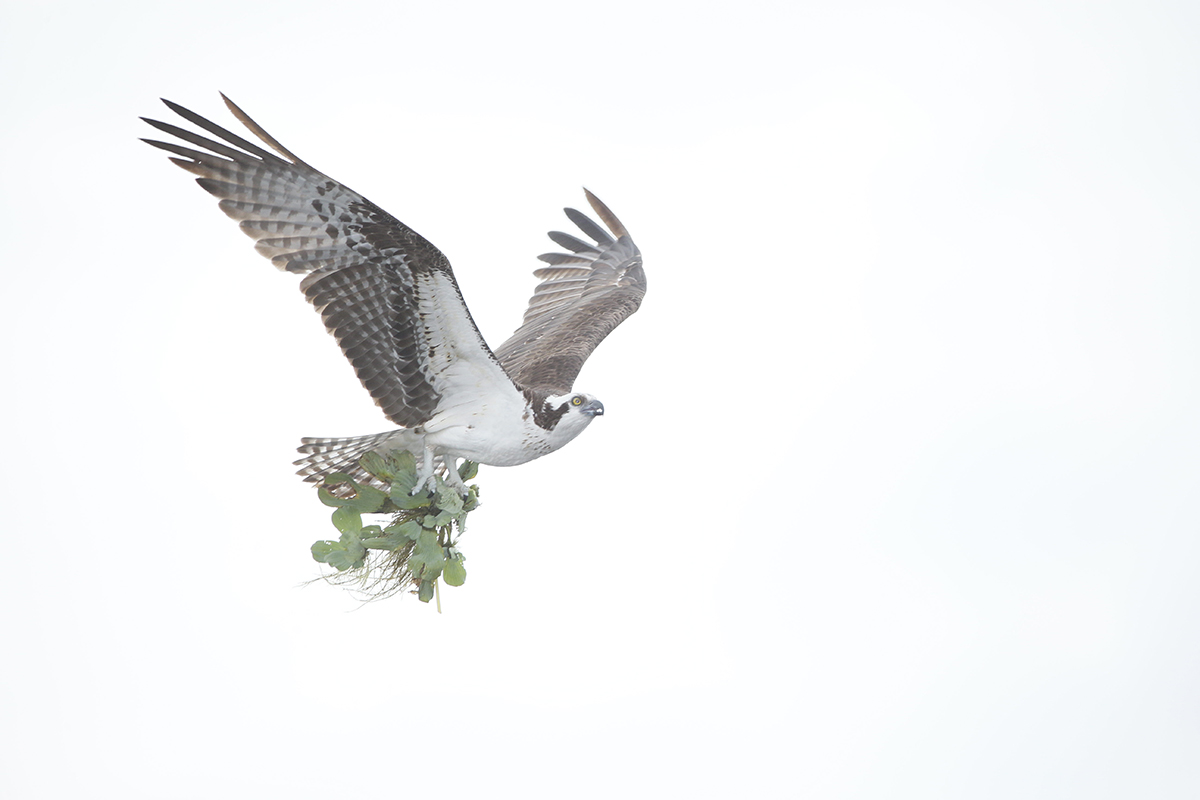
This image was created on a cloudy dark afternoon on Lake Blue Cypress on Friday afternoon April 11, 2014 at 3:02pm. There were five of us aboard Jim Neiger’s pontoon boat. I used the hand held Canon EF 200-400mm f/4L IS USM Lens with Internal 1.4x Extender (with the internal TC engaged at 560mm) and the Canon EOS-1D X. ISO 1600. Evaluative metering +3 1/3 stops off the white sky: 1/1250 sec. at f/5.6 in Manual mode. AWB.
Fill flash with Better Beamer using manual flash at 1:2 with High SPeed Synch with the Canon Speedlite 600EX-RT with the Canon CP-E4 Compact Battery Pack for faster re-charging times. With all that the flash did not do much….
Central Sensor/AI Servo-Surround/Rear Focus AF on the bird’s face active at the moment of exposure. Learn everything there is to know about the 1D X and 5D III AF systems including how to manage the various AF Area Selection Modes, when to use which one, and several ways to move the AF sensor around in my 1D X AF Guide and the 5D Mark III User’s Guide. Click here to see the latest version of the Rear Focus Tutorial. Click on the image to see a larger version. .
|
The Situation
It was cloudy dark; the conditions for photographing Osprey in flight were poor at best. But knowing the amazing capabilities of digital, I felt that there were good images to be made. I metered off the dreary white sky and set my exposure manually to +3 1/3 stops. I needed ISO 1600 to get a shutter speed of 1/1250 sec. I added High Speed Sync flash in hopes that by using the flash at full power, 1:1 in manual mode, that at least some flash would hit the bird. It did not.
Exposing to the Right
When we teach folks to expose to the right we explain that in low light situations their images will look washed out on the back of the camera and washed out when they see them on a computer; see the image above for a perfect example. We continue by explaining that images that are exposed to the right will contain more data than images that are exposed darker and look pretty good on the back of the camera, that they will have less noise, and will produce higher quality image files and prints. At times, as you will see below, it is necessary to completely over-expose a white sky in order to come up with the best exposure for the subject.
|
|
|
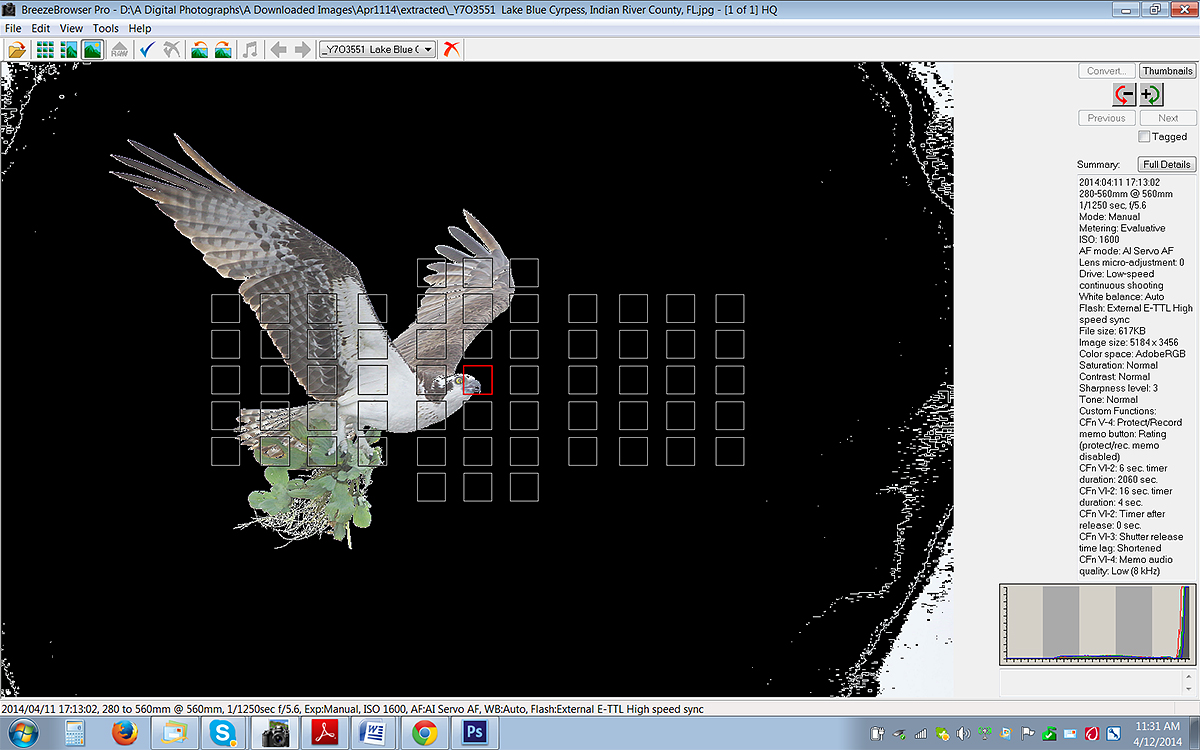
This is the BreezeBrowser Main View of today’s image.
|
Creating a High Key Image
I created the BreezeBrowser Main View screen capture above while the sky was flashing black indicating a large overexposure. Most of the sky was rendered with RGB values of 255, 255, 255, detail-less white. To create the high key look below with the best exposure for the subject that is exactly what I wanted. As above, if your image looks washed out on the back of the camera it will likely be your best exposure. Here is a very fine: this image showed some vignetting from being created at the wide open aperture, f/5.6. In the screen capture the vignetting is represented by the white splotches in the corners. You can also see the vignetting by looking at the image that opens this post: the corners are darker than the rest of the sky and show some CYAN artifacting. The vignetting was eliminated during the RAW conversion in DPP by checking the Peripheral Illumination box and adjusting the slider. You can find Peripheral Illumination in the Lens Aberration Correction section under the Lens tab.
The illuminated red square shows the AF point that was selected. Note: in Breezebrowser you need to check “Show Focus Points” under View to activate this feature. To see the focus points in DPP check “AF Point” under View or hit Alt L. Hit Alt M in DPP to see Highlight Alert. To learn how and why I use DPP (Canon Digital Photo Professional) to convert my RAW files, see the info on our DPP RAW Conversion Guide here.
Note that the WHITEs in the histogram are pegged up against right side of the histogram; this indicates overexposure of the WHITEs. But again, for this high key image, that is exactly what I wanted.
BreezeBrowser
Regular readers know that I use and depend on BreezeBrowser every day of the year. It allows me to sort my keepers and delete the rejects faster than any other Windows browsing program. We use it on the main computer in the home office to catalog our images file-drawer style. And the companion program, Downloader Pro allows me to download my images quickly and conveniently. It automatically adds my IPTC data and the shooting location. I have it set up to create a folder named by the Month/date/year. The Breezebrowser/Downloader Pro combo saves me many hours each week. To learn more or to purchase this great PC only program, click here. As far as the BreezeBrowser/Downloader Pro Combo goes, if you are using a Windows platform and are not using these two great programs you are at best, wasting your valuable time. My understanding is that Photo Mechanic is best for Mac-users who do not opt to run Parallels or VM Ware fusion on their Macs so that they can enjoy the many advantages of BreezeBrowser. See BreezeBrowswer on a Mac for details.
|
|
|
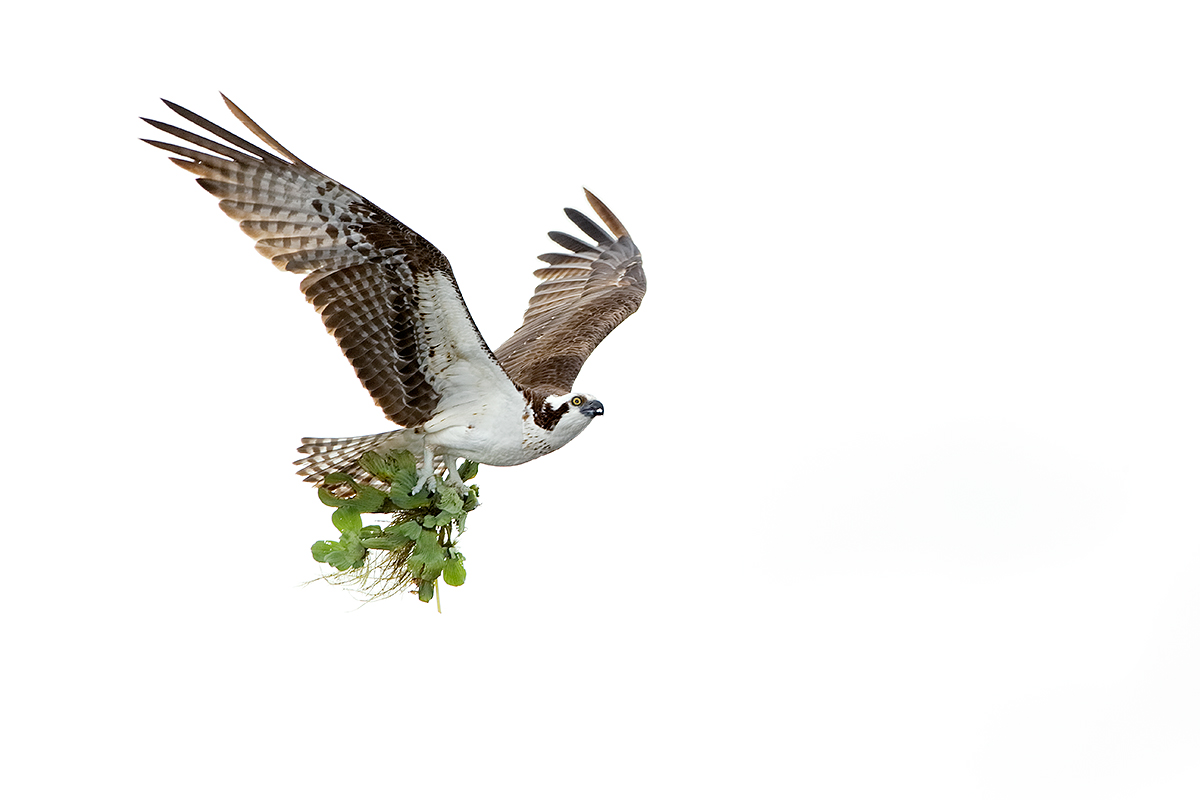
This is the optimized image. Be sure to click on it to view the spectacular larger version.
|
Burn the Sky and Wind Up in (Osprey) Heaven…
The Image Optimization
Once I converted the RAW file I brought the washed out image into Photoshop 6. While working on a Levels adjustment layer I pulled in the Shadow slider while holding down the ALT key and backed off a bit when I noticed the first speckles. That gave the image some much needed punch. Next was a layer of my NIK 50/50 Tonal Contrast/Detail Extractor recipe on the bird only. (I used the Quick Selection Tool to select the bird.) That was followed by adding 4 points of BLACK to the BLACKs and the NEUTRALs in Selective Color, the latter done by hitting the f/9 key twice to run my Selective Color action. Then a bit of Eye Doctor work and a contrast mask on the face only (by painting a Quick Mask of the face) put the finishing touches on what I consider a very fine image made in difficult conditions.
The DPP RAW Conversion Guide
To learn why I use Canon’s Digital Photo Professional (DPP) to convert every image that I work on, click here.
Digital Basics
Are you tired of making your images look worse in Photoshop? Do you have no clue as to how I optimized the image above? The Photoshop stuff mentioned above plus tons more is detailed in my Digital Basics File, an instructional PDF that is sent via e-mail. It includes my complete digital workflow, dozens of great Photoshop tips, the use of Contrast Masks, several different ways of expanding canvas, all of my time-saving Keyboard Shortcuts, Quick Masking, Layer Masking, and NIK Color Efex Pro basics, my killer image clean-up techniques, Digital Eye Doctor, creating time-saving actions, and lots more.
APTATS I & II
Learn the details of advanced Quick Masking techniques in APTATS I. Learn Advanced Layer Masking Techniques in APTATS I. Mention this blog post and apply a $5 discount to either with phone orders only. Buy both APTATS I and APTATS II and we will be glad to apply at $15 discount with phone orders only.
Remember: Expose to the Right
Remember to expose to the right. If you have ten seconds with a subject in the same light, there are no hard exposures with digital. Just get some data well into the rightmost histogram box and you will have an exposure that you can work with to produce a high quality image file. You can learn everything that you need to know about exposure theory in original classic, The Art of Bird Photography and in the Exposure Simplified section of The Art of Bird Photography II (ABP II:916 pages, 900+ images on CD only). You can save $10 by purchasing the 2-book bundle here.
|
|
|
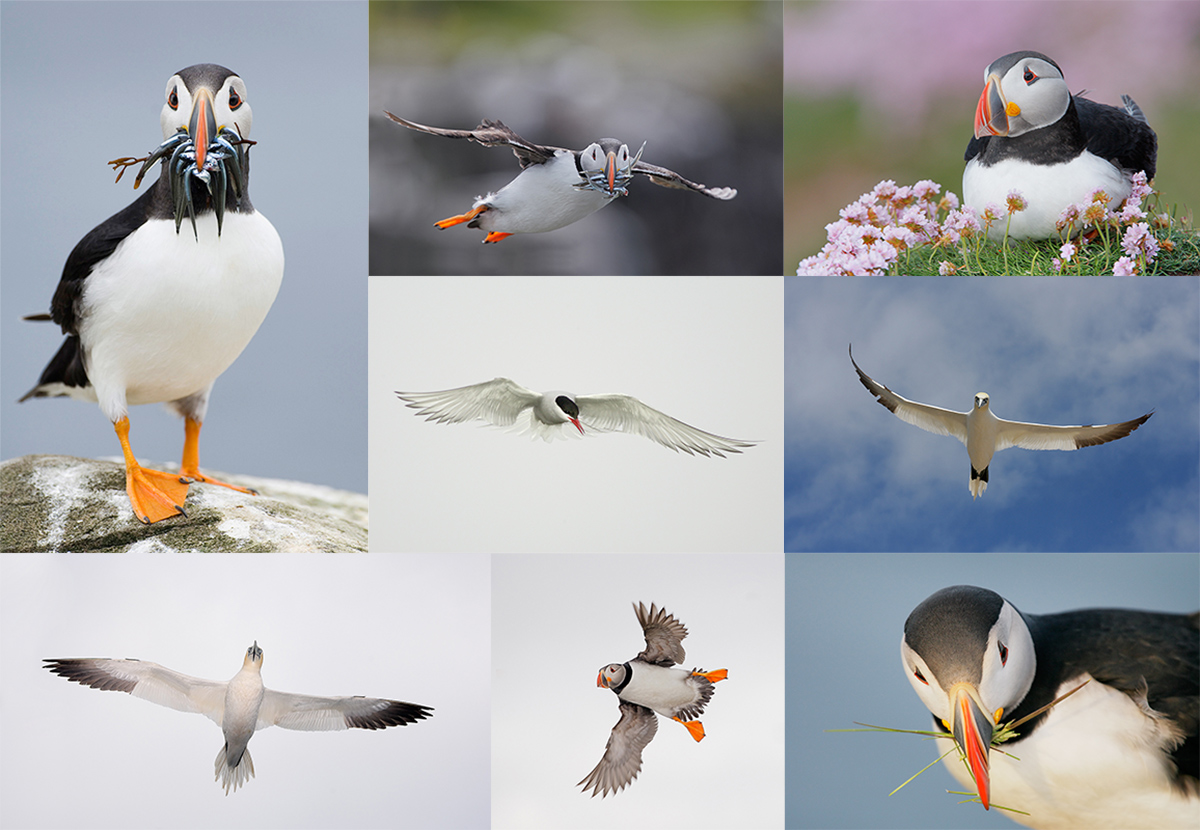
I hope that you can join us on this great trip. The vertical puffin image was created by David Tipling. The rest–almost all from the UK, are mine :).
|
UK Puffins and Gannets IPT July 2-9, 2014. 5 full days of puffins and two half-days of gannet boat photography: $4,999 USD. Limit 10 + the 2 leaders.
Desperately seeking: 1 female roommate & 1 male roommate.
With 5 folks registered, this trip is a go.
Fly to Edinburgh (say “ED-in-BRUH”), Scotland on a red eye flight on July 1st arriving on the early morning of July 2 or certainly before 10am. UK folks who plan on driving please contact me via e-mail immediately.
There are direct flights to Edinburgh from both Philadelphia and Toronto. If you learn of any others please advise via e-mail so that I may share with all the interested folks. Fly home mid-morning on July 9. UK locals and our many European friends are of course welcome.
With 5 deposits in hand, this trip is a go; you can buy your flights now :).
What’s included:
5 full DAYS on the best UK puffin boat; trips to 2 different islands–all dependent on decent weather, i.e, no major storms. Seabirds including scads of Atlantic Puffin both in flight and perched, Razorbill, Great Cormorant, Shag, and others likely. The trip is timed to maximize the opportunities for photographing the puffins bringing fish back to the nests. All boat fares and landing fees are included. The boat leaves at 9:30am. We have two hours on the first island. We are then picked up and head to the 2nd island for a 2+ hour session. The weather is typically cloudy bright.
One late-afternoon (2 July) and one early morning (probably 8 July) trip on a gannet photography boat where the birds are fed and dive very close to the boat. Both are dependent on good weather but we do have some flexibility. Boat fares and the cost of the fish are covered. Each will consist of a one hour outbound ride, two hours of diving Northern Gannet photography (with 6 boxes of fish) and the one hour return trip.
The tentative, weather-dependent itinerary:
July 2: airport pick-up no later than 10am UK time. Lunch on your dime. Drive to hotel. Afternoon gannet boat trip/time TBD.
July 3, 4, 5, 6, & 7: Full Day Puffin Boat trips as noted above.
July 8: early morning Gannet Boat trip. Afternoon: Small group Image review and Photoshop sessions. Pack for the trip home.
July 9: early morning departure for Edinburgh Airport (EDI).
The itinerary is subject to change to ensure the best possible photographic opportunities.
A super-telephoto lens is not required on this trip. The 300mm f/2.8s are ideal. I will be bringing one along with my 200-400mm with Internal Extender, my 70-200 f/2.8L IS II, and a shorter zoom lenses. Plus three 1.4X and two 2X TCs, a Gitzo 3532 LS Carbon Fiber tripod, and my Mongoose M3.6. I may go tripod-less on the puffin trips at times…. Or not…. All photography on the gannet boat will be hand held. It is likely that the 70-200s will be ideal for the gannets.
7 nights lodging in an older but excellent hotel just a few minutes from the puffin boat dock with about a 70 minute ride to the gannet boat. Double occupancy will be the rule though we might be able to offer a single supplement at an exorbitant price. See the hotel info here.
All breakfasts and dinner (at the hotel) from dinner on July 2 through dinner on July 8. And breakfast on our get-away day unless we need to leave earlier than they serve to make our flights home…
Airport pick-up until 10am on July 2–this should not be a problem as there are lots of red-eye flights from the US to Edinburgh.
All ground transportation. Airport return on the early morning of July 9. We may be getting up very early on July 9th.
Two great leaders; Denise Ippolito and yours truly will provide personalized and small group in-the-field instruction. As usual, the closer you stay to us and the more questions that you ask the more you will learn. We will of course point out the best situations. You will learn to see these great situations for yourself, to get the right exposure every time after making a single test exposure, to work in Manual mode, and to design pleasing images by mastering your camera’s AF system. You will learn the basics of photographing birds in flight and how the relationship between light direction and wind direction impacts the photography of both birds in flight and perched puffins. And tons more.
We will be conducting informal, small group image review and Photoshop sessions after dinner. All are invited to bring their laptops. Image critiques of your five best images will be done after the trip upon request.
Early morning castle photography right near the hotel is an option for the early risers. In the event of inclement weather or stormy seas there is the possibility of bird photography along the coast. Early evening bird photography along the coast is also optional.
Not included: all lunches–for the most part we will need to pack lunches for the puffin trips, or you may opt to skip lunch. Your round trip airfare from home to Scotland. Booze, wine, and any other beverages other than coffee and tea at breakfast.
A non-refundable deposit of $2,000 USD is required to hold your spot so please check on flights and your schedule before committing. The balance will be due on 15 May so you may wish to pay the whole thing at once. Overseas folks may e-mail for wire transfer info. Our $15 wire transfer fee will be added to your balance.
Trip insurance is highly recommended as your deposit (less a $200 cancellation fee) will not be refunded unless the trip fills completely. I, and my family, use Travel Insurance Services.
After letting us know via e-mail that you will be coming, please send your deposit check made out to “Arthur Morris” to us as follows:
Arthur Morris/BIRDS AS ART
PO Box 7245 (US mail) or 4041 Granada Drive (if by courier).
Indian Lake Estates, FL 33855
My friend David Tipling, with multiple BBC honored images and the author of dozens of photo illustrated books, helped with the planning and arrangements for this trip.
If you have any questions, please contact me via e-mail.
Support the BAA Blog. Support the BAA Bulletins: Shop B&H here!
We want and need to keep providing you with the latest free information, photography and Photoshop lessons, and all manner of related information. Show your appreciation by making your purchases immediately after clicking on any of our B&H or Amazon Affiliate links in this blog post. Remember, B&H ain’t just photography!
….. …..
Typos
In all blog posts and Bulletins, feel free to e-mail or to leave a comment regarding any typos, wrong words, misspellings, omissions, or grammatical errors. Just be right. 🙂
April 12th, 2014 The Streak Continues
As you read this, I will be photographing Ospreys for the second straight day on Lake Blue Cypress with Jim Neiger. This time with our second group of 3. It was a real pleasure meeting and photographing with George and Kay Williams, traveling in the southeast while pulling a 30-foot bumper pull travel trailer. Like me, they love their Toyota Sequoia. Joining us was Beth Eldridge who lives with her husband in a 43-foot fifth wheel trailer. They move on average about every six months.
This post marks 134 straight days with a new educational blog post. With so many folks getting in the habit of using our B&H and Amazon links why quit now? To show your appreciation for my efforts here, we do ask that you use our the B&H and Amazon affiliate links on the right side of the blog for all of your purchases. Please check the availability of all photographic accessories in the BIRDS AS ART Online Store, especially Gitzo tripods, Wimberley tripod heads, and the like. We sell only what I used, tested, and can depend on. We will not sell you junk. We know what you need to make creating great images easy and fun. And we are always glad to answer your gear questions via e-mail.
You can find the following items in the store: Gitzo tripods, Mongoose M3.6 and Wimberley heads, plates, low feet, and accessories, flash brackets, , Delkin e-film Pro Compact Flash Cards, LensCoat products, and our unique line-up of educational materials including ABP I & II, Digital Basics, Site and Set-up e-Guides, Canon and Nikon Camera Users and AF e-Guides, and MP-4 Photoshop video tutorials among others.
I would of course appreciate your using our B&H affiliate links for all of your major gear, video, and electronic purchases. For the photographic stuff mentioned in the paragraph above we, meaning BAA, would of course greatly appreciate your business. Here is a huge thank you to the many who have been using our links on a regular basis and visiting the BAA Online store as well.
This blog post took only about 1 1/2 hours to put together. Enjoy!
|
|
|
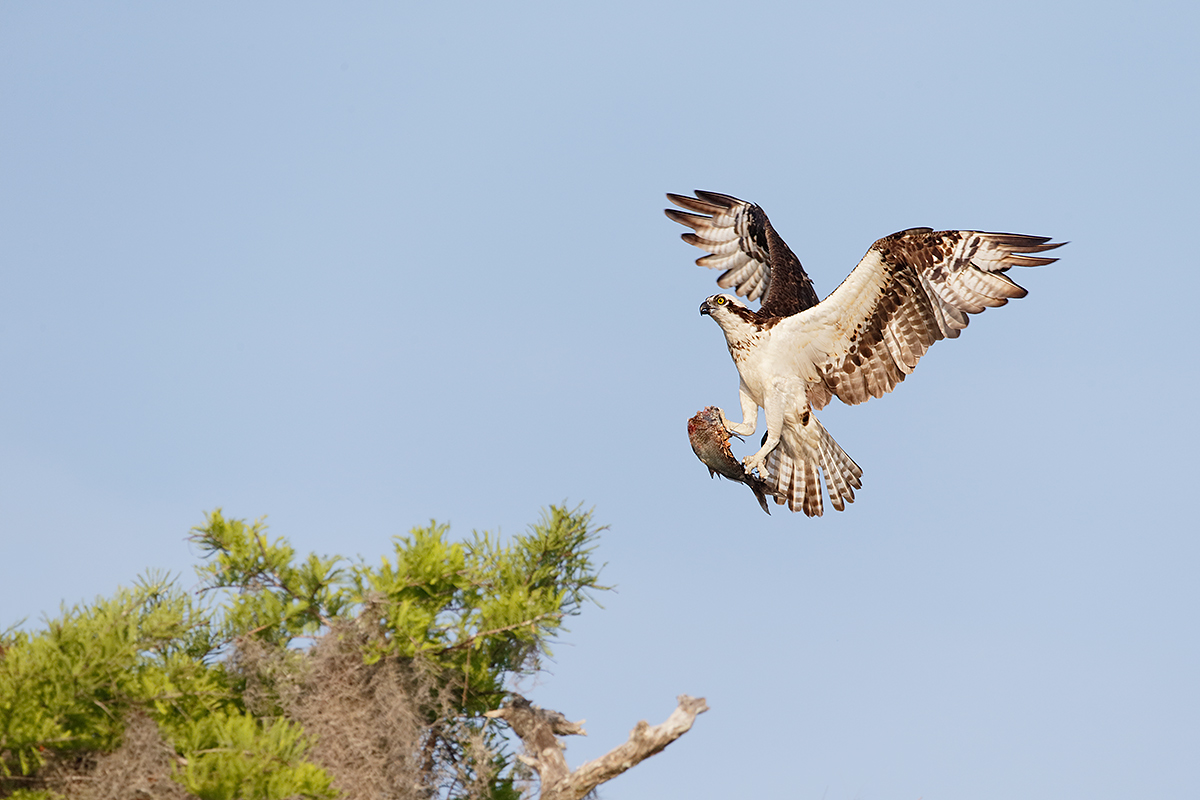
This image was created on the clear, sunny Friday morning of April 11, 2014 at 8:15am. There were five of us aboard Jim Neiger’s pontoon boat. I used the hand held Canon EF 200-400mm f/4L IS USM Lens with Internal 1.4x Extender (with the internal TC engaged at 560mm) and the Canon EOS-1D X. ISO 400. Evaluative metering +1 stop off the blue sky: 1/1600 sec. at f/7.1 in Manual mode. AWB.
Central Sensor/AI Servo-Surround/Rear Focus AF caught the fish and was active at the moment of exposure. Learn everything there is to know about the 1D X and 5D III AF systems including how to manage the various AF Area Selection Modes, when to use which one, and several ways to move the AF sensor around in my 1D X AF Guide and the 5D Mark III User’s Guide. Click here to see the latest version of the Rear Focus Tutorial. Click on the image to see a larger version. .
|
Two Shining Moments
Congrats to the Connecticut Men’s and Women’s basketball teams on their recent victories in the NCAA National Championship Tournaments, aka March Madness. The men’s teams from Florida and Kentucky were bigger and more athletic than the UConn men but the Huskies were faster, smarter, and more determined. Kudos to coach Kevin Ollie on his superb coaching job. The women finished an undefeated 40-0 season with a victory over previously undefeated Notre Dame. Congrats to the UConn women’s team coach Geno Auriemma on his record ninth national title.
One Shining Moment
We had a tough morning on Lake Blue Cypress. Early on there was not much wind so few Ospreys were flying. And when the wind picked up it was slightly north/northwest; the last thing you want on a clear morning is a wind with any westerly component… That leaves all the birds taking off and landing slightly away from you and from the light. Bad news.
The image above was created in near windless conditions just before the wind switched to the north/northwest. It was our very best landing opportunity of the morning. This was my favorite of an all-sharp eight-frame sequence. It is a small crop from the right and from below.
|

|
|
All of the images created at the St. Augustine Alligator Farm and copyright Arthur Morris/BIRDS AS ART
From top left clockwise to center: Snowy Egret pair in breeding plumage, breeding plumage Cattle Egret with fill flash, large Great Egret chicks in the nest, killer breeding plumage Snowy Egret displaying, flash-as-main light Great Egret chick happy to see mom, Little Blue Heron chicks, Cattle Egret breeding plumage head portrait, flash flight Wood Stork with nesting material, Great Egret landing at the nest, large Snowy Egret chicks.
Click on the image to enjoy a larger version.
|
St. Augustine Alligator Farm Short-Notice IPT. 3-FULL DAYS. Early entry/Late stay. May 5-7, 2014. Meet and greet at 8pm on Sunday May 4: $1299. Two Great Leaders: Arthur Morris and Denise Ippolito
This trip needs four to run.
Breeding herons, egrets, and Wood Storks. Eggs and chicks in the nest. Some fledged young possible. Breeding behaviors including displaying and copulations. Flight and flash flight. Great Egret, Snowy Egret, Little Blue Heron, Cattle Egret, Tricolored Heron, Wood Stork. Early May rocks at the Farm as the weather is usually gorgeous and there should be lots of both small and large chicks in the nest. And you avoid the possibly oppressive heat of June and July.
Includes in-the-field instruction, early entry, late stay, $5/person late-stay gratuity, informal, small group Photoshop and image review sessions. Three lunches.
Not included: your lodging, your St. Augustine Alligator Farm photographer’s pass ($79.95 for the year); we will be more than glad to pre-order your pass for you. Please let us know when you register.
What you will learn:
How to see the good situations.
How to best avoid the clutter of a rookery by choosing the very best perspective.
How to properly evaluate the histogram and come up with the right exposure every time after making a single test exposure
How to see and understand the light.
How to to design pleasing images by mastering your camera’s AF system.
Why you must work in Manual mode 95% of the time when photographing at a rookery and how to do it.
How to evaluate and process your images.
Via intensive instruction how to use fill flash flash as main light, and Manual flash.
Flash flight techniques including the necessary use of high speed sync.
And tons more.
Please call Jim or Jen at 863-692-0906 to hold your spot with your non-refundable $299 credit card deposit and then put your check in the mail along with your signed registration form; you can find the form here.
Suitable airports: Jacksonville (JAX), Daytona Beach (DAB), Orlando MCO).
We look forward to seeing you in the nation’s oldest city for three days of fun and learning.
Note: Folks interested in possibly continuing on to Fort DeSoto–great in spring, are invited to shoot me an e-mail.
Support the BAA Blog. Support the BAA Bulletins: Shop B&H here!
We want and need to keep providing you with the latest free information, photography and Photoshop lessons, and all manner of related information. Show your appreciation by making your purchases immediately after clicking on any of our B&H or Amazon Affiliate links in this blog post. Remember, B&H ain’t just photography!
….. …..
Typos
In all blog posts and Bulletins, feel free to e-mail or to leave a comment regarding any typos, wrong words, misspellings, omissions, or grammatical errors. Just be right. 🙂
April 11th, 2014 The Streak Continues
As you read this, I will likely be photographing Ospreys on Lake Blue Cypress with Jim Neiger and our Friday group of 3. This post marks 133 straight days with a new educational blog post. With so many folks getting in the habit of using our B&H and Amazon links why quit now? To show your appreciation for my efforts here, we do ask that you use our the B&H and Amazon affiliate links on the right side of the blog for all of your purchases. Please check the availability of all photographic accessories in the BIRDS AS ART Online Store, especially Gitzo tripods, Wimberley tripod heads, and the like. We sell only what I use, have used, and depend on. We will not sell you junk. We know what you need to make creating great images easy and fun. And we are always glad to answer your gear questions via e-mail.
You can find the following items in the store: Gitzo tripods, Mongoose M3.6 and Wimberley heads, plates, low feet, and accessories, flash brackets, , Delkin e-film Pro Compact Flash Cards, LensCoat products, and our unique line-up of educational materials including ABP I & II, Digital Basics, Site and Set-up e-Guides, Canon and Nikon Camera Users and AF e-Guides, and MP-4 Photoshop video tutorials among others.
I would of course appreciate your using our B&H affiliate links for all of your major gear, video, and electronic purchases. For the photographic stuff mentioned in the paragraph above we, meaning BAA, would of course greatly appreciate your business. Here is a huge thank you to the many who have been using our links on a regular basis and visiting the BAA Online store as well.
This blog post took only about 1 1/2 hours to put together. Enjoy!
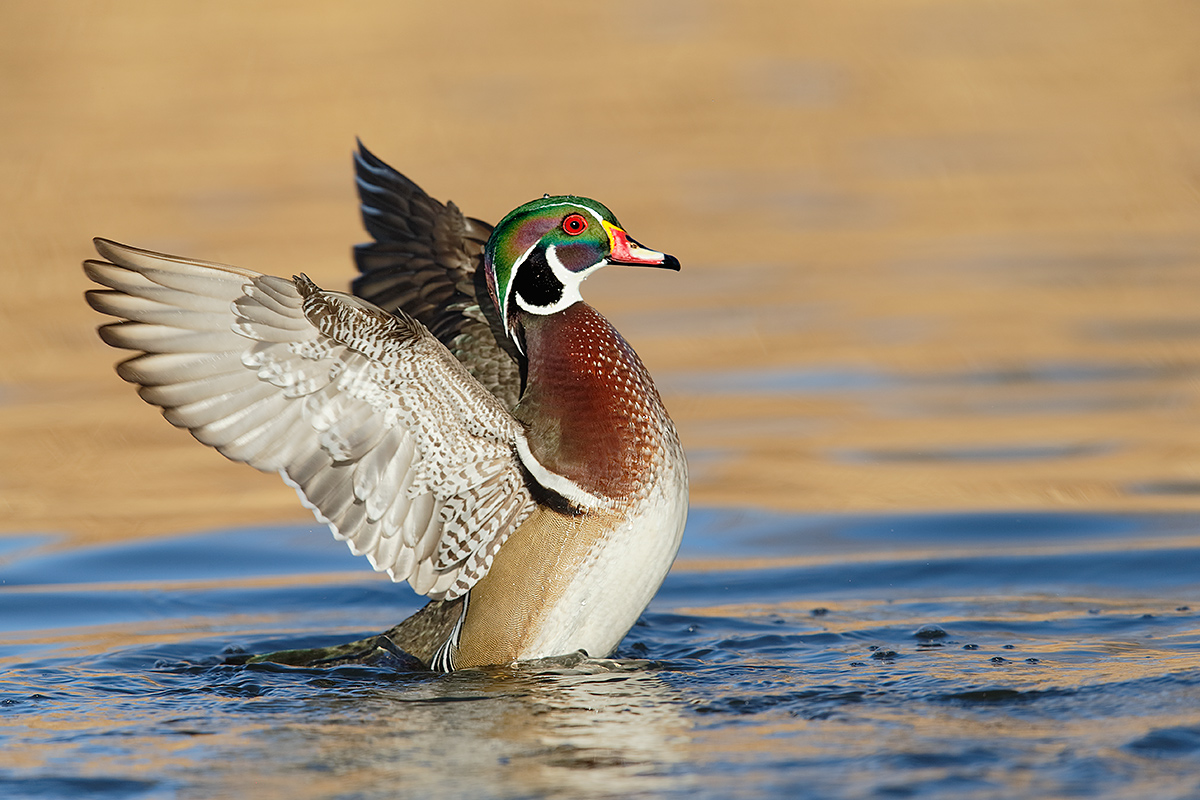
The Promised Flapper; Well Worth the Wait?
More than 3 months ago I mentioned that friend and multiple IPT veteran Mike Goldhamer (who is joining us on the UK Puffin IPT) ran into me in LaJolla and taught me a trick to get the Wood Ducks to flap. I have been so busy that I have not had a chance to optimize any of my favorites. I will be sharing Mike’s trick in the next update to the San Diego Site Guide; the update will be a short one. I promise to have it finished no later than October of this year. Reminders are welcome. 🙂
Let us know what you think of the image.
For the Eagle-Eyed Photoshop Police
In yesterday’s blog post, several eagle-eyed Photoshop policemen pointed out problems with my optimized image. They did of course, have the advantage of seeing the original. It is always easier to spot processing imperfections when you know exactly where to look. Today they have a second chance. I will tell you that I did some substantial Photoshop work in two areas of this image.
Do you see anything funky? Do let us know exactly where I went to work and I will tip my hat to you if you are correct.
San Diego IPT: early February, 2015
If you would like to be placed on the interested list, please shoot me an e-mail.
|

|
|
I hope that you can join us on this great trip. The vertical puffin image was created by David Tipling. The rest–almost all from the UK, are mine :).
|
UK Puffins and Gannets IPT July 2-9, 2014. 5 full days of puffins and two half-days of gannet boat photography: $4,999 USD. Limit 10 + the 2 leaders.
Desperately seeking: 1 female roommate & 1 male roommate.
With 5 folks registered, this trip is a go.
Fly to Edinburgh (say “ED-in-BRUH”), Scotland on a red eye flight on July 1st arriving on the early morning of July 2 or certainly before 10am. UK folks who plan on driving please contact me via e-mail immediately.
There are direct flights to Edinburgh from both Philadelphia and Toronto. If you learn of any others please advise via e-mail so that I may share with all the interested folks. Fly home mid-morning on July 9. UK locals and our many European friends are of course welcome.
With 5 deposits in hand, this trip is a go; you can buy your flights now :).
What’s included:
5 full DAYS on the best UK puffin boat; trips to 2 different islands–all dependent on decent weather, i.e, no major storms. Seabirds including scads of Atlantic Puffin both in flight and perched, Razorbill, Great Cormorant, Shag, and others likely. The trip is timed to maximize the opportunities for photographing the puffins bringing fish back to the nests. All boat fares and landing fees are included. The boat leaves at 9:30am. We have two hours on the first island. We are then picked up and head to the 2nd island for a 2+ hour session. The weather is typically cloudy bright.
One late-afternoon (2 July) and one early morning (probably 8 July) trip on a gannet photography boat where the birds are fed and dive very close to the boat. Both are dependent on good weather but we do have some flexibility. Boat fares and the cost of the fish are covered. Each will consist of a one hour outbound ride, two hours of diving Northern Gannet photography (with 6 boxes of fish) and the one hour return trip.
The tentative, weather-dependent itinerary:
July 2: airport pick-up no later than 10am UK time. Lunch on your dime. Drive to hotel. Afternoon gannet boat trip/time TBD.
July 3, 4, 5, 6, & 7: Full Day Puffin Boat trips as noted above.
July 8: early morning Gannet Boat trip. Afternoon: Small group Image review and Photoshop sessions. Pack for the trip home.
July 9: early morning departure for Edinburgh Airport (EDI).
The itinerary is subject to change to ensure the best possible photographic opportunities.
A super-telephoto lens is not required on this trip. The 300mm f/2.8s are ideal. I will be bringing one along with my 200-400mm with Internal Extender, my 70-200 f/2.8L IS II, and a shorter zoom lenses. Plus three 1.4X and two 2X TCs, a Gitzo 3532 LS Carbon Fiber tripod, and my Mongoose M3.6. I may go tripod-less on the puffin trips at times…. Or not…. All photography on the gannet boat will be hand held. It is likely that the 70-200s will be ideal for the gannets.
7 nights lodging in an older but excellent hotel just a few minutes from the puffin boat dock with about a 70 minute ride to the gannet boat. Double occupancy will be the rule though we might be able to offer a single supplement at an exorbitant price. See the hotel info here.
All breakfasts and dinner (at the hotel) from dinner on July 2 through dinner on July 8. And breakfast on our get-away day unless we need to leave earlier than they serve to make our flights home…
Airport pick-up until 10am on July 2–this should not be a problem as there are lots of red-eye flights from the US to Edinburgh.
All ground transportation. Airport return on the early morning of July 9. We may be getting up very early on July 9th.
Two great leaders; Denise Ippolito and yours truly will provide personalized and small group in-the-field instruction. As usual, the closer you stay to us and the more questions that you ask the more you will learn. We will of course point out the best situations. You will learn to see these great situations for yourself, to get the right exposure every time after making a single test exposure, to work in Manual mode, and to design pleasing images by mastering your camera’s AF system. You will learn the basics of photographing birds in flight and how the relationship between light direction and wind direction impacts the photography of both birds in flight and perched puffins. And tons more.
We will be conducting informal, small group image review and Photoshop sessions after dinner. All are invited to bring their laptops. Image critiques of your five best images will be done after the trip upon request.
Early morning castle photography right near the hotel is an option for the early risers. In the event of inclement weather or stormy seas there is the possibility of bird photography along the coast. Early evening bird photography along the coast is also optional.
Not included: all lunches–for the most part we will need to pack lunches for the puffin trips, or you may opt to skip lunch. Your round trip airfare from home to Scotland. Booze, wine, and any other beverages other than coffee and tea at breakfast.
A non-refundable deposit of $2,000 USD is required to hold your spot so please check on flights and your schedule before committing. The balance will be due on 15 May so you may wish to pay the whole thing at once. Overseas folks may e-mail for wire transfer info. Our $15 wire transfer fee will be added to your balance.
Trip insurance is highly recommended as your deposit (less a $200 cancellation fee) will not be refunded unless the trip fills completely. I, and my family, use Travel Insurance Services.
After letting us know via e-mail that you will be coming, please send your deposit check made out to “Arthur Morris” to us as follows:
Arthur Morris/BIRDS AS ART
PO Box 7245 (US mail) or 4041 Granada Drive (if by courier).
Indian Lake Estates, FL 33855
My friend David Tipling, with multiple BBC honored images and the author of dozens of photo illustrated books, helped with the planning and arrangements for this trip.
If you have any questions, please contact me via e-mail.
Support the BAA Blog. Support the BAA Bulletins: Shop B&H here!
We want and need to keep providing you with the latest free information, photography and Photoshop lessons, and all manner of related information. Show your appreciation by making your purchases immediately after clicking on any of our B&H or Amazon Affiliate links in this blog post. Remember, B&H ain’t just photography!
….. …..
Typos
In all blog posts and Bulletins, feel free to e-mail or to leave a comment regarding any typos, wrong words, misspellings, omissions, or grammatical errors. Just be right. 🙂
April 10th, 2014 The Streak Continues
This post marks 132 straight days with a new educational blog post. With so many folks getting in the habit of using our B&H and Amazon links why quit now? To show your appreciation for my efforts here, we do ask that you use our the B&H and Amazon affiliate links on the right side of the blog for all of your purchases. Please check the availability of all photographic accessories in the BIRDS AS ART Online Store, especially Gitzo tripods, Wimberley tripod heads, and the like. We sell only what I use, have used, and depend on. We will not sell you junk. We know what you need to make creating great images easy and fun. And we are always glad to answer your gear questions via e-mail.
You can find the following items in the store: Gitzo tripods, Mongoose M3.6 and Wimberley heads, plates, low feet, and accessories, flash brackets, , Delkin e-film Pro Compact Flash Cards, LensCoat products, and our unique line-up of educational materials including ABP I & II, Digital Basics, Site and Set-up e-Guides, Canon and Nikon Camera Users and AF e-Guides, and MP-4 Photoshop video tutorials among others.
I would of course appreciate your using our B&H affiliate links for all of your major gear, video, and electronic purchases. For the photographic stuff mentioned in the paragraph above we, meaning BAA, would of course greatly appreciate your business. Here is a huge thank you to the many who have been using our links on a regular basis and visiting the BAA Online store as well.
I awoke at 4:15am today to finish this blog post; it took about 2 1/2 hours in all to assemble. Enjoy!
My Thoughts on Exposure for the Image Above
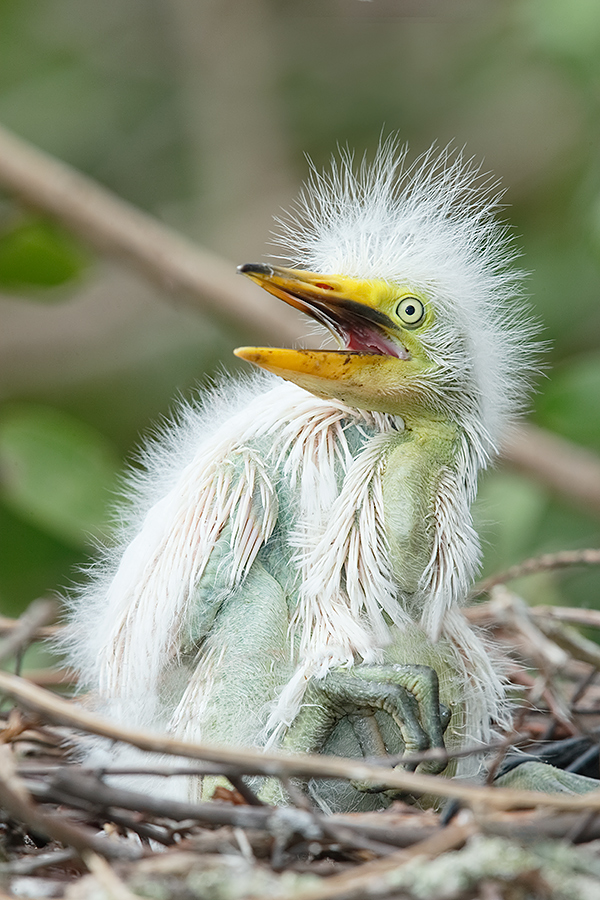
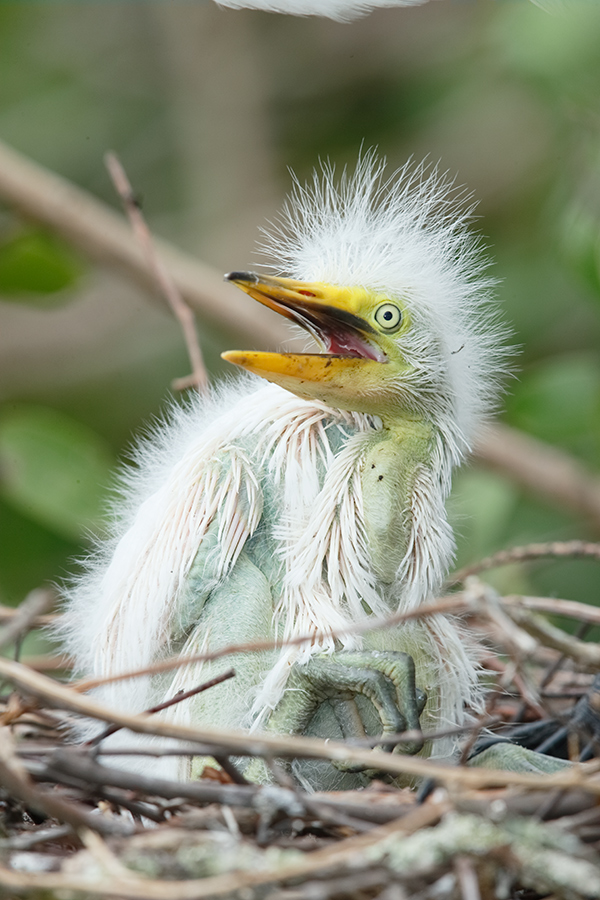
I see the light-toned chick, large and in the middle of the frame, the light-toned sticks, and a middle-toned BKGR. Without bright sun, my first choice is +1. I make a single image, see no blinkies, and check the histogram–lots of data in the rightmost box of the histogram tells me that my analysis was right on the money. Note: Had the sun been out at full strength this one would have been either 0 or +1/3 stop. Understanding exposure theory and being able to apply it in the field can often put you on the right exposure without having to check the back of the camera…. And that goes double in difficult (and often spectacular) lighting situations.
|
|
|
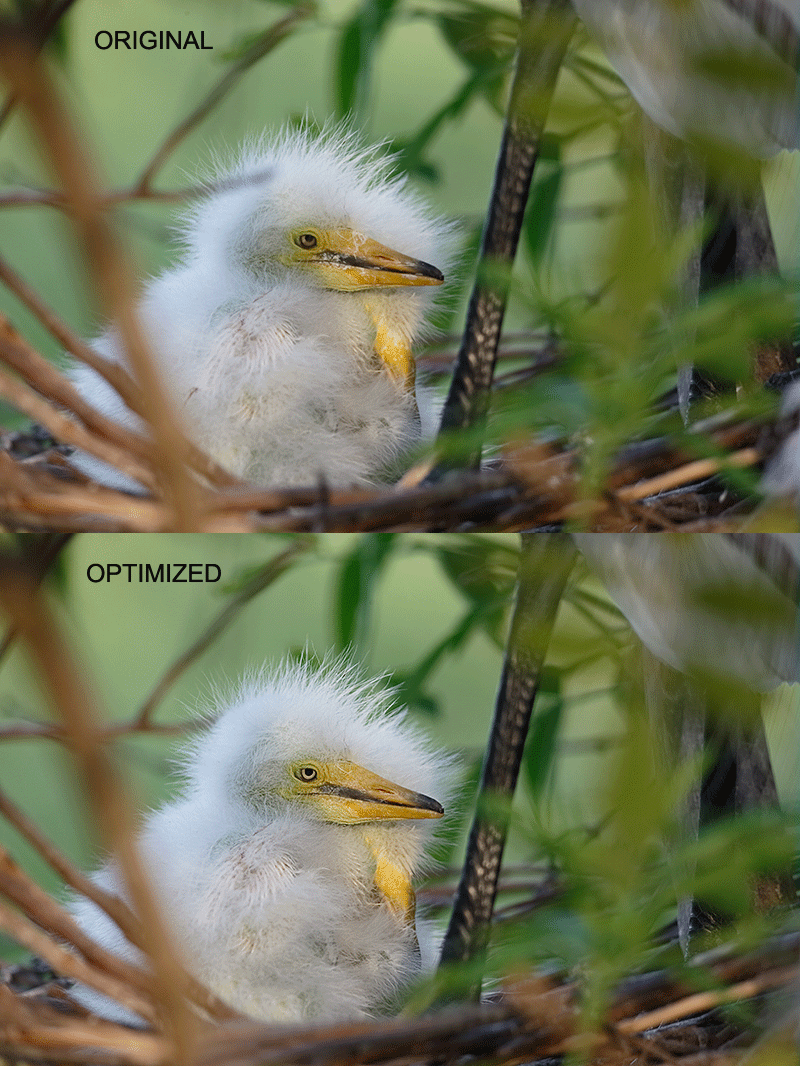
This is the original image capture.
|
Rookery Nest Image Clean-up and Optimization
Murphy’s Law of Bird Nests states that all bird nests will have at least one stick too many…. Rookeries are cluttered places. Your job is to find the best angle into the nest. To do that you need to move side to side and up and down to find the very best perspective. Be sure to explore all the possibilities. Sometimes you are able to find a single clear slot into a nest that at first looked to be an impossible situation.
Once I have an image in Photoshop, I do not attempt to remove every branch and every twig. But as you can see by comparing the optimized image with the original image immediately above, I will remove the most obtrusive sticks in an attempt to create an aesthetically pleasing image.
After converting this image in DPP I brought the image into Photoshop. I executed a small artistic crop from below and from the right. Then I used the Divide and Conquer technique to eliminate several of the most distracting small branches. That process involved the use of the Clone Stamp Tool, the Patch Tool, the Spot Healing Brush, and several small Quick Masks that were fine tuned with Regular Layer Masks. That followed by a 50/20 NIK layer (Tonal Contrast/Detail Extractor).
Which image Do You Prefer?
Please take a moment to let us know which image you prefer, the optimized image or the original. Would you have done more clean-up, or less? Either way, why?
The DPP RAW Conversion Guide
To learn why I use Canon’s Digital Photo Professional (DPP) to convert every image that I work on, click here.
Digital Basics
Are you tired of making your images look worse in Photoshop? Do you have no clue as to how I optimized the images above? The Photoshop stuff mentioned above plus tons more is detailed in my Digital Basics File, an instructional PDF that is sent via e-mail. It includes my complete digital workflow, dozens of great Photoshop tips, the use of Contrast Masks, several different ways of expanding canvas, all of my time-saving Keyboard Shortcuts, Quick Masking, Layer Masking, and NIK Color Efex Pro basics, my killer image clean-up techniques, Digital Eye Doctor, creating time-saving actions, and lots more.
APTATS I & II
Learn the details of advanced Quick Masking techniques in APTATS I. Learn Advanced Layer Masking Techniques in APTATS I. Mention this blog post and apply a $5 discount to either with phone orders only. Buy both APTATS I and APTATS II and we will be glad to apply at $15 discount with phone orders only.
Asking a Lot…
The other day I received an e-mail from a reader that requested that I give them tips on getting the right exposure in practically every conceivable situation…. I replied asking if they had purchased and studied ABP and ABP II. They kindly responded that they did not have the softcover book or the CD.
My response to that e-mail follows. I am AM (in green). The blog reader is BR (for blog reader).
AM: AM: Thanks for getting back to me.
re:
BR: I do not have either.
AM: While I love to answer e-mail questions, and answer probably 40-50 each week, what you are asking above is to teach you everything I know about exposure in all lighting conditions with all light angles…..
99% of your questions are answered in the two books that I referred to, the softcover ABP and ABP II, 916 pages on CD only.
This is from yesterday’s blog post:
Here’s the best news: you too can learn to determine the right exposure compensation with just a glance, to see and understand the light, to understand what your camera’s meter is doing, and to understand the influence of the various tonalities, be they black or white, light or dark, on the metering system. How? Study the chapter on Exposure in the original, soft cover, The Art of Bird Photography (ABP), especially the section on exposure theory. And once you have mastered that, study the Exposure Simplified section in The Art of Bird Photography II (ABP II: 916 pages, 900+ images). You can save $10 by ordering the two-book bundle here.
While I wish that I had the time to re-write extensive sections of both books just for you, I simply do not. I will answer what I can below very briefly in green. If you want to really learn and understand exposure, you will get the two books and study them Smile emoticon. Or not. Your call.
BR: I read your “At Long Last, As Promised: the Greatest, Most Educational Blog Post Ever? Manual… Av… Tv… Program… Which is The Best Shooting Mode?” blog post again. I try to read it often so that a bit more sinks in each time. I’ve had a couple of sets of questions from when I first read it and I’ve been reading the blogs and seeing if I could glean the answers in another way, but I hope you don’t mind me asking instead. I feel there’s something I’m just not grasping..
My understanding is that for birds in flight, its best to have the sun behind me, so its shining fully on the bird.
AM: Yes.
BR: In that situation and when shooting against backgrounds of rapidly changing tonality, you recommend working in Manual mode, and I get that. If I then turn left or right or 180 degrees to face into the sun, would they be the same or different exposure as used with the sun behind me?
AM: Totally different.
BR: If not the same, is there a rough guide for how much you need to compensate at each angle?
AM: No; you need to gain an understanding of exposure theory in order to come up with a good exposure in rapidly changing situations without having to take a test image and look at the histogram. That said, except for backlight I do not recommend shooting more than 10 or 15 degrees off of sun angle.
BR: Is the answer different if its overcast?
AM: Yes. You say that you have been studying the blog posts but I am confused as I have been commenting on the sun in/sun out exposure issues for quite some time….
BR: The situation where I’m not sure what shooting mode to use, is on a moving zodiac shooting sea otters or seals or puffins etc on the surface of the (dark) water, and cormorants or puffins or albatross in flight, sometimes with a lot of dark sea in the shot, sometimes a lot of sky (bright), and sometimes with mountains in the shot, sometimes with the sun coming in and out from behind the clouds, and it is sometimes in changing light at dawn or dusk. As the shots are opportunistic, they could be from any direction from the zodiac and sometimes from one side to the other between shots as subjects come into view. This seems to cross over a few of your situations (backgrounds of rapidly changing tonality, light is changing (though not too much of background being uniform), need minimum shutter speed (but not too much of background being uniform)..). In that situation, what shooting mode do you recommend?
AM: The answer to that question depends on many, many factors. You are basically asking me to teach you in a single e-mail how to get the right exposure in virtually every lighting situation that exists…
BR: Sorry if this kind of thing has been answered already or the answer is obvious.
AM: The answer is quite obvious at least to me. Buy the two books and get to work studying them. Again, I wish that I had the time to re-write extensive sections of both of the books that I recommended, but I do not.
later and love, artie
On a Related Note
I received an e-mail from another reader who stated that I was wrong in saying that if you know the right exposure for a middle-toned subject that a bright white subject would require one stop less light. That is John Shaw’s Sunny f/22 principle.
I wrote back as politely as I could suggested that he too get copies of ABP and ABP II and study them. He wrote me a long, very confusing e-mail explaining the tests that he did that proved that I was wrong.
Man, you gotta love it. Do you understand the concept of Sunny f/22? Do you understand exposure theory?
|

|
|
All of the images created at the St. Augustine Alligator Farm and copyright Arthur Morris/BIRDS AS ART
From top left clockwise to center: Snowy Egret pair in breeding plumage, breeding plumage Cattle Egret with fill flash, large Great Egret chicks in the nest, killer breeding plumage Snowy Egret displaying, flash-as-main light Great Egret chick happy to see mom, Little Blue Heron chicks, Cattle Egret breeding plumage head portrait, flash flight Wood Stork with nesting material, Great Egret landing at the nest, large Snowy Egret chicks.
Click on the image to enjoy a larger version.
|
St. Augustine Alligator Farm Short-Notice IPT. 3-FULL DAYS. Early entry/Late stay. May 5-7, 2014. Meet and greet at 8pm on Sunday May 4: $1299. Two Great Leaders: Arthur Morris and Denise Ippolito
This trip needs four to run.
Breeding herons, egrets, and Wood Storks. Eggs and chicks in the nest. Some fledged young possible. Breeding behaviors including displaying and copulations. Flight and flash flight. Great Egret, Snowy Egret, Little Blue Heron, Cattle Egret, Tricolored Heron, Wood Stork. Early May rocks at the Farm as the weather is usually gorgeous and there should be lots of both small and large chicks in the nest. And you avoid the possibly oppressive heat of June and July.
Includes in-the-field instruction, early entry, late stay, $5/person late-stay gratuity, informal, small group Photoshop and image review sessions. Three lunches.
Not included: your lodging, your St. Augustine Alligator Farm photographer’s pass ($79.95 for the year); we will be more than glad to pre-order your pass for you. Please let us know when you register.
What you will learn:
How to see the good situations.
How to best avoid the clutter of a rookery by choosing the very best perspective.
How to properly evaluate the histogram and come up with the right exposure every time after making a single test exposure
How to see and understand the light.
How to to design pleasing images by mastering your camera’s AF system.
Why you must work in Manual mode 95% of the time when photographing at a rookery and how to do it.
How to evaluate and process your images.
Via intensive instruction how to use fill flash flash as main light, and Manual flash.
Flash flight techniques including the necessary use of high speed sync.
And tons more.
Please call Jim or Jen at 863-692-0906 to hold your spot with your non-refundable $299 credit card deposit and then put your check in the mail along with your signed registration form; you can find the form here.
Suitable airports: Jacksonville (JAX), Daytona Beach (DAB), Orlando MCO).
We look forward to seeing you in the nation’s oldest city for three days of fun and learning.
Note: Folks interested in possibly continuing on to Fort DeSoto–great in spring, are invited to shoot me an e-mail.
…..
Typos
In all blog posts and Bulletins, feel free to e-mail or to leave a comment regarding any typos, wrong words, misspellings, omissions, or grammatical errors. Just be right. 🙂
April 9th, 2014 The Streak Continues
This post marks 131 straight days with a new educational blog post. With so many folks getting in the habit of using our B&H and Amazon links why quit now? To show your appreciation for my efforts here, we do ask that you use our the B&H and Amazon affiliate links on the right side of the blog for all of your purchases. Please check the availability of all photographic accessories in the BIRDS AS ART Online Store. We sell only what I use and depend on. We will not sell you junk. We know what you need to make creating great images easy and fun. And we are always glad to answer your gear questions via e-mail.
You can find the following items in the store: Gitzo tripods, Mongoose M3.6 and Wimberley heads, plates, low feet, and accessories, flash brackets, , Delkin e-film Pro Compact Flash Cards, LensCoat products, and our unique line-up of educational materials including ABP I & II, Digital Basics, Site and Set-up e-Guides, Canon and Nikon Camera Users and AF e-Guides, and MP-4 Photoshop video tutorials among others.
I would of course appreciate your using our B&H affiliate links for all of your major gear, video, and electronic purchases. For the photographic stuff mentioned in the paragraph above we, meaning BAA, would of course greatly appreciate your business. Here is a huge thank you to the many who have been using our links on a regular basis and visiting the BAA Online store as well.
This blog post took about 3 hours to assemble. Enjoy!
“The Different Tools, Different Light, Flash Off, Flash On…” Blog Post Why ISO 200 Answer….
Scroll down to Bill Richardson’s comment here to learn how I wound up at ISO 200 for Image 1. Remember, my one-size fits all ISO in all bright situations is 400.
|
|
|
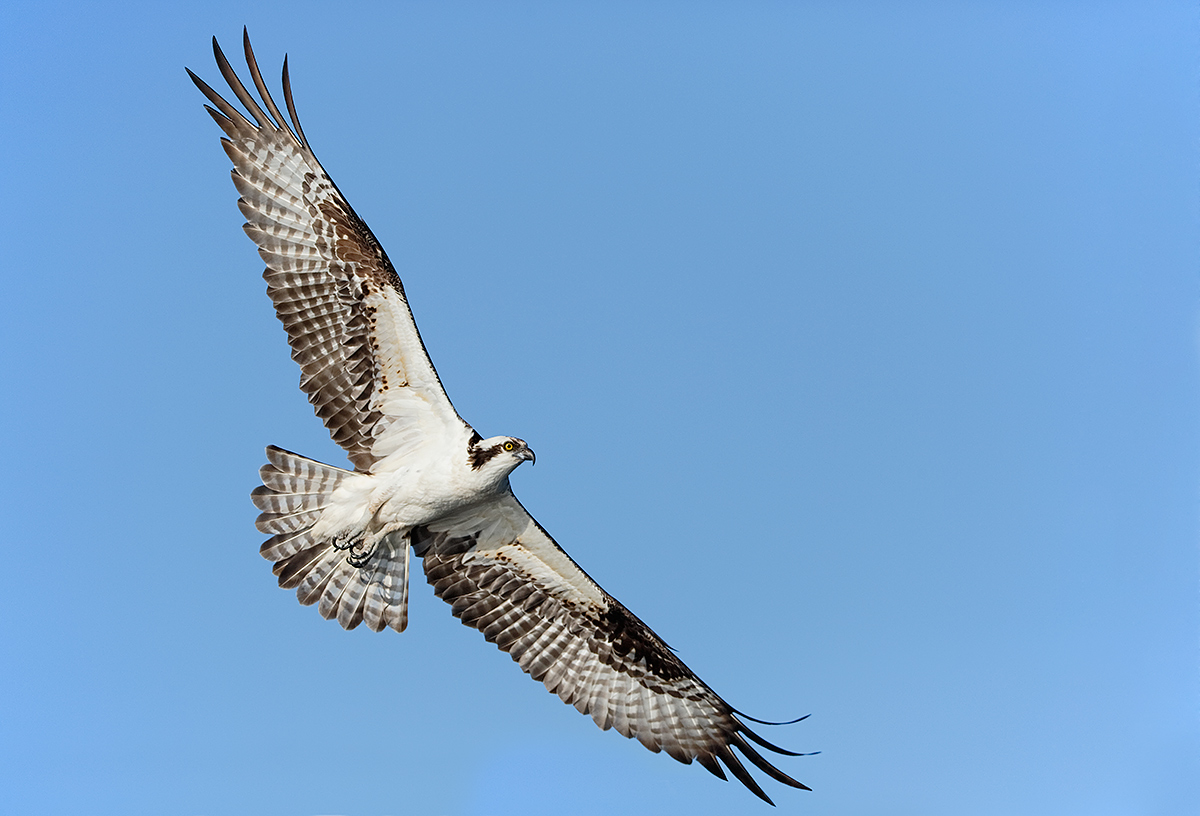
This image was created on Lake Blue Cypress on March 21, 2014 at 8:46am on a clear morning right down sun angle with the hand held the Canon EF 200-400mm f/4L IS USM Lens with Internal 1.4x Extender (with the internal TC engaged at 320mm) and the Canon EOS-1D X. ISO 800. Evaluative metering +1/3 stop as framed: 1/3200 sec. at f/7.1 in Manual mode. AWB.
Central Sensor/AI Servo-Surround/Rear Focus AF active at the moment of exposure just caught the top of the bird’s head; see the BreezeBrowser screen capture below. Click here to see the latest version of the Rear Focus Tutorial. Click on the image to see a larger version. .
|
Lake Blue Cypress
Lake Blue Cypress is an incredibly beautiful location with hundreds of pairs of Osprey all using natural nest sites. If you spend a morning and afternoon aboard Jim Neiger’s customized pontoon boat it is possible to create a wonderful Osprey portfolio in a single day. This Saturday’s trip is sold out but there is a single opening on Friday, April 11. Scroll down for details.
Update
Friday is now sold out.
|
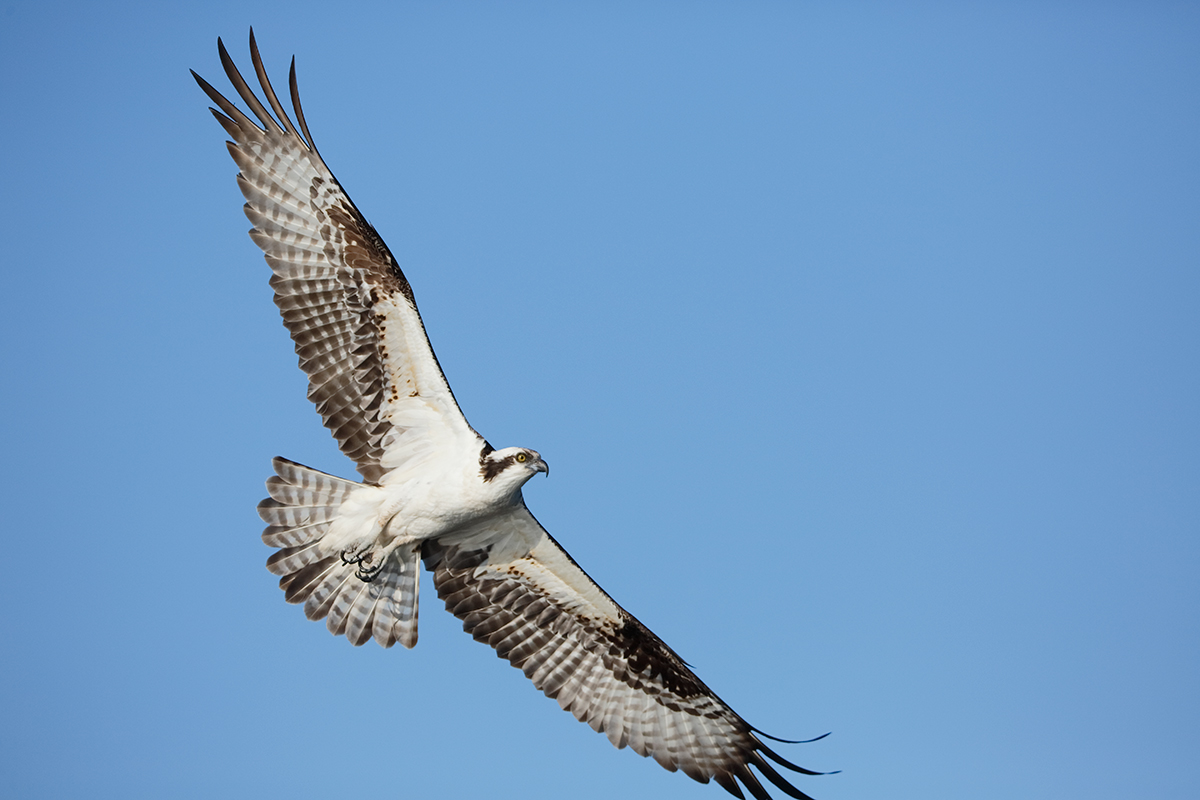
|
|
This is the original capture.
|
Greedy, Greedy, Greedy
Even having zoomed out to 320mm, I clipped the three of the bird’s left wingtips, those of the 3rd, 4th, and 5th primaries. I love the nearly perfect lighting on the underwings, the diagonal, and the placement of the bird well back in the frame so the choice to repair the missing wingtips was an obvious one. After converting the image in DPP, I expanded canvas below, grabbed the corresponding wingtips from the right wing–each on a separate layer, repositioned, transformed, and warped each of them, and then added a Regular Layer Mask to fine-tune things.
APTATS I to the Rescue
Using the techniques detailed in the 4th tutorial in APTATS I, “Clipped Feather Tip Repair,” it took me only fifteen minutes to salvage this image and replace tips of the 3 clipped primaries. I used the tip of the 5th primary to replace the missing tip of the 4th primary. And I used the tip of the first primary to replace the missing tips of the 2nd and 3rd primaries. I did work both large and carefully. The advanced knowledge of Layer Masking that I picked up from APTATS II was of course quite helpful in fine-tuning the various wingtip layers.
APTATS I & II
Learn the details of advanced Quick Masking techniques in APTATS I. Mention this blog post and apply a $5 discount with phone orders only. Learn advanced Layer Masking Techniques in APTATS II. Mention this blog post and apply a $5 discount with phone orders only. Buy the pair, APTATS I and APTATS II and we will be glad to apply at $15 discount with phone orders only.
Eye Doctor Work
Be sure to enlarge the optimized and the original versions and check out the Eye Doctor work. See more in Digital Basics immediately below.
Digital Basics
Are you tired of making your images look worse in Photoshop? Do you have no clue as to how I optimized the images above? The Photoshop stuff mentioned above plus tons more is detailed in my Digital Basics File, an instructional PDF that is sent via e-mail. It includes my complete digital workflow, dozens of great Photoshop tips, the use of Contrast Masks, several different ways of expanding canvas, all of my time-saving Keyboard Shortcuts, Quick Masking, Layer Masking, and NIK Color Efex Pro basics, my killer image clean-up techniques, Digital Eye Doctor, creating time-saving actions, and lots more.
The DPP RAW Conversion Guide
After seeing the accurate colors that I get from my DPP RAW conversions, Japan in Winter co-leader Paul McKenzie switched to DPP conversions and Denise Ippolito is considering doing the same. Now that is amazing…. To learn why I use Canon’s Digital Photo Professional (DPP) to convert every image that I work on, click here.
|
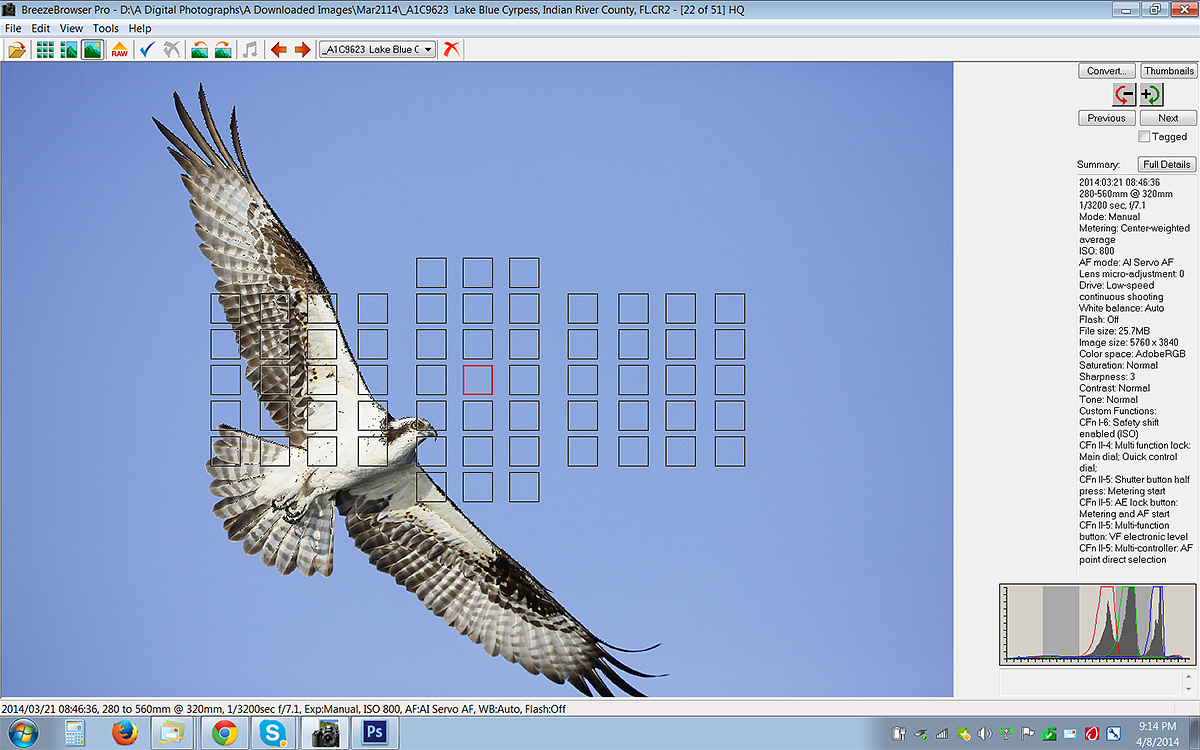
|
|
Our efforts to create flight images with large-in-the-frame subjects often results in clipped wingtips. Above is the Breezebrowser Main View screen capture for today’s image.
|
A Flight Photography Tip That You Have Never Read Anywhere Else….
Note in the BreezeBrowser screen capture above that the lower left corner of the lower left Surround AF point just barely caught the top of the bird’s head. Note: the 8 AF points surrounding the central sensor here were active; it would be nice if the sensor that was active at the moment of exposure were lit up rather than the selected sensor.
What I try to do with images like this where I want the original image file to feature the flying bird well back in the frame is to increase the speed of my panning motion just as I depress the shutter button even if that results in the active AF sensor falling on the sky. As doing this goes against instinct it requires a conscious effort to pull it off. In some cases you need to let go of the focus button (either rear or shutter) and then push the button again in order to re-acquire focus.
The heavy vignetting was corrected in Photoshop using Filter/Lens Correction/Custom on a separate layer as described in Digital Basics File.
The Breezebrowser Main View Screen Capture
Above is the BreezeBrowser Main View screen capture for today’s image. Note that the illuminated red square shows the AF point that was selected. Note: in Breezebrowser you need to check “Show Focus Points” under View to activate this feature. To see the focus points in DPP check “AF Point” under View or hit Alt L. Hit Alt M to see Highlight Alert. To learn how and why I use DPP (Canon Digital Photo Professional) to convert my RAW files, see the info on our DPP RAW Conversion Guide here.
Note the perfect histogram the WHITEs well into the rightmost histogram box. Regular readers know that I use and depend on BreezeBrowser every day of the year. It allows me to sort my keepers and delete the rejects faster than any other Windows browsing program. We use it on the main computer in the home office to catalog our images file-drawer style. And the companion program, Downloader Pro allows me to download my images quickly and conveniently. It automatically adds my IPTC data and the shooting location. I have it set up to create a folder named by the Month/date/year. The Breezebrowser/Downloader Pro combo saves me many hours each week. To learn more or to purchase this great PC only program, click here. As far as the BreezeBrowser/Downloader Pro Combo goes, if you are using a Windows platform and are not using these two great programs you are at best, wasting your valuable time. My understanding is that Photo Mechanic is best for Mac-users who do not opt to run Parallels or VM Ware fusion on their Macs so that they can enjoy the many advantages of BreezeBrowser. See BreezeBrowswer on a Mac for details.
|
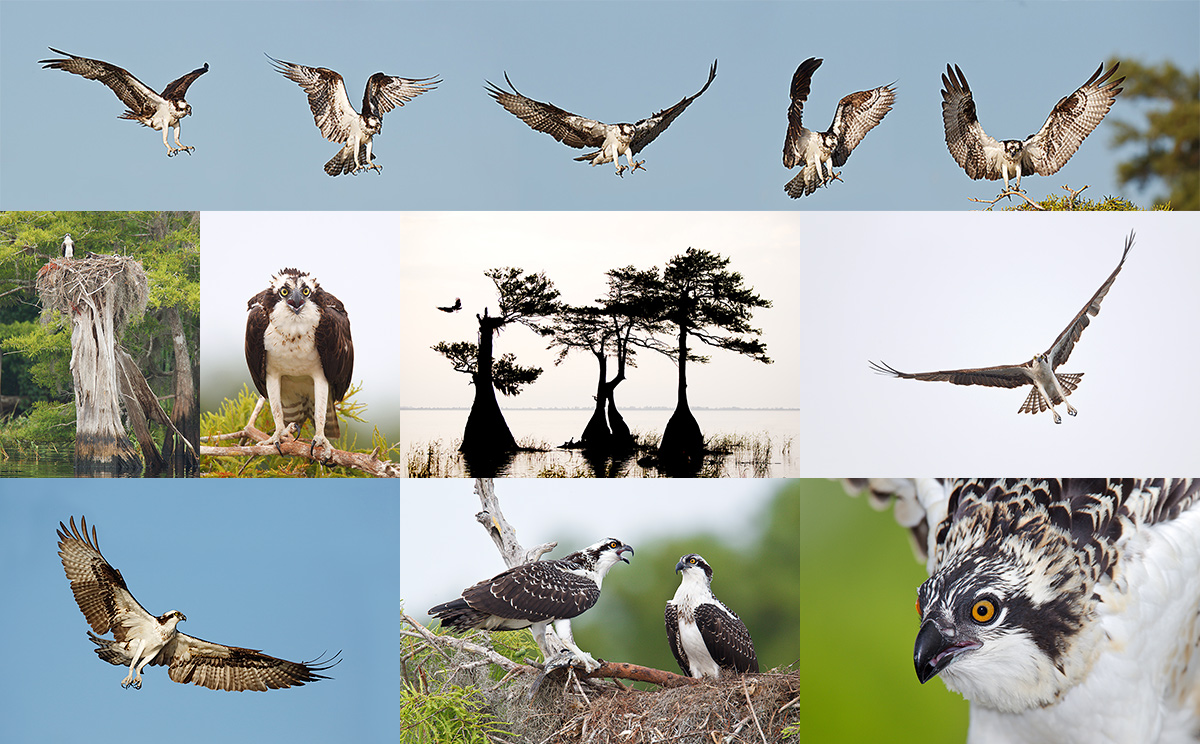
|
|
All images created on Lake Blue Cypress. Copyright Arthur Morris/BIRDS AS ART. Click on the composite to enjoy a larger version.
|
Lake Blue Cypress Osprey Heaven Full-Day In-the-Field Hand Holding Workshops via Customized Pontoon Boat
Two 3+ hour shooting sessions on a beautiful cypress lake teeming with Osprey; Barred Owl almost guaranteed. Red-shouldered Hawk and Pileated Woodpecker likely. Be sure to follow the link to Jim’s gallery below.
2 great leaders: Captain Jim Neiger and Arthur Morris.
Update
Friday and Saturday are now sold out.
Each full day booking includes a delicious healthy lunch at my home. Overnight lodging at my home is available cheap on a limited basis for folks who would like to do more than one day. Please inquire via e-mail.
Because of the late date payment in full by credit card is due now. Please e-mail for additional details of info or call Jim or Jennifer at 863-692-0906 to register.
Check out Jim Neiger’s Osprey Heaven/Lake Blue Cypress Gallery here and you will be amazed as to the quality of the flight and action images and the possibilities.
Flight Plan
If you want to learn to be a better flight photographer, check out Jim Neiger’s great e-Guide here.
Support the BAA Blog. Support the BAA Bulletins: Shop B&H here!
We want and need to keep providing you with the latest free information, photography and Photoshop lessons, and all manner of related information. Show your appreciation by making your purchases immediately after clicking on any of our B&H or Amazon Affiliate links in this blog post. Remember, B&H ain’t just photography!


Amazon
Everyone buys something from Amazon, be it a big lens or deodorant. Support the blog by starting your search by clicking on the logo-link below. No purchase is too small to be appreciated; they all add up. Why make it a habit? Because I make it a habit of bringing you new images and information on an almost daily basis.
Typos
In all blog posts and Bulletins, feel free to e-mail or to leave a comment regarding any typos, wrong words, misspellings, omissions, or grammatical errors. Just be right. 🙂
April 8th, 2014 The Streak Continues
This post marks 130 straight days with a new educational blog post. With so many folks getting in the habit of using our B&H and Amazon links why quit now? To show your appreciation for my efforts here, we do ask that you use our the B&H and Amazon affiliate links on the right side of the blog for all of your purchases. Please check the availability of all photographic accessories in the BIRDS AS ART Online Store. We sell only what I use and depend on. We will not sell you junk. We know what you need to make creating great images easy and fun. And we are always glad to answer your gear questions via e-mail.
You can find the following items in the store: Gitzo tripods, Mongoose M3.6 and Wimberley heads, plates, low feet, and accessories, flash brackets, , Delkin e-film Pro Compact Flash Cards, LensCoat products, and our unique line-up of educational materials including ABP I & II, Digital Basics, Site and Set-up e-Guides, Canon and Nikon Camera Users and AF e-Guides, and MP-4 Photoshop video tutorials among others.
I would of course appreciate your using our B&H affiliate links for all of your major gear, video, and electronic purchases. For the photographic stuff mentioned in the paragraph above we, meaning BAA, would of course greatly appreciate your business. Here is a huge thank you to the many who have been using our links on a regular basis and visiting the BAA Online store as well.
This blog post took about 3 hours to assemble. Enjoy!
Dreaming of Africa?
No need. Check out the wonderful video from Gustafson Photo Safaris here and Todd’s amazing image galleries here. You will find details on this summer’s Tanzania Photo Safari below.
|
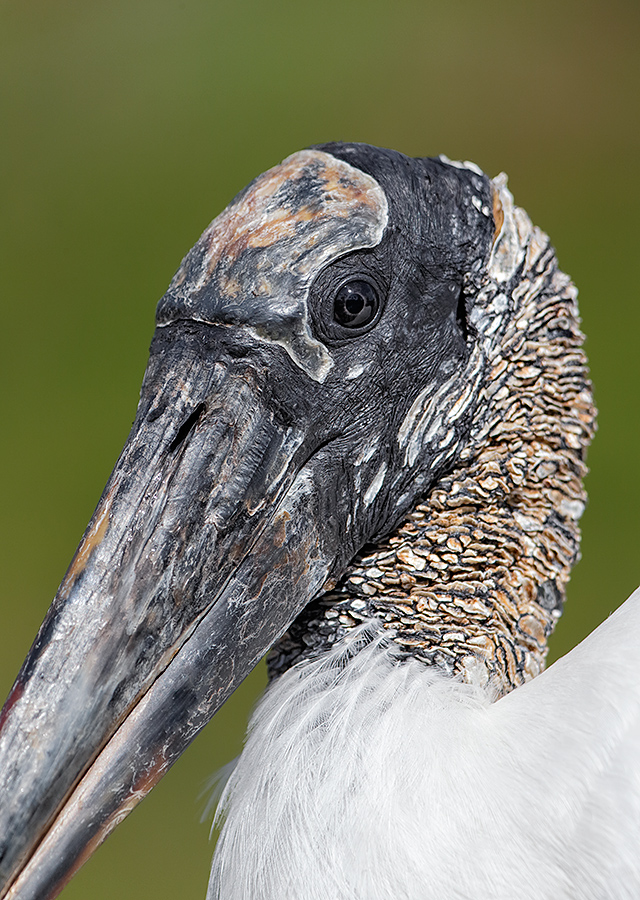
|
|
This image was created at Gatorland on Saturday April 5, 2014 at 4:38pm on a clear afternoon in direct sunlight. I hand held the Canon EF 200-400mm f/4L IS USM Lens with Internal 1.4x Extender (with the internal TC engaged at 490mm) and the Canon EOS-1D X. ISO 400. Evaluative metering +1/3 stop as framed: 1/1600 sec. at f/6.3 in Avmode. AWB.
Three sensors up from the central Sensor/AI Servo-Surround/Rear Focus AF directly on the bird’s eye as originally framed was active at the moment of exposure. Practicing so that you are able to change AF sensors almost instantly is an important skill to work on. Learn everything there is to know about the 1D X and 5D III AF systems including how to manage the various AF Area Selection Modes, when to use which one, and several ways to move the AF sensor around in my 1D X AF Guide and the 5D Mark III User’s Guide. Click here to see the latest version of the Rear Focus Tutorial. Click on the image to see a larger version. .
Image #1: Wood Stork Head and Face Detail.
|
Striking While the Iron is Hot
I have been asking lots of questions lately, and many folks have put their thinking caps on and left comments with their answers. There have been lots of right answers and lots of wrong answers. Some wrong answers however were perfect for another question :).
Here we will take an in-depth look at the questions from yesterday’s post. Enjoy the learning.
Note: I have responded to each comment in yesterday’s post here.
Image Questions
Questions in green
Answers in white.
#1: Why was I in Av mode for Image #1 but in Manual mode for Image #2?
Only Greg Payne got this one right; he nailed it when he wrote: “Aperture priority for #1 because it was possibly a fleeting opportunity and it had just occurred. You could dial in compensation and go to work. As the bird stayed around you could go to manual exposure based on the readings used previously.” The clue was in the story, and I quote: “Dierdre, Lynn, and I had just arrived and gotten our gear set up when some kids began tossing some gator food-pellets into the water. This in turn attracted not only a flock of small gators but some birds as well. Wood Storks rarely sit on the boardwalk railings, but this one pictured here was hungry for a pellet. I grabbed my 200-400 and went to work opting to hand hold so that I could frame accurately and react quickly.”
When presented with a new situation, as I was when creating the image above (having just arrived and grabbed my 2-4), I will most often go to Av mode. Having studied exposure for close to 3 decades now, I can usually set the exposure compensation to within 1/3 stop of perfect. Here I nailed it at +1/3. Once I knew the right exposure for the Wood Stork, 1/1600 sec. at f/6.3, I set that exposure manually. In effect, I had worked in Av mode to do my exposure check.
Here’s the best news: you too can learn to determine the right exposure compensation with just a glance, to see and understand the light, to understand what your camera’s meter is doing, and to understand the influence of the various tonalities, be they black or white, light or dark, on the metering system. How? Study the chapter on Exposure in the original, soft cover, The Art of Bird Photography (ABP), especially the section on exposure theory. And once you have mastered that, study the Exposure Simplified section in The Art of Bird Photography II (ABP II: 916 pages, 900+ images). You can save $10 by ordering the two-book bundle here.
#2: The exposure for Image #1 was perfect. Why did I need to go 1/3 stop darker for Image #2?
There were lots of misconceptions when folks attempted to answer this one. When you are working in Manual mode the shutter speed and the aperture together determine the exposure. The exposure compensation is the result not the cause. When you are working in an automatic mode like Av or Tv the EC is the cause. With image 1 the exposure was 1/1600 sec. at f/6.3. In image #2 the exposure was 1/2000 sec. at f/6.3, 1/3 stop darker.
The difference in the exposure compensations for the 2 images was the result of the differences in subject size, framing, and the amount of dark background.
So why did I go 1/3 stop darker (1/2000 sec. at f/6.3 is 1/3 stop darker than 1/1600 sec. at f/6.3) for image #2? Because the WHITEs on a Great Egret are brighter than the WHITEs on a Wood Stork. Knowing that, I made one image with the two birds in the frame, checked the histogram, saw the blinkies on the Great Egret, and spun the finger wheel dial 1/3 stop clockwise to increase the shutter speed from 1/1600 sec. to 1/2000 sec.
#3: Why should I definitely have gone to a smaller aperture, at least down to f/9, for Image #1?
Though Doug West hinted at the right answer Eve Turek and John Beasely got this one right: stopping down would have sharpened up the back of the stork’s neck.
#4: What is the one thing about Image #2 that bugs me a bit?
Kudos to multiple IPT veteran Doug West who knows me too well. He stated, “The head angle of the egret; it was facing slightly away.”
#5:Considering the fact that the aperture was the same, f/6.3. why does the skin on the Wood Stork’s neck look so much sharper in Image 2 than in Image 1?
Several folks got this one right but John Beasley said it best: “Oops. Question 5 – the neck is sharper because the subject was further away from your camera so your DOF is greater?” Only a wrong word kept him away from perfection. He should have used “farther” as he was referring to distance. Further refers to advancing a thought or idea.
|
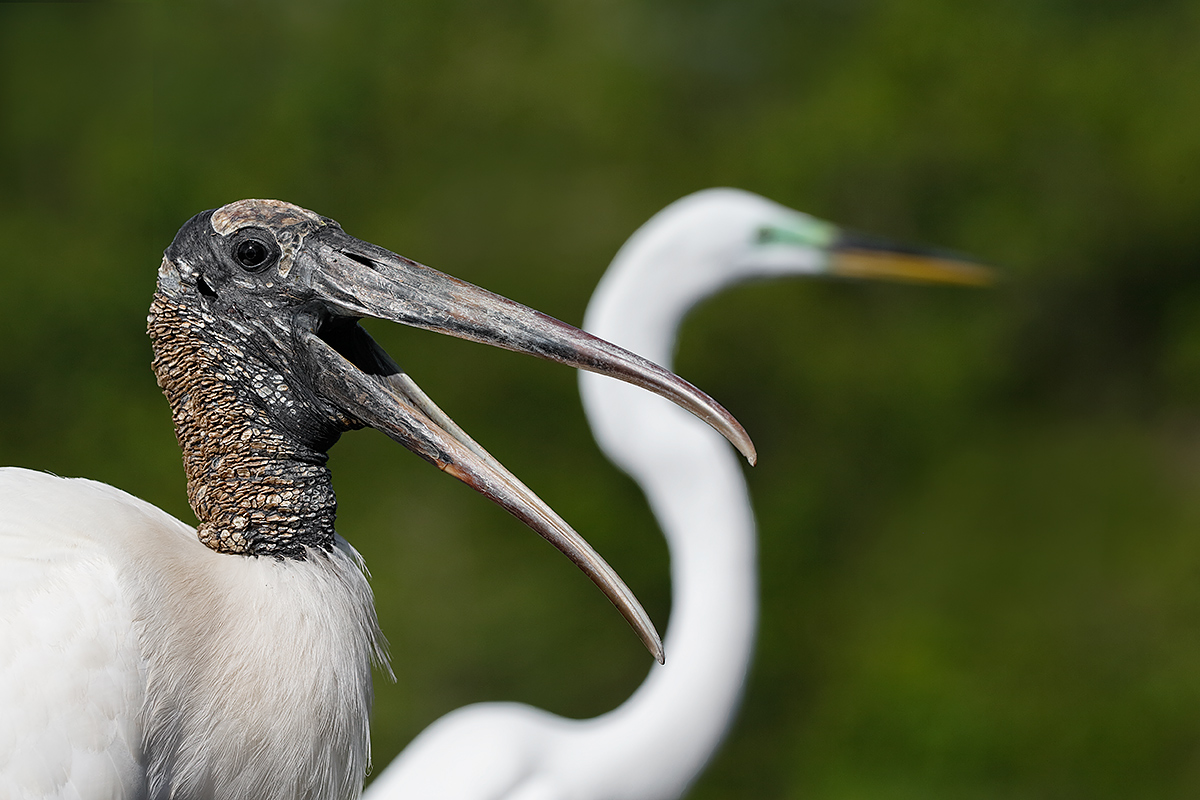
|
|
This image was also created at Gatorland on Saturday April 5, 2014, this one–of the same bird, at 4:39pm, about one minute after I created the opening image in this blog post. Again, on a clear afternoon in direct sunlight. And again I hand held the Canon EF 200-400mm f/4L IS USM Lens with Internal 1.4x Extender (at 250mm) and the Canon EOS-1D X. ISO 400. Evaluative metering -1/3 stop as framed: 1/2000 sec. at f/6.3 in Manual mode. AWB.
Three sensors to the left of the central Sensor/AI Servo-Surround/Rear Focus AF on the base of the stork’s lower mandible (as originally framed) was active at the moment of exposure. Again, practicing so that you are able to change AF sensors almost instantly is an important skill to work develop. You can learn everything that there is to know about the 1D X and 5D III AF systems including how to manage the various AF Area Selection Modes, when to use which one, and several ways to move the AF sensor around in my 1D X AF Guide and the 5D Mark III User’s Guide. Click here to see the latest version of the Rear Focus Tutorial. Click on the image to see a larger version.
Image #2: Wood Stork/Great Egret Juxtaposition.
|
My Favorite?
I like both images equally. Had the Great Egret had its head square to the back of the camera in the second image, it would have been my favorite by far.
Confused?
If you are confused by anything that I wrote above, do let me know by leaving a comment below and I will try to help.
Comments and Answers
After I publish this at about 11:15am, I will address the many comments left at the original post here.
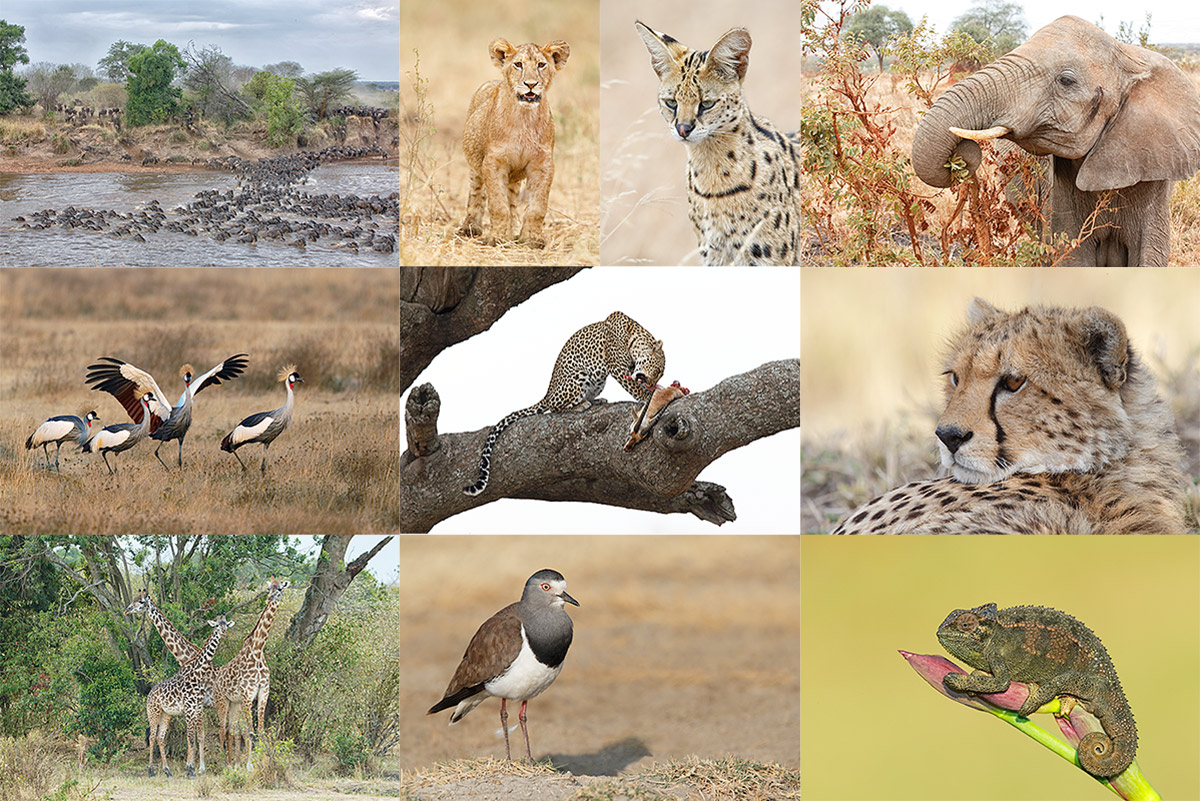
|
|
Now is about your last chance to join me for the 2014 Tanzania Summer Safari!
|
2014 Tanzania Summer Safari, 14-day African Adventure/leave the US on August 9. Fly home on August 24: $12,999.
Leader: Arthur Morris. Three photographers/van; you get your own row of seats. Our trip is a bit more expensive than the average safari for good reason. It is the best. We have the best driver guides with a total of decades of experience. They have been trained over the years by Todd and by me to drive with photography in mind. We stay in the best lodges and camps. We hope that you will join me for my 8th 35th African photo safari.
If you are seriously interested please e-mail me; I will be glad to send you the illustrated PDF with the complete itinerary and deposit info.
What else makes this expedition unique?
•Pre-trip consultation and camera equipment advice
•Award-winning photographers as your guides
•A seamless itinerary visiting the right locations at the best time of year
•Hands-on photography instruction in the field
•Specially designed three roof-hatch photo safari vehicles
•Proprietary materials for preparation, including free copy of “A Photographer’s Guide to Photographing in East Africa.”
•Post-safari image critiques
All-inclusive (double-occupancy) except for your flights to and from Kilamajaro Airport, bar drinks, soda & water (except at the Intimate Tented Camp where everything is free for our entire stay), tips for drivers and camp staff, personal items, and trip insurance.
Support the BAA Blog. Support the BAA Bulletins: Shop B&H here!
We want and need to keep providing you with the latest free information, photography and Photoshop lessons, and all manner of related information. Show your appreciation by making your purchases immediately after clicking on any of our B&H or Amazon Affiliate links in this blog post. Remember, B&H ain’t just photography!


Amazon
Everyone buys something from Amazon, be it a big lens or deodorant. Support the blog by starting your search by clicking on the logo-link below. No purchase is too small to be appreciated; they all add up. Why make it a habit? Because I make it a habit of bringing you new images and information on an almost daily basis.
Typos
In all blog posts and Bulletins, feel free to e-mail or to leave a comment regarding any typos, wrong words, misspellings, omissions, or grammatical errors. Just be right. 🙂
April 7th, 2014 The Streak Continues
I enjoyed another great weekend at Gatorland with my Saturday group of 5 and with Lynn Dolson staying on for Sunday morning when we were joined by the very pleasant Don Jones of Apopka, FL. Lynn became comfortable getting the right exposure using Manual mode and with moving her AF sensor around to create pleasing images. Don learned a ton too; his biggest lesson: frame looser. Thanks to all who attended.
This post marks 129 straight days with a new educational blog post. With so many folks getting in the habit of using our B&H and Amazon links why quit now? To show your appreciation for my efforts here, we do ask that you use our the B&H and Amazon affiliate links on the right side of the blog for all of your purchases. Please check the availability of all photographic accessories in the BIRDS AS ART Online Store. We sell only what I use and depend on. We will not sell you junk. We know what you need to make creating great images easy and fun. And we are always glad to answer your gear questions via e-mail.
You can find the following items in the store: Gitzo tripods, Mongoose M3.6 and Wimberley heads, plates, low feet, and accessories, flash brackets, , Delkin e-film Pro Compact Flash Cards, LensCoat products, and our unique line-up of educational materials including ABP I & II, Digital Basics, Site and Set-up e-Guides, Canon and Nikon Camera Users and AF e-Guides, and MP-4 Photoshop video tutorials among others.
I would of course appreciate your using our B&H affiliate links for all of your major gear, video, and electronic purchases. For the photographic stuff mentioned in the paragraph above we, meaning BAA, would of course greatly appreciate your business. Here is a huge thank you to the many who have been using our links on a regular basis and visiting the BAA Online store as well.
This blog post took about 2 1/2 hours to assemble. Enjoy!
|

|
|
This image was created at Gatorland on Saturday April 5, 2014 at 4:38pm on a clear afternoon in direct sunlight. I hand held the Canon EF 200-400mm f/4L IS USM Lens with Internal 1.4x Extender (with the internal TC engaged at 490mm) and the Canon EOS-1D X. ISO 400. Evaluative metering +1/3 stop as framed: 1/1600 sec. at f/6.3 in Av mode. AWB.
Three sensors up from the central Sensor/AI Servo-Surround/Rear Focus AF directly on the bird’s eye as originally framed was active at the moment of exposure. Practicing so that you are able to change AF sensors almost instantly is an important skill to work on. Learn everything there is to know about the 1D X and 5D III AF systems including how to manage the various AF Area Selection Modes, when to use which one, and several ways to move the AF sensor around in my 1D X AF Guide and the 5D Mark III User’s Guide. Click here to see the latest version of the Rear Focus Tutorial. Click on the image to see a larger version. .
Image #1: Wood Stork Head and Face Detail.
|
Unmatched Versatility
That the versatility of the Canon EF 200-400mm f/4L IS USM Lens with Internal 1.4x Extender is–as you can see by looking at the images above and below, each made from virtually the same spot–unmatched is not open to debate. Dierdre, Lynn, and I had just arrived and gotten our gear set up when some kids began tossing some gator food-pellets into the water. This in turn attracted not only a flock of small gators but some birds as well. Wood Storks rarely sit on the boardwalk railings, but this one pictured here was hungry for a pellet. I grabbed my 200-400 and went to work opting to hand hold so that I could frame accurately and react quickly.
First, I went to vertical for the tight face portrait. And rotated the tripod collar; see below for details on that. Then, just as the Wood Stork opened it’s bill and kept it open–I did not hear any laughing, the Great Egret landed right down sun angle right behind the stork. I had wanted to create a horizontal head portrait of the stork with his bill open but the egret put the kibosh on that so I dis-engaged the internal TC and created the juxtaposition image below.
Image Questions
#1: Why was I in Av mode for Image #1 but in Manual mode for Image #2?
#2: The exposure for Image #1 was perfect. Why did I need to go 1/3 stop darker for Image #2?
#3: Why should I definitely have gone to a smaller aperture, at least down to f/9, for Image #1?
#4: What is the one thing about Image #2 that bugs me a bit?
#5:Considering the fact that the aperture was the same, f/6.3. why does the skin on the Wood Stork’s neck look so much sharper in Image 2 than in Image 1?
|

|
|
This image was also created at Gatorland on Saturday April 5, 2014, this one–of the same bird, a minute after I created the opening image in this blog post. Again, on a clear afternoon in direct sunlight. And again I hand held the Canon EF 200-400mm f/4L IS USM Lens with Internal 1.4x Extender (at 250mm) and the Canon EOS-1D X. ISO 400. Evaluative metering -1/3 stop as framed: 1/2000 sec. at f/6.3 in Manual mode. AWB.
Three sensors to the left of the central Sensor/AI Servo-Surround/Rear Focus AF on the base of the stork’s lower mandible (as originally framed) was active at the moment of exposure. Again, practicing so that you are able to change AF sensors almost instantly is an important skill to work develop. You can learn everything that there is to know about the 1D X and 5D III AF systems including how to manage the various AF Area Selection Modes, when to use which one, and several ways to move the AF sensor around in my 1D X AF Guide and the 5D Mark III User’s Guide. Click here to see the latest version of the Rear Focus Tutorial. Click on the image to see a larger version.
Image #2: Wood Stork/Great Egret Juxtaposition.
|
200-400 Hand Holding Tips & Techniques for Static Subjects
#1-Replace the original lens foot with the CR-X5 Low Foot. Learn a lot more here. Doing so saves a few ounces in weight and more importantly, allows me to use my preferred and functional hand holding grip. For the 200-400 I use the last (rear) hole on the CR-X5. (The CR-X5 is pretty much mandatory for those using the 200-400 on a tripod and the same goes for all of the Series II super-telephotos as the CR-X5 allows you to position the foot–which serves as the lens plate–for perfect balance. It is the only lens plate that allows you to do this.
#2: Do not face the subject: stand roughly sideways to it, like an Olympic rife shooter.
#3: Unless you are positive that the bird is going to fly away in a moment, take the time to turn the tripod collar so that the lens plate is at the bottom of the lens whether you are working in horizontal or format or vertical format. If the tripod collar (and therefore the lens plate) is in the wrong position, then you need to rotate it 90 degrees.
#4: Grasp the end of the CR-X-5 plate with the last two fingers of your left hand. This will put the weight of the lens onto the heel of your left hand. The thumb and then middle finger will rest on the zoom ring. The pointer finger will rest on the lens just forward of the zoom ring. This acts as a point of support.
#5: When you raise the lens from the rest position tuck your left elbow into your body so that the elbow is resting just above the top of the hip bone. This shooting position will allow you to hold the lens steady for extended periods of time with the weight of the rig supported by your body structure rather than by your arms alone. This techniques also works well when photographing static subjects with super-telephoto lenses. Note that having the the CR-X5 foot properly positioned below the lens gives you additional elevation….
|
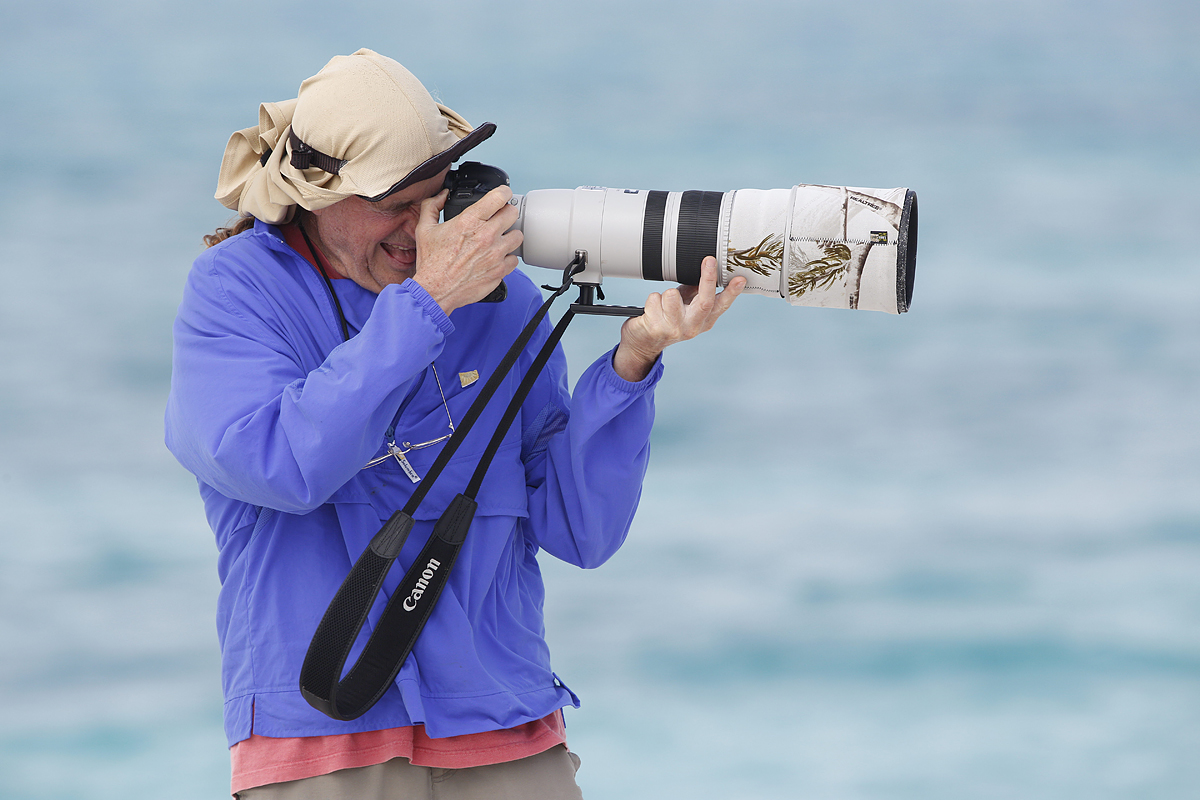
|
|
Yours truly hand holding the 200-400 in the Galapagos. Image courtesy of and copyright 2013 Denise Ippolito/A Creative Adventure.
|
A Picture is Worth a Thousand Words
Click on the image above to more easily note the lens plate properly positioned below the lens when working in horizontal format, the position of the fingers of the left hand, and the left arm tucked against the body. Note also that I am roughly sideways to my subject. Thanks to Lady D for the use of the image.
Your Favorite
Please take a moment to let all know which image you prefer, #1 or #2. And do let us know why.
|

|
|
I hope that you can join us on this great trip. The vertical puffin image was created by David Tipling. The rest–almost all from the UK, are mine :).
|
UK Puffins and Gannets IPT July 2-9, 2014. 5 full days of puffins and two half-days of gannet boat photography: $4,999 USD. Limit 10 + the 2 leaders.
Desperately seeking: 1 female roommate & 1 male roommate.
With 5 folks registered, this trip is a go.
Fly to Edinburgh (say “ED-in-BRUH”), Scotland on a red eye flight on July 1st arriving on the early morning of July 2 or certainly before 10am. UK folks who plan on driving please contact me via e-mail immediately.
There are direct flights to Edinburgh from both Philadelphia and Toronto. If you learn of any others please advise via e-mail so that I may share with all the interested folks. Fly home mid-morning on July 9. UK locals and our many European friends are of course welcome.
With 5 deposits in hand, this trip is a go; you can buy your flights now :).
What’s included:
5 full DAYS on the best UK puffin boat; trips to 2 different islands–all dependent on decent weather, i.e, no major storms. Seabirds including scads of Atlantic Puffin both in flight and perched, Razorbill, Great Cormorant, Shag, and others likely. The trip is timed to maximize the opportunities for photographing the puffins bringing fish back to the nests. All boat fares and landing fees are included. The boat leaves at 9:30am. We have two hours on the first island. We are then picked up and head to the 2nd island for a 2+ hour session. The weather is typically cloudy bright.
One late-afternoon (2 July) and one early morning (probably 8 July) trip on a gannet photography boat where the birds are fed and dive very close to the boat. Both are dependent on good weather but we do have some flexibility. Boat fares and the cost of the fish are covered. Each will consist of a one hour outbound ride, two hours of diving Northern Gannet photography (with 6 boxes of fish) and the one hour return trip.
The tentative, weather-dependent itinerary:
July 2: airport pick-up no later than 10am UK time. Lunch on your dime. Drive to hotel. Afternoon gannet boat trip/time TBD.
July 3, 4, 5, 6, & 7: Full Day Puffin Boat trips as noted above.
July 8: early morning Gannet Boat trip. Afternoon: Small group Image review and Photoshop sessions. Pack for the trip home.
July 9: early morning departure for Edinburgh Airport (EDI).
The itinerary is subject to change to ensure the best possible photographic opportunities.
A super-telephoto lens is not required on this trip. The 300mm f/2.8s are ideal. I will be bringing one along with my 200-400mm with Internal Extender, my 70-200 f/2.8L IS II, and a shorter zoom lenses. Plus three 1.4X and two 2X TCs, a Gitzo 3532 LS Carbon Fiber tripod, and my Mongoose M3.6. I may go tripod-less on the puffin trips at times…. Or not…. All photography on the gannet boat will be hand held. It is likely that the 70-200s will be ideal for the gannets.
7 nights lodging in an older but excellent hotel just a few minutes from the puffin boat dock with about a 70 minute ride to the gannet boat. Double occupancy will be the rule though we might be able to offer a single supplement at an exorbitant price. See the hotel info here.
All breakfasts and dinner (at the hotel) from dinner on July 2 through dinner on July 8. And breakfast on our get-away day unless we need to leave earlier than they serve to make our flights home…
Airport pick-up until 10am on July 2–this should not be a problem as there are lots of red-eye flights from the US to Edinburgh.
All ground transportation. Airport return on the early morning of July 9. We may be getting up very early on July 9th.
Two great leaders; Denise Ippolito and yours truly will provide personalized and small group in-the-field instruction. As usual, the closer you stay to us and the more questions that you ask the more you will learn. We will of course point out the best situations. You will learn to see these great situations for yourself, to get the right exposure every time after making a single test exposure, to work in Manual mode, and to design pleasing images by mastering your camera’s AF system. You will learn the basics of photographing birds in flight and how the relationship between light direction and wind direction impacts the photography of both birds in flight and perched puffins. And tons more.
We will be conducting informal, small group image review and Photoshop sessions after dinner. All are invited to bring their laptops. Image critiques of your five best images will be done after the trip upon request.
Early morning castle photography right near the hotel is an option for the early risers. In the event of inclement weather or stormy seas there is the possibility of bird photography along the coast. Early evening bird photography along the coast is also optional.
Not included: all lunches–for the most part we will need to pack lunches for the puffin trips, or you may opt to skip lunch. Your round trip airfare from home to Scotland. Booze, wine, and any other beverages other than coffee and tea at breakfast.
A non-refundable deposit of $2,000 USD is required to hold your spot so please check on flights and your schedule before committing. The balance will be due on 15 May so you may wish to pay the whole thing at once. Overseas folks may e-mail for wire transfer info. Our $15 wire transfer fee will be added to your balance.
Trip insurance is highly recommended as your deposit (less a $200 cancellation fee) will not be refunded unless the trip fills completely. I, and my family, use Travel Insurance Services.
After letting us know via e-mail that you will be coming, please send your deposit check made out to “Arthur Morris” to us as follows:
Arthur Morris/BIRDS AS ART
PO Box 7245 (US mail) or 4041 Granada Drive (if by courier).
Indian Lake Estates, FL 33855
My friend David Tipling, with multiple BBC honored images and the author of dozens of photo illustrated books, helped with the planning and arrangements for this trip.
If you have any questions, please contact me via e-mail.
Support the BAA Blog. Support the BAA Bulletins: Shop B&H here!
We want and need to keep providing you with the latest free information, photography and Photoshop lessons, and all manner of related information. Show your appreciation by making your purchases immediately after clicking on any of our B&H or Amazon Affiliate links in this blog post. Remember, B&H ain’t just photography!


Amazon
Everyone buys something from Amazon, be it a big lens or deodorant. Support the blog by starting your search by clicking on the logo-link below. No purchase is too small to be appreciated; they all add up. Why make it a habit? Because I make it a habit of bringing you new images and information on an almost daily basis.
Typos
In all blog posts and Bulletins, feel free to e-mail or to leave a comment regarding any typos, wrong words, misspellings, omissions, or grammatical errors. Just be right. 🙂
April 6th, 2014 The Streak Goes On
First off, I would like to give a shout out to Quazi Ahmed Hussain who was tricked 100% by my Canon new gear belated April Fool’s spoof. In a comment here he wrote: “If my Guru fools me; I feel honored. Because this means he cares about me. Where else can I get this honor! Hats off to you Guru. I mean what I said above.” Quazi, thanks for your kind words and for being so understanding and accepting.
This post marks 128 straight days with a new educational blog post. With so many folks getting in the habit of using our B&H and Amazon links why quit now? To show your appreciation for my efforts here, we do ask that you use our the B&H and Amazon affiliate links on the right side of the blog for all of your purchases. Please check the availability of all photographic accessories in the BIRDS AS ART Online Store. We sell only what I use and depend on. We will not sell you junk. We know what you need to make creating great images easy and fun. And we are always glad to answer your gear questions via e-mail.
You can find the following items in the store: Gitzo tripods, Mongoose M3.6 and Wimberley heads, plates, low feet, and accessories, flash brackets, , Delkin e-film Pro Compact Flash Cards, LensCoat products, and our unique line-up of educational materials including ABP I & II, Digital Basics, Site and Set-up e-Guides, Canon and Nikon Camera Users and AF e-Guides, and MP-4 Photoshop video tutorials among others.
I would of course appreciate your using our B&H affiliate links for all of your major gear, video, and electronic purchases. For the photographic stuff mentioned in the paragraph above we, meaning BAA, would of course greatly appreciate your business. Here is a huge thank you to the many who have been using our links on a regular basis and visiting the BAA Online store as well.
This blog post took about 1 1/2 hours to assemble. Enjoy!
Gatorland Yesterday
It was a busy day at Gatorland yesterday. There were lots of photographers out early enjoying the great weather. My group of 5 eager-to learn folks included a group of 3 from southeast Florida, David Bates, and William Freund and his son Max. Multiple IPT veteran and dear friend Deirde Sheerr-Gross and first-timer Lynn Dolson who drove up from Fort Myers rounded out the group. It was great to see an influx of new birds in full breeding plumage. Those included a fresh batch of Great Egrets–2 seen here, several Snowy Egrets, and more than a dozen of my favorite Gatorland species, Cattle Egret. Everyone in the group but Deirdre needed lots of help with exposure: get some data in the fifth histogram box(the fourth histogram box for the two Nikon-shooters), expose to the right, and make sure that there are no blinkies. Both David and William were ecstatic about what they learned. David was also thrilled that I taught him how to use his 600 II with the 2X III TC; I created a new head-hunter. And quiet Max absorbed all of the lessons without asking any questions; whenever I glanced at his histograms they were spot on.
The image above was front lit. I went to f/16 in an effort to sharpen up the flower. With d-o-f at 1200mm being so tiny I still needed to run a contrast mask on the flowers in an attempt to sharpen them up. Uncharacteristically, this bird posed very nicely for probably 10 seconds or more; that gave me time to focus on the eye and re-compose.
Image Question
Why was I at ISO 200? Trust me, nobody will get this one right. But you can never know unless you try.
Different Tools, Different Light, Flash Off, Flash On…
The opening image was created with the tripod-mounted 600II/2X III TC combo, my favorite head-hunter rig. With the on angle sunlight and me working right on sun angle with my shadow pointed directly at the subject, there was no need for fill flash. It was great seeing old friend Walt Anderson, the inventor and manufacturer of the Better Beamer, my very first mail order product.
To create the second image, the backlit one immediately above, I stood atop the sturdy plastic milk crate hand holding the 2-4. That to get above some foreground vegetation. Hand holding gives you a tremendous amount of freedom of movement. My tripod is not tall enough for me to work from atop the milk crate. With the gentle backlight I went with some extra flash: -2 as compared to the -3 that I usually use for fill. Had the backlight been stronger I would have gone with more flash, -1 or even 0. When another bird flew close by over-head, the bird I was photographing got a bit agitated and erected its head feathers as a threat. Hand hold made it easier to frame the image properly than if I have been on a tripod.
Your Favorite?
Though these images are similar, I have a clear favorite. Take a moment to leave a comment and let us know which one you like best and why you made your choice.
|

|
|
All images created on Lake Blue Cypress. Copyright Arthur Morris/BIRDS AS ART. Click on the composite to enjoy a larger version.
|
Lake Blue Cypress Osprey Heaven Full-Day In-the-Field Hand Holding Workshops via Customized Pontoon Boat
Two 3+ hour shooting sessions on a beautiful cypress lake teeming with Osprey; Barred Owl almost guaranteed. Red-shouldered Hawk and Pileated Woodpecker likely. Be sure to follow the link to Jim’s gallery below.
2 great leaders: Captain Jim Neiger and Arthur Morris.
Available dates: April 8, 9, 11 & 12, 2014.
Here are the Full Day rates:
1 photographer: $650.
2 photographers: $500 each.
3 photographers: $450 each.
4 photographers: $400.
Each full day booking includes a delicious healthy lunch at my home. Overnight lodging at my home is available cheap on a limited basis for folks who would like to do more than one day. Please inquire via e-mail.
So far one photographer signed up for Saturday, April 12; join us and enjoy at least a $150 savings.
One or two photographers may hire the boat on a private basis by paying the full day rate for 4: $1600.
Because of the late date payment in full by personal check is due now. Please e-mail for additional details of info.
Check out Jim Neiger’s Osprey Heaven/Lake Blue Cypress Gallery here and you will be amazed as to the quality of the flight and action images and the possibilities.
Here’s what BPN member David Salem had to say about a day on the lake with Jim Neiger in Pane 1 here:
“We met our friend Jim Neiger on his boat at Lake Blue Cypress and had a blast shooting hundreds of Osprey and many other species including some great shots of Barred owls. I highly suggest booking a trip with Jim on the lake as he knows the lake real well and the birds even better. It was a trip that I will never forget with literally hundreds of Osprey flying around starting their nesting season. A sight to see; will be posting some pics from the lake soon. ”
Support the BAA Blog. Support the BAA Bulletins: Shop B&H here!
We want and need to keep providing you with the latest free information, photography and Photoshop lessons, and all manner of related information. Show your appreciation by making your purchases immediately after clicking on any of our B&H or Amazon Affiliate links in this blog post. Remember, B&H ain’t just photography!


Amazon
Everyone buys something from Amazon, be it a big lens or deodorant. Support the blog by starting your search by clicking on the logo-link below. No purchase is too small to be appreciated; they all add up. Why make it a habit? Because I make it a habit of bringing you new images and information on an almost daily basis.
Typos
In all blog posts and Bulletins, feel free to e-mail or to leave a comment regarding any typos, wrong words, misspellings, omissions, or grammatical errors. Just be right. 🙂
April 5th, 2014 127
While you are reading this I am spending Saturday at Gatorland with a group of 5 eager-to-learn photographers. This post marks 127 straight days with a new educational blog post. With so many folks getting in the habit of using our B&H and Amazon links, why quit now? To show your appreciation for my efforts here, we do ask that you use our the B&H and Amazon affiliate links on the right side of the blog for all of your purchases. Please check the availability of all photographic accessories in the BIRDS AS ART Online Store. We sell only what I use and depend on. We will not sell you junk. We know what you need to make creating great images easy and fun. And we are always glad to answer your gear questions via e-mail.
You can find the following items in the store: Gitzo tripods, Mongoose M3.6 and Wimberley heads, plates, low feet, and accessories, flash brackets, , Delkin e-film Pro Compact Flash Cards, LensCoat products, and our unique line-up of educational materials including ABP I & II, Digital Basics, Site and Set-up e-Guides, Canon and Nikon Camera Users and AF e-Guides, and MP-4 Photoshop video tutorials among others.
I would of course appreciate your using our B&H affiliate links for all of your major gear, video, and electronic purchases. For the photographic stuff mentioned in the paragraph above we, meaning BAA, would of course greatly appreciate your business. Here is a huge thank you to the many who have been using our links on a regular basis and visiting the BAA Online store as well.
This blog post took about 1 1/2 hours to put together. Of 7 years if you are counting…. Enjoy!
It’s Not Too Late!
Gatorland Sunday Morning In-the-Field Workshop
7:15am till 10:45 photo session. Lunch, image review, and Photoshop session included: $299.
The cost of your Gatorland Photographer’s Pass is not included.
Only a check in hand or cash on the barrel head will work for Sunday morning. Please e-mail if you would like to join us. Optionally you can call my cell at noon on Saturday: 863-221-2372. Right now there are two in the group.
You can learn more about the Gatorland In-the-Field Workshops by scrolling down here.
Where Was My 200-400 with Internal Extender?
When working on a boardwalk or in other tight situations zoom lenses like the Canon EF 200-400mm f/4L IS USM Lens with Internal 1.4x Extender or the Canon EF 70-200mm f/2.8L IS II USM ens, the latter usually with a Canon Extender EF 1.4X III in place are almost always more effective than fixed focal length lenses.
Though I had stepped away from the birds and had my back against the boardwalk railing I was still too tight. I would have loved a bit more room above the male bird. Imagine if I’d had the new 200-400 on the tripod for the image of the copulating Cattle Egrets above…. I would have been able to zoom out just a bit. I doubt that I would have gone wide enough to include all of the spread wings but having a bit more room above would have–as noted above–been ideal… Alas, the new 2-4 was not even a dream in 2007.
|
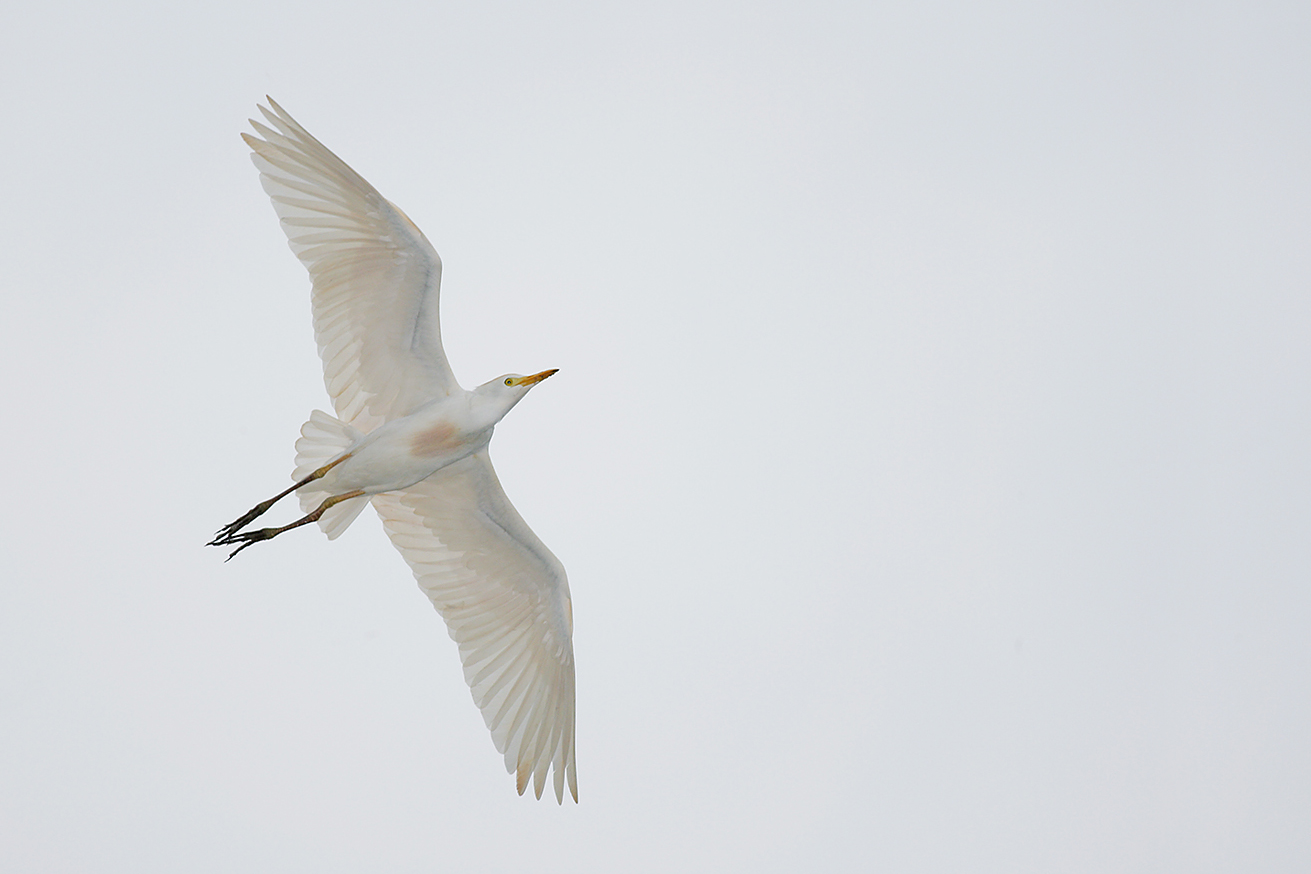
|
|
This image was created at the St. Augustine Alligator Farm at 5:20pm on May 117, 2007 with the hand held Canon EF 400mm f/4 DO IS USM lens and the EOS-1Ds Mark II now replaced by the Canon EOS-1D X. ISO 500. Evaluative metering 2 stops off the white sky: 1/1000 sec. at f/5.6 in Manual mode. AWB.
On-camera High Speed Sync flash with the Better Beamer probably at 0 in ETTL. With an older Canon Speedlight now replaced by the Canon Speedlite 600EX-RT with the Canon CP-E4 Compact Battery Pack for faster re-charging times.
Central sensor/Rear Focus AI Servo AF on the bird’s neck active at the moment of exposure. Click here to see the latest version of the Rear Focus Tutorial. Click on the image to see a larger version.
|
Flash Flight
While Gatorland can be good for flight both in the morning and the late afternoon, St. Augustine can be very good for flight in the morning and superb for flight in the late afternoon. On most early evenings the opportunities for creating flash flight images are simply outstanding. Learning flash flight techniques is actually easy, and I love the high key look, preferring it in fact to the look of flight images created on sunny days.
|

|
|
All of the images created at the St. Augustine Alligator Farm and copyright Arthur Morris/BIRDS AS ART
From top left clockwise to center: Snowy Egret pair in breeding plumage, breeding plumage Cattle Egret with fill flash, large Great Egret chicks in the nest, killer breeding plumage Snowy Egret displaying, flash-as-main light Great Egret chick happy to see mom, Little Blue Heron chicks, Cattle Egret breeding plumage head portrait, flash flight Wood Stork with nesting material, Great Egret landing at the nest, large Snowy Egret chicks.
Click on the image to enjoy a larger version.
|
St. Augustine Alligator Farm Short-Notice IPT. 3-FULL DAYS. Early entry/Late stay. May 5-7, 2014. Meet and greet at 8pm on Sunday May 4: $1299. Two Great Leaders: Arthur Morris and Denise Ippolito
This trip needs four to run; one down, four to go.
Breeding herons, egrets, and Wood Storks. Eggs and chicks in the nest. Some fledged young possible. Breeding behaviors including displaying and copulations. Flight and flash flight. Great Egret, Snowy Egret, Little Blue Heron, Cattle Egret, Tricolored Heron, Wood Stork. Early May rocks at the Farm as the weather is usually gorgeous and there should be lots of both small and large chicks in the nest. And you avoid the possibly oppressive heat of June and July.
Includes in-the-field instruction, early entry, late stay, $5/person late-stay gratuity, informal, small group Photoshop and image review sessions. Three lunches.
Not included: your lodging, your St. Augustine Alligator Farm photographer’s pass ($79.95 for the year); we will be more than glad to pre-order your pass for you. Please let us know when you register.
What you will learn:
How to see the good situations.
How to best avoid the clutter of a rookery by choosing the very best perspective.
How to properly evaluate the histogram and come up with the right exposure every time after making a single test exposure
How to see and understand the light.
How to to design pleasing images by mastering your camera’s AF system.
Why you must work in Manual mode 95% of the time when photographing at a rookery and how to do it.
How to evaluate and process your images.
Via intensive instruction how to use fill flash flash as main light, and Manual flash.
Flash flight techniques including the necessary use of high speed sync.
And tons more.
Please call Jim or Jen at 863-692-0906 to hold your spot with your non-refundable $299 credit card deposit and then put your check in the mail along with your signed registration form; you can find the form here.
Suitable airports: Jacksonville (JAX), Daytona Beach (DAB), Orlando MCO).
We look forward to seeing you in the nation’s oldest city for three days of fun and learning.
Note: Folks interested in possibly continuing on to Fort DeSoto–great in spring, are invited to shoot me an e-mail.
Support the BAA Blog. Support the BAA Bulletins: Shop B&H here!
We want and need to keep providing you with the latest free information, photography and Photoshop lessons, and all manner of related information. Show your appreciation by making your purchases immediately after clicking on any of our B&H or Amazon Affiliate links in this blog post. Remember, B&H ain’t just photography!


Amazon
Everyone buys something from Amazon, be it a big lens or deodorant. Support the blog by starting your search by clicking on the logo-link below. No purchase is too small to be appreciated; they all add up. Why make it a habit? Because I make it a habit of bringing you new images and information on an almost daily basis.
Typos
In all blog posts and Bulletins, feel free to e-mail or to leave a comment regarding any typos, wrong words, misspellings, omissions, or grammatical errors. Just be right. 🙂
April 4th, 2014 126
Well, the last two days were fun and exciting for me. Though many folks got fooled, pretty much everyone enjoyed the spoof. Thanks again to the very kind and generous Bryan Carnathan of The Digital-Picture.com who kindly granted me permission to adapt and re-publish his clever April Fool’s post here on my blog on April 2, 2014. Lots of folks were on guard on April 1 but had let their guard down by the next day. If you missed it, you can read Bryan’s original post here
This post marks 126 straight days with a new educational post. With so many folks getting in the habit of using our B&H and Amazon links why quit now? To show your appreciation for my efforts here, we do ask that you use our the B&H and Amazon affiliate links on the right side of the blog for all of your purchases. Please check the availability of all photographic accessories in the BIRDS AS ART Online Store. We sell only what I use and depend on. We will not sell you junk. We know what you need to make creating great images easy and fun. And we are always glad to answer your gear questions via e-mail.
You can find the following items in the store: Gitzo tripods, Mongoose M3.6 and Wimberley heads, plates, low feet, and accessories, flash brackets, , Delkin e-film Pro Compact Flash Cards, LensCoat products, and our unique line-up of educational materials including ABP I & II, Digital Basics, Site and Set-up e-Guides, Canon and Nikon Camera Users and AF e-Guides, and MP-4 Photoshop video tutorials among others.
I would of course appreciate your using our B&H affiliate links for all of your major gear, video, and electronic purchases. For the photographic stuff mentioned in the paragraph above we, meaning BAA, would of course greatly appreciate your business. Here is a huge thank you to the many who have been using our links on a regular basis and visiting the BAA Online store as well.
This blog post took about 1 1/2 hours to assemble. Enjoy!
The Cabbage Palm Kids
On cloudy mornings or on any given afternoon there are lots of opportunities to photograph the birds and nests on the eastern side of the gator swamp. On sunny afternoons you will have the sun behind you. All of the Wood Stork nests are on that side in the larger trees. But the herons and egrets like to build their nests in the cabbage palms.
Image Questions
#1: In the soft light, why did I need -1/3 stop with a white bird? Note: there are 2 reasons…
#2: What do you think that I like best about the design of this image?
#3: Click on the image to enlarge it and see if you can figure out what I like least about this image.
#4: After enlarging the image what do you think of the head positions and head angles of the two chicks?
#5: With the same gear would you have re-composed differently?
Selling Your Used Photo Gear Through BIRDS AS ART
Selling your used (or like-new) photo gear through the BAA Blog or via a BAA Online Bulletin is a great idea. We charge only a 5% commission. One of the more popular used gear for sale sites charges a minimum of 20% plus assorted fees! Yikes. The minimum item price here is $500 (or less for a $25 fee). If you are interested please e-mail with the words Items for Sale Info Request cut and pasted into the Subject line :). Stuff that is priced fairly–I offer free pricing advise, usually sells in no time flat as did Dennis Cassidy’s 500 II recently on the blog. Larry Master’s 400 DO and his 800 f/5.6 sold within a week. From Larry via e-mail: Thanks for helping me sell the lenses so quickly!
|

|
|
Join me at Gatorland for a ton of learning. I will have my flash along…. Click on the composite image to enjoy a larger version. Click on the composite to enjoy the larger size.
|
Gatorland Saturday Full Day/Sunday Morning In-the-Field Workshop
Saturday Full Day April 5: $399/Sunday Morning April 6, 2014. 7:15am till 10:45 photo session.Lunch, image review, and Photoshop session included: $299.
The cost of your Gatorland Photographer’s Pass is not included.
Payment in full via credit card is due upon registering. Please call Jim or Jennifer at 863-692-0906 to register. Please ask for me if you have any questions. Or get in touch via e-mail. Lens rentals are available.
Please note: There is a single opening left on the Saturday April 5 ITF Workshop. But three folks are leaving early; if you are interested in an afternoon only session ($149) or attending on Saturday afternoon and Sunday (morning and lunch)–($299), please contact me via e-mail.
You can learn more about the Gatorland In-the-Field Workshops by scrolling down here.
Support the BAA Blog. Support the BAA Bulletins: Shop B&H here!
We want and need to keep providing you with the latest free information, photography and Photoshop lessons, and all manner of related information. Show your appreciation by making your purchases immediately after clicking on any of our B&H or Amazon Affiliate links in this blog post. Remember, B&H ain’t just photography!


Amazon
Everyone buys something from Amazon, be it a big lens or deodorant. Support the blog by starting your search by clicking on the logo-link below. No purchase is too small to be appreciated; they all add up. Why make it a habit? Because I make it a habit of bringing you new images and information on an almost daily basis.
Typos
In all blog posts and Bulletins, feel free to e-mail or to leave a comment regarding any typos, wrong words, misspellings, omissions, or grammatical errors. Just be right. 🙂
April 3rd, 2014 125
You know the drill!
The EOS-1D W/70-600mm Aftermath….
Those very few of you who read yesterday’s blog post and believed every word of it obviously missed the two links at the end of the article that brought you to the page with this on it:
Belated Happy April Fools Day!
I would like to wish all of you a belated happy April Fools Day. There is no 1D W and there is no EF 70-600mm f/4L IS-W with Internal Extenders USM/STM lens. If you had read more carefully, you would have already known that :).
I would like to thank Bryan Carnathan of The Digital-Picture.com who kindly granted me permission to adapt and re-publish his clever spoof here on my blog on April 2, 2014. You can read the original here. Thanks also to Ron May who alerted me to the original April Fools joke.
Bryan obviously did a great job as I have received several e-mail complaining about Canon :). Some from folks who should have known better… There are some really cool image galleries on Bryan’s site; here is a link to one of my favorites: Kid Picture.
For a really good chuckle, see the comments here and check out those who got taken in hook, line, and sinker. I hope that in retrospect most of them would be able to look in the mirror and have a good laugh at themselves and say, “Good one Artie. You got me. I should have read more carefully.”
|

|
|
All of the images created at the St. Augustine Alligator Farm and copyright Arthur Morris/BIRDS AS ART
From top left clockwise to center: Snowy Egret pair in breeding plumage, breeding plumage Cattle Egret with fill flash, large Great Egret chicks in the nest, killer breeding plumage Snowy Egret displaying, flash-as-main light Great Egret chick happy to see mom, Little Blue Heron chicks, Cattle Egret breeding plumage head portrait, flash flight Wood Stork with nesting material, Great Egret landing at the nest, large Snowy Egret chicks.
Click on the image to enjoy a larger version.
|
St. Augustine Alligator Farm Short-Notice IPT. 3-FULL DAYS. Early entry/Late stay. May 5-7, 2014. Meet and greet at 8pm on Sunday May 4: $1299. Two Great Leaders: Arthur Morris and Denise Ippolito
This trip needs four to run.
Breeding herons, egrets, and Wood Storks. Eggs and chicks in the nest. Some fledged young possible. Breeding behaviors including displaying and copulations. Flight and flash flight. Great Egret, Snowy Egret, Little Blue Heron, Cattle Egret, Tricolored Heron, Wood Stork. Early May rocks at the Farm as the weather is usually gorgeous and there should be lots of both small and large chicks in the nest. And you avoid the possibly oppressive heat of June and July.
Includes in-the-field instruction, early entry, late stay, $5/person late-stay gratuity, informal, small group Photoshop and image review sessions. Three lunches.
Not included: your lodging, your St. Augustine Alligator Farm photographer’s pass ($79.95 for the year); we will be more than glad to pre-order your pass for you. Please let us know when you register.
What you will learn:
How to see the good situations.
How to best avoid the clutter of a rookery by choosing the very best perspective.
How to properly evaluate the histogram and come up with the right exposure every time after making a single test exposure
How to see and understand the light.
How to to design pleasing images by mastering your camera’s AF system.
Why you must work in Manual mode 95% of the time when photographing at a rookery and how to do it.
How to evaluate and process your images.
Via intensive instruction how to use fill flash flash as main light, and Manual flash.
Flash flight techniques including the necessary use of high speed sync.
And tons more.
Please call Jim or Jen at 863-692-0906 to hold your spot with your non-refundable $299 credit card deposit and then put your check in the mail along with your signed registration form; you can find the form here.
Suitable airports: Jacksonville (JAX), Daytona Beach (DAB), Orlando MCO).
We look forward to seeing you in the nation’s oldest city for three days of fun and learning.
Note: Folks interested in possibly continuing on to Fort DeSoto–great in spring, are invited to shoot me an e-mail.
The e-Mail from Tim P.
On Wednesday, April 2, 201 I received an e-mail from a Tim P. I chose to share it with you here along with my response. He is TP. I am AM.
TP: Mr. Morris
I was going to post a comment on your blog about your new canon products blog but I’m sure you would (sic) just delete it as you mentioned you have deleted some already. So I’m hoping a personal email will get through to you. You have disappointed me greatly.
AM: Hey Tim, Great to hear from you. Do know that disappointment is a choice. But it is your lucky day as I did get your e-mail. And not only that, not only am I not going to delete it, I decided to publish it on the blog. As noted by you, I did delete a few comments that would have spoiled the fun for some of the boys and girls who had not yet seen the post. To make up for your disappointment, I have opted to post your entire e-mail here for all to read. Along with my response.
TP: I hope you take the time to read this email before you delete it—but I bet you don’t.
AM: I guess that you would have lost that bet….
TP: I read your blogs all the time including the one today about the new canon products including the new 70-600 lens—I guess I am gullible.
AM: That is one excellent guess. It is great to know that you were visiting the blog often and learning each day.
TP: And why?—well you are a professional photographer and well respected and I believe what you write—not anymore. You should be above this sort of ‘joke.”
AM: Is that your opinion or an absolute fact? Tim seriously, can’t you take a joke??? Heck, maybe your e-mail was a belated April Fools joke….
TP: I wasted 15 minutes reading it and embarrassed myself with 6 of my photography friends by forwarding it to them.
AM: Sorry, but feeling embarrassed is also a choice. You state that you wasted 15 minutes reading the post. Apparently you did not read very carefully. If you had, you would have read this in the first section, 4th paragraph:
“That the new Canon EOS-1D W is going to revolutionize wildlife photography is unquestionable” says EoL Rick Salmon after 3 months of field testing the new camera. Mr. Salmon was recently announced as the Director of Photography for BBC’s upcoming “Planet Life” series. “We spend weeks waiting for the an animal to be in the right position. When that perfect moment arrives, we cannot risk any camera-related issues causing a missed shot. The EOS-1D W is a game changer. Like my hair gel, it never misses.”
In retrospect, would you not agree that the hair gel comment indicated that there was something very fishy about Mr. Salmon’s comments? Please excuse the pun.
TP: Fortunately one of them is more informed than I, knew it was fake and let me know.
AM: Wow, he must be absolutely brilliant.
TP: I pride myself in not forwarding junk to my friends—only good information that can help them. You have embarrassed me and you should be embarrassed as a professional—I expect better from someone in your position.
AM: Thank you for sharing your thoughts. I find it very hard to believe that there are six other photographers who, like you, have absolutely no sense of humor. That is really remarkable. As for me, I am not at all embarrassed. In fact, I am rather proud of myself that I managed to snag at least a few folks with the spoof. Thanks again to Bryan Carnathan for graciously allowed me to adapt and publish his copyrighted April Fool’s joke a day late.
As far as junk, had you forwarded links to the previous 124 blog posts to them?
On the subject of jokes, do these words mean anything to you: Lighten up. Get a life. Breathe deeply and have some fun. Enjoy life. Can’t you take a joke?
TP: I have attended an IPT with you in Bosque where you were more interested in taking your own photos than helping paying students like myself.
As it states clearly on the web site on the IPT general information page:
Do know that the leader, that’s me: Arthur Morris, and the co-leaders, photograph during IPTs. We let you know what we are doing, and why, and we are always available to answer your questions. We often teach by example. In addition to the in-the-field sessions, there is much teaching done during the lunches and even during dinners; many folks take advantage of these times to ask a multitude of questions on a great variety of photography topics. In addition, folks (including me) often learn a ton from skilled IPT participants.
As far as not helping paying students like you, is that absolutely true? Did you stay close? Did you ask questions? Did you keep your eyes and ears open? The only folks who ever go home unhappy after an IPT are those who arrive as bitter, unhappy campers. I can’t help those folks.
How long has it been since your IPT? A decade, or longer? IAC, you might ask yourself this: why did I wait so many years to get this off of my chest? I think that an honest answer to that question would be quite revealing.
TP: I will never again attend another with you and have discouraged many of my friends from attending your IPT’s
AM: I guess that I will just have to count this as one of my luckier days.
TP: And its no wonder to me you were at Gatorland recently by yourself.
AM: That was just a weird coincidence. On the first two Saturday In-the-Fields at Gatorland 5 folks attended. Each went home thrilled. And I have 5 folks signed up for this coming Saturday’s session. That sort of blows holes in your theory, no?
Not to mention the fact that we average about 60% repeat participants and that most IPTs sell out even in today’s crazy market where the only requirement for leading a photo tour is that one owns a camera…. I, along with Denise Ippolito, receive dozens of e-mails each month from folks who were thrilled with what we have to offer. Much of that praise is effusive.
TP: I think the word is gradually getting out. Art Morris doesn’t like anyone that is not a ‘happy camper’.
AM: Wow, thanks for helping spread that word. I choose to be associated with happy folks who want to learn and improve rather than to surround myself with the bitter unhappy folks who go out of their way to spread their poison and rob others of their energy. To think that you see that as a fault is beyond my comprehension, but again, it says a lot about you.
TP: The other pros that I know like feedback—both good and bad so they can improve. I don’t believe that is the case with you.
AM: If you spent any time on BPN you would know that I am open to good, constructive criticism. I see none of that in your e-mail.
TP: Yes you are a wonderful photographer but you lack the skills to be great when it comes to your followers and students.
AM: That is absolutely hilarious. Would that be in your humble opinion? Perhaps you should ask the 2,700+ folks who visit the blog daily. Or the hundreds of happy campers who have traveled with me over the past three decades. Or the thousands who have attended my or our programs and seminars.
TP: You have lost me forever, Tim
AM: I wish that I could say that leaves me distraught but it does not. Tim, you really need to work on your sense of humor, and on your ability to laugh at yourself when you have been had. I wish you the best with those.
later and love, artie
Please Let Me Know
Please leave a comment and let me know your thoughts on Tim P’s e-mail.
Slomo
For a great read, and an inspirational video that might change your life, or not, check out the post here by Josh Izenberg is a filmmaker based in San Francisco, on the NY Times “The Opinion Pages.” It is about a respected doctor who walked away from his practice to skate up and down the path by the ocean at Pacific Beach in San Diego. Thanks to Dr. Cliff Oliver of The Center for Balance for sharing.
The main message: “Do what you want to.” You might guess why I identify to some degree with Slomo. That’s his nickname, shortened from Slow Motion.
|

|
|
There is a single opening left on the April 5 ITF Workshop. But three folks are leaving early; if you are interested in an afternoon only session ($149), please contact me via e-mail. Please note that I have added the Sunday morning session below.
|
Gatorland Short Notice Sunday Morning In-the-Field Workshop
Sunday April 6, 2014. 7:15am till 10:30 photo session.Lunch, image review, and Photoshop session included: $299.
The cost of your Gatorland Photographer’s Pass is not included.
Payment in full via credit card is due upon registering. Please call Jim or Jennifer at 863-692-0906 to register. Please ask for me if you have any questions. Or get in touch via e-mail. Lens rentals are available.
Support the BAA Blog. Support the BAA Bulletins: Shop B&H here!
We want and need to keep providing you with the latest free information, photography and Photoshop lessons, and all manner of related information. Show your appreciation by making your purchases immediately after clicking on any of our B&H or Amazon Affiliate links in this blog post. Remember, B&H ain’t just photography!


Amazon
Everyone buys something from Amazon, be it a big lens or deodorant. Support the blog by starting your search by clicking on the logo-link below. No purchase is too small to be appreciated; they all add up. Why make it a habit? Because I make it a habit of bringing you new images and information on an almost daily basis.
Typos
In all blog posts and Bulletins, feel free to e-mail or to leave a comment regarding any typos, wrong words, misspellings, omissions, or grammatical errors. Just be right. 🙂
April 2nd, 2014 124
This post marks 124 straight days with a new blog post. It took more than 3 hours to prepare this one. Enjoy.
Gatorland Short Notice Sunday Morning In-the-Field Workshop
Sunday April 6, 2014. 7:15am till 10:30 photo session.Lunch, image review, and Photoshop session included: $299.
This is a new offering: 4/2/2104.
The cost of your Gatorland Photographer’s Pass is not included.
Payment in full via credit card is due upon registering. Please call Jim or Jennifer at 863-692-0906 to register. Please ask for me if you have any questions. Or get in touch via e-mail. Lens rentals are available.
St. Augustine Alligator Farm Short-Notice IPT. 3-FULL DAYS. Early entry/Late stay. May 5-7, 2014. Meet and greet at 8pm on Sunday May 4: $1299. Two Great Leaders: Arthur Morris and Denise Ippolito.
This trip needs four to run.
Announced here for the first time. Scroll down to the composite image at the bottom for complete details.
|
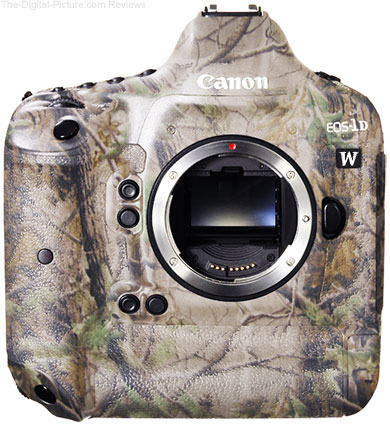
|
|
The new EOS-1D W will revolutionize bird, nature, and wildlife photography and instantly become my favorite camera body ever.
|
The New Canon EOS-1D W & Canon Inc. Announces Development of EF 70-600mm f/4L IS-W with Internal Extenders USM/STM Lens
Scroll down for the Development Announcement of the amazing new Canon EF 70-600mm f/4L IS-W with Internal Extenders USM/STM Lens(with two built-in 1.4X Extenders that will give us the equivalent of a built-in 2X TC when the TCs are engaged in tandem).
LAKE SUCCESS, N.Y., March 31, 2014
Canon Introduces the EOS-1D W: The Professional DSLR Designed Specifically for Wildlife Photographers/Guaranteed Ship Date: May 15, 2014.
The EOS 1D W features Canon’s proven 61-Point High Density Reticular AF, Extreme Fast Shooting up to 24 fps, 39.9-Megapixel Full-Frame CMOS Sensor, Outstanding ISO Sensitivity up to 204800, Dual Pixel CMOS AF II, Full HD Video Recording, Extreme-Durability Camouflage Finish.
Canon U.S.A., Inc. once again shows its leadership in digital imaging by introducing the Canon EOS-1D W “Wildlife” Digital SLR camera, the EOS-1D W is the world’s first professional DSLR designed specifically for the needs of wildlife photographers and videographers. A new addition to Canon’s arsenal of professional DSLRs, the EOS-1D W is a progressive EOS-1D series camera based on the EOS-1D X, but loaded with exciting new features.
According to Yuzuru Hanyu, Canon’s Executive Vice President and General Manager, Imaging Technologies & Communications Group, Canon U.S.A., “Wildlife photographers make up a large percentage of DSLR camera users. These photographers have specific needs – needs that have been too long overlooked.”
“That the new Canon EOS-1D W is going to revolutionize wildlife photography is unquestionable” says EoL Rick Salmon after 3 months of field testing the new camera. Mr. Salmon was recently announced as the Director of Photography for BBC’s upcoming “Planet Life” series. “We spend weeks waiting for the an animal to be in the right position. When that perfect moment arrives, we cannot risk any camera-related issues causing a missed shot. The EOS-1D W is a game changer. Like my hair gel, it never misses.”
New Ultra-High Density Sensor
By utilizing groundbreaking technology first introduced in the EOS 70D, a pair of APS-C format imaging sensors can now be rotated vertically and joined into one very high resolution, full frame, 30 x 22.5mm imaging sensor while enjoying the production efficiencies of smaller sensors. The EOS-1D W natively delivers a 3X2 ratio 7296 x4864 pixel image for 39.9 megapixels of resolution.
“Wildlife photographers have long had to make a choice between the high pixel density sensor found in the EOS 7D and the outstanding performance of the EOS-1-Series bodies,” says Akito Watabe, Director of Professional Imaging, Canon U.S.A. “These photographers now have the highest pixel density Canon DSLR sensor available in the highest performing DSLR camera available.”
Dual Pixel CMOS AF II – The Evolution Continues
Canon’s recently-introduced Dual Pixel CMOS AF, a phase-detection autofocus (AF) technology on the camera’s image sensor plane, enables users to shoot video with AF capabilities similar to a camcorder. Dual Pixel CMOS AF employs a Canon-patented CMOS sensor technology in which all of the effective pixels are able to perform both still imaging and phase-detection AF simultaneously, resulting in dramatically improved AF performance during Live View and video shooting.
Dual Pixel CMOS AF II extends this technology to allow the EOS-1D W to continuously track subject focus while shooting in high frame rate mode using the viewfinder. By combining information from the conventional phase-detection AF system with information provided by Dual Pixel AF, the EOS 1D-W is able to shoot two frames each time the mirror is raised for a frame rate twice as fast as the EOS-1D X – an eye-opening 24 fps in Extreme-High Speed shooting mode.
New high-quality “L” series lenses incorporating STM are under development to take full advantage of Dual Pixel AF technology for video recording purposes.
Moving the Data Fast
Capturing 39.9 megapixel images at 24 fps requires extreme processing power unavailable until now. In addition to dual DIGIC 5+ image processors and a metering and an AF control-dedicated DIGIC 4 processor, the EOS-1D W incorporates a dedicated DIGIC 6+ image processor. During capture, sensor image data is streamed directly to 32GB of on-processor memory to store up to 220 RAW images before the buffer limit is reached. Upon reaching internal memory capacity, data from the EOS-1D W imaging sensor is optionally streamed directly to a high speed (UHS-1) SDXC memory card for transformation when the processor is idle. By incorporating a user-upgradeable imaging buffer, photographers can choose their own maximum burst rate. A 64GB UHS-1 SDXC buffer memory card extension can store sensor image data for approximately 440 RAW images(1).
Massive Storage Capability
Extreme resolution image files captured at extremely fast rates demand massive storage capabilities. The EOS-1D W provides four SD/SDHC/SDXC memory card slots that can be used successively or optionally configured to RAID 1 (mirrored) or RAID 5 (parity bit stored on a single card). Ultra High Speed (UHS-1) cards are supported with currently available cards providing up to 1TB of total storage.
Impressive in Low Light/High ISO Performance
That wildlife is typically most active in low light levels is not an issue for the EOS-1D W’s new Low Light Mode. Enabling the Dual Pixel technology to be used for noise reduction in all modes (excluding Extreme-High Speed shooting mode, Live View and video recording) means that unprecedented low noise levels are characteristic of EOS-1D W images. Effective doubling the light sampling at the pixel level yields at least 1.5 stops of noise improvements at all ISO settings.
The Eyes are Always in Focus
Wildlife images usually include at least one eye and Canon recognizes that it is critical that your wildlife subjects’ eyes are in focus. The EOS 1D W includes two previously unavailable focus modes – Animal Eye Tracking and Zone Animal Eye Tracking. Animal Eye Tracking builds on the EOS iTR (Intelligent Tracking and Recognition) AF technology incorporated into the EOS-1D X. Utilizing the viewfinder light sensor, Canon’s newly developed eye recognition technology can recognize the closest animal eye in the frame and automatically assign the correct AF point to obtain a perfectly focused eye every time. Zone Animal Eye Tracking allows restriction of eye selection to one specific AF zone. For even better performance, Dual Pixel CMOS AF II technology is utilized for eye tracking right into frame borders in High and Extreme-High shooting modes.
Eye-Controlled Focus
Wildlife action can move fast and the needed focus point can change in a split second. Your eyes can follow that action and now your focus point selection can too. Just look your subject in the eyes, concentrate on framing and the 1D W will take care of the rest. Last seen in the EOS Elan 7NE, Canon revived Eye-Controlled Focus to provide wildlife photographers with a simple way to maintain focus on erratically moving subjects. Zone Eye-Controlled Focus mode can be used in conjunction with Animal Eye Tracking mode.Eye-Controlled Focus utilizes five strategically placed infrared viewfinder LEDs and advanced tracking algorithms to calculate the corresponding point of focus within the frame. Enabled on the quick control screen, photographers can now activate Eye-Controlled Focus in any AF mode.
Birds-in-Flight Mode
“Capturing sharp images of birds in flight is a huge challenge to both the photographer and to the camera” claims Canon Explorer of Light Emeritus Morris Arthur Edward. “Accurate focusing is one of those big challenges.” The EOS-1D W’s new Birds-In-Flight Mode uses a combination of Animal Eye Tracking technology along with Bird Recognition algorithms that prevents the focus from jumping to the background. Also, the shutter release can optionally be programmed to institute a delay to avoid clipped wing tips, ensuring perfect BIF images.
Built for the Outdoors
A camera designed for wildlife photography must be ready to take on the elements. The EOS-1D W incorporates Canon’s most extreme weather sealing ever, rated for submersion up to 1M for up to 30 seconds with matched STM lens mounted. The EOS-1D X-inherited magnesium alloy body shell and internal structure has proven its ability to absorb the impacts inevitably encountered in the field.
The Camera that Hides in Plain Sight
Also built for rough use is the EOS-1D W’s new exterior finish. In cooperation with Realtree Outdoors® and 3M®, the EOS-1D W features camouflage patterns such as Hardwood, Waterfowl, and Snow. Each pattern has been specifically designed for ultimate concealment while the newly developed nanotechnology finish suppresses glare and provides a sure grip even when wet. The impact and abrasion durability of Canon’s new “Wildlife” finish is unprecedented. “There is no reason to cover this camera” says Morris Arthur Edward.
Built-in Wildlife Call
Not only can the EOS-1D W remain hidden, it can bring the wildlife to the camera. By inserting the optional iBird/Predator/Prey Calls and Cries memory card the EOS 1D-W can play a variety of useful recordings. No longer does the photographer need to carry a duck, turkey, songbird, or predator call with them to attract wildlife. Canon will provide additional open source MP3 bird and wildlife call audio files as free downloads at a website to be announced soon.
Virtual Silence
Sensitive wildlife can be startled by traditional DSLR shutter releases. In Silent mode, the new EOS-1D W incorporates a slightly reduced mirror travel rate to achieve a shutter release that is no louder than the shutter itself. Capture unlimited frames of a strutting gobbler at close range without fear of alarming it.
Always at Work – Introducing the Canon MT-1 Motion Trigger
Never before has it been so easy to get premium-grade wildlife photos. Canon understands that wildlife photography is time-consuming. To allow photographers to capture photos while attending to other demands such as work, family and sleep, the Canon MT-1 Motion Trigger is being introduced. Featuring trail cam technology, the hot shoe-mounted MT-1 will trigger the EOS-1D W when wildlife motion is detected within a selected angle of view and focus distance. The MT-1 provides its own hot shoe to support simultaneous flash use. It will now be easy to create BBC Wildlife Photographer of the Year images while sleeping or otherwise engaged with that special person in your life.
For remote transmission of images, the EOS 1D W features a built-in LAN connection featuring a gigabit Ethernet Jack capable of 1000BASE-T transmission speeds. Optionally supported is the Canon WFT-E6A Wireless File Transmitter featuring wireless LAN support for 802.11n network transfer rates. Scroll down for B&H pre-ordering.
|
|
|
Owners of this new lens can toss all of their other telephoto lenses into the nearest lake, river, ocean, or sea.
|
Canon Inc. Announces Development of EF 70-600mm f/4L IS-W with Internal Extenders USM/STM Lens
Canon Inc., the parent company of Canon U.S.A., Inc., a leader in digital imaging solutions, has announced the development of a new super-telephoto zoom lens, the EF 70-600mm f/4 L W IS USM/STM. Designed specifically for use with Canon’s EOS-1D W, the EF 70-600mm f/4 L (W) IS USM/STM will feature:
Massive 530mm focal length range
6-stop image stabilization system
User selectable AF mechanisms (USM/STM)
“Canondrophobic” (Hydrophobic Fluorine) lens coating
Extreme Weather sealing
Realtree Outdoors® Camouflage patterns (Hardwood, Waterfowl and Snow)
Developed as a new category of Canon’s acclaimed L-series professional lenses, this new Wildlife lens will offer an unsurpassed combination of versatility, optical performance, concealment and submersion-climate-proof construction(2). The twin Internal Extenders will yield additional focal lengths of 840 and 1200mm without having to mount or un-mount an external TC. And best of all, at 3.62 kg (7.98 lbs), this great new lens weighs the same as the vaunted 200-400 with Internal Extender.
Pricing and Availability
The guaranteed ship date for the Canon EOS-1D W Digital SLR camera body is May 15, 2014; it will be sold in a body-only configuration at an estimated retail price of $12,900.00. The EF 70-600mm f/4 L W IS USM/STM is expected to be available in late 2014 and will be list priced at $27,999.
Pre-order Opportunities
The Canon EOS-1D W available for pre-order at B&H here.
Additional Information
For additional information on these 2 great new products and links to the Canon White Papers on each, click here.
|

|
|
All of the images created at the St. Augustine Alligator Farm and copyright Arthur Morris/BIRDS AS ART
From top left clockwise to center: Snowy Egret pair in breeding plumage, breeding plumage Cattle Egret with fill flash, large Great Egret chicks in the nest, killer breeding plumage Snowy Egret displaying, flash-as-main light Great Egret chick happy to see mom, Little Blue Heron chicks, Cattle Egret breeding plumage head portrait, flash flight Wood Stork with nesting material, Great Egret landing at the nest, large Snowy Egret chicks.
Click on the image to enjoy a larger version.
|
St. Augustine Alligator Farm Short-Notice IPT. 3-FULL DAYS. Early entry/Late stay. May 5-7, 2014. Meet and greet at 8pm on Sunday May 4: $1299. Two Great Leaders: Arthur Morris and Denise Ippolito
This trip needs four to run.
Breeding herons, egrets, and Wood Storks. Eggs and chicks in the nest. Some fledged young possible. Breeding behaviors including displaying and copulations. Flight and flash flight. Great Egret, Snowy Egret, Little Blue Heron, Cattle Egret, Tricolored Heron, Wood Stork. Early May rocks at the Farm as the weather is usually gorgeous and there should be lots of both small and large chicks in the nest. And you avoid the possibly oppressive heat of June and July.
Includes in-the-field instruction, early entry, late stay, $5/person late-stay gratuity, informal, small group Photoshop and image review sessions. Three lunches.
Not included: your lodging, your St. Augustine Alligator Farm photographer’s pass ($79.95 for the year); we will be more than glad to pre-order your pass for you. Please let us know when you register.
What you will learn:
How to see the good situations.
How to best avoid the clutter of a rookery by choosing the very best perspective.
How to properly evaluate the histogram and come up with the right exposure every time after making a single test exposure
How to see and understand the light.
How to to design pleasing images by mastering your camera’s AF system.
Why you must work in Manual mode 95% of the time when photographing at a rookery and how to do it.
How to evaluate and process your images.
Via intensive instruction how to use fill flash flash as main light, and Manual flash.
Flash flight techniques including the necessary use of high speed sync.
And tons more.
Please call Jim or Jen at 863-692-0906 to hold your spot with your non-refundable $299 credit card deposit and then put your check in the mail along with your signed registration form; you can find the form here.
Suitable airports: Jacksonville (JAX), Daytona Beach (DAB), Orlando MCO).
We look forward to seeing you in the nation’s oldest city for three days of fun and learning.
Note: Folks interested in possibly continuing on to Fort DeSoto–great in spring, are invited to shoot me an e-mail.
Typos
In all blog posts and Bulletins, feel free to e-mail or to leave a comment regarding any typos, wrong words, misspellings, omissions, or grammatical errors. Just be right. 🙂
April 1st, 2014 123
This post marks 123 straight days with a new educational blog post. With so many folks getting in the habit of using our B&H and Amazon links why quit now? To show your appreciation for my efforts here, I do ask that you use our the B&H and Amazon affiliate links on the right side of the blog for all of your purchases. Please check the availability of all photographic accessories in the BIRDS AS ART Online Store. We sell only what I use and depend on. We will not sell you junk. We know what you need to make creating great images easy and fun. And we are always glad to answer your gear questions via e-mail.
You can find the following items in the store: Gitzo tripods, Mongoose M3.6 and Wimberley heads, plates, low feet, and accessories, flash brackets, , Delkin e-film Pro Compact Flash Cards, LensCoat products, and our unique line-up of educational materials including ABP I & II, Digital Basics, Site and Set-up e-Guides, Canon and Nikon Camera Users and AF e-Guides, and MP-4 Photoshop video tutorials among others.
I would of course appreciate your using our B&H affiliate links for all of your major gear, video, and electronic purchases. For the photographic stuff mentioned in the paragraph above we, meaning BAA, would of course greatly appreciate your business. Here is a huge thank you to the many who have been using our links on a regular basis and visiting the BAA Online store as well.
This blog post took about 2 1/2 hours to put together. Enjoy!
|
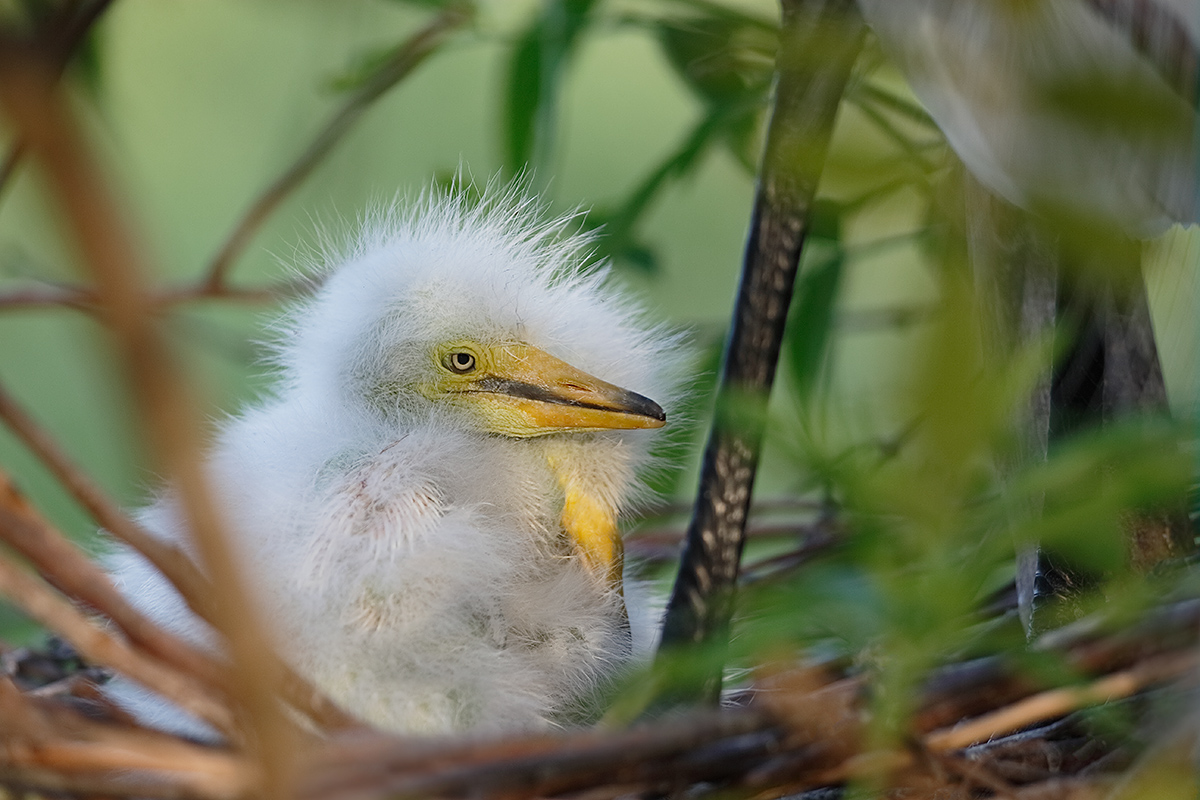
|
|
This image was created at Gatorland on the second Saturday In-the-Field Workshop with the Canon EF 200-400mm f/4L IS USM Lens with Internal 1.4x Extender (hand held with the interal TC engaged at 560mm) and the Canon EOS-1D X. ISO 800. Evaluative metering +2/3 stop as framed: 1/200 sec. at f/7.1 in Manual mode. AWB.
One sensor to the left of the central Sensor/AI Servo-Surround/Rear Focus AF on the middle of the subject’s bill was active at the moment of exposure. Practicing so that you are able to change AF sensors almost instantly is an important skill to perfect. Click here to see the latest version of the Rear Focus Tutorial. Click on the image to see a larger version. Learn everything there is to know about the 1D X and 5D III AF systems including how to manage the various AF Area Selection Modes, when to use which one, and several ways to move the AF sensor around in the 1D X AF Guide and the 5D Mark III User’s Guide.
|
In Memoriam…
The image above, with the two chicks in the nest, was created at 8:12am on March 22, 2014. One week later the nest was empty….
There is a chance that the pair might re-nest.
Basic Gator Farm Biology
When wading birds chicks fall into the moats at Gatorland or the St. Augustine Alligator Farm, they are instantly snatched up by the gators. Folks often ask, “Why would the birds nest in such a hostile environment?”
The answer is simple: Any chicks that fall out of their stick nests die. With or without alligators. The fences and the gators at the tourist attractions provide unparallaled protection from ground predators like oppossums and feral cats. The birds know this and flock to these spots year after year to nest successfully.
Rookeries are Cluttered Places
To make the image above, it was necessary to get low and search for the single opening that yielded a clear line of sight to the nest. After creating only four images, I shared the spot with the others on the ITF Workshop. Learning to see the good situations and minimize the clutter are techniques that can be learned :).
Image Question
In the image above, how many bird bills do you see?
The Image Optimization
After conversion in DPP the image optimization was largely straight-forward. With the nictitating membrane half covering the eye I borrowed the eye from the next frame after painting it with a Quick Mask, and fine-tuned it with a Regular Layer Mask. I used a Quick Mask fine-tuned with a Regular Layer mask to move the small brown twig behind left side of the chick’s head. Bill clean-up was done as usual with the Patch Tool, the Clone Stamp Tool at reduced Opacity, and the Spot Healing Brush. The same tools were utilized for the minimal background clean-up. Using the Clone Stamp Tool at a reduced Opacity, usually between 40 and 70%, leaves a hint of the distracting element while leaving the image believable. This trick resulted in a huge improvement in the look of the out-of-focus foreground clutter in the center and right side of the frame. Remember, rookeries are cluttered places so trying to create a completely clean looking image by removing all branches and twigs is not the way to go.
The DPP RAW Conversion Guide
After seeing the accurate colors that I get from my DPP RAW conversions, Japan in Winter co-leader Paul McKenzie switched to DPP conversions and Denise Ippolito is consider doing the same. Now that is amazing…. To learn why I use Canon’s Digital Photo Professional (DPP) to convert every image that I work on, click here.
Digital Basics
Are you tired of making your images look worse in Photoshop? Are you amazed by the quality of my JPEGs? Do you have no clue as to how I optimized the egret chicks image here? All is detailed in my Digital Basics File, an instructional PDF that is sent via e-mail. It includes my complete digital workflow, dozens of great Photoshop tips, the use of Contrast Masks, several different ways of expanding canvas, all of my time-saving Keyboard Shortcuts, Using Adjustment Layers, Quick Masking, Layer Masking, and NIK Color Efex Pro basics, my killer image clean-up techniques, Digital Eye Doctor, creating time-saving actions, and lots more.
APTATS I & II
Learn the details of advanced Quick Masking techniques in APTATS I. Mention this blog post and apply a $5 discount with phone orders only. Learn advanced Layer Masking Techniques in APTATS II. Mention this blog post and apply a $5 discount with phone orders only. Buy the pair, APTATS I and APTATS II and we will be glad to apply at $15 discount with phone orders only.
BirdPhotographers.Net; It Ain’t Just Birds/Honest Critiques Done Gently
Learn more here. I learn something new on most every visit and one of the best ways to improve it to critique the images of others while having your images critiqued as well. Plus, you get to see lots of great images on a daily basis.
|

|
|
There is only a single opening left on the April 5 ITF Workshop. But three folks are leaving early; if you are interested in an afternoon only session, please contact me via e-mail.
|
Gatorland Short Notice Saturday Full-Day In-the-Field Workshop
Saturday April 5, 2014. 7:15am till 10:15am & 4:00pm till dusk. Lunch, image review, and Photoshop session included: $399. Limit 6.
The cost of your Gatorland Photographer’s Pass is not included.
Gatorland is so good right now that I am going back again next Saturday, April 5 There are a very few great nests and tons of activity. Each week it is rare that I see a photographer who know’s what they are doing. There were a few in the rain last Saturday, but still most folks need help. Join me on this, the 4th Gatorland Short Notice Saturday Full-Day In-the-Field Workshop and you will learn to spot the good situations, to choose the best perspective, to see and understand the light, to get the right exposure every time after making a single test exposure, and to design pleasing images by mastering your camera’s AF system. A big part of the above is that you will learn how and why you must work in Manual mode 90% of the time at Gatorland. That is exactly what Jim Weerts learned on Saturday past.
At lunch we will review my images, take a look at five of your best images from the morning session (for those who opt to bring their laptops), and process a few of my images in Photoshop after converting them in DPP. That followed by Instructor Nap Time. Last Saturday all 3 folks had a great time and learned a ton. And the weather for this coming Saturday is looking good.
Payment in full via credit card is due upon registering. Please call Jim or Jennifer at 863-692-0906 to register. Ask for me if you have any questions.
Mint Canon 800mm f/5.6L IS Lens for Sale
Friend and multiple IPT veteran Larry Master is offering a mint condition Mint Canon 800mm f/5.6L IS Lens for sale for $8495. This great lens, my favorite for 3 years, the Canon EF 800mm f/5.6L IS USM lens, sells new at B&H for $13,218.00. Last week, they were offering one in mint condition for a ridiculously high $10,249.90; it sold overnight. Go figure. Larry’s lens will save you a ton of dough and you will have a great lens with lots of reach. The sale includes a Lenscoat, an Aquatech soft lens cap that fits like a glove, a Kirk Enterprises LP30 plate (not recommended by me), the lens trunk and leather cover, and insured shipping by UPS Ground to US addresses only. Personal checks only; your new lens will be shipped only after your check clears.
Interested folks may contact Larry on his cell phone at 518-645-1545 or via e-mail.
Selling Your Used Photo Gear Through BIRDS AS ART
Selling your used (or like-new) photo gear through the BAA Blog or via a BAA Online Bulletin is a great idea. We charge only a 5% commission. One of the more popular used gear for sale sites charges a minimum of 20% plus assorted fees! Yikes. The minimum item price here is $500. If you are interested please e-mail with the words Items for Sale Info Request cut and pasted into the Subject line :). Stuff that is priced fairly–I offer free pricing advise, usually sells in no time flat as did Dennis Cassidy’s 500 II recently on the blog and Larry Master’s 400 DO.
|

|
|
I hope that you can join us on this great trip. The vertical puffin image was created by David Tipling. The rest–almost all from the UK, are mine :).
|
UK Puffins and Gannets IPT July 2-9, 2014. 5 full days of puffins and two half-days of gannet boat photography: $4,999 USD. Limit 10 + the 2 leaders.
Desperately needed: 1 female roommate & 1 male roommate.
Just learned of a killer non-stop flight: Newark to Edinburgh on United.
Fly to Edinburgh (say “ED-in-BUR-row”), Scotland on a red eye flight on July 1st arriving on the early morning of July 2 or certainly before 10am. UK folks who plan on driving please contact me via e-mail immediately.
There are direct flights to Edinburgh from both Philadelphia and Toronto. If you learn of any others please advise via e-mail so that I may share with all the interested folks. Fly home mid-morning on July 9. UK locals and our many European friends are of course welcome.
With the needed 5 deposits in hand, this trip is a go; you can buy your flights now :).
What’s included:
5 full DAYS on the best UK puffin boat; trips to 2 different islands–all dependent on decent weather, i.e, no major storms. Seabirds including scads of Atlantic Puffin both in flight and perched, Razorbill, Great Cormorant, Shag, and others likely. The trip is timed to maximize the opportunities for photographing the puffins bringing fish back to the nests. All boat fares and landing fees are included. The boat leaves at 9:30am. We have two hours on the first island. We are then picked up and head to the 2nd island for a 2+ hour session. The weather is typically cloudy bright.
One late-afternoon (2 July) and one early morning (probably 8 July) trip on a gannet photography boat where the birds are fed and dive very close to the boat. Both are dependent on good weather but we do have some flexibility. Boat fares and the cost of the fish are covered. Each will consist of a one hour outbound ride, two hours of diving Northern Gannet photography (with 6 boxes of fish) and the one hour return trip.
The tentative, weather-dependent itinerary:
July 2: airport pick-up no later than 10am UK time. Lunch on your dime. Drive to hotel. Afternoon gannet boat trip/time TBD.
July 3, 4, 5, 6, & 7: Full Day Puffin Boat trips as noted above.
July 8: early morning Gannet Boat trip. Afternoon: Small group Image review and Photoshop sessions. Pack for the trip home.
July 9: early morning departure for Edinburgh Airport (EDI).
The itinerary is subject to change to ensure the best possible photographic opportunities.
A super-telephoto lens is not required on this trip. The 300mm f/2.8s are ideal. I will be bringing one along with my 200-400mm with Internal Extender, my 70-200 f/2.8L IS II, and a shorter zoom lenses. Plus three 1.4X and two 2X TCs, a Gitzo 3532 LS Carbon Fiber tripod, and my Mongoose M3.6. I may go tripod-less on the puffin trips at times…. Or not…. All photography on the gannet boat will be hand held. It is likely that the 70-200s will be ideal for the gannets.
7 nights lodging in an older but excellent hotel just a few minutes from the puffin boat dock with about a 70 minute ride to the gannet boat. Double occupancy will be the rule though we might be able to offer a single supplement at an exorbitant price. See the hotel info here.
All breakfasts and dinner (at the hotel) from dinner on July 2 through dinner on July 8. And breakfast on our get-away day unless we need to leave earlier than they serve to make our flights home…
Airport pick-up until 10am on July 2–this should not be a problem as there are lots of red-eye flights from the US to Edinburgh.
All ground transportation. Airport return on the early morning of July 9. We may be getting up very early on July 9th.
Two great leaders; Denise Ippolito and yours truly will provide personalized and small group in-the-field instruction. As usual, the closer you stay to us and the more questions that you ask the more you will learn. We will of course point out the best situations. You will learn to see these great situations for yourself, to get the right exposure every time after making a single test exposure, to work in Manual mode, and to design pleasing images by mastering your camera’s AF system. You will learn the basics of photographing birds in flight and how the relationship between light direction and wind direction impacts the photography of both birds in flight and perched puffins. And tons more.
We will be conducting informal, small group image review and Photoshop sessions after dinner. All are invited to bring their laptops. Image critiques of your five best images will be done after the trip upon request.
Early morning castle photography right near the hotel is an option for the early risers. In the event of inclement weather or stormy seas there is the possibility of bird photography along the coast. Early evening bird photography along the coast is also optional.
Not included: all lunches–for the most part we will need to pack lunches for the puffin trips, or you may opt to skip lunch. Your round trip airfare from home to Scotland. Booze, wine, and any other beverages other than coffee and tea at breakfast.
A non-refundable deposit of $2,000 USD is required to hold your spot so please check on flights and your schedule before committing. The balance will be due on 15 May so you may wish to pay the whole thing at once. Overseas folks may e-mail for wire transfer info. Our $15 wire transfer fee will be added to your balance.
Trip insurance is highly recommended as your deposit (less a $200 cancellation fee) will not be refunded unless the trip fills completely. I, and my family, use Travel Insurance Services.
After letting us know via e-mail that you will be coming, please send your deposit check made out to “Arthur Morris” to us as follows:
Arthur Morris/BIRDS AS ART
PO Box 7245 (US mail) or 4041 Granada Drive (if by courier).
Indian Lake Estates, FL 33855
My friend David Tipling, with multiple BBC honored images and the author of dozens of photo illustrated books, helped with the planning and arrangements for this trip.
If you have any questions, please contact me via e-mail.
|

|
|
All images created on Lake Blue Cypress. Copyright Arthur Morris/BIRDS AS ART. Click on the composite to enjoy a larger version.
|
Lake Blue Cypress Osprey Heaven Full-Day In-the-Field Hand Holding Workshops via Customized Pontoon Boat
Two 3+ hour shooting sessions on a beautiful cypress lake teeming with Osprey; Barred Owl almost guaranteed. Red-shouldered Hawk and Pileated Woodpecker likely. Be sure to follow the link to Jim’s gallery below.
2 great leaders: Captain Jim Neiger and Arthur Morris.
Available dates: April 8, 9, 11 & 12, 2014.
Here are the Full Day rates:
1 photographer: $650.
2 photographers: $500 each.
3 photographers: $450 each.
4 photographers: $400.
Each full day booking includes a delicious healthy lunch at my home. Overnight lodging at my home is available cheap on a limited basis for folks who would like to do more than one day. Please inquire via e-mail.
So far one photographer signed up for Saturday, April 12; join us and enjoy at least a $150 savings.
One or two photographers may hire the boat on a private basis by paying the full day rate for 4: $1600.
Because of the late date payment in full by personal check is due now. Please e-mail for additional details of info.
Check out Jim Neiger’s Osprey Heaven/Lake Blue Cypress Gallery here and you will be amazed as to the quality of the flight and action images and the possibilities.
Here’s what BPN member David Salem had to say about a day on the lake with Jim Neiger in Pane 1 here:
“We met our friend Jim Neiger on his boat at Lake Blue Cypress and had a blast shooting hundreds of Osprey and many other species including some great shots of Barred owls. I highly suggest booking a trip with Jim on the lake as he knows the lake real well and the birds even better. It was a trip that I will never forget with literally hundreds of Osprey flying around starting their nesting season. A sight to see; will be posting some pics from the lake soon. ”
Support the BAA Blog. Support the BAA Bulletins: Shop B&H here!
We want and need to keep providing you with the latest free information, photography and Photoshop lessons, and all manner of related information. Show your appreciation by making your purchases immediately after clicking on any of our B&H or Amazon Affiliate links in this blog post. Remember, B&H ain’t just photography!


Amazon
Everyone buys something from Amazon, be it a big lens or deodorant. Support the blog by starting your search by clicking on the logo-link below. No purchase is too small to be appreciated; they all add up. Why make it a habit? Because I make it a habit of bringing you new images and information on an almost daily basis.
Typos
In all blog posts and Bulletins, feel free to e-mail or to leave a comment regarding any typos, wrong words, misspellings, omissions, or grammatical errors. Just be right. 🙂
March 31st, 2014 122
This post marks 122 straight days with a new educational blog post. With so many folks getting in the habit of using our B&H and Amazon links why quit now? To show your appreciation for my efforts here, we do ask that you use our the B&H and Amazon affiliate links on the right side of the blog for all of your purchases. Please check the availability of all photographic accessories in the BIRDS AS ART Online Store. We sell only what I use and depend on. We will not sell you junk. We know what you need to make creating great images easy and fun. And we are always glad to answer your gear questions via e-mail.
You can find the following items in the store: Gitzo tripods, Mongoose M3.6 and Wimberley heads, plates, low feet, and accessories, flash brackets, , Delkin e-film Pro Compact Flash Cards, LensCoat products, and our unique line-up of educational materials including ABP I & II, Digital Basics, Site and Set-up e-Guides, Canon and Nikon Camera Users and AF e-Guides, and MP-4 Photoshop video tutorials among others.
I would of course appreciate your using our B&H affiliate links for all of your major gear, video, and electronic purchases. For the photographic stuff mentioned in the paragraph above we, meaning BAA, would of course greatly appreciate your business. Here is a huge thank you to the many who have been using our links on a regular basis and visiting the BAA Online store as well.
This blog post took about 3 hours to assemble. Enjoy!
They Are Different Animals
I got an e-mail last night from friend and multiple IPT veteran Larry Master who sold his 400 DO through BIRDS AS ART and is reducing the price on his mint 800; see below for details on that. Anyway, he broke down and purchased both a 1D X and a 200-400. He wrote:
Now I am wondering if I should sell my 600 and my 300…
His comment inspired today’s blog post.
I responded:
For you, selling the 300 II would be a good idea unless the 200-400 proves too heavy to hand hold for long flight photography sessions where you cannot use a tripod…. On trips where I do not take the 600 II, I bring both the 200-400 and the 300 II so that I have a back-up in case of a smashing lens disaster.
For me, it would be insanity for anyone to sell the 600II. The 600 gives me 840 with lightning fast AF and sharp 1200mm when I need it. Which is often. A lot depends on where and what you will be photographing. The 200-400 is great in the Galapagos, on Southern Oceans cruises, on Japan in Winter trips, and in Florida. I leave the 600 at home for the Galapagos and Southern Oceans trips but would not be caught dead without it in Japan, here in my home state, pretty much everywhere else that I go to photograph birds. Your call :).
In short, the 200-400 and the 600 II are completely different, very specialized tools. With the 200-400 giving you all AF sensors from 200-560 the 600 begins where the 2-4 ends. Add to that 840 and 1200 (for those who are capable of creating sharp images with the 2X III TC), and it is obvious they make a perfect combination that covers all focal lengths from 200-1200mm. Throw in the 70-200 II and the 24-70 and you have yourself a nice kit.
|
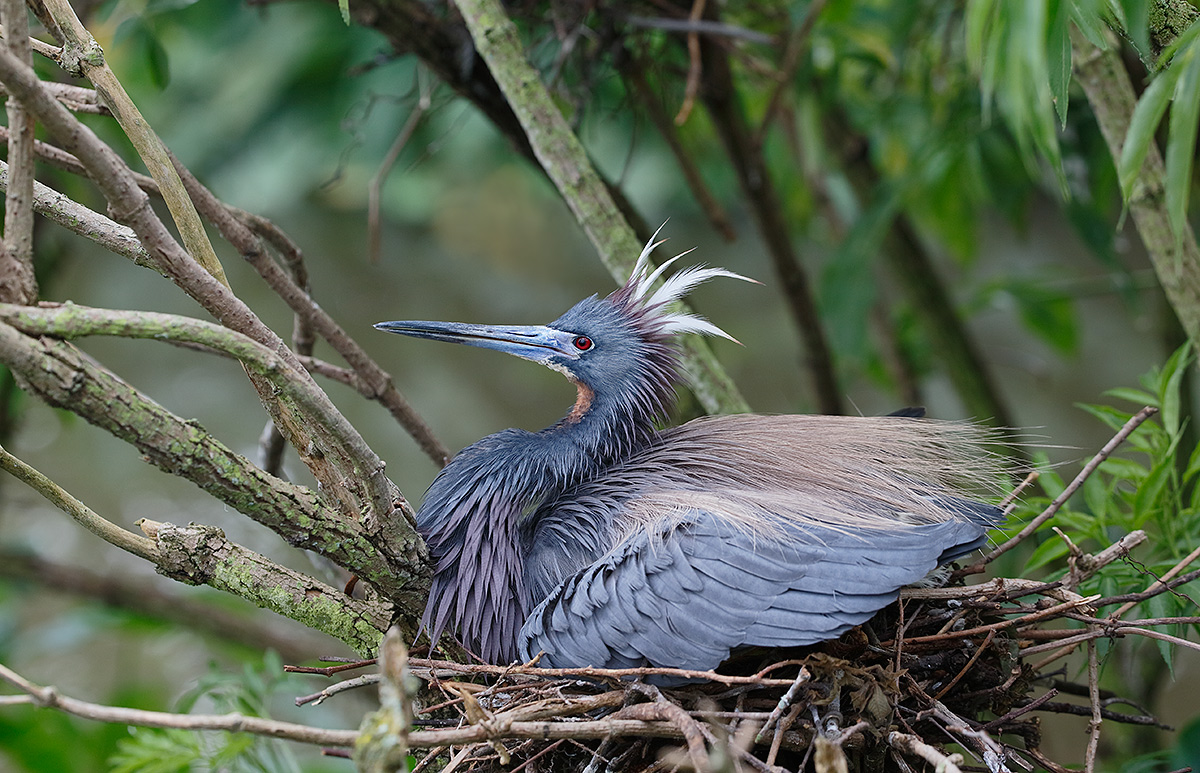
|
|
This Tricolored Heron image was created at Gatorland with the Canon EF 200-400mm f/4L IS USM Lens with Internal 1.4x Extender (hand held at 219mm) and the Canon EOS-1D X. ISO 800. Evaluative metering -+1/3 stop as framed: 1/320 sec. at f/5.6 in Manual mode. AWB.
One sensor below the central Sensor/AI Servo-Surround/Rear Focus AF on the bird’s neck active at the moment of exposure yielded a pleasing image design with the bird in the lower part of the frame. Practicing so that you are able to change AF sensors almost instantly is an important skill to work on. Click here to see the latest version of the Rear Focus Tutorial. Click on the image to see a larger version. Learn everything there is to know about the 1D X and 5D III AF systems including how to manage the various AF Area Selection Modes, when to use which one, and several ways to move the AF sensor around in the 1D X AF Guide and the 5D Mark III User’s Guide.
Image #2: Tricolored Heron Nest Defense Threat Display
|
Why Do I Need Both?
In many situations, I need both of these great lenses at hand in order to have almost unlimited framing options available. For the Great Egret image that opened this blog post, I went with the big gun and the 2XIII TC to create an image that showed off the incredible beauty and details of the face, lores, and bill. I placed the Canon Extension Tube EF 25 II behind the 2X for closer focus while maintaining AF. As the AF system is slowed by the loss of light from the two accessories I pre-focused manually and in addition, to keep the system from hunting, I turned the inaptly named “Lens drive when AF impossible” to “Stop focus search/OFF.” Though most folks have no clue as to how to use this properly, it can be extremely valuable in the right situation. It is so important to me that I have registered it as one of my My Menu items. You can learn exactly how, when, and why to use it in our 1D X AF Guide, the 5D Mark III User’s Guide, and the Mark IV User’s Guide. I am not sure about the 7D; I would appreciate it if someone would let me know whether “Lens drive when AF impossible” is covered in the 7D User’s Guide.
As I was working the Great Egret with the 600II/2X/1D X combo, the 200-400 rested flat on the wet boardwalk waiting for me to grab it. I turned my head to my left to check out the activity at the tricolored nest to my left. The nest had four beautiful light blue eggs. I had been photographing it off and on all morning so I knew in advance that Evaluative metering +1/3 stop in Av mode would give me something that I could work with. As it was getting darker each hour this is another example of a situation where Av mode soundly trumps Manual mode. .
Whenever the bird would stand up, I’d grab the 2-4 and get to work in a moment. When a Great Egret landed right above her nest, she rose in protest so I grabbed my quasi-wide angle lens, disengaged the TC, moved the AF point down one row, and created the image here showing the bird displaying against the large white intruder above. As you can see having the two lenses available allowed me to create two vastly different images in the same minute. But in addition to owning the right gear and having it at hand lots of thinking and skill came into play. Without being able to think and work quickly, to be fully aware of the various options available with the 200-400/1D X combo, the displaying heron image would never have come to fruition.
Learn to use your gear, explore all of the options in our great eGuides, and then practice, practice, practice.
Image Optimization Question
Rookeries are cluttered places. Murphy’s Law of Nests (every nest has one stick or twig in the wrong place…) prevails. On the Gatorland In-the-Field Saturday Workshops I teach folks how to tell the good situations from the poor ones and how to choose the best perspective. See below for details. For the image above you are invited to leave a comment and let us know what, if anything, you would choose to clean-up or eliminate.
Your Favorite?
Please take a minute to leave a comment letting us know which of the 2 images here that you like best. And why.
|

|
|
There are only 2 openings left on the April 5 ITF Workshop. But three folks are leaving early; if you are interested in an afternoon only session, please contact me via e-mail.
|
Gatorland Short Notice Saturday Full-Day In-the-Field Workshop
Saturday April 5, 2014. 7:15am till 10:15am & 4:00pm till dusk. Lunch, image review, and Photoshop session included: $399. Limit 6.
The cost of your Gatorland Photographer’s Pass is not included.
Gatorland is so good right now that I am going back again next Saturday, April 5 There are a very few great nests and tons of activity. Each week it is rare that I see a photographer who know’s what they are doing. There were a few in the rain last Saturday, but still most folks need help. Join me on this, the 4th Gatorland Short Notice Saturday Full-Day In-the-Field Workshop and you will learn to spot the good situations, to choose the best perspective, to see and understand the light, to get the right exposure every time after making a single test exposure, and to design pleasing images by mastering your camera’s AF system. A big part of the above is that you will learn how and why you must work in Manual mode 90% of the time at Gatorland. That is exactly what Jim Weerts learned on Saturday past.
At lunch we will review my images, take a look at five of your best images from the morning session (for those who opt to bring their laptops), and process a few of my images in Photoshop after converting them in DPP. That followed by Instructor Nap Time. Last Saturday all 3 folks had a great time and learned a ton. And the weather for this coming Saturday is looking good.
Payment in full via credit card is due upon registering. Please call Jim or Jennifer at 863-692-0906 to register. Ask for me if you have any questions.
Mint Canon 800mm f/5.6L IS Lens for Sale
Friend and multiple IPT veteran Larry Master is offering a mint condition Mint Canon 800mm f/5.6L IS Lens for sale for $8495. This great lens, my favorite for 3 years, the Canon EF 800mm f/5.6L IS USM lens, sells new at B&H for $13,218.00. Last week, they were offering one in mint condition for a ridiculously high $10,249.90; it sold overnight. Go figure. Larry’s lens will save you a ton of dough and you will have a great lens with lots of reach. The sale includes a Lenscoat, an Aquatech soft lens cap that fits like a glove, a Kirk Enterprises LP30 plate (not recommended by me), the lens trunk and leather cover, and insured shipping by UPS Ground to US addresses only. Personal checks only; your new lens will be shipped only after your check clears.
Interested folks may contact Larry on his cell phone at 518-645-1545 or via e-mail.
Selling Your Used Photo Gear Through BIRDS AS ART
Selling your used (or like-new) photo gear through the BAA Blog or via a BAA Online Bulletin is a great idea. We charge only a 5% commission. One of the more popular used gear for sale sites charges a minimum of 20% plus assorted fees! Yikes. The minimum item price here is $500. If you are interested please e-mail with the words Items for Sale Info Request cut and pasted into the Subject line :). Stuff that is priced fairly–I offer free pricing advise, usually sells in no time flat as did Dennis Cassidy’s 500 II recently on the blog and Larry Master’s 400 DO.
Support the BAA Blog. Support the BAA Bulletins: Shop B&H here!
We want and need to keep providing you with the latest free information, photography and Photoshop lessons, and all manner of related information. Show your appreciation by making your purchases immediately after clicking on any of our B&H or Amazon Affiliate links in this blog post. Remember, B&H ain’t just photography!


Amazon
Everyone buys something from Amazon, be it a big lens or deodorant. Support the blog by starting your search by clicking on the logo-link below. No purchase is too small to be appreciated; they all add up. Why make it a habit? Because I make it a habit of bringing you new images and information on an almost daily basis.
Typos
In all blog posts and Bulletins, feel free to e-mail or to leave a comment regarding any typos, wrong words, misspellings, omissions, or grammatical errors. Just be right. 🙂
March 30th, 2014 Yesterday at Gatorland
I woke early and drove to Gatorland in a light drizzle. I entered at 7:30 just as the rain quit. Conditions stay dry until about 1pm despite the darkening skies. I headed for Ruby Tuesday’s for the salad bar and an electrical outlet; they save that booth for me every Saturday and just, and I mean just beat the storm. As I ate, the view from my table was Armageddon-like as the storm–there were tornado warnings for Kissimmee–roared through. The ride home was not too bad until I headed east on SR 60 into another strong cell.
The Streak Goes On
This post marks 121 straight days with a new educational blog post. With so many folks getting in the habit of using our B&H and Amazon links why quit now? To show your appreciation for my efforts here, we do ask that you use our the B&H and Amazon affiliate links on the right side of the blog for all of your purchases. Please check the availability of all photographic accessories in the BIRDS AS ART Online Store. We sell only what I use and depend on. We will not sell you junk. We know what you need to make creating great images easy and fun. And we are always glad to answer your gear questions via e-mail.
You can find the following items in the store: Gitzo tripods, Mongoose M3.6 and Wimberley heads, plates, low feet, and accessories, flash brackets, , Delkin e-film Pro Compact Flash Cards, LensCoat products, and our unique line-up of educational materials including ABP I & II, Digital Basics, Site and Set-up e-Guides, Canon and Nikon Camera Users and AF e-Guides, and MP-4 Photoshop video tutorials among others.
I would of course appreciate your using our B&H affiliate links for all of your major gear, video, and electronic purchases. For the photographic stuff mentioned in the paragraph above we, meaning BAA, would of course greatly appreciate your business. Here is a huge thank you to the many who have been using our links on a regular basis and visiting the BAA Online store as well.
This blog post took 3 hours to assemble. Enjoy!
|
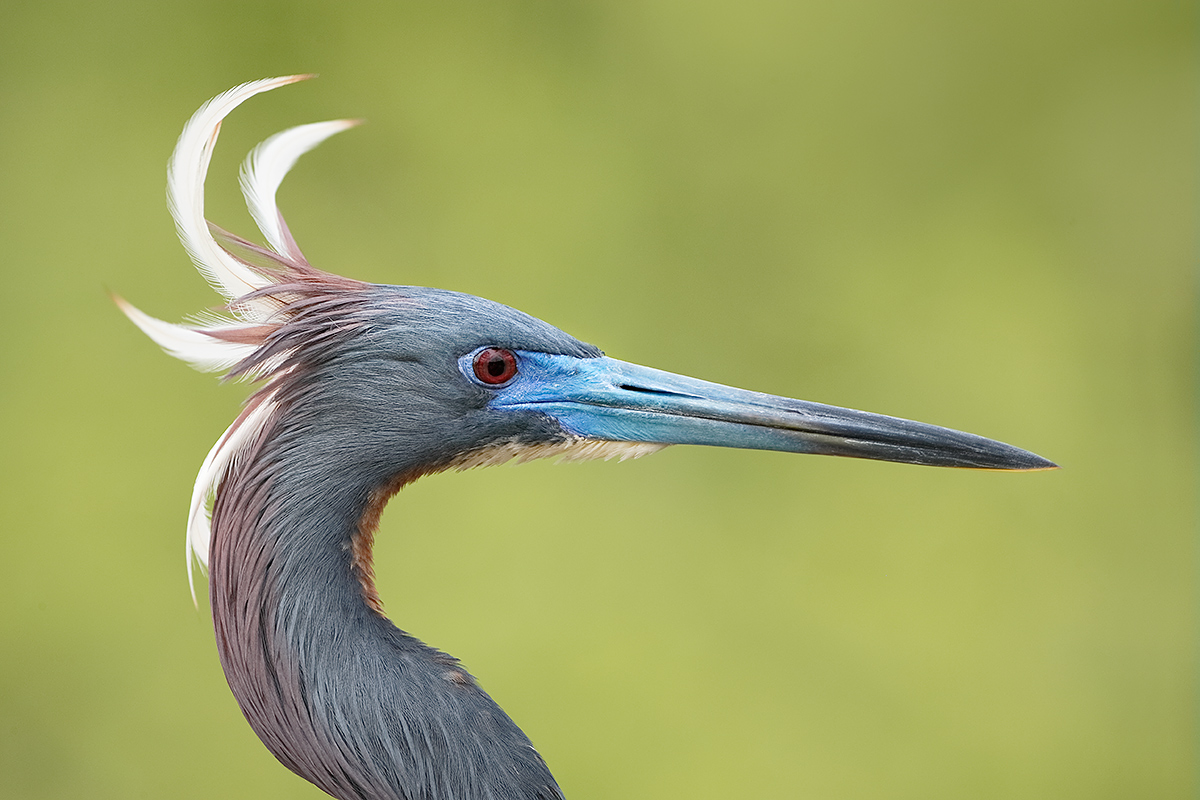
|
|
This Tricolored Heron head portrait was created yesterday at Gatorland at 11:35am on a cloudy day with the Canon EF 200-400mm f/4L IS USM Lens with Internal 1.4x Extender (hand held with the internal extender in place at 436mm) and the Canon EOS-1D X. ISO 800. Evaluative metering +1/3 stop as framed: 1/640 sec. at f/6.3 in Manual mode. AWB.
Two sensors to the left of the central sensor/AI Servo-Expand/Rear Focus AF just below and slightly behind the bird’s eye active at the moment of exposure. Click here to see the latest version of the Rear Focus Tutorial. Click on the image to see a larger version.
Image #1: The Original
|
Wind Against Crest
Birds always land and take off facing into the wind. And when they are perched, the almost always face into the wind as well. Why? To reduce wear and tear on their feathers. By facing into the wind their feathers lie flat on their body, undisturbed by either a breeze or a strong wind.
The Tricolored Heron above was facing into the wind when it suddenly turned 180 degrees to argue with a very aggressive Snowy Egret that had been picking on it all morning. With the wind now behind the bird its crest was blowing around like crazy. This created a short-lived but wonderful photographic opportunity. Bird photographers need to learn to be aware of such situations as the blowing crests or even blowing head feathers can add lots of interest to an otherwise lifeless image.
AF Point Area Selection Mode and Active Sensor Selection
As I approached this bird I immediately went to 61-Point AF, but in the low light it was not as responsive as I would have liked so I went to Expand. (I thought at the time that I had made it all the way to Surround but the EXIF showed otherwise.) I had moved the active sensor to 2 to the left and 2 rows up but wound up clipping the crest so I moved the sensor down two rows and was fortunate to catch the perfect moment here.
1D X and 5D III User’s Guides
Learn to put the sophisticated AF systems in these 2 great full frame digital camera bodies in our 1D X AF Guide and our 5D Mark II User’s Guide. I am hoping to be able to offer a complete 1D X Guide no later than June of this year.
Head Portrait Head Angle Fine Points
For years I have taught that the best overall head angle has the bird’s head turned about 3 degrees toward the photographer. But when working tight and creating head portraits of herons and egrets I have realized that even when you are able to stop down to f/8 or beyond that 3 degrees towards is too much; the bill tip will be well out of focus. Square to the back of the camera or perhaps 1 degree towards is ideal, the latter if you are able to get to f/8. In the image above the bird’s head is angled about 1/2 degree away from us. This is less than ideal. Though the spectacular blowing crest makes up for the poor head angle in part it still bugs me :).
Exposure and Image Optimization Fine Points
Even in the soft, low light conditions I was concerned about blowing out the whites of the bird’s crest. With the dark face you need to be on your toes while optimizing such images. (I did wind up going 1/3 stop lighter–to f/5.6–with this bird without encountering any problems.) After lightening the image a bit during the RAW conversion in DPP I used more NIK Detail Extractor than usual on bird and painted it in with a Black or Hide-All Mask at about 30% on the bird’s body but at 90% on the darker face. In addition I selected the face with the Quick Selection Tool, put that on its own layer, and pulled the curve up (Control M for curves on a layer).
The DPP RAW Conversion Guide
After seeing the accurate colors that I get from my DPP RAW conversions, Japan in Winter co-leader Paul McKenzie switched to DPP conversions and Denise Ippolito is consider doing the same. Now that is amazing…. To learn why I use Canon’s Digital Photo Professional (DPP) to convert every image that I work on, click here.
200-400 Versatility and Other Advantages
Hand holding the 200-400 and zooming out from 560mm allowed me to frame the image perfectly. In addition, by hand holding I was able to get low instantly and eliminate 2 distracting Queen Anne’s Lace blossoms from the background. I love my 2-4. If you break down and decide to purchase a 200-400, please use our product-specific B&H affiliate link:
|
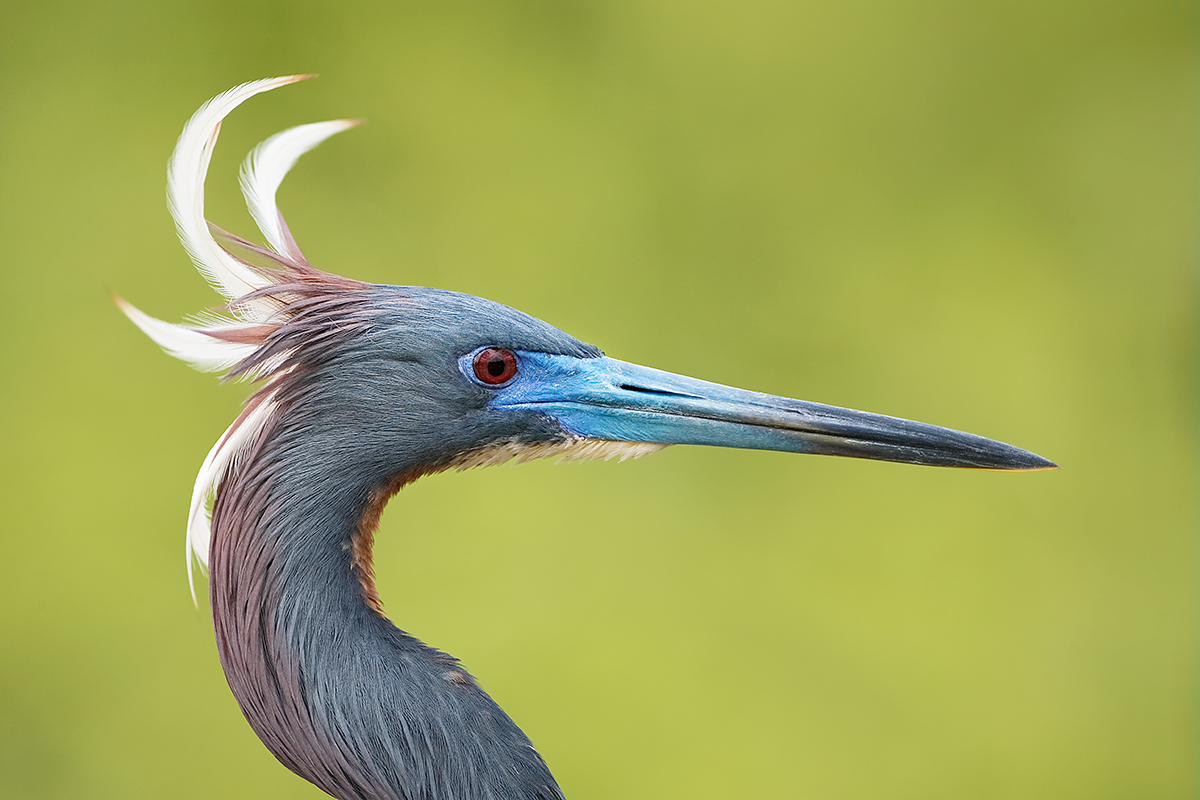
|
|
This is a second version of the image above.
Image #2: The Juiced Up Version
|
The Do-Over Image Optimization
I originally processed this image early last night while watching some NCAA games on TIVO. When I awoke this morning, I took a second look at it (the image that opened this post), and felt that I could improve it. It looked a bit flat and there was some noise showing in the background, that as a result of the slight underexposure at ISO 800, so I worked on the image again this morning.
I brought the optimized TIFF file back into Photoshop and increased the vibrance. Then I selected all and put that on its own layer (Control A, Control J), applied the Linear Curve preset, added a Regular Layer Mask, and erased the face that had gone too dark. I further lightened the face with the Tim Grey Dodge & Burn technique. Then I selected the background with the Magic Wand Tool, applied Refine Edge, put the selection on a Layer, and ran Filter/Blur/Surface Blur as taught to me by Denise Ippolito. It is a bit difficult to see the differences by scrolling; can you see them?
Digital Basics
Every Photoshop technique and tool mentioned in this blog post is detailed in my Digital Basics File. You can, for example, learn the best settings for Filter/Blur/Surface Blur and tons more. Are you tired of making your images look worse in Photoshop? Do your JPEGs not look as good as mine? Do you have no clue as to what I am talking about when I talk image optimization? In my Digital Basics File, an instructional PDF that is sent via e-mail, it is all spelled out in clearly written, easy-to-understand language. In easy-to-follow steps. DB includes my complete digital workflow, dozens of great Photoshop tips, the use of Contrast Masks, several different ways of expanding canvas, all of my time-saving Keyboard Shortcuts, Using Adjustment Layers, Quick Masking, Layer Masking, and NIK Color Efex Pro basics, my killer image clean-up techniques, Digital Eye Doctor, creating time-saving actions, and lots more.
Your Favorite?
If you can see the differences, please leave a comment and let us know which of the two images you like better, and why.
|

|
|
I hope that you can join us on this great trip. The vertical puffin image was created by David Tipling. The rest–almost all from the UK, are mine :).
|
UK Puffins and Gannets IPT July 2-9, 2014. 5 full days of puffins and two half-days of gannet boat photography: $4,999 USD. Limit 10 + the 2 leaders.
Desperately needed: 1 female roommate & 1 male roommate.
Just learned of a killer non-stop flight: Newark to Edinburgh on United.
Fly to Edinburgh (say “ED-in-BUR-row”), Scotland on a red eye flight on July 1st arriving on the early morning of July 2 or certainly before 10am. UK folks who plan on driving please contact me via e-mail immediately.
There are direct flights to Edinburgh from both Philadelphia and Toronto. If you learn of any others please advise via e-mail so that I may share with all the interested folks. Fly home mid-morning on July 9. UK locals and our many European friends are of course welcome.
With the needed 5 deposits in hand, this trip is a go; you can buy your flights now :).
What’s included:
5 full DAYS on the best UK puffin boat; trips to 2 different islands–all dependent on decent weather, i.e, no major storms. Seabirds including scads of Atlantic Puffin both in flight and perched, Razorbill, Great Cormorant, Shag, and others likely. The trip is timed to maximize the opportunities for photographing the puffins bringing fish back to the nests. All boat fares and landing fees are included. The boat leaves at 9:30am. We have two hours on the first island. We are then picked up and head to the 2nd island for a 2+ hour session. The weather is typically cloudy bright.
One late-afternoon (2 July) and one early morning (probably 8 July) trip on a gannet photography boat where the birds are fed and dive very close to the boat. Both are dependent on good weather but we do have some flexibility. Boat fares and the cost of the fish are covered. Each will consist of a one hour outbound ride, two hours of diving Northern Gannet photography (with 6 boxes of fish) and the one hour return trip.
The tentative, weather-dependent itinerary:
July 2: airport pick-up no later than 10am UK time. Lunch on your dime. Drive to hotel. Afternoon gannet boat trip/time TBD.
July 3, 4, 5, 6, & 7: Full Day Puffin Boat trips as noted above.
July 8: early morning Gannet Boat trip. Afternoon: Small group Image review and Photoshop sessions. Pack for the trip home.
July 9: early morning departure for Edinburgh Airport (EDI).
The itinerary is subject to change to ensure the best possible photographic opportunities.
A super-telephoto lens is not required on this trip. The 300mm f/2.8s are ideal. I will be bringing one along with my 200-400mm with Internal Extender, my 70-200 f/2.8L IS II, and a shorter zoom lenses. Plus three 1.4X and two 2X TCs, a Gitzo 3532 LS Carbon Fiber tripod, and my Mongoose M3.6. I may go tripod-less on the puffin trips at times…. Or not…. All photography on the gannet boat will be hand held. It is likely that the 70-200s will be ideal for the gannets.
7 nights lodging in an older but excellent hotel just a few minutes from the puffin boat dock with about a 70 minute ride to the gannet boat. Double occupancy will be the rule though we might be able to offer a single supplement at an exorbitant price. See the hotel info here.
All breakfasts and dinner (at the hotel) from dinner on July 2 through dinner on July 8. And breakfast on our get-away day unless we need to leave earlier than they serve to make our flights home…
Airport pick-up until 10am on July 2–this should not be a problem as there are lots of red-eye flights from the US to Edinburgh.
All ground transportation. Airport return on the early morning of July 9. We may be getting up very early on July 9th.
Two great leaders; Denise Ippolito and yours truly will provide personalized and small group in-the-field instruction. As usual, the closer you stay to us and the more questions that you ask the more you will learn. We will of course point out the best situations. You will learn to see these great situations for yourself, to get the right exposure every time after making a single test exposure, to work in Manual mode, and to design pleasing images by mastering your camera’s AF system. You will learn the basics of photographing birds in flight and how the relationship between light direction and wind direction impacts the photography of both birds in flight and perched puffins. And tons more.
We will be conducting informal, small group image review and Photoshop sessions after dinner. All are invited to bring their laptops. Image critiques of your five best images will be done after the trip upon request.
Early morning castle photography right near the hotel is an option for the early risers. In the event of inclement weather or stormy seas there is the possibility of bird photography along the coast. Early evening bird photography along the coast is also optional.
Not included: all lunches–for the most part we will need to pack lunches for the puffin trips, or you may opt to skip lunch. Your round trip airfare from home to Scotland. Booze, wine, and any other beverages other than coffee and tea at breakfast.
A non-refundable deposit of $2,000 USD is required to hold your spot so please check on flights and your schedule before committing. The balance will be due on 15 May so you may wish to pay the whole thing at once. Overseas folks may e-mail for wire transfer info. Our $15 wire transfer fee will be added to your balance.
Trip insurance is highly recommended as your deposit (less a $200 cancellation fee) will not be refunded unless the trip fills completely. I, and my family, use Travel Insurance Services.
After letting us know via e-mail that you will be coming, please send your deposit check made out to “Arthur Morris” to us as follows:
Arthur Morris/BIRDS AS ART
PO Box 7245 (US mail) or 4041 Granada Drive (if by courier).
Indian Lake Estates, FL 33855
My friend David Tipling, with multiple BBC honored images and the author of dozens of photo illustrated books, helped with the planning and arrangements for this trip.
If you have any questions, please contact me via e-mail.
|

|
|
All images created on Lake Blue Cypress. Copyright Arthur Morris/BIRDS AS ART. Click on the composite to enjoy a larger version.
|
Lake Blue Cypress Osprey Heaven Full-Day In-the-Field Hand Holding Workshops via Customized Pontoon Boat
Two 3+ hour shooting sessions on a beautiful cypress lake teeming with Osprey; Barred Owl almost guaranteed. Red-shouldered Hawk and Pileated Woodpecker likely. Be sure to follow the link to Jim’s gallery below.
2 great leaders: Captain Jim Neiger and Arthur Morris.
Available dates: April 8, 9, 11 & 12, 2014.
Here are the Full Day rates:
1 photographer: $650.
2 photographers: $500 each.
3 photographers: $450 each.
4 photographers: $400.
Each full day booking includes a delicious healthy lunch at my home. Overnight lodging at my home is available cheap on a limited basis for folks who would like to do more than one day. Please inquire via e-mail.
So far one photographer signed up for Saturday, April 12; join us and enjoy a $150 savings.
One or two photographers may hire the boat on a private basis by paying the full day rate for 4: $1600.
Because of the late date payment in full by personal check is due now. Please e-mail for additional details of info.
Check out Jim Neiger’s Osprey Heaven/Lake Blue Cypress Gallery here and you will be amazed as to the quality of the flight and action images and the possibilities.
Here’s what BPN member David Salem had to say about a day on the lake with Jim Neiger in Pane 1 here:
“We met our friend Jim Neiger on his boat at Lake Blue Cypress and had a blast shooting hundreds of Osprey and many other species including some great shots of Barred owls. I highly suggest booking a trip with Jim on the lake as he knows the lake real well and the birds even better. It was a trip that I will never forget with literally hundreds of Osprey flying around starting their nesting season. A sight to see; will be posting some pics from the lake soon. ”
Support the BAA Blog. Support the BAA Bulletins: Shop B&H here!
We want and need to keep providing you with the latest free information, photography and Photoshop lessons, and all manner of related information. Show your appreciation by making your purchases immediately after clicking on any of our B&H or Amazon Affiliate links in this blog post. Remember, B&H ain’t just photography!


Amazon
Everyone buys something from Amazon, be it a big lens or deodorant. Support the blog by starting your search by clicking on the logo-link below. No purchase is too small to be appreciated; they all add up. Why make it a habit? Because I make it a habit of bringing you new images and information on an almost daily basis.
Typos
In all blog posts and Bulletins, feel free to e-mail or to leave a comment regarding any typos, wrong words, misspellings, omissions, or grammatical errors. Just be right. 🙂
March 29th, 2014 120
This post marks 120 straight days with a new educational blog post. With so many folks getting in the habit of using our B&H and Amazon links why quit now? To show your appreciation for my efforts here, we do ask that you use our the B&H and Amazon affiliate links on the right side of the blog for all of your purchases. Please check the availability of all photographic accessories in the BIRDS AS ART Online Store. We sell only what I use and depend on. We will not sell you junk. We know what you need to make creating great images easy and fun. And we are always glad to answer your gear questions via e-mail.
You can find the following items in the store: Gitzo tripods, Mongoose M3.6 and Wimberley heads, plates, low feet, and accessories, flash brackets, , Delkin e-film Pro Compact Flash Cards, LensCoat products, and our unique line-up of educational materials including ABP I & II, Digital Basics, Site and Set-up e-Guides, Canon and Nikon Camera Users and AF e-Guides, and MP-4 Photoshop video tutorials among others.
I would of course appreciate your using our B&H affiliate links for all of your major gear, video, and electronic purchases. For the photographic stuff mentioned in the paragraph above we, meaning BAA, would of course greatly appreciate your business. Here is a huge thank you to the many who have been using our links on a regular basis and visiting the BAA Online store as well.
This blog post took 2 hours to assemble. Enjoy!
ps: I am publishing this at 4:47am on Saturday. I will be off to Gatorland on my own in 58 minutes.
Image Design Questions
In the image above (and below, the same image actually), why did I place the crane chick on the left side looking out of the frame?
Why should I have stepped back one foot and pointed the lens one inch higher?
|
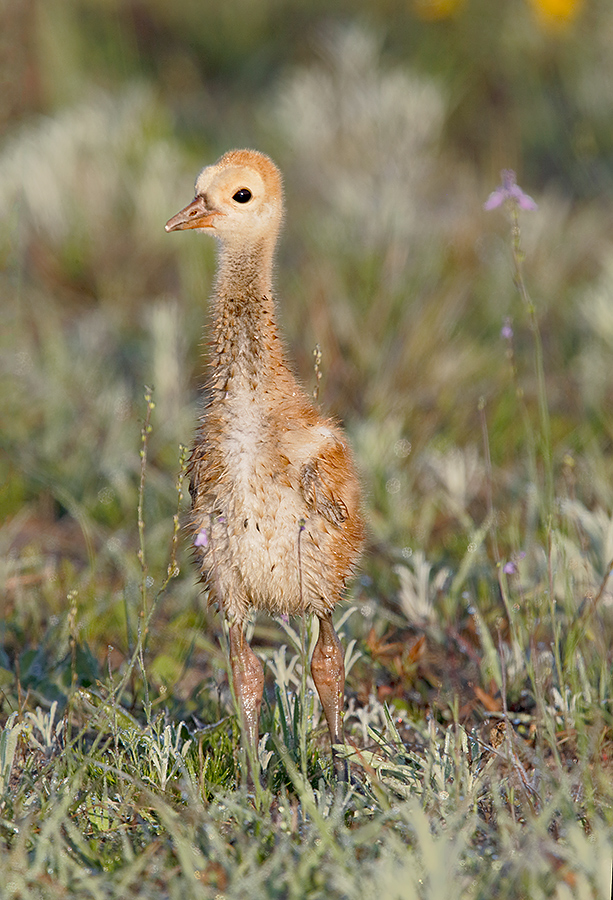
|
|
The image that opens this blog post was lightened with a Levels Adjustment Layer. The image here was lighted with a Gamma adjustment in the Exposure Adjustment Layer. See more below.
|
A New Toy: The Exposure Adjustment Layer
The first time that I ever even realized that there was an Exposure Adjustment Layer was when I read Pane 13 of my BPN White-tailed Sea Eagle post here. After reading the comment by Regional Moderator Bill Jobes I decided to play around a bit with the new toy.
The image that opens this blog post was lightened with a Levels Adjustment Layer. The image here was lighted with a Gamma adjustment in the Exposure Adjustment Layer. They are very close. By a small margin I like the somewhat softer look of image 2. I have done some experimenting comparing results with a Levels Adjustment to those with a Curves Adjustment to those with a Gamma adjustment. I can only say that in each case the results are somewhat different from each other and somewhat different from what you might expect.
If you open an Exposure Adjustment Layer you will see 3 sliders, Exposure, Offset, and Gamma Correction. Moving the Exposure slider is fairly straightforward: to the right lightens the image, to the left darkens it. Note: though there are some strange incremental values you can type in any number that you would like. The third slider, the Gamma Correction slider is the opposite. Move it to the right to darken and to the left to lighten. I have been looking at the changes to the histogram when you move the Exposure slider as compared to what happens when you move the Gamma Correction slider. Again, the results are different but I cannot describe or quantify those differences. I can say that whatever the Gamma Correction slider is doing I like it. And I prefer results with the Gamma slider to a similar Curves adjustment. See below for my comments on the Offset slider.
|
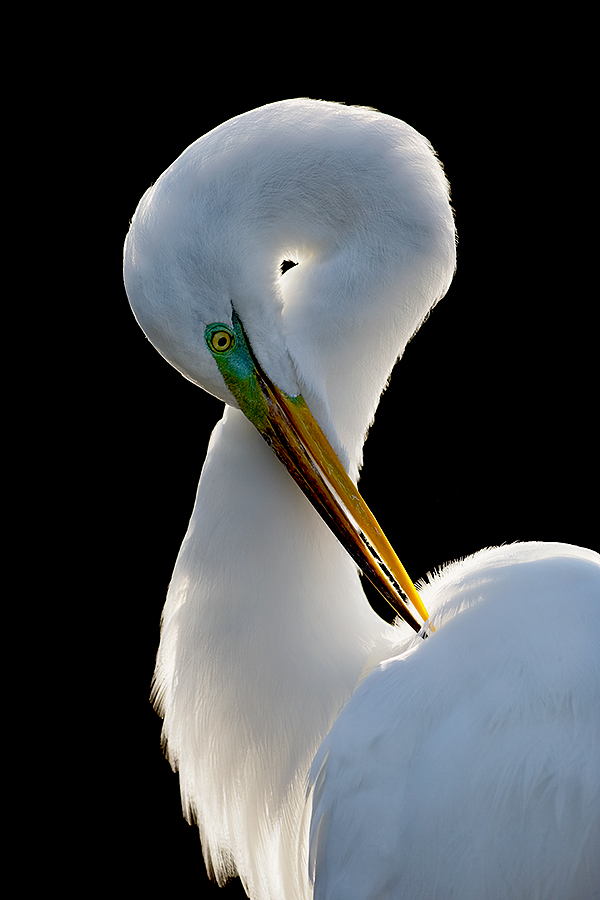
|
|
This backlit Great Egret was created at Gatorland with the Canon EF 200-400mm f/4L IS USM Lens with Internal 1.4x Extender (hand held with the internal extender in place at 467mm) and the Canon EOS-1D X. ISO 400. Evaluative metering -1 2/3 stops as framed: 1/1000 sec. at f/7.1 in Manual mode. AWB.
Two sensors up from the central Sensor/AI Servo-Surround/Rear Focus AF on the bird’s neck active at the moment of exposure. Click here to see the latest version of the Rear Focus Tutorial. Click on the image to see a larger version.
|
The Offset Slider
This is a more extreme version of the similar image that was posted here. This image was created from that version by moving the Offset slider one click to the left to -0.0048. This slider moves in 0.0048 increments but again, you can type in whatever value you like. With this image that small change dramatically blackened the background while not doing much to the tonality of the bird. Denise Ippolito, who was helping me fine-tune the look of this image by phone after I sent her a JPEG, came up with the idea of using the Offset slider to darken the background. Again, I find it impossible to describe the changes with this slider.
My Advice for Using the Exposure Adjustment Layer
My advice for using the exposure adjustment layer is to try it, experiment by creating several versions of each image, and compare. In time I suspect that you and I will be able to come up with some concrete preferences.
If anyone can point us to an online tutorial that details the effects of the three sliders in the Exposure Adjustment Layer please do post a comment with the link here.
|

|
|
I hope that you can join us on this great trip. The vertical puffin image was created by David Tipling. The rest–almost all from the UK, are mine :).
|
UK Puffins and Gannets IPT July 2-9, 2014. 5 full days of puffins and two half-days of gannet boat photography: $4,999 USD. Limit 10 + the 2 leaders.
Desperately needed: 1 female roommate & 1 male roommate.
Just learned of a killer non-stop flight: Newark to Edinburgh on United.
Fly to Edinburgh (say “ED-in-BUR-row”), Scotland on a red eye flight on July 1st arriving on the early morning of July 2 or certainly before 10am. UK folks who plan on driving please contact me via e-mail immediately.
There are direct flights to Edinburgh from both Philadelphia and Toronto. If you learn of any others please advise via e-mail so that I may share with all the interested folks. Fly home mid-morning on July 9. UK locals and our many European friends are of course welcome.
With the needed 5 deposits in hand, this trip is a go; you can buy your flights now :).
What’s included:
5 full DAYS on the best UK puffin boat; trips to 2 different islands–all dependent on decent weather, i.e, no major storms. Seabirds including scads of Atlantic Puffin both in flight and perched, Razorbill, Great Cormorant, Shag, and others likely. The trip is timed to maximize the opportunities for photographing the puffins bringing fish back to the nests. All boat fares and landing fees are included. The boat leaves at 9:30am. We have two hours on the first island. We are then picked up and head to the 2nd island for a 2+ hour session. The weather is typically cloudy bright.
One late-afternoon (2 July) and one early morning (probably 8 July) trip on a gannet photography boat where the birds are fed and dive very close to the boat. Both are dependent on good weather but we do have some flexibility. Boat fares and the cost of the fish are covered. Each will consist of a one hour outbound ride, two hours of diving Northern Gannet photography (with 6 boxes of fish) and the one hour return trip.
The tentative, weather-dependent itinerary:
July 2: airport pick-up no later than 10am UK time. Lunch on your dime. Drive to hotel. Afternoon gannet boat trip/time TBD.
July 3, 4, 5, 6, & 7: Full Day Puffin Boat trips as noted above.
July 8: early morning Gannet Boat trip. Afternoon: Small group Image review and Photoshop sessions. Pack for the trip home.
July 9: early morning departure for Edinburgh Airport (EDI).
The itinerary is subject to change to ensure the best possible photographic opportunities.
A super-telephoto lens is not required on this trip. The 300mm f/2.8s are ideal. I will be bringing one along with my 200-400mm with Internal Extender, my 70-200 f/2.8L IS II, and a shorter zoom lenses. Plus three 1.4X and two 2X TCs, a Gitzo 3532 LS Carbon Fiber tripod, and my Mongoose M3.6. I may go tripod-less on the puffin trips at times…. Or not…. All photography on the gannet boat will be hand held. It is likely that the 70-200s will be ideal for the gannets.
7 nights lodging in an older but excellent hotel just a few minutes from the puffin boat dock with about a 70 minute ride to the gannet boat. Double occupancy will be the rule though we might be able to offer a single supplement at an exorbitant price. See the hotel info here.
All breakfasts and dinner (at the hotel) from dinner on July 2 through dinner on July 8. And breakfast on our get-away day unless we need to leave earlier than they serve to make our flights home…
Airport pick-up until 10am on July 2–this should not be a problem as there are lots of red-eye flights from the US to Edinburgh.
All ground transportation. Airport return on the early morning of July 9. We may be getting up very early on July 9th.
Two great leaders; Denise Ippolito and yours truly will provide personalized and small group in-the-field instruction. As usual, the closer you stay to us and the more questions that you ask the more you will learn. We will of course point out the best situations. You will learn to see these great situations for yourself, to get the right exposure every time after making a single test exposure, to work in Manual mode, and to design pleasing images by mastering your camera’s AF system. You will learn the basics of photographing birds in flight and how the relationship between light direction and wind direction impacts the photography of both birds in flight and perched puffins. And tons more.
We will be conducting informal, small group image review and Photoshop sessions after dinner. All are invited to bring their laptops. Image critiques of your five best images will be done after the trip upon request.
Early morning castle photography right near the hotel is an option for the early risers. In the event of inclement weather or stormy seas there is the possibility of bird photography along the coast. Early evening bird photography along the coast is also optional.
Not included: all lunches–for the most part we will need to pack lunches for the puffin trips, or you may opt to skip lunch. Your round trip airfare from home to Scotland. Booze, wine, and any other beverages other than coffee and tea at breakfast.
A non-refundable deposit of $2,000 USD is required to hold your spot so please check on flights and your schedule before committing. The balance will be due on 15 May so you may wish to pay the whole thing at once. Overseas folks may e-mail for wire transfer info. Our $15 wire transfer fee will be added to your balance.
Trip insurance is highly recommended as your deposit (less a $200 cancellation fee) will not be refunded unless the trip fills completely. I, and my family, use Travel Insurance Services.
After letting us know via e-mail that you will be coming, please send your deposit check made out to “Arthur Morris” to us as follows:
Arthur Morris/BIRDS AS ART
PO Box 7245 (US mail) or 4041 Granada Drive (if by courier).
Indian Lake Estates, FL 33855
My friend David Tipling, with multiple BBC honored images and the author of dozens of photo illustrated books, helped with the planning and arrangements for this trip.
If you have any questions, please contact me via e-mail.
|

|
|
All images created on Lake Blue Cypress. Copyright Arthur Morris/BIRDS AS ART. Click on the composite to enjoy a larger version.
|
Lake Blue Cypress Osprey Heaven Full-Day In-the-Field Hand Holding Workshops via Customized Pontoon Boat
Two 3+ hour shooting sessions on a beautiful cypress lake teeming with Osprey; Barred Owl almost guaranteed. Red-shouldered Hawk and Pileated Woodpecker likely. Be sure to follow the link to Jim’s gallery below.
2 great leaders: Captain Jim Neiger and Arthur Morris.
Available dates: April 8, 9, 11 & 12, 2014.
Here are the Full Day rates:
1 photographer: $650.
2 photographers: $500 each.
3 photographers: $450 each.
4 photographers: $400.
Each full day booking includes a delicious healthy lunch at my home. Overnight lodging at my home is available cheap on a limited basis for folks who would like to do more than one day. Please inquire via e-mail.
So far one photographer signed up for Saturday, April 12; join us and enjoy a $150 savings.
One or two photographers may hire the boat on a private basis by paying the full day rate for 4: $1600.
Because of the late date payment in full by personal check is due now. Please e-mail for additional details of info.
Check out Jim Neiger’s Osprey Heaven/Lake Blue Cypress Gallery here and you will be amazed as to the quality of the flight and action images and the possibilities.
Here’s what BPN member David Salem had to say about a day on the lake with Jim Neiger in Pane 1 here:
“We met our friend Jim Neiger on his boat at Lake Blue Cypress and had a blast shooting hundreds of Osprey and many other species including some great shots of Barred owls. I highly suggest booking a trip with Jim on the lake as he knows the lake real well and the birds even better. It was a trip that I will never forget with literally hundreds of Osprey flying around starting their nesting season. A sight to see!! I will be posting some pics from the lake soon. ”
Support the BAA Blog. Support the BAA Bulletins: Shop B&H here!
We want and need to keep providing you with the latest free information, photography and Photoshop lessons, and all manner of related information. Show your appreciation by making your purchases immediately after clicking on any of our B&H or Amazon Affiliate links in this blog post. Remember, B&H ain’t just photography!


Amazon
Everyone buys something from Amazon, be it a big lens or deodorant. Support the blog by starting your search by clicking on the logo-link below. No purchase is too small to be appreciated; they all add up. Why make it a habit? Because I make it a habit of bringing you new images and information on an almost daily basis.
Typos
In all blog posts and Bulletins, feel free to e-mail or to leave a comment regarding any typos, wrong words, misspellings, omissions, or grammatical errors. Just be right. 🙂
March 28th, 2014 Right Now, It’s Just Me!
Gatorland has been so good this season that my plan–despite the fact that no one is signed up for tomorrow’s In-the-Field Workshop–is to have a great day there by myself. I will be using lots of flash and doing some video. Do considering joining me at the last minute. Feel free to apply a $50 late registration discount to the March 29 workshop only.
|

|
|
On Saturday, March 29th, it is only me. I hope that you can make it. The weather for Saturday is looking fine. Click on the composite to enjoy a larger version.
|
Gatorland Short Notice Saturday Full-Day In-the-Field Workshops
Saturday March 29 and Saturday April 4, 2014. 7:15am till 10:15am & 4:00pm till dusk. Lunch, image review, and Photoshop session included. Limit 6. Small groups are likely: $399. Both: $749.
The cost of your Gatorland Photographer’s Pass is not included.
Gatorland is so good right now that I am going back the next two Saturdays (March 29 & April 4). The Snowy and Cattle Egrets are in way early and there are many in full breeding plumage. Here’s the story: last week there were about two dozen photographers at Gatorland on Saturday past. Aside from two decent photographers–I can tell by where you are pointing your lens…, nobody had a clue as to how to make a good image…. Yesterday it was even worse; pretty much no one had a clue. Most folks just stand in one spot and point and shoot. Without regard for light angle or background. Join me on this, the 3rd Gatorland Short Notice Saturday Full-Day In-the-Field Workshop and you will learn to spot the good situations, to choose the best perspective, to see and understand the light, to get the right exposure every time after making a single test exposure, and to design pleasing images by mastering your camera’s AF system. A big part of the above is that you will learn how and why you must work in Manual mode 90% of the time at Gatorland. That is exactly what Jim Weerts learned on Saturday past.
At lunch we will review my images, take a look at five of your best images from the morning session (for those who opt to bring their laptops), and process a few of my images in Photoshop after converting them in DPP. That followed by Instructor Nap Time. Last Saturday all 3 folks had a great time and learned a ton. And the weather for this coming Saturday is looking good.
Payment in full via credit card is due upon registering. Please call Jim or Jennifer at 863-692-0906 to register. Ask for me if you have any questions.
Last Saturday’s Gatorland Kudos
Via e-mail from multiple IPT veteran Peter Hawrylyshyn:
Artie, Just wanted to say thanks. I really enjoyed the Saturday IPT at Gatorland. It was a great one-day refresher course on composition, lighting/sun angles, exposure settings, birds in flight, and fill-flash, … I also learnt a lot watching your workflow and new processing tips over lunch. I thought you’d post that great Black-crowned Night-Heron that you found for us on your blog. I guessed wrong. Peter
Note. I will be devoting a whole post to that bird soon; have not had time to process them yet….
Via e-mail from Jim Weerts:
Thanks, Artie, for your kind hospitality, the Gatorland adventure, and sharing your expertise! I did indeed fall into it and for that I’m most appreciative. My father told me a long time ago that when I retire, I must retire to something else! Well, photography has filled the bill for me and the challenge to keep learning is the best part of it. You certainly pushed me hard last weekend and I hope to keep up with this adventure including with your blog. I did review the “Working in Manual Mode” material on your blog and will focus on this more as time allows.
The best part of the week-end included learning to look for the distractions in the background, understanding the wind direction and what it presents, and lining up my shadow with the target. Using Manual mode is a new favorite particularly with the changing situations like lighting, background and birds or wildlife. Learning new techniques with the 5D MK III (like rear focus and changing AF points), plus adding more knowledge about some of the rear buttons on the camera all added to the experience. Previously, I had not been able to make any changes on the fly that finally happening now, thanks to somebody teaching me how to do that! Beyond all of this, seeing the subject in new ways and new dimensions just opens up more fun! Thanks my new friend, for so much! I loved it! And “Thanks” for your talents! Jim Weerts
Note: Jim just signed up for the Holland IPT!
119
This post marks 119 straight days with a new educational blog post. With so many folks getting in the habit of using our B&H and Amazon links why quit now? To show your appreciation for my efforts here, we do ask that you use our the B&H and Amazon affiliate links on the right side of the blog for all of your online shopping. Please check the availability of all photographic accessories in the BIRDS AS ART Online Store. We, meaning BAA, sell only what I use and depend on. We will not sell you junk. We know what you need to make creating great images easy and fun. And we are always glad to answer your gear questions via e-mail
This log post took 3 hours to prepare. Enjoy and learn.
Classic Fill Flash
The image above illustrates the classic use of fill flash: set the right exposure for the situation as if you were not using flash. Work in ETTL. Dial back the flash to add just a splash of light that adds a bit of fine detail sharpness and a pinpoint eye highlight, restores the color balance in low light situations, and reduces or eliminates any shadows. A flash bracket is needed with tripod-mounted super-telephoto lenses to prevent or reduce eye shine, purple eye, flash eye, or steel eye, all very close relatives.
Using Flash to Light the Shaded Side of a Backlit Subject
Flash is commonly used to light the shaded side of a backlit subject. Note that despite my post-processing efforts with this image that the WHITEs are not as bright as the WHITEs in the first image. My bad…. I should have increased flash setting from -3 stops to about -1/3 stop. As I said here, it had been a long time since I used flash and I was a bit rusty.
Exposure Question
Why +1 1/3 stops for Image #1 but only +1/3 stop for image #2?
Low Light/Long Lens/Hand Holding Flash Tactics…
With the very low light conditions and me working at 560mm and not wanting to go to ISO 1600 or use a slower shutter speed, I opted to under-expose (i.e., shoot too dark) but opted to use more flash: -1 stop yields four times as much flash as -3 stops. In any case I lightened the image 1 full stop during the DPP conversion and a bit more in Photoshop. The background was still quite noisy so I selected it using the Magic Wand Tool, ran a Refine Edge on the selection, placed it on its own layer, and ran Filter/Blur/Surface Blur as taught to me by Denise Ippolito. The Surface Blur rendered the background smooth as the proverbial baby’s tush.
The DPP RAW Conversion Guide
After seeing the accurate colors that I get from my DPP RAW conversions, Japan in Winter co-leader Paul McKenzie switched to DPP conversions and Denise Ippolito is consider doing the same. Now that is amazing…. To learn why I use Canon’s Digital Photo Professional (DPP) to convert every image that I work on, click here.
Digital Basics
Learn the settings for Filter/Blur/Surface Blur and tons more in this best-selling eGuide. Are you tired of making your images look worse in Photoshop? Do you have no clue as to how I optimized the images here? All is detailed in my Digital Basics File, an instructional PDF that is sent via e-mail. It includes my complete digital workflow, dozens of great Photoshop tips, the use of Contrast Masks, several different ways of expanding canvas, all of my time-saving Keyboard Shortcuts, Using Adjustment Layers, Quick Masking, Layer Masking, and NIK Color Efex Pro basics, my killer image clean-up techniques, Digital Eye Doctor, creating time-saving actions, and lots more.
Flash Flight
It had been so long since I used flash flight that I had to ask an old friend from Vero Beach how to set High Speed Synch on the Canon Speedlite 600EX-RT. (It’s the fourth round button on the right just below the LCD screen on the back of the flash. With the flash on, it is right below the small black rectangle with the word SYNC in it. Duh! Press this button to toggle between High Speed Synch (used to create this image), Rear Curtain Synch, and the nothing setting that limits the fastest shutter speed to 1/250 second.
To create flash flight images, you first need to set High Speed Synch so that you can set a shutter speed that is fast enough to give you a shot at creating a sharp image. In low light I go to Manual flash. In really low light I go back to ETTL.
Flash Simplified
If you are clueless when it comes to flash you are advised to study the “Flash Simplified” section in The Art of Bird Photography II. ABP II: 916 pages on CD only with 900+ great images each with one of our legendary BAA educational captions. Just like the ones you see here on the blog. Topics covered include flash gear and set-up, Better Beamer basics, telephoto fill flash, flash as main light, and the use of Manual flash. The use of High Speed Synch for flash flight photography and additional flash flight strategies are detailed in various ABP II image captions as is the use of Rear Curtain Synch for creating flash blurs.
I had several ABP IIs for sale on the bench at the Gator Breeding Marsh these last two weekends. Though virtually every single photographer there would have benefited greatly by getting a copy and studying this amazing resource, I sold not a one….
Flash Disaster
Though the image above is pretty cool, the mega-overexposed RAW file from which it was created was a result of operator error. Take a close look at the image captions for Images #4 and 5 and leave a comment if you can figure out what I did that was so wrong.
Your Favorite?
Please take a moment to leave a comment and let us know which of the 5 images here is your favorite. And as always, please let us know why.
Support the BAA Blog. Support the BAA Bulletins: Shop B&H here!
We want and need to keep providing you with the latest free information, photography and Photoshop lessons, and all manner of related information. Show your appreciation by making your purchases immediately after clicking on any of our B&H or Amazon Affiliate links in this blog post. Remember, B&H ain’t just photography!


Amazon
Everyone buys something from Amazon, be it a big lens or deodorant. Support the blog by starting your search by clicking on the logo-link below. No purchase is too small to be appreciated; they all add up. Why make it a habit? Because I make it a habit of bringing you new images and information on an almost daily basis.
Typos
In all blog posts and Bulletins, feel free to e-mail or to leave a comment regarding any typos, wrong words, misspellings, omissions, or grammatical errors. Just be right. 🙂
|
|


